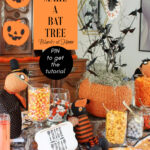
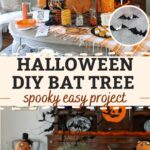
How to Make the Easiest Bat Tree for Halloween
We have Christmas trees. I have made an Easter tree. I’ve made a fall tree. Then I thought, “Why not a Halloween tree?” Specifically one with bats. Here is how to make the easiest bat tree for Halloween for any place in your home.
Do you decorate your home for Halloween? If you have kids at home, decorating your home with ghosts and goblins may be something you do. Or you just may love Halloween decor.
Why did I make a bat tree to use for Halloween?
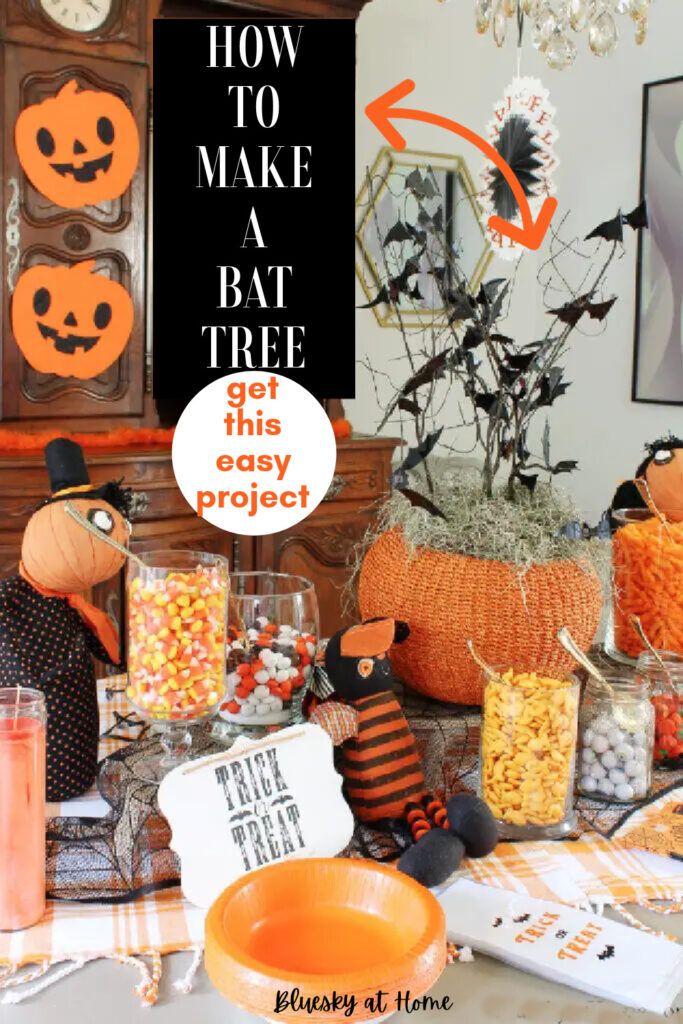
I needed a centerpiece for a Halloween buffet. Every table needs a centerpiece and I thought a bat tree would be perfect.
This easy Halloween tree will add a touch of spooky Halloween décor to your home or party.
Did I mention that this spooky tree is adorned with decorative bats?

It’s perfect timing to share this Halloween bat tree. We are getting into a fall frame of mind.
It’s a great time to begin focusing on some Halloween-themed projects. I’ve gathered some friends for this month’s Celebrate the Holiday. We are all sharing a fun Halloween decoration for you.
Are you joining me from Michelle of Thistle Key Lane? I love Michelle’s style year-round.
After you read about my Halloween bat tree, take a look at the end of the post for the other projects.
I recently made a new fall tree for our mantel. I had such fun making that paper leaf tree that I wanted to share this easy bat tree again.
The Idea for the Easiest Bat Tree for Halloween
This post contains affiliate links to products used to create this project. If you should order any item from this site, I may receive compensation, but you do not pay a penny more. Your purchase is greatly appreciated as it helps support the continued publication of this site.
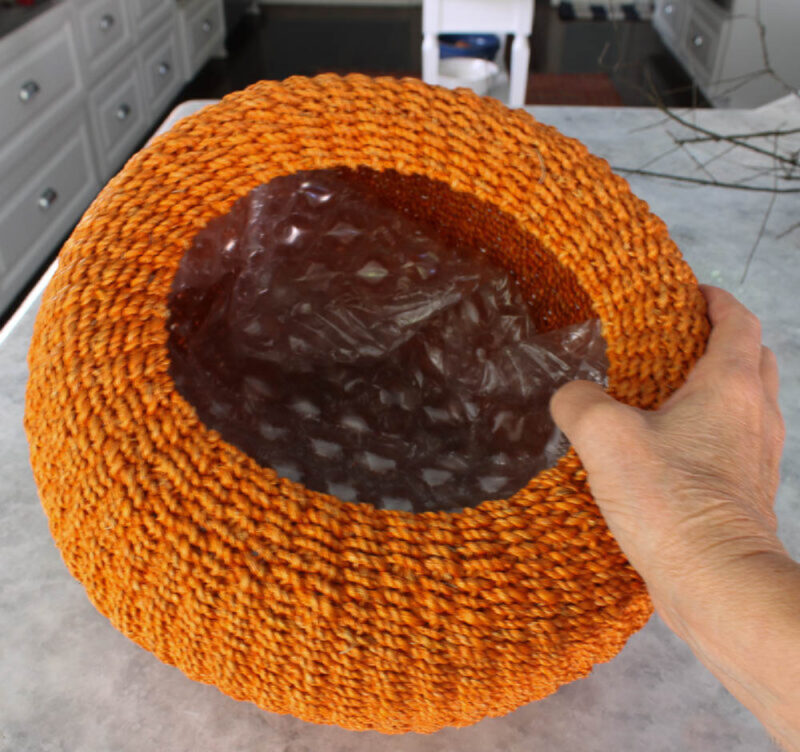
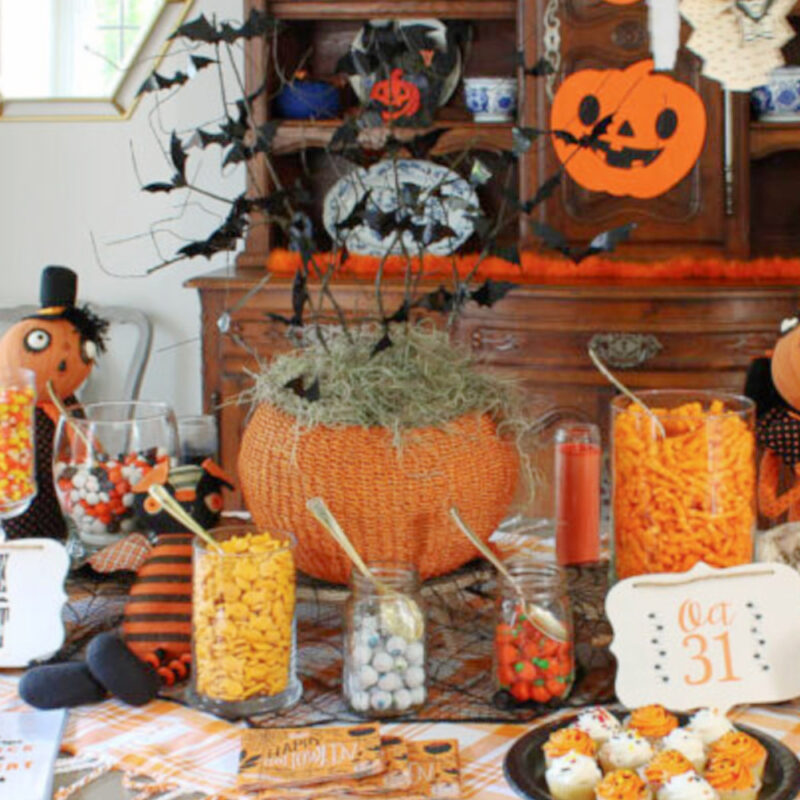
The idea for my fun Halloween tree started with a pumpkin. I found this pumpkin basket at a local antique mall a few years ago. It was too cute to pass up.
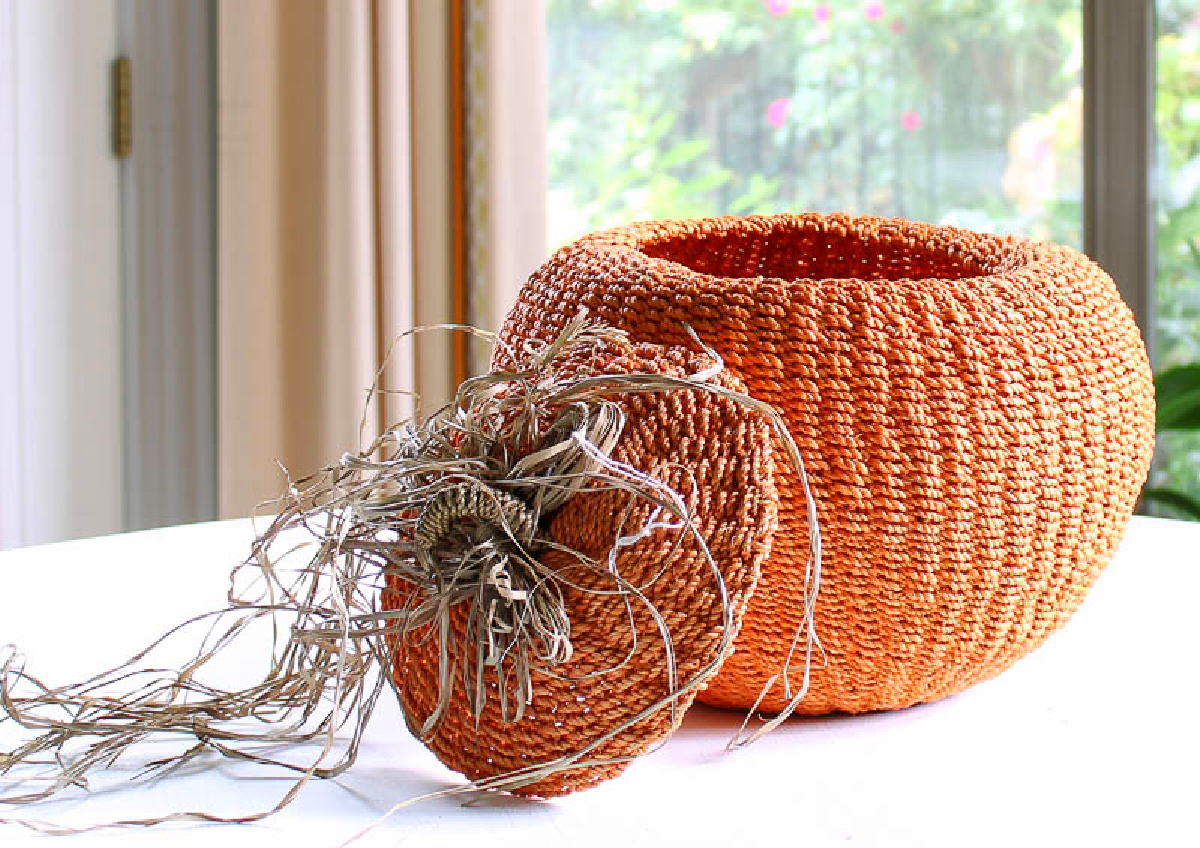
I’ve used this pumpkin basket several times for floral arrangements. This is the first time it has been the base for a small tabletop Halloween tree.

This project is so easy your kids could make it. It’s also fast. A no-brainer. You just need a few supplies. And hot glue isn’t required!
Supplies for this Easy Halloween Project
What makes this Halloween tree so great is that it requires just a few supplies. There are several options for what supplies you use.
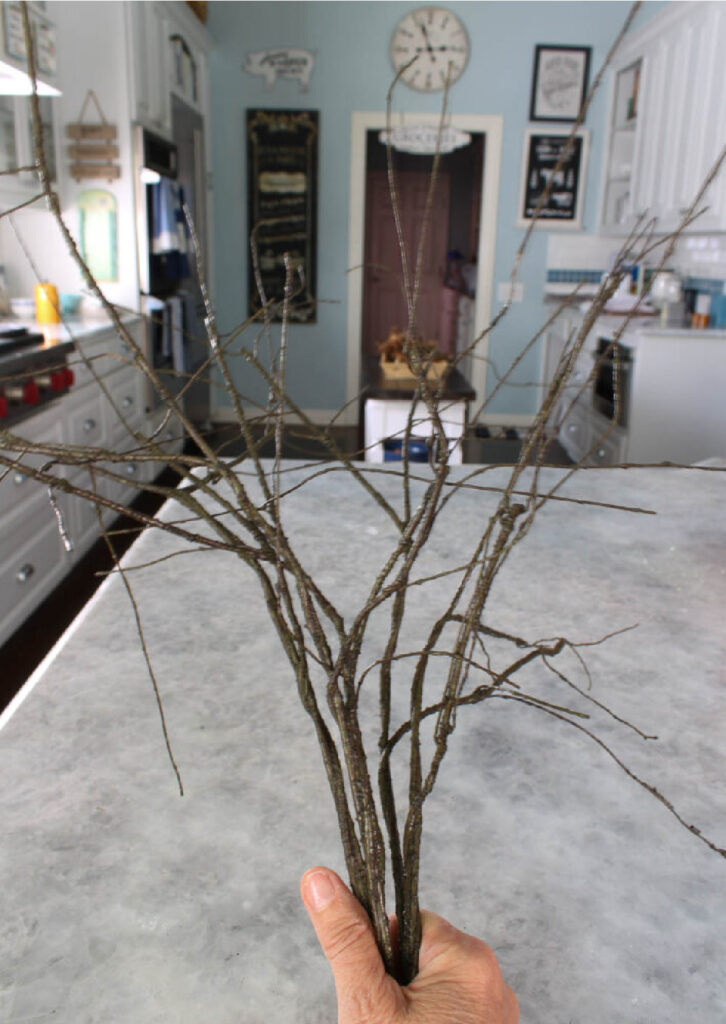
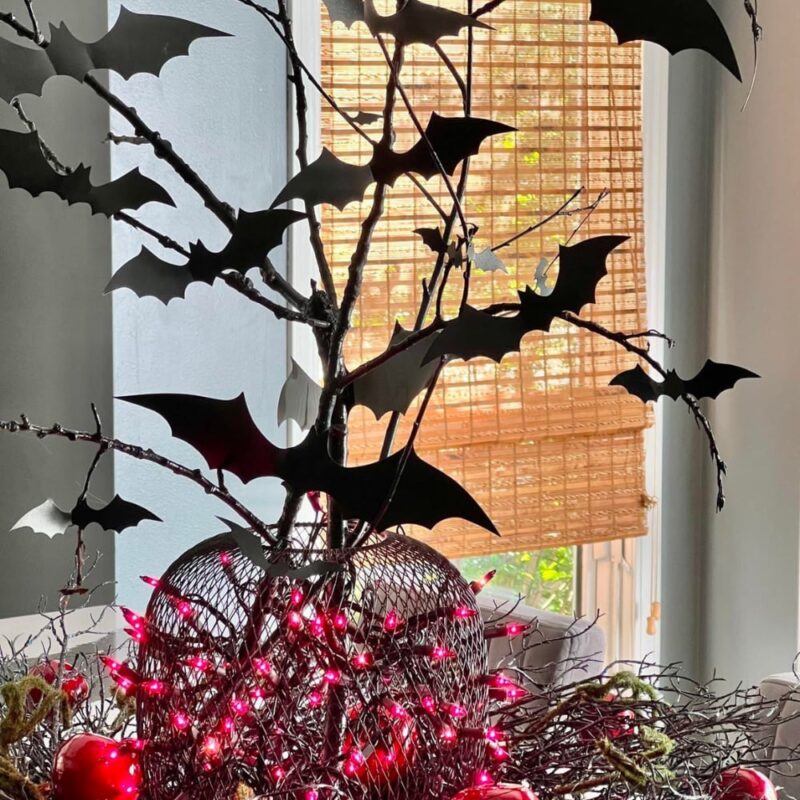
- tree branches – these could be from your yard or neighborhood. I ordered these curly tree branches and they worked perfectly. They look real and you can bend them whichever way you like. (I also used them on my fall paper leaf tree.)
- a container for your tree – mine is the woven pumpkin, but here is a similar pumpkin basket to the one I found at the antique mall
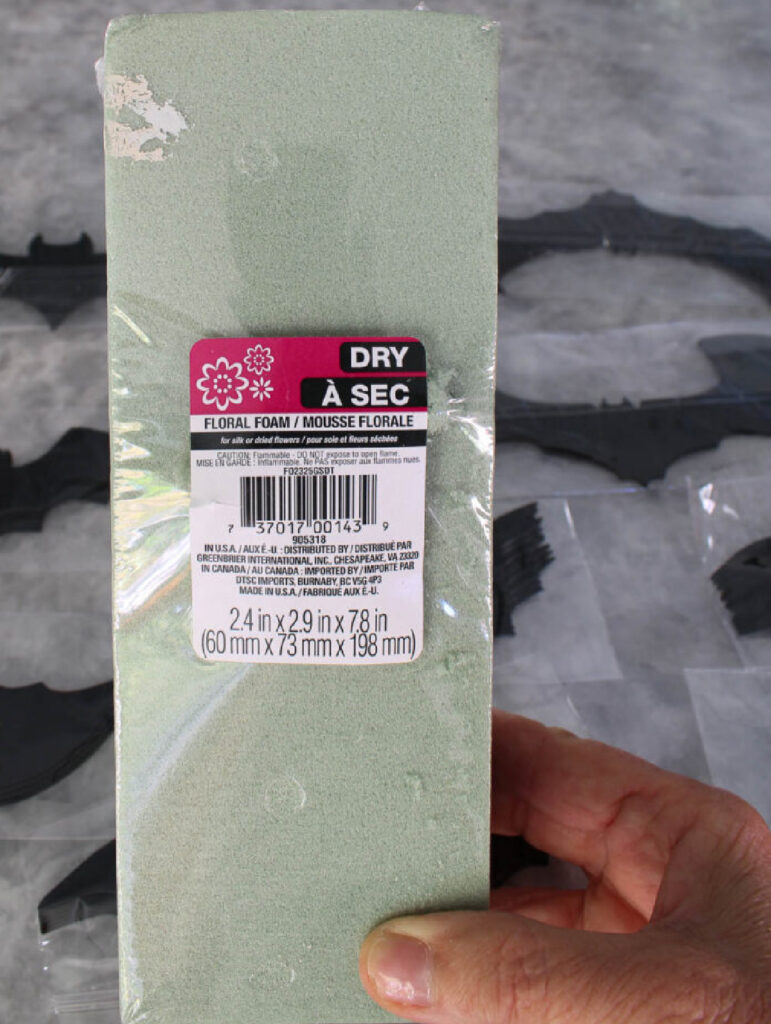
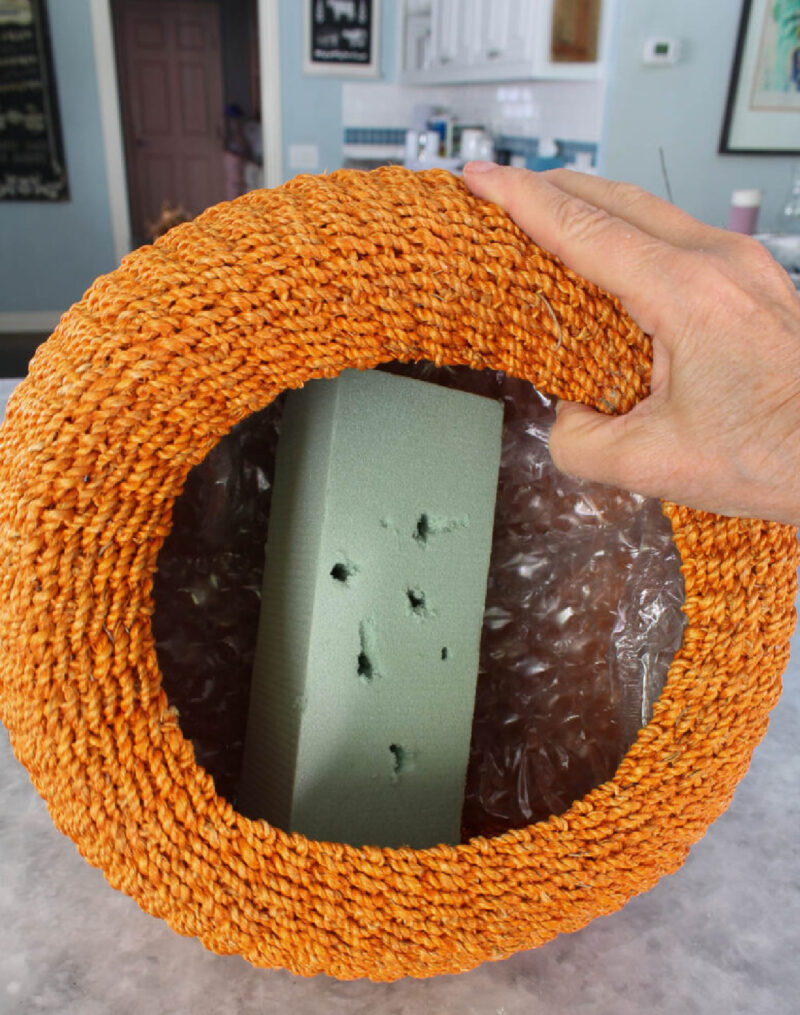
- florist foam to hold your tree branches
- paper or bubble wrap to secure the florist foam and your branches
- Spanish moss as filler to cover the base of the Halloween tree
- plastic attachable bats or try this package of bats and spiders

Step-by-Step Instructions to Make Your Easy Halloween Bat Tree
Even though this spooky Halloween tree is so easy to make, I’ve broken down the process into 11 steps.
Step 1 – First, choose your container.
This could be a container you already own. Luckily, I already had my woven pumpkin basket. For this Halloween tree project, I didn’t need the top of the basket.
And yes, it’s always been wonky.
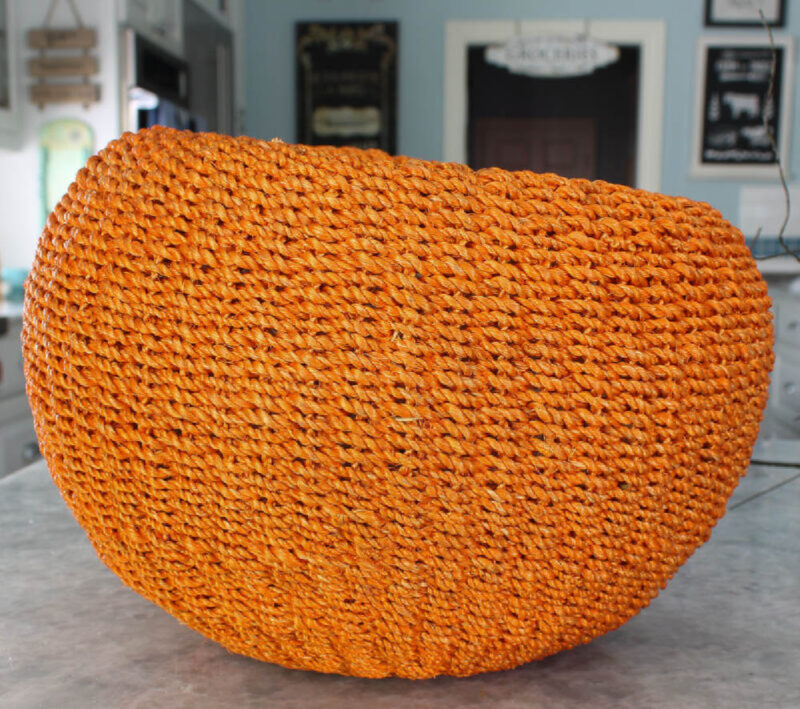
You just want to have the mouth of the container large enough to place the tree branches in.
Step 2 – Next, if needed, place the florist foam in the container. The florist foam holds the tree branch stems securely. If the mouth of your container is narrow, you might not need the florist foam.
I had already tested that the stems would go in the florist foam.
Step 3 – Then, if using the faux tree branches pull the stems of the tree branches apart. Bend the stems as you like.
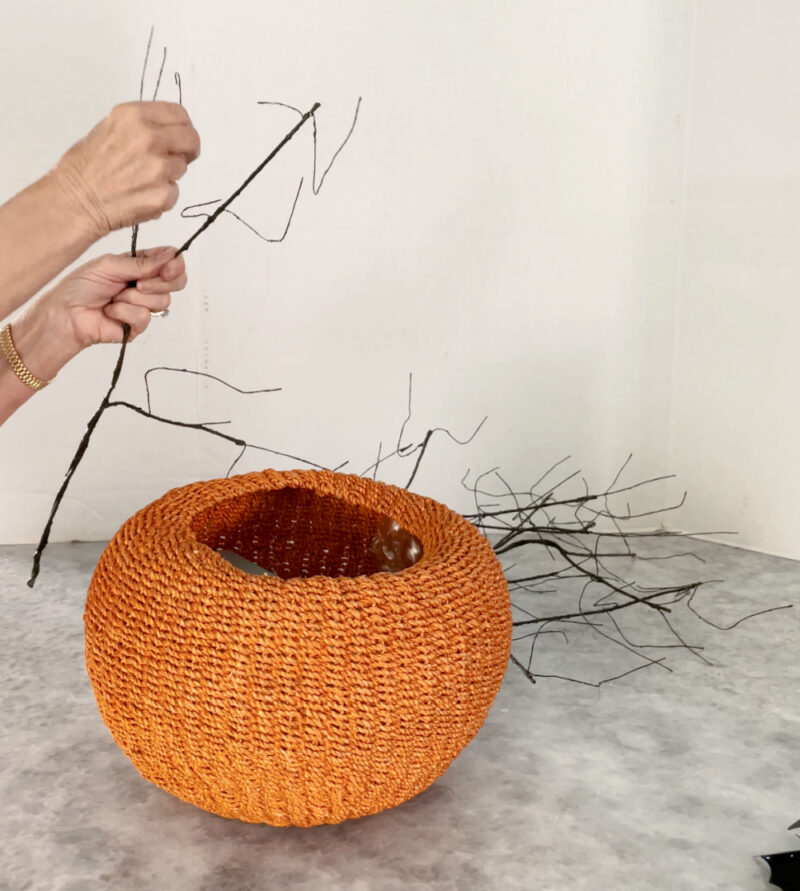
NOTE: Originally, I planned to use real tree branches I had collected. I was going to spray paint them black. I have bought faux tree branches before (see this Easter tree). After my real branches got wet, I decided that it would be easier to use the faux branches.
Step 4 – Push the stems into the bottom of the foam, spacing them out as you like. If needed, pull the main branches apart to separate them.
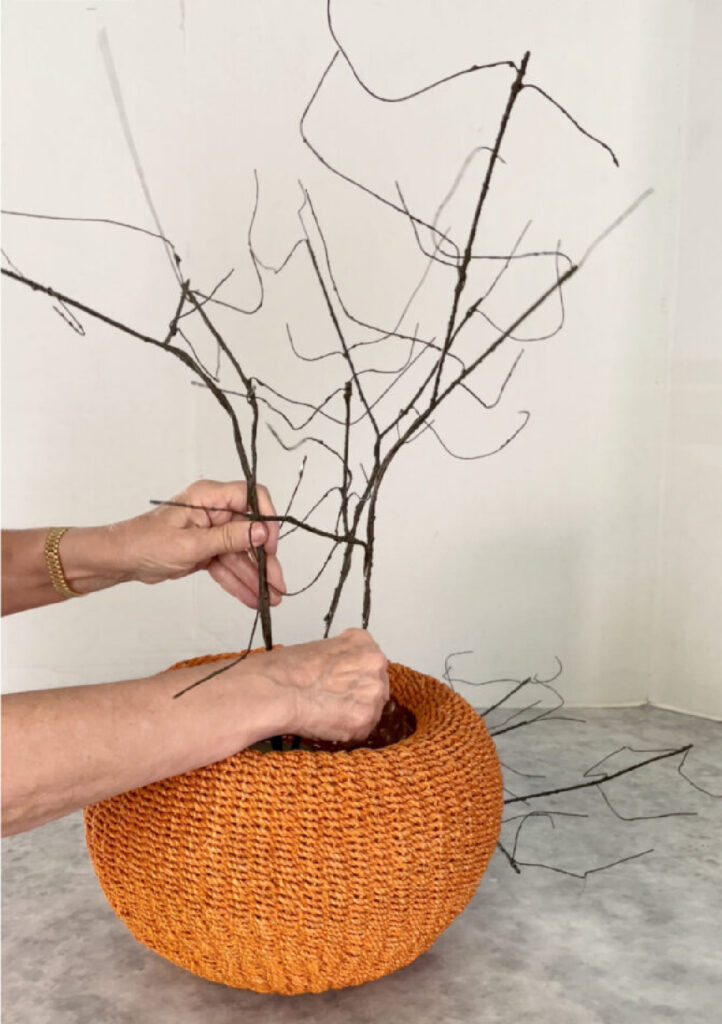
Step 5 – Stuff your container with crushed newspapers, packing paper, or bubble wrap. This step will help to hold your branches in place and upright. Fill the container with the paper almost to the top of the container.

Step 6 – Unwrap the plastic bats from the packaging. They come in a few different sizes and shapes.
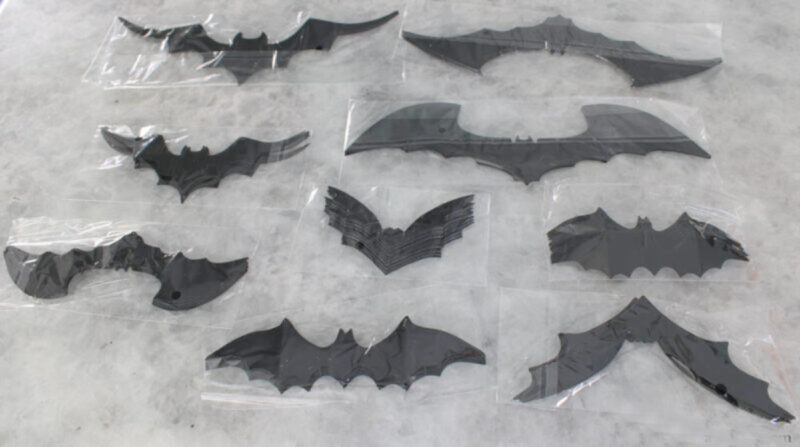
This package had 7 different sizes. Pick a variety of sizes for more interest. I chose the three smallest bats for my Halloween tree.

Remove the bats from the plastic bags.
NOTE: At this point, you won’t know how many bats you will need. Just start with a few dozen. You may have to use more, depending on the size of your tree or how full you want the bat tree to be.
Step 7 – Using the designated folds on the bats (The bats have either 2 or 4 folds.), bend them to create the look of a bat with wings. Set aside.

TIP: I put all my bats in a bowl.
Step 8 – Next, attach one adhesive square (included with the bats) to the back of the center body of each bat. Don’t remove the adhesive red backing yet. Set aside all the bats.
Step 9 – When you are ready to start attaching the bats to the tree branches, start removing the red adhesive backing. This step will take the longest. The squares are about 1/4-inch square.
NOTE: To be honest, this step was the only hard step in this DIY project. It was a challenge to remove the little red square adhesive backing without any fingernails (another story).
Step 10 – Once all the backing is removed, you can start attaching the bats to the branches of the tree. Press the body of the bat securely to the branch. I had one or two fall off. I just found a better place to put it.
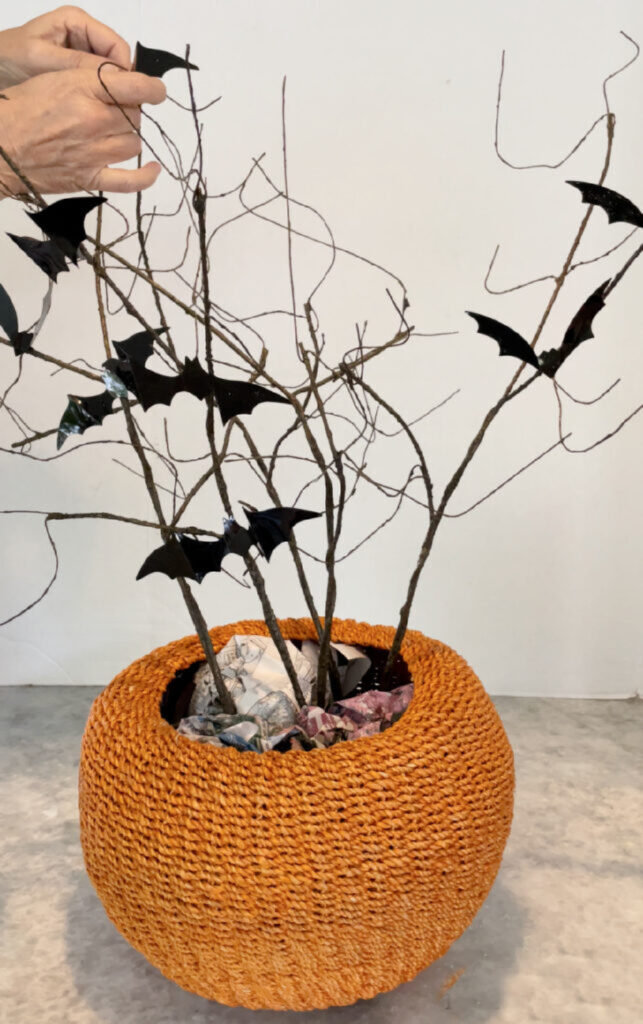
Step 11 – Finally, place the Spanish moss on top of the filler.
Make sure you cover the filler. I draped some of the moss down the side of the container.
This DIY project really is the easiest bat tree you could make for Halloween.

NOTE: Depending on where you are going to place your Halloween tree, you can face the bats to one side or spread them around all the branches. Since my bat tree would only have one side facing out on my table, I placed my bats on one side of the tree.


Options for Making this Spooky Tree
This easy Halloween tree can be adapted to your own tastes. Try these possible options for your DIY Halloween trees.
Option 1 – Use either real branches or faux branches
Option 2 – Leave the branches as is or use black spray paint. If you want to really customize it, spray paint it orange.
Option 3 – Use the purchased plastic bats which are so easy and inexpensive or cut out bats from cardstock using a Cricut.
Option 4 – Instead of bats, use witches, witches’ hats, cats, spiders, or ghosts.
Option 5 – Add fake spider webs to the tree.
I think the whole family will love this fun Halloween tree. Who wouldn’t love a creepy tree?
More Halloween Projects You Will Love

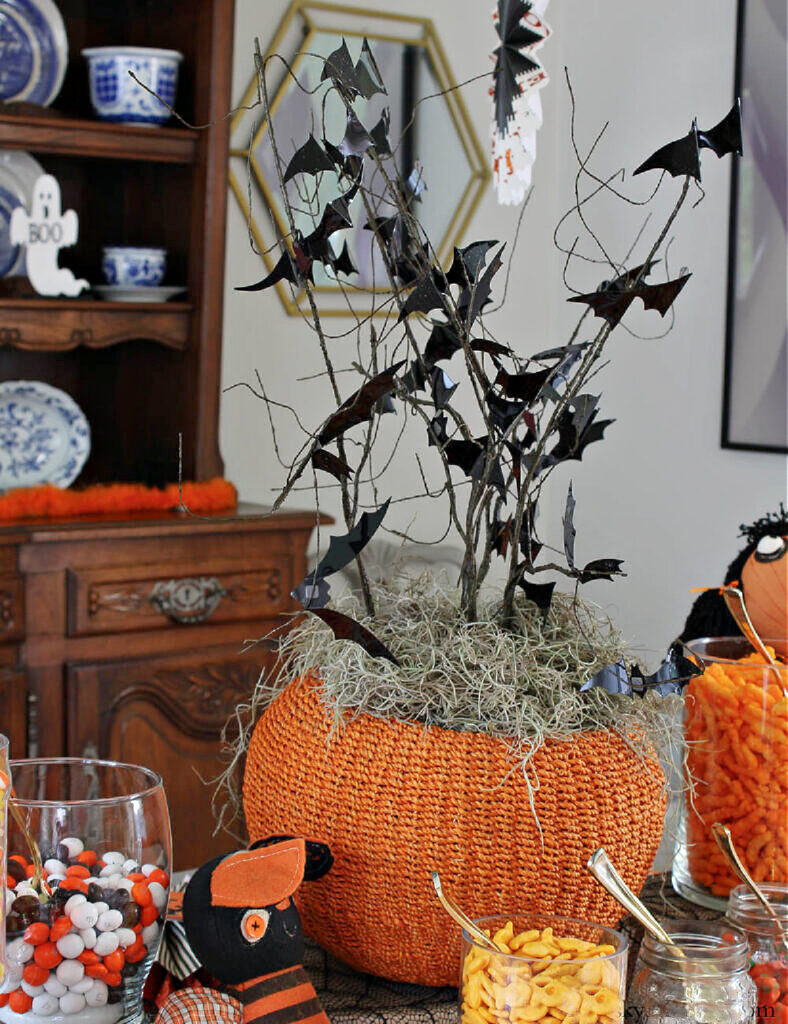
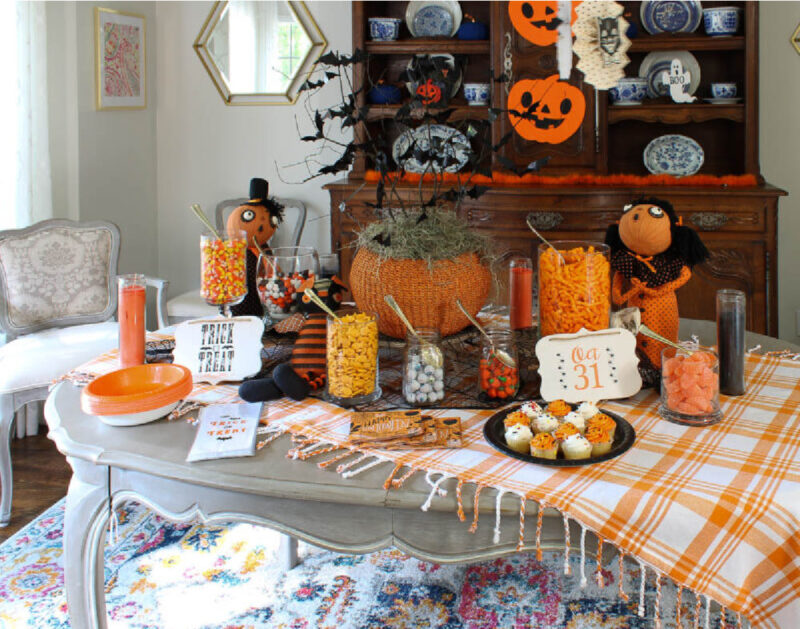
Using My Bat Tree as a Centerpiece
My Halloween tree with bats was the centerpiece for my sweet Halloween buffet. I loved the focal point it created.
If bats aren’t your thing, then use this tutorial to make: a witch tree or a ghost tree or a Jack-o-lantern tree. Or use my air-dry clay pumpkins tutorial and make ornaments for your tree.
I hope that you’ll make a bat tree this year. It’s so easy, inexpensive, and fast to make. Those are all must-have criteria for my DIY projects.
Next up on our Celebrate the Holiday Halloween Blog Hop is Mary Jo of Masterpieces of My Life and her wickedly unique Halloween table ideas. Take a look at all the great ideas.
As easy as this project is, I hope that you will PIN IT to remember it for this year and in the future. Check out my Halloween DIY Project Ideas Board for more inspiration.


Hi my BATTY friend! I love your bat tree! Your orange pumpkin basket is perfect for this project. So fun to decorate for Halloween! Pinned!
LOVE those cute little bats! Your centerpiece is fabulous Carol especially with the Spanish moss and the orange pumpkin. I would love to make one for my entry table! Pinning!
This is such a great project Carol. It came out great and looks perfect on your table. Love the basket too. Thanks for the Halloween fun! XO- MaryJo
HI Carol
Too cute! I love your table too with all the Halloween finds!
Thank you for coordinating! xo laura
Love everything about this Halloween tree! Great color and textures combine for a great look! Thanks for sharing at Vintage Charm. xo Kathleen
This looks so cute Carol. I’m featuring it tomorrow on Farmhouse Friday. Thanks for linking up! pinned
This is so cute Carol! I love it!
What an absolutely spooky tree for Halloween – and so simple too. Have to now go and gather up some sticks to replicate this craft! Popping by from Karins Kottage Linky Party 🙂
What a fun Halloween craft, Carol! I LOVE that cute basket that you used for the base. Such a great idea and it looks so cool on your table! Thanks so much for sharing and for stopping by the Home Imagined link party. I am grateful!
Oh my Carol, that Halloween tree is adorable! I love the way it turned out, I am visiting from Linda’s party. I will need to keep this in mind for next year!
Cara, it’s so nicecto have you. Thanks for the sweet comment. I hope you’ll visit again.
Such an easy way to decorate for Halloween.
Hi, Janet. Yes, it is. Really easy project. It’s now on my coffee table.
What a great project Carol! I’m pinning this and I think it will be a fun thing to do while visiting my daughter next week. Thanks so much for the inspiration.
Denise, the tree would be a great easy project to do on a trip. Have fun. Happy Halloween.