How to Make a DIY Computer Monitor Stand
Have you ever realized that there is something that you didn’t know you needed until you saw it? I decided that I needed to figure out how to make a computer monitor stand. Rather than take the easy way out and buy it, I knew that I could make one myself ~ for nothing.
I never knew that I needed a computer monitor stand until I saw one. Since I’m always looking for ways to make my office more organized and add more storage space, a way to raise my computer seemed like a good idea.
I love to organize and sometimes I reorganize spaces multiple times as I see a better way to manage the space. This project is one of my favorites because it still provides extra space and efficiency every day.

It’s been almost 3 years since my office space was revealed and I have never loved a space as much as this one. If you are a new reader, you can see the entire process of creating my office, from conception, to the construction, and the finish out and the installation of all the office equipment. I also shared some office DIY projects, such as making a printer paper storage box.
How to Make a DIY Computer Monitor Stand
This post contains affiliate links to products that I use, love and highly recommend. If you should purchase any product through this website, I may receive compensation, but you do not pay one penny more.
Figuring out how to make the computer monitor stand was easy and the process was quick ~ I (with a little help from Sweet Shark) made it in about 2 hours ~ and that includes paint drying time.
The Inspiration for the Computer Monitor Stand
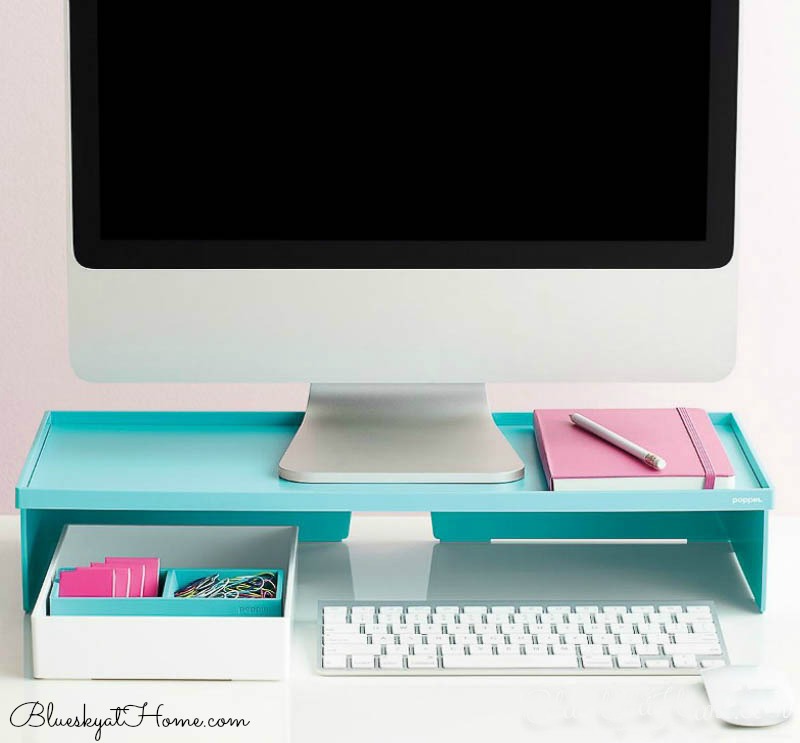
I love The Container Store and have used many of their products in outfitting my office with shelf storage and office supplies. My inspiration for the computer monitor stand was the one shown on The Container Store website.
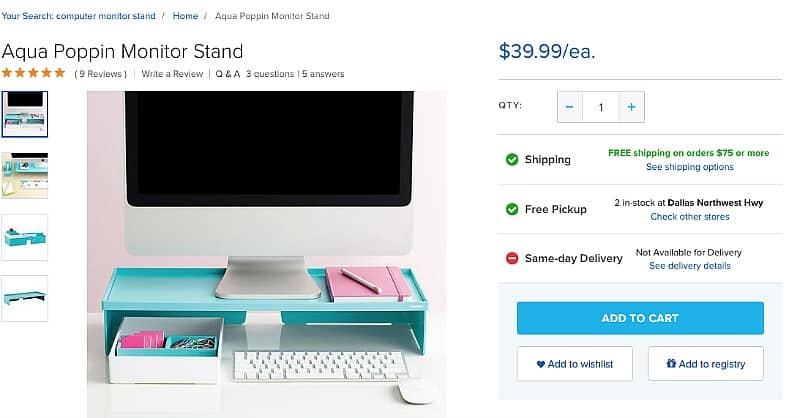
I loved that it raised the computer monitor up several inches and provided space underneath and on the stand for small office supplies. I love all the office supplies from Poppin, especially my stapler and scotch tape dispenser.
When I saw the monitor on the website, I saved the picture and I thought about it for about a week before deciding I definitely wanted one. But, as I said earlier, I knew I could make one myself and I knew I had all the supplies I needed at home.
Supplies for the Computer Monitor Stand
I had all these supplies in our garage and toolbox:
- 3/4~inch plywood
- 2~inch X 5/8″~inch L~brackets with screws
- hand saw
- pencil
- sandpaper
- dropcloth or another work protector
- paint of choice
- paint brushes
- sealer or shellac
Preparing the Wood for the Computer Monitor Stand
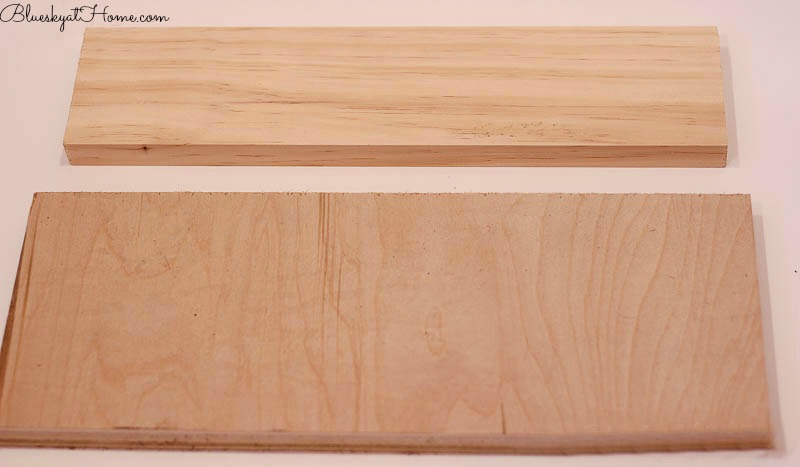
The monitor is basically 3 pieces ~ the top that the monitor sits on and the 2 pieces that support the top piece.
Step 1 ~ Determine the size that you want the monitor stand to be. The Container Store stand is 21 1/8″ wide X 9 7/8″ deep X 4 1/8″ high. I check what scrap wood I had. I had one piece that was 15″ X 6″. I decided that that piece would work just fine. I also had 2 pieces that were 3 3/4 inches wide and 15 inches long. I used one of those pieces to make the 2 support pieces.
I used the piece that would be the top as my measuring piece and measured the 3 3/4 x 15″ piece into 2 ~ 6-inch pieces.

Then I used my hand saw and miter to cut the board.
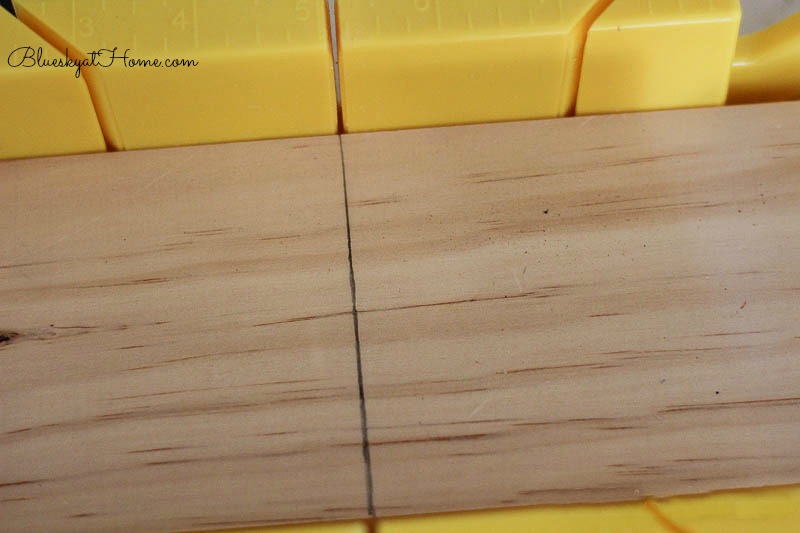
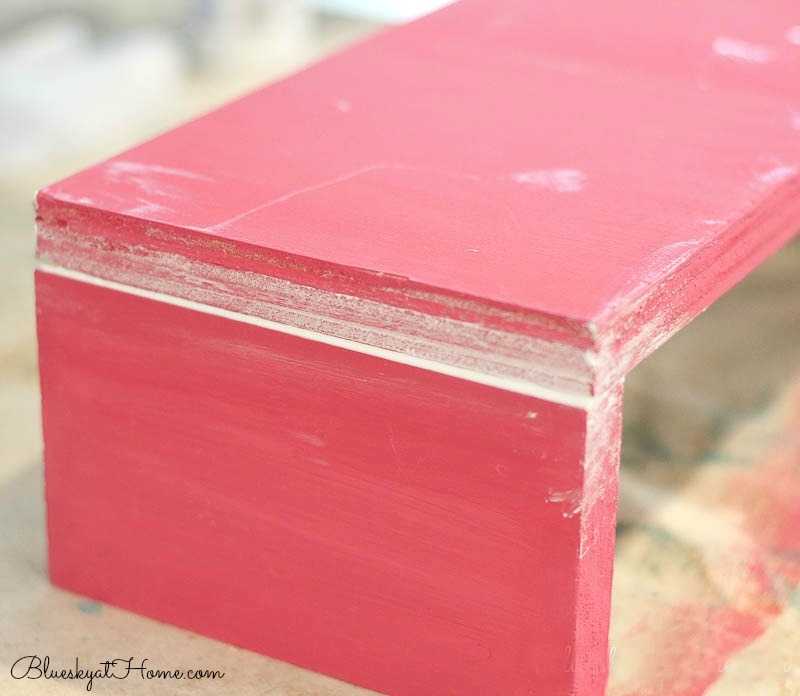
Now I had my 3 pieces. I did sand the edges of all the pieces just to make sure there were no rough spots.
Painting the Computer Monitor Stand
Determine your paint color and the paint you are going to use.
I still had almost a whole jar of Amy Howard at Home One Step Paint in Drama Queen left from my printer paper box project and it was the perfect color for the computer monitor stand. (If you don’t have a stir stick handy, a plastic fork will do.) I would be painting inside on my kitchen island (I wanted to watch some the Australian Open tennis matches while I painted.) so I covered the granite with my dropcloth.

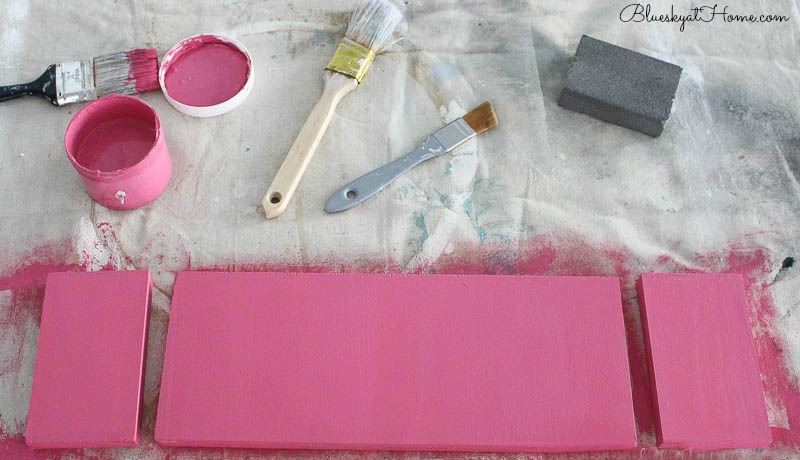
One Step Paint has amazing coverage. One coat completely covered the wood, no primer or wood sealer is required.
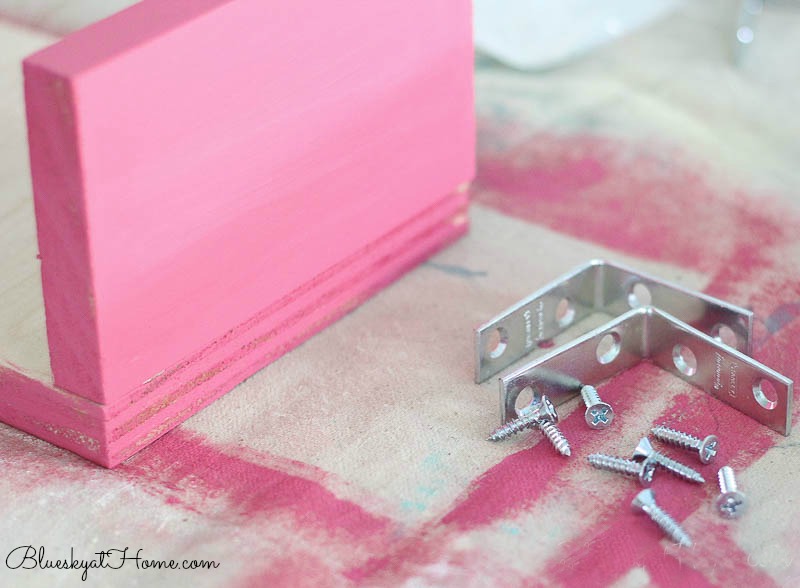
Constructing the Computer Monitor Stand
I love L~brackets. For a DIYer like me, they are an easy way to firmly secure 2 pieces of wood perpendicularly when you don’t want any screws to show. I would use 2 on each end. I determined where the screws should go, marked the spot, made pilot holes, and then screwed the L~brackets in. I love using my electric drill. It makes the work easy, but if you don’t have an electric drill, a good old screwdriver will work.
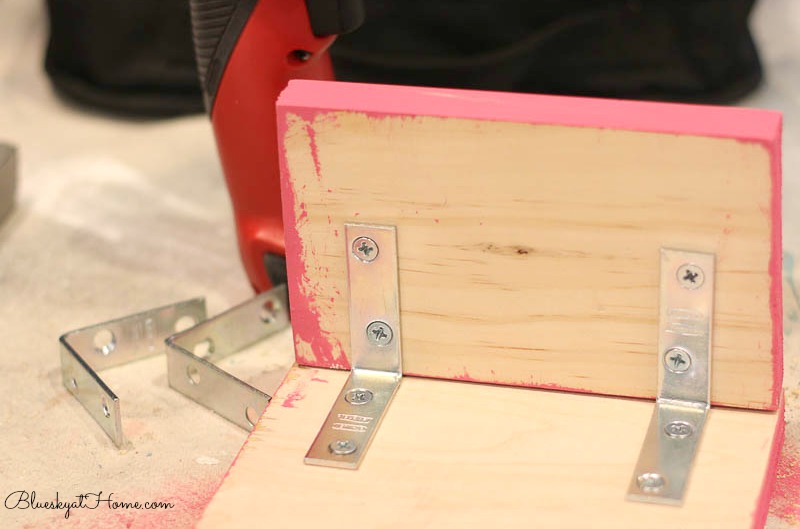
It was at this point I realized I should have painted the other sides of the boards before attaching them. Don’t make that little mistake.
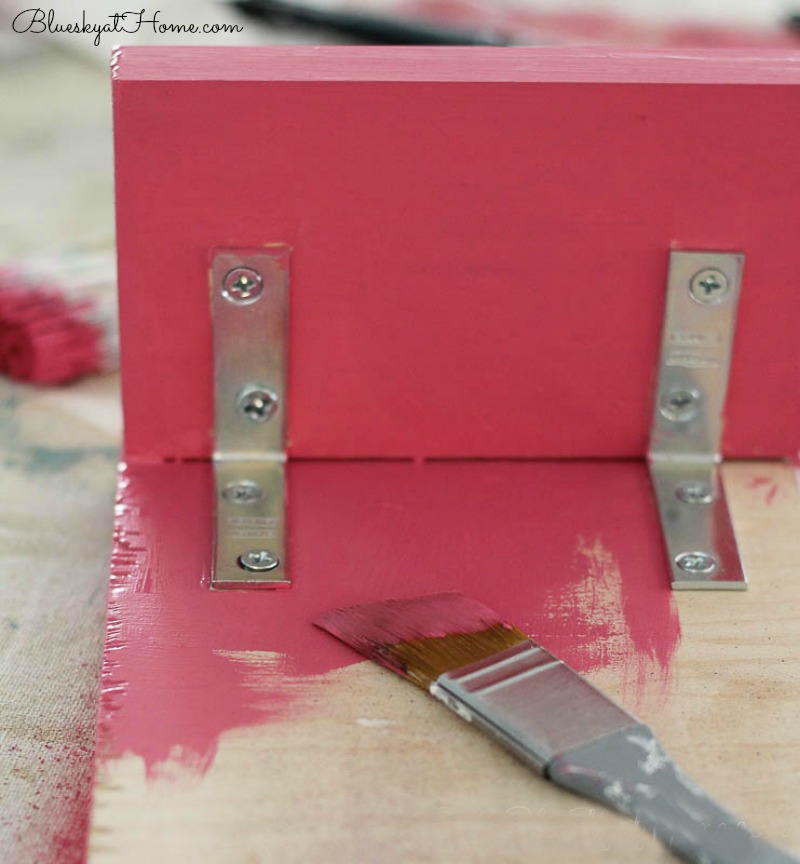
Because the wood at the corners had a tiny gap, I used some caulk to fill in, knowing that I could go back and touch up the paint. When the caulk was dry, I touched up the outside of the monitor stand with paint.
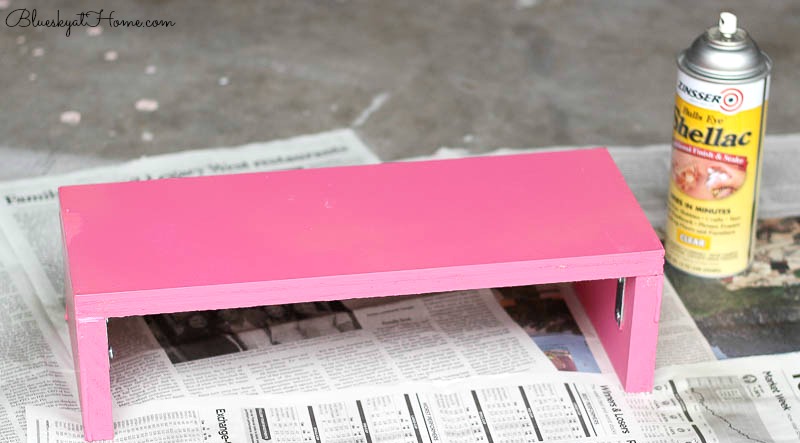
Rather than wax the monitor stand, I used some spray shellac to give it a bit of shine.
Setting up the Computer Monitor Stand
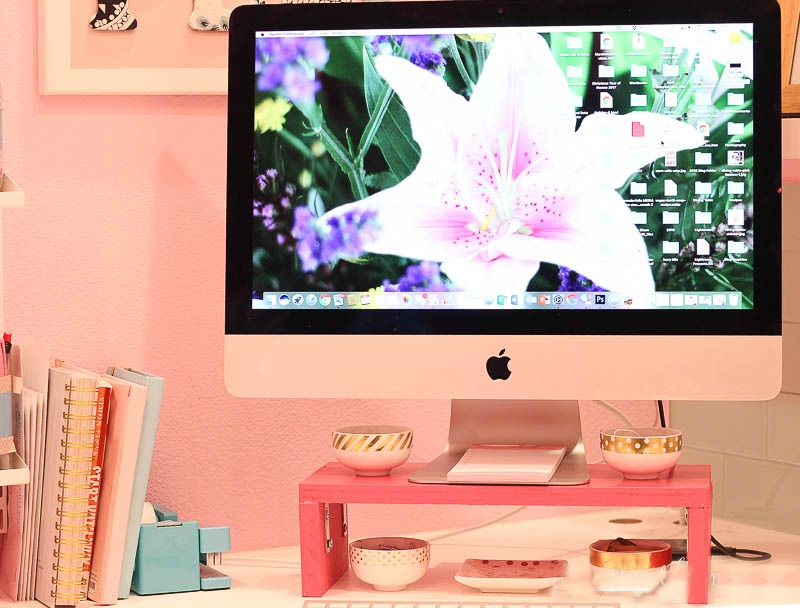
In under 2 hours, the monitor stand was finished. I love how it gives my space under it for my little dish (I use this for my ring when I’m typing a lot.) and 2 of my little bowls for paper clips and rubber bands. On the top I had room for more clips, rubber ties and a notepad.
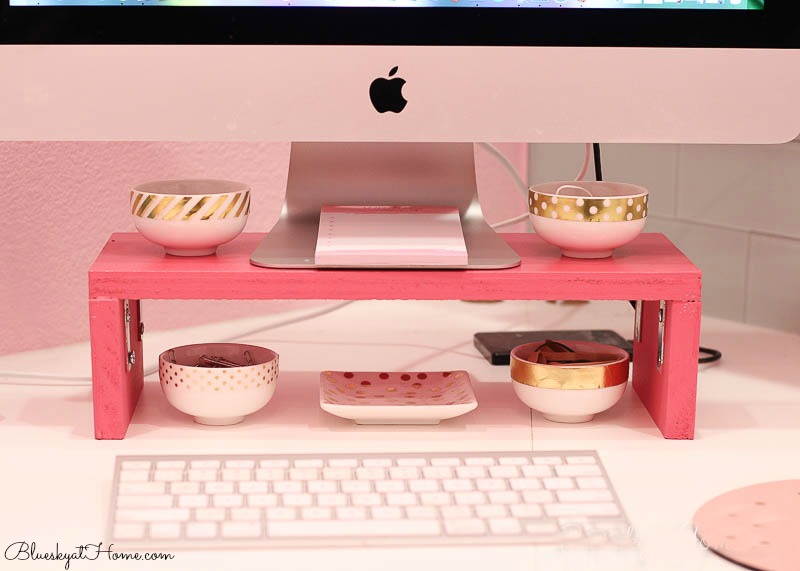
I now had space where the 4 bowls had been for 3 Dollar Tree containers which had been in a drawer. They hold post~it~notes, various supplies and white-out tape.
I love the added display and storage space this computer monitor stand gives me. And another pop of color is a good thing too. Practical and pretty ~ what a great combination for any office space. With tax, I would have spent about $42. My computer stand has the same functionality, adds a great pop of color, but didn’t cost me anything. Just a couple of hours of fun DIY work.
Here’s how I built a printer paper storage box also with leftover wood and paint.

I hope that showing you how to make a computer monitor stand has inspired you to add a bit of pretty practicality to your office space. Please be sure to PIN this project.


Carol, what a clever girl! Now you have me wanting one, but my monitor does not need raising. You make DIY look so easy that even I could do it.
Jean, believe me, anyone could make this monitor stand. I didn’t know I needed one until I made it. NOw the height is so much seeing on my neck ~ I don’t have to look up or down.
Cute. Looks very sturdy!
So far, so good, Jennifer
carol
This is so pretty and practical! love it! Love the color! I found a really cute white lamp at HG with brass accents! It would look good in your space. run.run to HG! happy monday laura
Laura, I’ll try to get by there this week. Thanks for the suggestion.