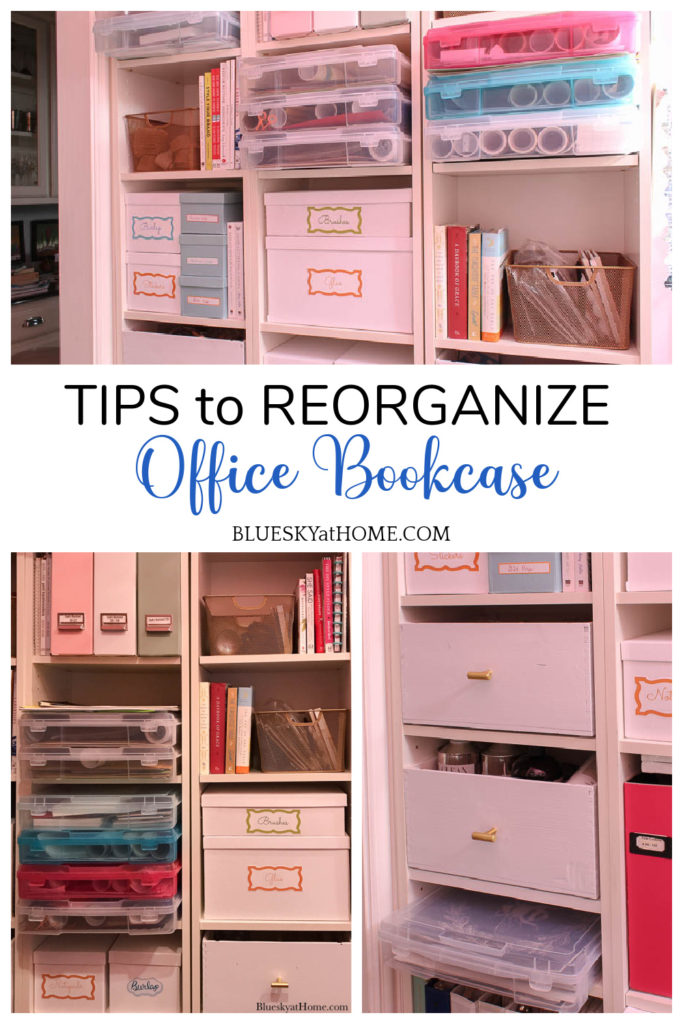
How to Reorganize an Office Bookcase
Do you have a bookcase in your office? Bookcases can be great places for all sorts of storage. I recently gained four new storage boxes that allowed me to redo the bookcase in my office. I think you will get some great ideas on how to reorganize an office bookcase.
How to reorganize an office bookcase is partly individual storage needs and partly the style you want.
Some other factors to consider:
- size of your bookcase
- amount of storage you need
- number of shelves
- storage options
How to Reorganize an Office Bookcase
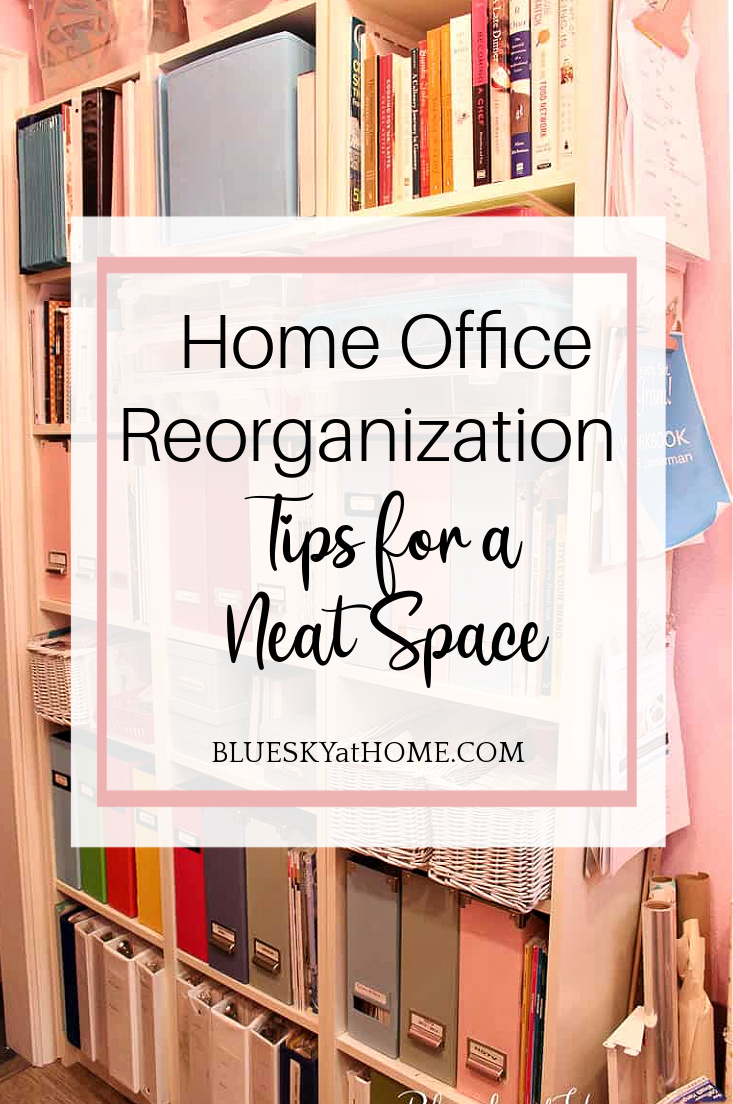
My entire bookcase actually consists of three Billy Bookcases from IKEA. I bought them several ago when I took over one of the kids’ bedrooms as my office in our previous home.
When we built my office a few years ago, I had a wall perfect for the bookcases. Since then, I have rearranged the shelves several times ~ reorganizing is a constant process.
Now it was time to reorganize my office bookcase.

WHY REORGANIZE YOUR OFFICE BOOKCASE?
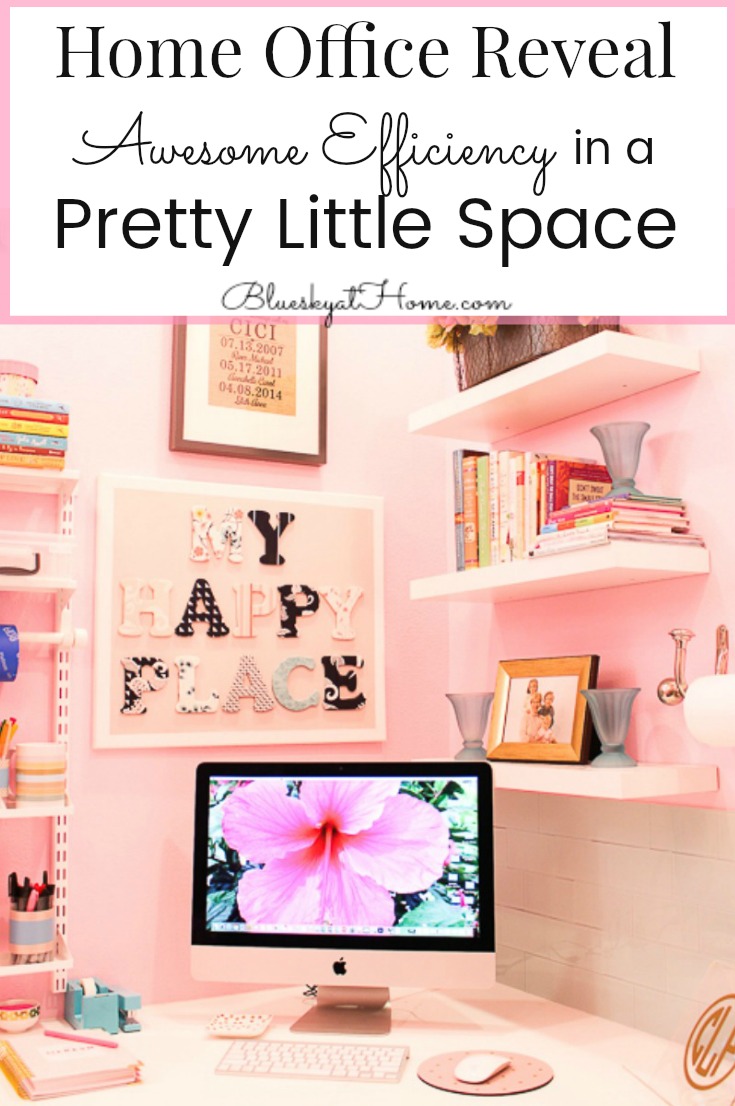
NOTE: My office is just 62 square feet and narrow. The width between the countertop and the front of the bookcase is just four feet. There’s not much “move around” space or depth to take pictures.
Often our storage needs change. We acquire more supplies or the arrangement just isn’t as efficient as it could be.
You can see how the office bookcase looked in my office reveal.
In my case, the reasons for reorganizing the bookcase were in play.
- I didn’t have enough room for my supplies.
- Some containers weren’t as efficient as they could be.
- Some spaces weren’t being used to the best advantage.
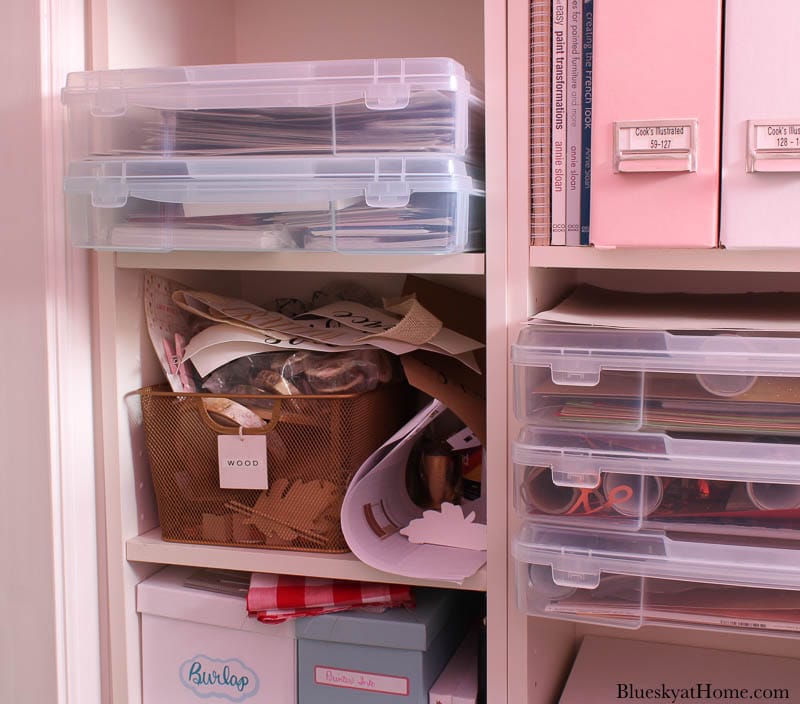
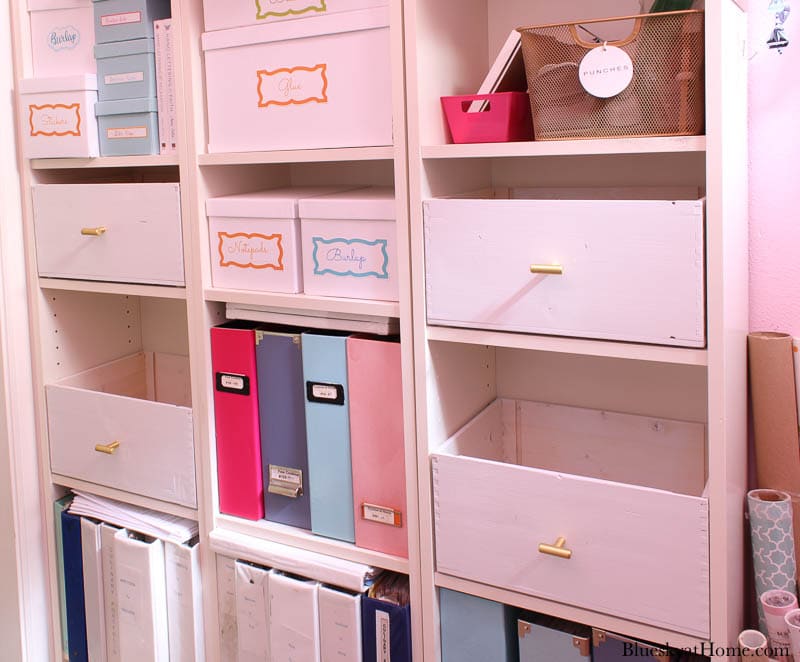
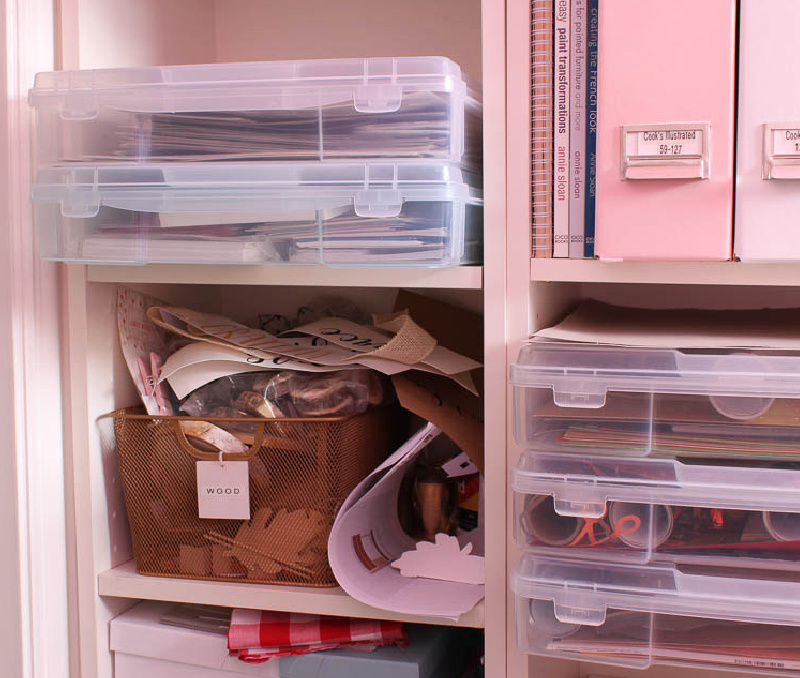
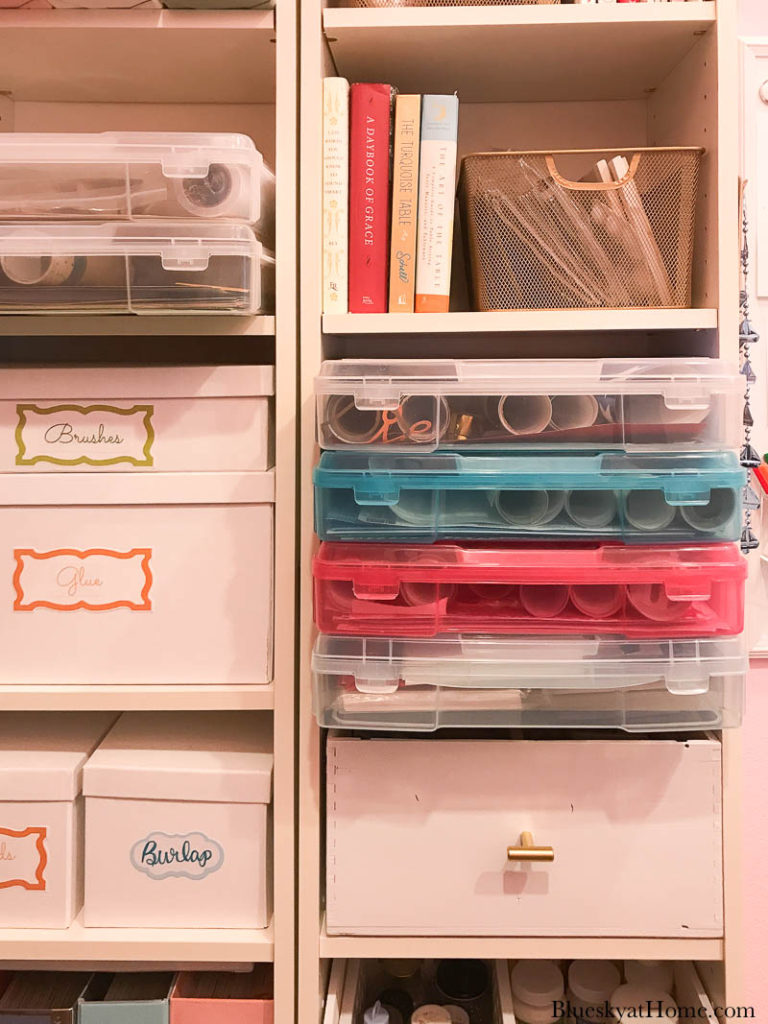
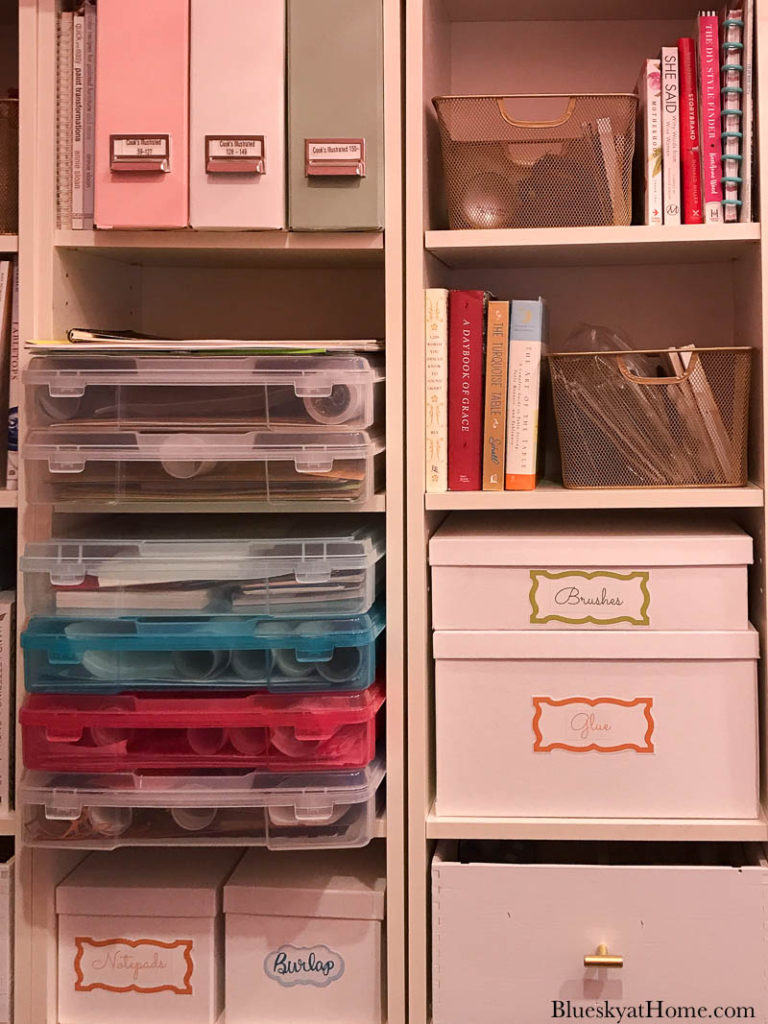
The shelves in the bookcases create an almost “cubby” effect. I needed to find a way to fill and rearrange the cubbies to include more space for supplies. Some of the containers I had weren’t efficiently holding supplies ~ as in, messy and overflowing.
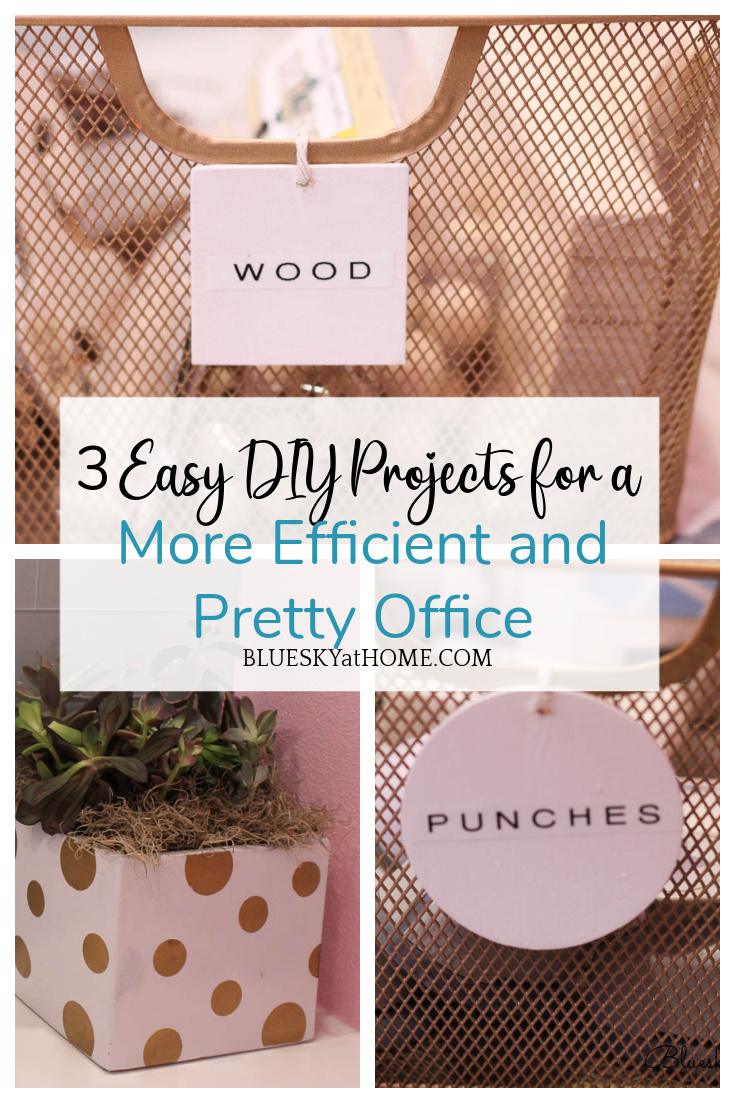
I only had four containers ~ these wire basket containers. I loved the look, but they didn’t fill the entire cubby. Also, a couple of the wire baskets were overflowing.
MY NEW CONTAINERS FOR THE BOOKCASE
I knew I could improve the storage by adding different storage containers. But what kind of storage box? Ideally, one that would fill the cubby for maximum usage.
Then the perfect container dropped in my lap ~ actually, they landed on my neighbor’s curbside.
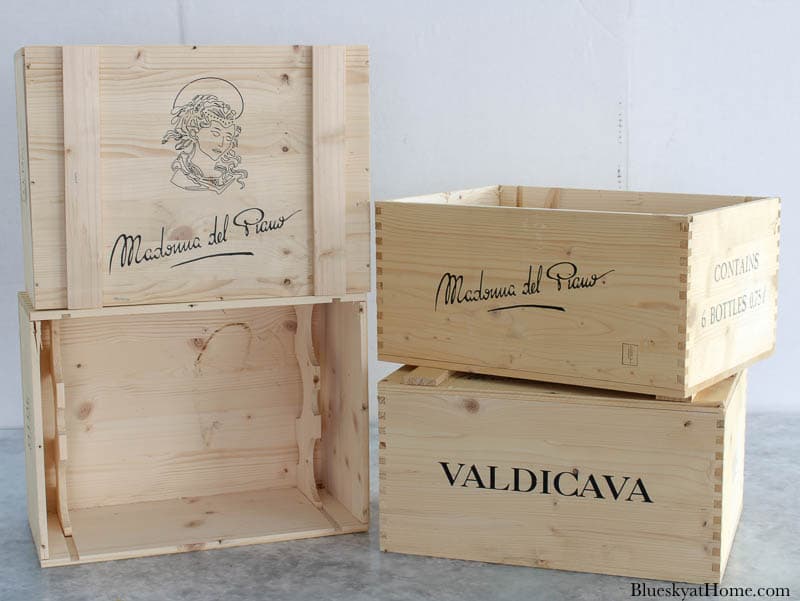
When I discovered that the wine crates fit perfectly in the cubbies, I began the process of repurposing them into a container that would look great on my bookcase.

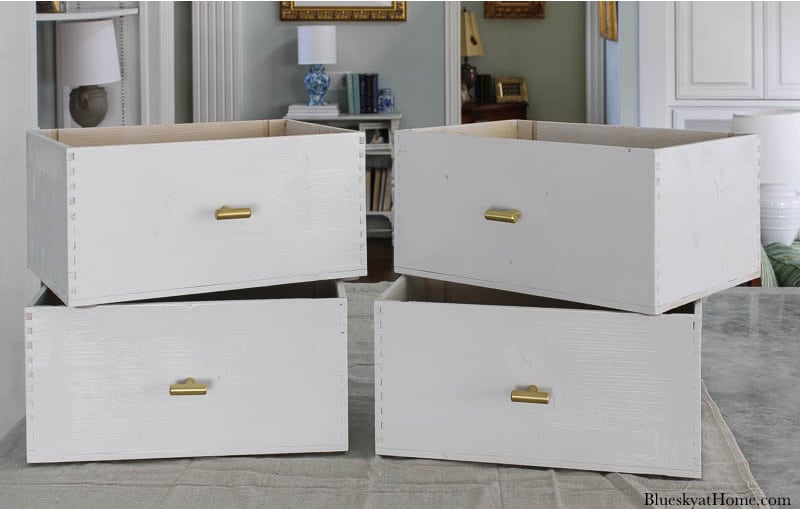
Now I was ready to reorganize the bookcase using these new containers. I loved that they looked like drawers.
STEPS TO ORGANIZE THE BOOKCASE
I started the process by filling all the “drawers” more efficiently.
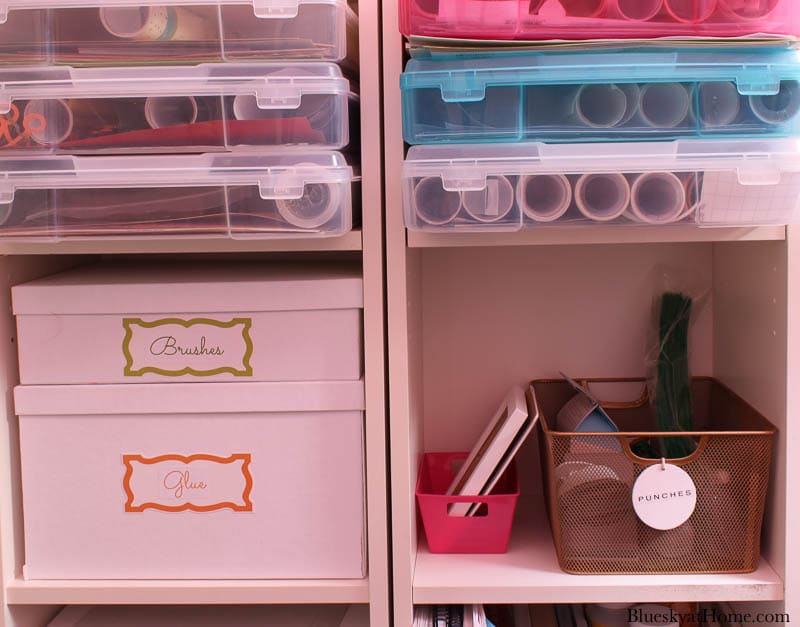
Drawer Number 1 ~ My glitter jars were in one of the wire baskets ~ which had glitter all over it. I moved them to a smaller plastic container (I bought 3 at an estate sale pre~Covid for $3.00.) inside the drawer. That left me plenty of room for my Mod Podge supplies.
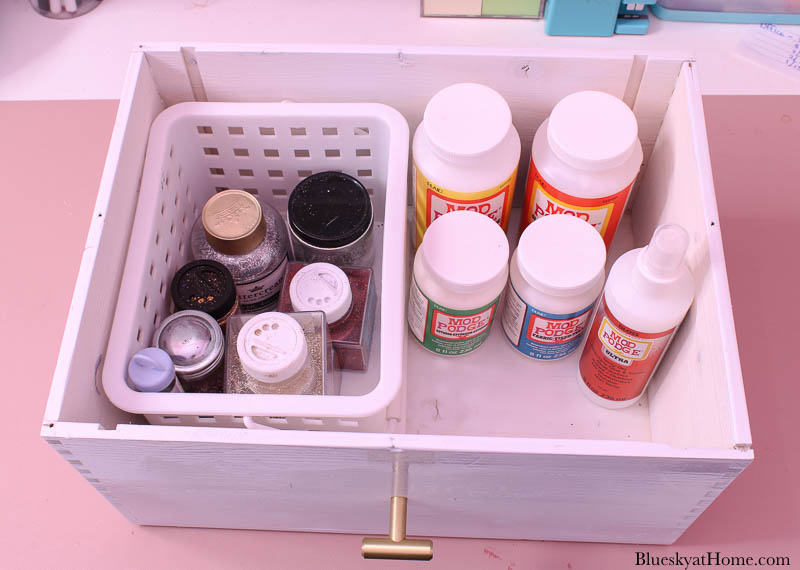
RESULT: Two container contents in one. I especially liked that the glitter was contained.
Drawer Number 2 ~ The second wire basket was full of punches that needed more efficient space. I used another plastic container like the one I used in the first drawer for my smaller punches.
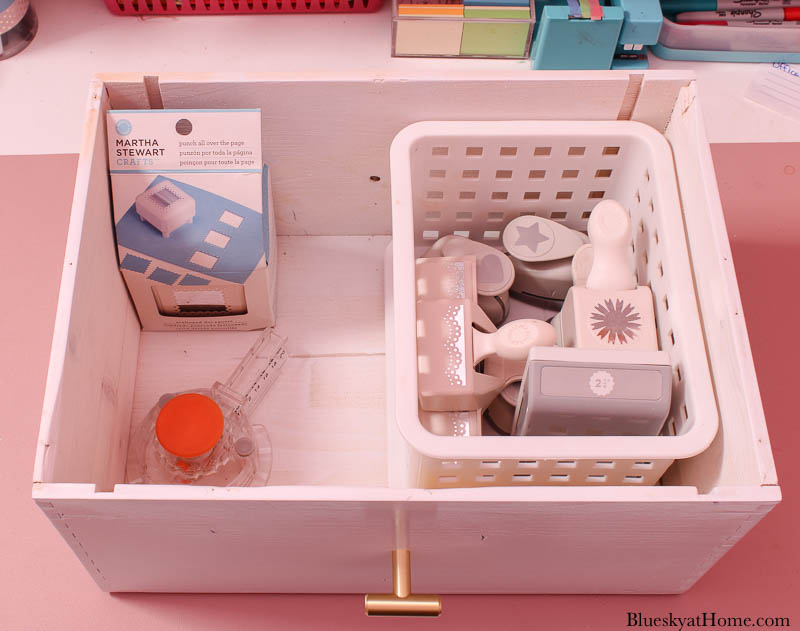
Look at all that extra room I have for more punches.
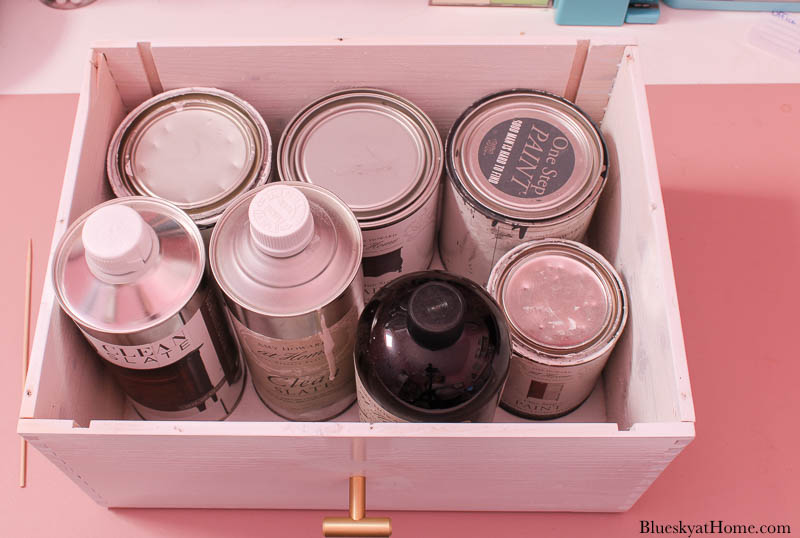
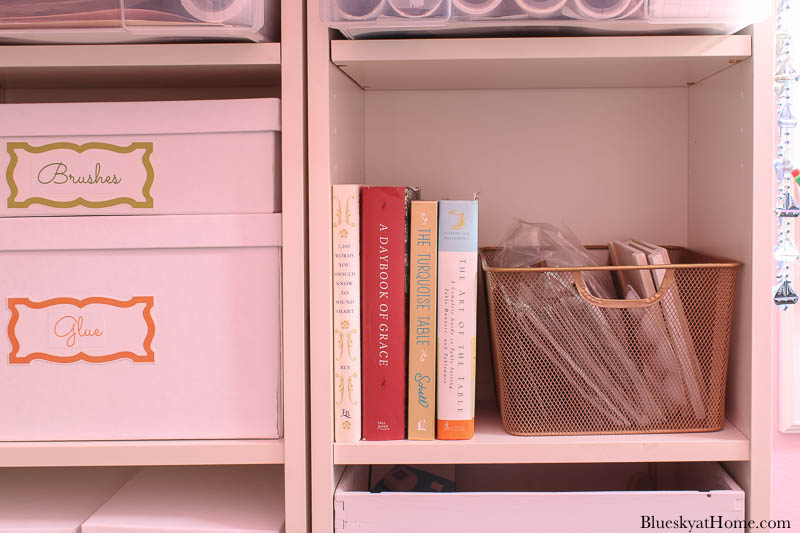
Drawer Number 3 ~ I didn’t have a place to gather all my One Step Paints and other products from Amy Howard at Home. I really wanted them in one place. They all fit in the 3rd drawer.
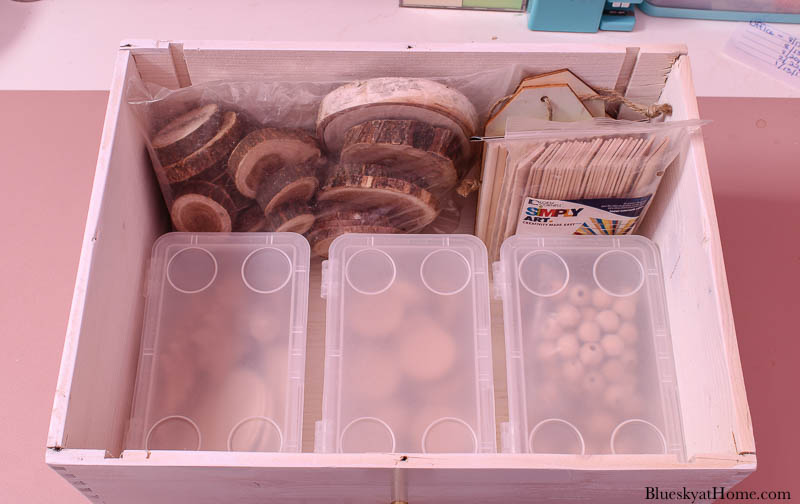
Drawer Number 4 ~ Another wire basket held my wood supplies: wood beads, wood tags, wood slices, wood sticks. As I bought more wood items, the basket started overflowing.
The different wood items were in plastic bags, which I don’t care for, and just seemed to pile up.
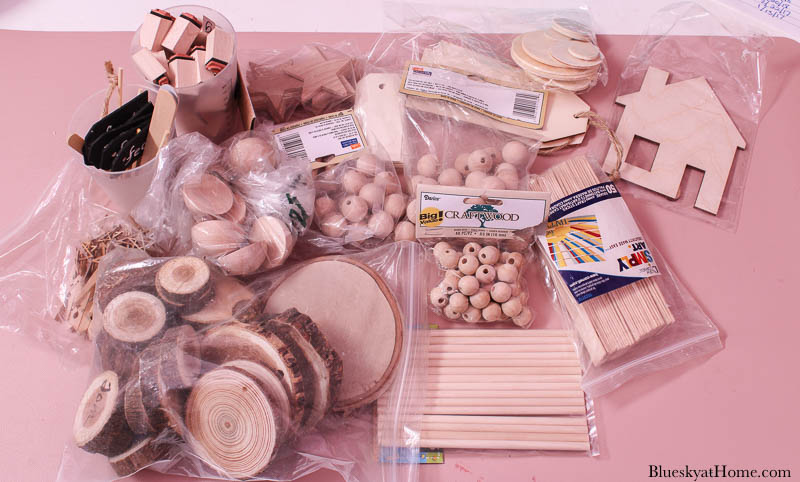
My goal was to find containers for the different wood items. Then multiple containers would fit in a new drawer.
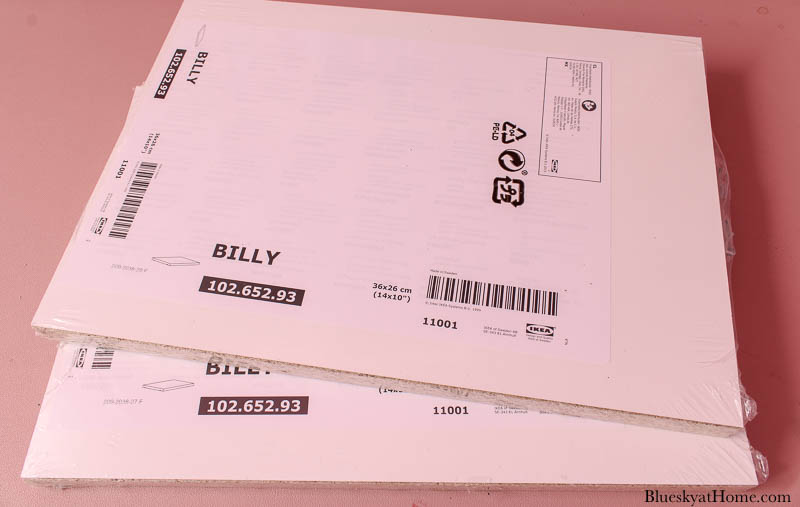
First, I made a trip to IKEA. On my shopping list were containers that would work in this drawer for wood items. I bought home three possibilities.
TIP: Bring home several options, pick the best one and return what you don’t need.
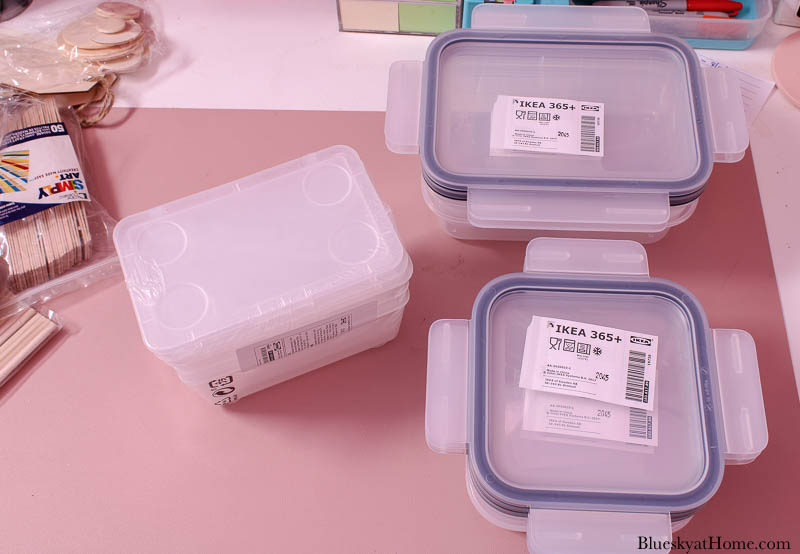
I tried all three containers and the rectangle container with a movable lid was the best choice.
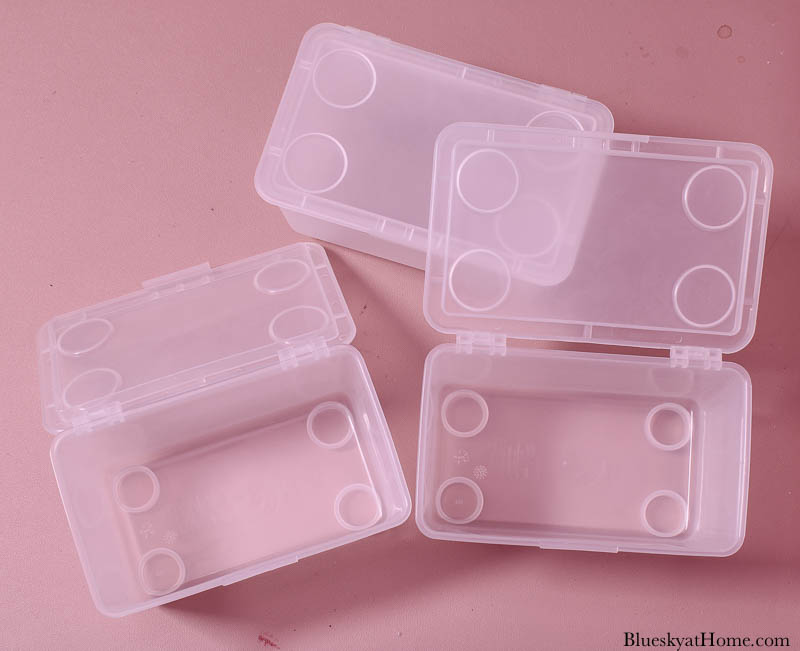
This 3~pack container with attached lids is 4 X 6~inches. Not only was it the best fit in the drawer, but these boxes were the best price at $2.99.
I was able to put all the different beads and tags into the boxes. I love that I can see exactly what is inside the boxes.
My plan is to return the other containers that I don’t need and purchase another package of lidded boxes for the rest of the wood items.
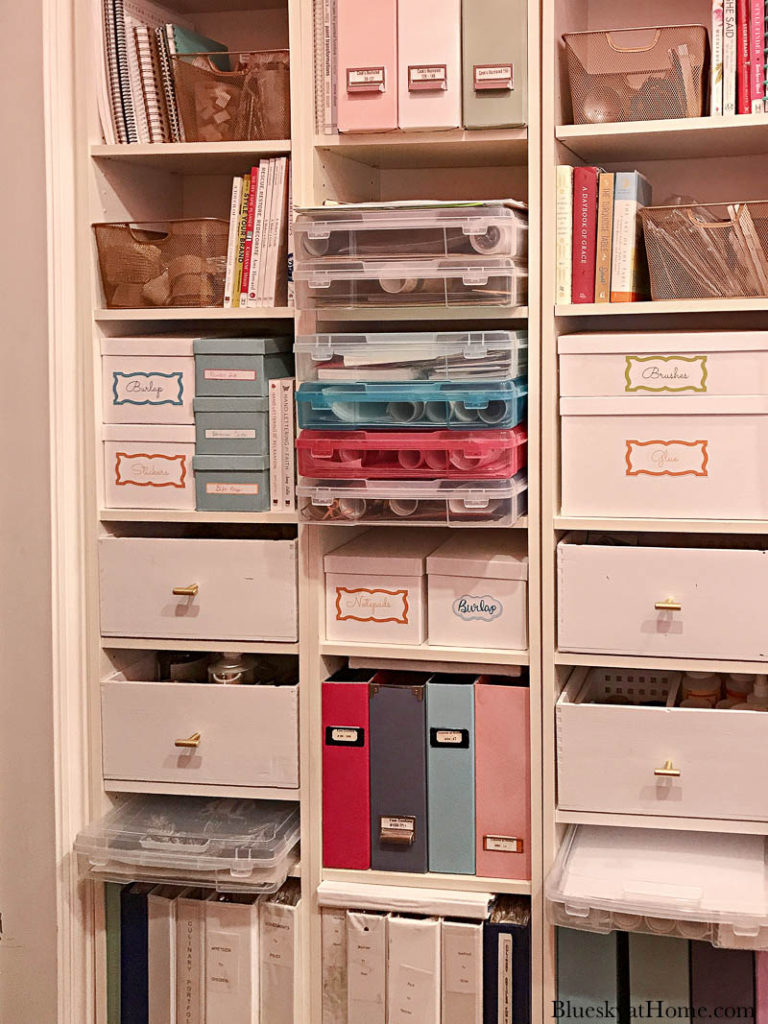
ADDING EXTRA SHELVES
When I first placed one of the empty drawers in the bookcase, there was a lot of empty, wasted space above two of the drawers.
What if I added another shelf?
TIP: When shopping for storage solutions, take measurements with you to the store.
On the IKEA website, I discovered that you can buy extra shelves for Billy Bookcases. I put two of those on my IKEA shopping list.
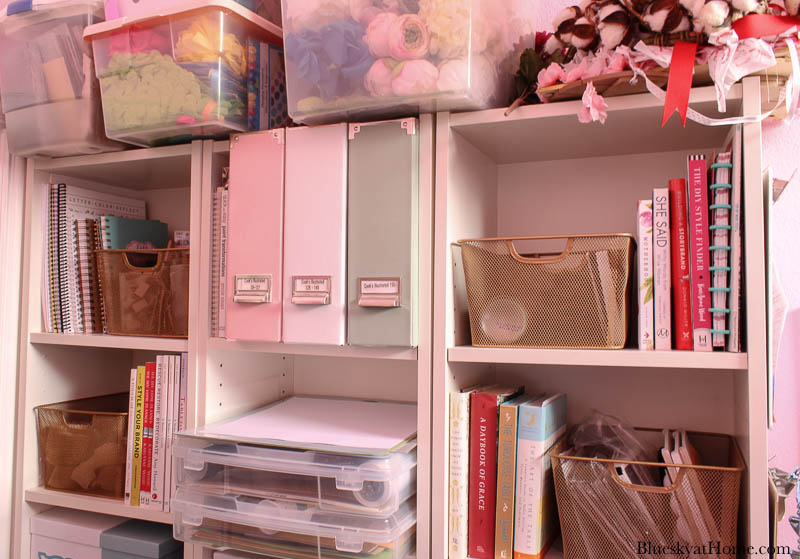
After adding the two shelves, this extra space was perfect to add two of my scrapbook paper containers.
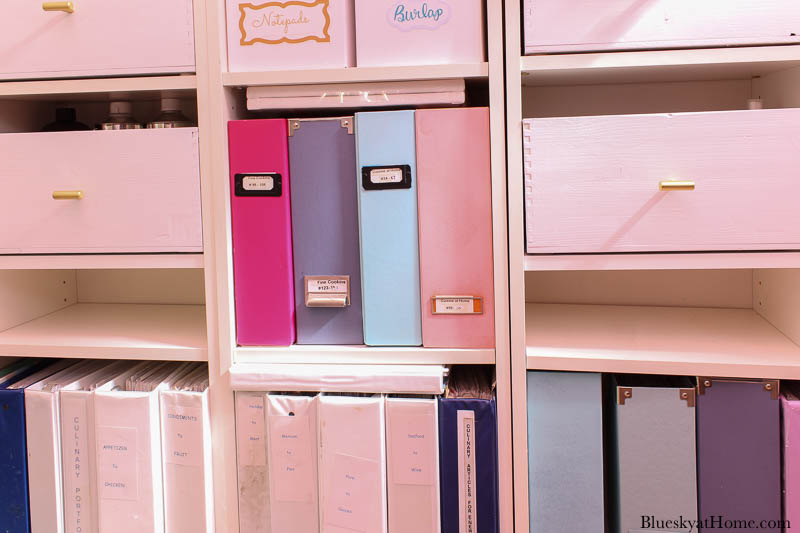
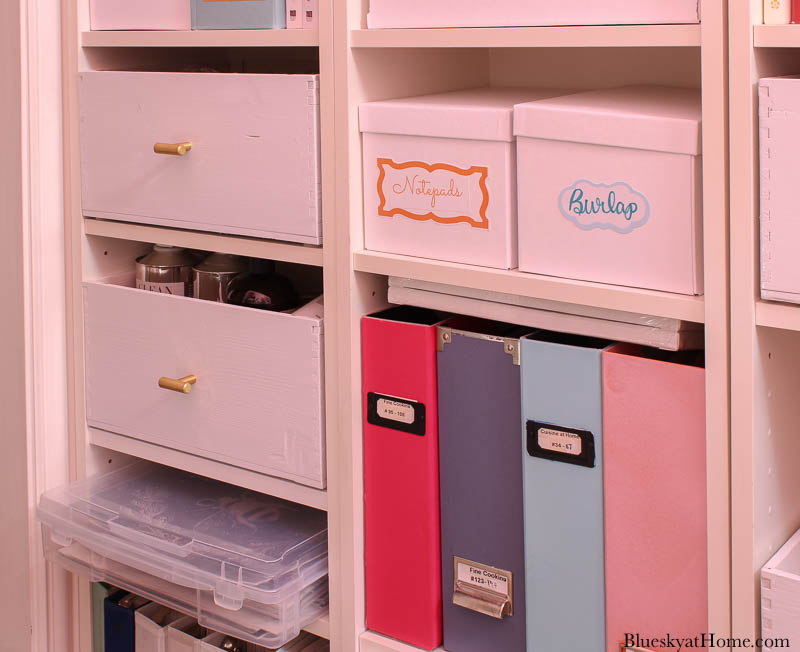
Moving these two scrapbook containers freed up this cubby.
REUSING THE WIRE BASKETS
By removing items from three of the four wire baskets I freed them up for other items. The one basket I didn’t touch contains Gold Leaf packages and plastic scrapers from A Makers’ Studio.
In one wire basket, I placed some of the extra~large twine and burlap ribbon from another cardboard box on the bookcase. That still leaves me with two more wire baskets to fill up.
I wasn’t happy with the open space above the wire basket and books (on the right side of the bookcase), so I switched those with the scrapbook containers above.
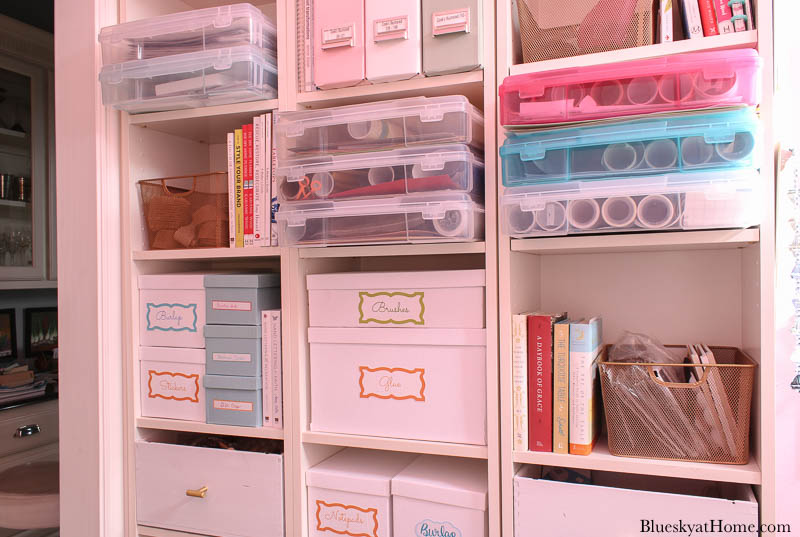
I think this look has more symmetry. The reorganized bookcase also gained more space for some of my books. There is room for one more scrapbook container if I need it.
FINAL BOOKCASE ORGANIZATION
Finally, I switched the stack of scrapbooks to the center bookcase for a more symmetrical bookcase design.
To get a picture of the final reorganized bookcase, I had to climb on my countertop and take this picture with my iPhone.
Did you get some ideas for how to reorganize your own office bookcase? The main idea is to play with the arrangement until you get the maximum storage and the look you like.
Love these bookcase reorganization ideas? Please PIN it.


Aren’t Billy bookcases fabulous?! I love how you have painted and organised yours. The pink is lovely and you’ve got some great storage ideas. The Billy Bookcases are such well designed products. We have passed ours (which were well over 20 years old) to our son and his partner for their home about 5 years ago and they are still in great use! Thank you for sharing and for being a part of the Hearth and Soul Link Party Community. Take care and have a lovely week!
You have some great tips here for organizing. It is a constant job to keep things neat and tidy! I just did my own office/sewing/project room today. Where does the stuff come from! Haha! Thanks for sharing! Pinning!
I should think that your neighbor would call you when she has good “trash”! I think you should come to my house and show me how it ‘s done! I love using the large scrapbook paper storage plastic boxes for everything–even scrapbook paper! I find that removing stuff from plastic bags helps condense things, too. I cut the staple marked cardboard off the bottom of the cardboard tag, turn it inside out, add a small-to-sell item to the bag, then restaple the cardboard top on. Voila! Pretty upcycled packaging! We don’t waste much at my house. Mystery soup for lunch again today (using up leftovers in a can of soup!).
Kathy A, what a great idea about the cardboard. There is so much we can do to keep things out of the landfills. It feels so good to repurpose and recycle. Enjoy your lunch. You go, girl!
HI Carol,
Your neighbor had those crates for trash? They look gorgeous! I had to reread the post to see those crates were now the white boxes with gold hardware. I have a narrow office too. My hips bump something every time I get to my desk ;0)
Are you playing tennis this spring? laura