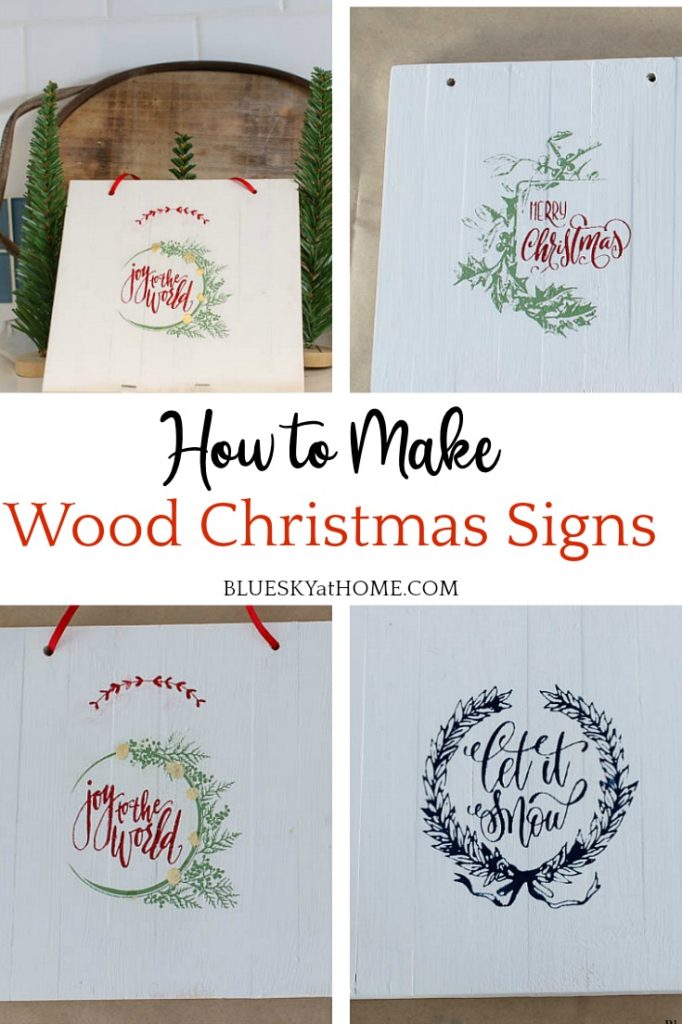
How to Make Wood Christmas Signs
Do you like to receive homemade items for gifts? I love giving homemade items for gifts. As I show you how to make wood Christmas signs, you will see them for both as seasonal decor and Christmas gifts.
I know you will love how to make wood Christmas signs as both gifts and decorations. With all the craft supplies available these days at both the craft stores and online, our options for making homemade items are endless.
The idea for these wood Christmas signs started with a walk down the wood aisle at Joann. This is one of my favorite aisles to shop. As they say, the rest is history ~ DIY history.
How to Make Wood Christmas Signs
I intend to give these wooden Christmas signs as gifts for some neighbors and friends. Homemade gifts are just the thing to say that you care. They don’t have to be expensive, but they do need to convey a feeling of friendship.
Christmas is the perfect time for a little wooden Christmas sign to brighten anyone’s holidays and home decor.

As it turned out, I was asked to participate in a Christmas Gift Makerthon by A Makers’ Studio. The timing was perfect ~ it got me going early on these wood Christmas signs.
The Makerthon took place on the A Makers’ Studio Facebook page on Saturday, November 7th. You can watch my demonstration, as well as several others available on replay.
Here on the blog, you can see more of the project’s process and a list of supplies that you need to make your own wood Christmas signs.
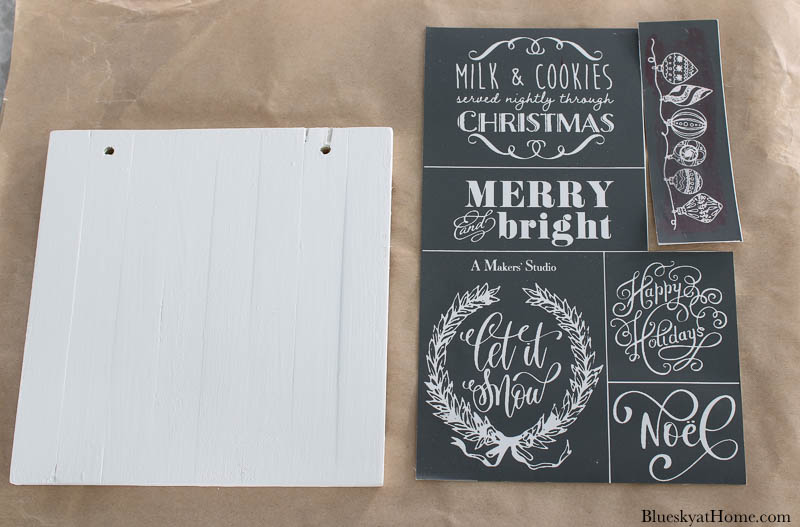
Wood Christmas Sign Supplies
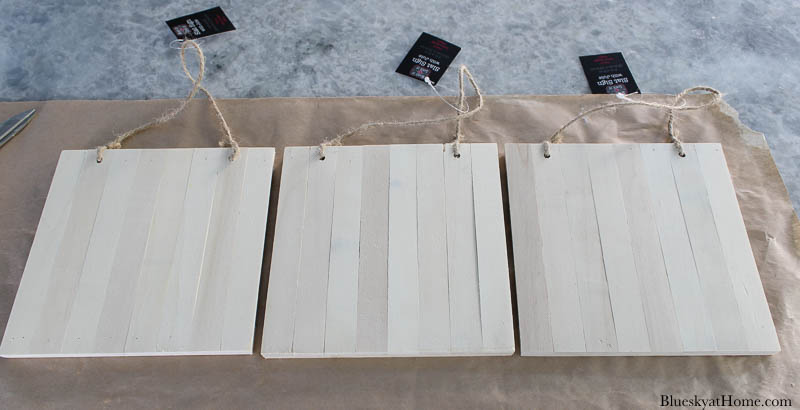
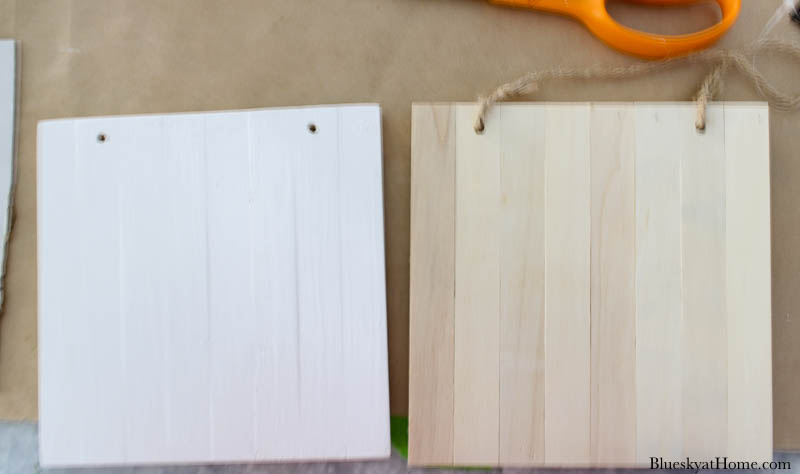
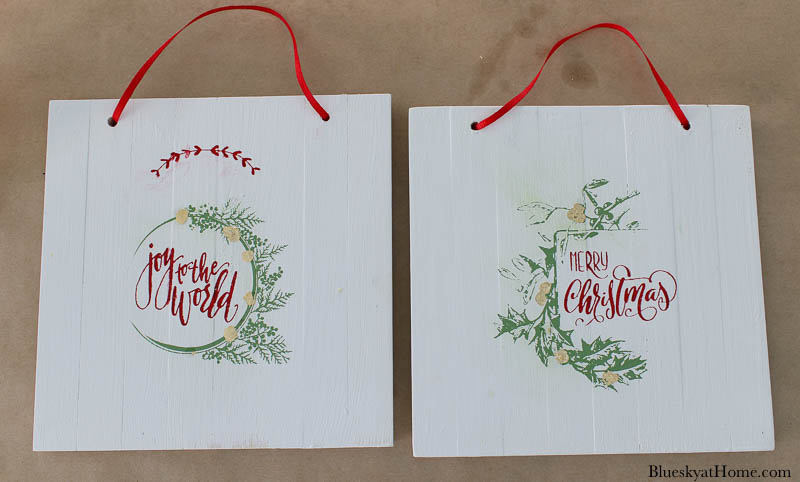
As I mentioned, this project began when I found 3 wood signs at Joann. They are lightweight wood in a modified “pallet” design. The plaques, as we will call them, are 6 X 6~inches.
They also come with a jute twine hanger.
Here are the supplies that I used for this project with links.
- 1 wood plaque for each sign ~ they are $2.99 each; try to use coupons! Here is another option for wood signs.
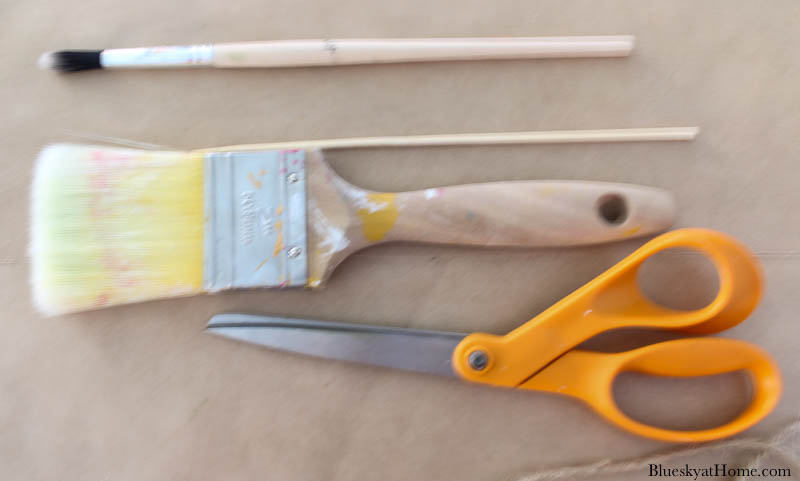
- 220 grit sandpaper
- scissors
- 2 ~ 3~inch chip paintbrush
- artist’s brush ~ optional
- white paint for background ~ I used One Step Paint from Amy Howard at Home in Bauhaus Buff; Rescue Restore paint is also a great option.
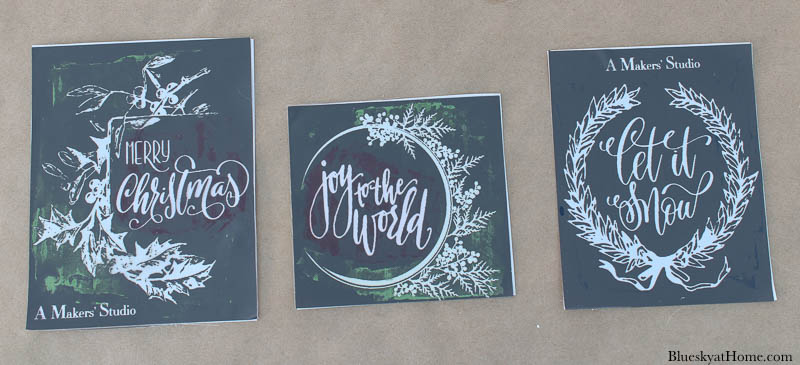
- Christmas stencils of choice ~ I used stencils from the extensive Christmas selection at A Makers’ Choice.
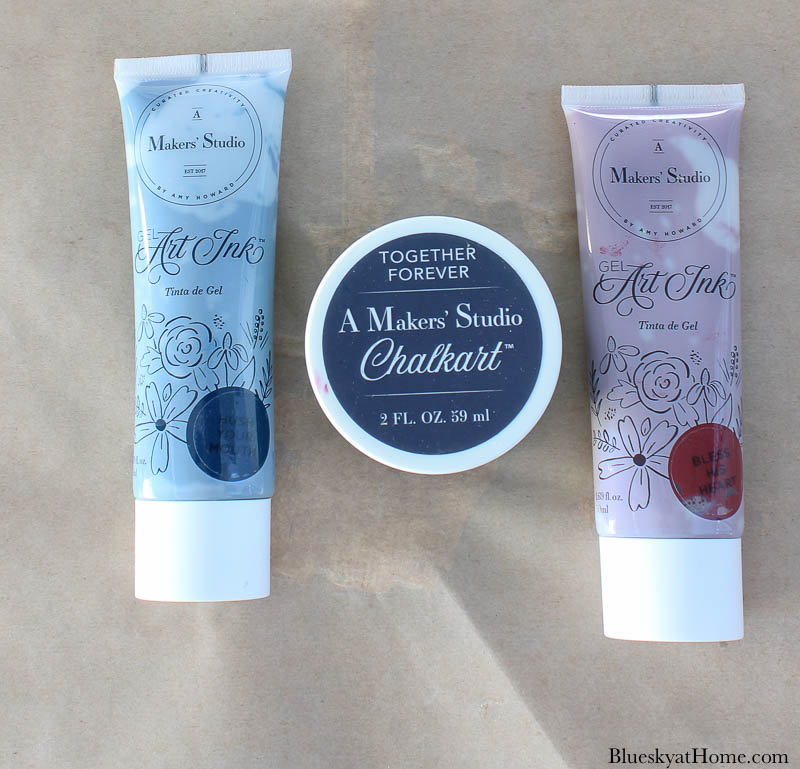
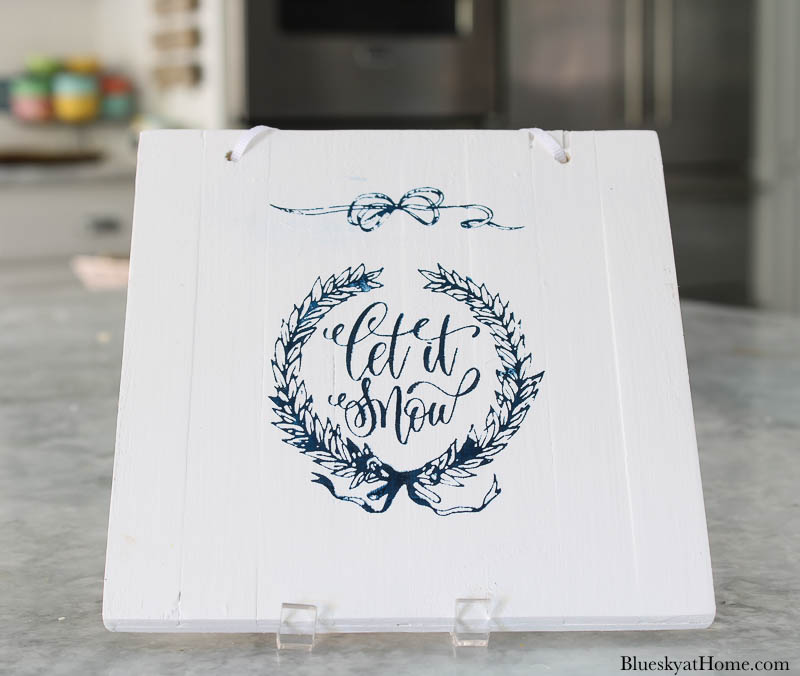
- GelArt Ink or ChalkArt ; I used GelArt Ink in Bless His Heart (red) and Hush Your Mouth (dark blue) and ChalkArt in Together Forever (green).
- Gold Leaf and Gilding Size ~ optional
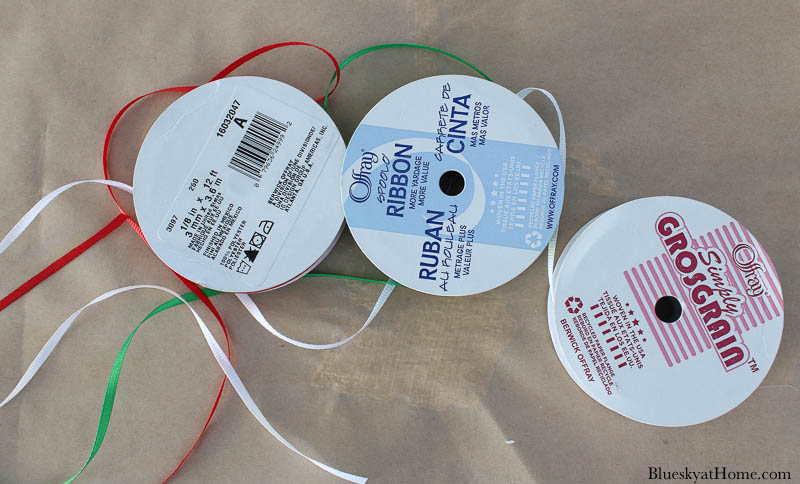
- 1/8 or 1/4~inch wide ribbon in your choice of colors
Making Your Christmas Signs
Some of these steps are shown on the video in more detail.
Step 1 ~ Remove the jute twine from the wood plaques.
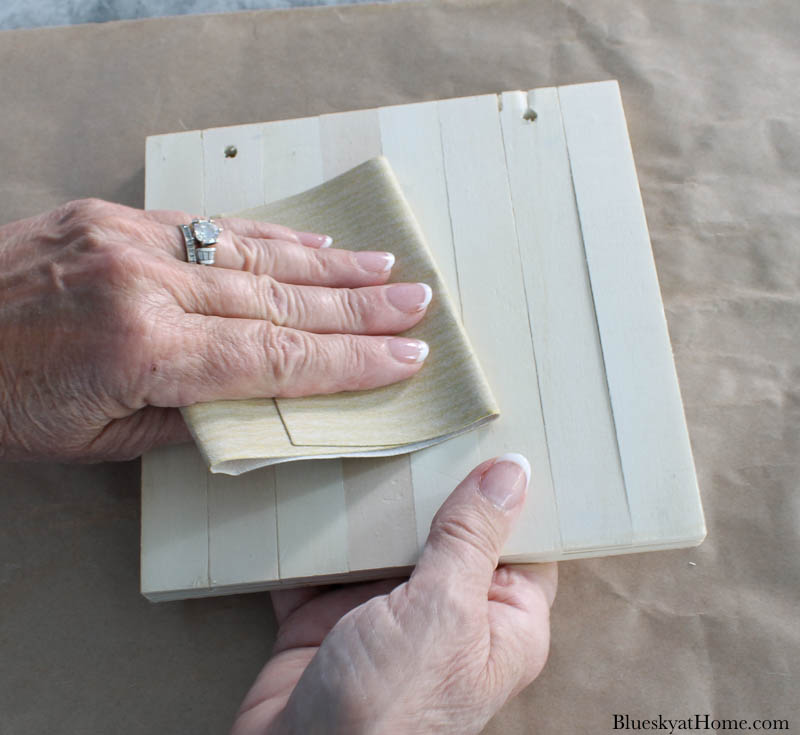
Step 2 ~ The raw wood is slightly rough, so lightly sand the surface with a 220 grit sandpaper and wipe off any dust with a lint~free towel.
Step 3 ~ Then, use the chip paintbrush to apply the paint. Remember to paint from wet to dry areas.
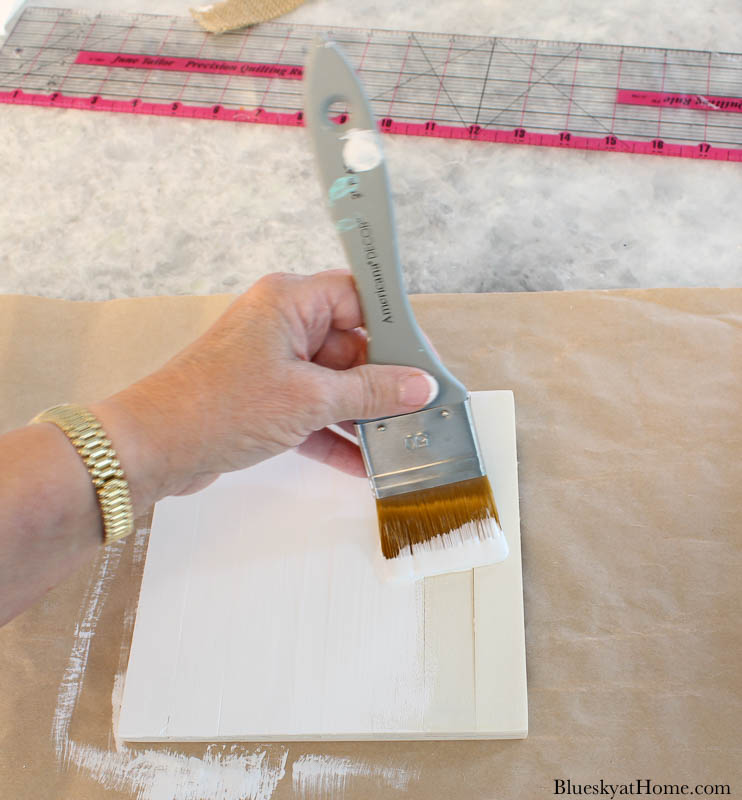
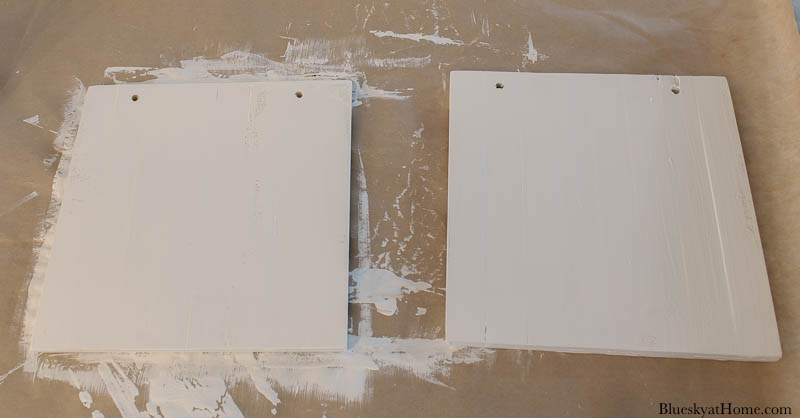
Step 4 ~ Allow the paint to dry for about 15 ~ 20 minutes. If needed lightly sand again, wipe off dust and apply a 2nd coat of paint. Let dry for another 20 minutes.
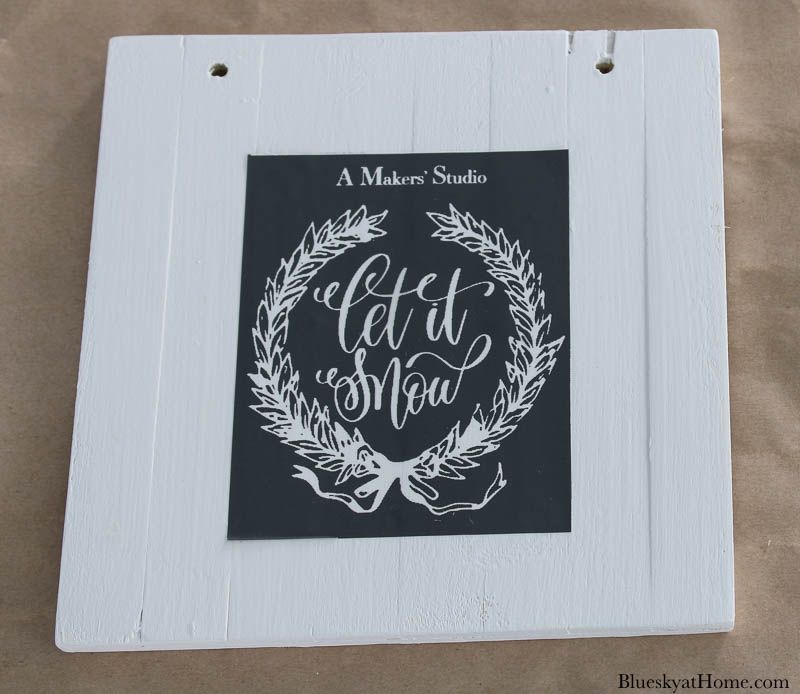
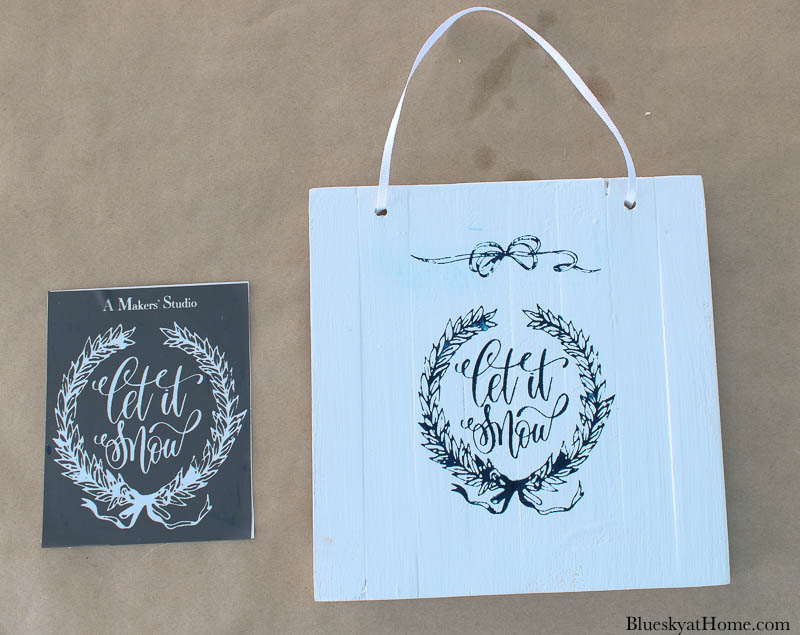
Step 5 ~ Choose your stencils. I used 3 stencils from one of the new 2~sheet Christmas stencil packs. This pack contains 12 different stencils.
Step 6 ~ Remove the stencil from the paper backing (Set aside to use to store your stencils.) from the stencil. The tri~mesh stencils have an adhesive backing to stick to your surface. Place the stencil in the center of the wood plaque. Rub your fingers over to adhere the stencil and take out any bubbles.
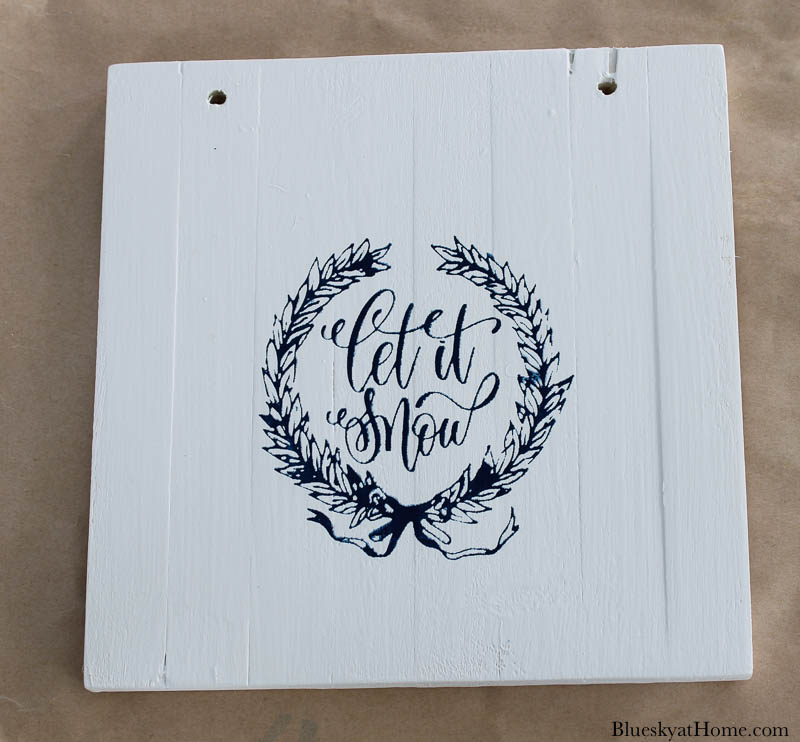
Step 7 ~ Apply your GelArt Ink or ChalkArt using the plastic scraper. Allow the stencil paint to dry for about 10 minutes.
I recommend watching the FB video or reading How to Make Signs with Stencils.
For this wood Christmas sign, I used GelArt Ink in the Hush Your Mouth (dark blue). I also added an additional stencil “bow” above the main stencil.
Step 8 ~ Next, add the ribbon to the wood Christmas sign.
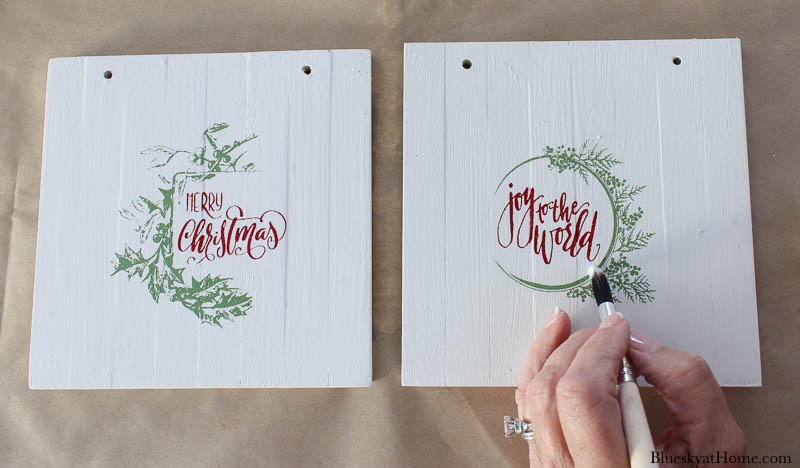
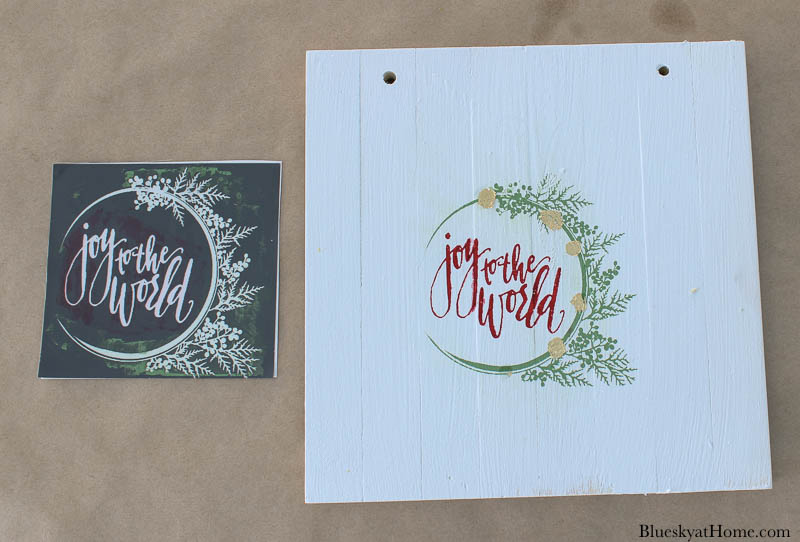
Step 9 ~ Repeat the Step 7 for your other wood signs. I used both GelArt Ink in red and ChalkArt in green on these wood signs. I really like the combination of colors.
Step 10 ~ At this point, I decided that some Gold Leaf would add a nice touch to these 2 stencil designs. I applied the Gilding Size with an artist’s brush. Wait about 5 ~ 10 minutes until the size feels tacky to the touch.
I recommend reading How to Use Gold Leaf.
This step added a sparkly look to the sign.
I also decided to add another small stencil to the top of this design. I used a couple of pieces of painter’s tape at the bottom of the stencil to keep from getting paint on the wood surface. If I did, it’s easy to remove the paint with a damp paper towel.
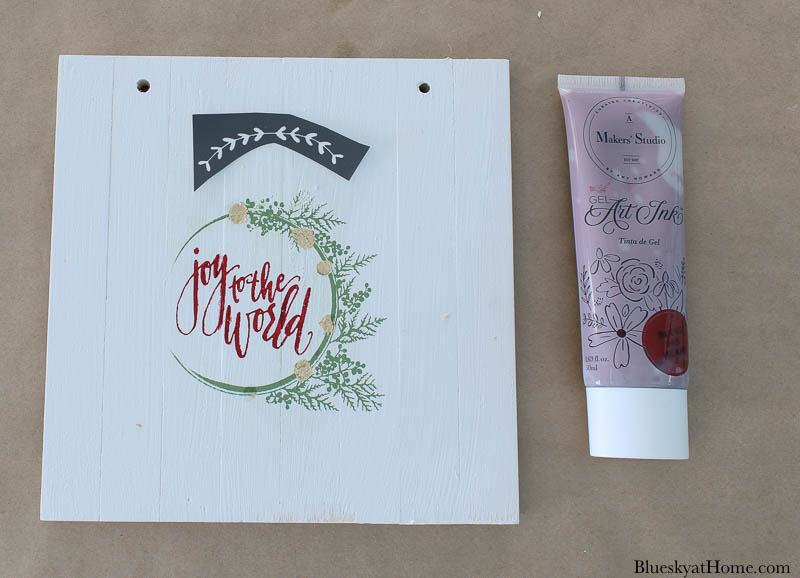

The final step ws to add ribbon for the hangers.
Using Your Wood Christmas Signs
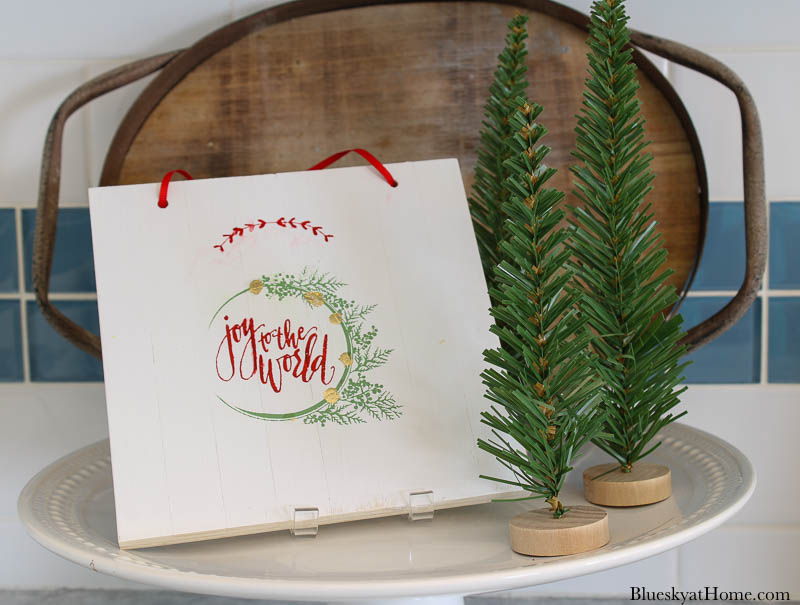
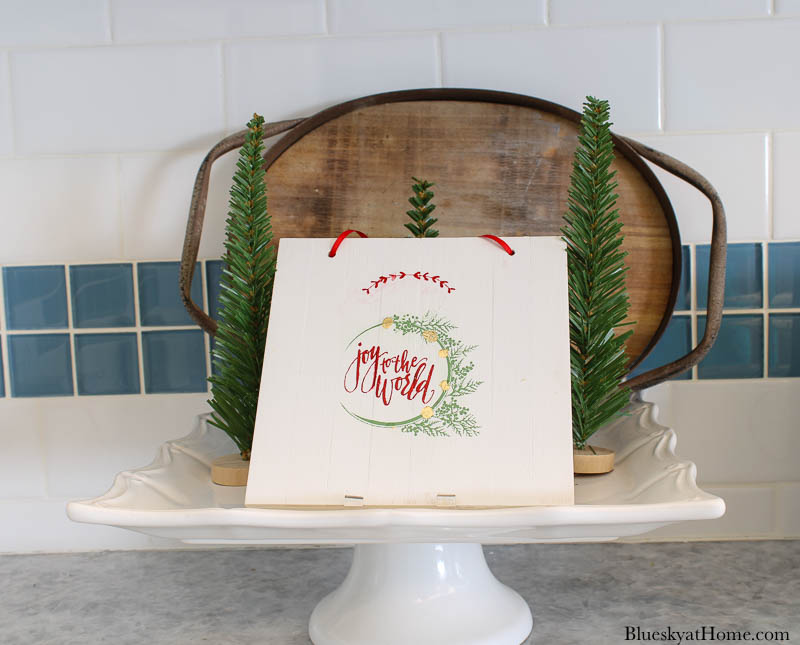
Obviously, you can hang your signs individually or as a group. You can also use a small acrylic or wood stand to display them.
Use them in a Christmas vignette.
I’m planning to get more of these signs or something very similar this week because I need to make several more.
Do you like these wood Christmas signs? I think they are the perfect small gift to give to family, friends, neighbors, and teachers. they are great to make for groups of people, such as a Bible study or bridge group.
Do you need other ideas for DIY Christmas gifts? Try these easy Christmas gifts that I made with paper.
Don’t want to forget these ideas? Be sure to PIN them. It’s not too early to start your Christmas gift-making.


I love these. So cute and such a great idea.
Carol – your sign is so beautiful.
Thank you for sharing with us at Meraki Link Party.
Much love
Naush
Love your festive signs! And the gold leaf adds just the right touch. Thanks for sharing at Vintage Charm. xo Kathleen
What lovely gifts to give to your friends and family, Carol. A Makers’ Studio sure has some beautiful stencils to choose from! Thank you for sharing at Party In Your PJ’s.
Ann, thanks for visiting. The stemcil designs from AMS are beautiful and they keep getting better.
Love these Carol – and they look like fun to make! I ordered a set of stencils from that company the last time you mentioned using them. I’ll have to get the Christmas ones next. Great project!
Shelley