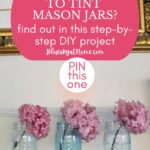
How to Tint Mason Jars for a Vintage Look
We love the versatility of decorating with mason jars. These little jars have morphed from strictly utilitarian objects to one of the most popular home decor items ever. I have an easy and fun project to dress up any mason jar. Let me show you how to tint mason jars for a vintage look.
Most mason jars are clear glass. Blue-tinted ones have become one of the most popular flea market items.
If you can’t find the color of a mason jar you want or don’t want to buy the higher-priced blue-tinted ones, you can create the mason jar color of your dreams with a little DIY magic.
The iconic shape of mason jars with screw-top lids has been around since 1858, invented by a man named Mason, of course. Mason patented his invention, gave the jar his name, and the rest is history.
Today, mason jars come in different sizes and shapes and are no longer used just for canning fruits and vegetables.

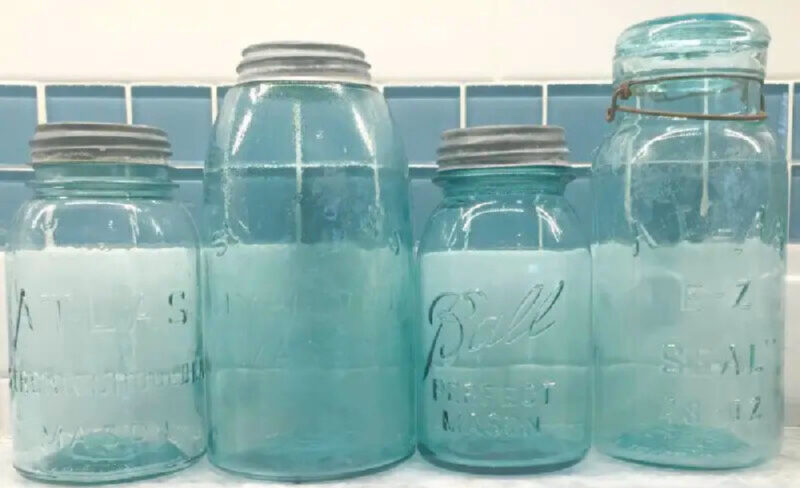
I have been collecting blue mason jars for over 15 years, but their prices have risen considerably in the last few years.
I think I paid $8 for my first one, then $11, then $14, and the last large ones I bought were $18. Since then, I’ve seen prices as high as $24.
I was thrilled to find out that you can get the look of vintage mason jars with a little DIY ingenuity. Tinting mason jars for a vintage look isn’t as hard as you would think.
Give Mason Jars a Vintage Look
Here are a few of my vintage mason jars.

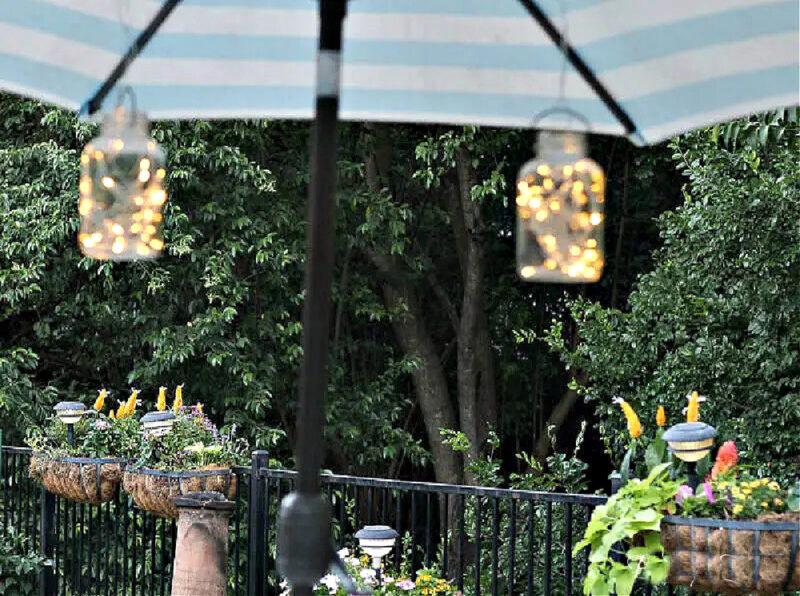
In previous posts, I’ve shared how I use mason jars: to hold flowers, for seasonal decorations, and even to make them into outdoor lighting.
Mason jars can be used to organize any item from flowers to dried food items, buttons to paper clips to rubber bands, hold pens and markers, twine or ribbon.
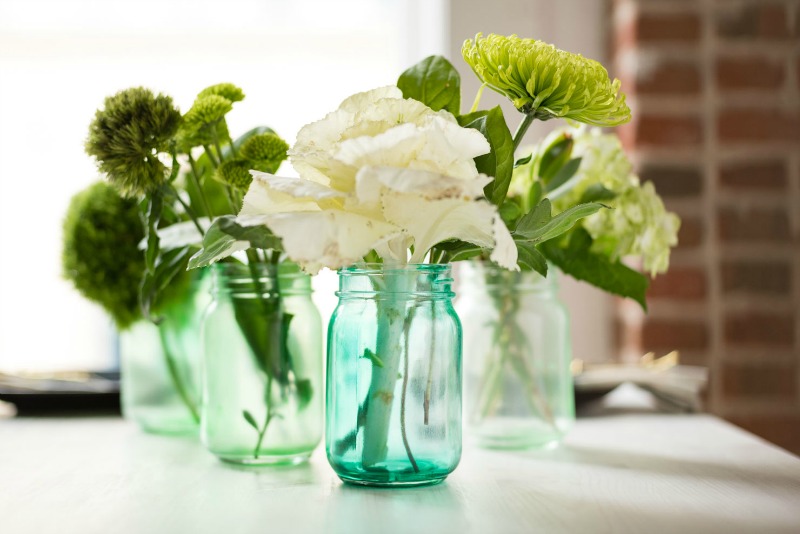
With or without a lid, mason jars are both practical and pretty, especially when you want a vintage or farmhouse look. I’ve used some of mine to hold cut greenery from our backyard. So easy and so pretty.
Can You Use Other Types of Jars?
As much as we love the shape and style of a good old mason jar, you can use any jar for this project. A large mayonnaise or pickle jar is great for the tinted look. A free empty jar is also a plus for a DIY project. Check out How to Make Outdoor Lighting Using Mason Jars.
I came across this method to tint mason jars and decided to give it a try. Here was an example of tinted mason jars using green food coloring.
To be honest, I was a little skeptical at first, but intrigued. I had to try this method myself.
Well, the process worked or I wouldn’t be sharing how to tint mason jars with you.
Supplies To Tint the Mason Jars
This post contains affiliate links to products used to create this project. If you should order any item from this site, I may receive compensation, but you do not pay a penny more. Your purchase is greatly appreciated as it helps support the continued publication of this site.
You only need a few supplies to tint your mason jars.
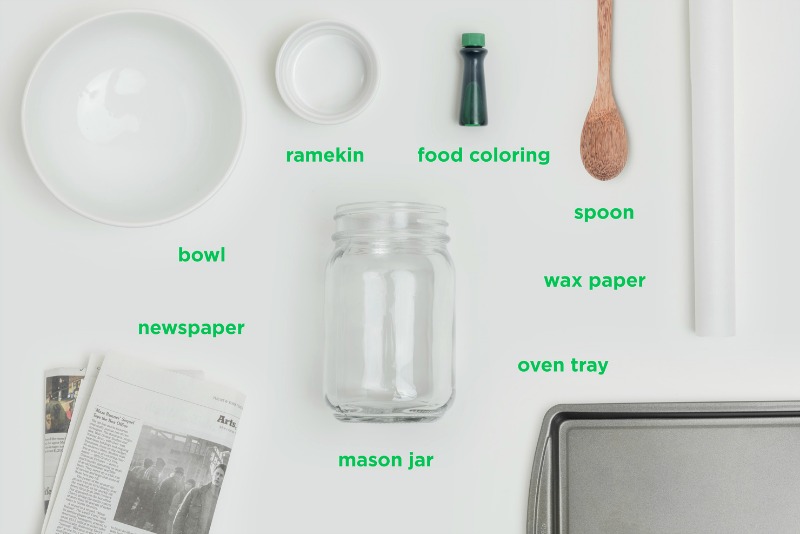
- Mason jars – you can buy mason jars in 8-ounce, 16 ounce and 32 ounce sizes. They also come in a small 4-ounce size, which is cute, but doesn’t hold a lot. They are still great for tinting.
- Glue sealer – I used Mod Podge in the gloss finish. Be sure that your glue is labeled “gloss” and not “matte”, otherwise the finished product will come out dull and murky.
- Food coloring of choice
- Ramekin or small bowl
- Newspaper or wax paper to cover your workspace
- Half-sheet pan to hold all your supplies while you work
How To Tint Mason Jars
You won’t believe how easy this project is!
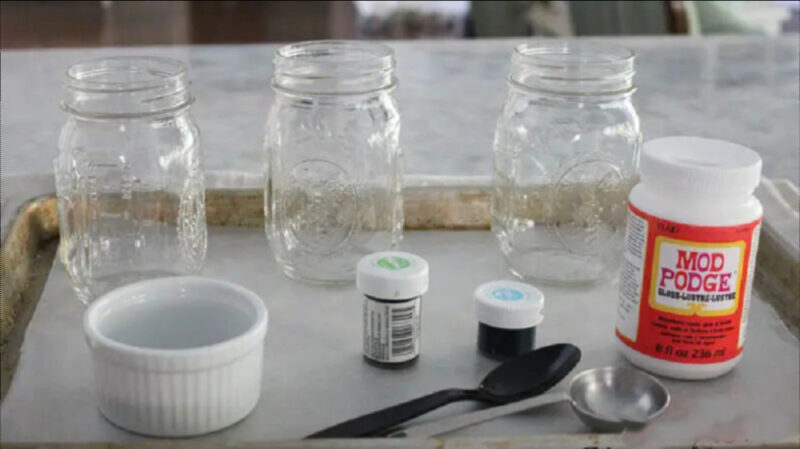
Step 1
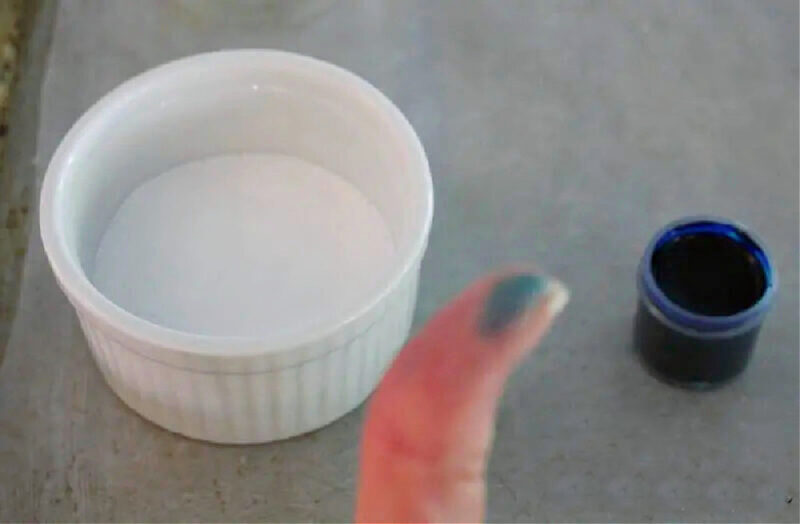
Pour a few tablespoons of Mod Podge into a ramekin. Since I planned to tint 3 jars, I poured in about 1/4 cup.

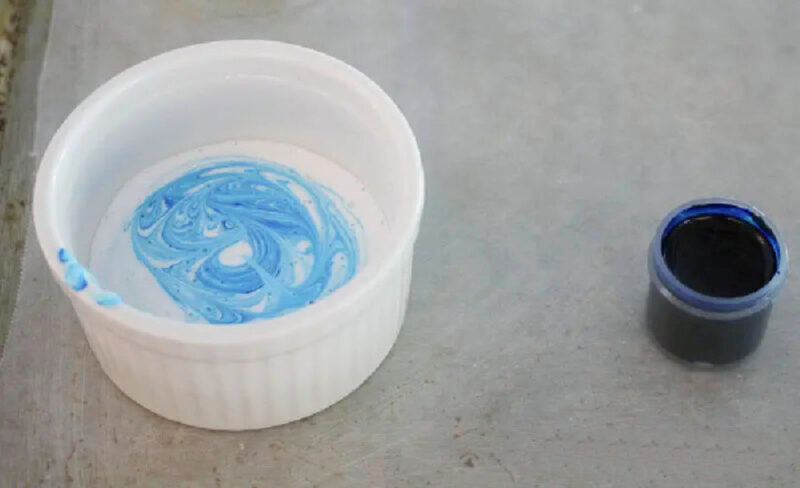
Step 2
Add your color of food coloring, starting with a very small amount. You can always add more if you want a darker color.
I used blue gel food coloring since that’s what I had and I love blue.
Stir in the food coloring (I used a plastic spoon.) and approximately 1 tablespoon of water and stir to combine.
Less water will give you a deeper, richer color while more water will give you a more subtle tint. Stir the mixture until you have a consistent color. The mixture will be somewhat watery.
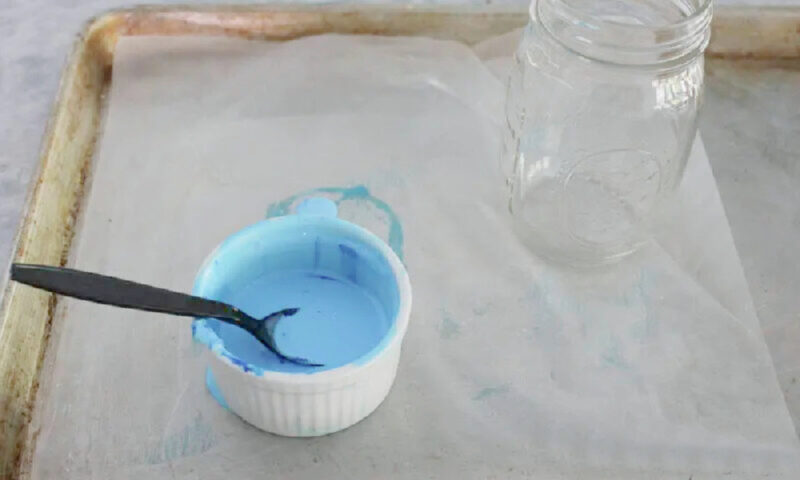
Step 3
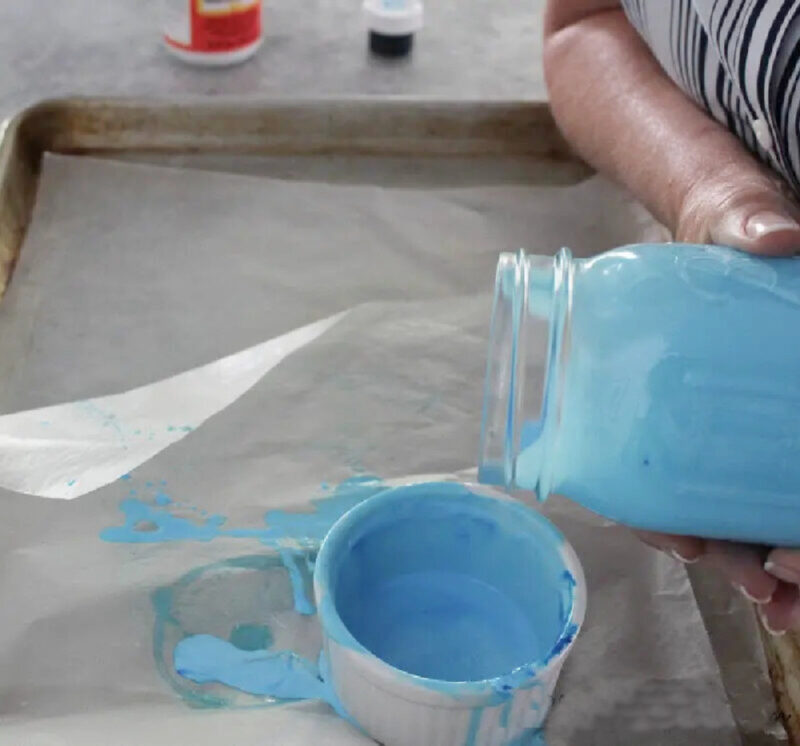
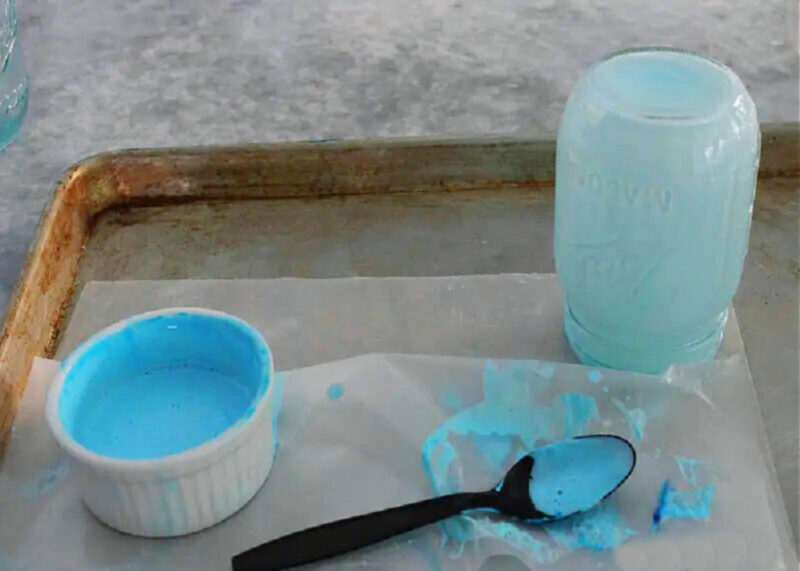
Pour the glue mixture into your mason jar.
TIP: Do this step over a piece of wax paper. You do not want to get the glue mixture on your countertop. I placed a piece of wax paper inside a sheet pan.
Step 4
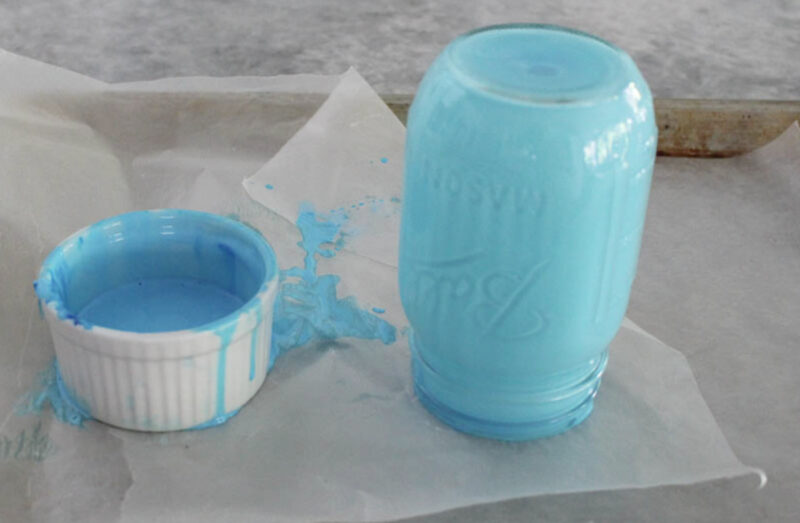
Coat the mason jar with the glue mixture.
I turned the jar around and around, getting closer each time to the mouth of the jar until it was evenly coated with the dyed glue mixture.
Do this over the ramekin so that excess glue will fall back into the ramekin, which you can reuse for your next mason jar.
Step 5
Pour the excess glue back into the ramekin to use on the next jar.

Step 6
Let the jar dry upside down on wax paper for about 30 minutes. Check it periodically and wipe away any excess paint that may collect on the lip of the jar.
TIP: I kept a damp paper towel ready to do this.
Setting the Paint in the Mason Jars
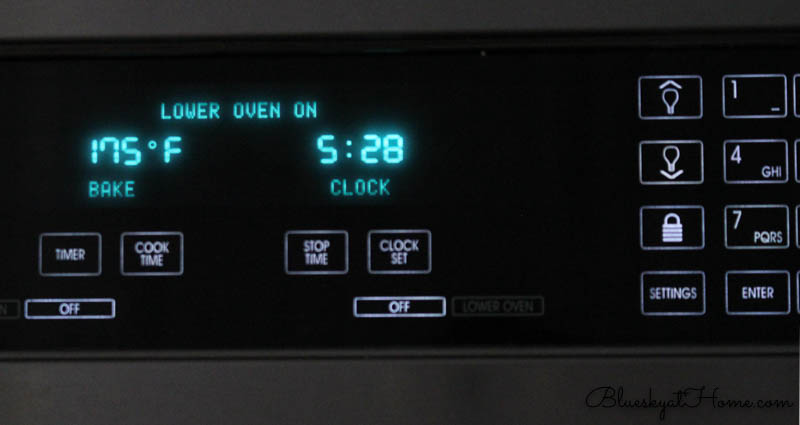
Step 7
Set oven to “warm” (about 175° F).
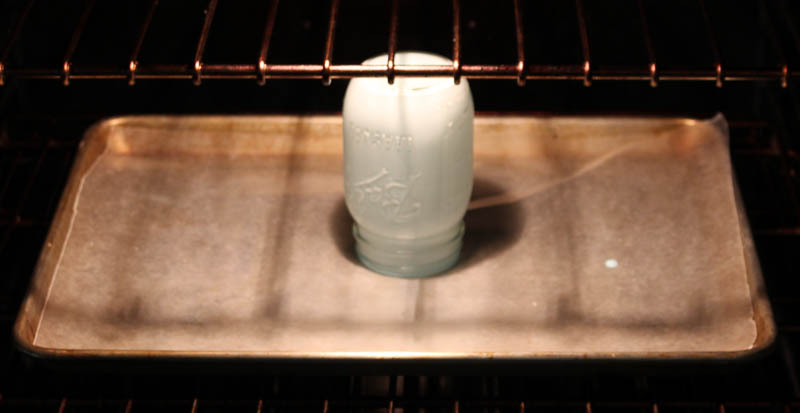
Step 8
Place the mason jar upside down on a wax-covered cookie sheet and heat in the oven for 10 minutes. Flip the jar over and let it dry for another 20 to 30 minutes.
When the jar is done, it should be clear with no streaks. If the jar still has streaks, place it back in the oven for 10-minute increments until they disappear.
TIP: I found 25 minutes worked best.
Step 9
Remove the tinted mason jars from the oven (Keep them on the baking sheet) and let them cool for a few minutes.
Once cool, you can use them to decorate your home decor. You can’t use them to store food items, but we are all about the decorating.
You can control the shade of color, which is great if you need a particular color for your home decor style.
Displaying Your Tinted Mason Jars
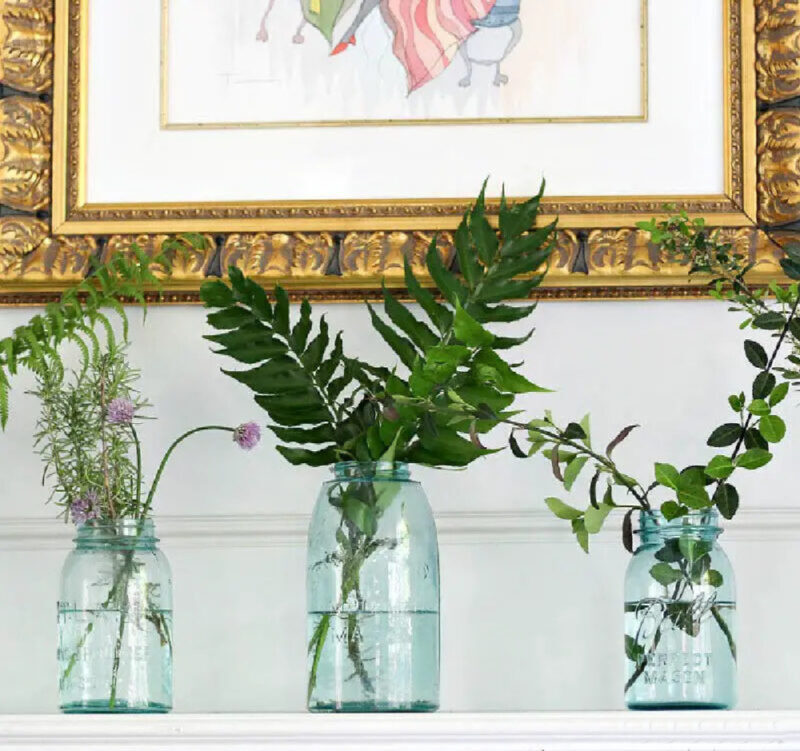
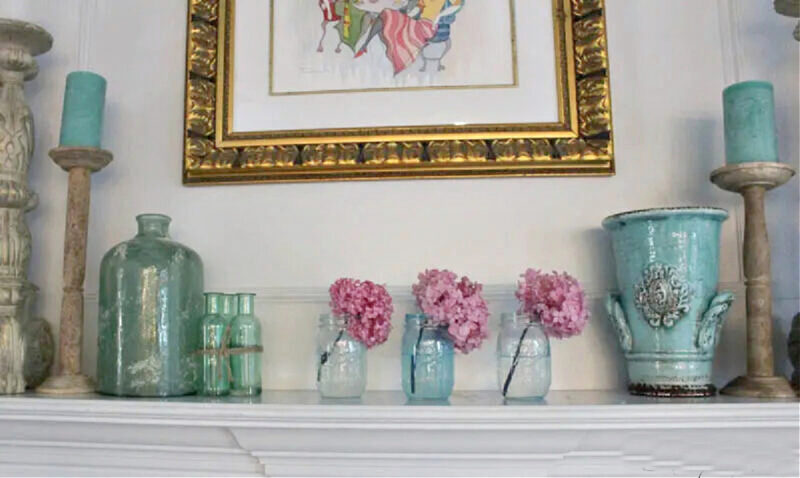
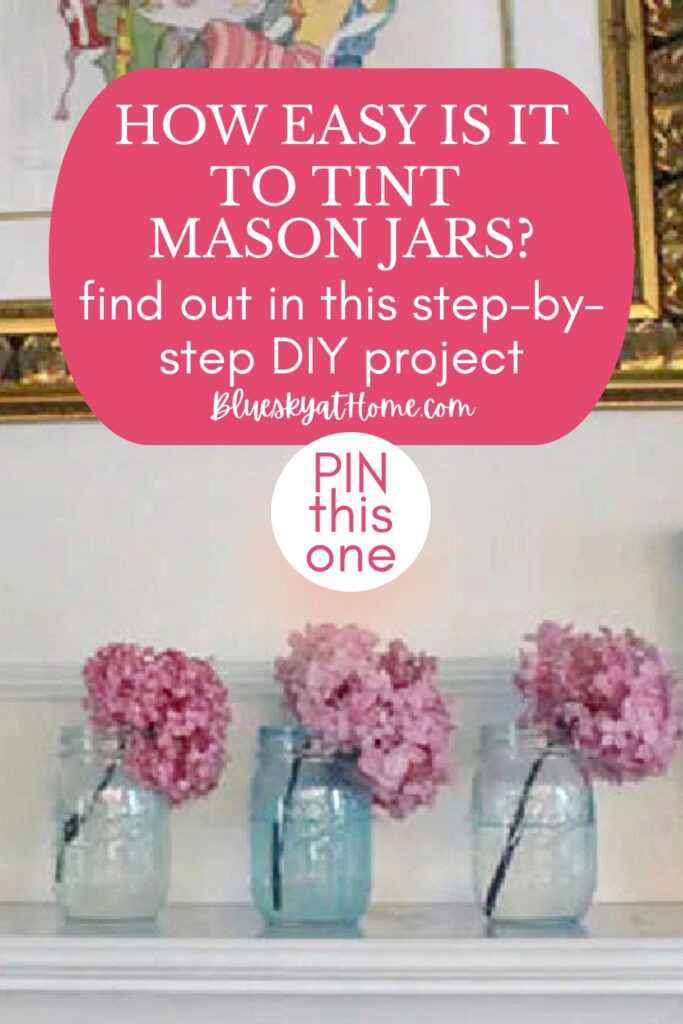
I used my tinted mason jars on our mantle.
Pink hydrangeas from our backyard looked lovely with the pale blue-tinted mason jars. You can see the center mason jar, which is the last one I tinted, is darker than the others.
NOTE: When I was taking these pictures, I started worrying about what would happen to the set glue inside. I poured out the water and reset the glue in the oven for about 10 minutes. I realized that you CANNOT put water in the jars or it will dissolve the glue. So you have to use fuax flowers.
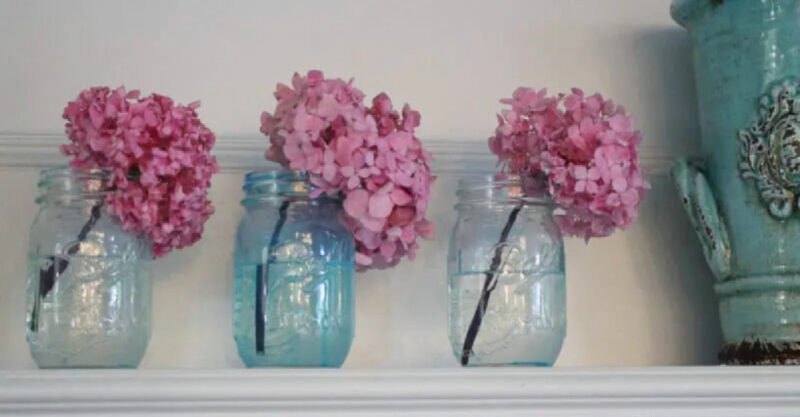
I used more food coloring on it and I like it best. It looks almost exactly like the real vintage blue ones that I have collected.
The one on the right was the first one I tinted when I didn’t know quite how much food coloring to add. I added more with each jar
I also plan to try to tint mason jars with pink food coloring.
The large jar and the three smaller ones on the left are real tinted glass that I found at an antique mall.
Tips for How to Tint Mason Jars
Here are some takeaways from learning how to tint mason jars.
#1 – It takes a little more food coloring than you think. It’s amazing how the glue mixture lightens up after you turn the mason jar right side up for the final 20-30 minutes in the oven.
#2 – Food coloring can stain so be careful. Have some damp paper towels for clean up.
#3 – I tinted my first mason jar late one afternoon. I had leftover glue mixture in my ramekin. Rather than throw it out, I wrapped it carefully in plastic wrap and it was perfect the next morning for my 2nd jar.
I added a little more Mod Podge, a little more water, and more food coloring. After tinting my 2nd jar, I rewrapped the glue mixture. Later that day, I just added a little more food coloring and I had plenty of glue mixture for my 3rd jar.
Ideally, you would tint multiple jars at once, but as this was my first time testing this method and I only had snippets of time, that’s why I did it at three different times. We DIY when we can, right?
#4 – When I finished my last jar, I placed the ramekin in the sink and ran the water until all the glue mixture was gone. Then I washed the ramekin in the dishwasher.
NOTE: If you want to remove the tint from the jars, fill them with water and get them set for a while until you see the glue “lift” away from the sides of the jar. Using a bottle brush inside the jar, “scoop” up the tinted glue and discard. Wash the jars in the dishwasher.
SO DO NOT PUT WATER INSIDE YOUR TINTED MASON JARS!!
I hope you loved this project as much as I did. It was easy, very inexpensive and you get a lot of bang for your buck.
Here are some other painted glass projects:
- How to Make Sea Glass Bottles
- How to Paint Glass for Summer Decor
- Fun Way to Decorate Glass with Paint
I hope that you will PIN this project to your favorite DIY or vintage boards. Check out my DIY Projects and Paint Projects Pinterest Boards for more ideas.


HI Carol, Welcome home! I am sharing your DIY mason jar idea on The Weekend Edit because I am so mad I didn’t think of this first! It is awesome! In the past I have used paint to “tint” my glasses but your tutorial takes it to a new level.
Thank you friend!!!! I hope you get some traffic from Everyday Edits on Saturday!
xo laura
I had no idea blue jars had become that expensive. I guess I need to dig my stash out and sell them. I’m sorta on the fence about the durability of the food/coloring and modge-podge on the inside. I’m wondering if poly-acrylic floor/furniture sealer…might take the tint better and be more permanent. Might want to try on the outside also…you can always give them another spray of a sealer, then water on the inside, wouldn’t matter…any way it’s a great idea to try for some ‘fun’ colors also! Hugs, Sandi
I love your blogs and I love blue so thank you for a lot of ideas. I am not a mason jar lover except for the ones filled with pickles and preserves (lol). But I read this and am going to try it on florist vases and some other clear glass containers. Thanks again.
Thanks so much for linking up at the #UnlimitedMonthlyLinkParty 1! Pinned ♥
Thanks for the invitation Dee. I did link up.
Great idea! They look really nice! Pinned ♥ I invite you to link up at my #UnlimitedMonthlyLinkParty!
Thank you Dee. I appreciate you Pinning. Sharing is caring!!
I love mason jars too. You tinted jars are really pretty holding your flowers. TFS your technique.
Does the oven baking “set” the Mod Podge so that you can use water in the jar as a vase. I should think it would eventually soften up the finish; I’d be tempted to paint the outside instead. I was so pleased to see a “REAL” cooky sheet that looks like it’s been well used instead of a brand new one. After 40 years, mine are some kind of beat up!
Kathy, so far, so good, but that is a good question. I’ve had the flowers in the jars for 3 days and looks O.K. but I will keep watch for sure.
Hey Carol,
Cute idea! Are you going to Haven? I’m getting a ticket from someone as they are sold out. Looking for a room mate? What are your plans?
Cynthia, so good t hear from you. Yes, I’m going to Haven. WIll DM you.
HI Carol,
I love this! Sharing on the weekend edit.
Fyi… because this is going to be a popular post I think autocorrect changed tablespoon to tablescape at the beginning of the tutorial ;0) xo laura in CO (formerly not a trophy wife)
Laura, thank you so much for catching that. I edit and proofread, but didn’t catch that one. Made the correction. I hope it is popular.