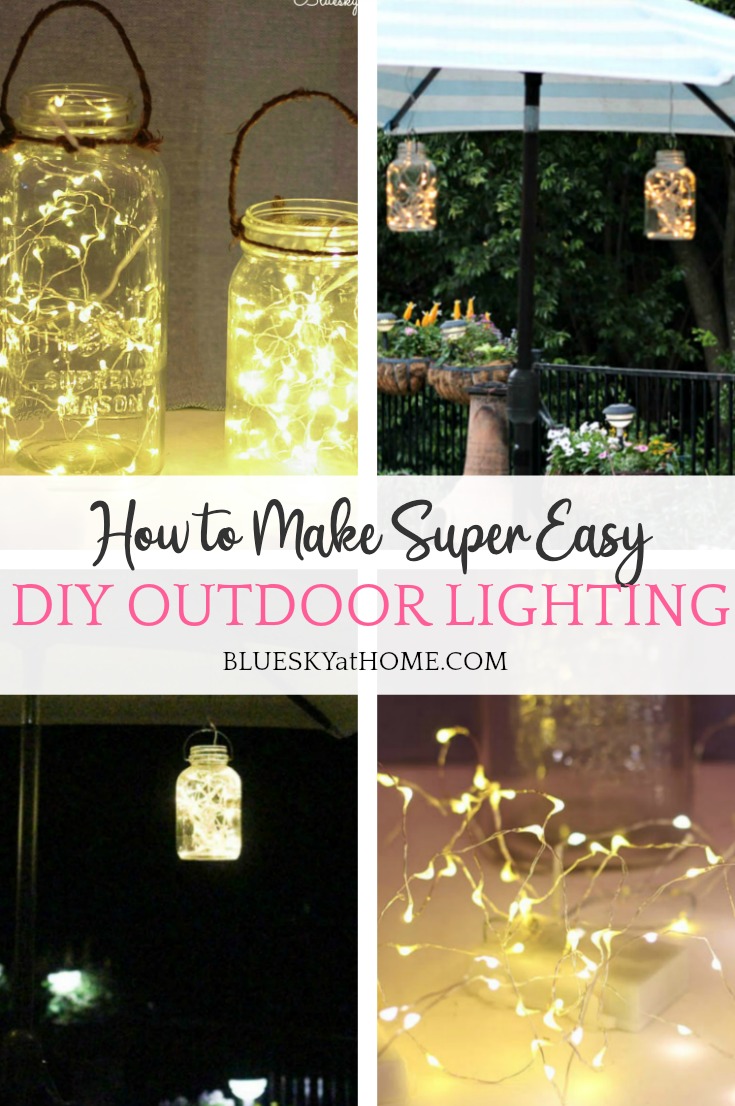
How to Make Super Easy DIY Outdoor Lighting
Outdoor lighting can be expensive. Need an inexpensive and easy DIY outdoor lighting solution? This super-easy DIY outdoor lighting project will brighten up your spaces this summer.
Do you remember as a kid in the summer catching fireflies and putting them in a jar?
That’s one of my fondest memories – asking my mom for an empty pickle jar and running around with the neighborhood kids trying to trap fireflies and put the lid on before they could escape. It was our childhood attempt at DIY outdoor lighting – and we had never heard of DIY.
One of the common themes that I noticed when I was choosing my favorite backyard makeovers from the One Room Challenge last year was outdoor lighting.
Let’s face it: it’s hard to enjoy and use our outdoor spaces if we can’t see them. Have you used outdoor lighting in your backyard?
I found a way to make some super-easy DIY outdoor lighting for our backyard and I didn’t have to ask for a pickle jar to do it.
When we moved into our home several years ago, we had two “coach” lights and two floodlights on the patio.
The coach lights provide just enough light to see outside, but not enough for entertaining. The floodlights are so bright that we rarely use them.
I’d love to have string lights across our patio, but that would involve creating some tall poles to hold them up since our back fence is only 4 1/2 feet tall. I hope to do that someday.

With summer here, we want to spend more time outdoors. So I decided to figure out a way to bring a little more light into our backyard. By accident, I found I could make the cutest, most sparkling, amazing DIY outdoor lighting – and it was so easy. Kind of what I call a “random act of DIY”.
So many options are available today to add outdoor lighting: floodlights and string lights and solar lights; lights in trees, in flower beds, on fences and hanging lights
Some require electricity to work – those are the expensive lighting options. Others just need the sun. Some are expensive. Others require poles or switches. My idea is inexpensive, easy, and pretty.
How to Make Super-Easy DIY Outdoor Lighting
This post contains affiliate links to products used to create this project. If you should order any item from this site, I may receive compensation, but you do not pay a penny more. Your purchase is greatly appreciated as it helps support the continued publication of this site.
So here’s the story of the little lights that could.
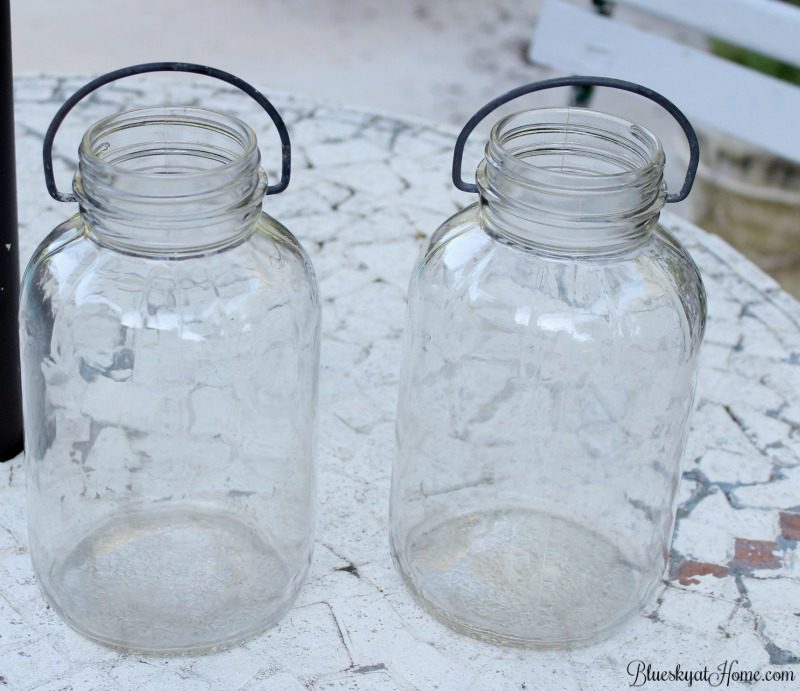
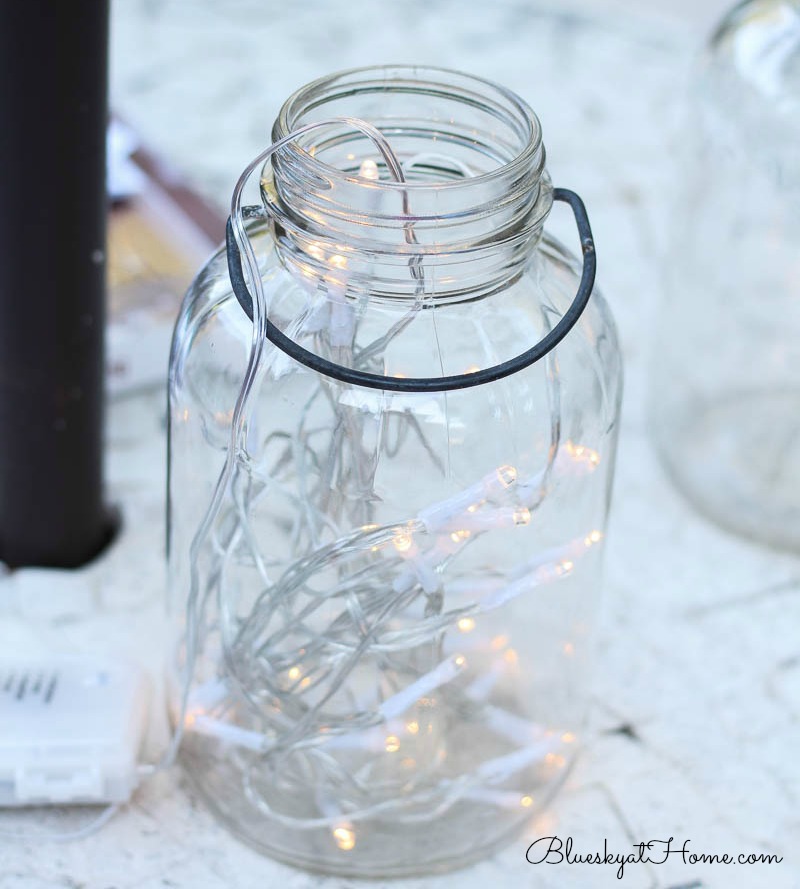
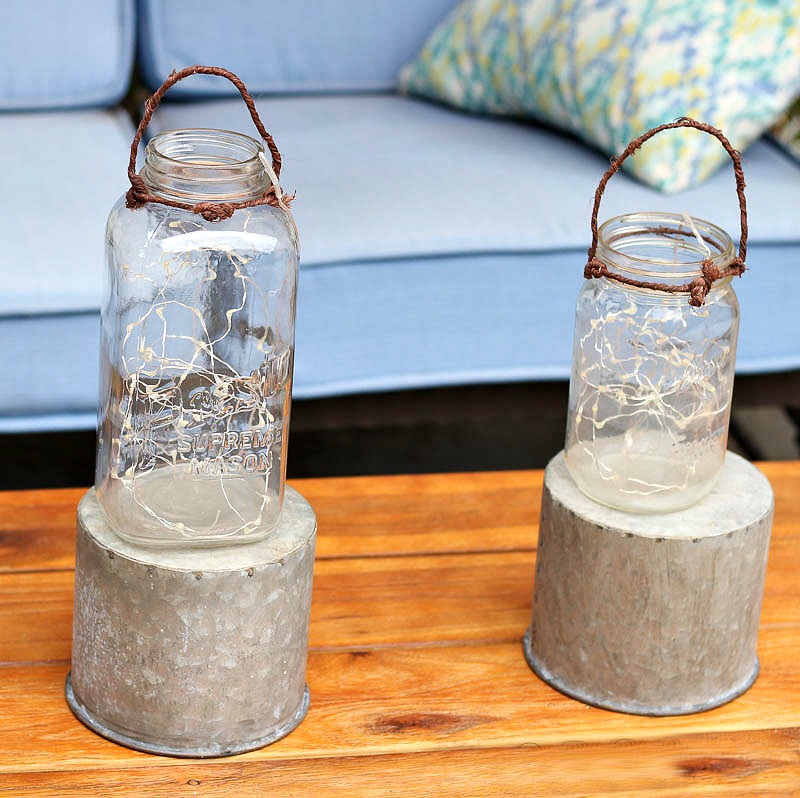
A few weeks ago, I was looking for a glass vase for some flowers. As I was moving glass jars and vases around, I found two large mason jars that I forgot I even had.
I pulled them out of the cabinet and then remembered buying them a few years ago, either at a flea market or a garage sale. What made them unique, and I’m sure the reason I bought them, was the heavy wire handle across the top. Surely I could make something useful with them.
The Outdoor Lighting Idea
Light bulb moment – the two jars would make great containers for lights for our backyard. But the lights had to be battery-operated and have a remote control or a timer.
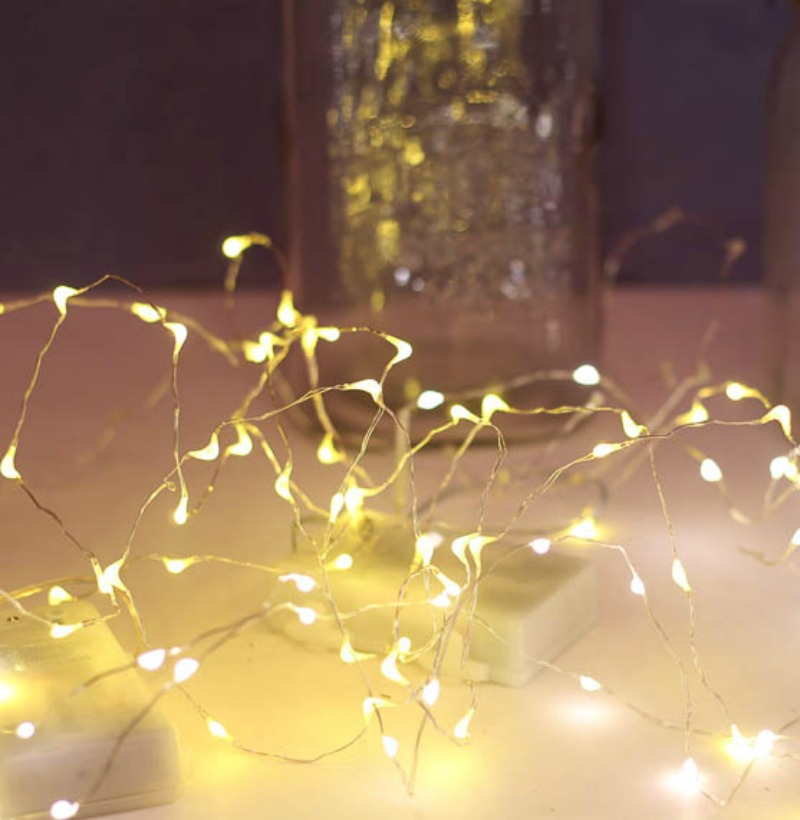
I was so excited because I knew that we had several dozen battery-operated lights just waiting to be reused for my outdoor lighting project. And I only needed two strands of lights and some fresh batteries.
As soon as Sweet Shark came home from work, I told him my plan – get down the box with all the battery-operated lights from the (way up high) shelves in the garage. One box out of about 18 boxes of Christmas decorations on high shelves.
He looked at me with that look that says: “I am not getting out the ladder and looking for one box out of all those boxes to find two strands of lights.” O.K., I said, I’ll just run up to Target and buy 2 boxes of BOL (You know what that stands for, right?)
Well, guess what? Target doesn’t carry the BOLs except at Christmas. So you’ve been given the heads up; if you want BOLs for after the holidays buy extra (or keep them someplace easily accessible) or you will have to order them online.
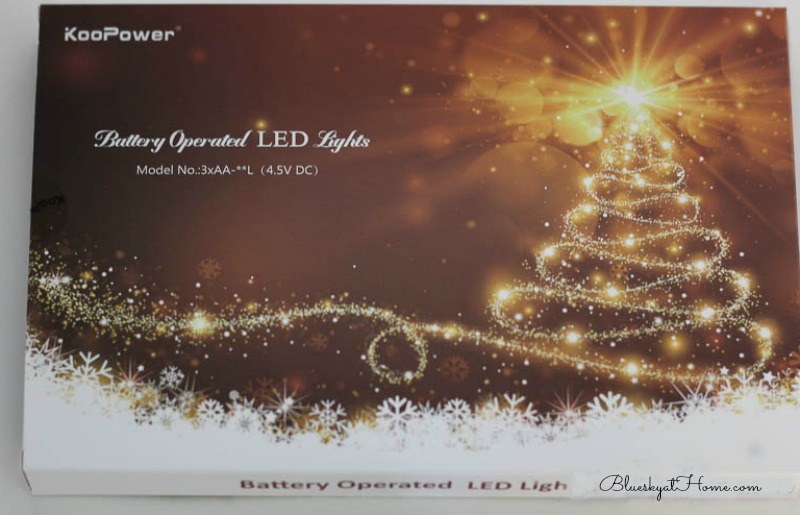
So back home and on to the next best thing to a Target that’s 5 minutes away – Amazon. Two minutes of searching and I found these LED 40-count lights – two to a package and only $11.00. Click Add to Cart.
Creating Outdoor Lighting
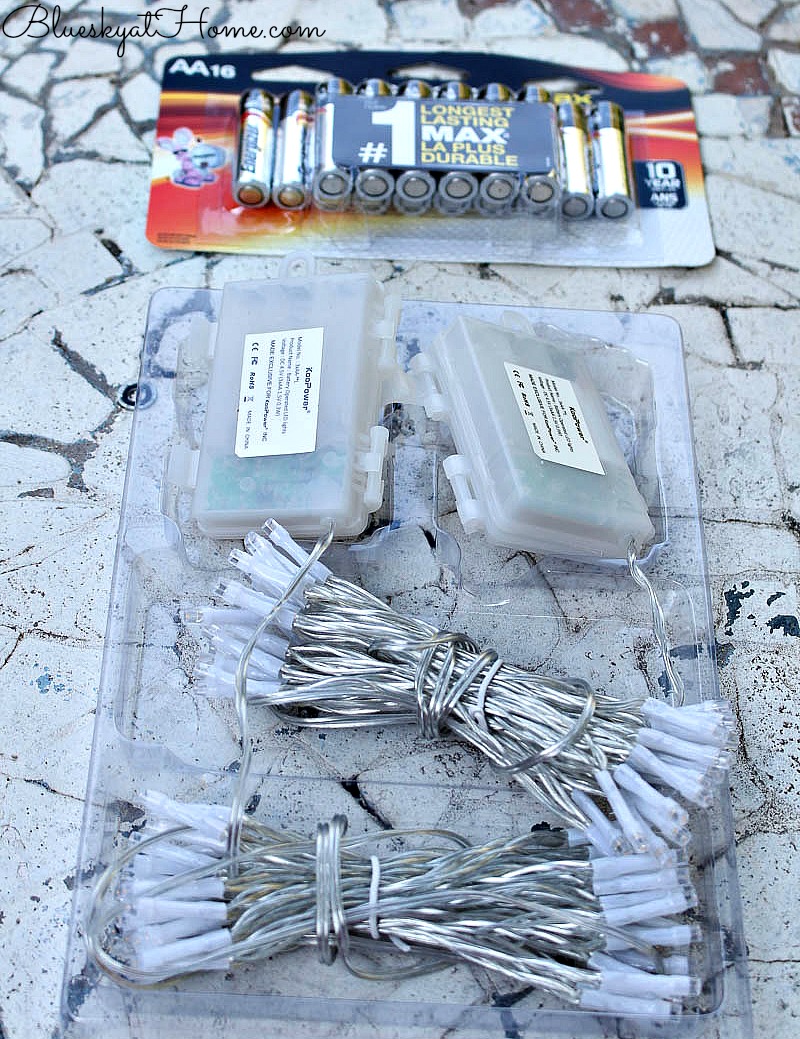
A couple of days later, my lights arrived. As it turned out, they have 8 different settings, from blinking to twinkle to steady. These lights are on a timer, so whenever you turn them on, they stay on for 6 hours. I found our stash of AA batteries and put them in the lights. Cool.
BIG TIP: Never run out of AA batteries. I think the world runs on AA batteries. At Christmas time, buy stock because we buy tons of AA batteries. You could get rich off the number of AA batteries we buy.
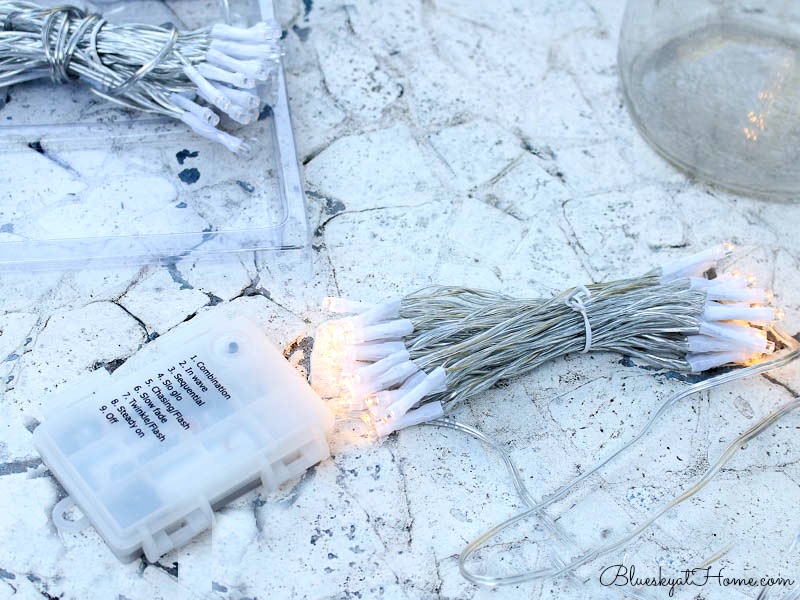
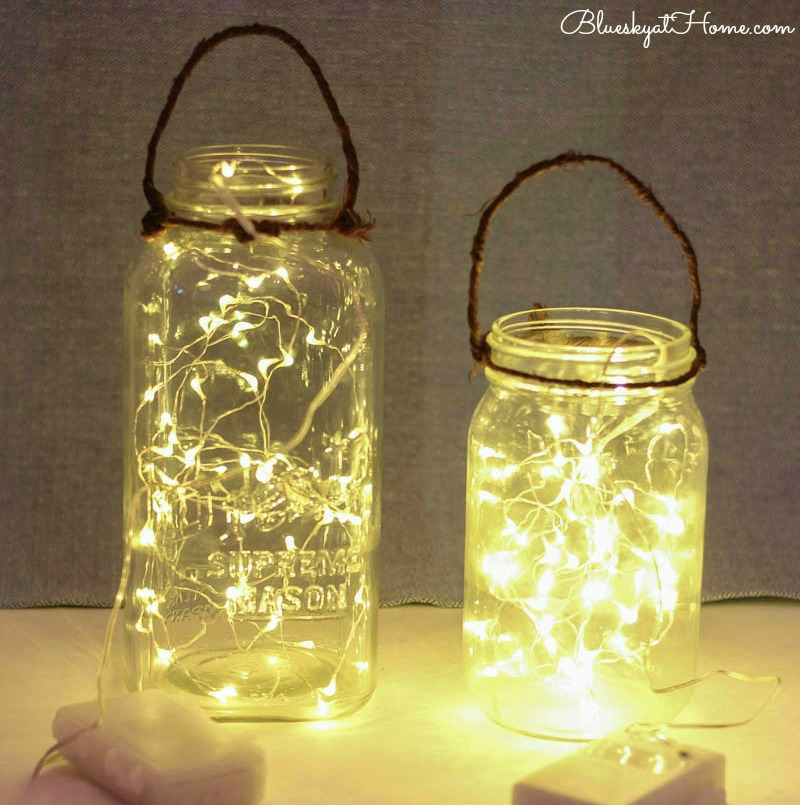
Now I unwound the lights and pushed them down into the mason jars, leaving the battery pack hanging out.
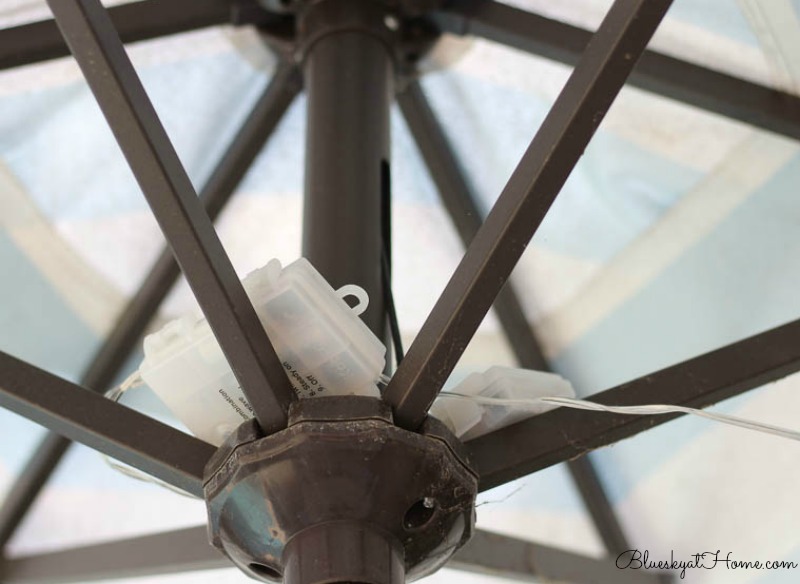
I wanted to hang them from our patio table umbrella. Now all I needed was some medium gauge wire, which I knew we had.
So Sweet Shark used small wire cutters to cut two pieces of wire – 1 about 18 inches and 1 about 6 inches. I made a loop around the wire handle on the mason jar, making sure it was good and tight.
Next, we looped the 18-inch wire around the bar of the umbrella, again wrapping and twisting it to be secure.
I held up the mason jar to determine the height for the jars. We wanted to make sure you could see them from the house. Sweet Shark twisted the two pieces of wire together tightly.
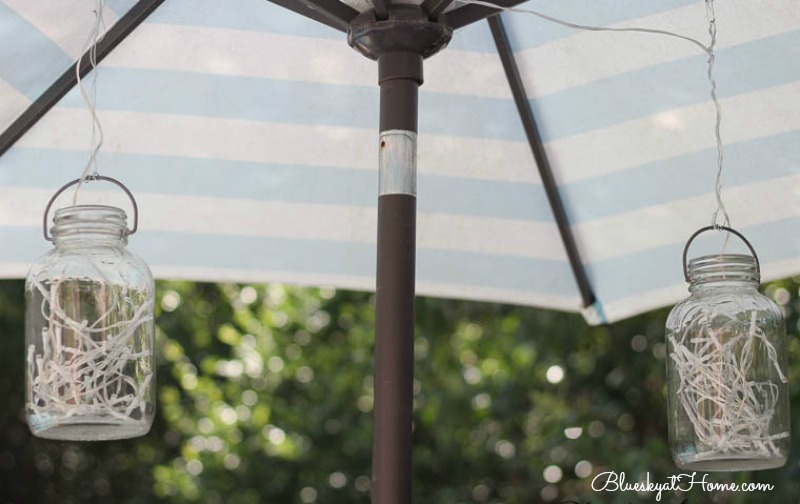
Then he set the battery pack on the center post of the umbrella and looped it around the horizontal bar. There are 6 bars on the umbrella and we put the second mason jar directly across from the first one.
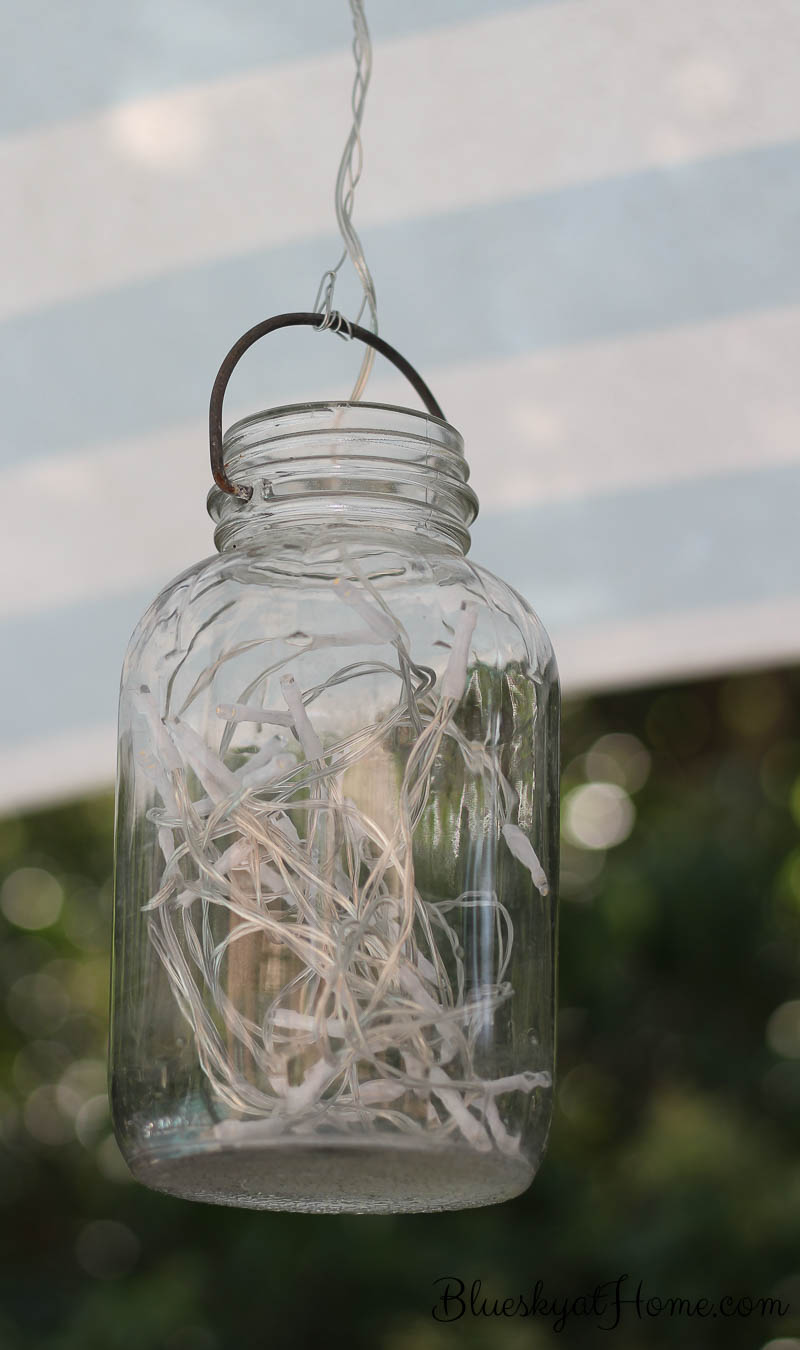
I turned the lights on just to see what they looked like from outside and inside. Just as I hoped – fireflies in a jar.
I turned them off and waited until 8:00 that night, then turned them on. As the sun went down, my mason jar outdoor lighting got brighter and brighter.
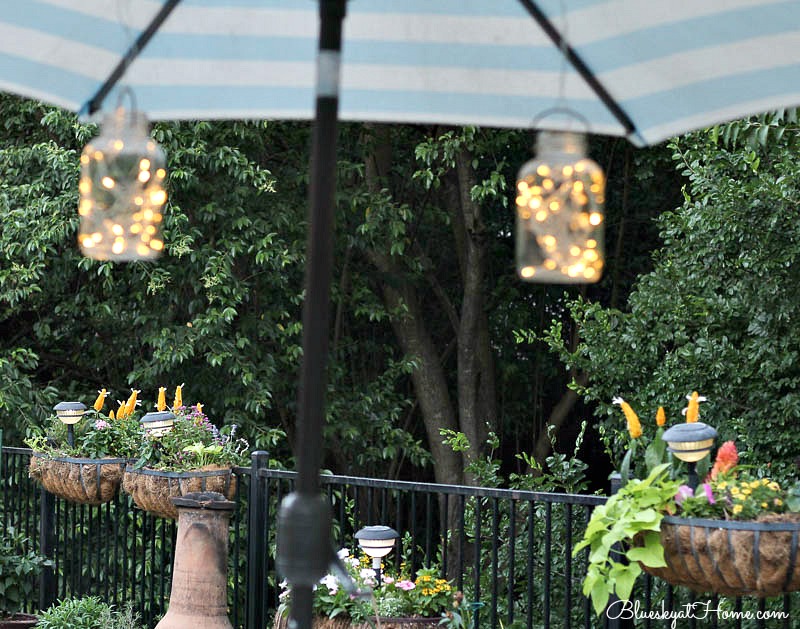
When it’s totally dark outside, the mason jar lights look like balls of fireflies.
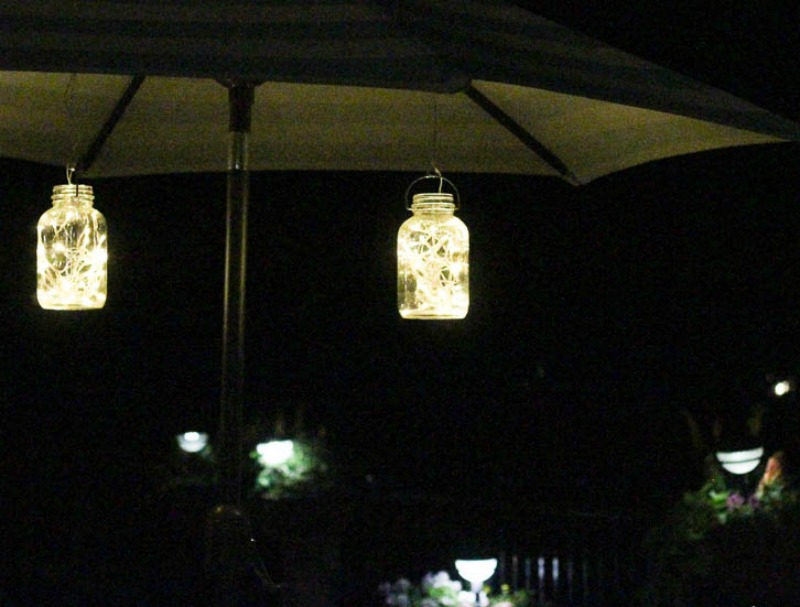
So pretty and just enough outdoor lighting to add some ambiance and a whimsical feel of summertime to our small backyard.
DIY Outdoor Lighting – Option 2
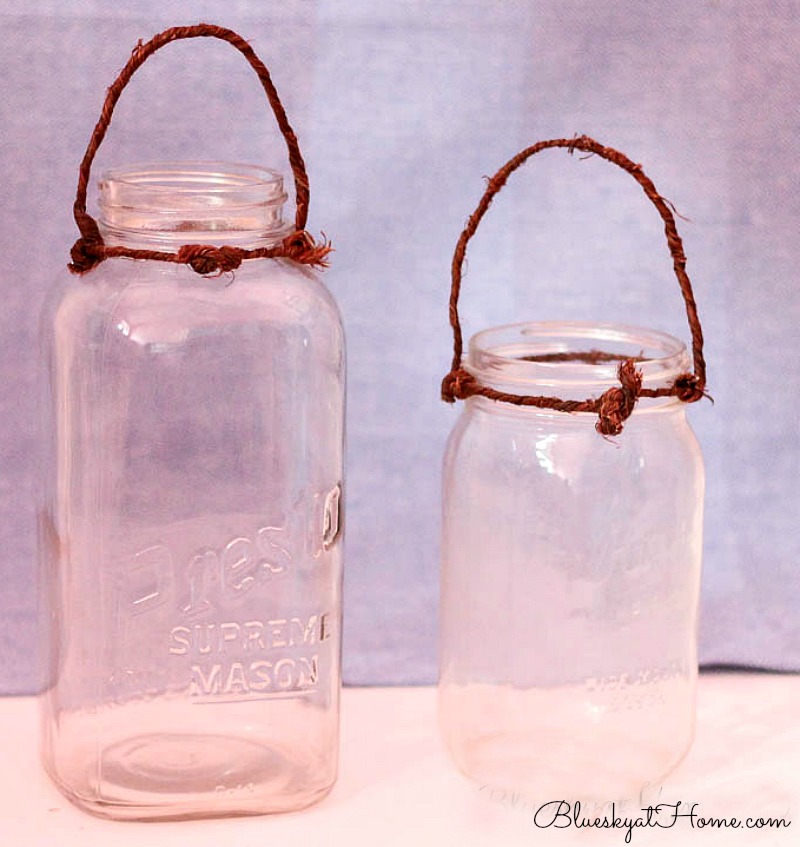
You may be asking, “What do you do if you don’t have mason jars with wire handles?” No problem. I’ve got you covered. I found two more big mason jars in the cabinet that were just dying to be lit up.
So here’s what I did.
I found some wire in my “don’t know what to do with this, but it may come in handy someday” basket. It was covered in brown something or other – I honestly don’t know what to call it, twine? But I liked the look. A bit rustic. Using wire cutters, I cut 2 pieces about 10 inches long to make handles.
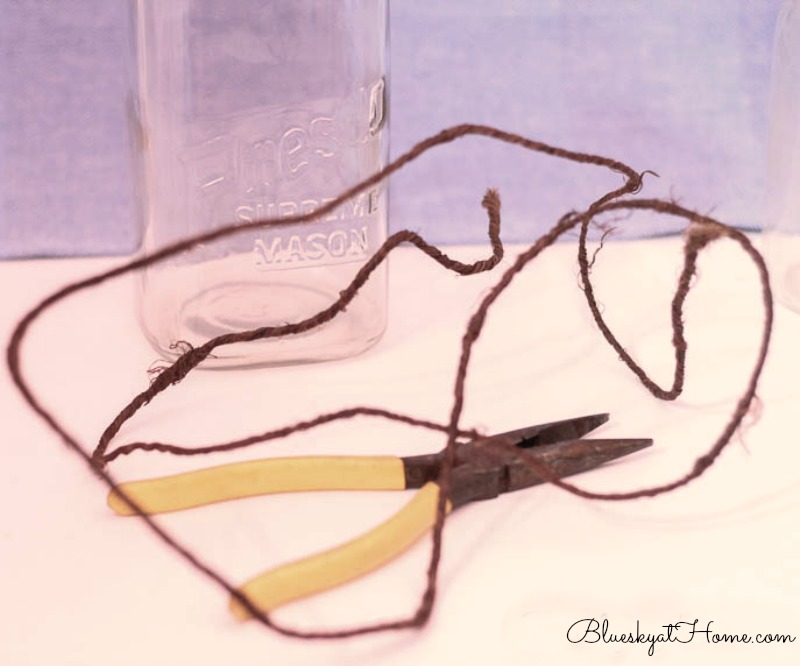
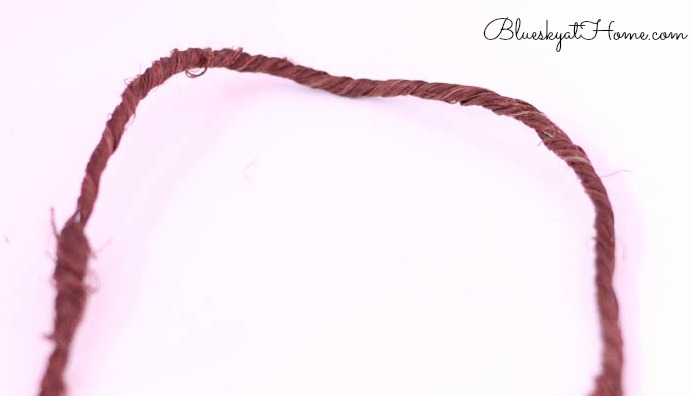
Then I wrapped one end of my handle tightly around my remaining piece of covered wire. I put that piece under the neck of the jars and eyeballed where the other end of the handle would go and twisted it tightly to form the handle.

Next, I pulled the two ends together around the neck of the jar and twisted a few times as tightly as I could. Then I cut off the excess wire.
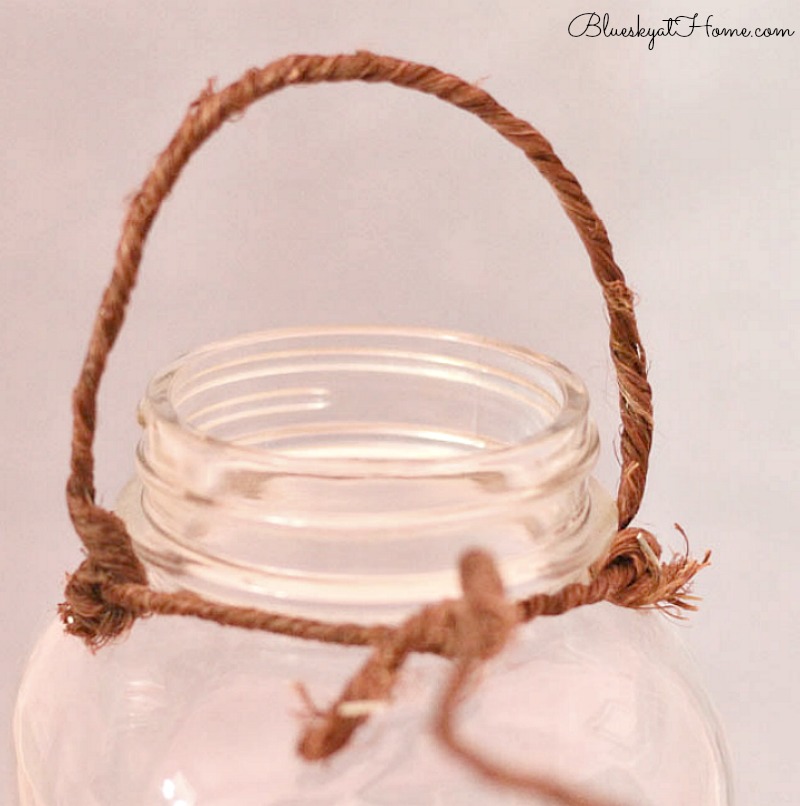
Looks pretty cool, uh? I like the rustic look almost better than the wire look of the original mason jars. Then I repeated with the 2nd jar.
I was so excited about my 2nd set of jars, I couldn’t wait to order more BOL lights. So I did what any resourceful DIYer does when hubby is not around – I pulled that darn ladder out, backed my car away from the shelving, and climbed up to search for the BOLs myself.
And what do you know? A couple of dozen lights were in a box on the lower shelf on the front row, and nothing was on top.
I looked for the ones with timers and couldn’t find them. I decided I’d try some anyway. I brought two strands of the same kind down, put the ladder away, went into my office, and put the batteries in.
Wouldn’t you know it? One set was cool lights and one was warm lights. Got out the ladder again and climbed back up for another set – which didn’t work. Back up again. This time, I brought the remaining two strands down. As it turned out, I found two of the warm lights that worked so that’s what I went with.
TIP: Do not put away your ladder or step stool until you are 100% sure you have what you need.
I had to make sure they worked.
Now that my two jars were ready, I took them outside to hang. My idea was to hang them in our Japanese maple where we could see them from the breakfast room. I realized that I couldn’t do that without help so I found a place for them – on our new patio table.

I needed something to hide the battery packs and so I used 2 galvanized pots. Now you see them, now you don’t.
It’s not a perfect place, but I think it will work until I can hang them in the tree.
Ingredients to Make Your DIY Outdoor Lighting
- Ideally, large mason jars with wire handles OR any large jar with a wide neck
- Battery-operated remote control or timer lights
- AA Batteries
- Medium gauge wire for hanging OR for making a DIY handle
- Wire cutters
So go out and light up your world. Make it sparkle, make it shine. A little jar, some wire and some BOLs. Make some fireflies.
P.S. Here’s another way to use mason jars ~ just without fireflies.
If you still need some decorations for Memorial Day or 4th of July, check out Memorial Day Decorations Inspired by Instagram and PIN it.
Those are GREAT!!! Don’t forget that if the tops are unprotected, the jars will fill with water if it ever rains in Texas again !!!!
Love your fireflies!
Blessings,
J
Jaybird, Ha! I thought of that too. For now, the 2 that are on our patio table are protected by our large awning. The first 2 I made are under the patio umbrella, so they should be fine. I’d take a chance just to get a little rain!
I love this idea and have a few packs of fairy lights in a drawer – so tonight I will have created something similar – thanks for the inspiration!!
Patti, definitely use them. I’m getting ready to order some more.
Oh I just love this project Carol! Sparkly lights on a Summer evening are perfect. Thanks for showing us how to go about it all too!
Jemma
Jemma, love it when I come up with a useful idea!
Carol, the lights really do look like fireflies when lit at night! I discovered fairy lights several years ago and keep them in a handy place. Seems like I’m using them all the time for all sorts of reasons. If you have a Hobby Lobby near you, they have short strands of Christmas lights and fairy lights year round.
I love these dainty lights. I have been contemplating something like this myself…thanks for the easy DIY. Now I’m all set!! 🙂
This is adorable. They do look like fireflies in a jar. I always try to keep a few Christmas lights down for lighting emergencies. So cute, Carol.
This is the best idea and I love the way you told all about the process. But girl…did you get in the attic this week when it was so hot? You are devoted to your readers. 🙂
Love these! Those are super pretty jars. I have several strings of those lights. Definitely trying this.
We use thos for the wreath on the gate. And now Inhave a new use for them! So cute. Thanks for the DIY! Love it. ❤️
I love the “fireflies in a jar”! Reminds me of summer nights in my childhood.
Cute and easy, Love it.
Thanks Clearissa.