How to Make Decorative Ribbon for Your Home Decor
Ribbons and bows. On wreaths, gifts, jars, baskets, or books (just to name a few). One of the best ways to add a little pop of color, pattern or a theme to your home decor, accessories or gifts. Not to mention an element of cuteness. Yes, we can buy plain ribbon. Did you know that you can personalize ribbon for a specific holiday, occasion, season or event? Well, yes, you can and I’m here to show you how to make decorative ribbon for your home decor.
Last week when I was creating my 4th of July Pinterest~Inspired Challenge, I wanted to add some 4th of July DIY elements to my vignettes. The first one was the no~sew dish towel pillows. I needed ribbon for another part of my Pinterest Challenge. I looked at some at the craft stores for simple red, white and blue patriotic ribbon, but I couldn’t find anything I liked.
Back home, I looked through my ribbon box. Do you keep a box of ribbon in varying colors, types, or patterns? I never throw away ribbon, even just a small length; you just never know when it might come in handy for a project. That’s where I found a piece of ribbon that would work for my 4th of July vignette. But it definitely didn’t have a 4th of July theme, but I knew that I could easily make decorative ribbon for my 4th of July scene.

How to Make Decorative Ribbon for Your Home Decor
For your convenience, this post contains links to products used in this project. If you should order any product from this site, I may receive compensation, but you do not pay one penny more.
So how do you make decorative ribbon for your home decor, party or gift?
Supplies to Customize Your Ribbon
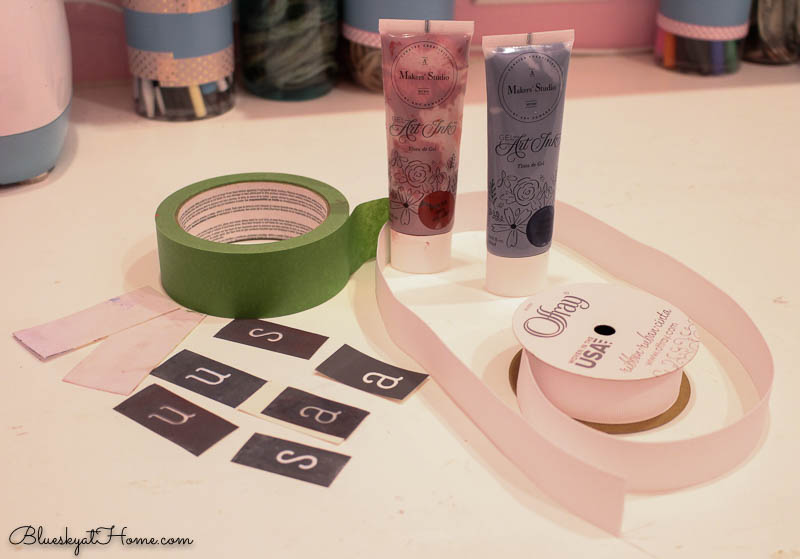
Well, first you need ribbon. What kind? Any kind of cotton ribbon will work. Fortunately, I found 2 pieces of white grosgrain ribbon in my ribbon box and that’s what I used for this project.
You need some kind of paint designed specifically for fabric. Ribbon is fabric. It needs to be a paint that can be easily applied to the ribbon. A paint that will stay on the ribbon. When you think of patriotic colors, you think red, white, and blue. Fortunately, I had red and blue Gel Ink from A Makers’ Studio. This paint is specifically designed for fabric. You can use it on:
- tea towels
- napkins,
- t~shirts
- canvas tote bags
- zippered bags
- children’s clothes
I am using Gel Ink in red (Bless His Heart) and navy blue (Hush Your Mouth). Love these Southern names.
Then you need a design or letters to paint onto the ribbon. Unless you are a very good painter and can paint free hand ~ which I am not, stencils or stamps are the perfect way to add a design or words to your decorative ribbon.
My white grosgrain ribbon was only about an inch thick, so I needed a design that was less than 1 inch tall. Since I was making my decorative ribbon for the 4th of July, I chose to spell u ~ s ~ a in red and blue using the Alphabet 4 stencil from A Makers’ Studio.
Painter’s tape also helps to hold your ribbon to your work surface.
Steps to Making Your Decorative Ribbon
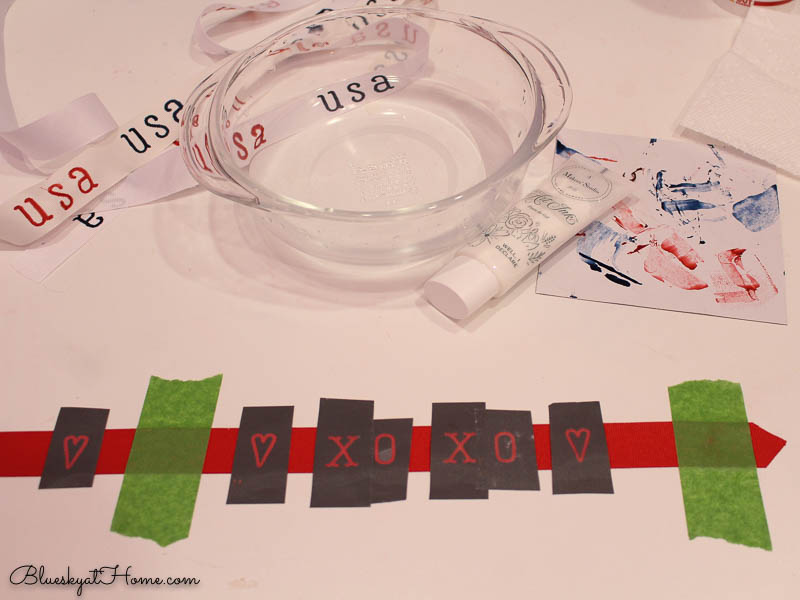
Step 1 ~ Decide how much ribbon you will need for your project. I had 2 pieces of grosgrain ribbon; 1 piece was 42 inches and the other was almost 2 yards. I just needed the smaller piece for my project. Lay out your ribbon on your work surface. Tape it down using the painter’s tape. I used Frog Tape.
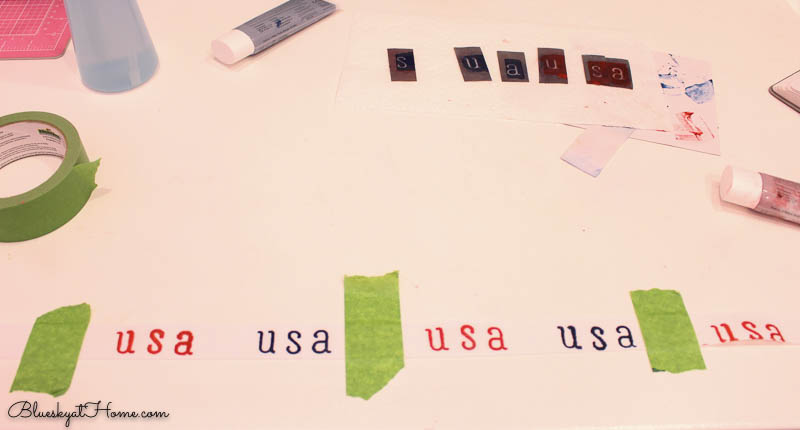
Step 2 ~ Cut out the design or letters or word that you want to use. Move around on the ribbon until you get the spacing you want.
I measured 6 inches between pieces of Frog Tape. I cut out 2 sets of u ~ s ~ a. Then I set down 1 set just to the left of my 2 pieces of tape. These first 2 sets will be blue.
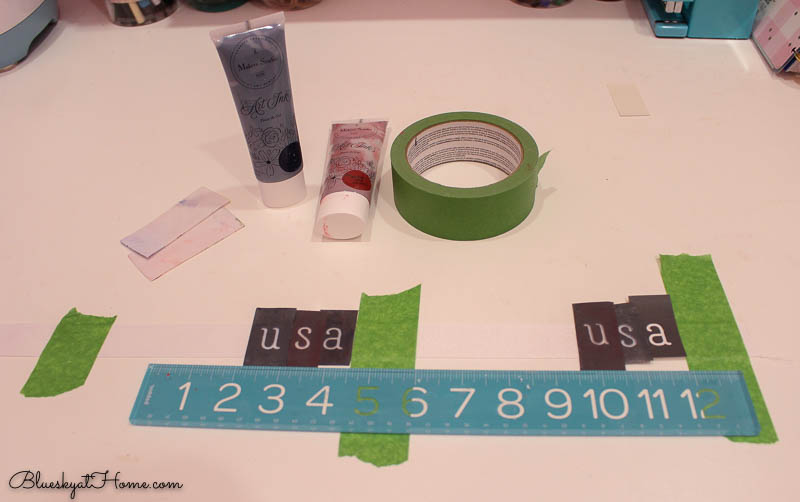
TIP: Even though the tri~mesh stencils are adhesive backed, when you have small pieces, I think it helps to tape them together so you can pick the set of letters up at 1 time.
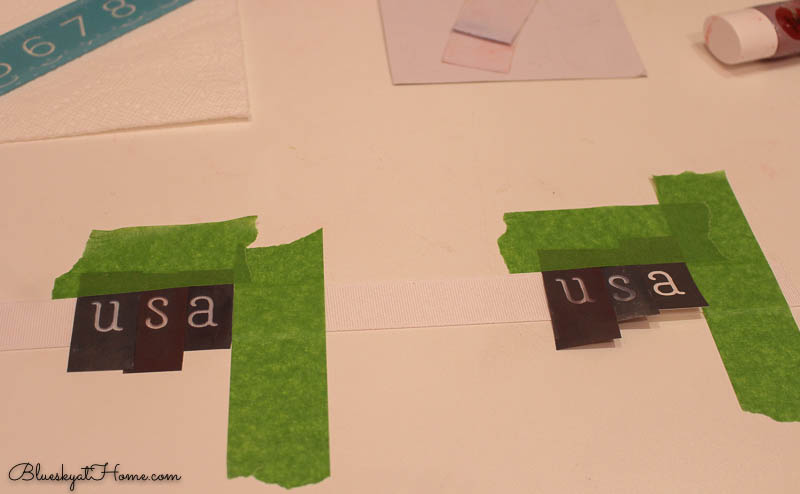
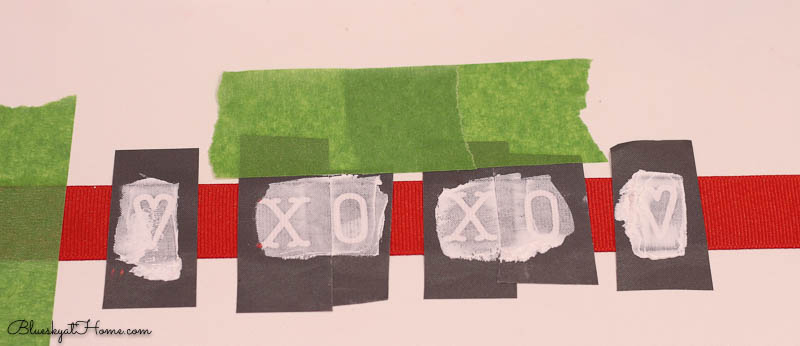
Step 3 ~ Squeeze out a small amount of the Gel Ink onto a piece of cardboard or a paper plate. Using your plastic scraper (I always cut mine into 3 pieces.), apply the Gel Ink to the stencil in a “scraping” motion, cover all the stencil design.
NOTE: Unlike ChalkArt which can be easily wiped off a surface, Gel Ink is more permanent, so be very careful about not getting on the ribbon where you don’t want it.

Step 4 ~ Now gently remove the stencil letters. This is where the Frog Tape makes removing all the letters at once really easy.
Step 5 ~ Wash the blue Gel Ink off the stencils with your fingers. Having a bowl of water nearby makes this easy.
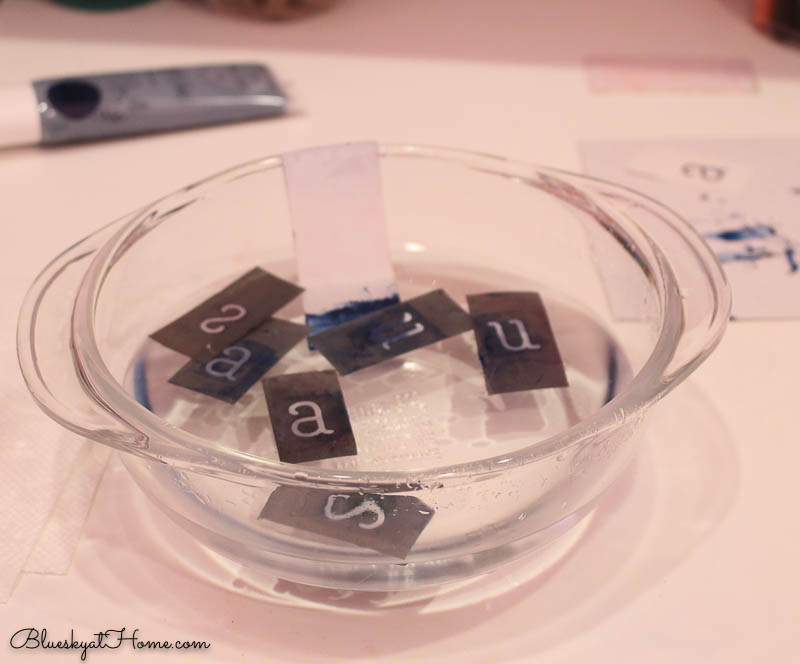
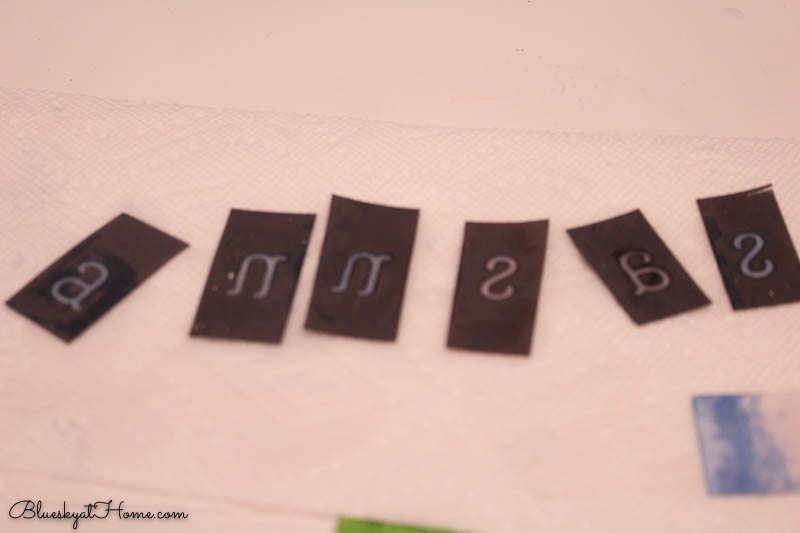
Next, set the stencils on a paper towel to dry, adhesive side up.
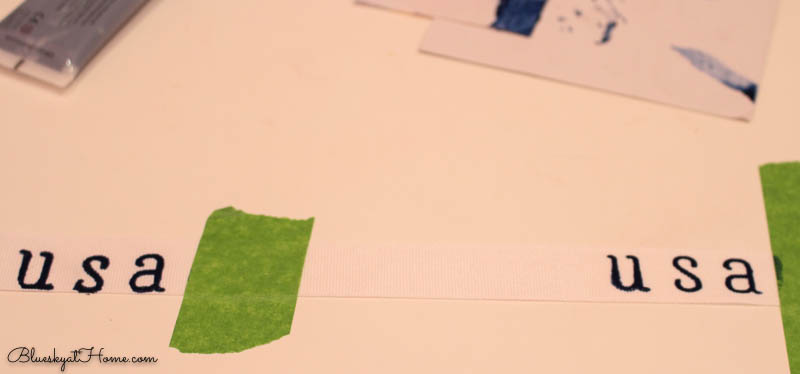
Step 6 ~ Once the stencils are dry, repeat the process. This time use the red Gel Ink.
Step 7 ~ Finally, allow the Gel Ink to set for about 1 hour. To set it permanently and make it washable, set your iron on medium. Place a clean cloth on top of the ribbon and press down with the iron for about 3o seconds. Now your ribbon is washable.
NOTE: Since I don’t know if I would ever need to wash the ribbon, I didn’t heat~set it.
This is how I used the ribbon in my 4th of July vignette. I wrapped it around the lip of a mason jar and made a bow.
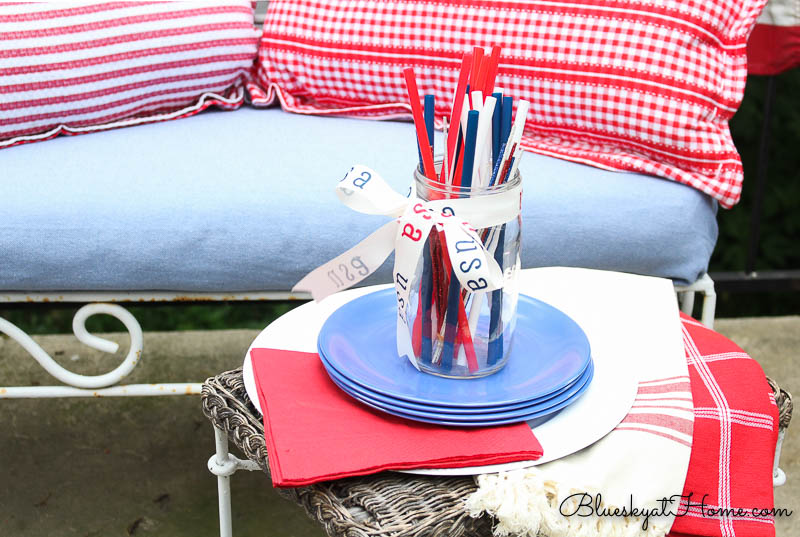
Pretty cute, uh? The ribbon was a leftover piece. I have already used the Alphabet 4 stencil many times (They can be reused about 25 times.) and I’ve used the Gel Ink a few times (You can barely tell I’ve used any of it.), my decorative ribbon was practically free.
I know it was hard to see the white ribbon against my white work surface, so I found another piece of ribbon in my ribbon box. This time I used red ribbon and white Gel Ink just for fun.
I know it’s not anywhere close to Valentine’s Day, but I again used the Alphabet 4 stencil. The hearts are on that stencil too.

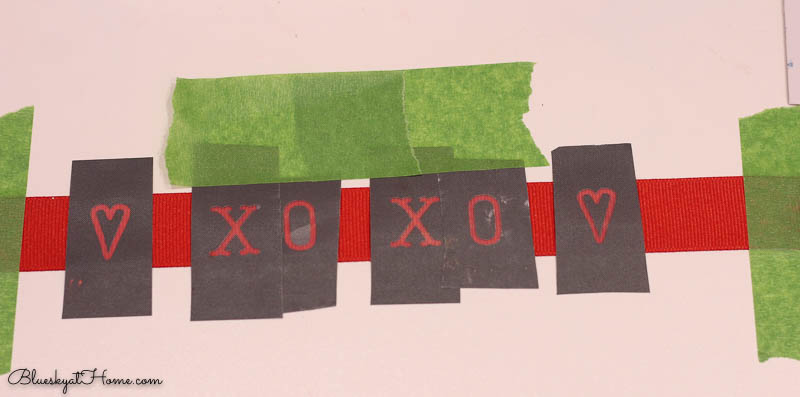
The Gel Ink in white is called Well, I Declare.
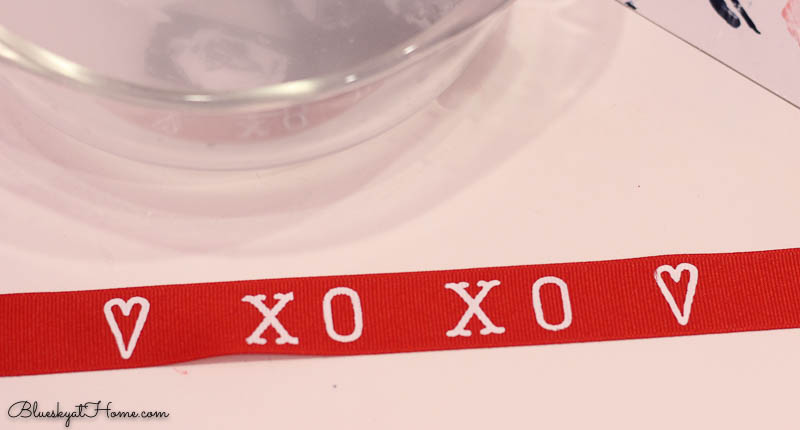
Want to bet that you’ll see more of this ribbon next year?
When to Use Decorative Ribbon
- any holiday
- stencil an child’s name on ribbon
- a birthday party
- baby or wedding shower
- wrapping a gift
- leaves or flowers
Any other ideas?
I hope that you enjoyed this little project and that you will want to try to make your own decorative ribbon. It was fun, easy, and added such a nice detail to my vignette. What designs would you use? All A Maker’s Studio products may be ordered through the links on this post.
Be sure to sign up to receive more creative DIY ideas.


What a great way to style ribbon. I love this. Thanks for sharing.
One year I spent a wad of money on stamped ribbon. Well NO MORE! I adore this idea and can hardly wait to do it. You can get so personalized with it. Fantastic! Pinned too. 😉
What a great idea! I would never in a million years thought about painting ribbon! Thank you for sharing!
Karen, neither would I int I had the right supplies to do this project. Be sure to use A Makers’ Studio.
It has never occurred to me to paint ribbon! ‘Course, I am a rank amateur at stenciling. When I first saw the tape on you ribbons, I thought you were painting random width stripes would would be about my speed as a beginner! Loved how nicely your stenciling came out!