7 Paint and Stencil Easy DIY Halloween Decorations
Are you ready to decorate for Halloween? I have some super cute DIY paint and stencil Halloween decorations. With these simple ideas, you can make easy DIY Halloween decorations for your home.
Halloween decorations are so much fun for ghosts and witches of all ages. Making these DIY paint and stencil Halloween decorations will give your home a high dose of trick-or-treat fun.
Kids will be trick-or-treating in full force this year. This cherished holiday tradition is continuing as usual. Halloween is still one of the most fun holidays on our calendar.
I love creating a few DIY Halloween decorations myself. These DIY paint and stencil Halloween decorations will add to the scare factor in any room in your home.
We have been collecting ghosts, goblins, witches, and scarecrows for years. Every year I like to create a few new DIY Halloween decorations.
I’m excited to share this year’s creations with you. These are so easy that trick-or-treaters could make them.
Guess what? You can watch me demonstrate some of these Halloween decorations.
For these simple Halloween decor ideas, you can customize them with paint colors and your favorite stencils.
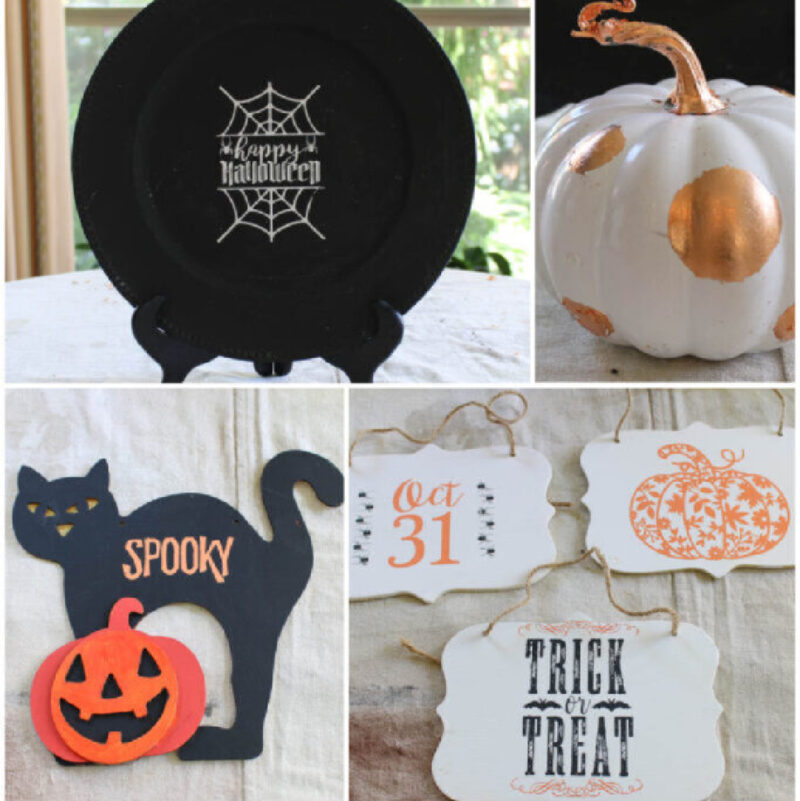
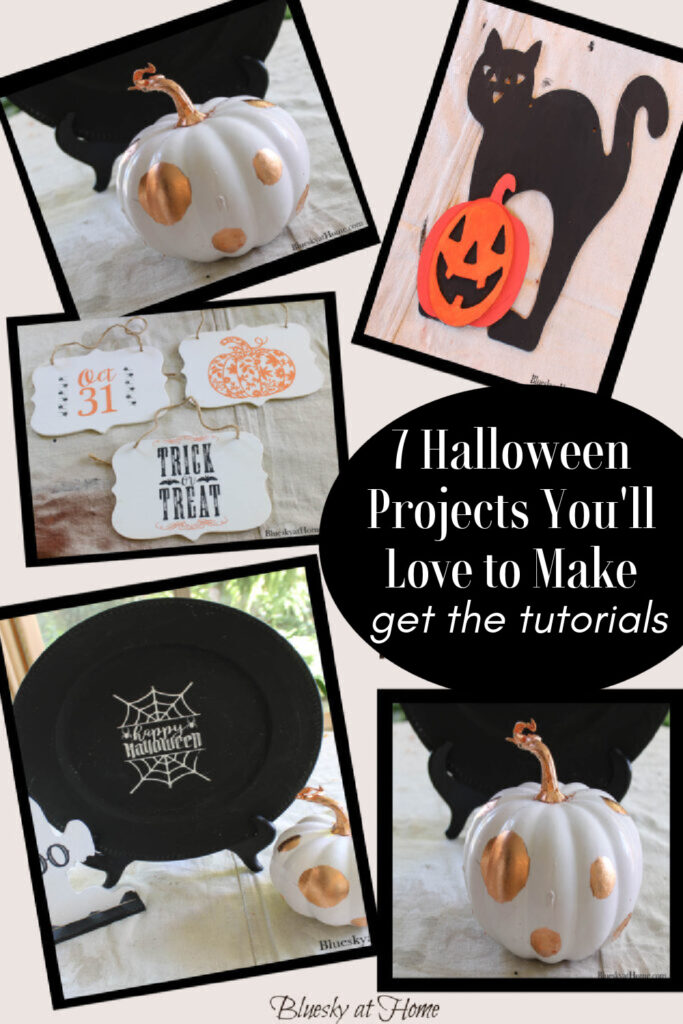
I made 7 new DIY decorations. Six of the pieces I used for these Halloween decorations came from Dollar Tree. The other one came from Target Dollar Spot. Right there, I spent less than $15.
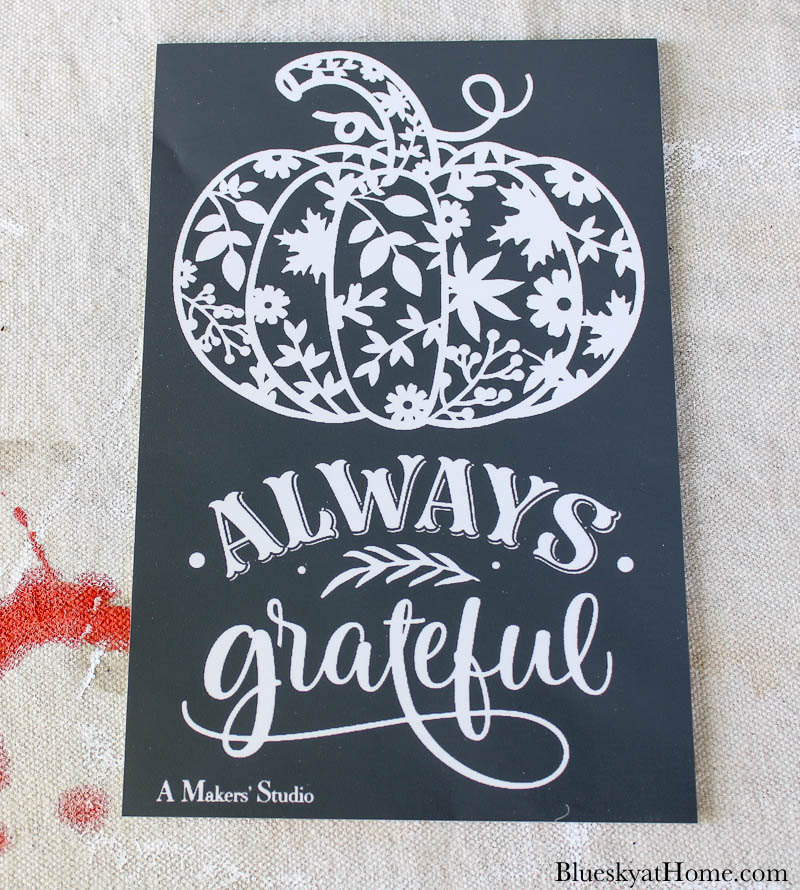
The paint and stencils that I used for the 6 Dollar Tree pieces came from A Makers’ Studio. We’ll start with those.
Paint and Stencil Easy DIY Halloween Decorations
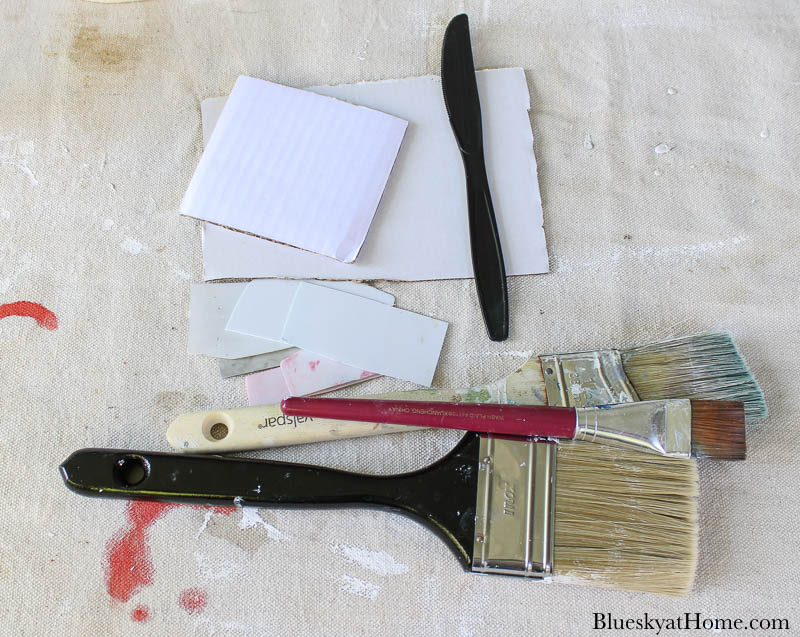
Paint and Stencil Supplies
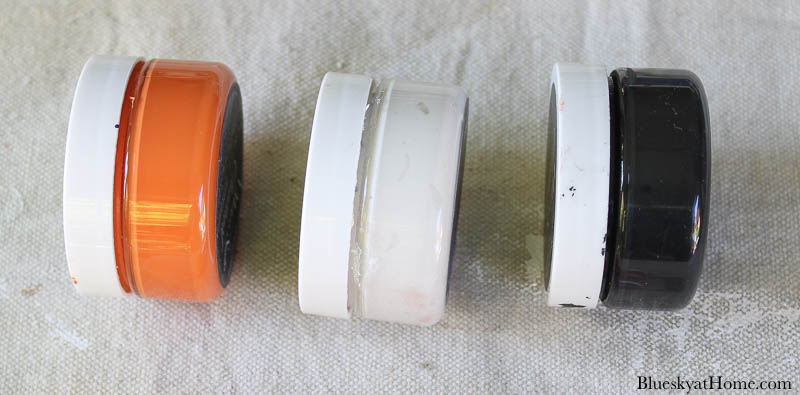
I used 2 kinds of paint for these projects, but you can use whatever white, orange, and black craft paint you have on hand, but I highly recommend the A Makers’ Studio ChalkArt for stenciling.
NOTE: If you are artistic, you can free-hand the designs.
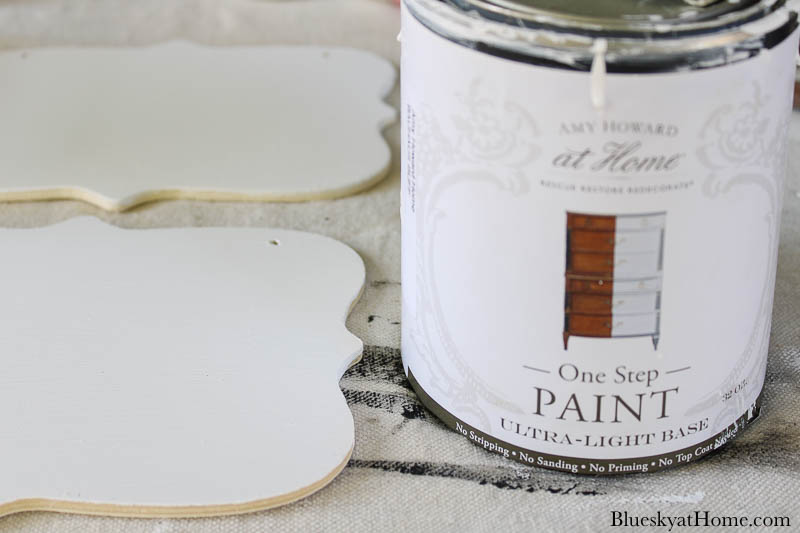
- One Step Paint in Bauhaus Buff. (I was out of white paint in AMS.)
- ChalkArt in Preaching to the Choir (black)
- ChalkArt in Peace & Joy (white)
- ChalkArt in Mind Your Manners (orange)
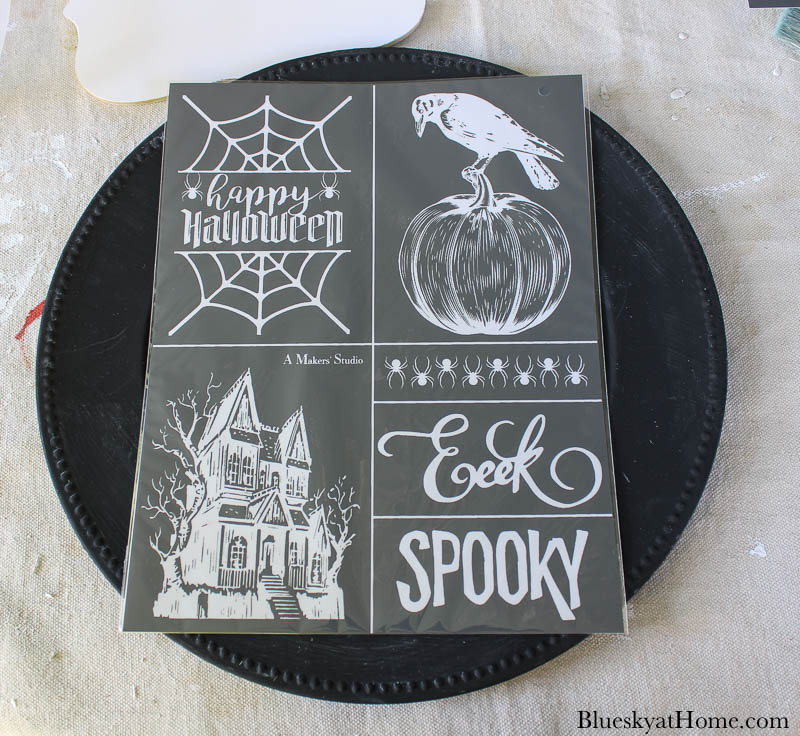
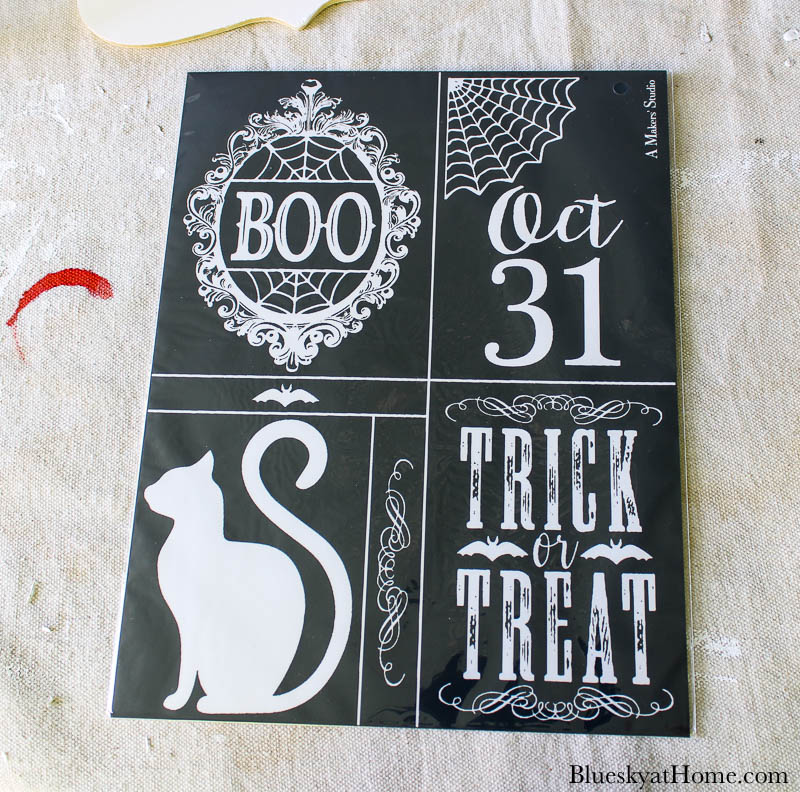
For stencils, I used 2 Halloween stencils from A Makers’ Studio. “EEK” and “BOO”. Or pick you favorite Halloween stencils.
You will also need these household items:
- paper towels for cleaning up
- spray bottle with water
- paintbrushes
- plastic scraper (A Makers’ Studio)
- stirrer for paint
- Frog Tape

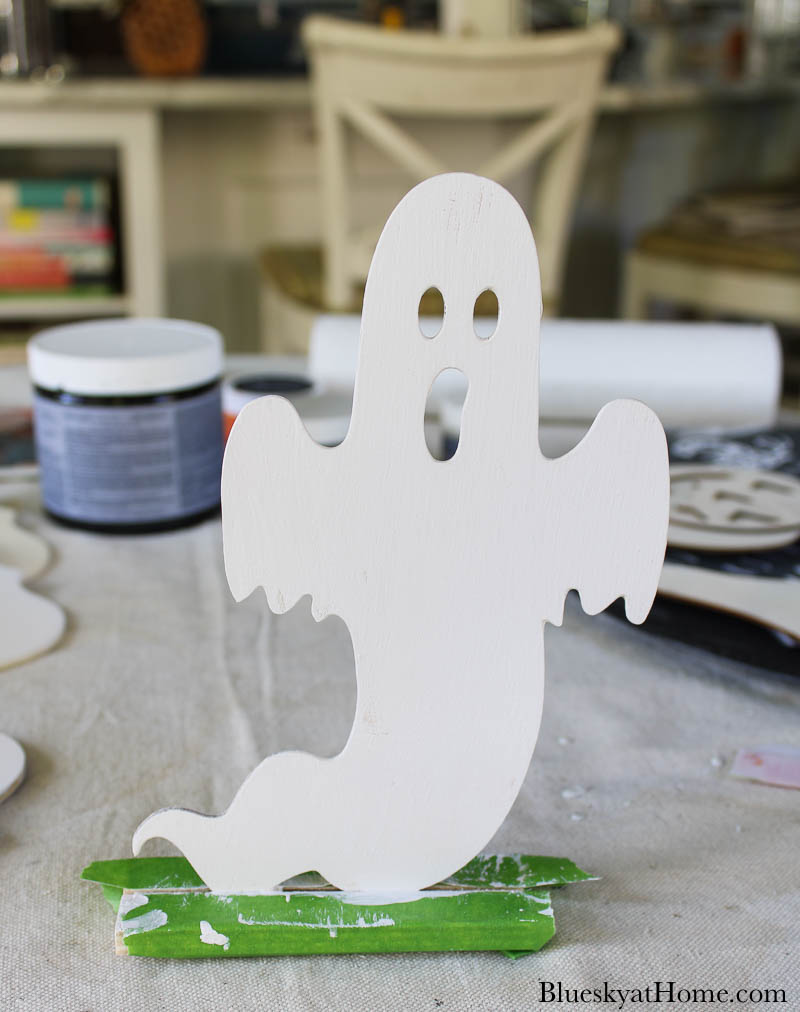
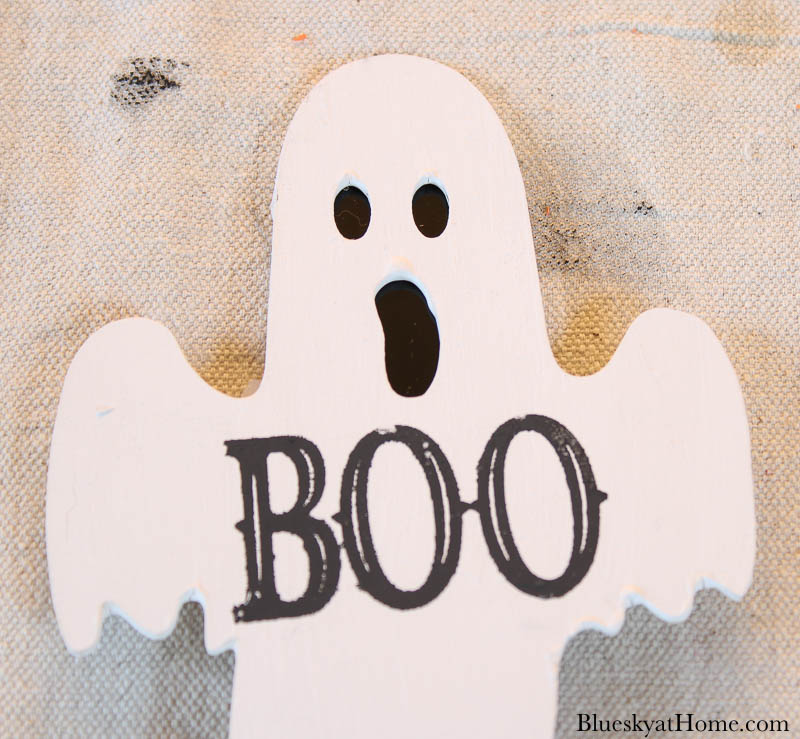
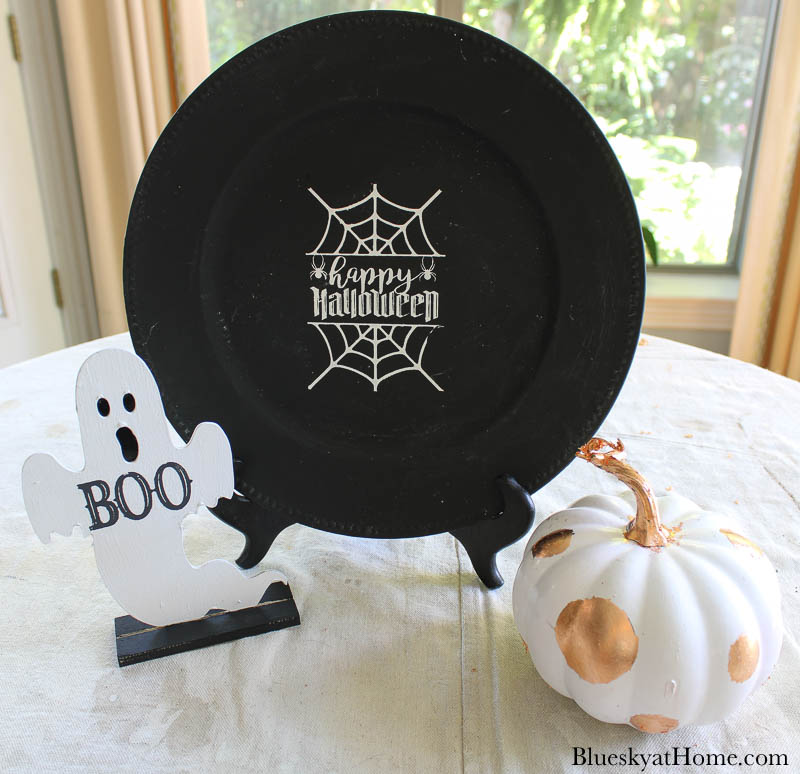
Cute Little Halloween Ghost
This cute little ghost was raw wood on a stand. I lightly sanded “him” and used painter’s tape to tape off the ghost from the stand. I first painted the ghost with 2 coats of the Bauhaus Buff. Then I moved the tape and painted the base black.

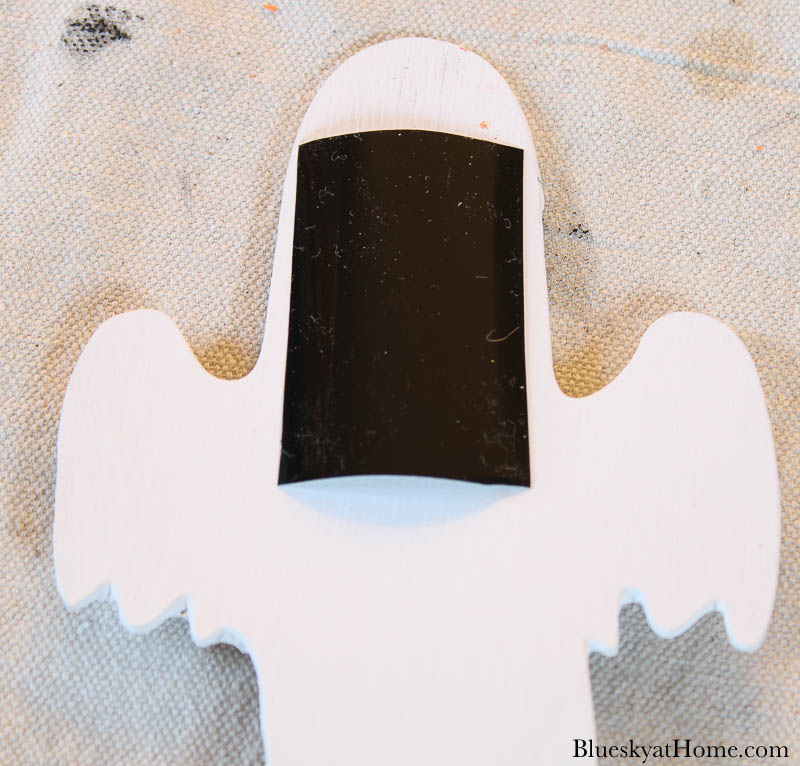
What do ghosts say? BOO! I used just the letters from the BOO stencil and ChalkArt in Preaching to the Choir. Then I taped a piece of black paper on the back of the ghost for his eyes and mouth.
Super easy!!
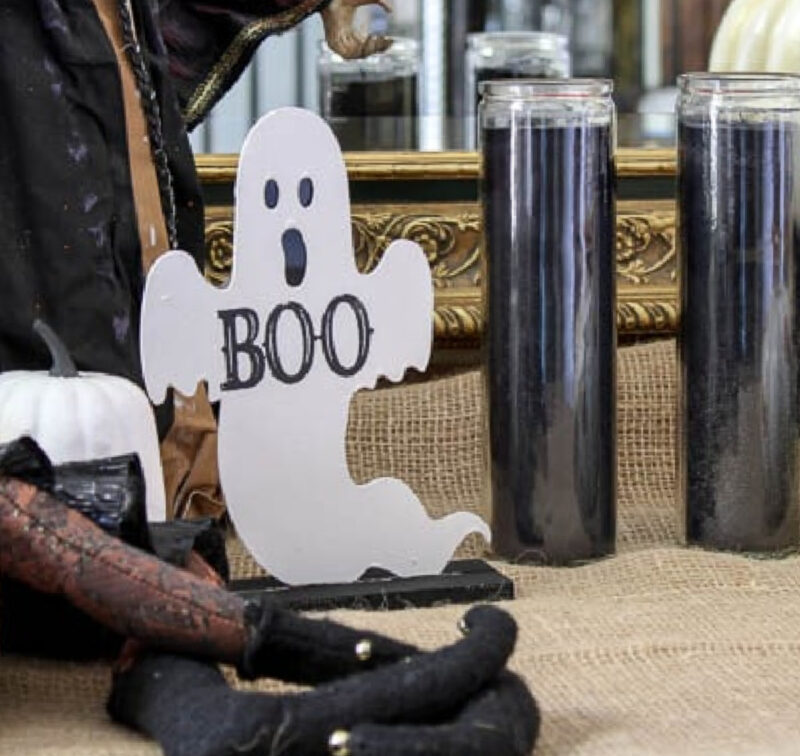
Here is how the ghost looked in our entry.
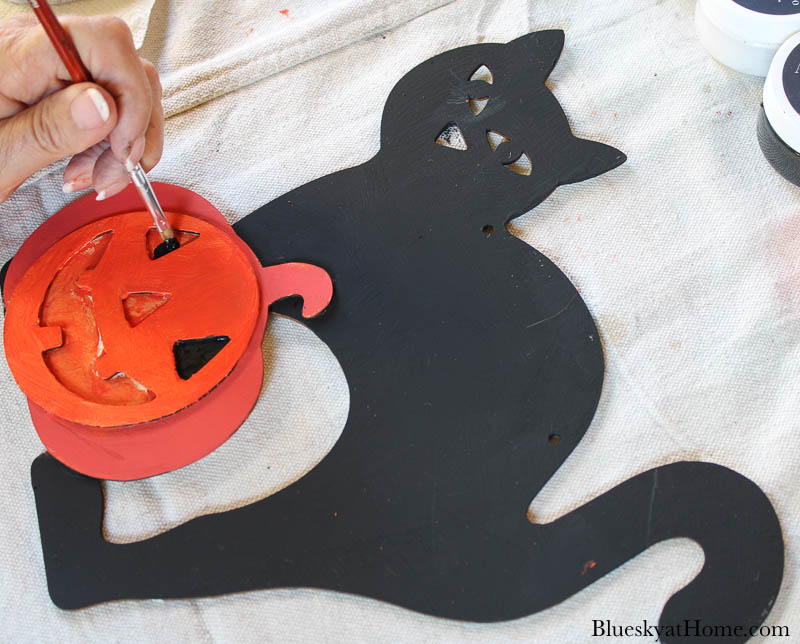
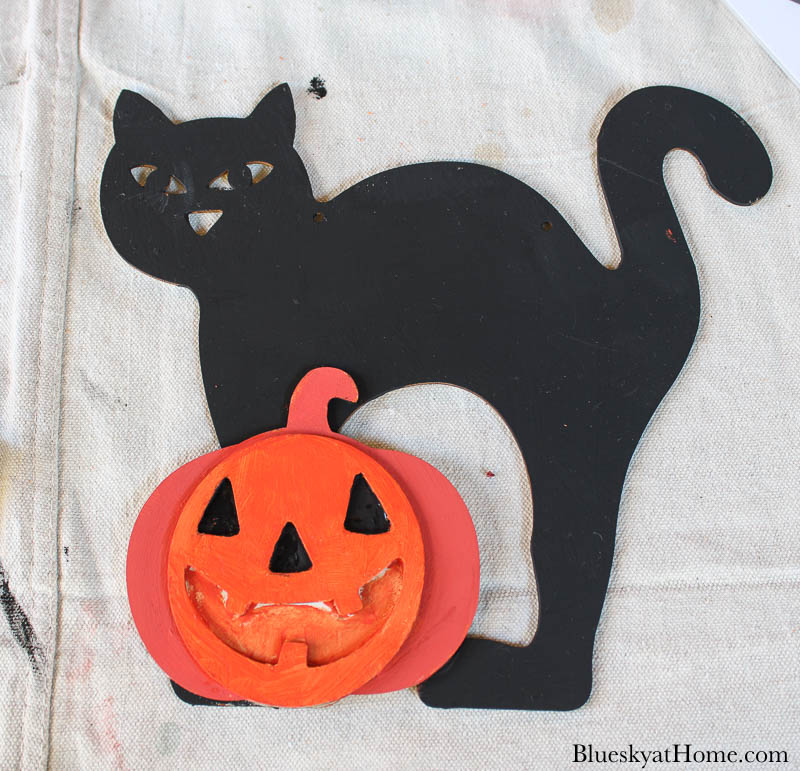
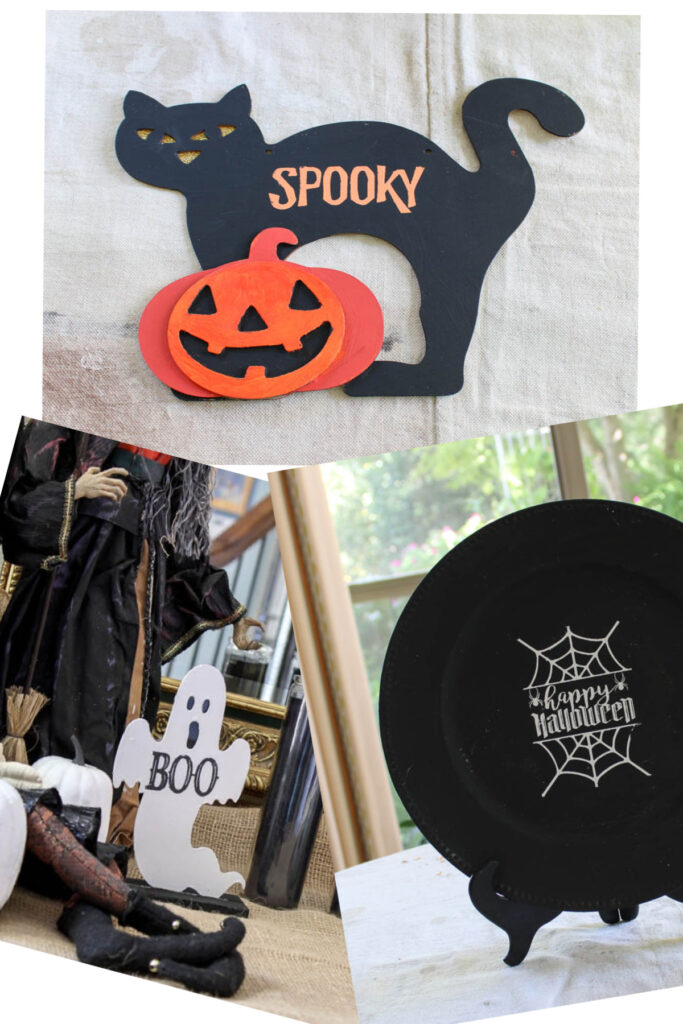
Spooky Black Cat
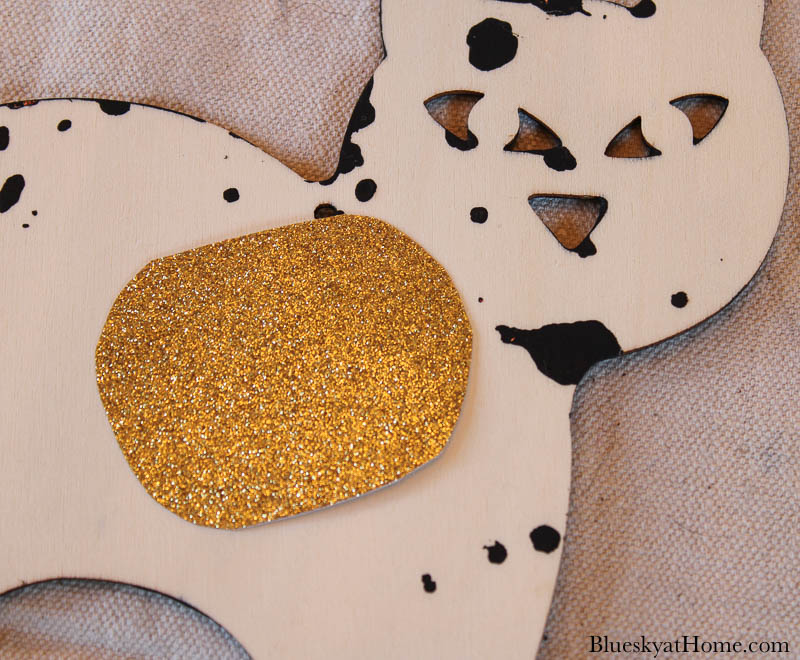
At Dollar Tree, I also found a cat and pumpkin wood cutout.
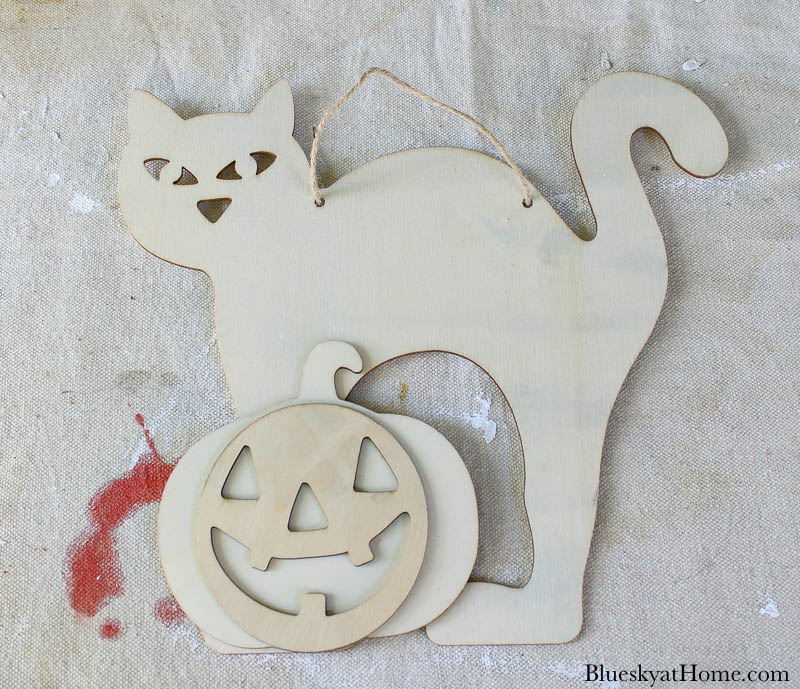
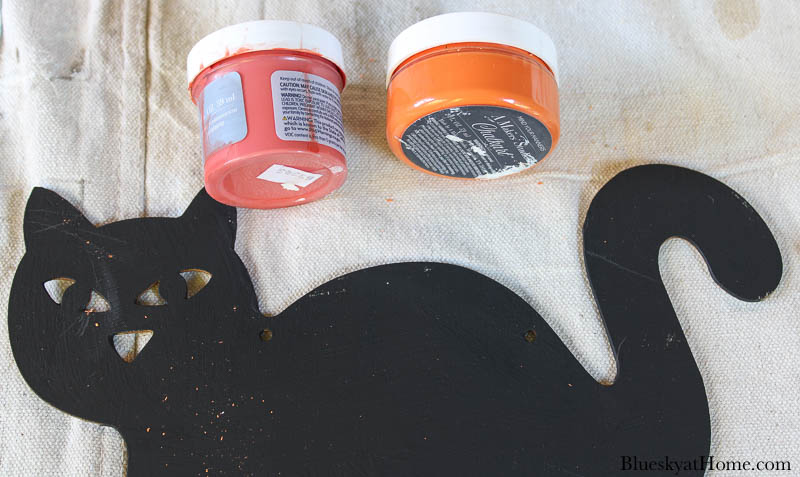
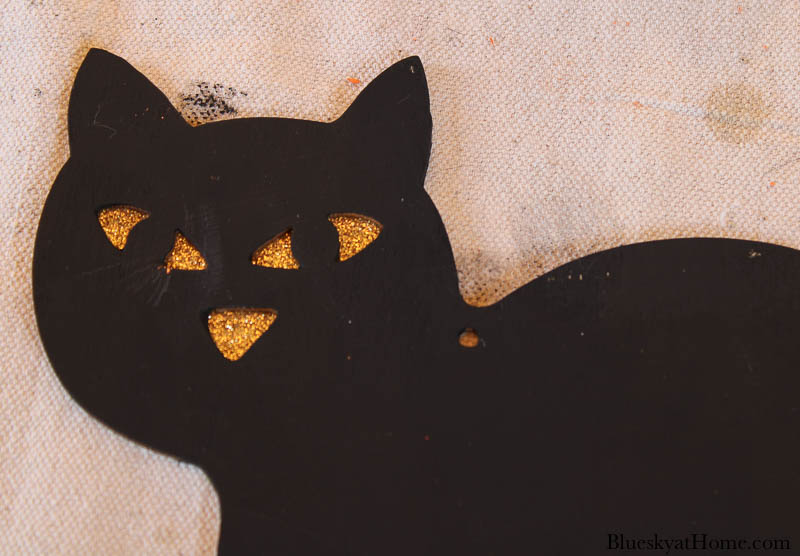
I removed the twine hanger and painted the cat black with black paint.
I painted the pumpkin with Pick a Pepper and Mind Your Own Business. Using a small brush, I painted the spooky pumpkin’s eyes, nose, and mouth black paint.
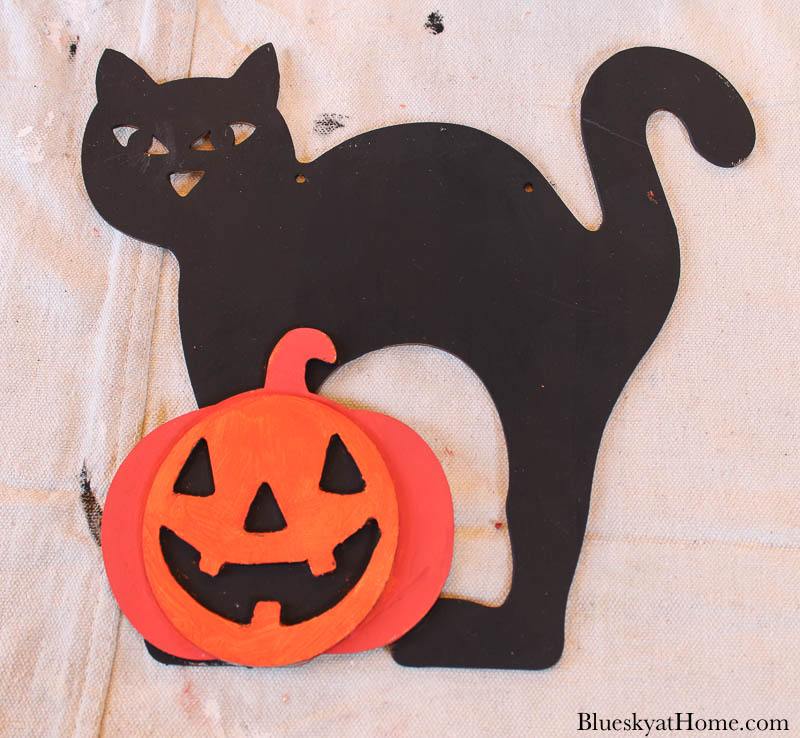
Black cats are Spooky so I used that stencil and ChalkArt in Mind Your Manners.
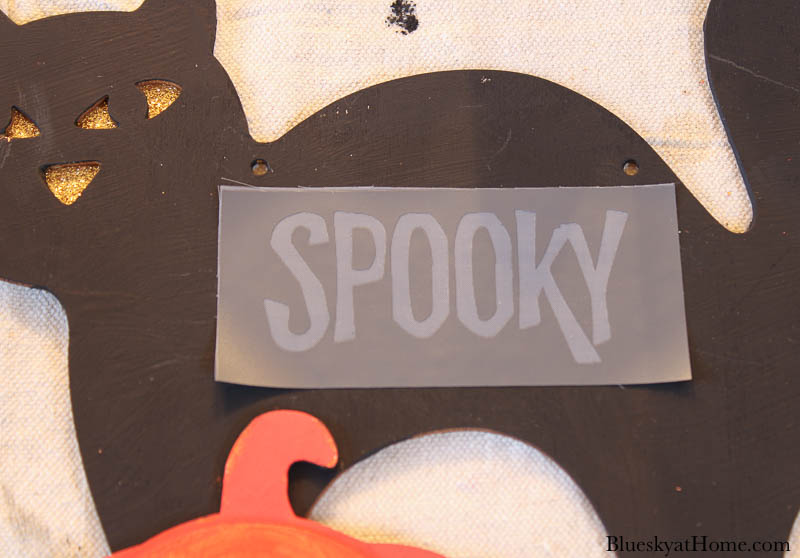
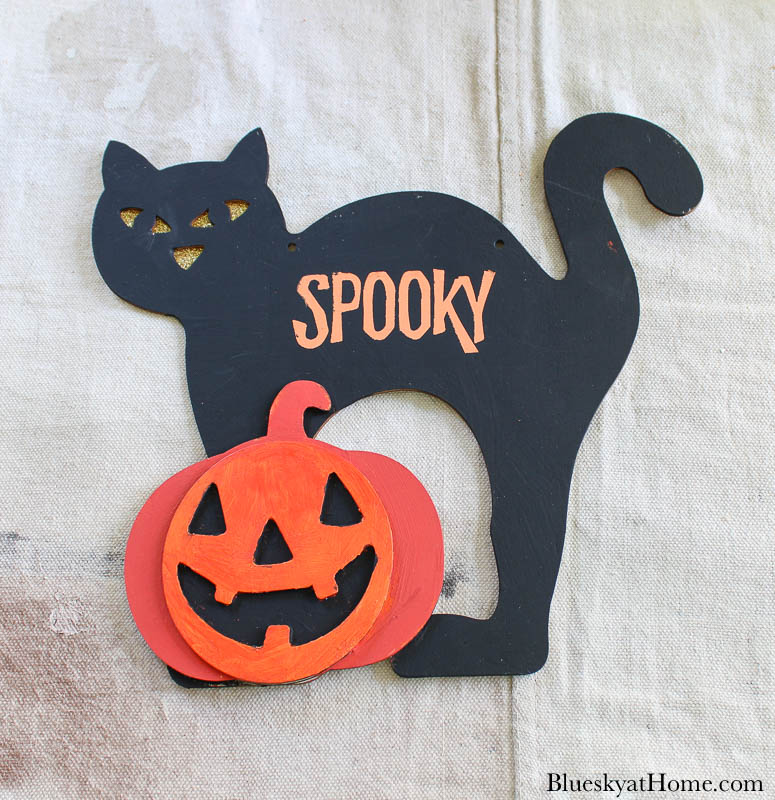
The cat’s eyes, nose, and mouth became gold with a piece of scrapbook paper from my paper stash.
Paint and Stencil DIY Halloween Signs
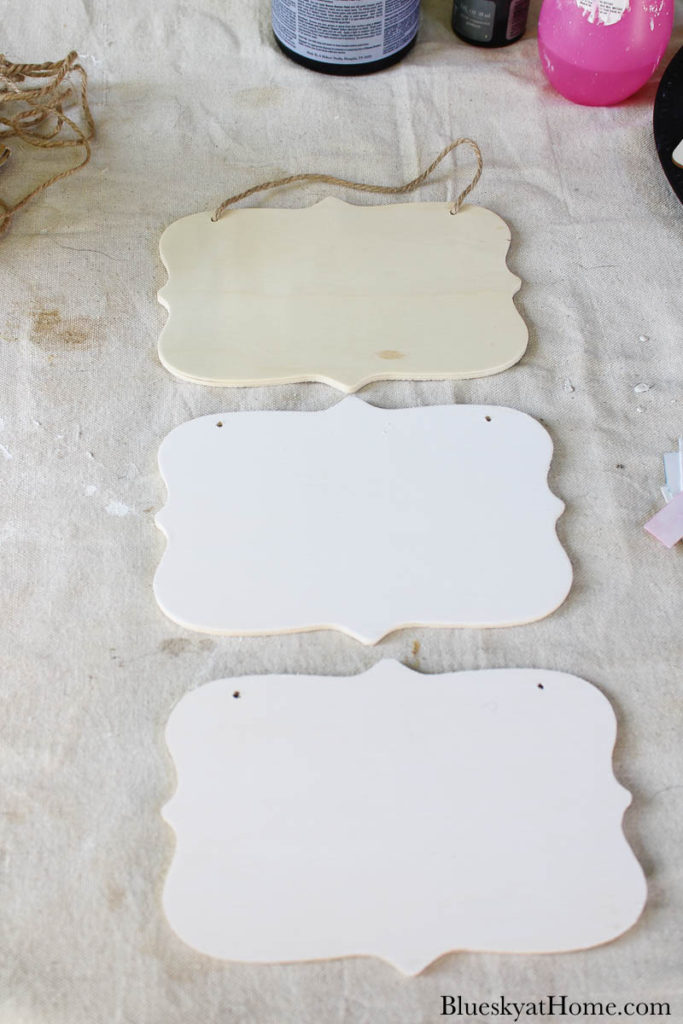
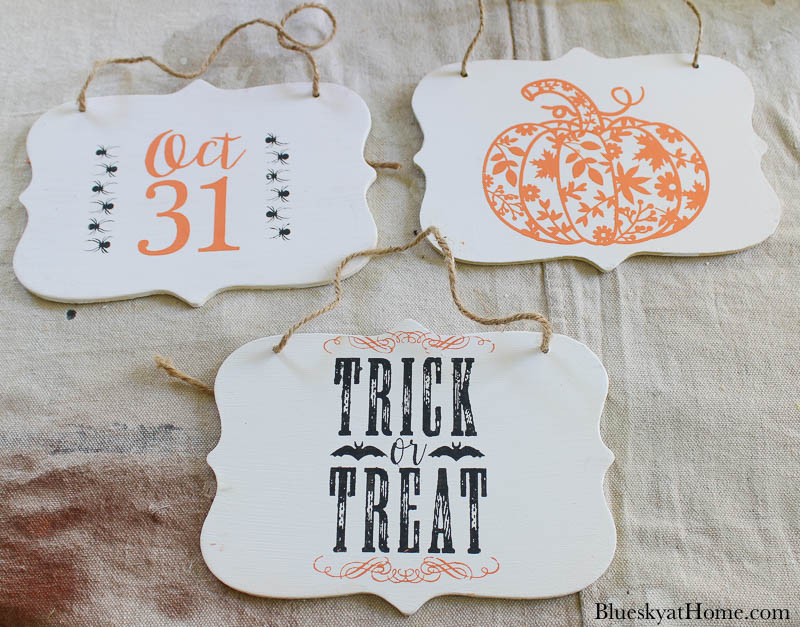
You may remember that I made a Fall Yard Art Sign. I moved it inside for our Black and White Fall Entry. Fortunately, on another shopping trip, I found similar signs again at Dollar Tree for my Halloween decorations.
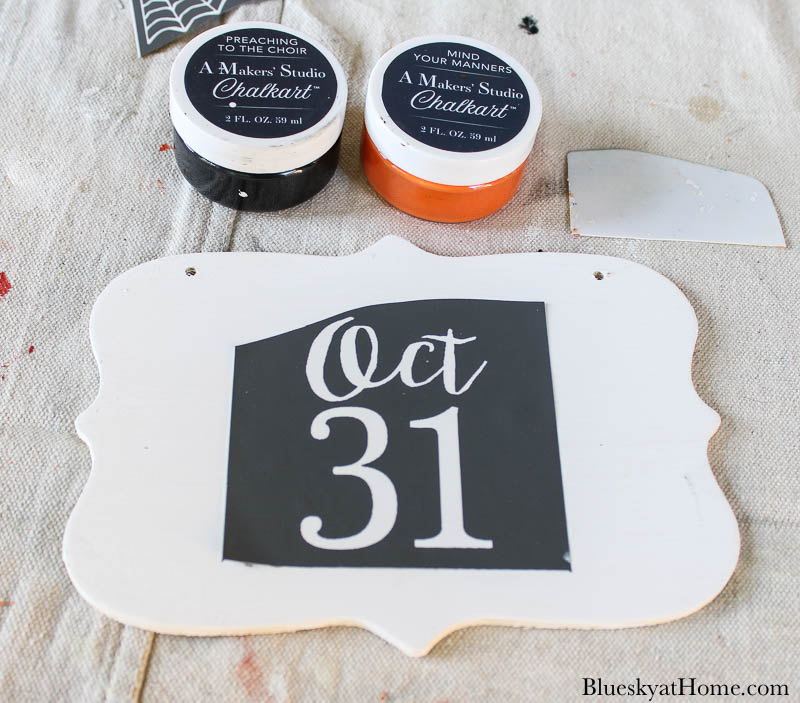
I first removed the twine hangers. Then I lightly sanded the wood signs. After I applied 2 coats of Bauhaus Buff, the signs were ready for stenciling.
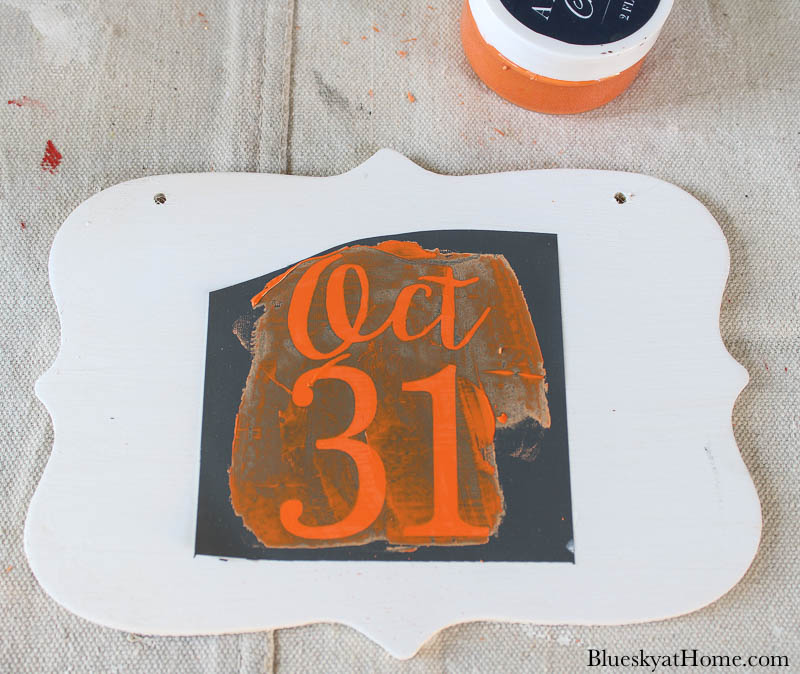
I used ChalkArt in Preaching to the Choir and Mind Your Manners on the stencils. Here’s one example.
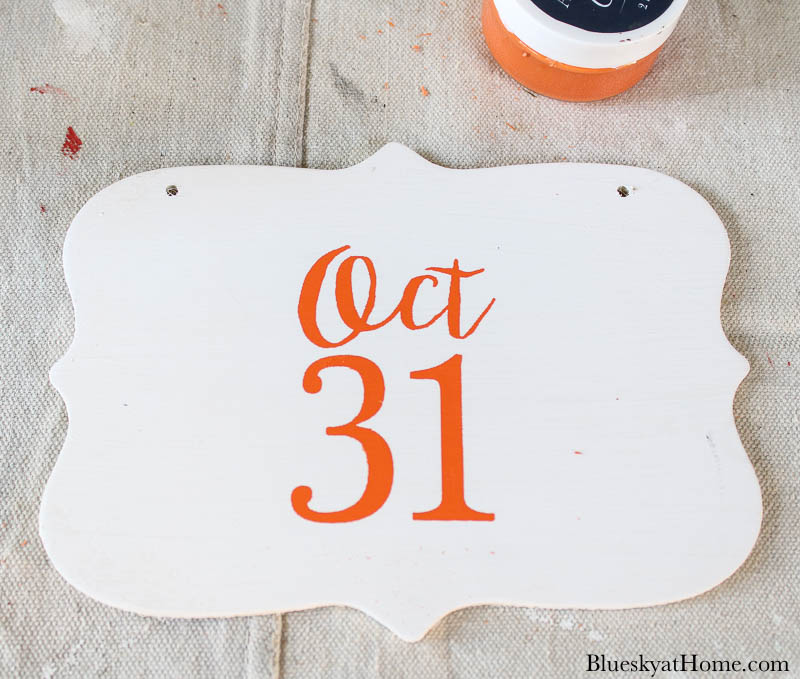
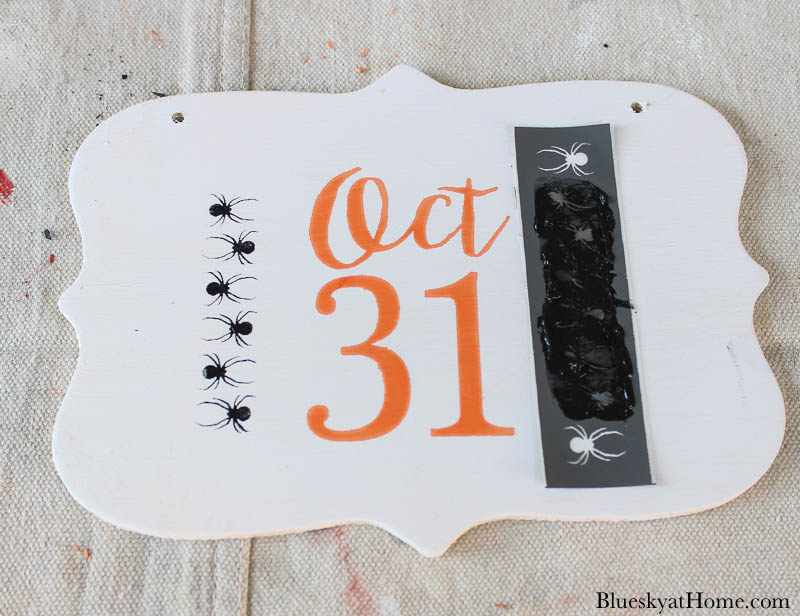
I love how these turned out.
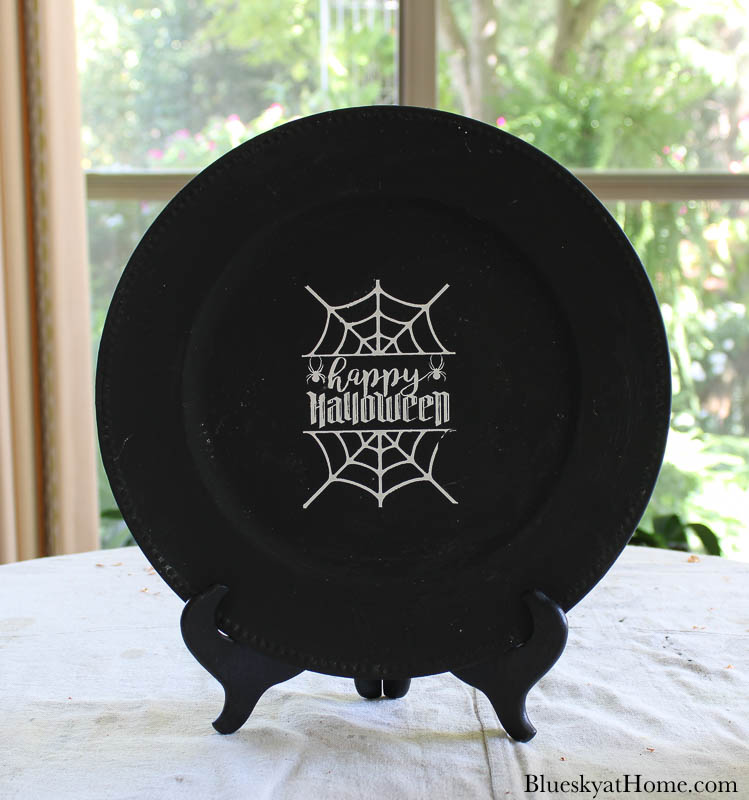
A Paint and Stenciled Charger Used as a Sign
You might remember this charger project I first made for a fall tablescape.

I used one of these chargers for our fall entry. I decided to reuse the other one for our Halloween entry.
ChalkArt can be easily removed with water (that’s where the spray bottle comes in) and paper towels. Next, I applied a new Halloween stencil, Happy Halloween, using Peace & Joy.
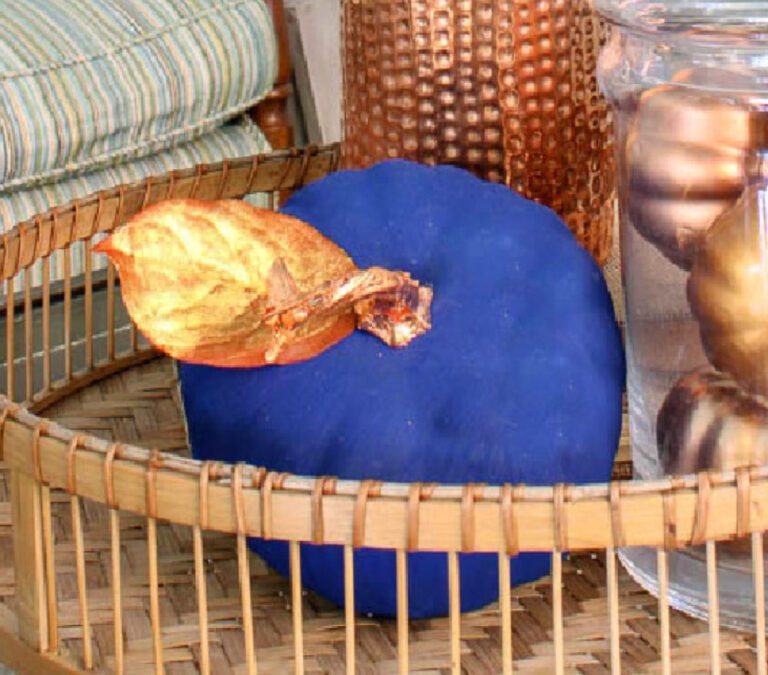
Gilded DIY Halloween Pumpkin
I’ve mentioned I love gilding and I’ve shared some gilding projects with you.
This last project started with a random orange pumpkin from the Target Dollar Spot.
Supplies for a Gilded Pumpkin
Here is what you need for this project:
- plastic or paper maché pumpkin
- paint for pumpkin
- Gilding Size from A Makers’ Studio
- Copper Leaf from A Makers’ Studio
- pencil
- paper circles for outline
- artist’s brush
- Frog Tape
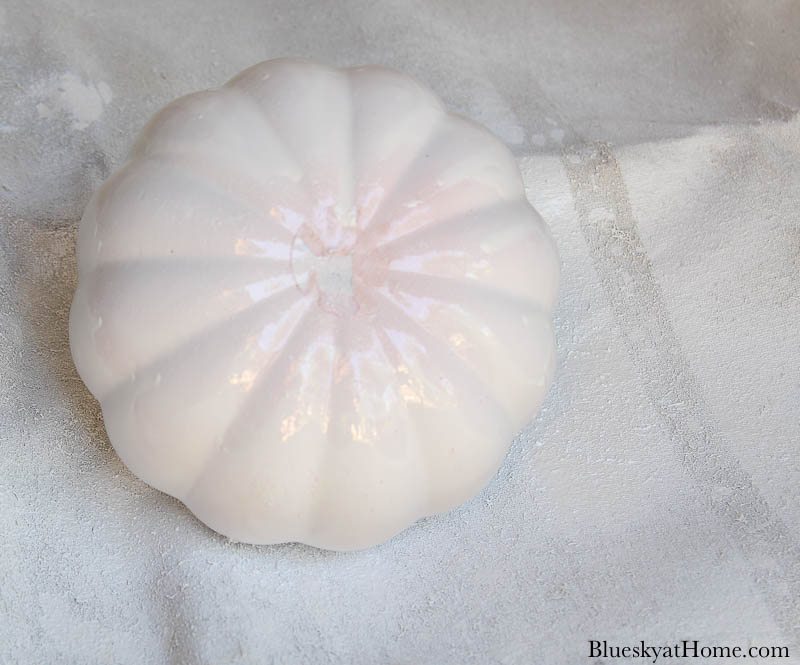
My small spray tent was still set up in the garage so I pulled it outside onto the driveway. I still had Krylon Spray paint in White Gloss that would work to cover the orange.
First, I used Frog Tape to protect the pumpkin stem for painting.
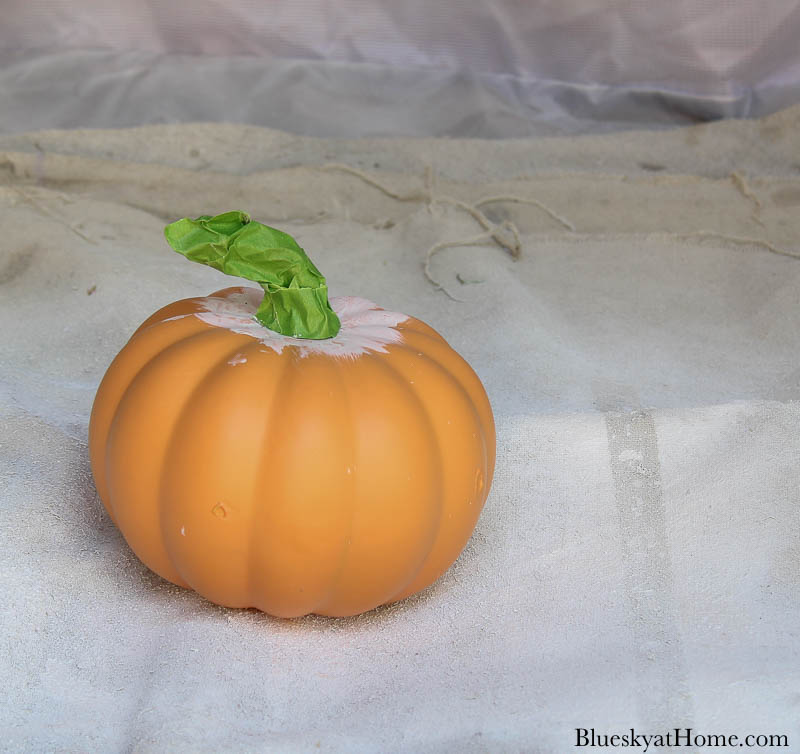
Then, it was easy to paint the pumpkins.

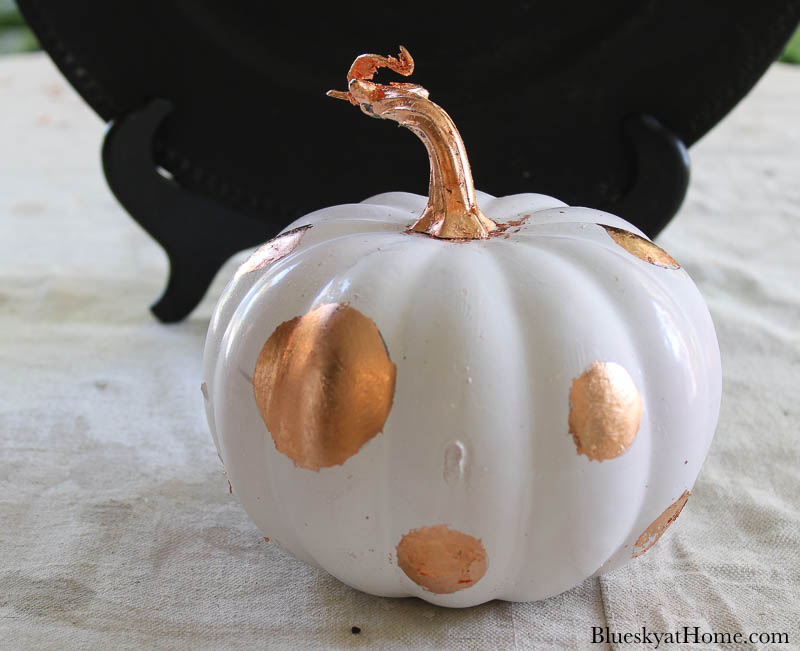
Next, I made paper circles in 2 sizes with a punch and used them to draw circles on the pumpkin. I’m not sure how well you can see the circles.
I applied the Gilding Size inside the circle with a small brush and let it come to tack for about 5 minutes.

Next, I applied the Copper Leaf to the circles. Then I repeated the process on the stem of the pumpkin.
I was doing a few of these projects all at once and forgot to take pictures of the pumpkin project.
EEK! Here’s the finished project:
Be sure to check out these projects for gilding how–to.
Finished Paint and Stencil DIY Halloween Decorations
Here are all my fun paint and stencil Halloween decorations.
I used these new DIY painted Halloween decorations for a new Halloween display in our entry.
You will have fun making Halloween projects for your own holiday decorations. On Halloween night, you’ll be ready for all the trick-or-treaters.
Want more ideas for DIY Halloween decorating? Follow these Pinterest Boards: Halloween DIY Projects and Halloween Ideas.
I’ll be sharing more DIY Halloween projects. Until then, I would love for you to PIN and save these projects.


Thank you so much for sharing this with us on Farmhouse Friday 366 last week. I love it and plan to feature it tomorrow. Hope you have a great weekend. pinned
Super cute and I am sure all with love it this Halloween.
Thank you for sharing your links with us at #282 SSPS Linky. See you again next week.
These are such cute ideas! I’m sharing it in my weekend round up post From My Neck of the Woods on Sunday. My followers will love these ideas and your blog!
Hi Carol –
So many great ideas! Thank you for sharing them with us. I am inspired to go paint and stencil my own Halloween decor.
So many cute Halloween ideas! My favorite is the wooden signs and black plates. Thanks for stopping in and sharing at the Home Imagined party.
Thanks for the nice comment. I love getting ready for each holiday and season, don’t you?
Hi Carol! I love your gilded pumpkin! Thank you for linking up with us at this week’s link party!
Cute Halloween decorations, Carol. Thank you for sharing at Party In Your PJ’s!
Great projects! And a great assortment! Please send me some of your ambition! I got a fall garland made and have stuck a pair of skeleton hands (DT) into an still outdoor house plant so far!
HI Carol, Finally catching up on bloglovin. I am on waitlist for the fall pumpkin stencil. I love that against the black charger! Pinned a few things!
laura
HI Laura. Thanks so much for Pinning. I want to see what you make with the stencil They are so great to work with.
All of these are just fantastic and such fun. Glad you shared them this week with us. #HomeMattersParty I will use this post in my weekend roundup of ideas. Thanks so much.
Many great ideas. Thank you for sharing.