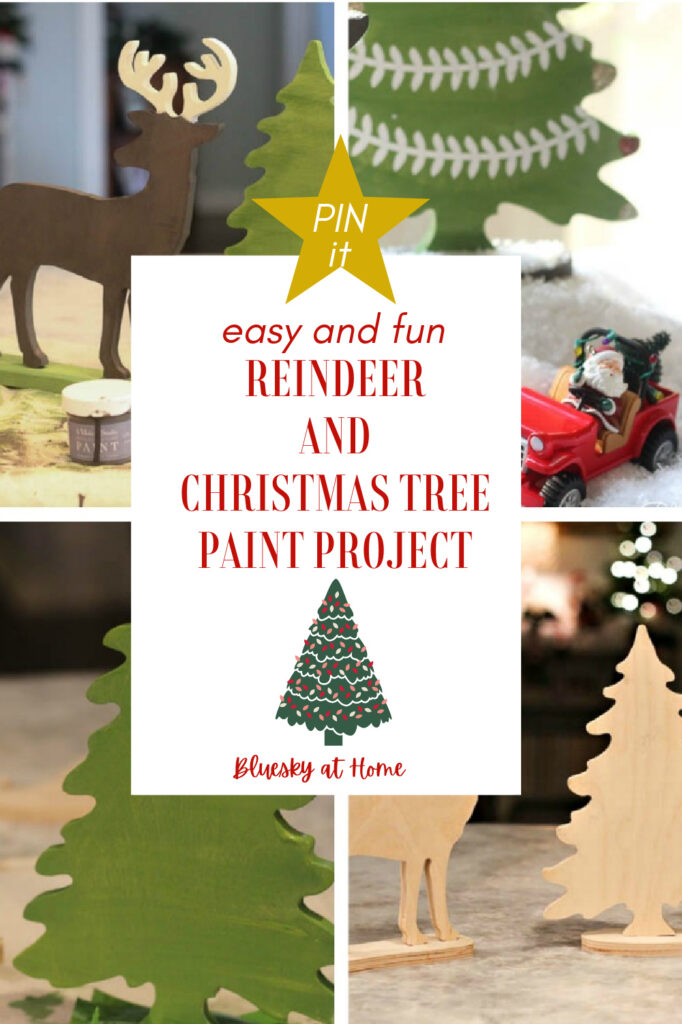
Easy Reindeer and Christmas Tree DIY Project
Do you like to create easy DIY decorations for the Christmas season? I just made an easy reindeer and Christmas tree DIY project that was easy and fun.
Most of my vignettes are composed of items I already have, ones that I just rearrange for a new point of decorative interest.
One little vignette was brand new. This DIY project was easy and became one of my favorites this year. A little reindeer and Christmas tree DIY project.
This reindeer and Christmas tree DIY project was one I almost forgot to do. I purchased the cutest wooden reindeer and a Christmas tree at the Pinners Conference last fall. Then they kind of got lost in a bag under my work counter. Fortunately, looking for something else, I found the bag and it was like a little surprise finding them.
I was so excited to find them. I already had all the supplies needed to take them from plain wood into a colorful and fun vignette. This reindeer and Christmas tree DIY project is one you can do in an hour and set out to enjoy for the holidays.

Reindeer and Christmas Tree DIY Project
I’ve talked about creating vignettes for your holiday decor to add whimsy and charm to your home.
This post contains affiliate links to products used to create this project. If you should order any item from this site, I may receive compensation, but you do not pay a penny more. Your purchase is greatly appreciated as it helps support the continued publication of this site.
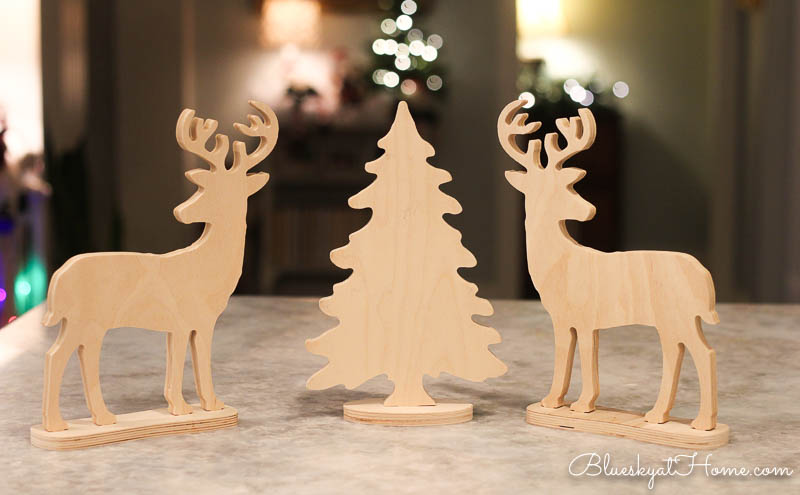
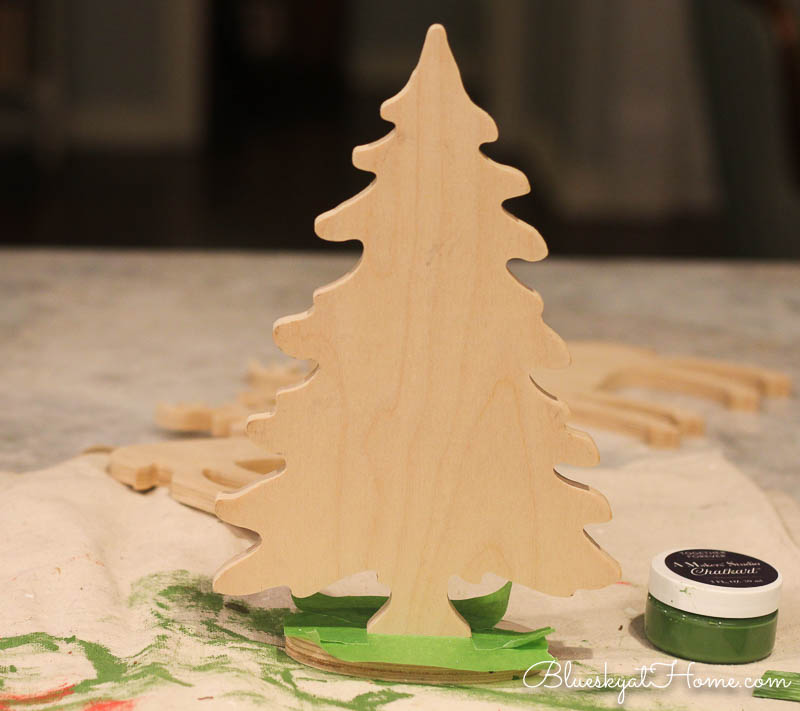
Here are the reindeers and Christmas tree naked and bare.
The Christmas tree is attached to its base, but the reindeer come out of their stands. Obviously, you probably wouldn’t have the same wooden reindeer and Christmas tree as I have. But I’ve seen similar wood Christmas trees that you can embellish in the same way that I did these.
These wood Christmas vignettes are really cute.
Supplies for My Reindeer and Christmas Tree DIY Project
You only need a few supplies for this project. In addition to the wooden figures, you probably have some of these on hand:
- 2 colors of paint for the reindeer and Christmas tree
- 2 colors of paint for the eyes and tail
- small paint brush
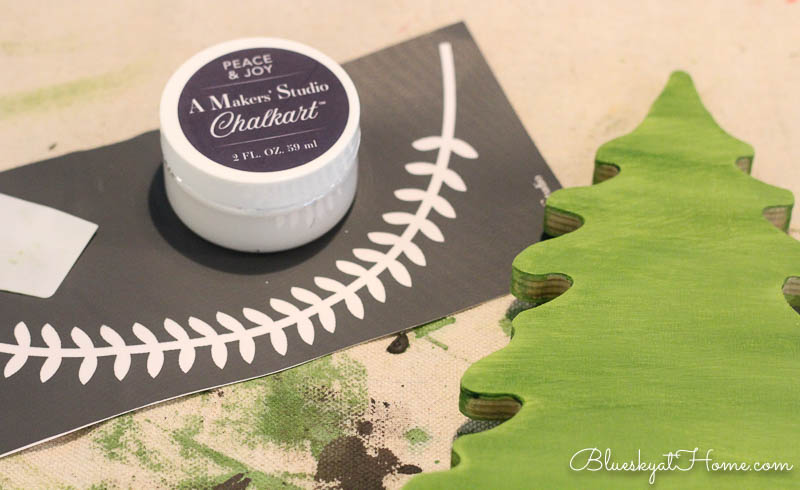
- a stencil for garland
- ChalkArt for the garland
- glue
- glitter
- star for the top of your tree
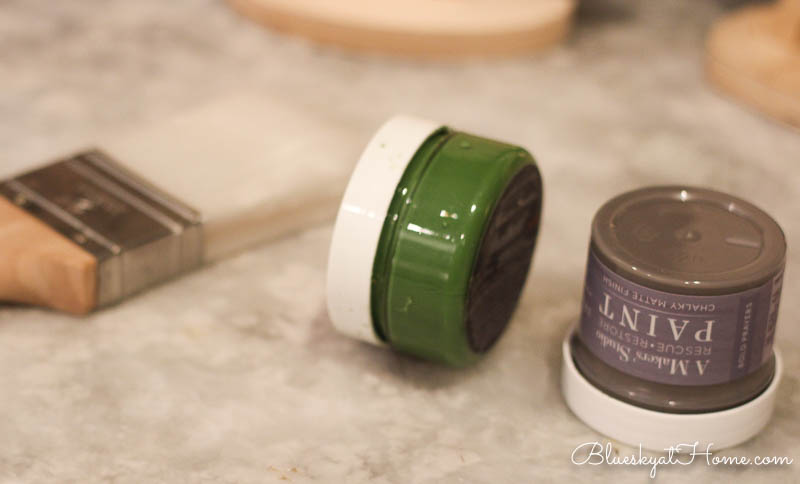
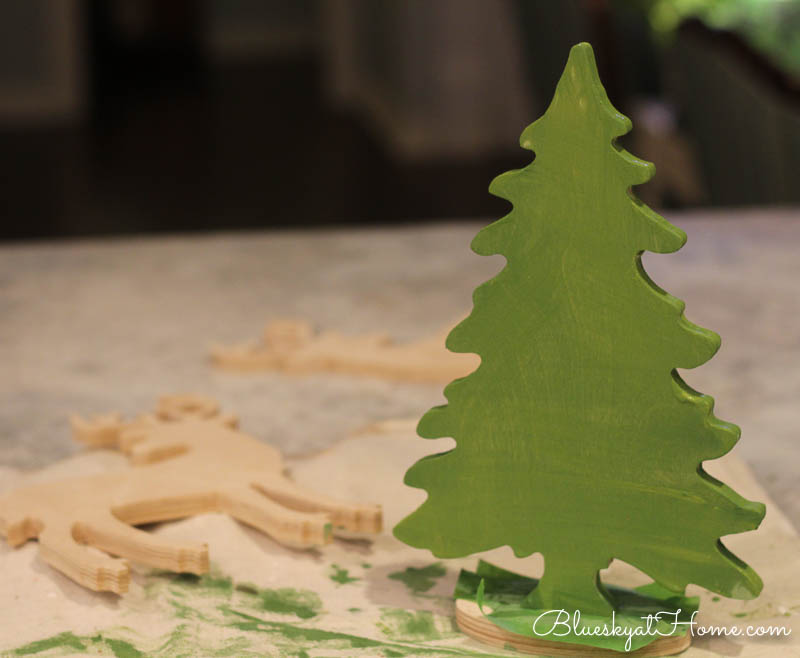
I used 2 colors from A Maker’s Studio product line. For the reindeer, I used a Rescue Restore color called Bold Prayers. It’s a brownish grey that would be just right for the reindeer. For the Christmas tree, I used ChalkArt in Together Forever, a soft green.
Painting the Reindeer and Christmas Tree
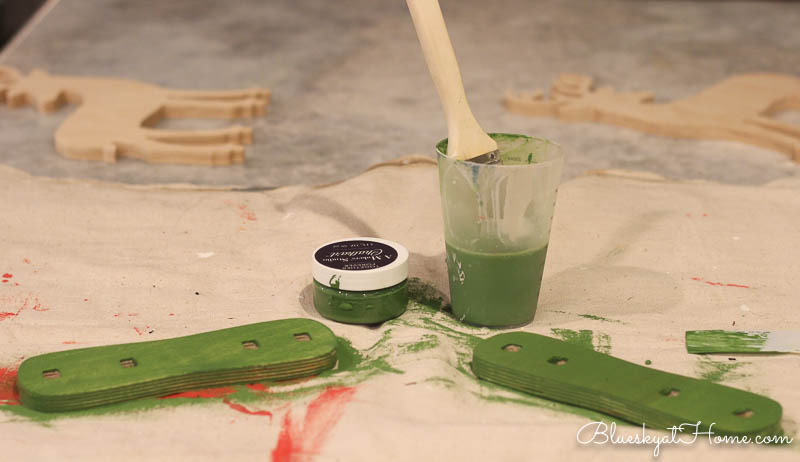
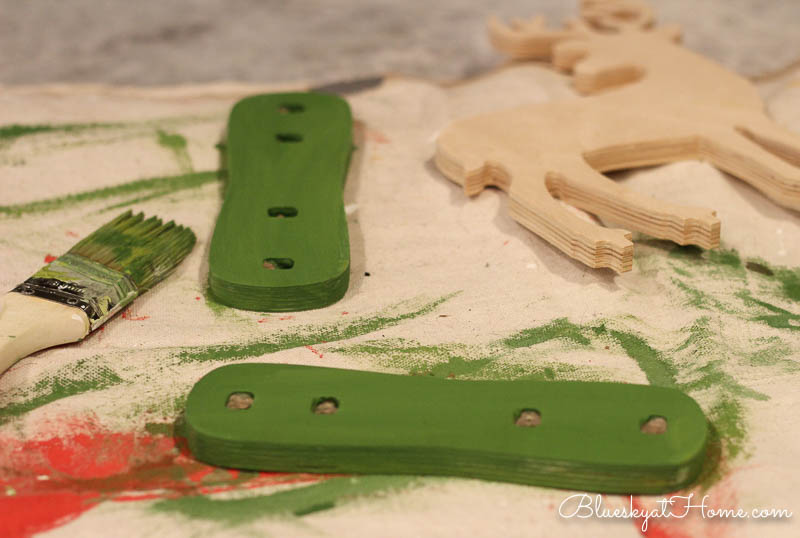
Did you know you can use ChalkArt to paint? You can dilute it in water. I removed the reindeer from their bases and began by diluting the ChalkArt to paint the bases green – like grass. It took 2 coats to cover the raw wood.
While the bases were drying, I taped around the base of the Christmas tree with Frog Tape.
I also painted the Christmas tree with 2 coats of the diluted ChalkArt in Together Forever. I used a “swishing” back and forth motion since I didn’t want the tree to have a solid, flat look.
Next, I used Bold Prayers to paint the reindeer. Rescue Restore paint is like chalk paint but it goes on more smoothly and has great coverage.
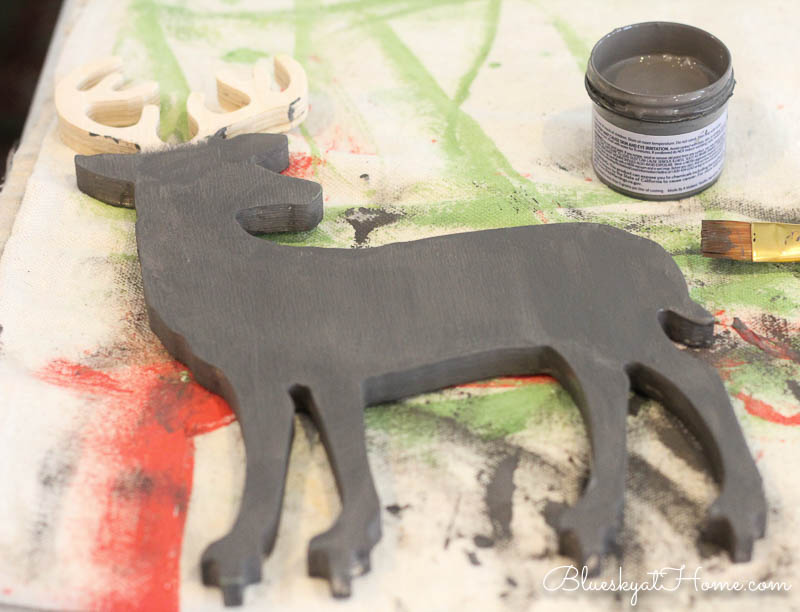
Then I used the Bold Prayers to paint the base of the Christmas tree ~ it was my dirt.
I decided to paint the deer’s antlers a light color. I used Rescue Restore in Biscuits & Gravy, a soft light cream. Then I added a little of the same color to their tails. These reindeer may not be biologically color~correct, but I thought the white tail was cute.
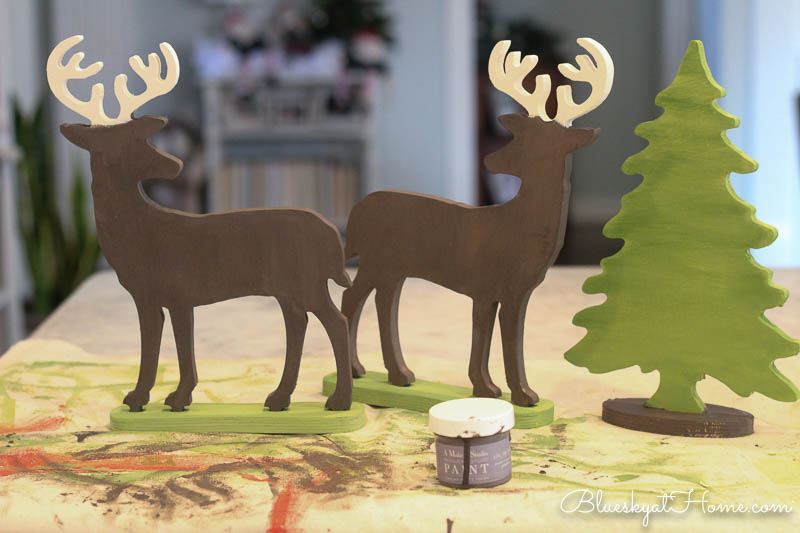
Sweet Shark told me that the reindeer needed eyes. I’m not an artist by any stretch, so I made eyes by dabbing a dot of the Biscuits & Gravy where I thought an eye should be. Then I used a small brush to add some black with Little Black Dress. The eyes came out pretty well.
I used glue and red glitter to give the reindeer red noses. So cute.
I already had a few red jingle bells on gold string that I tied around the deer’s necks.

For the Christmas tree, I added garland using a leaf design from our Blessed Grateful Thankful stencil and ChalkArt in Peace & Joy. I started at the top, centering the stencil and applying the ChalkArt with my spreader, and then moving down the tree.
For decorations, I used glue and gold and red glitter, which I already had, to create Christmas balls.
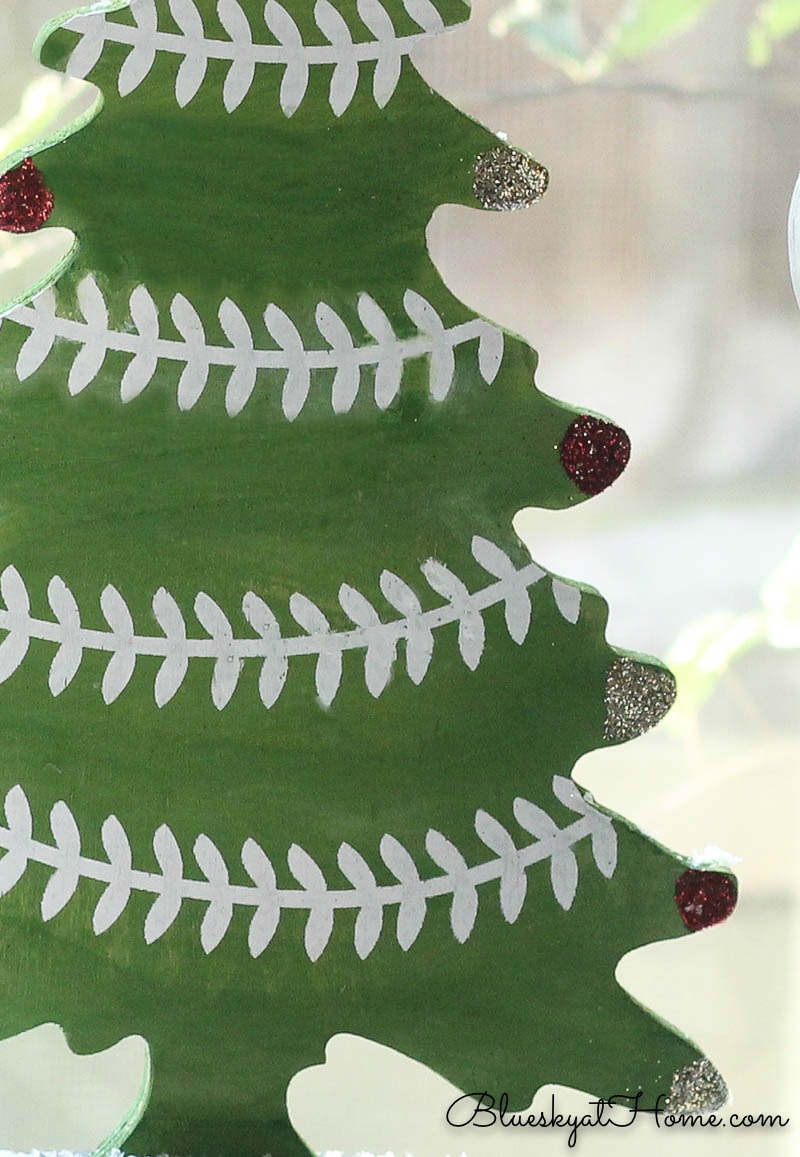
Lastly, I glued a gold glitter star on top; it is from a package of different sized stars I have used for a few years. And my reindeer and Christmas tree were done.
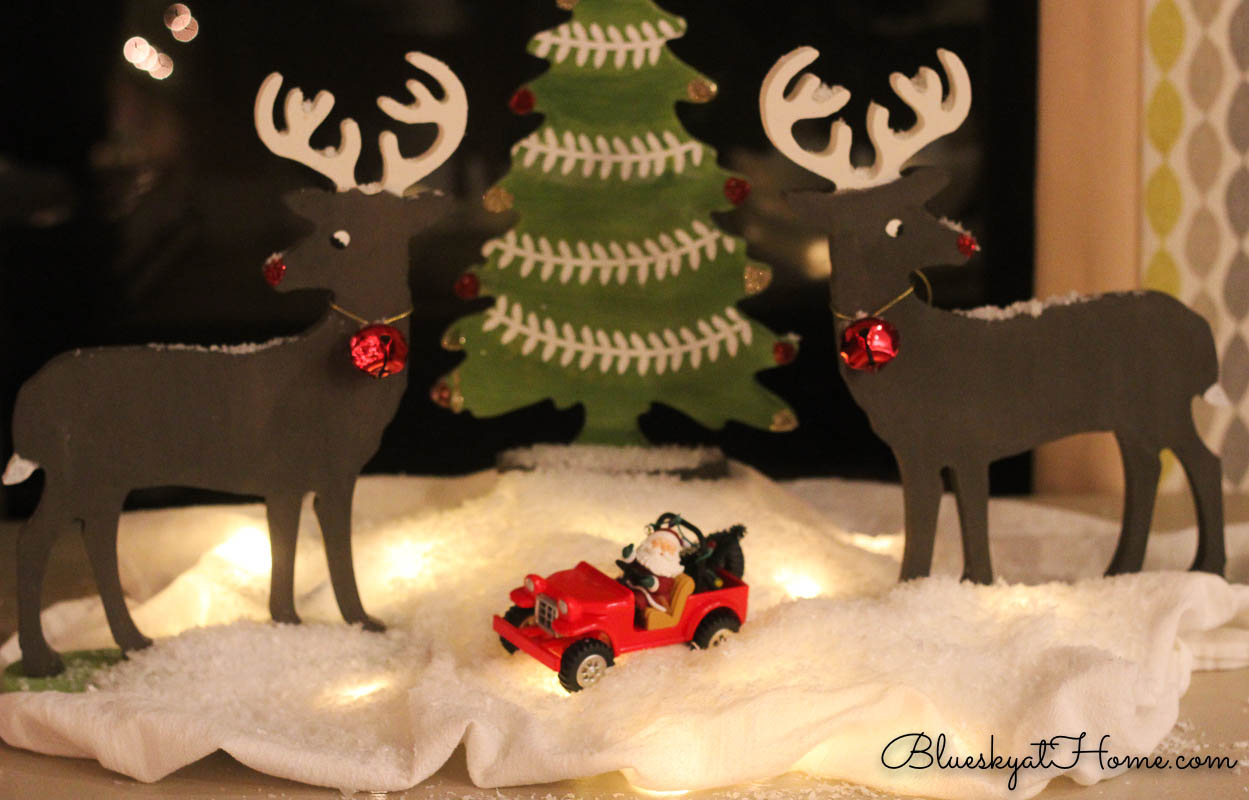
The Reindeer and Christmas Tree Vignette
To create a setting for my reindeer and Christmas tree DIY project, I pulled out a piece of white fabric and one strand of lights. I place the lights under the fabric. Then the reindeer and Christmas tree went on top. I thought I was through.
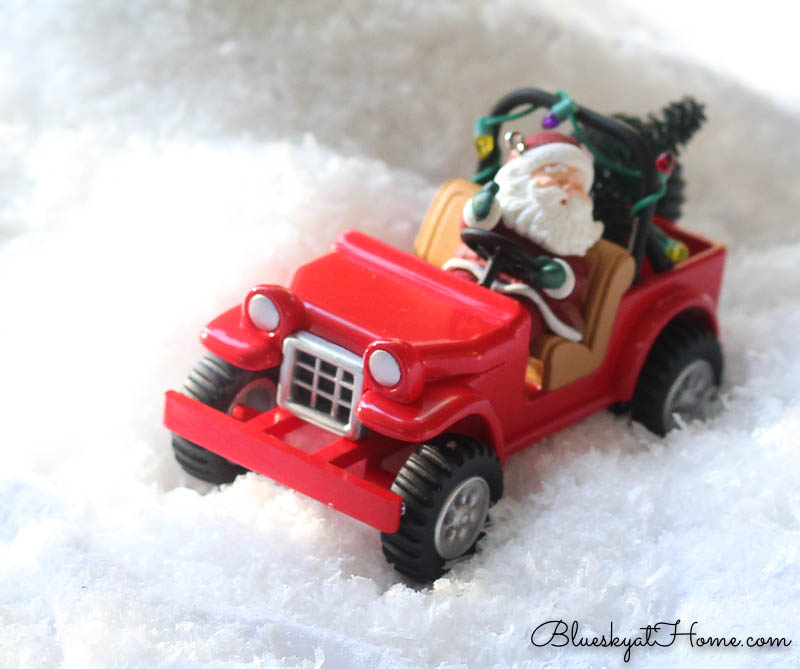
A few days later, returning to the antique mall to buy more bottle brush Christmas trees for my Christmas tablescape, I found this little Santa in a red jeep.
Santas in red trucks have been everywhere this Christmas season. I thought a red jeep was close enough and I added it to my reindeer and Christmas tree vignette. I thought Santa was the perfect addition.
Some sprinkles of snow and I was finished.
I love this little vignette. It’s whimsical, charming, colorful, and tells a story ~ Santa frolicking in his red jeep among the reindeers in the forest with a beautiful Christmas tree.
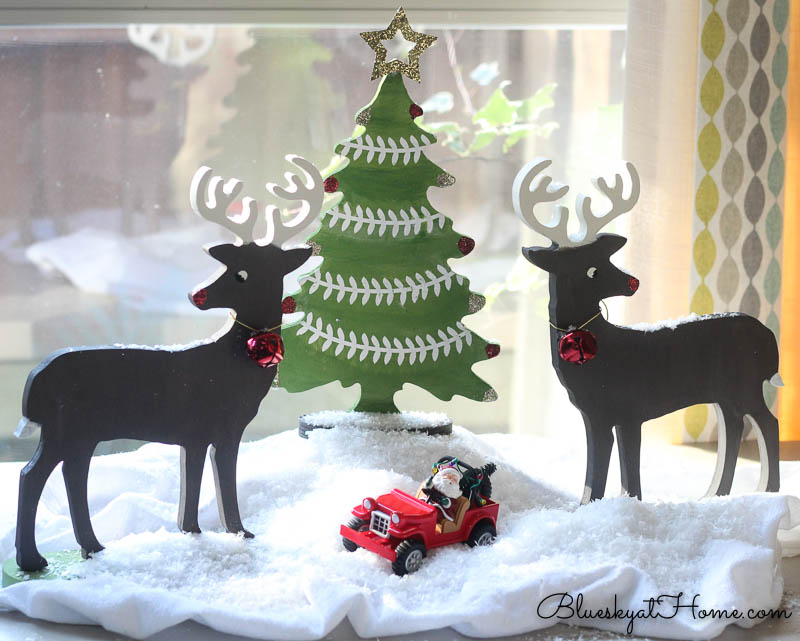
And it has a magical quality at night.
I don’t remember how much I paid for the reindeer and Christmas tree – maybe $10 – $15? The Santa in the red jeep was $10. But I had all the other supplies on hand. An hour or so to make the reindeer and Christmas tree DIY project and about 5 minutes to arrange the vignette.
I think this would be a fun project for kids, too. Something to do over the holidays and put in their rooms. Or you be a kid and make one yourself.
This year I moved the reindeer and Christmas tree to the bookshelf in our living room.

I feel like a kid when I create a DIY project; my inner creative person that I never knew was inside comes out.
Sweet Shark told me just last night – no kidding – that he can’t believe all the things I’ve created and painted in the last few years. From restoring furniture to making bows and placemats for tablescapes and stenciled signs for our home. He seemed amazed and pleased.
I’m a little amazed and very pleased too. I bet you have a talent you don’t know you have. A creative streak that’s just waiting to be released. Grab a paint brush, a piece of wood or paper, a stencil, some glitter and glue – let your inner creative self come out for the holidays.
Want more Christmas ideas? Check out some of my Christmas Pinterest Boards: Christmas Inspiration, Christmas DIY Ideas, and Christmas Home Decor.
Amaze Yourself.


So cute!
So very cute. You did really well with the eyes. 🙂 Simply adorable.
Super cute idea. Love how you used the garland stencil on the tree!
Cindy, it was so easy and made the tree pop. Merry Christmas.