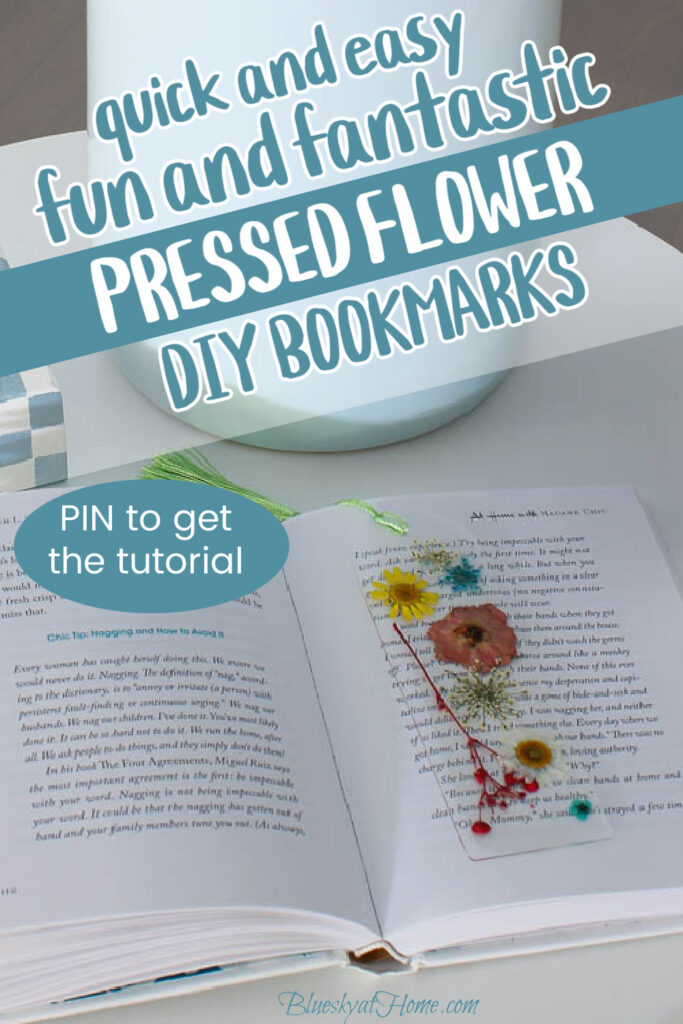
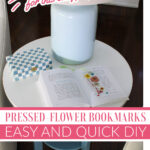
How to Make Pretty Bookmarks with Pressed Flowers
Are you a reader? If so, then you know that a pretty bookmark not only keeps your place but adds to the enjoyment of reading. Here is how to make pretty bookmarks with pressed flowers.
I am thrilled to share this enchanting and nature-inspired DIY project that will add a touch of elegance to your reading experience
These delightful bookmarks not only keep your place in your favorite books but also double as charming decorations for your reading nook or coffee table.
There’s something truly magical about the delicate petals of a flower preserved in all their glory within the pages of a book. As an avid reader and flower lover, I’m excited to incorporate the beauty of the garden into my reading time.
I was inspired to try this enchanting DIY idea by a few projects I saw on Pinterest. The result not only brings the vibrant colors of nature to your books but also adds a special touch to your reading experience.
With just a handful of materials, a sprinkle of creativity, and a dash of inspiration from Mother Nature herself, you can create bookmarks that are not only functional but also provide a sense of artistry and personalization.
Trust me, these pressed flower bookmarks with tassels will not only enhance your reading experience but also make thoughtful gifts for bookworm friends.
Let’s dive into this delightful crafting project. We’ll gather botanical treasures, preserve their splendor with Mod Podge, and add a personalized touch with tassels.
Get ready to experience the joy of creating something truly extraordinary – a unique blend of literature and nature’s lovely flower creations.

This is my second project using dried flowers, but my first one making bookmarks. Using dried pressed flowers to make a bookmark is so easy and quick. Book lovers and crafters alike will love this project.
It was just as easy as making my pressed flower vase.
Supplies to Make Pressed Flower Bookmarks
I had all these supplies on hand except for the dried flowers and the plastic bookmarks.
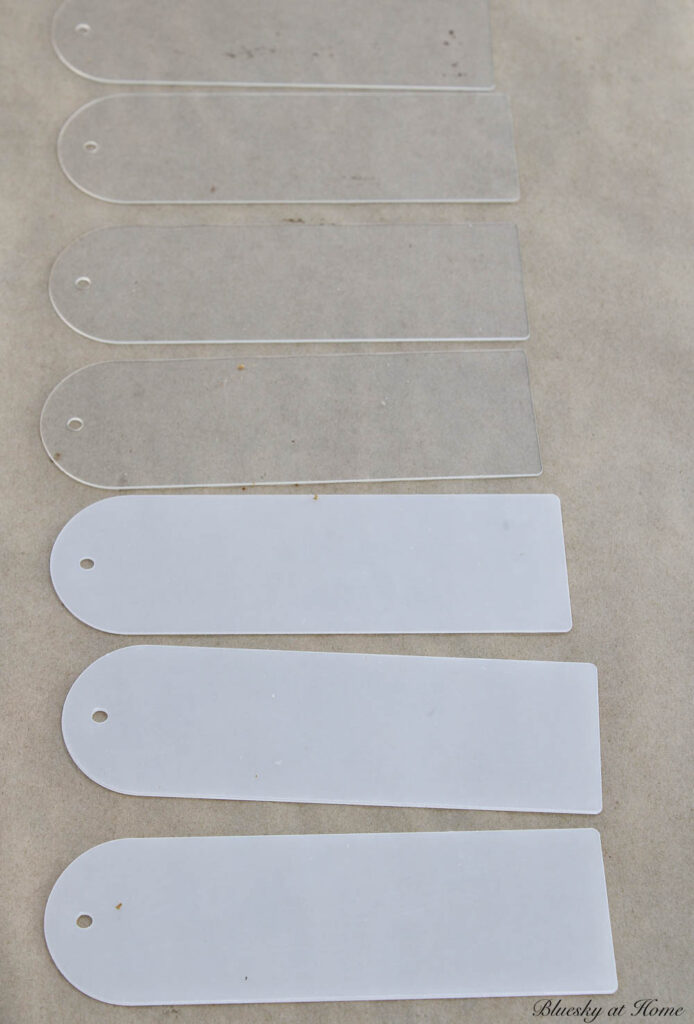
- Clear plastic bookmarks – I bought my plastic bookmarks online. They came in a package of 20. (You could also use a lamination machine if you have one.)
- Clear plastic bookmarks – I bought my plastic bookmarks online. They came in a package of 20. (You could also use a lamination machine if you have one.)
- These bookmarks are 5.9 inches X 1.97 inches. You can choose between four different shapes. I chose the bookmark shape with rounded corners at the top. These acrylic bookmarks also come with a hole at the top for the tassels.
- Assorted pressed flowers and leaves. I had some leftover dried pressed flowers from my flower vase project, but I had bought a larger package of pressed flowers and pressed leaves to have on hand for more projects.

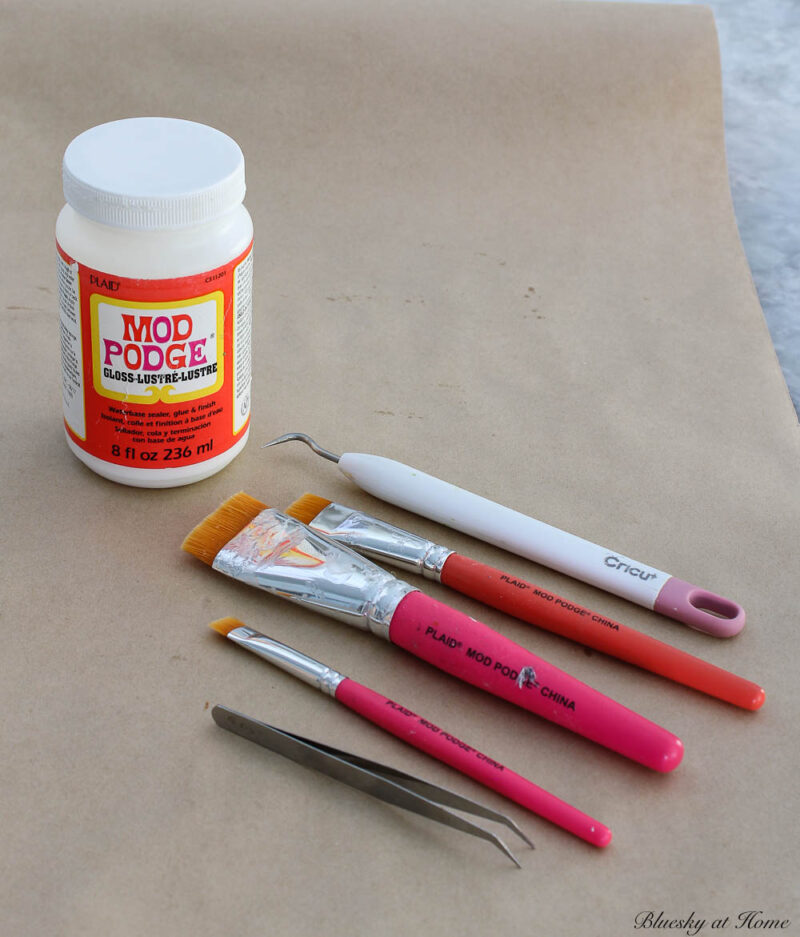
- Mod Podge (Matte or Glossy, your choice) – I used Gloss Mod Podge which I always have on hand.
- Small paintbrush – I used one of my smaller Mod Podge paint brushes.
- Scissors – it doesn’t hurt to have a small pair of sharp scissors on hand in case you have to trim any of the flowers
- Tweezers – Use to pick up the flowers without breaking any flower petals or leaves. My first package of pressed flowers came with a pair of tweezers.
- Hole puncher – optional
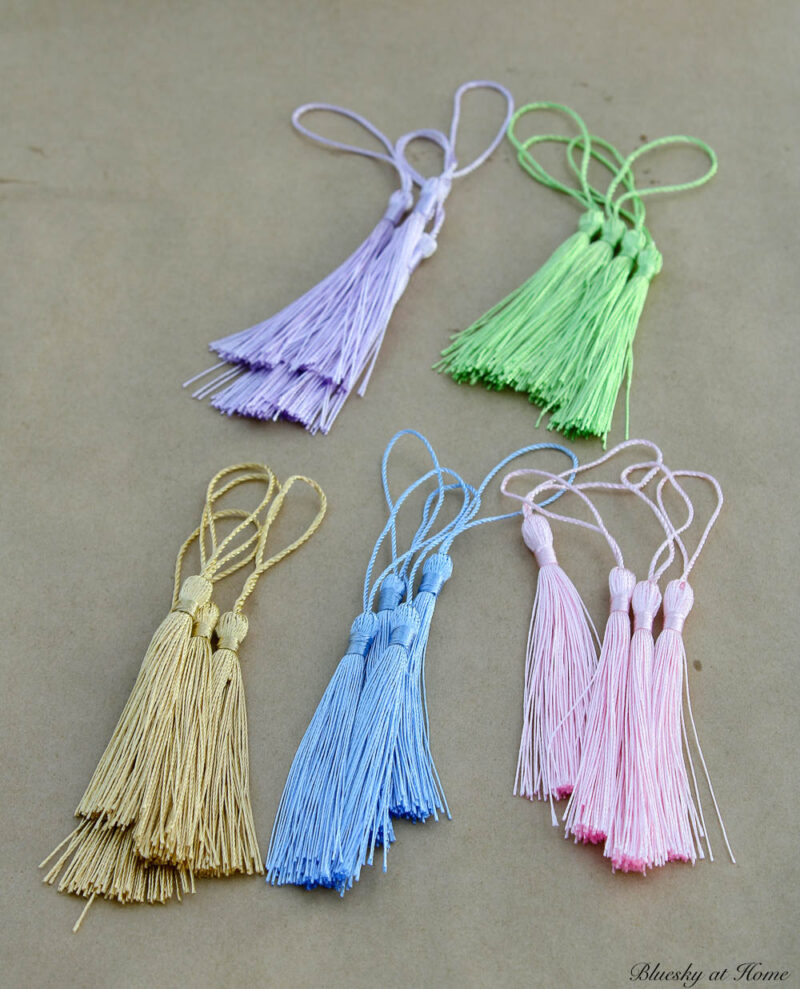
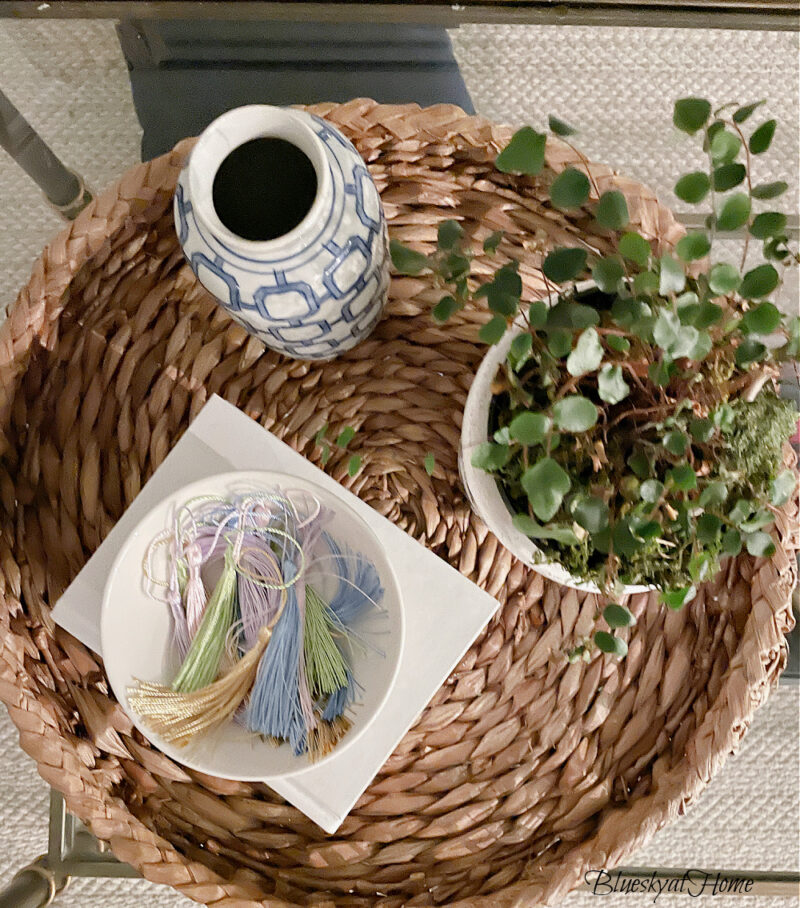
- Colorful tassels – the plastic bookmarks I ordered included a set of 20 tassels in five different colors.
Remember: If you choose, you can gather your own fresh flowers. You will need a flower press or heavy books to accomplish that. There are plenty of videos on YouTube that show you how to press flowers. It does take more time than ordering flowers online and having them delivered.
Create Beautiful Pressed-Flower Bookmarks – A Step-by-Step DIY Guide
You will see how easy this project is with these step-by-step instructions.
Step 1: Set Up Your Workspace and Gather Your Supplies
You will want to cover a flat surface in either craft paper, wax paper or parchment paper to keep your surface clean.
Step 2: Prepare the Plastic Bookmarks
My bookmarks came with a film on both sides. Remove the film from both sides of the bookmarks. I used my Cricut weeder to “scrape” back the film on the edge of the bookmark. Once you pick up a corner, the film easily peels back.
Step 3: Design Your Bookmark
Select the dried pressed flowers you want to use by color and size. Use the tweezers to arrange them on your plastic bookmarks. Get creative and experiment with different compositions – the possibilities are endless!
I didn’t have a specific design in mind when I started. A random combination of color and size on the plastic bookmarks worked just fine. I used as many flowers to fill the bookmarks as needed with some open space in between the flowers.
TIP: Take a picture of the bookmarks so you can remember how to recreate the arrangement.
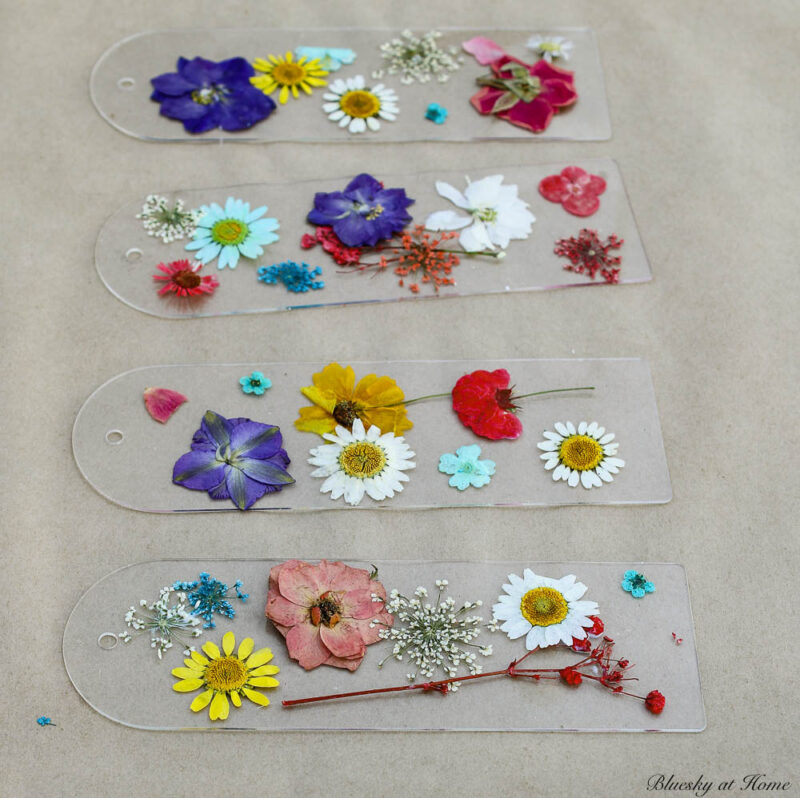
Once you’re satisfied with your design, you are ready to begin gluing the flowers to the bookmarks.
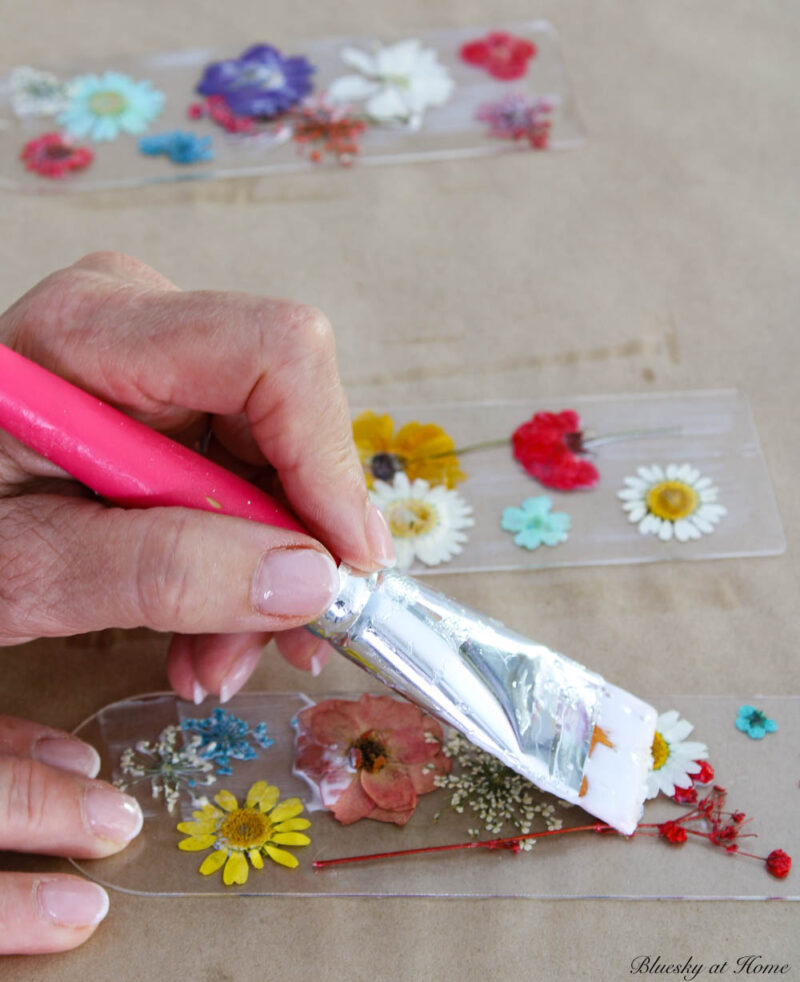
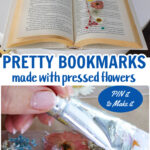
Step 4: Glue the Flowers to the Bookmark with Mod Podge
Now it’s time to attach your pressed flowers to the plastic bookmarks. I poured a small amount of Mod Podge into a small plastic container.
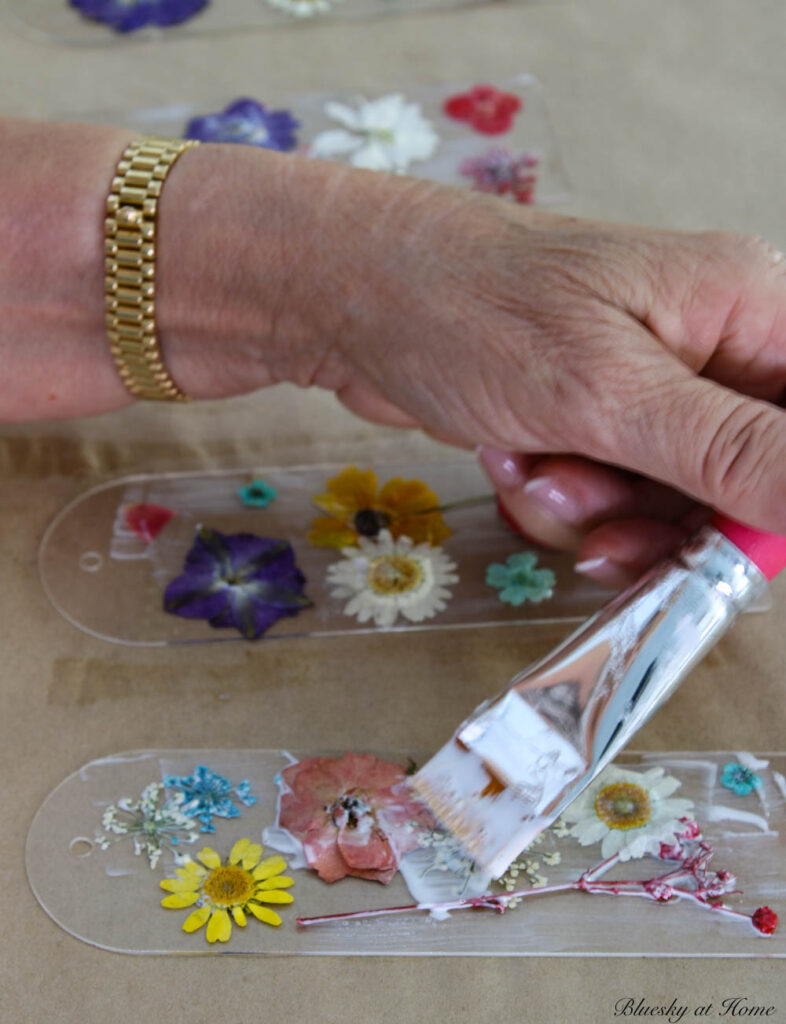
Using your paintbrush, carefully coat the surface of the bookmark with a little bit of Mod Podge in small sections. The Mod Podge will act as a sealant, protecting the flowers and giving your bookmark a glossy or matte finish, depending on your preference. Allow it to dry completely.
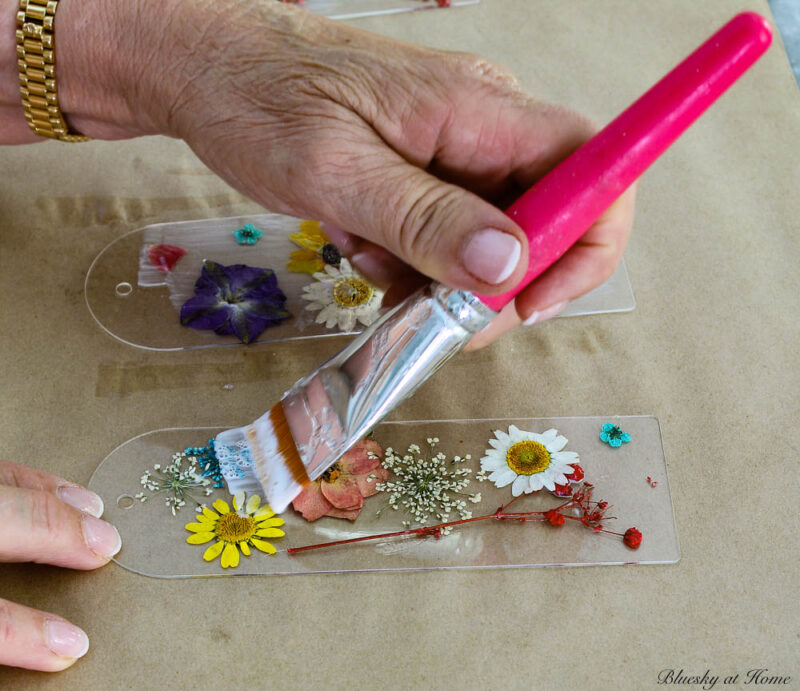
Step 5: Brush a thin film of Mod Podge over the top of the bookmark and flowers. This step is important to seal and protect your flowers. Allow to completely dry. There should be no tackiness to the bookmark.
Step 5: Add a Personalized Touch with Tassels
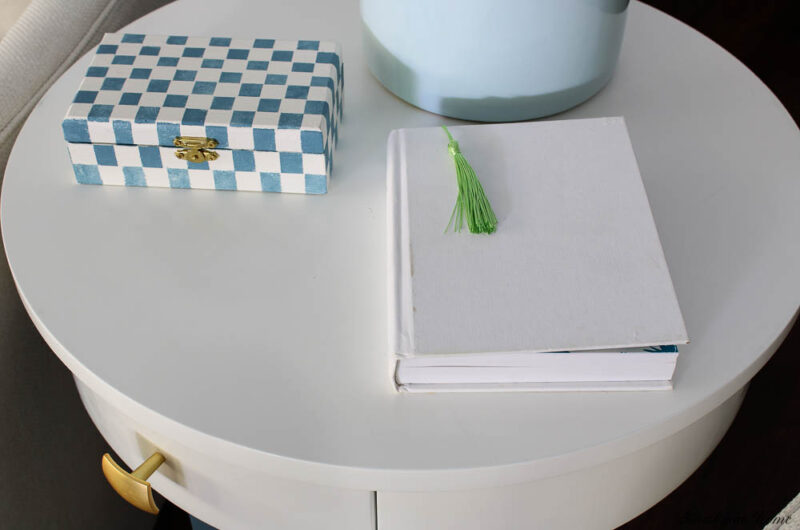
To make your bookmark truly stand out, it’s time to attach a pretty tassel. My pressed flowers came with five colors of tassels: green, blue, pink, gold and lavender.
Pick a tassel that complements the colors of your pressed flowers. All you have to do is push the loop through the hole and loop the tassel through it.
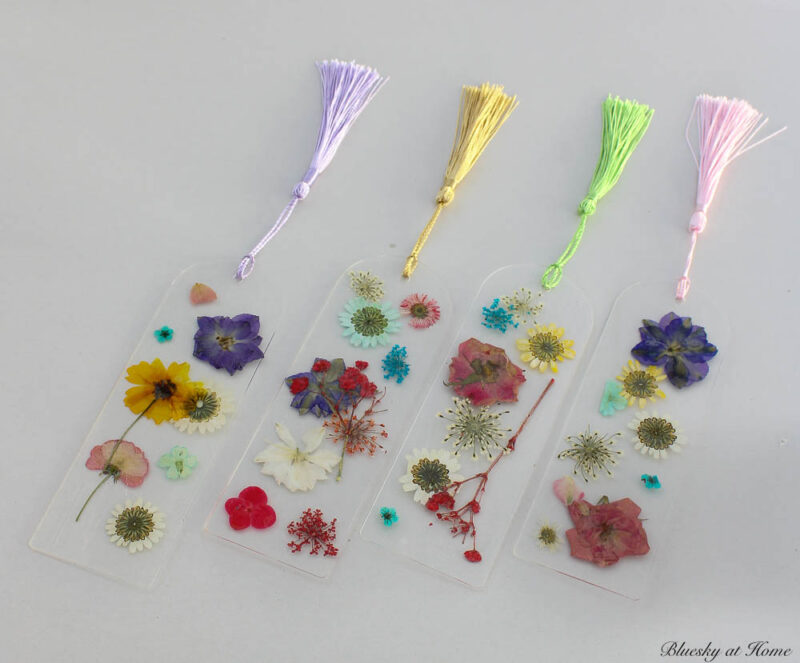
If you don’t have tassels, you could use a thin piece of ribbon – the 1/16th-inch type. I would put a small knot at the end of the ribbon to keep it from fraying.
Step 6: Showcase Your Handiwork
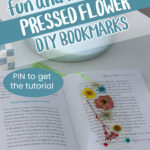
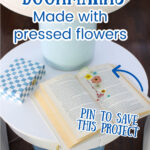
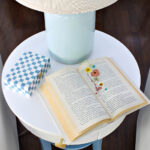
Now that your pressed flower bookmarks with tassels are ready, it’s time to show them off. Slip them into your current book.
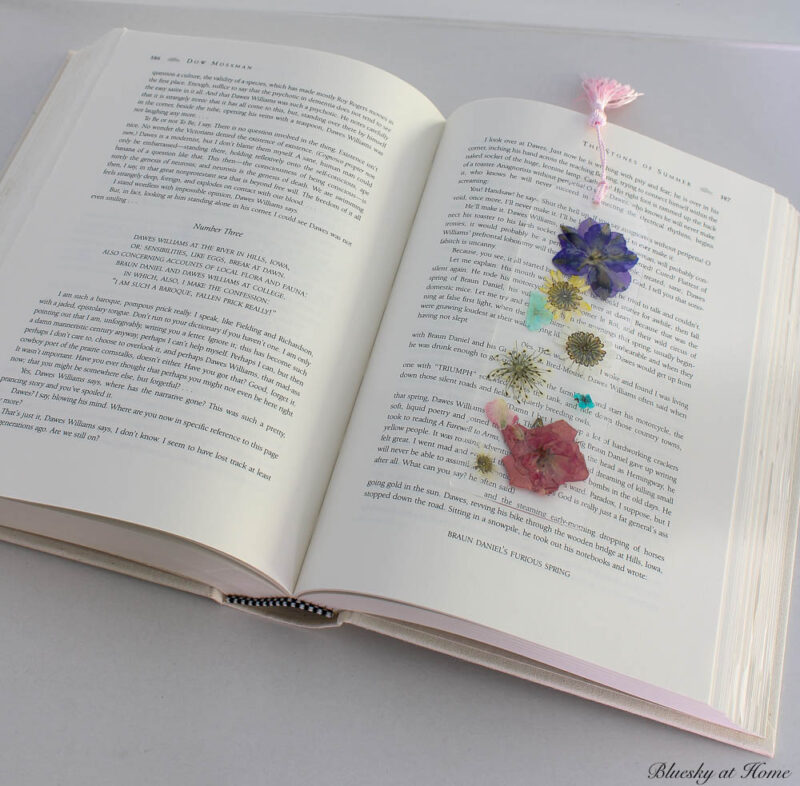
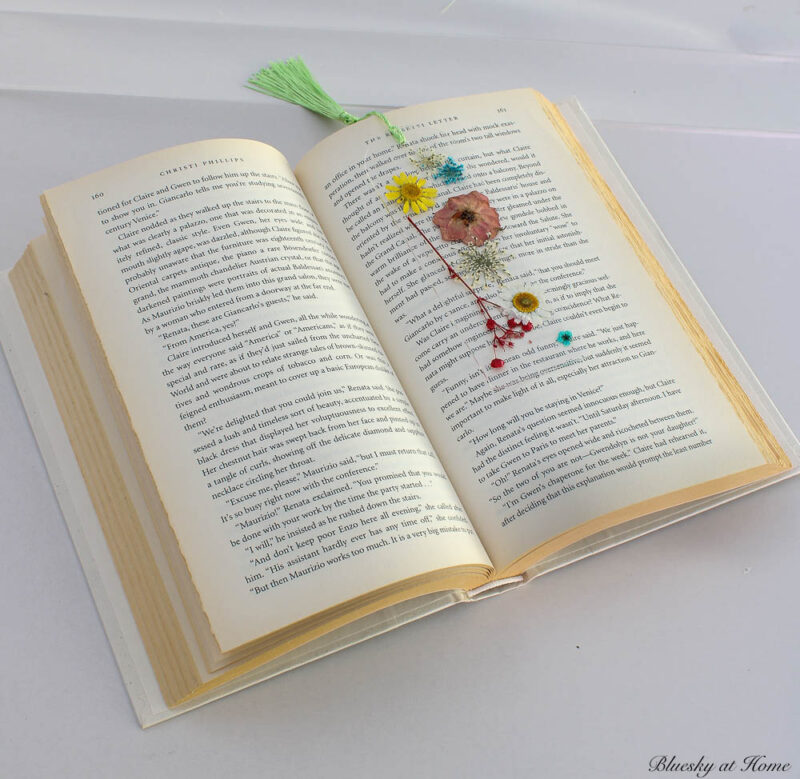
You could even leave your book open on a table to show them off.
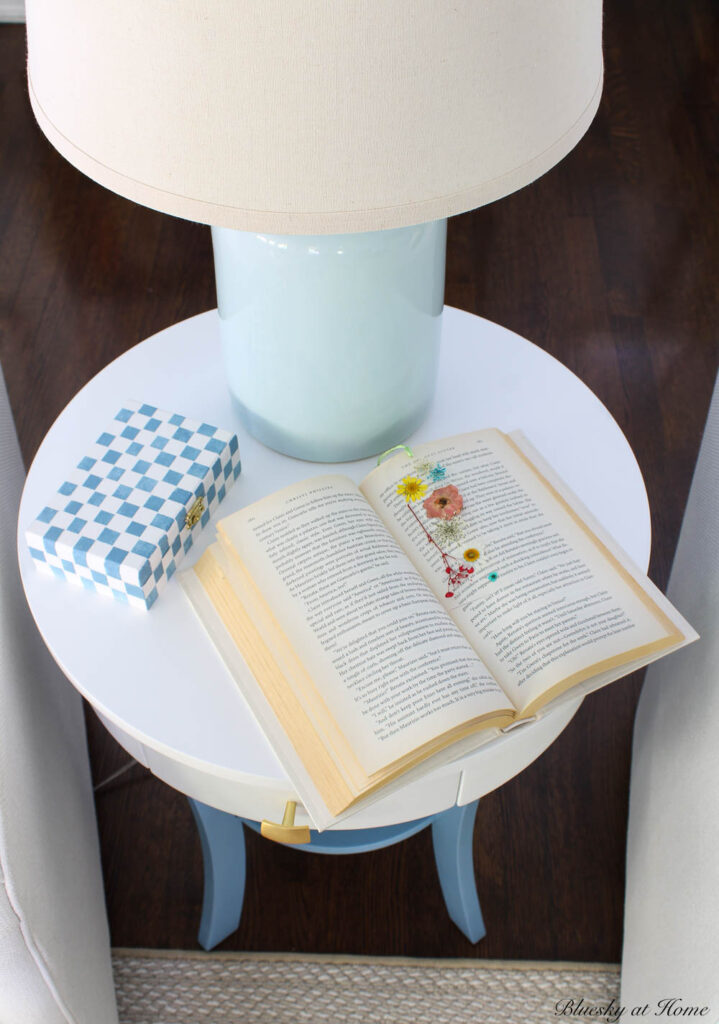
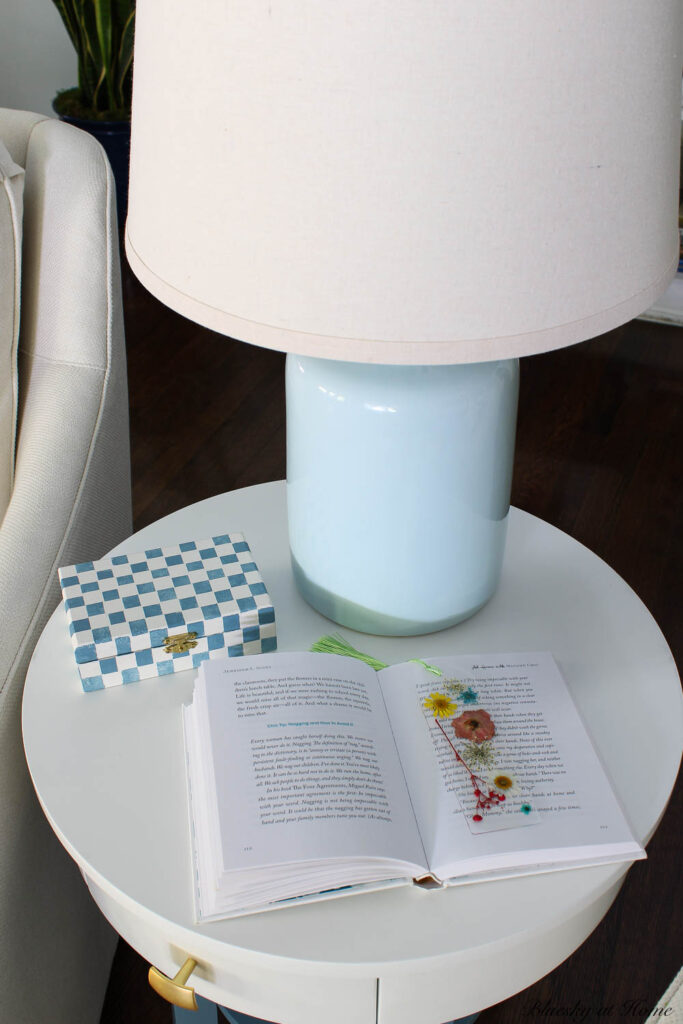
Even with just the tassel showing, the bookmark provides whimsy and color.
To display their beauty when not in use, arrange a few on your coffee table next to a stack of books – a perfect conversation starter. A pile of the extra tassels would look pretty in a small bowl.
These pressed flower bookmarks would make a great homemade gift or favors.
- Hosting your book club? Make a bookmark for every member.
- They would make great teacher gifts.
- Gift for all your friends who are book lovers.
- Favors for parties of all kinds: showers, birthday parties, etc.
- Encourage kids to read with flower bookmarks – at least the girls!
Conclusion: Make these Bookmarks Now


Crafting these stunning pressed flower bookmarks with tassels has been an absolute delight. I hope you enjoyed this DIY project as much as I did. They remind us of the beauty of nature every time we open a book.
Remember, you can always experiment with different flower combinations, colors, and tassel styles to suit your unique taste.
So, grab your supplies, get creative, and embark on a journey of crafting wonder!
I know you will love it. My granddaughters are arriving to visit today and I plan to let them make some.
Here are some more DIY projects you will like:

- Flea Market Vase with Pressed Flowers
- How to Make DIY Luggage Tags
- Easy DIY Summer Front Door Projects
- How to Decorate a Wood Box with Paint and Tape
I hope that you loved this pressed flower bookmark project. It was easy, quick, and inexpensive. Be sure to PIN it to save the directions and the inspiration.
Please visit my creative friends and see what they have created. The complete list is below. Next up is Ann of Apple Street Cottage.


I am really enjoying your pressed flower projects. They have been so simple and elegant. Thanks for joining the hop this month.
Gorgeous! I love your idea for giving them out at a book club. I bet they would be a big hit!
These are so pretty, Carol! They would be great for book clubs. Pinned! It’s great hopping with you!
Wonderful project idea, Carol.
Carol, these bookmarks are so pretty! I have to make some of these for friends. Thanks for sharing this DIY with us!
This is super cute and such a great gift idea. pinned
These are soooo pretty Carol, they would make wonderful gifts or to give with a new book! I bet your granddaughters will have a lot of fun making them! Happy crafting!
Great idea for a book mark. Looks amazing Carol.
Very pretty, Carol. As a reader and someone who loves flowers, I can say this is the perfect gift for a book-lover/gardener.
Your bookmarks are quite adorable and pretty, Carol! I love that they are clear and transparent. They certainly highlight the beautiful colors and shapes of the flowers!
How fun are these? I love everything about these from the beautiful flowers to the colorful tassels. I will be making these for sure. Thanks for sharing!