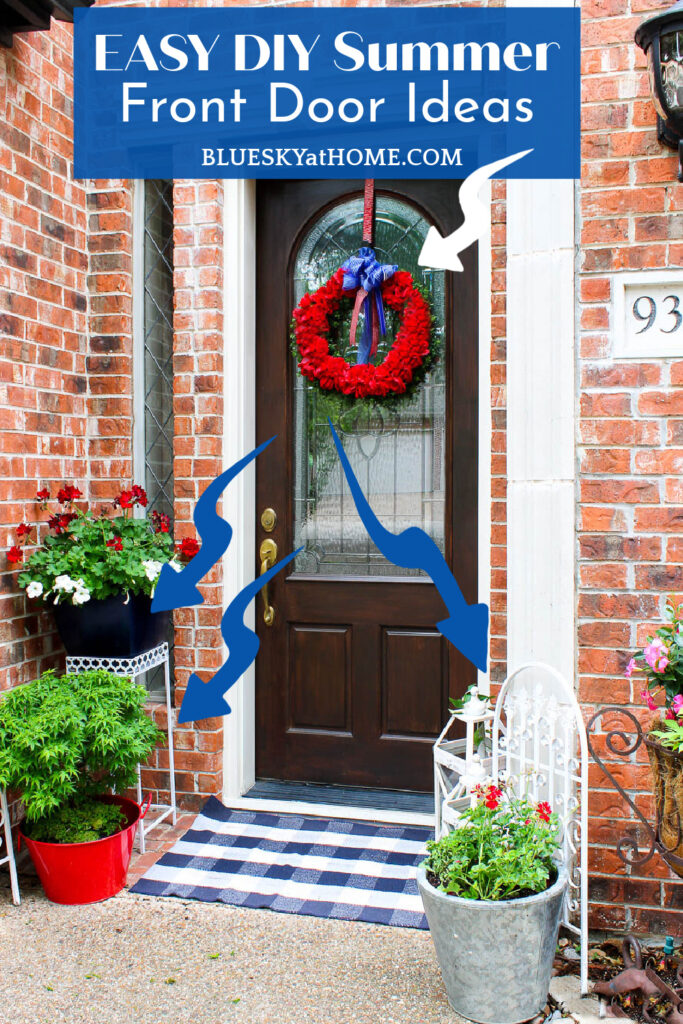
Easy DIY Summer Front Door Ideas
Do you notice a pretty front door? Of course! I have a couple of easy DIY summer door ideas to help you give your front door a pretty vibe.
Our front doors are central to creating a welcoming focus for guests. Just a few DIY summer front door ideas can give your front door area a boost.
When possible, I like to use things I already have and that can be reused for accessories and decorations. Whether for indoors or outdoors, creating DIY projects gives your home a personal feel.
It’s really easy to decorate your front door with projects you make yourself. I just did that for our summer front door.
I shared our summer front door last week. Now I want to share the easy DIY summer front door projects I made for our front area.

Red, White and Blue Front Door Wreath
Wreaths are one of the best ways to add a focal point to your front door. The possibilities are endless
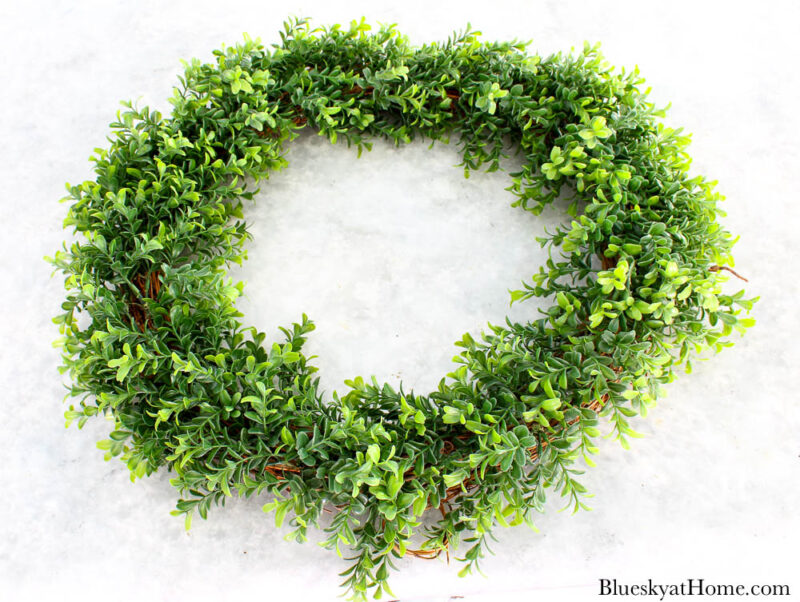
To make this front door wreath, I started with a plain boxwood wreath. This type of wreath lent itself to our Kentucky Derby party theme but would last right through Memorial Day.
This is one of the easiest wreaths to make. It requires no glue and no wire. Just a wreath and faux flowers.
Boxwood wreaths are easy to find. I had this one for several years. It’s been used multiple times.
Add Your Flowers
Decide on the type of flower and color that you want for your summer front door wreath. Because my theme is red, white, and blue and it was for our Kentucky Derby party, I chose faux red roses.
I had some in my Valentine’s stash but needed more so I made a trip to Dollar Tree for faux red roses and bought 10 picks.
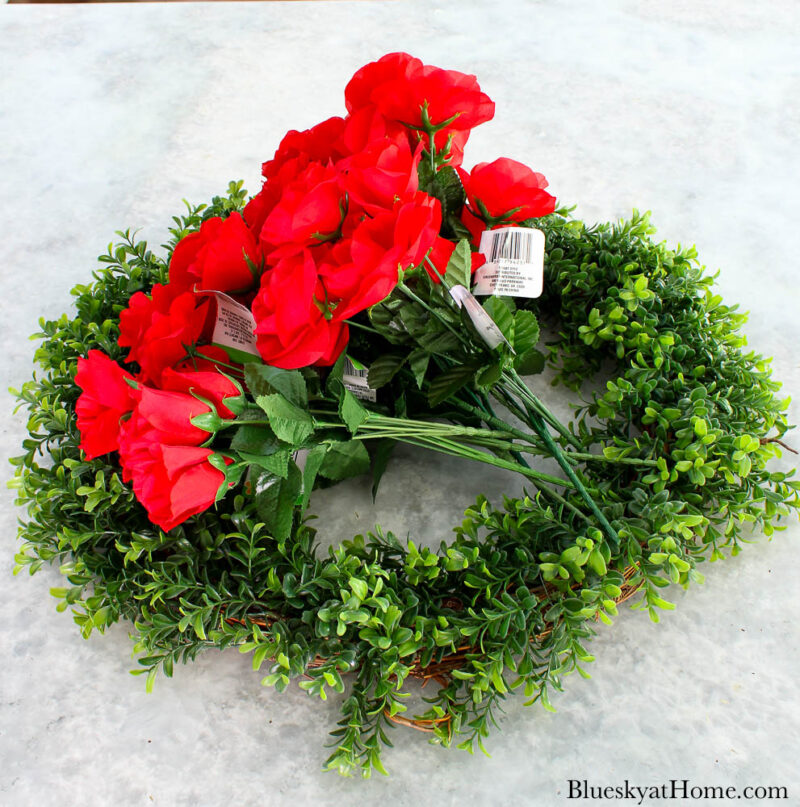
Using wire snips, I cut the roses off the branches with about 5-inch stems.
Then I stuck the stems into the wreath. I tried to keep the roses very close together.
There were about 6 roses on each branch, for a total of about 60 flowers, and I used all of them.
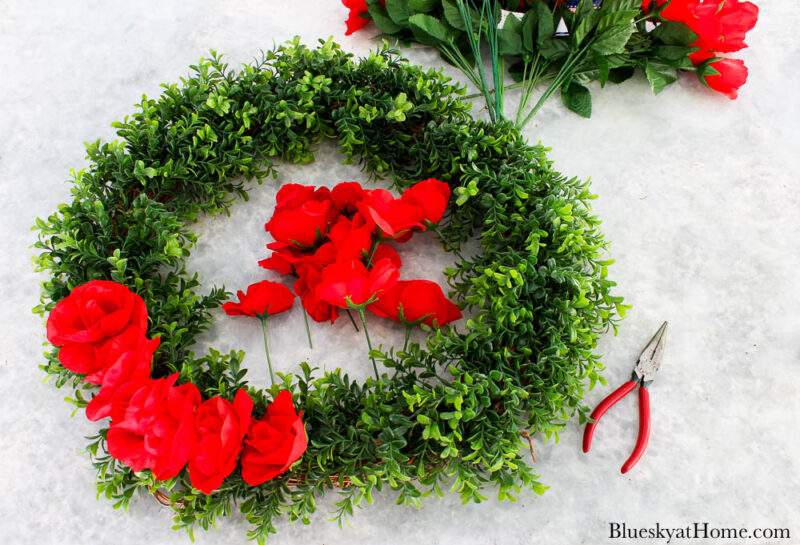
Continue all around the wreath, leaving about a 4-inch width where your bow will go. Check where the top of the wreath is and if there is already a hanger.
Check that the roses are even all around the wreath, adding more if needed. If I had a couple more picks, I would have added more roses.

Make Your Bow
I needed more wire ribbon in red and blue. I made a trip to Joann and found several possibilities to use. The nice thing about red and blue is that there are so many occasions to use these colors.
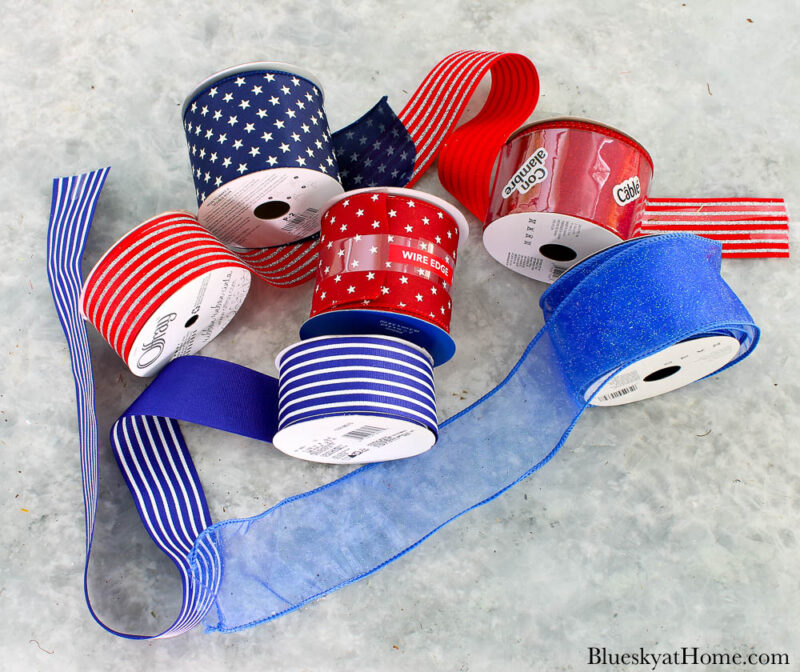
I actually used four different ribbons. I used one piece to wrap around the door hanger.
I will admit that I am not the best bow maker, but I try.
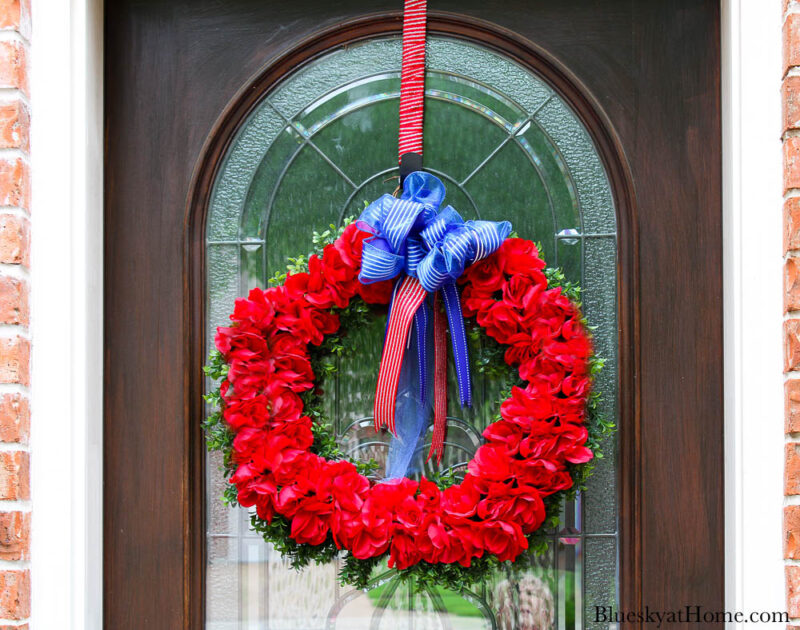
This wreath took about 30 minutes to make. I said it was easy – and fast.
Here is another wreath project you will like: Blue and White Tulip and Grapevine Wreath
Flower Pot and and Stand
For my next easy DIY summer front door idea, I wanted a planter for real flowers. We have a spot to the left of our front door that needs something with height.
I also wanted to continue the red, white and blue theme.
A few years ago, I bought a metal stand at a garage sale. It was about $5 so I had to have it even though it was mustard yellow.
The bottom of the stand is wood.
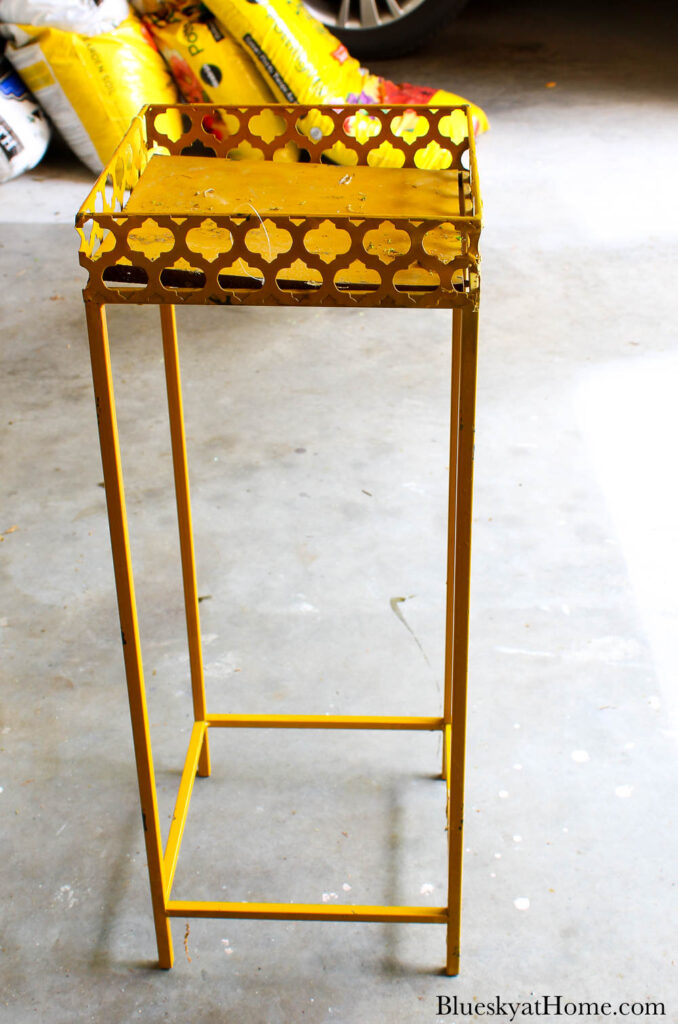
After sitting in our garage for a few years, I now knew how I wanted to use it.
First, I set up my small Spray Shelter. The metal stand fit snugly inside.
TIP: I turned it upside down. That way you always end with the painted top at the top of your project.
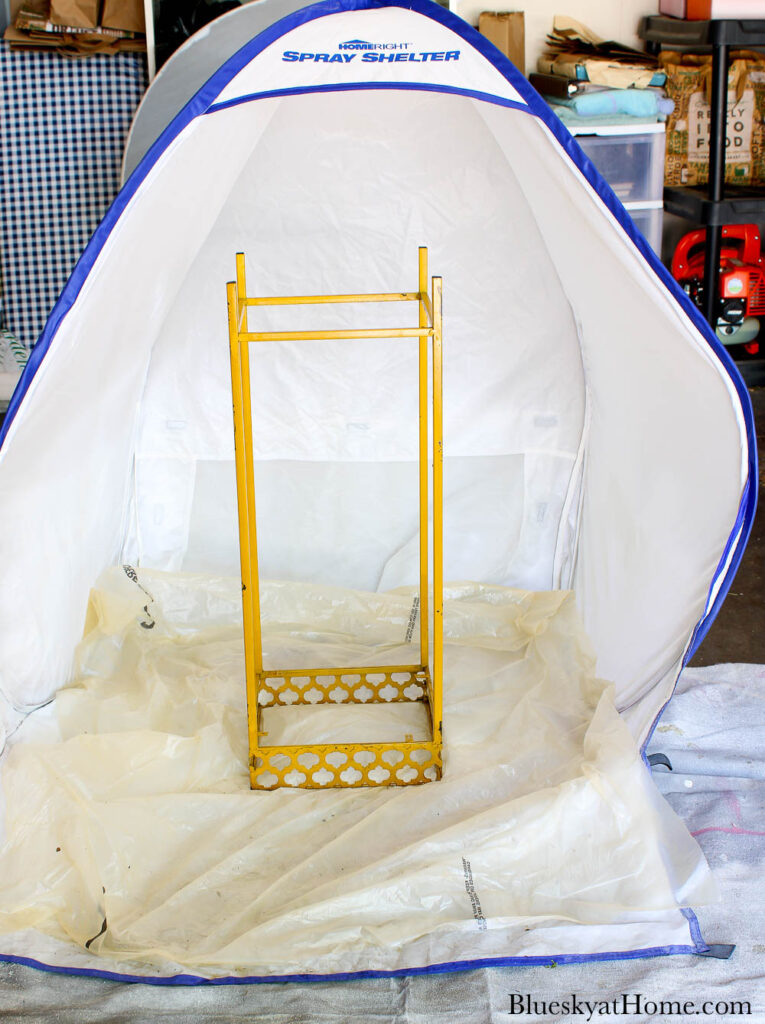
I attached my Rust-Oleum Grip to a can of Rust-
Oleum Clean Metal Primer. I can’t imagine using a can of spray paint without it.

After applying the primer, I applied two coats of Rust-Oleum Semi~Gloss Protective Enamel.
After two coats of primer and paint, I turned the stand right side up and repeat the process.
NOTE: Remember to spray paint in light coats. Move your spray can slowly across your piece from side to side or top to bottom.
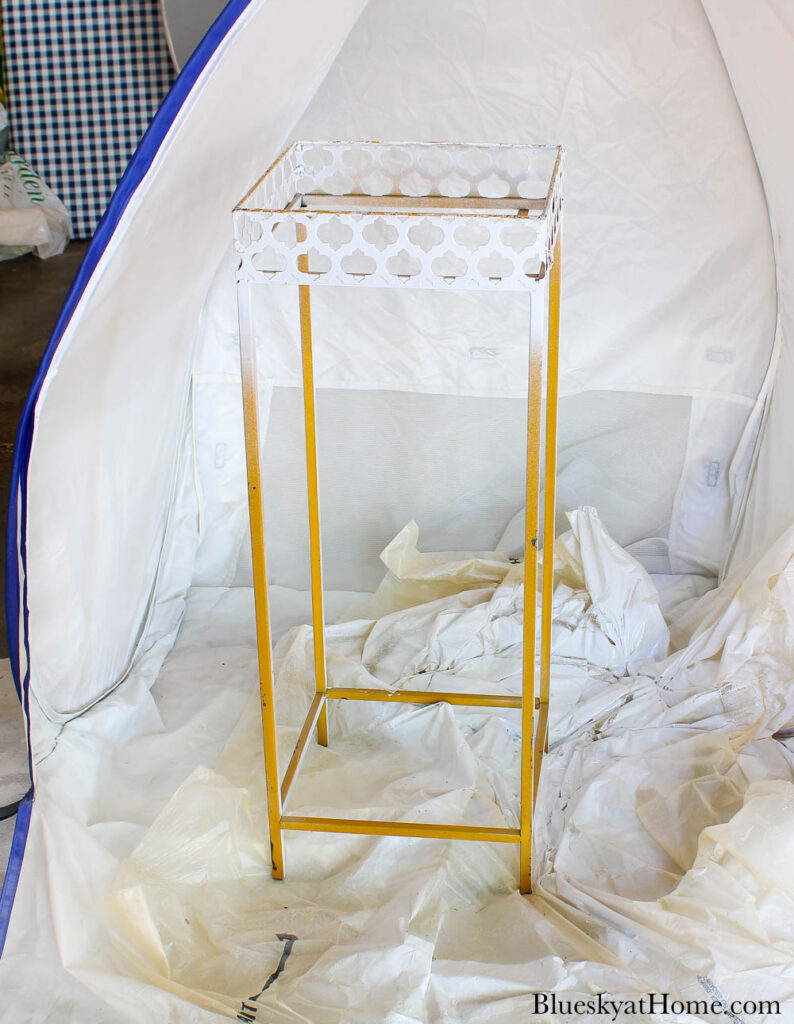
Lastly, I painted the wood base. Even though it is wood, I used the same spray paint.

I allowed the metal stand to thoroughly dry between coats.
Painting a Ceramic Planter
I needed a planter for my red flowers. The base had to fit inside the metal stand.
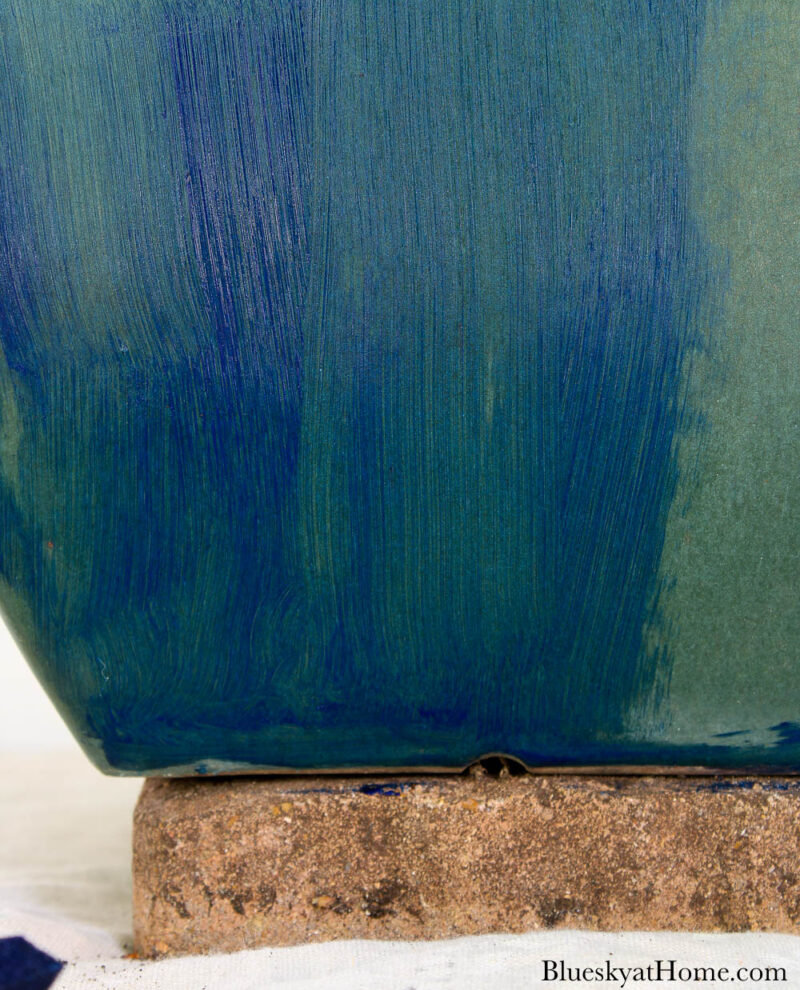
As it turns out, I had a ceramic pot that was the perfect size and shape. Unfortunately, it was the wrong color. I wanted a blue planter.
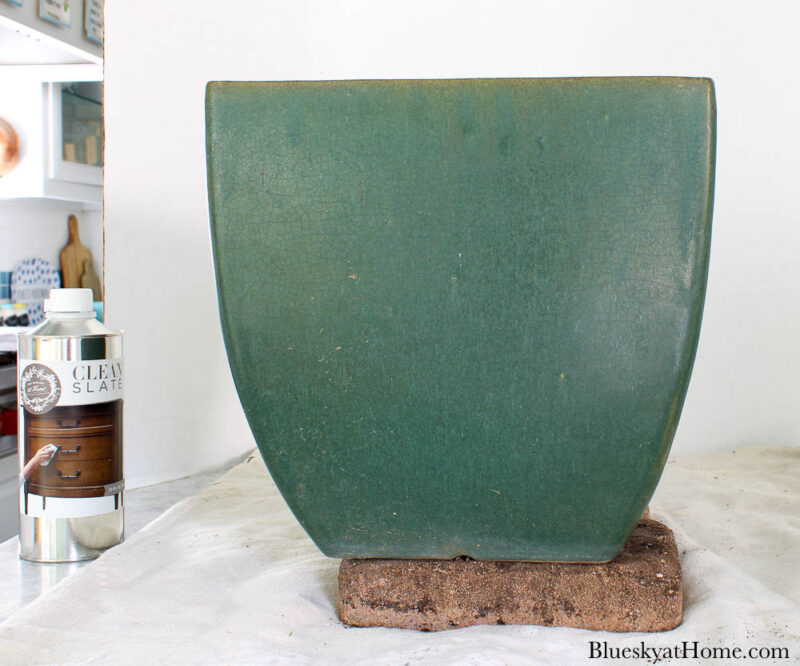
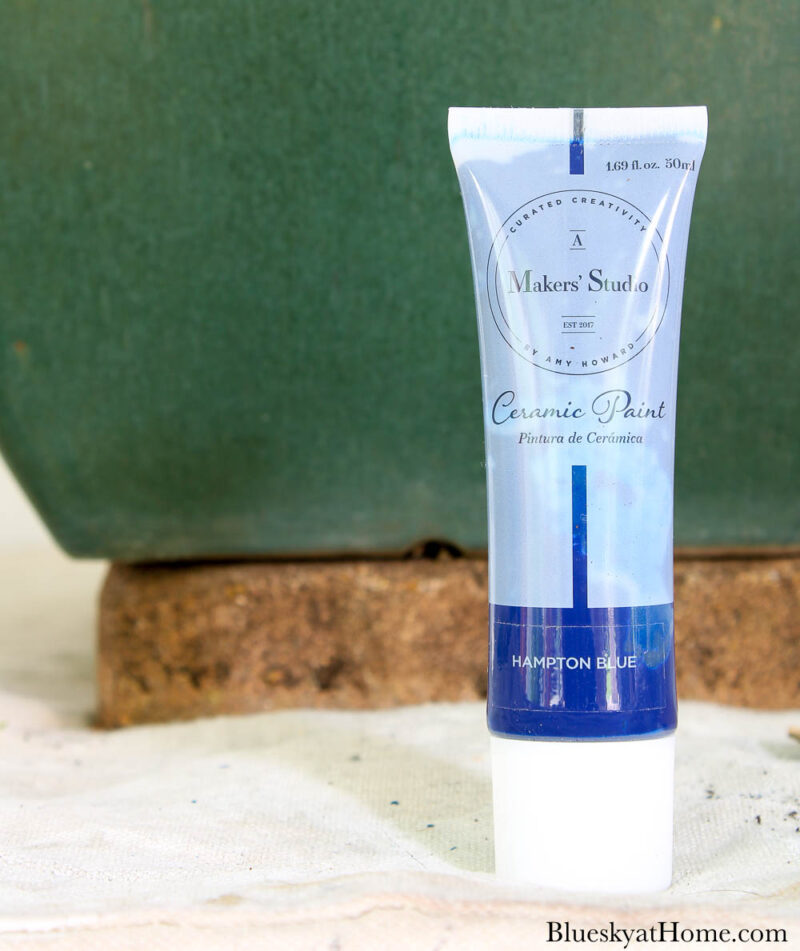
What to do? Paint the planter with ceramic paint.
I knew the perfect ceramic paint – No~Bake Ceramic Paint from A Makers’ Studio. I ordered a tube of Hampton Blue, a deep blue.
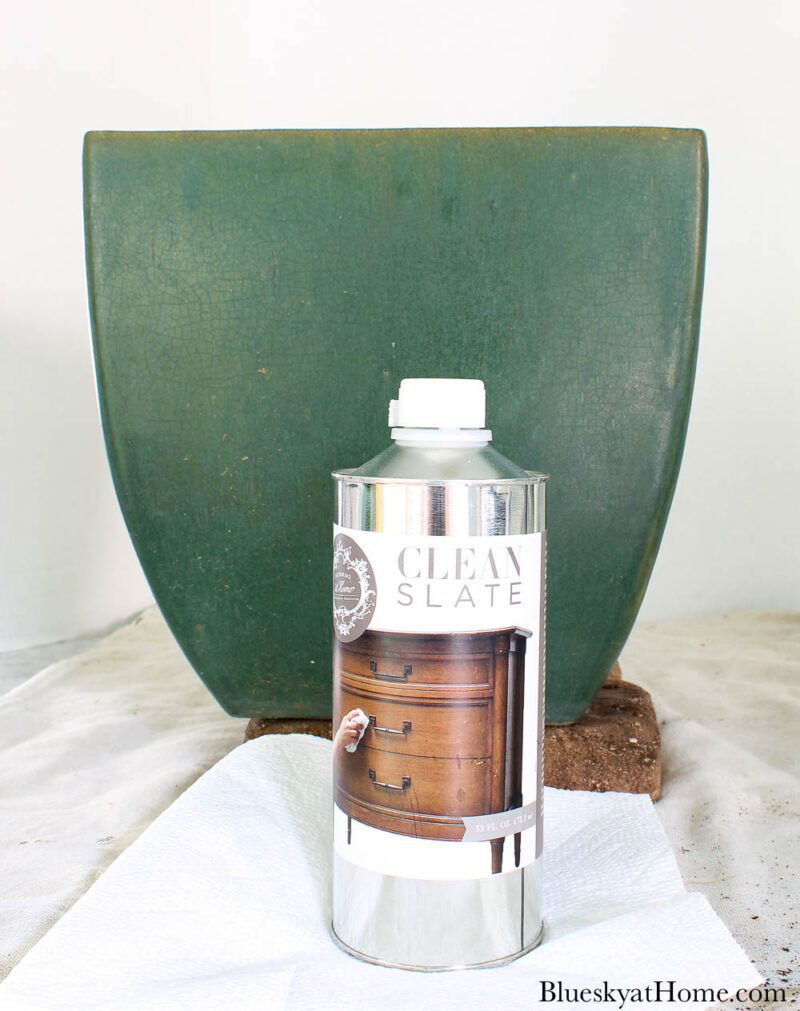
First, I cleaned the ceramic planter with Clean Slate and a rag to remove dirt and grime. This furniture cleaner makes cleaning up before painting a breeze.
I squeezed out the Ceramic Paint into a plastic container.
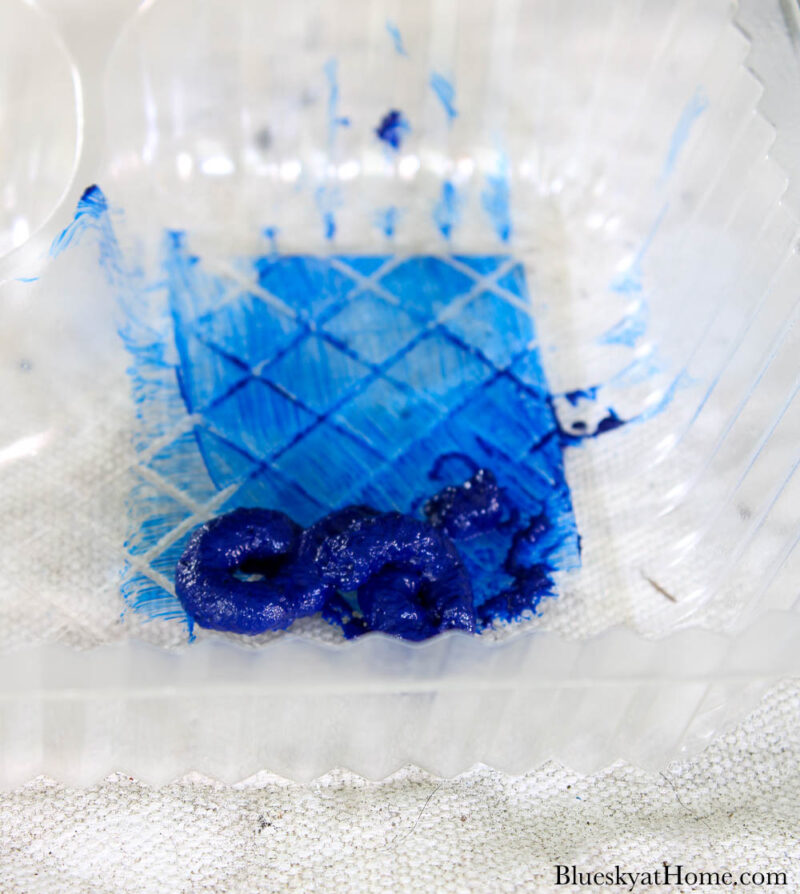
Using a large sponge brush, I applied two coats of the ceramic paint, allowing the paint to dry for about 30 minutes between coats. During that time, I would go outside and spray paint the metal stand.

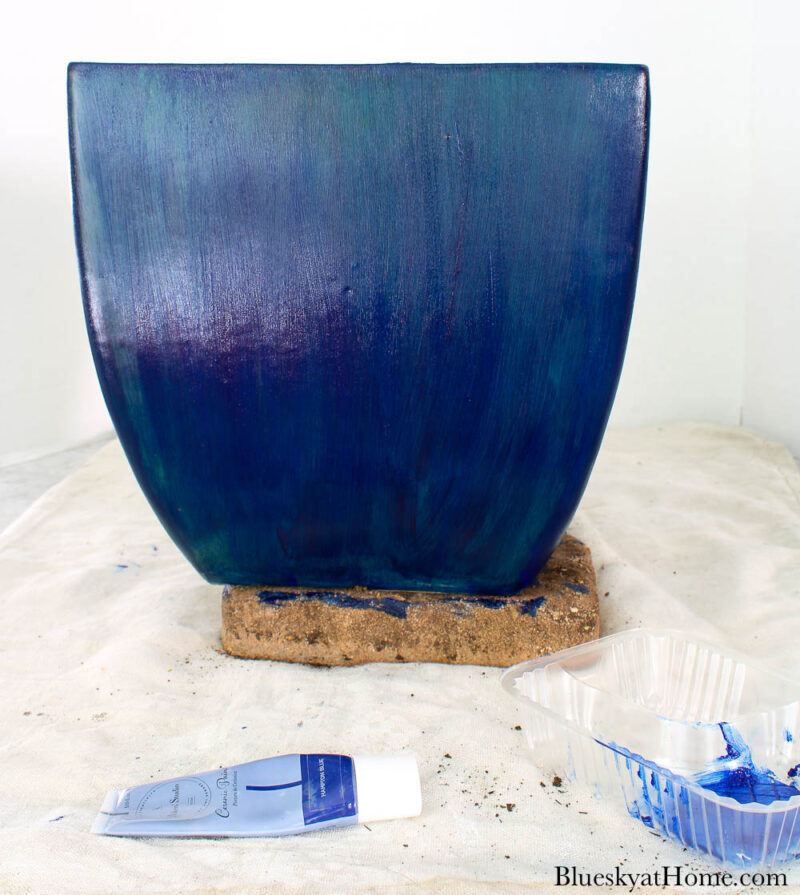
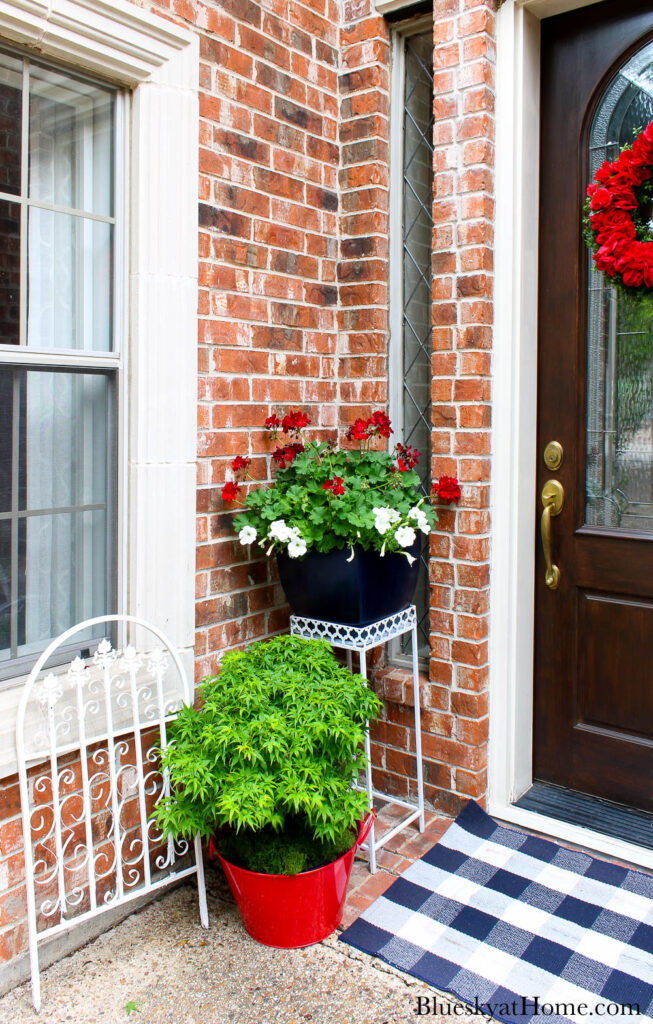
Here is the finished ceramic planter and metal stand. I love the classic blue and white look and the height of the stand.
Blue and white is much better than green and mustard yellow, don’t you think?

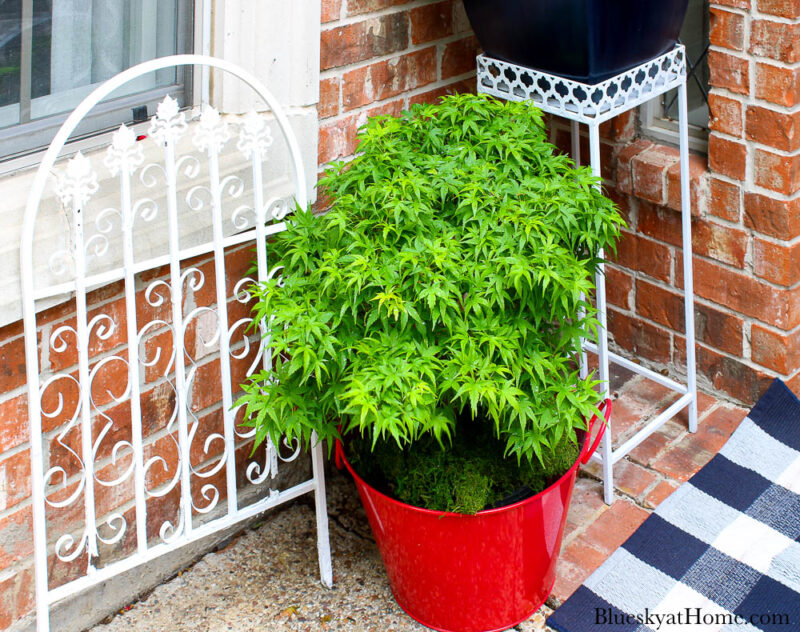
I had my heart set on red geraniums. They won’t last in this west-facing spot through our hot Texas summer. For now, they are so pretty mixed with white petunias.
For more greenery and a pop of red, I placed a mini-Japanese maple (which will be planted in the ground) in a large red bucket in front of the white metal stand. (We actually use the red bucket as an ice bucket.)
I also added my blue and white plaid mat at the front door. I love that finishing touch.
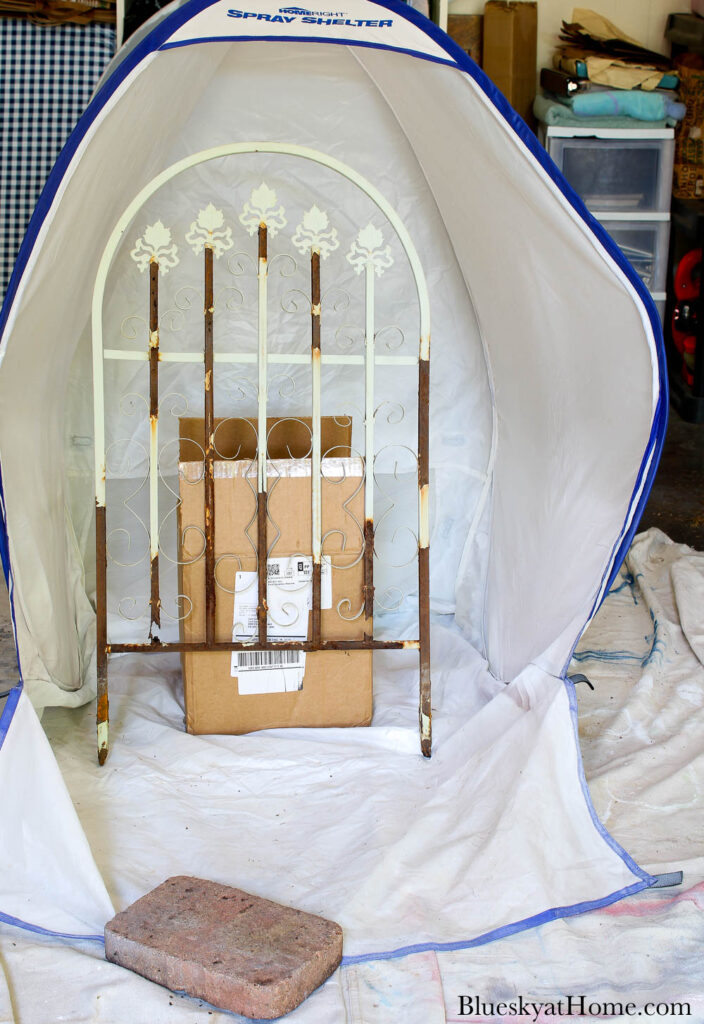
Painting Garden Fencing
See the garden fencing in the picture above? I bought four of them twenty years ago in Salado, Texas. They have gotten chippier and more rusted over the years.
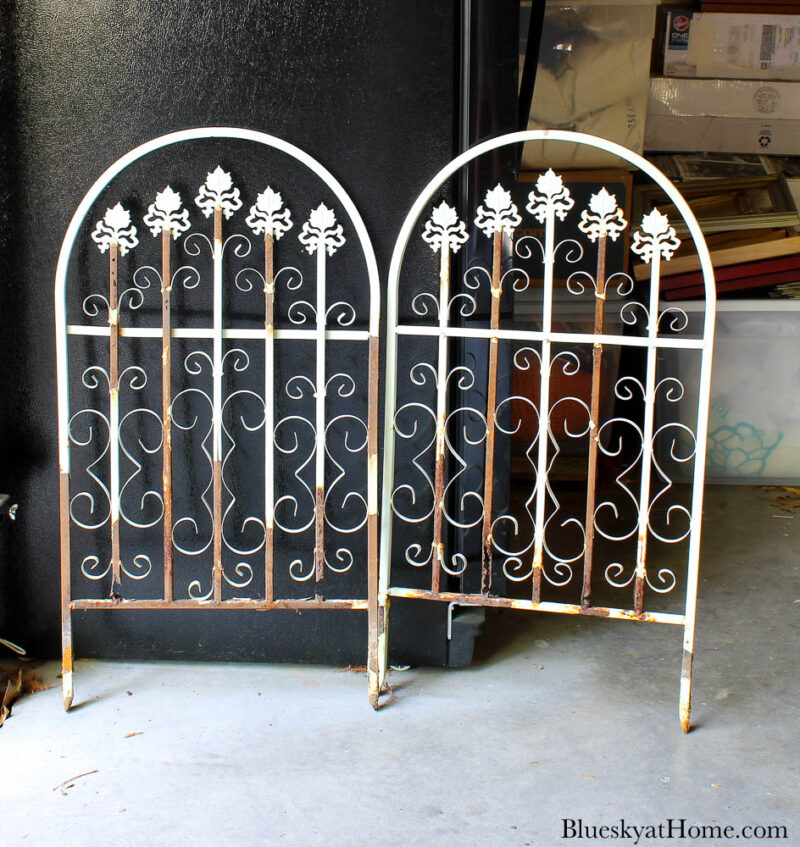
I thought it was time for an update.
First, I used a very coarse sandpaper block to knock off the chippy paint and smooth the metal.
Then I put the garden fencing in the spray shelter tent. I had to buy more Rust~Oleum Primer and Metal Paint. Each fence piece received two coats of Primer and two of Protective Enamel Paint.
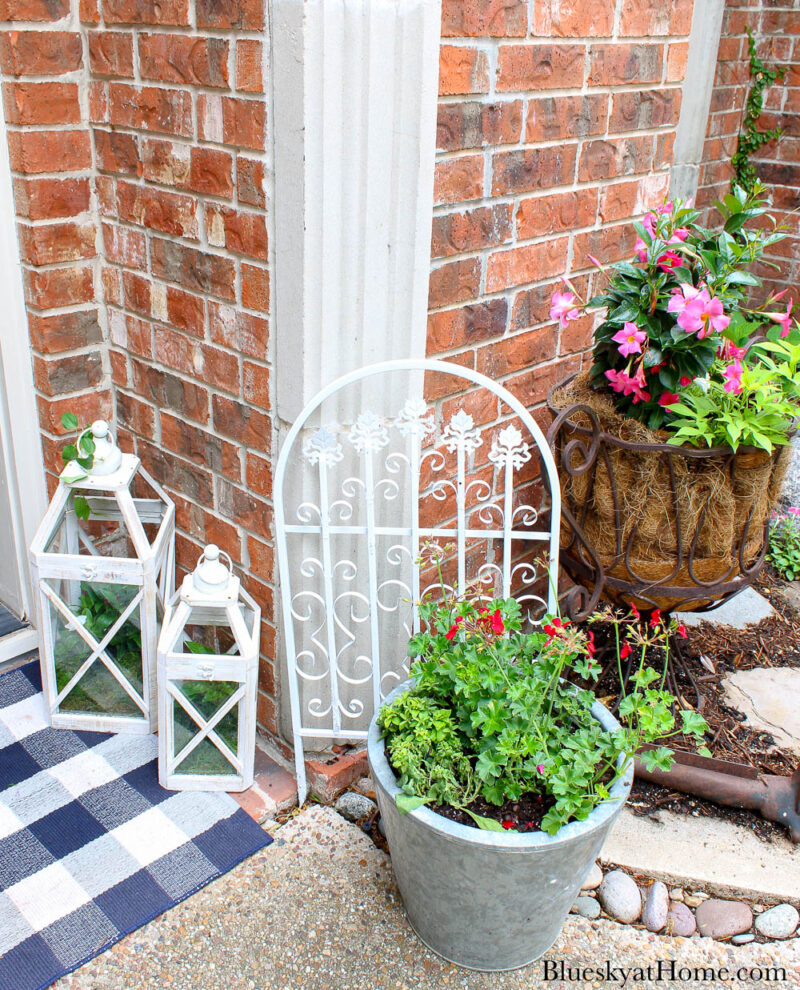
I set one section of garden fencing on each side of the front door.
On this side of the front door, I also added my set of two wood lanterns from Wayfair.
As a final touch, I filled one of our galvanized pails with more geraniums for more color and to balance the front door setting.
So, these are my easy DIY summer front door ideas. These projects are not only easy, they didn’t take long and they were very inexpensive to make.
Products You Need for These Projects


Want more great home decor and DIY ideas? Join the Bluesky at Home community and start with this PRINTABLE: 11 Ways to Style Your Coffee Table. Check out all my PRINTABLES here.
Use these ideas to inspire you to reuse your own possessions. I hope you’ll PIN these ideas to remember them.


All your makeover items for your front porch decor turned out great! I especially like that your projects were easy enough that anyone can do!
Very pretty! Great upcycles. Being bad (and cheap, oops, frugal!) I stuck my 3 last year’s red geranium bushes into a big pot of dirt and planted it near my front walkway! Next year I will brighten them up with some red spray paint, I think! Last year they were “planted” in 3 new GW pots–red, royal blue and sky blue ceramic pots on my steps. They were a Joanne’s BI, G2F. I still have a pot of red silk tulips in a pot in the old chair with busted out reed seat in another part of the yard–I still have tulips blooming in Maine! Not willing to fight mosquitoes, black flies and ticks (already had one bite) to do yardwork! Hope your trip is funtastic; take lots of pictures to show us!
AMAZING ideas, Carol!! They all turned out so beautifully. I’m amazed by your creativity!!
Love what you have done with your front porch! It’s beautiful! Thanks for giving us all the instructions for painting the planters and the iron stand,
Absolutely beautiful and creative!