DIY Christmas Wood Signs to Make
Let’s get a head start with some cute Christmas decorations. Love little handmade signs? How about some DIY Christmas wood signs to make now?
It’s never too early to start thinking about Christmas decorations. I have some cute DIY Christmas wood signs that you can make now and easily store until it’s time to decorate.
Signs are perfect for any home decor style at Christmas. You can use them individually, style them in a gallery wall, or set them on a table or the mantel.

It seems that everyone wants to plan early for Christmas this year. If you need some ideas for Christmas signs to make, you will like this project.
DIY Wood Signs to Make for Christmas
These wood signs would not only make pretty holiday decorations for your home. They would also make great gifts for friends and family.
Supplies for Your Christmas Signs
These sweet Christmas signs use easy-to-obtain supplies. Using stencils and ChalkArt to make signage is so fun for those of us who are not artistic.
- small wood sign with frame 8 X 8 inches
- Rescue Restore Paint in Blessed
- Rescue Restore Paint in Little Black Dress
- Christmas stencils from A Makers’ Studio (there are brand new stencils available)
- ChalkArt in Preaching to the Choir (back)
- small chip brush
- painter’s tape
- plastic scraper
Painting your Signs
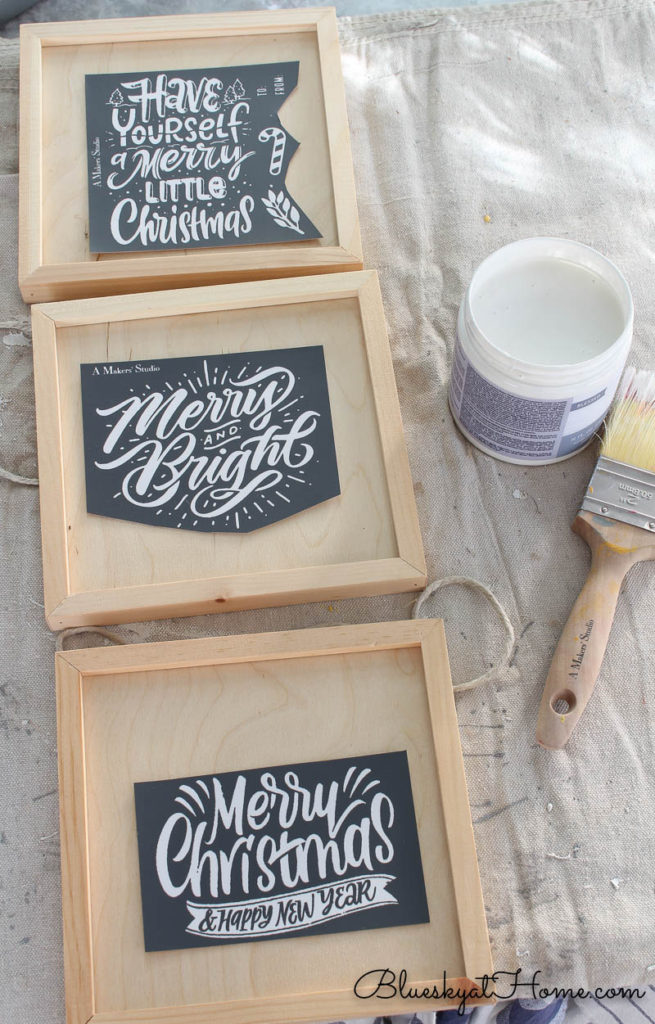
For these DIY Christmas signs, I had 3 small unpainted wood frames on hand. They are 8 x 8 inches.
You can buy them at Joann ~ don’t forget your coupons! These square signs had a twine hanger which I removed.
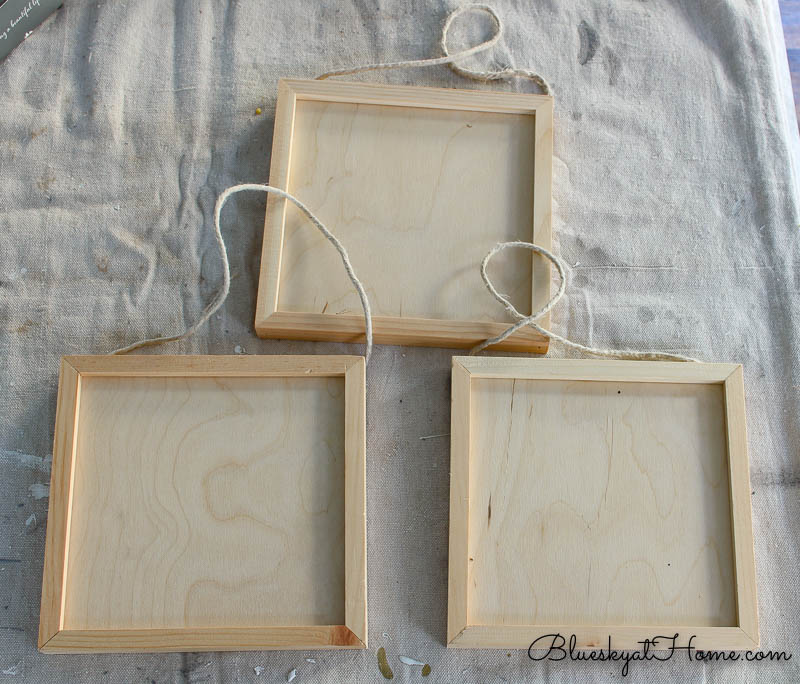
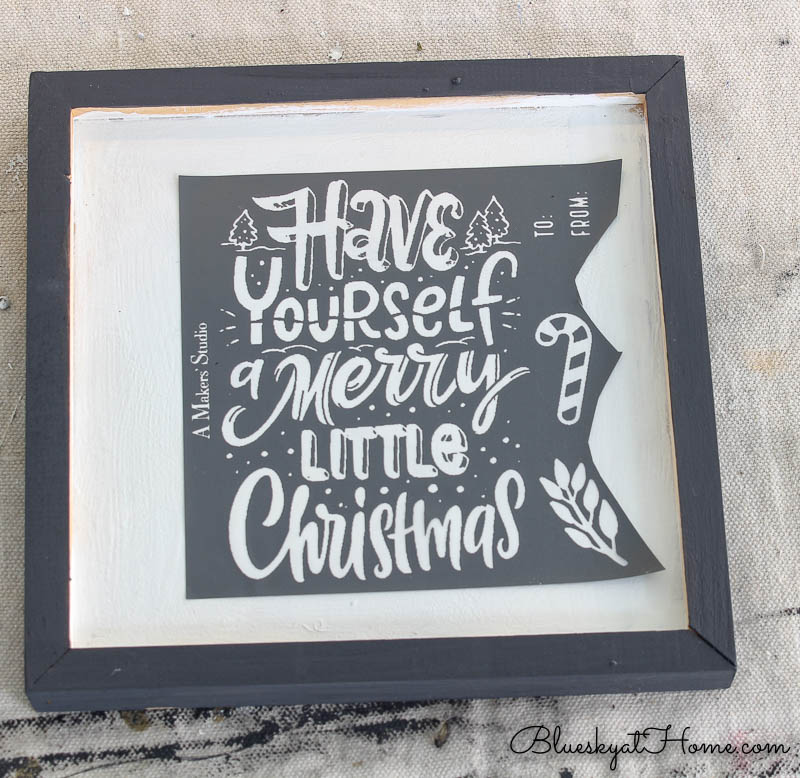
First, I painted the wood frames with Rescue Restore paint in Blessed and Little Black Dress. I painted the frame in Little Black Dress and the flat background in Blessed. The 2-ounce jars are perfect for small DIY projects.
You could use white and black acrylic paint that you have on hand.
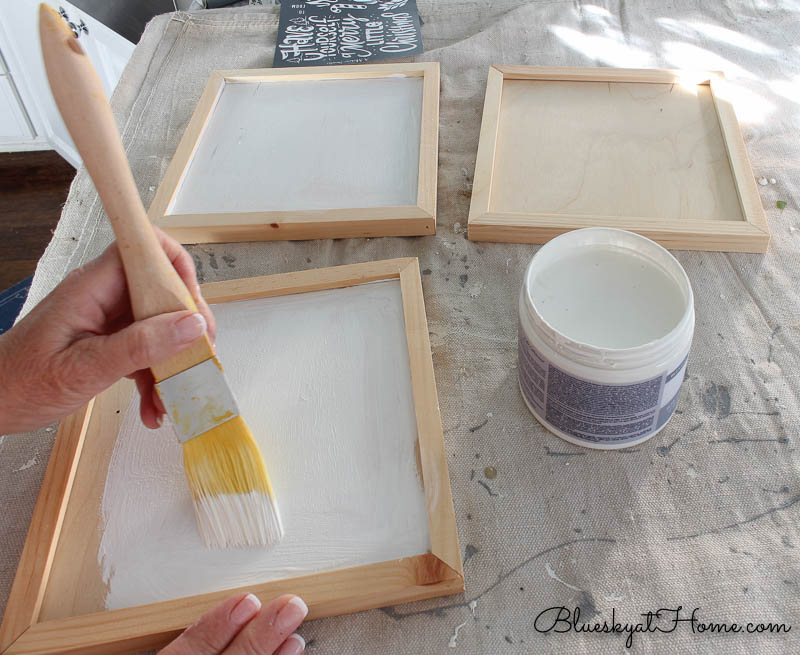
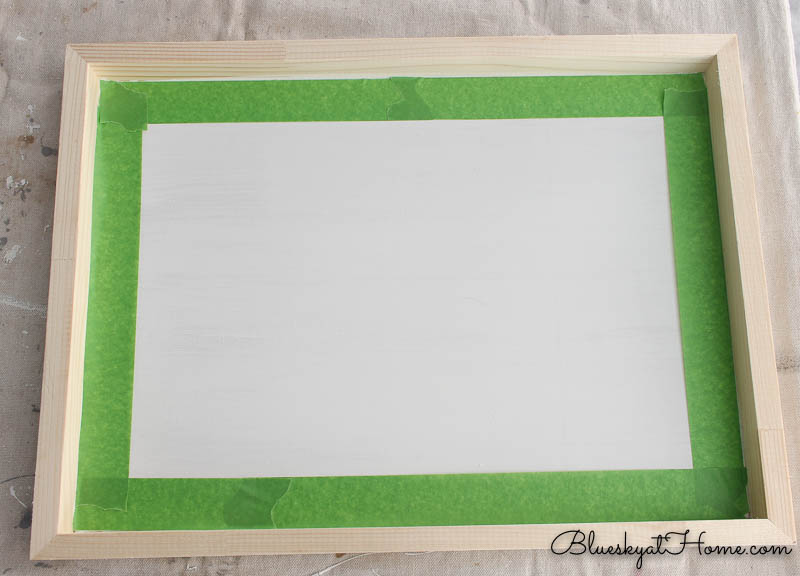
After I painted the center base white, I edged the frame with painter’s tape and painted the frame black.
Stenciling Your Signs
I had plenty of cute Christmas stencils from A Makers’ Studio on hand. I cut out the 3 stencils I would use.
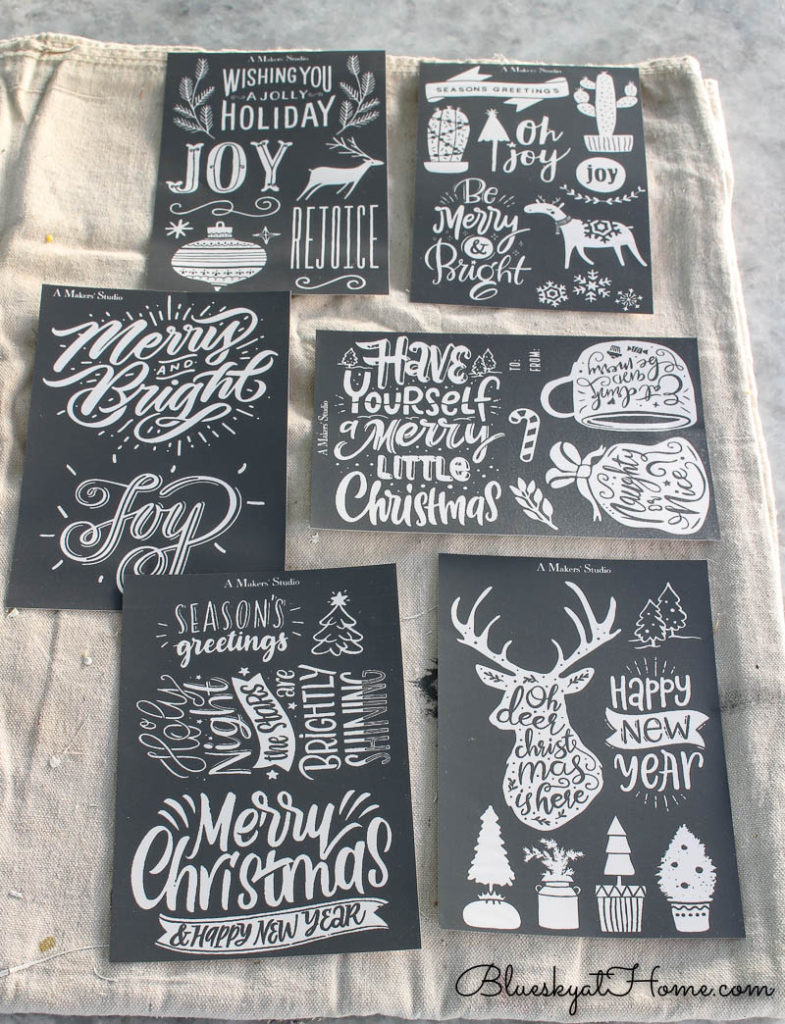
Next, I picked the ones that would fit best in the framed wood signs. As you can see, I laid out the stencils before I painted the signs.
These stencils have an adhesive backing, so they are easy to lay on the wood back and reposition until you have them centered. Then you can “rub” them down on the wood so they adhere in place.
TIP: Place painter’s tape around the stencil, if needed. This step provides a little extra workspace.

Using the plastic scraper, you apply the ChalkArt by pressing and scraping it across and into the stencil. You will be able to see the stencil design.
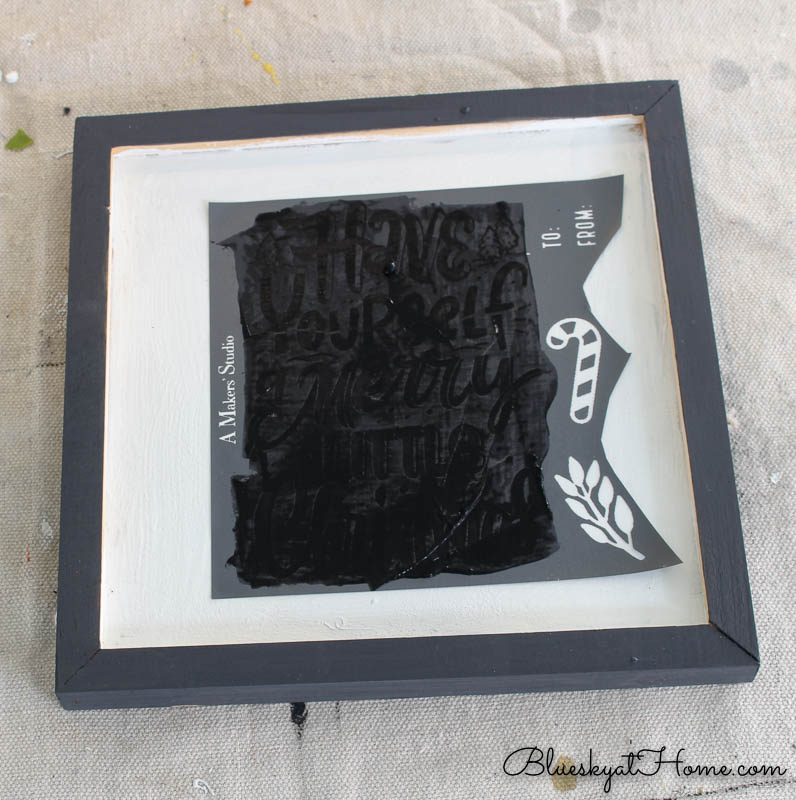
Carefully remove the stencil from the wood.
TIP: I have a bowl of water ready to put the stencil it to wash off the Chalk Art.
It will take the ChalkArt about 30 minutes to completely dry. Then you can run your finger over the design and it will be secure. If you want to remove the stencil, you can use a damp paper towel to rub it off.
Repeat with more signs, changing the stencil design.
Displaying Your Signs
I stapled some red and white twine to hang the Christmas wood signs on the side of our kitchen cabinet.
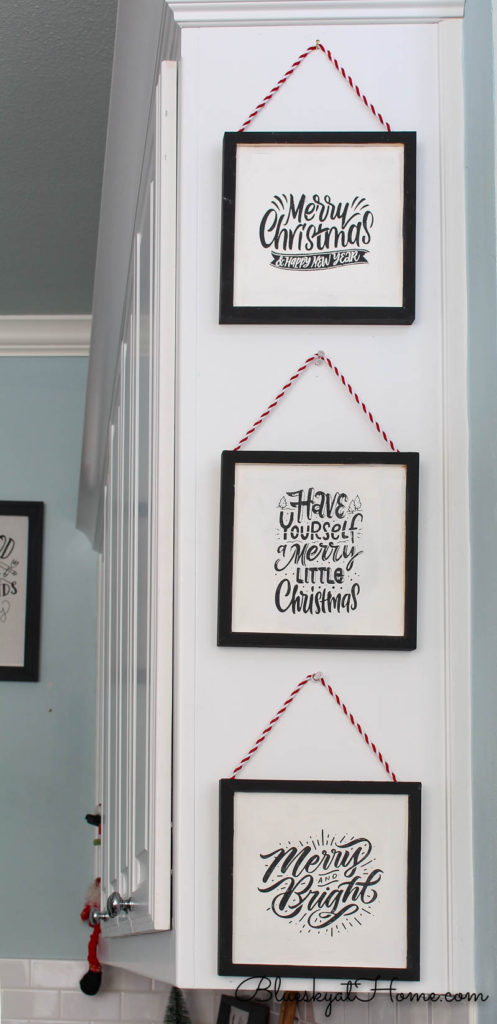
You could also place the stenciled wood sign on a stand and display on an end table.
These DIY Christmas wood signs are easy and fun to make. They will last as long as you want to use them.
If you want some more instructions on making signs with stencils, this post on 9 tips to make signs with stencils will be very helpful.
If you aren’t ready to make these handmade Christmas signs, then PIN this post for later so you will have the instructions.


These are adorable! I’m hoping to get a jump on Christmas and not wait until the last minute! Thank you for sharing!
Marty, so glad you liked it. I think everyone is anxious to get on to the holidays.
These signs are wonderful Carol!
These are really great, cant wait to have a try.
What a lovely collection of stencils. There’s so much you can do with them and your signs look so cool too. Love the black and white combo and the the red twine you used to hang them.
Hi, Michelle. The stencils are awesome. You should see the new Christmas stencils coming out this year. Stay tuned.
These turned out so cute!
These signs are so fantastsic, Carol! It’s so hard to believe it’s already time for Christmas but I’m definitely ready to get started crafting things. Thanks so much for the fabulous inspo! Hugs, CoCo
So cute! I love those stencils. Also, the red and white twine is a perfect embellishment!
I love your signs! They are so cute and perfect for Christmas!
These stencils look awesome! I just clicked over and ordered a set because if I plan to do it later, I’ll forget! Normally, the whole – Christmas in July idea doesn’t really appeal to me but I am ready to hurry 2020 along…. Thanks for the inspiration and enjoy the rest of your weekend!
Shelley
Thank you, Shelley. You will love them. Let me know when they arrive and if you have any questions.
What cute little signs! I am confused about part of the directions, though– “If you want to remove the stencil, you can use a damp paper towel to rub it off.” The stencil doesn’t just peel off? You have to use a damp towel? Can the stencil be reused then?
Liberty
Liberty, sorry for the confusion. I was referring to the actual design, not the mesh stencil. The stencils can be used over and over. If you want to change the design and reuse your surface, you can remove the stencil design with a damp paper towel. Hope that helps. Let me know.
I love all of Your signs and the red and white twine you used to hang them was the perfect touch! I’ll for sure be making some of these.
Danya, thank you for your feedback and I’m so glad you like them.
I have never tried the stencils. I love your stencils and how you used them. Your signs are adorable. I am going to have to add this to my must do list. Thanks for sharing. I pinned this to try soon!
Terrie, these stencils will change the way you think of stencils. They are wonderful to use. Let me know if you have any questions.
Adorable. I love the bakers twine hangar, such a cute final touch. Pinning.
Thank you, Leanna. The twine was a last-minute decision.
Your signs turned out so cute and I love the touch of red in the twine to bring color in! Pinned!
Pamela, thank you so the compliment. So glad you liked them.
I love the Christmas stencils and to this day kick myself for never making up my mind to getting one. You just need to have me over so I can make one and get it without the constant second guessing. 😉 They turned out so cute and I love the added red and white string. As always Carol, so glad to be joining you today. Pinned
Don’t kick yourself. There are brand new stencil designs just released. Lots more back in stock.Check them out and we’ll do a project together.
I love these! Pinned for later!
Thank you, Jodi.