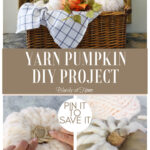
How to Decorate a Pumpkin with Yarn
How do you decorate a pumpkin? Let me count the ways. There is more than one way to use yarn in crafts and more than one way to make a plain pumpkin prettier. I will show you how easy it is to decorate a pumpkin with yarn.
As we start thinking about fall decor, decorating pumpkins is so popular. With so many options, the possibilities are endless.
You can use different materials, different colors, styles, and textures. Different methods and different supplies.
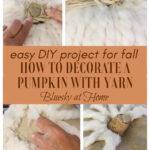
I loved this recent pumpkin project. It uses different materials and a variety of methods. My newly decorated pumpkin is so easy to make with minimal supplies. It turned out so pretty – perfect for using in a fall vignette.

I just made the cutest yarn pumpkin as a “trial-and-error” project. It turned out so well that I’m going to make more. Then I remembered this way to make yarn pumpkins from a year ago.
Decorating a Pumpkin with Yarn: Easy Fall Project
Inspiration for Decorating a Pumpkin with Yarn
If you Google “how to decorate a pumpkin” a million different suggestions will come up. The same thing for Pinterest. I actually found the idea for this pumpkin method on the Tuesday Turn About Link Party that I used to co-host.
I loved the look of the pumpkin made by Corine of Junk to Gems. This pumpkin is a natural color and has a soft, organic texture.
After reading through Corine’s how-to post, I knew that this pumpkin decorated with yarn would be my first DIY pumpkin project of the season.
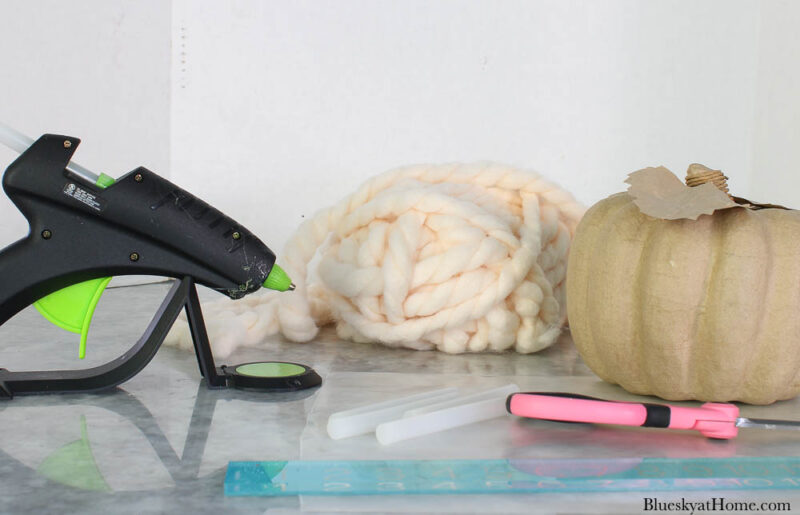
Supplies for the Pumpkin with Yarn
You need just a few supplies to make this pumpkin with yarn. Fortunately, I already had everything I needed.
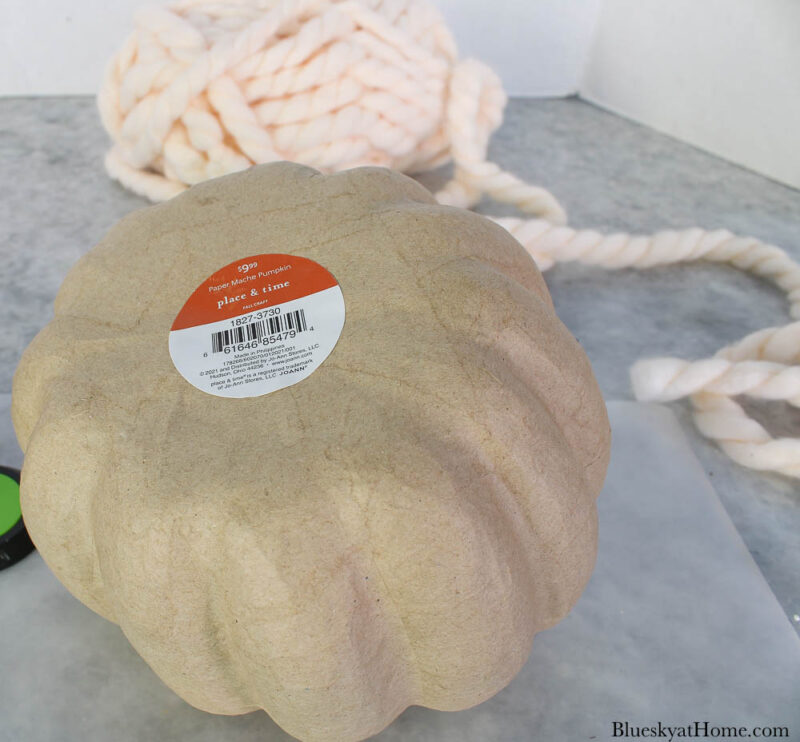
- craft pumpkins, either styrofoam, plastic or paper maché – I used paper maché.
- chunky, thick yarn in your color of choice
- glue gun and sticks
- scissors
- ruler (optional)
- raffia or wired twine to use as an embellishment
I used two paper maché pumpkins in last year’s fall mantel. One of them could definitely be used in this pumpkin with yarn project.
I had also seen another style of paper maché pumpkins on sale for $5.00 at Joann. There were four of them and I bought three.
It wasn’t until I started working on my pumpkins with yarn that I realized they were the same as the ones Corine used. Now I had a total of five pumpkins in two styles to choose from.
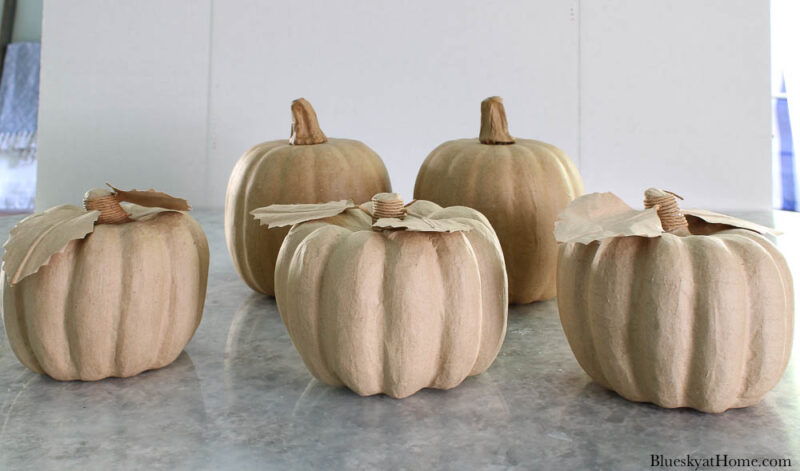
NOTE: This past weekend I had to stop at Joann for more glue sticks. The last pumpkin was still there and I bought it. Now I had four of the leaf style.
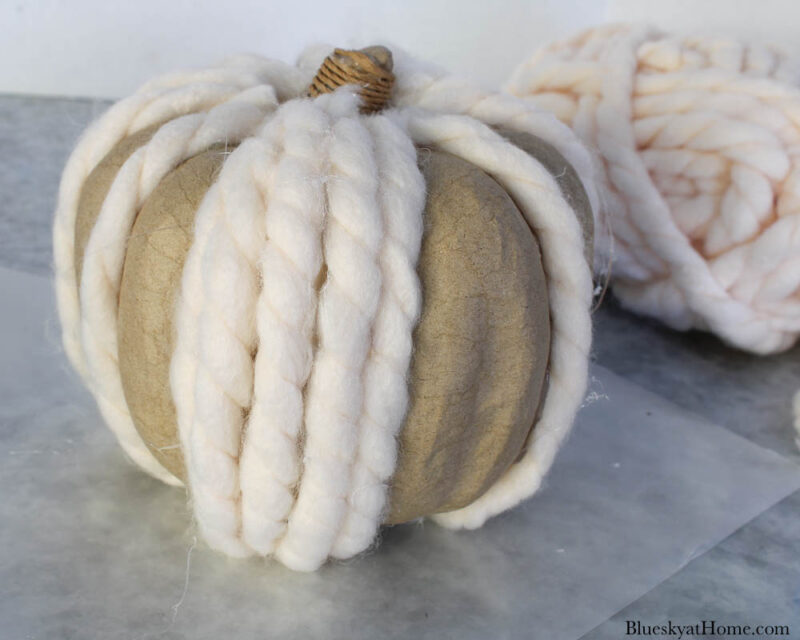
Corine used a cream-colored braided yarn for her pumpkin. I didn’t have braided yarn, but I did have a thick, twisted yarn in a cream/blush color. It was chunky and a pretty off-white with a touch of blush.


Steps to Decorating a Pumpkin with Yarn
With all my supplies gathered, I was ready to start decorating my pumpkin with yarn. I decided to use one of the pumpkins with the leaves attached. Like Corine, I removed the leaves. I’ll keep them for another project.
NOTE: If you are using one of the plastic orange pumpkins, I would paint it white or cream first – unless you are covering it with orange yarn.
Step 1 – Pumpkin Preparation
I set my glue gun on a piece of wax paper and plugged it in.
While it was heating up, I used a ruler to cut several lengths of yarn to wrap from the top to the bottom of the pumpkin, about 8 inches. I also removed the price tag. You can see the original $9.99 price.
Step 2 – Gluing the Yarn to the Pumpkin
I began by gluing a length of yarn to the top of the pumpkin. I started with the intentions.
Place a bead of glue at the top of the pumpkin near the stem.
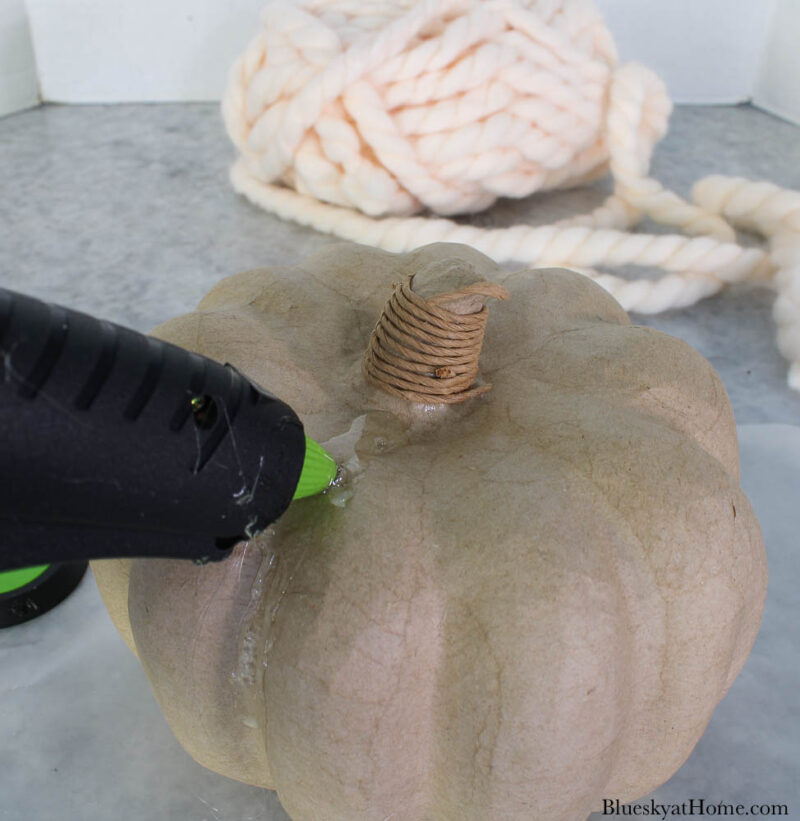
Carefully hold the end of the yarn on the glue for a few seconds until it adheres.
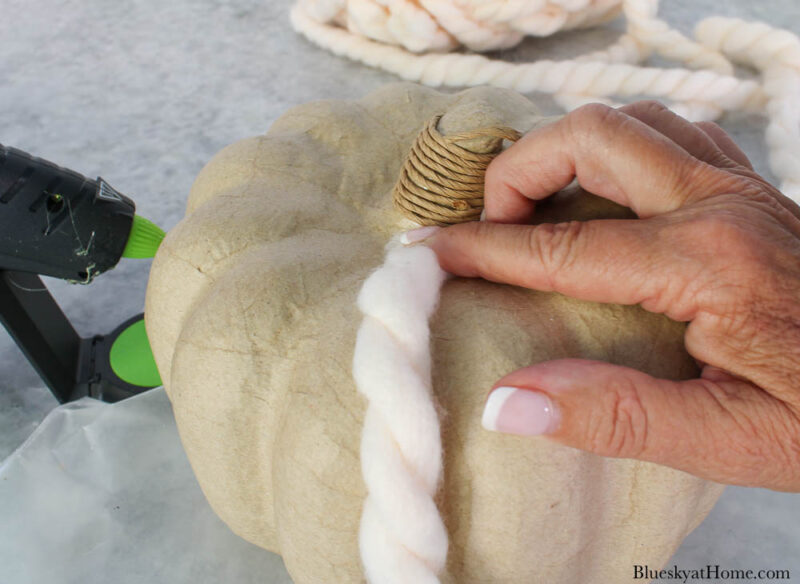
Run the glue gun down several inches of the pumpkin.
Hold the yarn firmly against the glue as you attach the yarn to the pumpkin.
Continue gluing the yarn around the bottom of the pumpkin and up the other side.
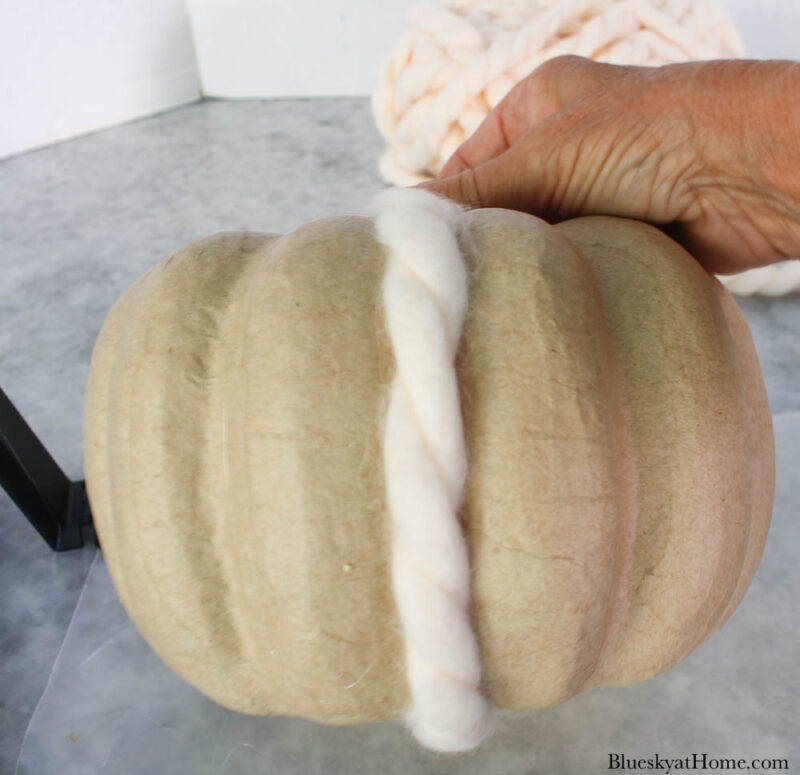
It took eleven lengths of yarn to go around the pumpkin from one side of the stem to the other side. Cut off the yarn next to the stem.
Repeat the Step 2 until you have covered all the grooves of the pumpkin.
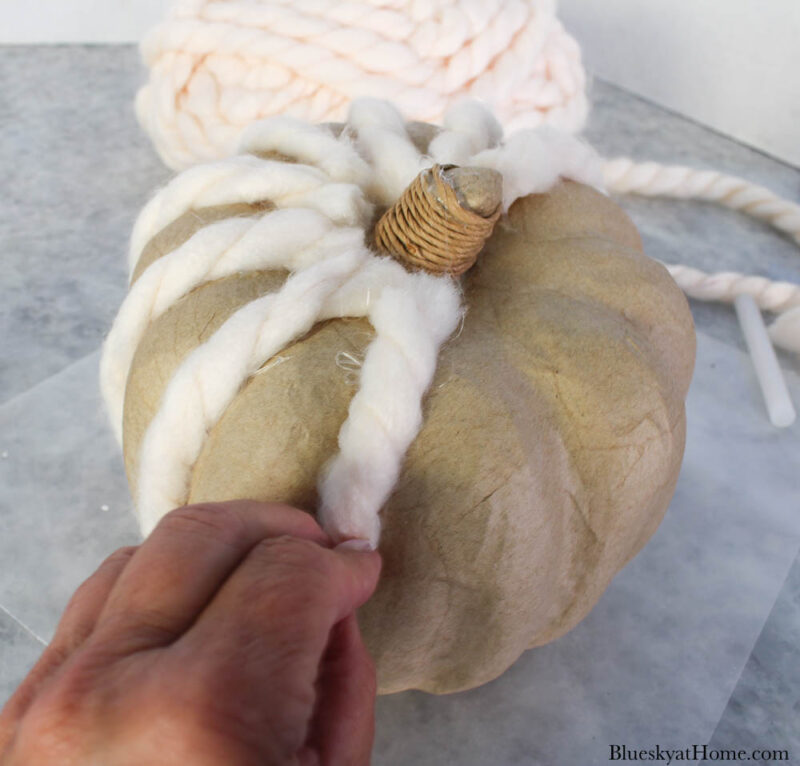
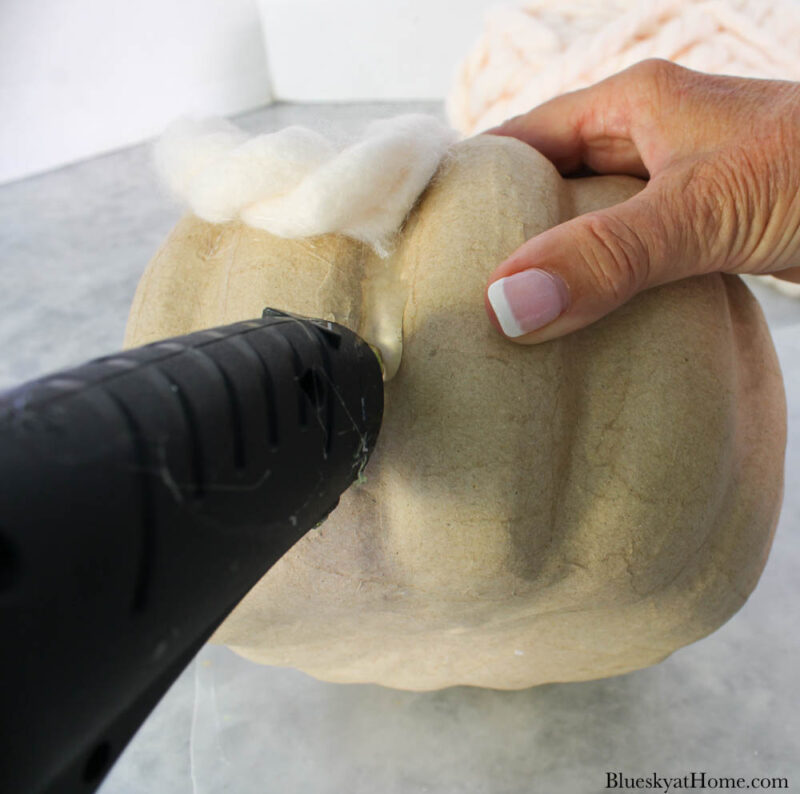
Step 3 – Filling in the Pumpkin with Yarn
After all the grooves are covered with yarn, you can start filling in between the indented pumpkin lengths. It took about four lengths to fill in.
The last two lengths will be a little shorter. Just cut the extra yarn off to fit in the shorter space.
TIP: I found that cutting the yarn on the diagonal gave a smoother look.
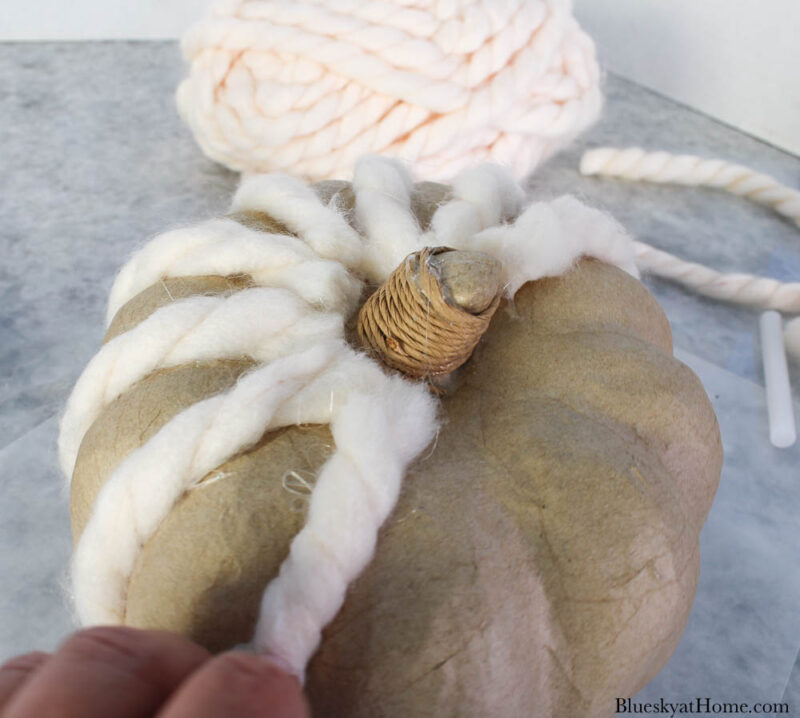
TIP: To hold down the end of the yarn, I found that using a glue stick works well. When I was making a pumpkin and flower wreath a couple of years ago, I burned two fingers really badly. It took weeks to heal, so I’m a little glue gun-shy.
TIP: If you have any “glue globs”, just cut them off with scissors – not your sewing scissors.
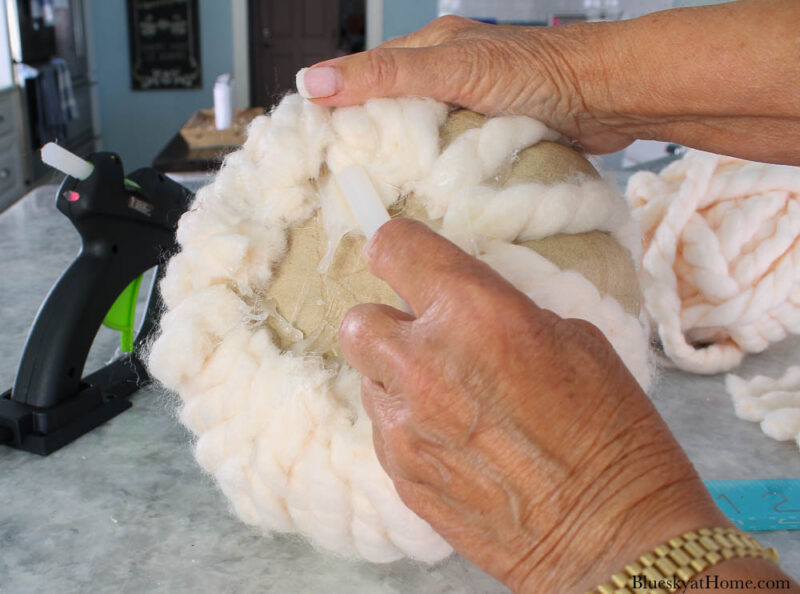
TIP: If you have any yarn fuzz, just shave it off with your scissors.
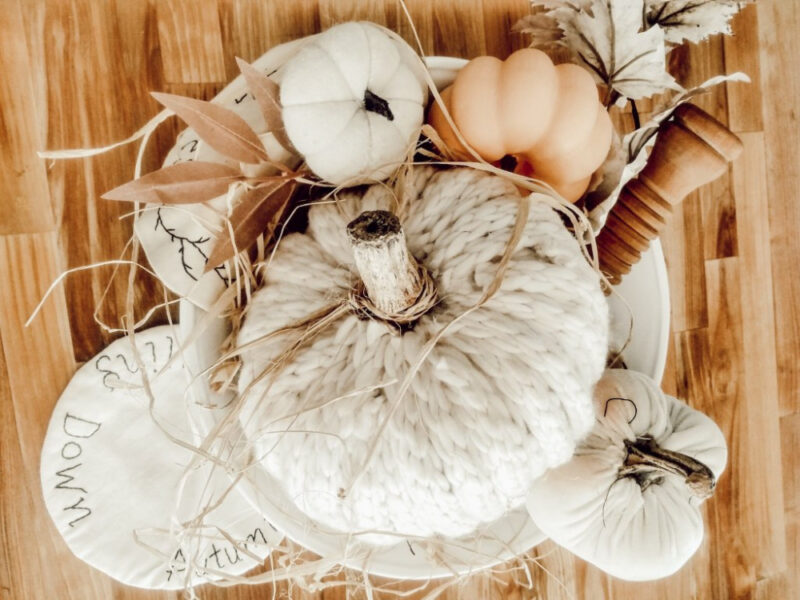
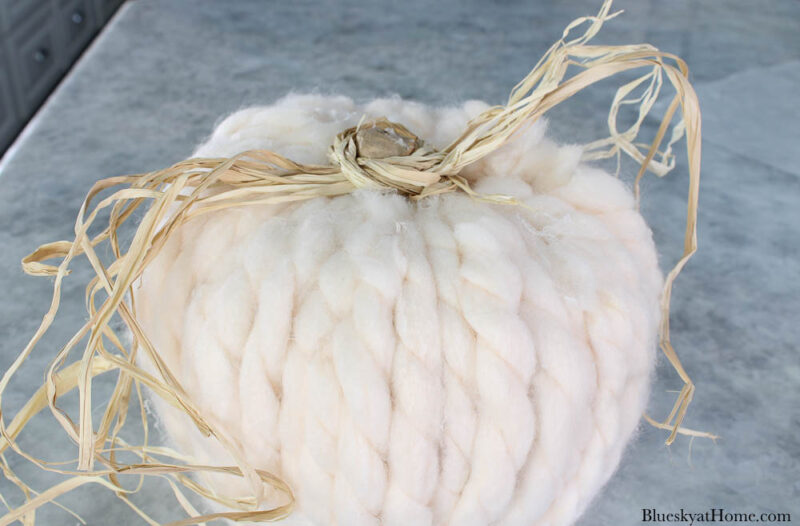
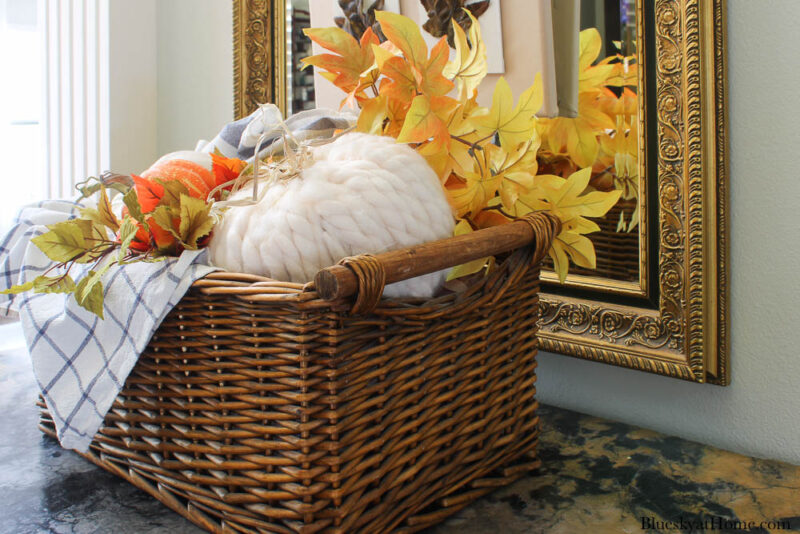
The first pumpkin is now decorated with yarn. I love it!!
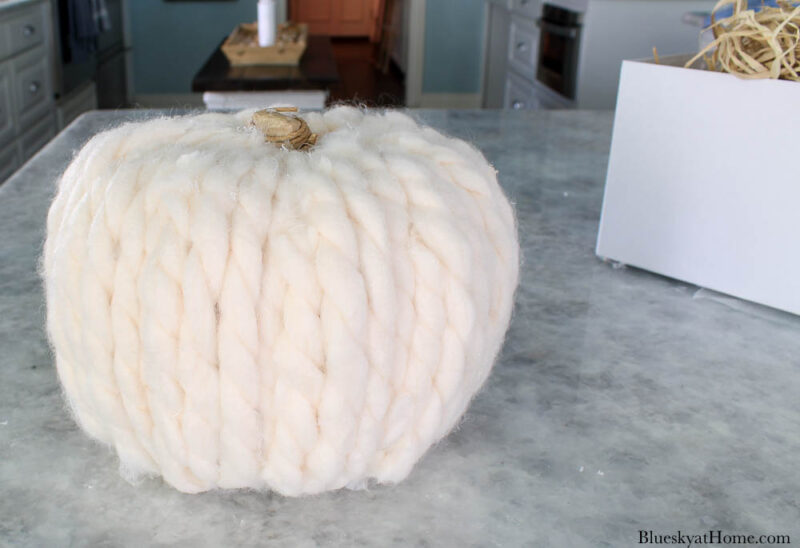
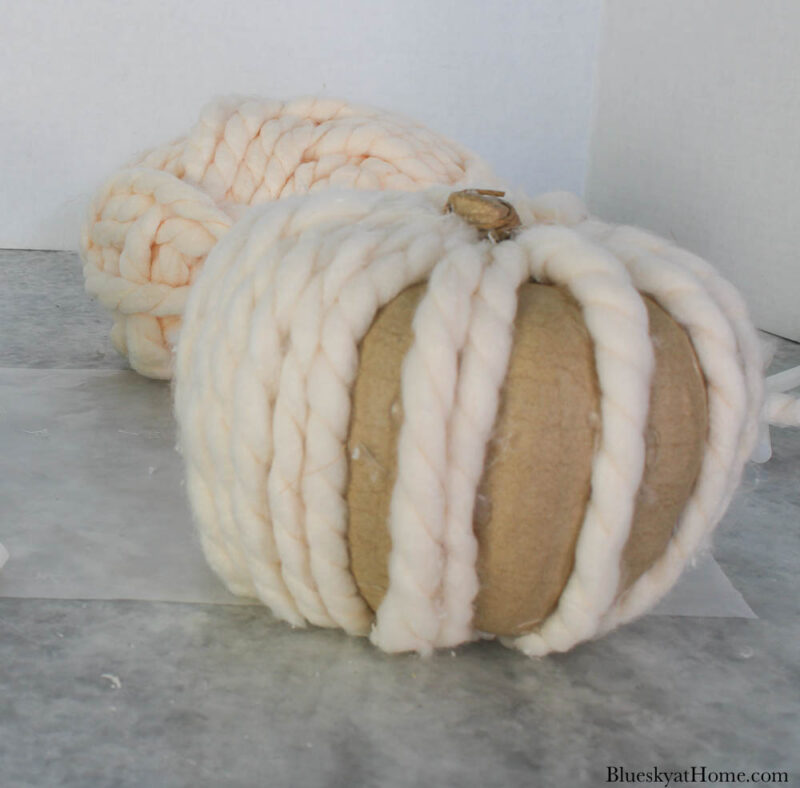
Step 4 – Finishing the Pumpkins with Raffia
The pumpkin stem had a small twine wrapped around it. I left it there. To give the pumpkin a more finished look and cover the edges of the yarn, I used raffia. I had plenty in my craft supplies.
I gathered several strands of raffia and wrapped them around the stem.
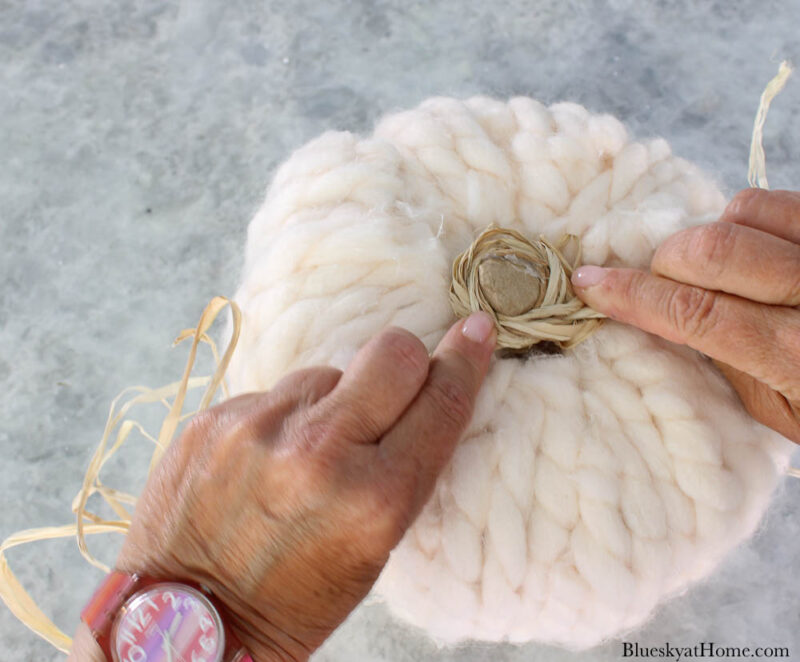
Then you can tie the raffia in a knot and cut off the excess.
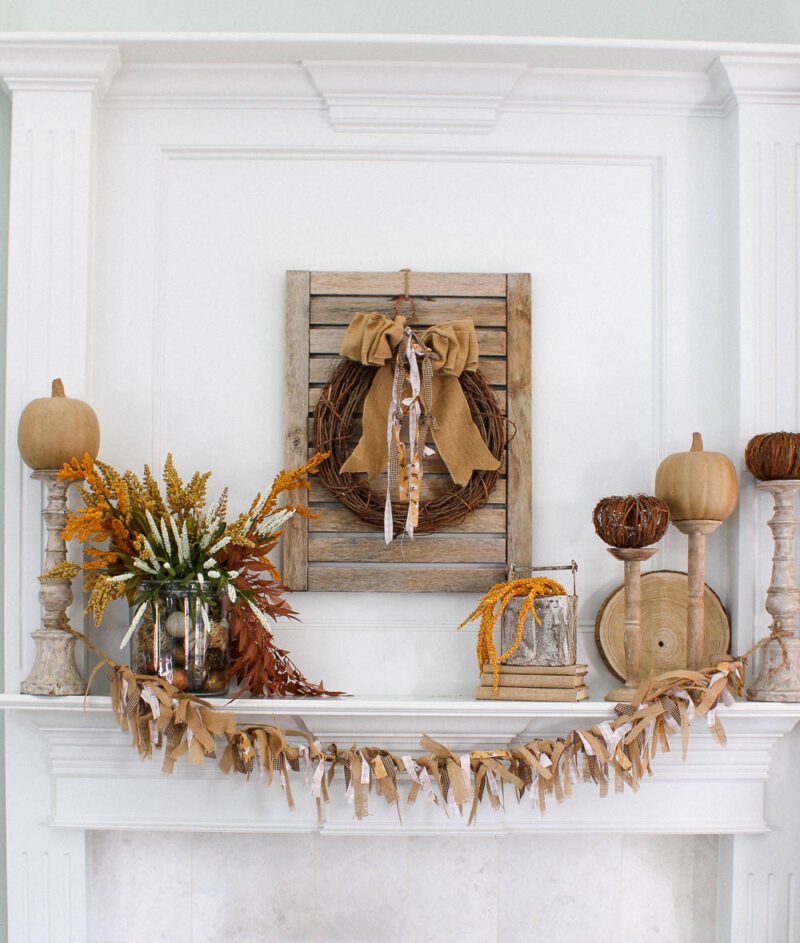
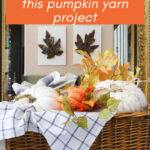
Step 5 – Styling the Yarn Pumpkin In a Fall Vignette
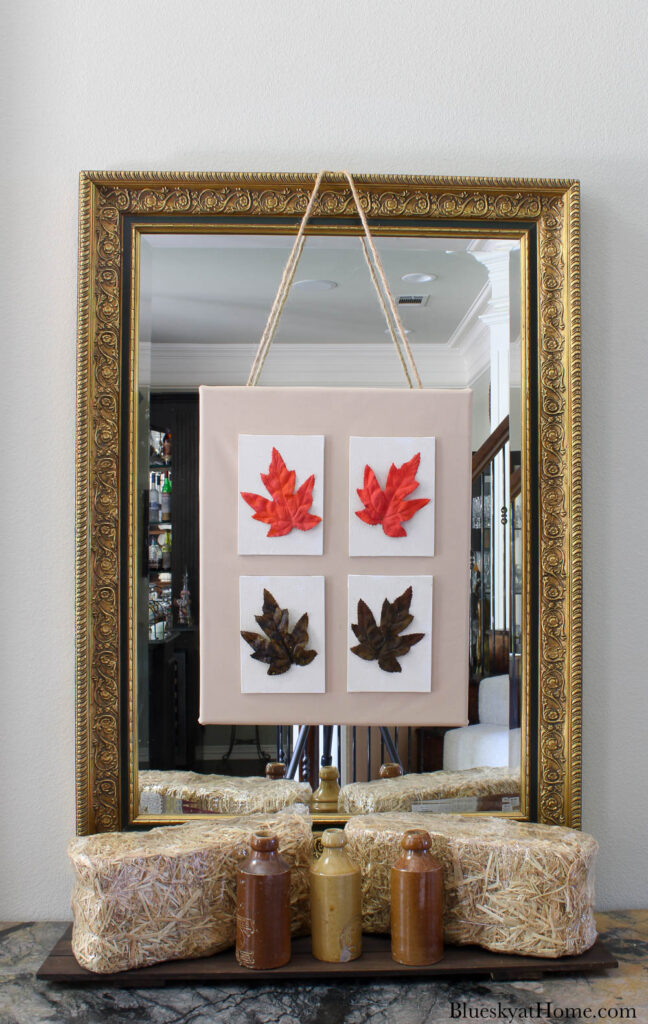
I knew the vignette I wanted to create using my pumpkin decorated with yarn. It would be part of the focal point for our entry. You might remember the fall leaf art project I made a few weeks ago.
I never finished the entry arrangement. It definitely needed another fall focal point.
To complete my fall vignette with my yarn pumpkin, I started shopping the house for items to use in a vignette.
For my entry arrangement, I used:
- a large wicker basket my older daughter gave me years ago
- my pumpkin with yarn
- a white-painted pumpkin
- a small orange pumpkin
- three fall foliage stems in two colors
- two blue check dishtowels
NOTE: I used a plastic shoe box in the bottom of the basket as filler. Then I stuffed in packing paper.
TIP: Save packing paper for decorative stuffing.
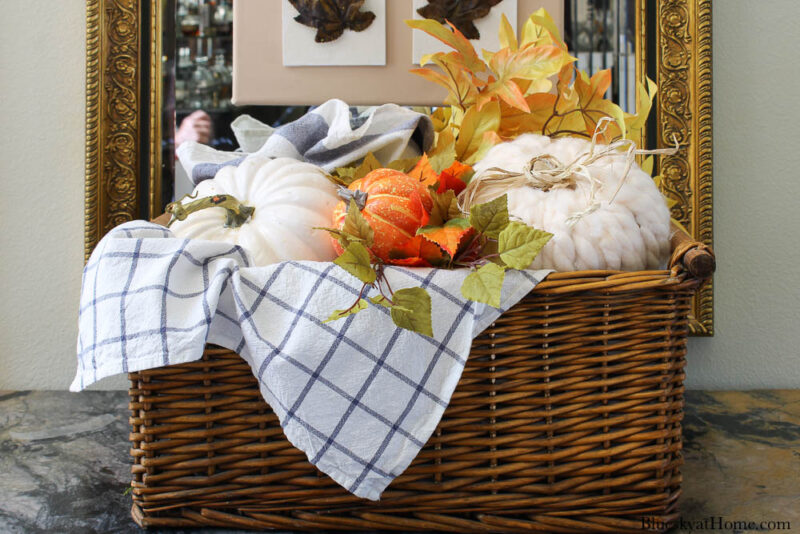
I love that the colors of the leaf art are repeated in the pumpkin basket. The blue check dishtowels provide an unexpected color and casual farmhouse style.
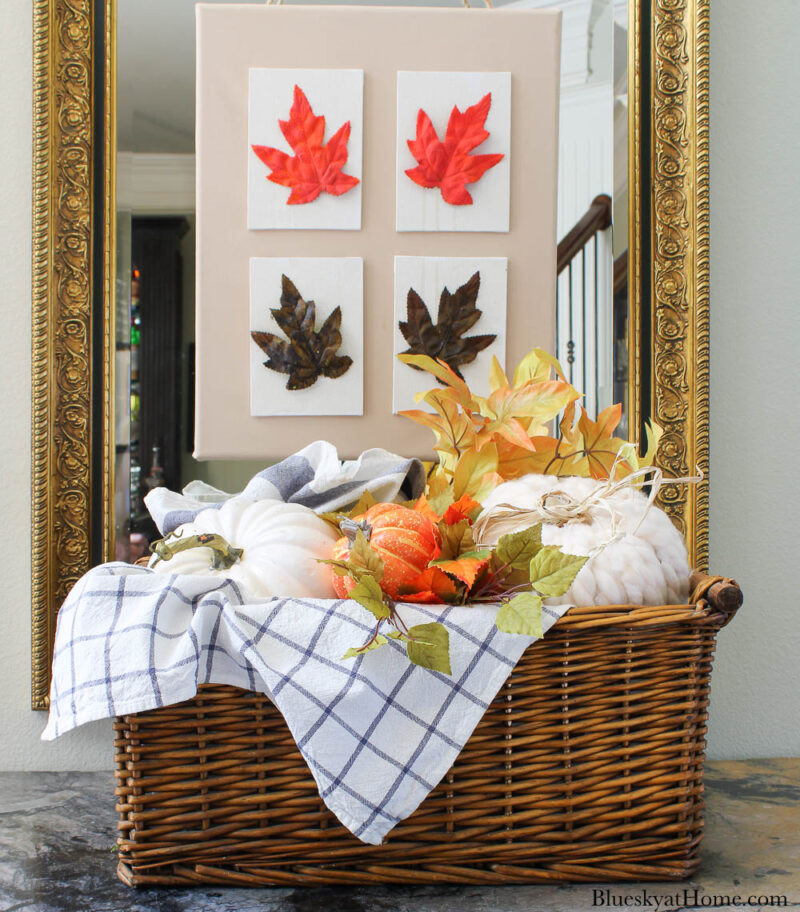
Now my decorated pumpkin with yarn is finished and my fall entry is complete. I am ready to start on another yarn pumpkin project and a new look for our entry.
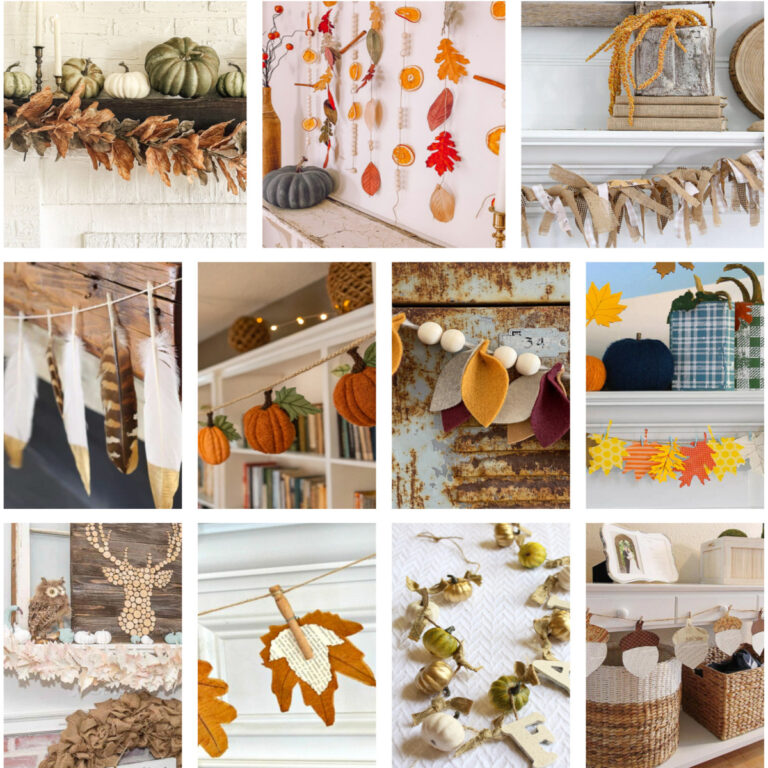
Want More Fall-ish DIY Projects?
Take a look at these posts.
Want to repeat this pumpkin yarn project for your own fall decorations? I do hope that you will PIN this project for yourself.


Carol these came out so good!
Carol! These are so cute and cozy! What a great fall craft. Thank you for the step-by-step instructions.
Thanks so much for joining the Grace at Home party at Imparting Grace. I’m featuring you this week!
These are so cute! I’ve burned my fingers by pressing things on the glue so many times. I have scars to prove it lol. Dollar Tree has hot pink rubber finger tips that are great. They come in a 3-pack & are well worth the $1.25!! Thanks for sharing on Crafty Creators!
Carol, Love this idea! Thanks so much for sharing!!
Hugs,
Debbie
It was an easy project, Ann, with big returns. Thanks for your comment.
The before pumpkin was pretty darn cute but the after is lovely. The color and added texture looks perfect against those fall leaves. Thanks for sharing this at Farmhouse Friday. We are featuring it tomorrow! Pinned
Thank you, sweet friend. I’ll be looking.
I am really liking all of the yarn pumpkin tutorial this year. So many great ideas. Thanks for sharing with us this week. #HomeMattersParty
I love how your pumpkins turned out.
I love this! Believe it or not I just made a few of my own yarn pumpkins that I’ll be blogging about soon. Great minds think alike! Great tutorial! Thanks for sharing at Vintage Charm. xo Kathleen
Thanks so much for the great tutorial Carol! I love yarn pumpkins and I especially love the chunkier ones like this one. Happy almost fall to you!
Very pretty!
Awesome pumpkin! So easy and very impressive; my idea of a good project! Dollar Tree has finger cots (protectors)–silicone, hot pink, 3 in a pkg. I’ve already lost 2! I keep the third on the end of a glue stick in my plastic Hershey’s cocoa box! I hate glue gun burns–they are the worst! I also keep some teriyaki sticks handy to poke and prod stuff into where I want them to be. When the end gets nasty, I just cut a new end!
That is so pretty. I will definitely put this on my to-do list. Thanks.
Pinned this – maybe be doing this with my collection of paper maiche and foam pumpkins – will use low temp glue on the foam pumpkins.