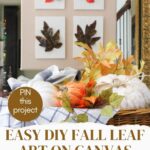
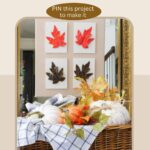
Easy DIY Fall Leaf Art On Canvas
Where do you begin your fall decorating? How about the entry? I’m showing you how easy it is to use fall colors as the focal point of an easy DIY fall leaf art on canvas project. It’s the perfect project for your entry.
The three most impactful places to begin your fall (or any seasonal) decor are:
- your entry
- your mantel
- the coffee table
I chose to begin our fall decor efforts in our entry.
Regardless of where you start your fall decorating, what puts you in a fall mood? Fall colors!
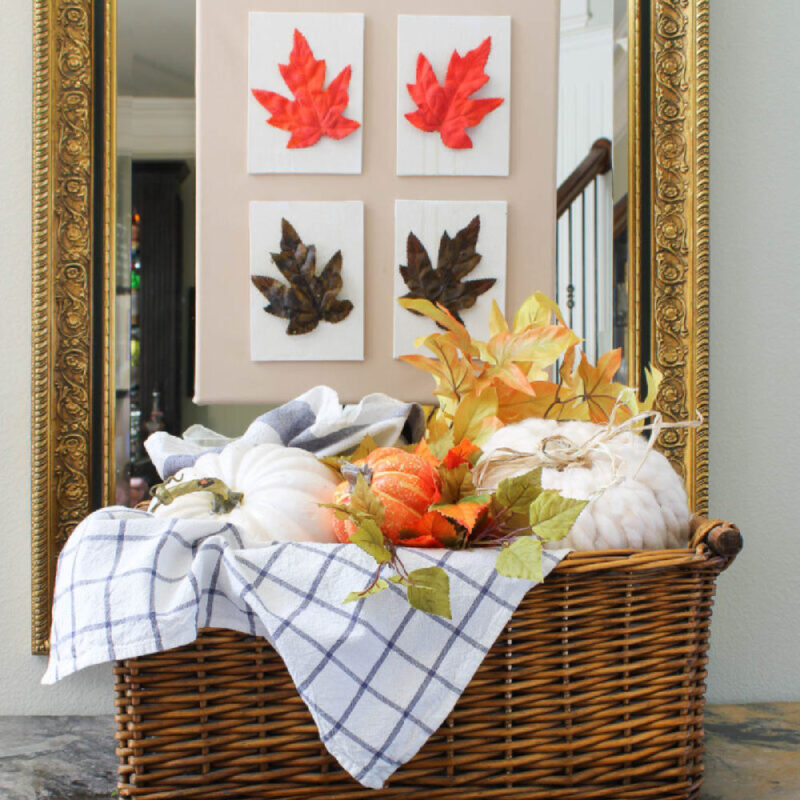
The colors of fall leaves is a traditional sign of the changing season. Using leaves as the central ingredient, this easy DIY fall leaf art on canvas is a great accessory. It creates a focal point as soon as guests enter your home.
I love a DIY project with a minimum of supplies and minimal expense. This project fits those criteria.
This isn’t my first attempt at creating a DIY wall art project. A few years ago, for our dining room, I used fabric to make a pair of lovely fabric-framed pieces that I still love today. I encourage you to check out that project.
Let’s celebrate the colors of fall with this easy DIY fall leaf art on canvas project.

Easy DIY Fall Leaf Art Project
- Decide on a Plan for Your Easy DIY Fall Wall Art
- Gather or Purchase Your Supplies for the Leaf Art Canvas
- STEP 1 – Paint the Small Canvases
- STEP 2 – Paint the Faux Leaves
- STEP 3 – Cover Large Canvas with Fabric
- STEP 4 – Attach the Leaves to the Small Canvases
- STEP 5 – Add Jute/Twine/Ribbon to the Large Canvas
- STEP 6 – Attach Small Canvases to Large Canvas
- STEP 7 – Hanging the Canvas on the Mirror
This post contains affiliate links to products used to create this project. If you should order any item from this site, I may receive compensation, but you do not pay a penny more. Your purchase is greatly appreciated as it helps support the continued publication of this site.
As we begin our journey into fall decorating, I’m so happy to be joined by some of my blogging besties. We’re gathering for our fall themed Celebrate the Holiday.

This ladies are pros at creating and sharing home decor ideas for any season. The complete list is at the end of this project post. If you are joining me from Missy of Sonata Home Design, welcome to our kick off to fall.
How do you create art with autumn leaves? I’ll show you how I did it.
Decide on a Plan for Your Easy DIY Fall Wall Art
My vision for this canvas project was a picture that I saw on Pinterest from Lauren of Blesser House. She framed 15 dried leaves in wood frames.
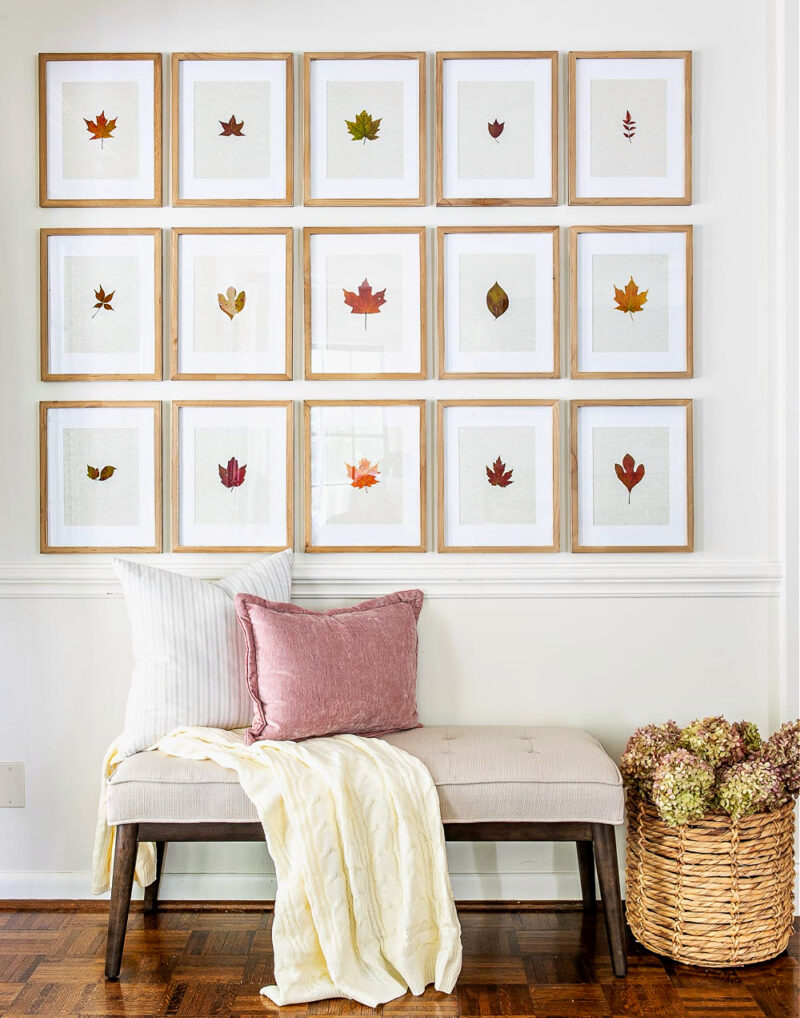
My project would be much smaller. Rather than put real leaves in glass and wood frames, I would mount faux leaves on small canvases. In fact, I’m making just one large canvas with smaller canvases on it.
Gather or Purchase Your Supplies for the Leaf Art Canvas
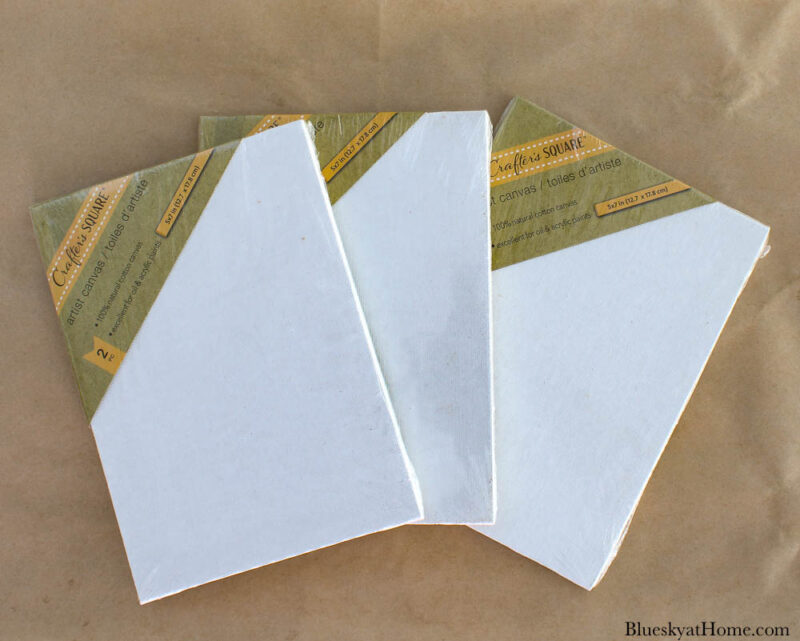
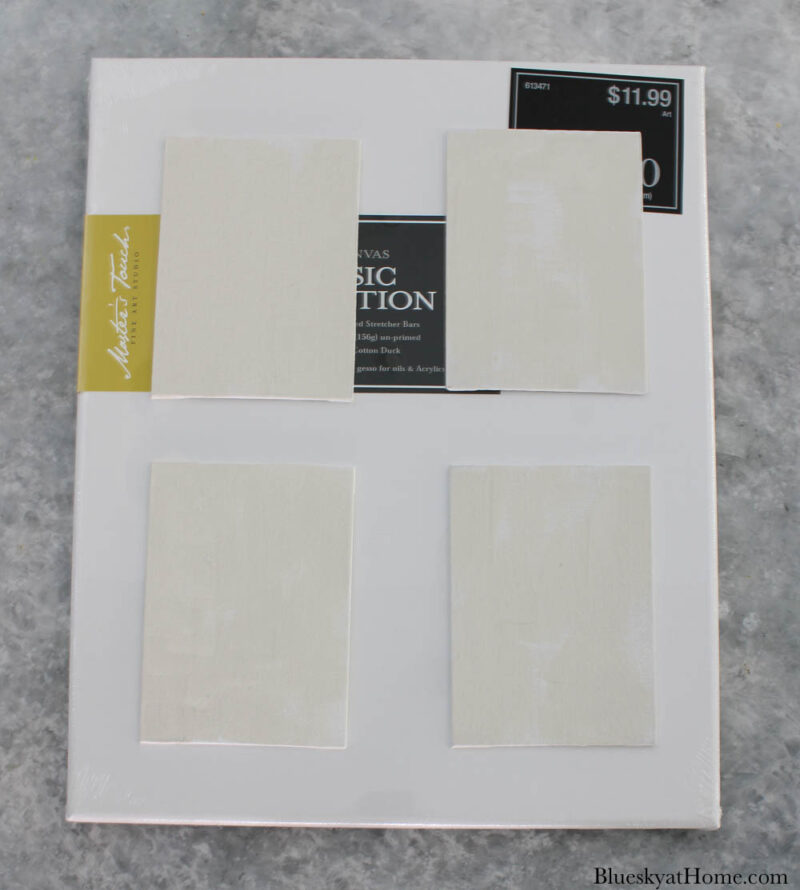
A few years ago I bought a package of 5 X 7-inch canvases at Dollar Tree.
My first step was to locate the Dollar Tree canvases. (Do you ever lose craft supplies you’ve bought?)
After searching every drawer and bin in my office, I couldn’t find the canvases. So a trip to Dollar Tree was in order. Two canvases come in each package. I bought three.
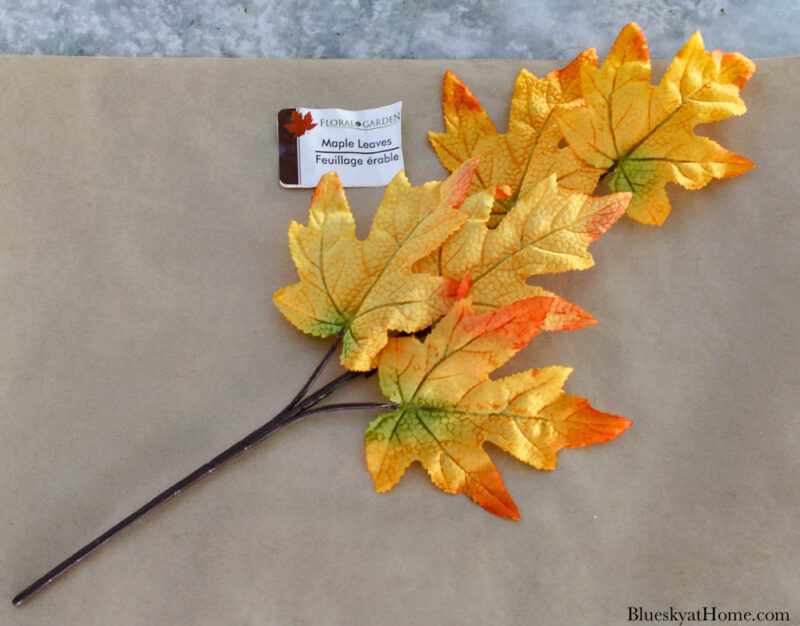
I also purchased one stem of maple leaves. These leaves were a little too bright for my taste.
For Steps 1 and 2, here are the supplies needed for the DIY fall leaf art canvas project:
- 5 X 7 canvases, as many as you want. I planned on using six.
- Chalk Paint, Acrylic Paint or other craft paint of choice for canvases
- faux maple leaves, as many as you need; I really like this option as the leaves are large and you don’t have to remove them from a stem.
- Chalk Paint, Acrylic Paint or other craft paint in colors of choice to paint the leaves
- small paint brush
STEP 1 – Paint the Small Canvases
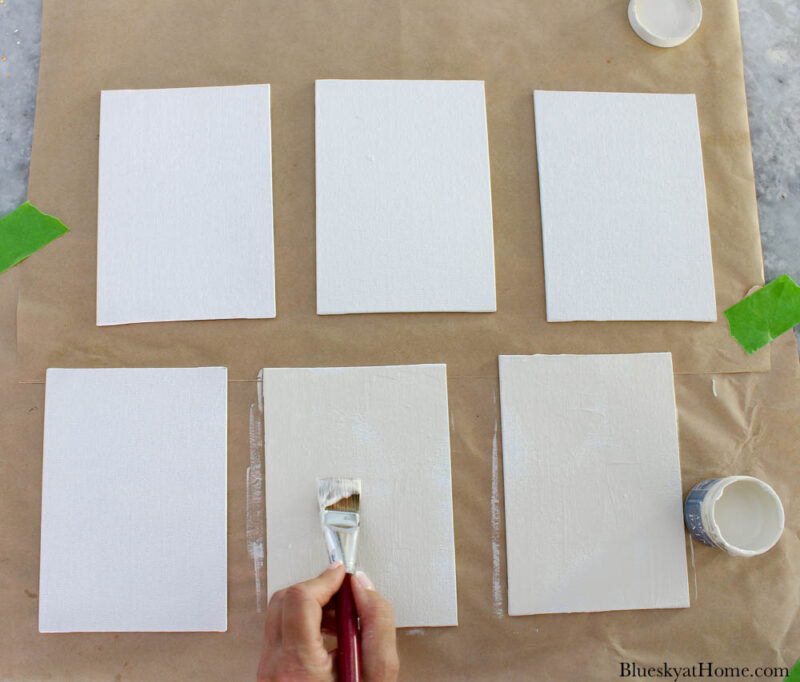
I opened the canvas packages and placed them on a piece of craft paper to protect my kitchen granite.
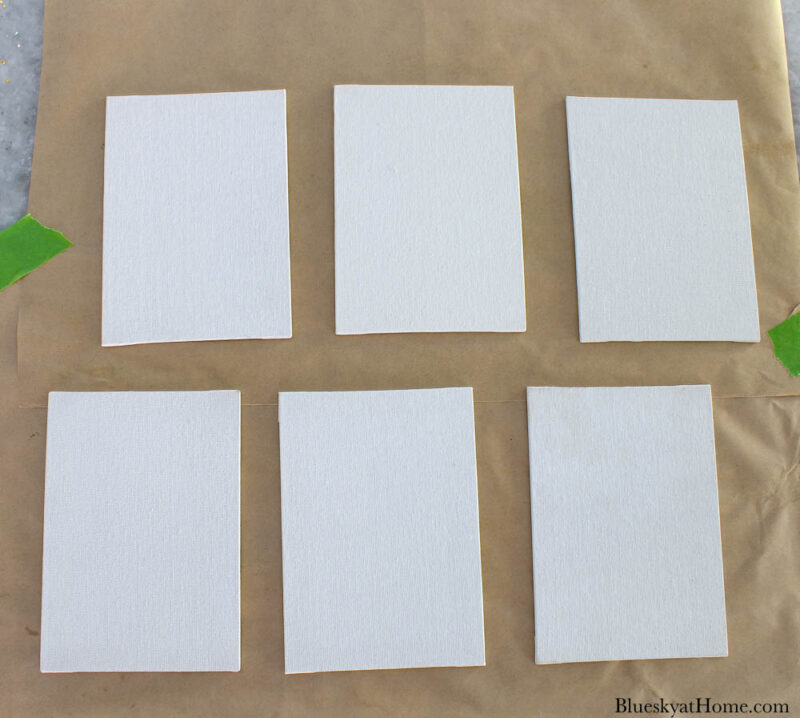
Bright white was not the color I wanted for my fall leaf art canvas. Painting them was the obvious choice
My paint of choice for the small canvases was Rescue Restore in Biscuits & Gravy. If you know the color of Southern cream gravy, this is it.
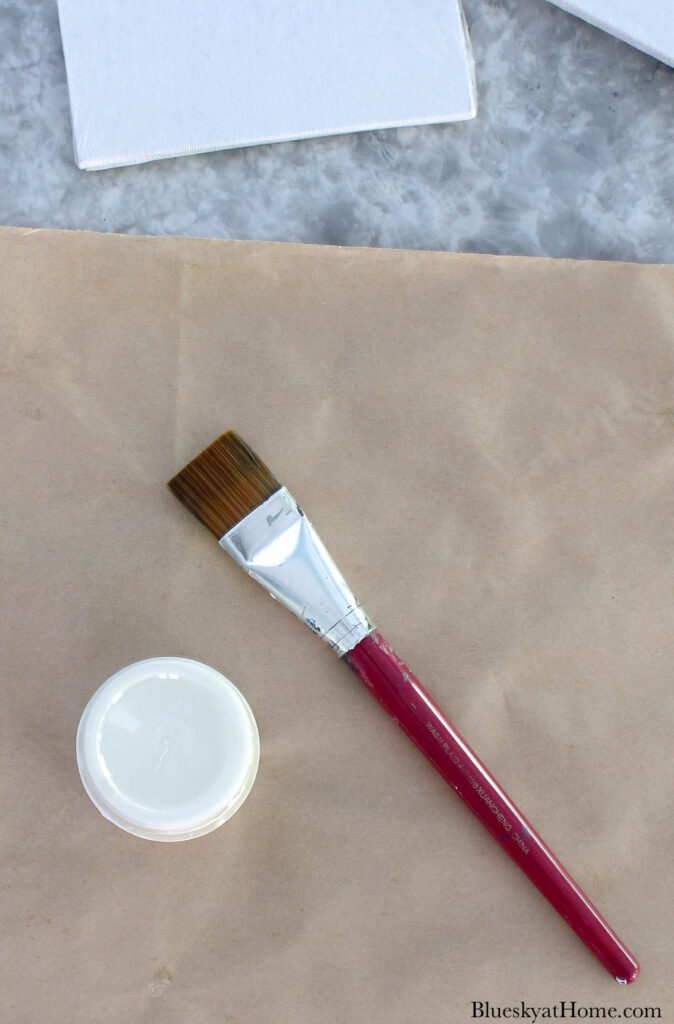
Using a small paintbrush, I applied one coat of paint and let it dry.


STEP 2 – Paint the Faux Leaves
While the small canvases were drying, I removed the faux leaves from the stem.
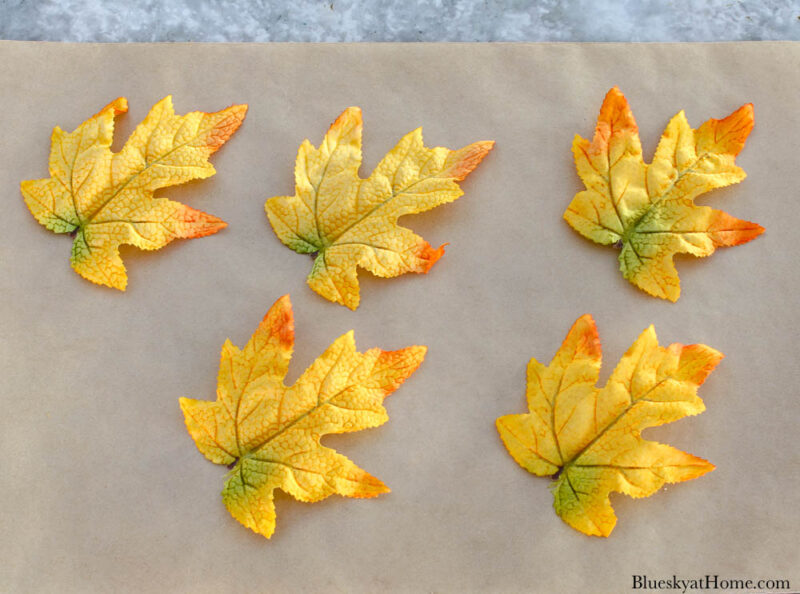
Do you notice a problem? I only had five faux leaves. I had to go back to Dollar Tree to buy another stem. (Now my cheap leaves doubled in price!)
NOTE TO SELF: Check the number of leaves on a stem, or even better buy the package of 50 online.
I wanted to use three different colors for my project.
In my paint stash, I found 2 colors: a burnt orange in Rescue Restore and a medium green in ChalkArt. I love both of these paints, but ChalkArt is really meant for stenciling. I would try it.
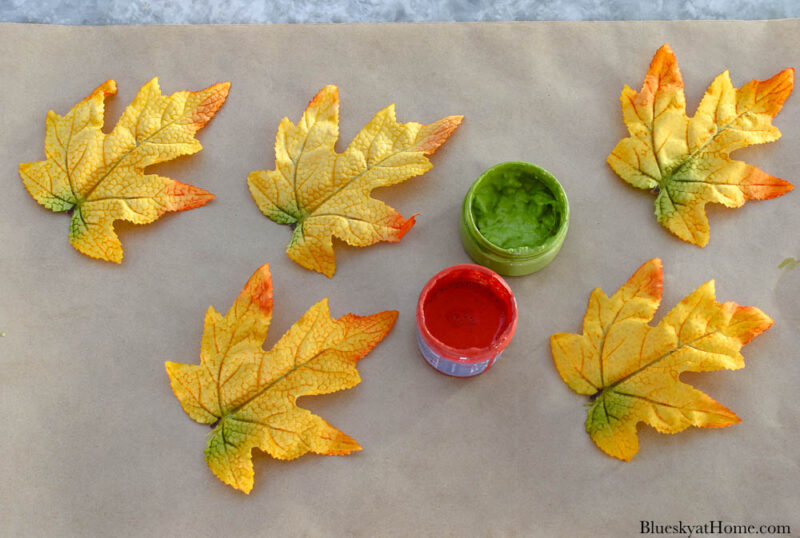

The burnt orange leaves were looking good. I wasn’t sure I liked the green color of the other leaves.
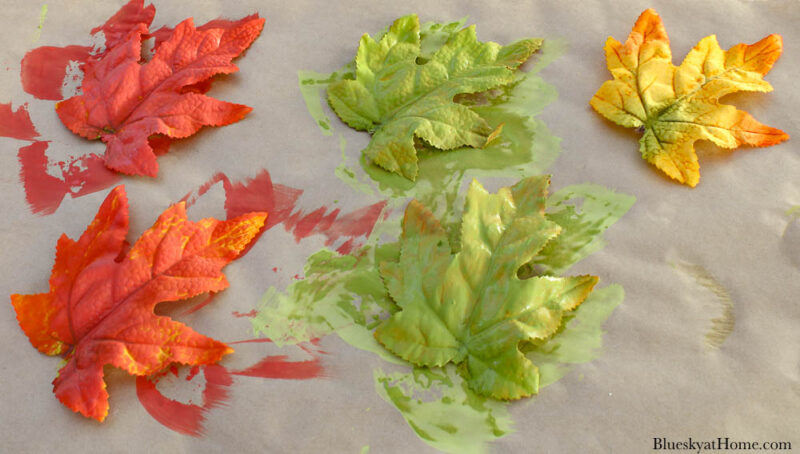
Since I had to wait until the next day to buy another maple leaf stem. I waited to decide on the third color of the leaves.
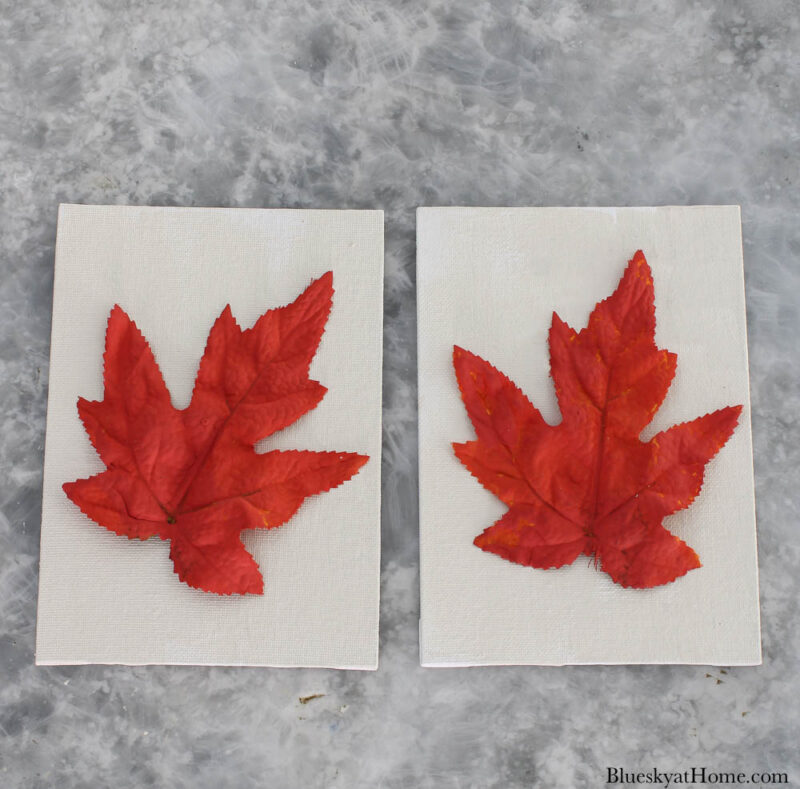
After realizing that I only had room for four small canvases (see Step 3 below), I decided I didn’t really like the green leaf color. I looked for something that was more fall-ish. I thought a shade of brown would work.
I didn’t have any brown paint, but I did have two shades of brown Gel Stain that would work. I chose English Walnut, leftover from staining our patio tables and recycling a table as a plant stand.
I just painted over the green paint and also painted the extra leaf.
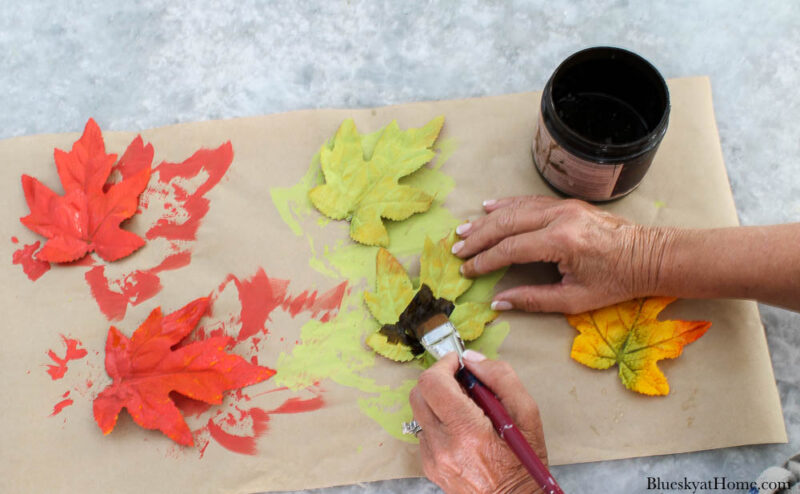
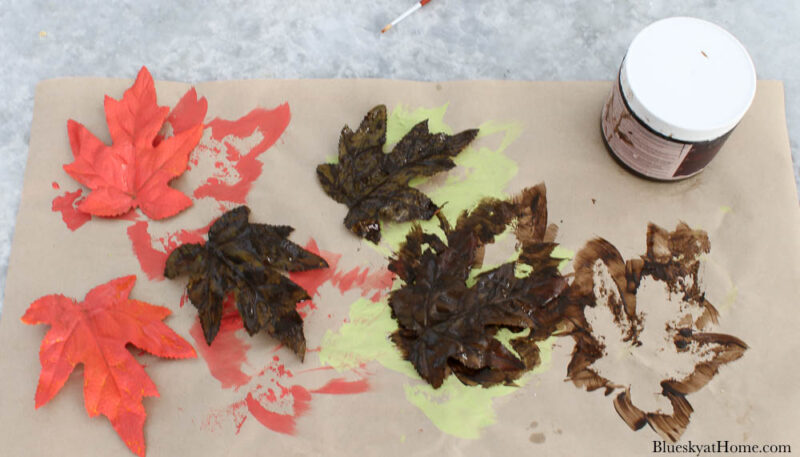
I liked the brown leaves much better. I let the stain dry while I worked on the next step.
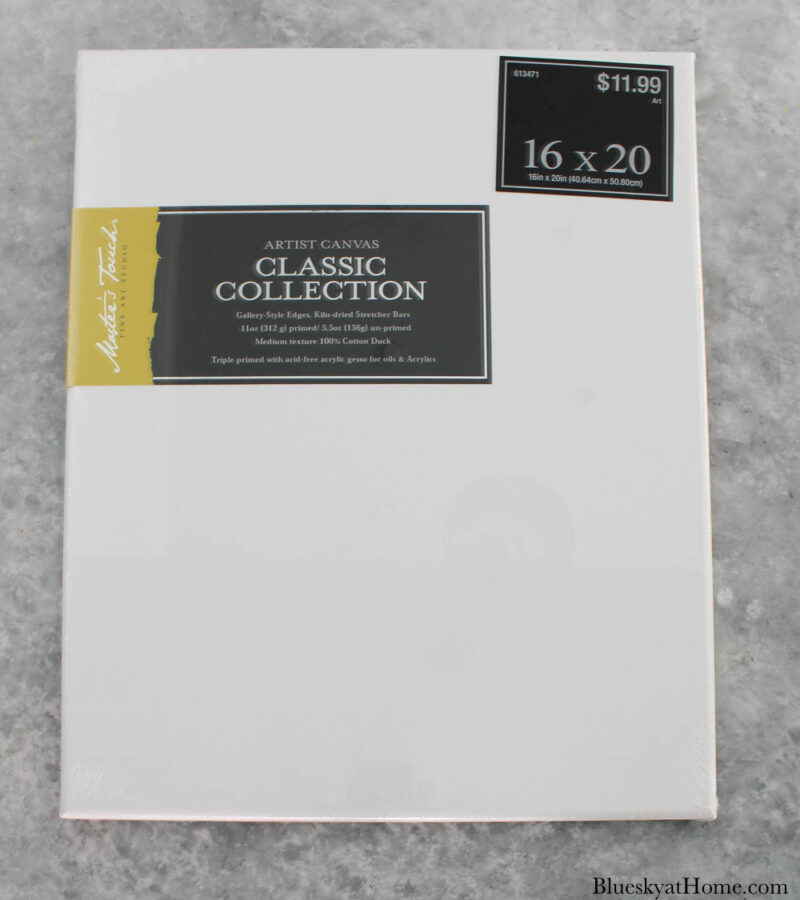
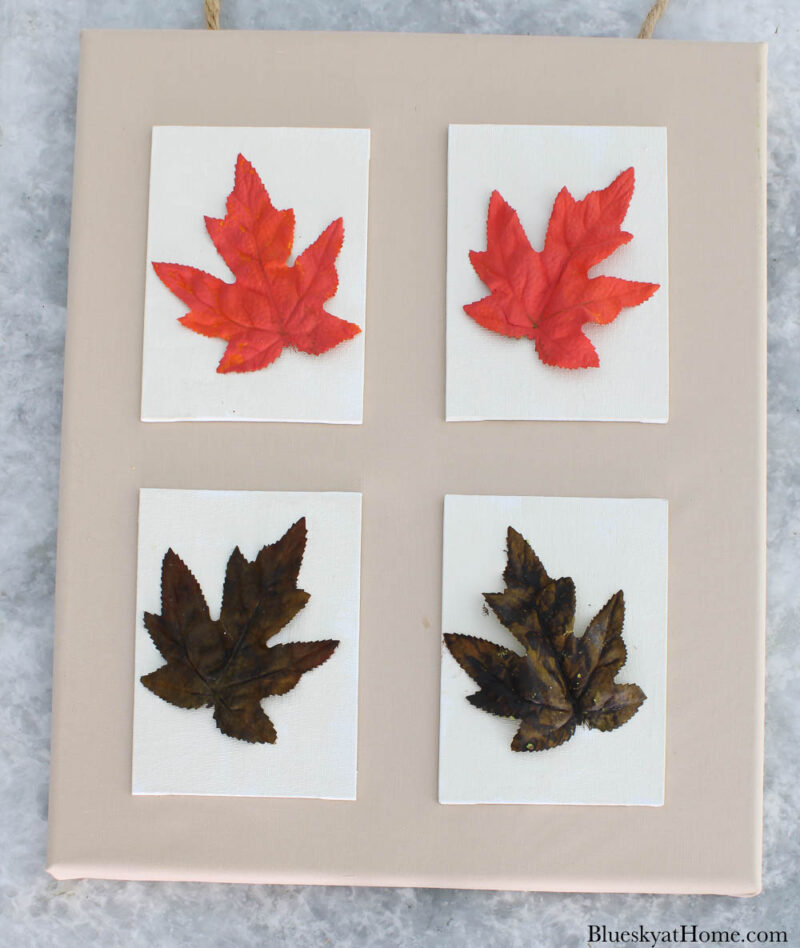
It occurred to me the next morning that the six canvases would look better mounted on a larger canvas, an 16 X 20-inch, which, fortunately, I already had.
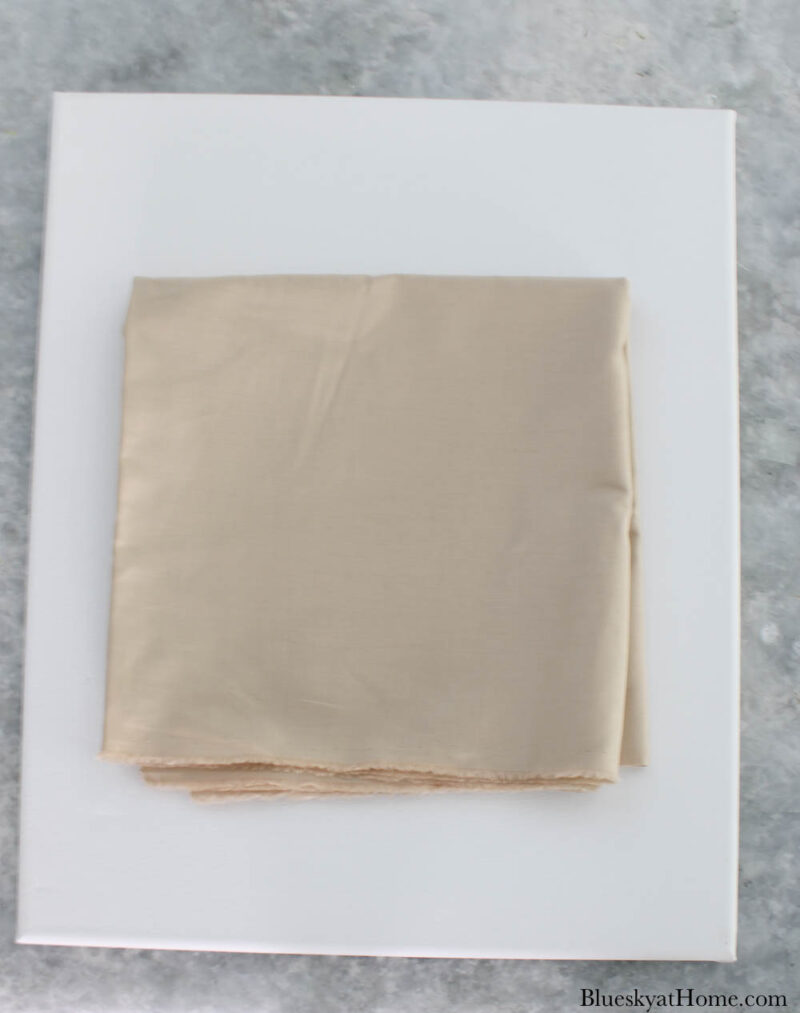
STEP 3 – Cover Large Canvas with Fabric
Supplies needed:
- large canvas to hold small canvases: either 11 x 14 or 16 X 20, depending on the space you have and the size of number of small canvases you want to use.
- fabric of choice, large enough to turn back at least 2 inches on all four sides. Fortunately, I had a piece of light cotton fabric in my fabric stash.
- staple gun to attach the fabric to wood on canvas; a staple gun is an indispensable tool
I’ve had several large canvases in my office just waiting for a project. I bought them months ago at Joann on a 50% off sale. The DIY fall leaf art canvas project was the perfect time to use this large canvas.
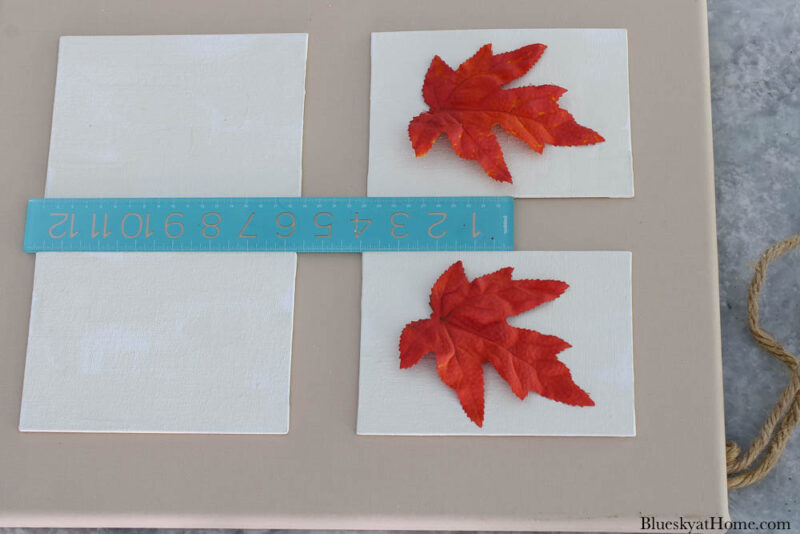
First, I placed the smaller canvases on top to see the arrangement. It was obvious that only four would fit.
The good news? Since I only needed four painted maple leaves, no trip to Dollar Tree was necessary.
Again, the canvas was too bright white for the fall season. I wanted another way to change the color rather than more paint. How about fabric? I went through my bin of cream, beige, and taupe fabric and picked this one.
Other Options to Cover the Canvas:
- use paint to change the color of the canvas.
- cover it with vinyl or glue wrapping paper.
- use adhesive shelf paper
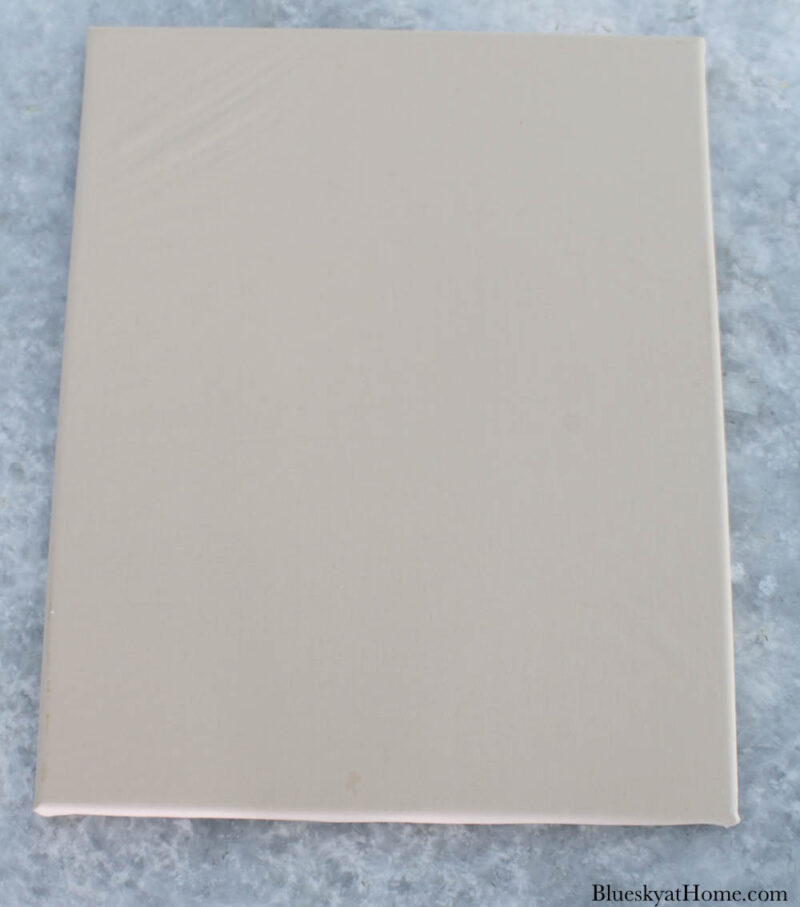
After ironing the fabric, I placed the canvas on top of the fabric, face down.
Using the canvas as a guideline, I cut out the piece of fabric about two inches larger than the canvas. Then Sweet Shark helped me use the staple gun to attach the fabric to the wood frame. (We’ve had this staple gun since Sweet Shark was climbing on the roof to string Christmas lights AKA Clark Griswold.)

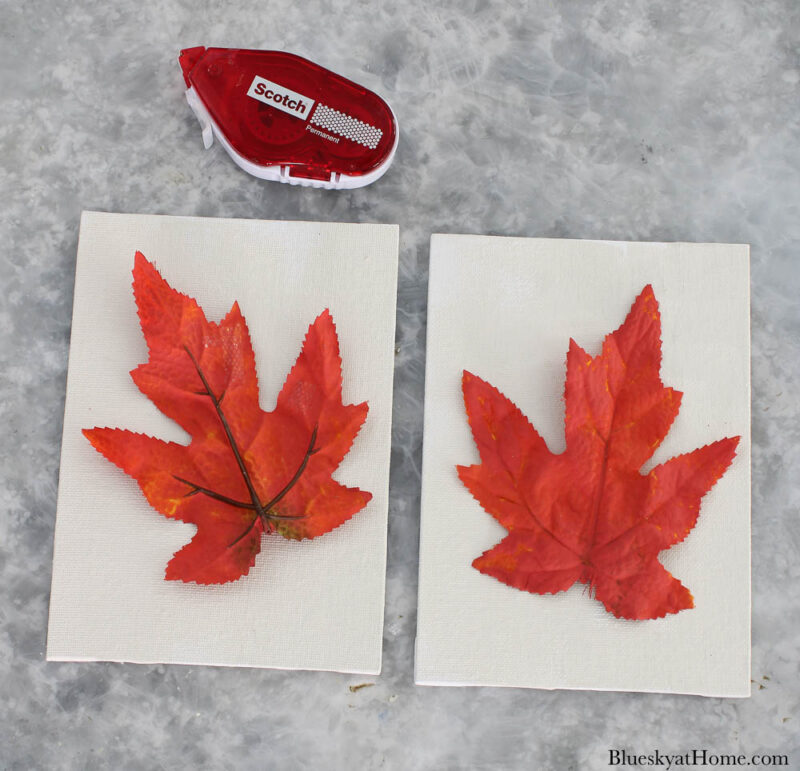
STEP 4 – Attach the Leaves to the Small Canvases
Once the paint on the small canvases and the leaves were dry, it was time to attach the leaves to the canvas.
How do you attach leaves to a canvas?
For this step, you will need an adhesive.
At first, I tried to use permanent adhesive tape. It seemed to work, but when I held up the canvases with leaves, a couple fell off. Next, I used Clear Elmer’s Glue, which worked much better. I placed a book on top of the leaves until the glue dried.
After gluing the orange leaves to the small canvases, I decided to attach the other two canvases to the large canvas first.
STEP 5 – Add Jute/Twine/Ribbon to the Large Canvas
To hang the large canvas, I used two small eye-hooks and a piece of jute twine, all of which I had on hand
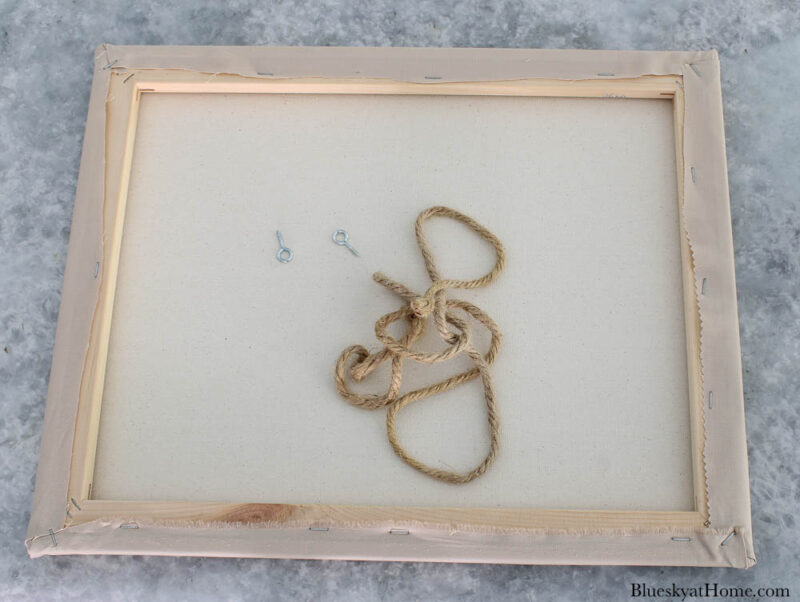
I didn’t tie the other end of the jute twine yet. I would wait until I was ready to hang the large canvas.
STEP 6 – Attach Small Canvases to Large Canvas
I measured inch inches down from the top of the large canvas to place the top two small canvases.
Then I used my ruler to place the four small canvases both vertically and horizontally.
To attach the small canvases to the large one I used double stick mounting tape on the back of the small canvases at the top and bottom. I pressed down and rubbed until I thought they were secure.
Then, I added the two brown leaves to the small canvases with the Elmer’s Glue.
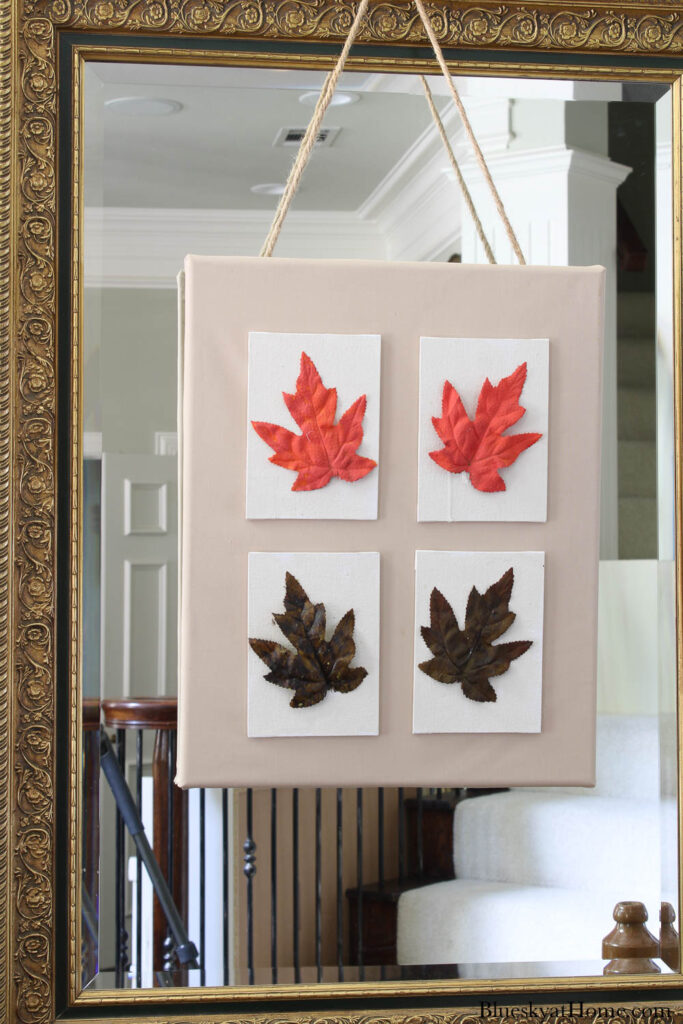
STEP 7 – Hanging the Canvas on the Mirror
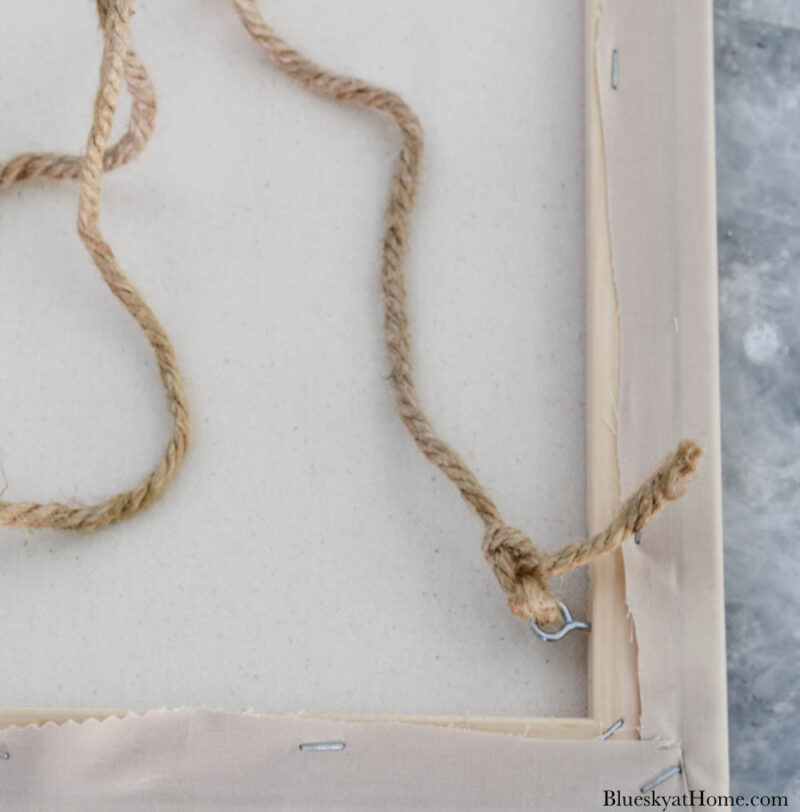
I knew that my fall leaf art canvas would hang in front of our entry mirror. A few years ago, I placed a small nail in the top of the frame. I use it to hang wreaths and other seasonal signs.
I held up the large canvas to estimate how long the jute twine hanger needed to be. I tied off the other end of the jute twine in the eye-hook. I didn’t even cut off the excess twine. I just tucked in the extra twine behind the canvas.
I’ve never created a “mixed media” project before. Using canvas, faux leaves, paint, and fabric together worked out better than I anticipated. But I do love how the fall leaf art on canvas looks. It’s simple, but impactful.
Here is another fun fall wall art project that is so easy to make with a unique way to make a DIY frame.

To start accessorizing the entry commode, first, I added a wood palette, two hay bales from Hobby Lobby and three ceramic containers, a flea market find.
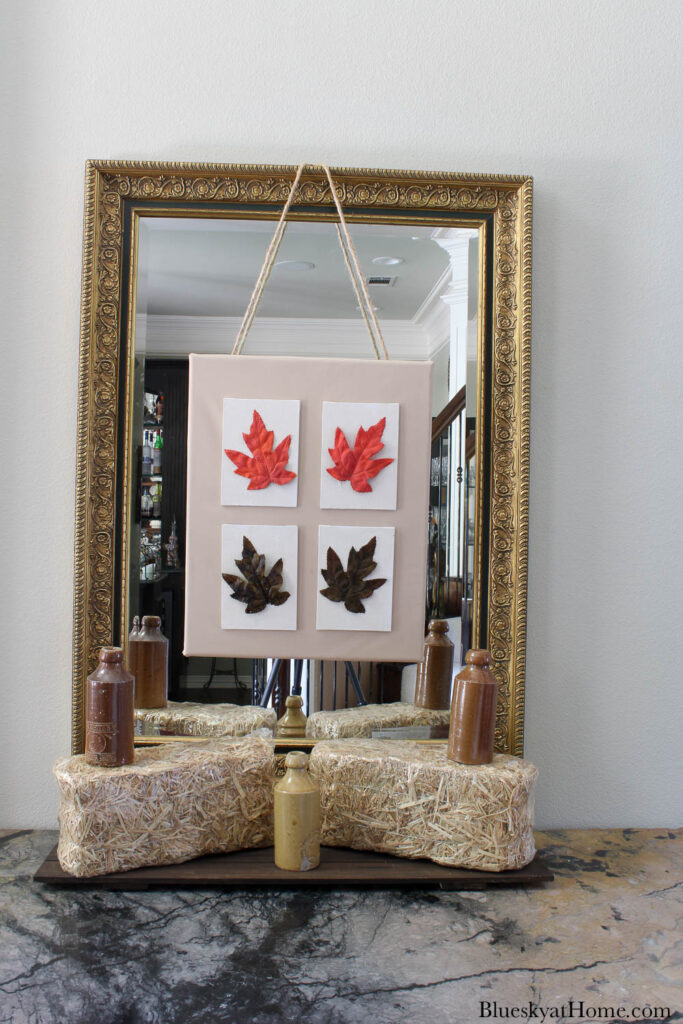
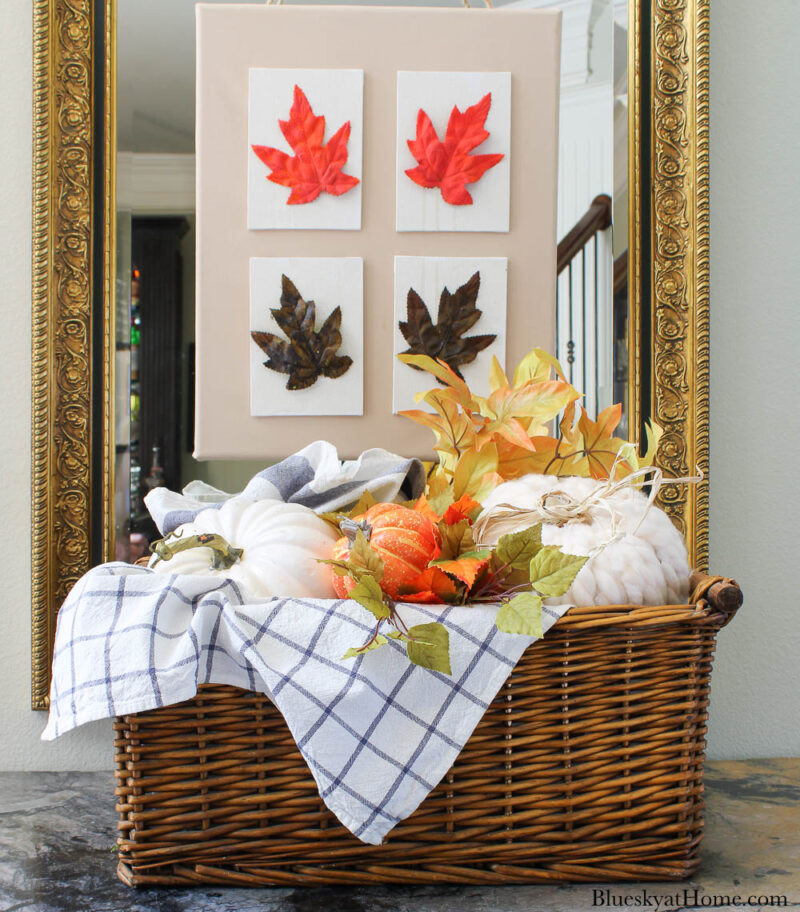
Here is how I finished the entry vignette. I think it looks great.
Ready to see what my friends have in store for you. First hop over to Mary Jo of Masterpieces of My Life and see her collection of craft projects.
I hope you will PIN this fall leaf art canvas project.


Simple but yet cute and feels like Fall. I like it and thank you for sharing….. Cathy
Hi, Cathy. I’m so glad you liked this project. It’s one of my new fall favorites.
LOVE this Fall Canvas Wall Hanging, Carol!
Don’t forget to join us over at the Creatively Crafty Linky Party every Wednesday through Sunday
https://creativelybeth.com/creative-crafts-linky-party/
Followed and Pinned!
Creatively, Beth
That is lovely!
Thank you, Joanne. I appreciate your feedback.
What a fun project Carol! I love your process and how you use what you have on hand. I try to do the same thing and I’m always hoarding craft supplies. lol. I like the canvas idea and I’m saving that for a future project. Thanks for the inspiration. It’s always fun to share with you. XO- MaryJo
Very creative idea, Carol! I l love that you can be as creative as you’d like and customize the art to your own personal taste for fall!
I enjoyed reading through your creative process. It’s so helpful to learn how paints can be mixed, how to use different textures, and that it’s okay to not like something you are working on. Love this tutorial and imagine how you could do this with Christmas bulbs and fun fabric.
Thank you, Kelli. The former English teacher comes out in me, even when explaining a DIY project. And, yes, a Christmas project could definitely be used.
Such a cool idea to decorate for fall! I love the beautiful paint colors on the leaves!
Your leaf art looks really pretty, and perfect for decorating for fall, Carol! What a great idea to paint the leaves! I was trying to find leaves in an off white color but couldn’t – never thought about painting them! Duh! Thanks to you, now I know! Lol!
This is so cute, love your version of the leaves. Can’t wait to see your home all decorated in it’s fall coat. Great tutorial!
What a fun project. It came out so pretty and looks perfect hung over the mirror. Nice job!
I love this project Carol! The wall of framed leaves is stunning, however I think that your project is more attainable and pretty. Awesome finished piece of art! Thanks so much for sharing.