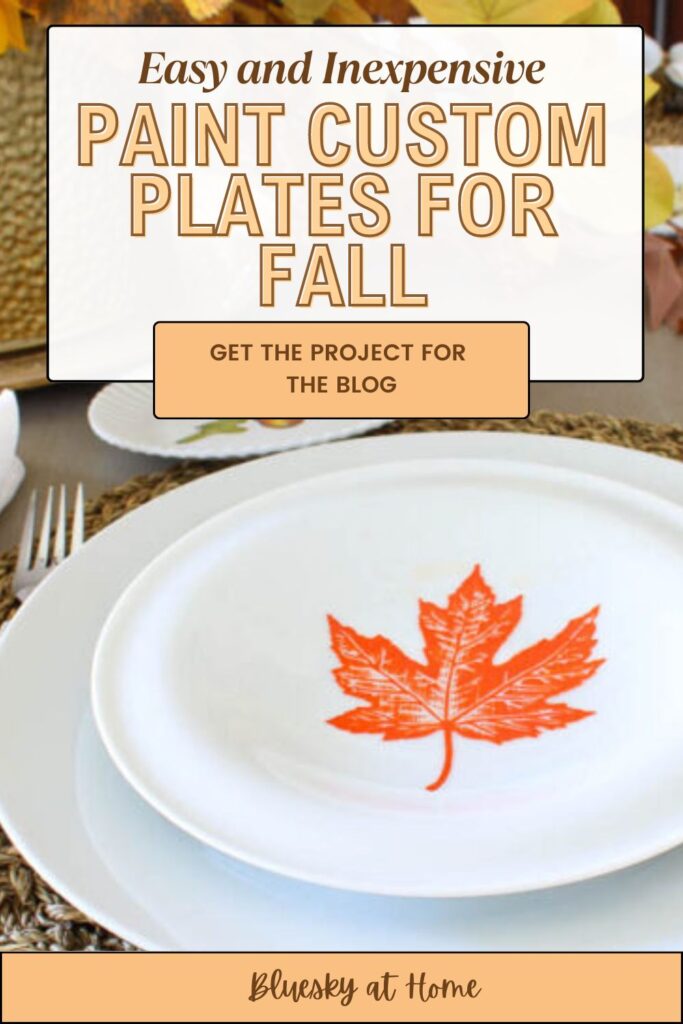
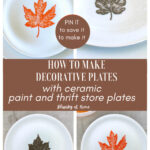
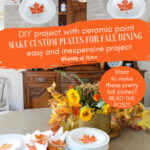
How to Make Decorative Fall Plates
Do you like to add a custom touch to your decor? We want pretty things with a fall vibe. It will also soon be entertaining time. Custom plates can add a fun fall vibe to any table. I’m going to show you how to make decorative fall plates.
Whether you want to use fall plates as decorative decor or as dishes for your autumn tables, you can use this DIY project.
You can customize these plates to your liking. Once you know the steps, you then can pick your design and color, and gather your other supplies. Then you are ready to start making decorative fall plates.

This project is not hard, I promise. It’s also very inexpensive. That’s two checks in my book.
If you follow Bluesky at Home, you know I love creating pretty accessories for our home. If you enjoy the creative process, then you’ll really like this project.
Decorative Fall Plates: an Easy DIY Project
Are you an artist? If you are, then my hat is off to you. I’m not, so I rely on stencils to create artistic designs on all sorts of surfaces.
With the right stencils and other supplies, you can create pretty designs that have depth, color, and interest. It’s easy when you know the easy steps to follow.
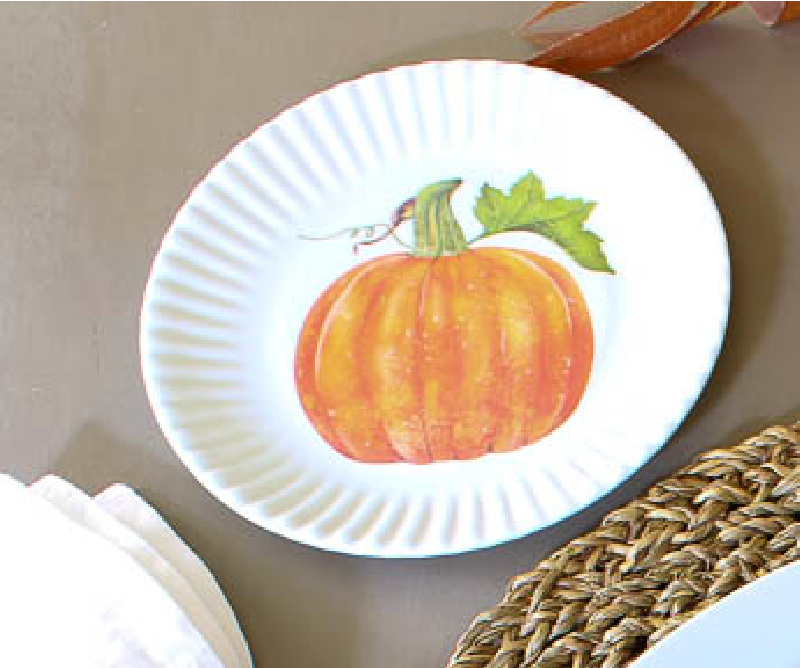
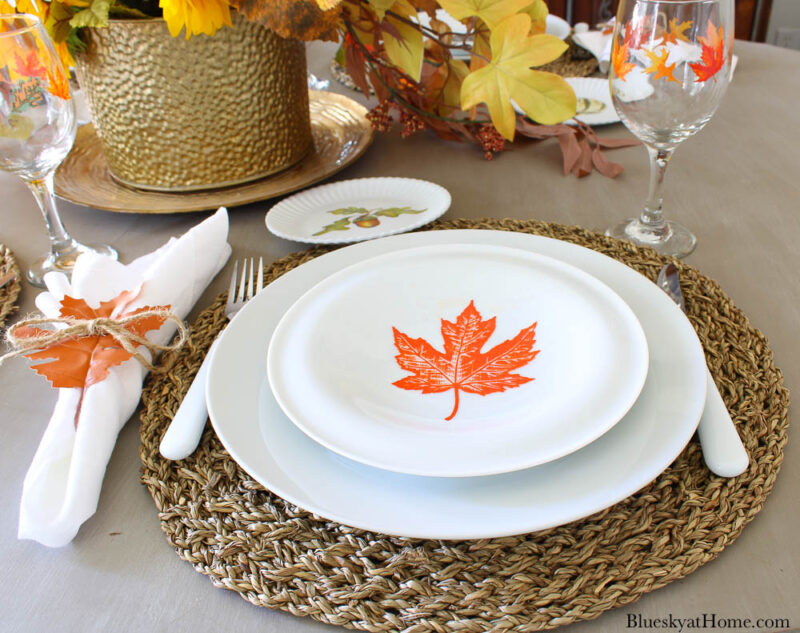
I did have a small inspiration for making these decorative fall plates. We found these darling bread and butter plates at a store called Mast General Store in Boone, North Carolina last summer when we were visiting friends who have a home in Blowing Rock.
I still needed salad plates for a little dinner party we were hosting. That’s when the idea of making more decorative fall plates popped into my head.
Supplies for the Decorative Plates
It only takes a few supplies to make these decorative fall plates. I planned to use them as part of my fall tablescape.
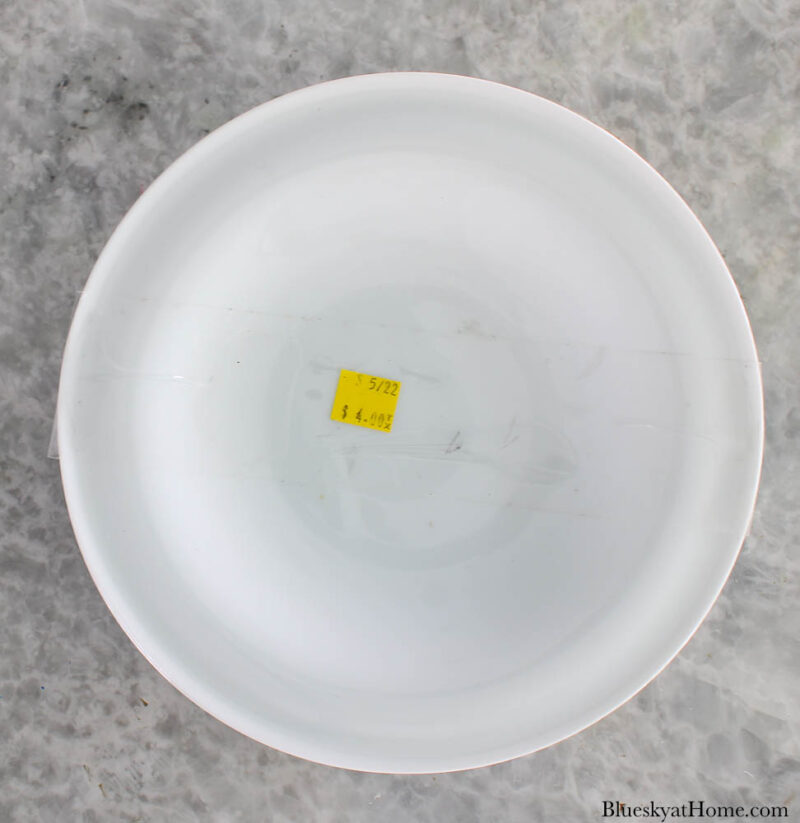
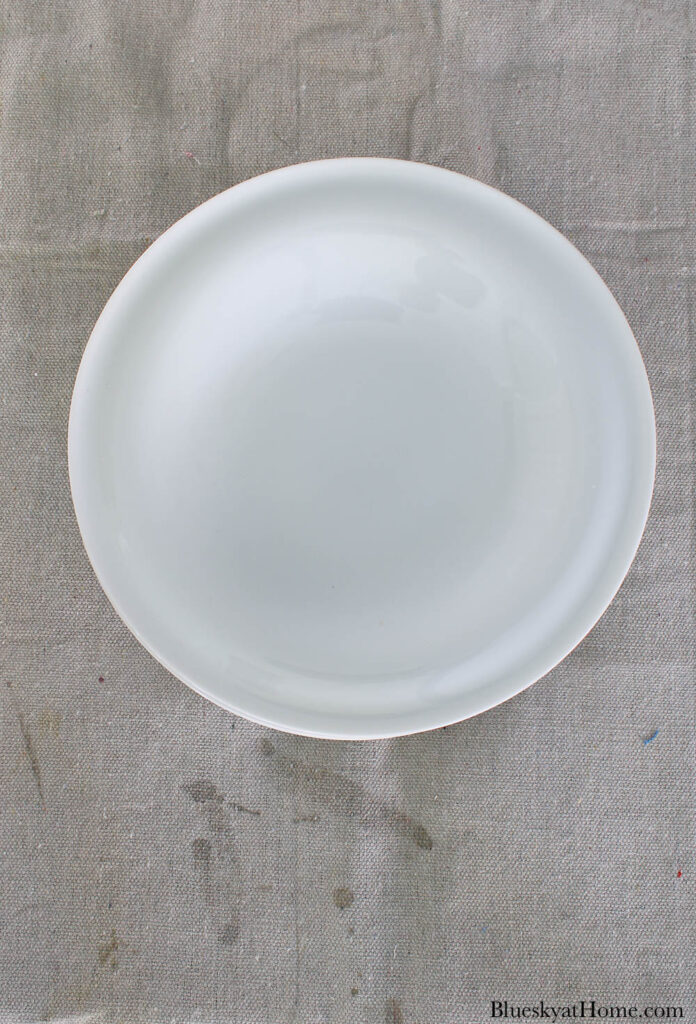
- a plate or shallow bowl of your preferred size – I found 4 shallow bowls at the Resale Shop back in July – $4.00 for all. Thrift stores, flea markets, and garage sales are great places to find plain white plates.
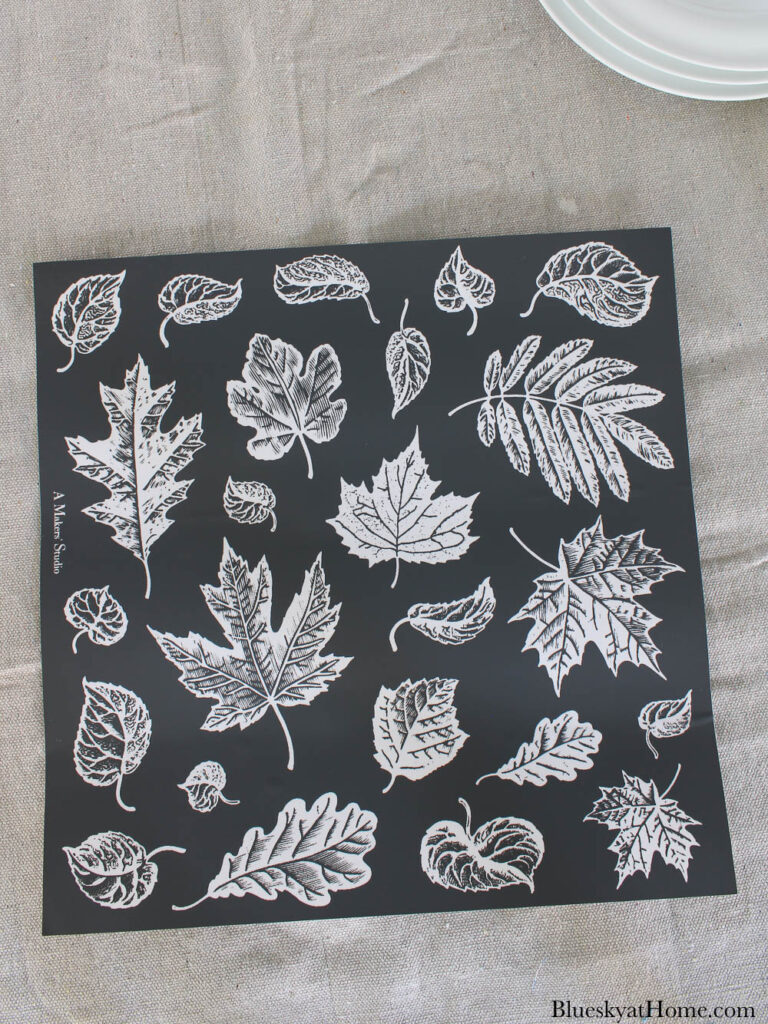
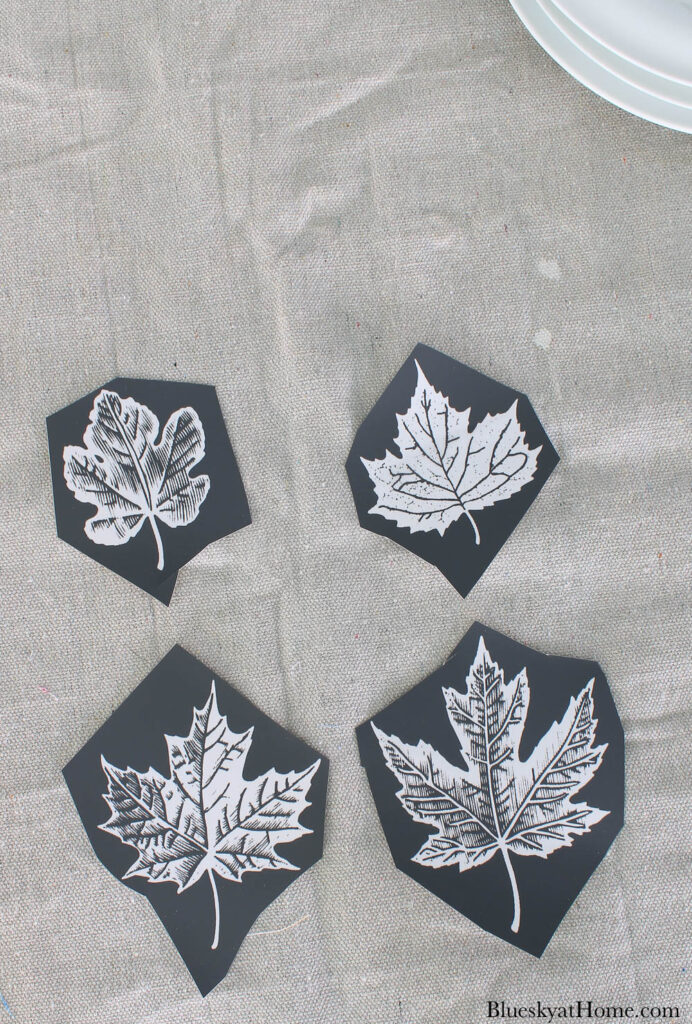
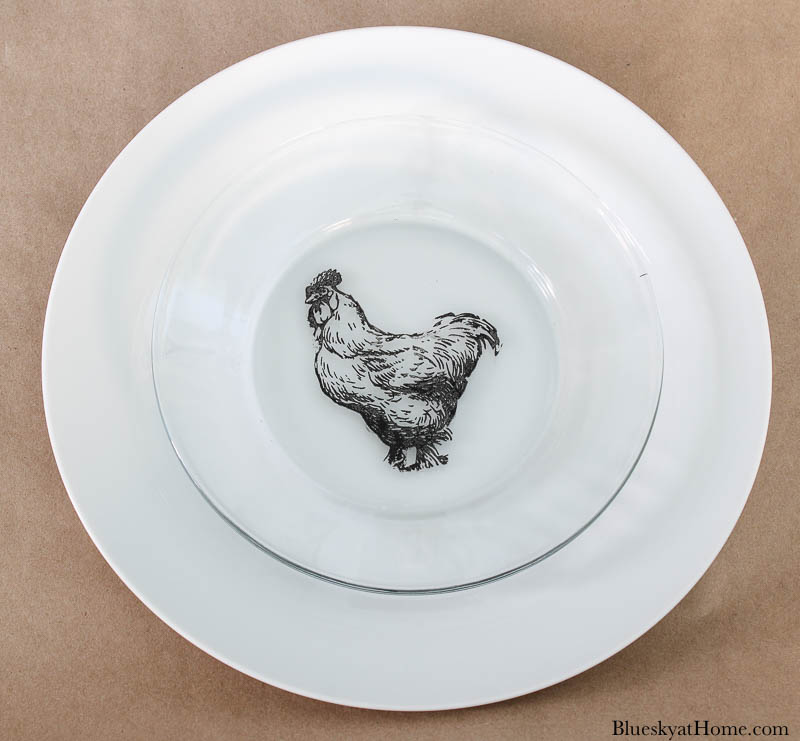
- fall stencil of choice – I chose the Leaf Stencil from A Makers’ Studio. There are about two dozen different leaves on a single sheet.
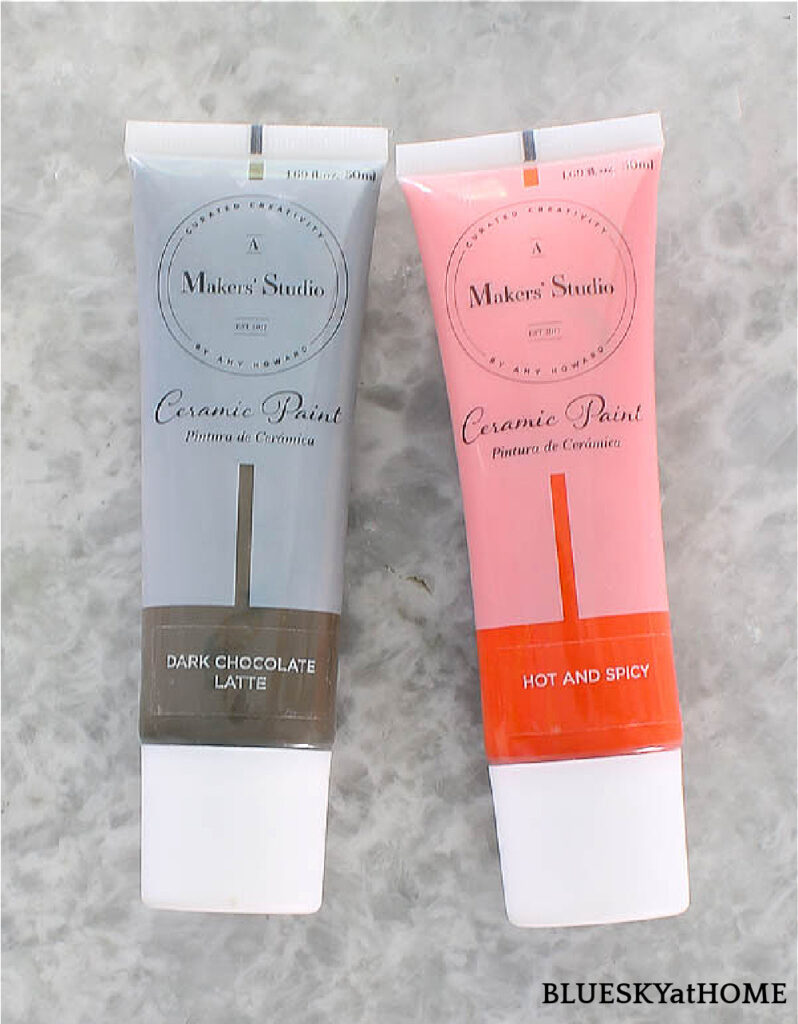
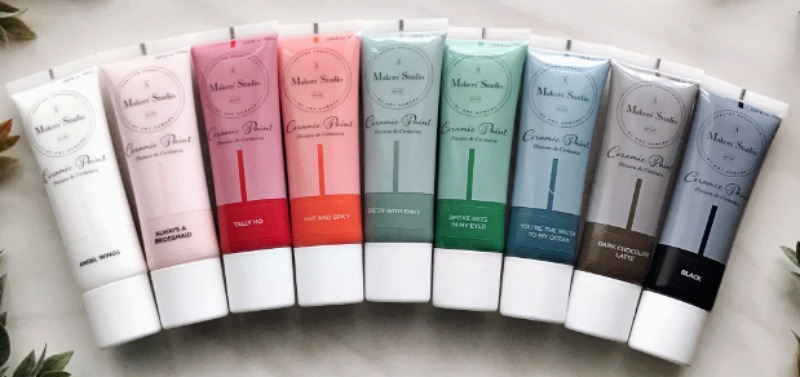
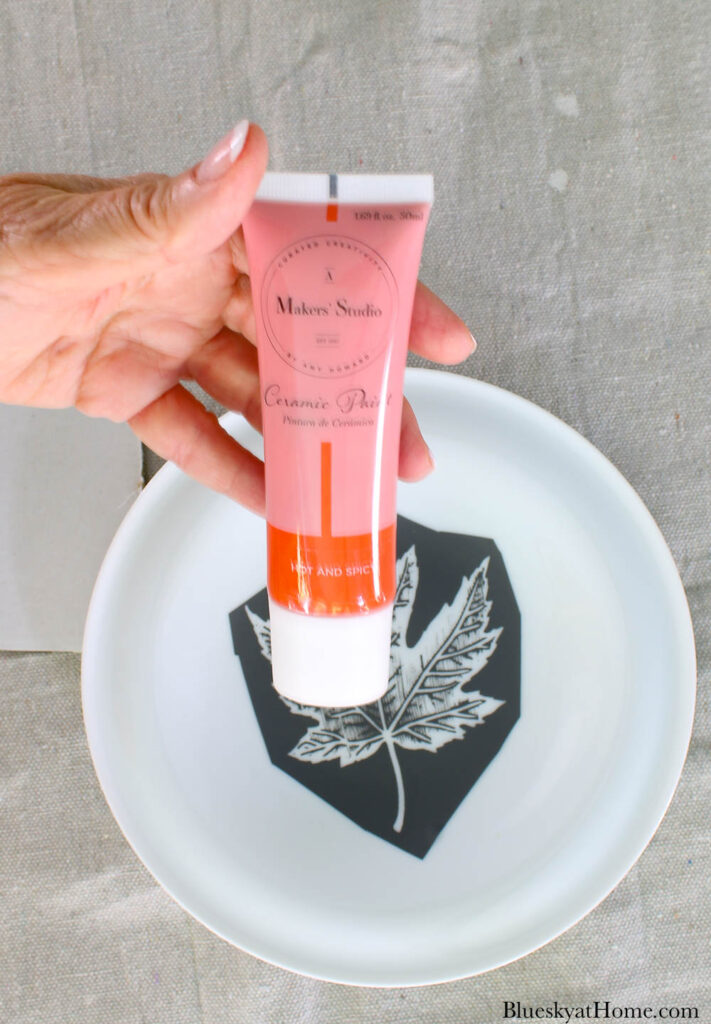
- Ceramic Paint in your colors of choice – I used two colors: Hot and Spice and Dark Chocolate Latte.
- cover for your workspace
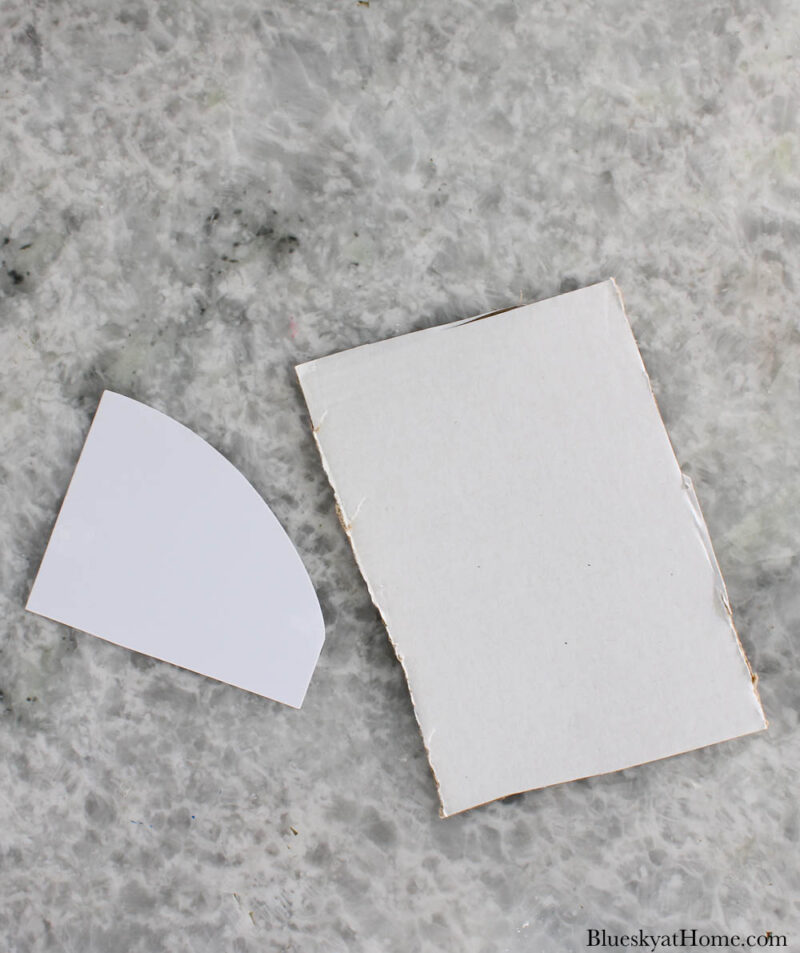
- plastic scraper to apply paint and a piece of cardboard
- scissors – to cut out stencils
- container of water – for cleaning stencils
You will use the cardboard to offload your Ceramic Paint.
Why Ceramic Paint?
- It can be applied to ceramics, porcelain, glass, and metal.
- It is food-safe.
- It can be microwaved.
- It can be hand-washed.
- It is no-bake.
- It comes in a range of beautiful colors.
- It goes a long way.
Why These Stencils?
- Tri-mesh stencils allow for a depth of design.
- The stencils can be repositioned if needed.
- The stencils have an adhesive backing so they adhere to your surface and paint will not bleed through.
- The stencils can be washed of paint and reused multiple times.
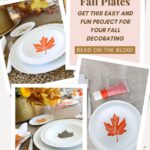
Step 1 – Prepare Your Plates/Bowls
Remove price stickers and/or tape from the plates. Use Goo Gone to remove the stickiness. Thoroughly wash and dry.
Step 2 – Prepare Your Stencils
Choose your stencils and use scissors to cut out the stencil you want to use. I chose four leaf stencil designs.
Do not remove the stencils from the paper backing yet.
Pull the tri-mesh stencil from the paper backing. Set the backing aside. You will place the stencil back on the backing when you are finished with it.
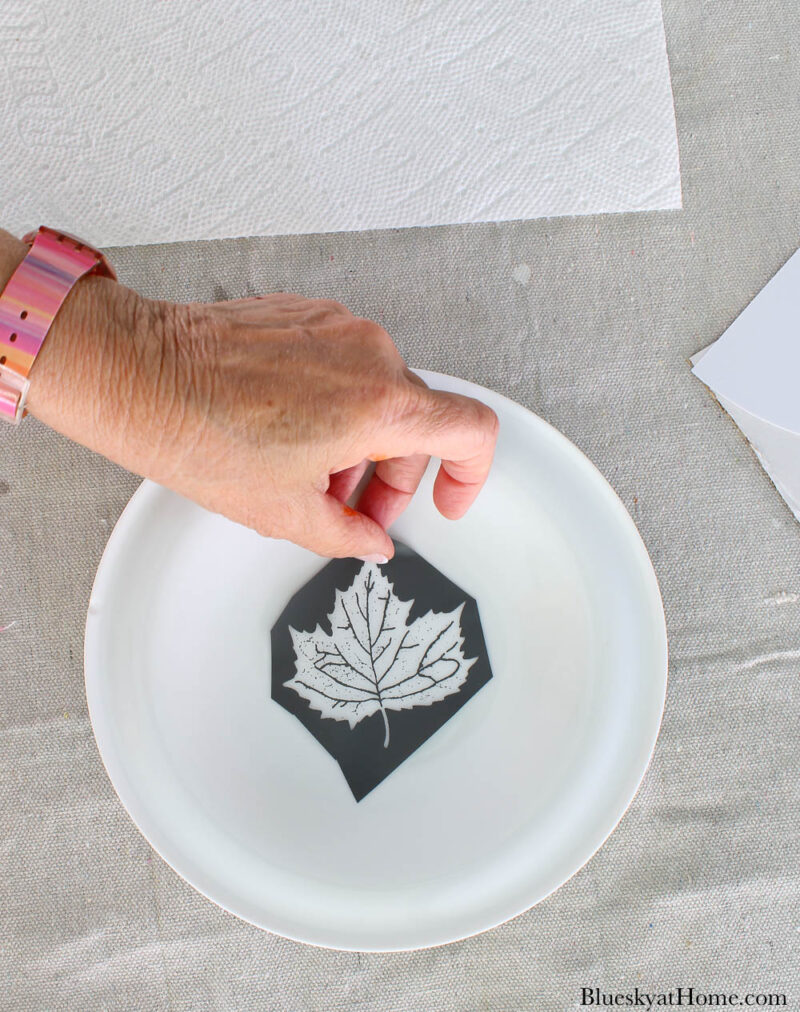
Place the stencil design on the plate and position it where you want it.
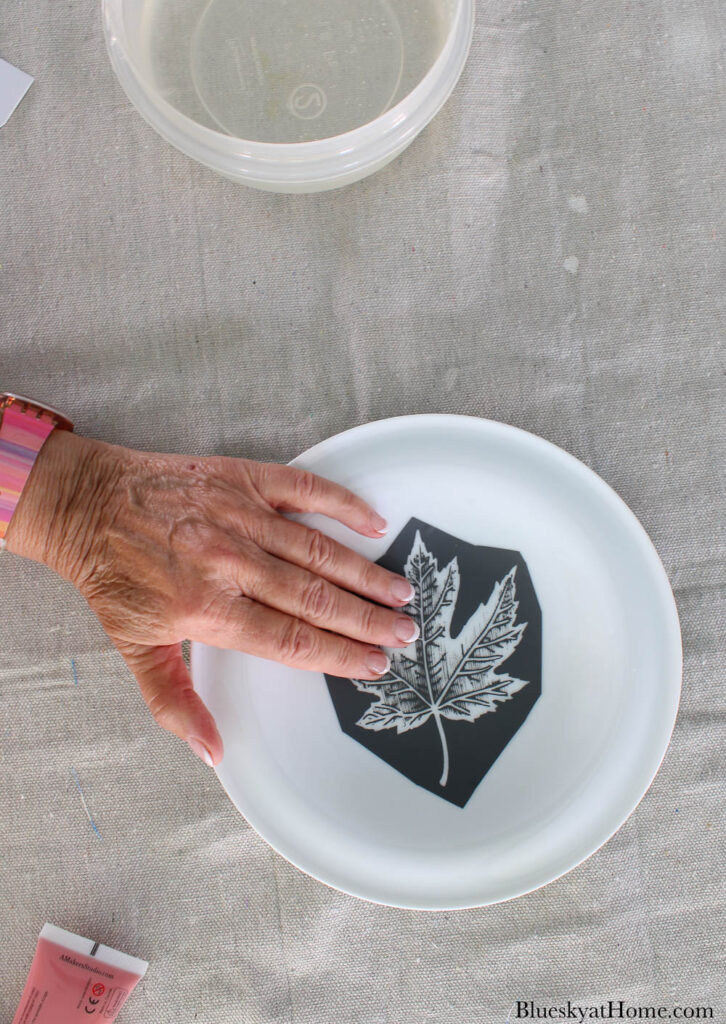
Smooth down the stencil on the plate. Make sure there are no bubbles. If necessary, you can remove the stencil and reposition it.
Step 3 – Apply the Ceramic Paint to the Stencils
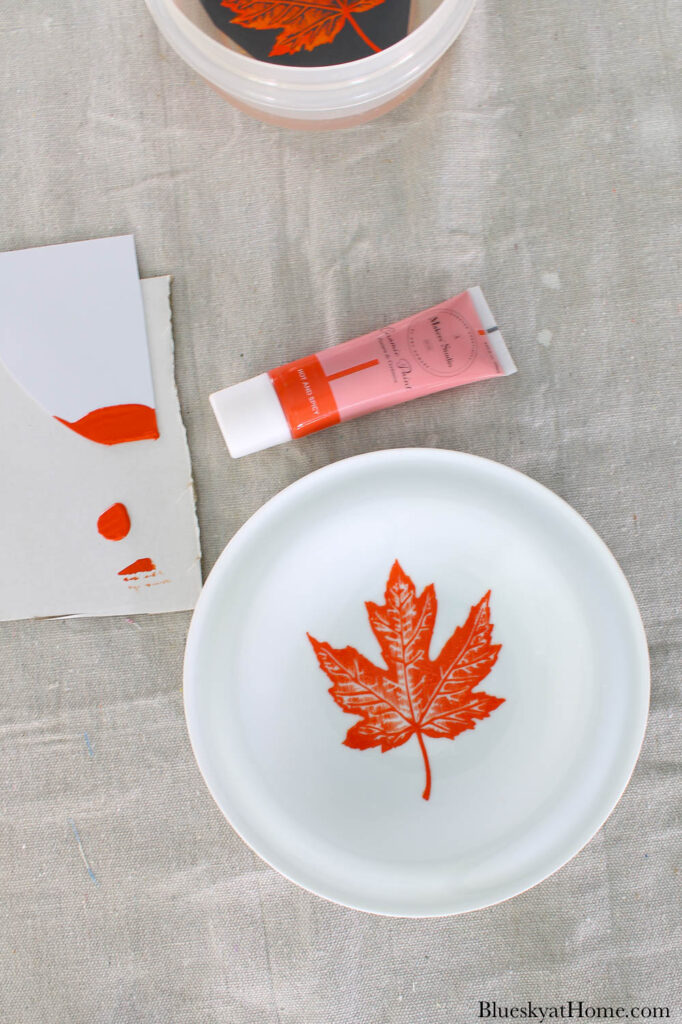
Squeeze out a small amount of your preferred paint color onto a piece of cardboard or glass.
Use your plastic scraper to transfer the paint from the cardboard to the surface of the stencil. Smooth the paint across the stencil, pressing down as you go.
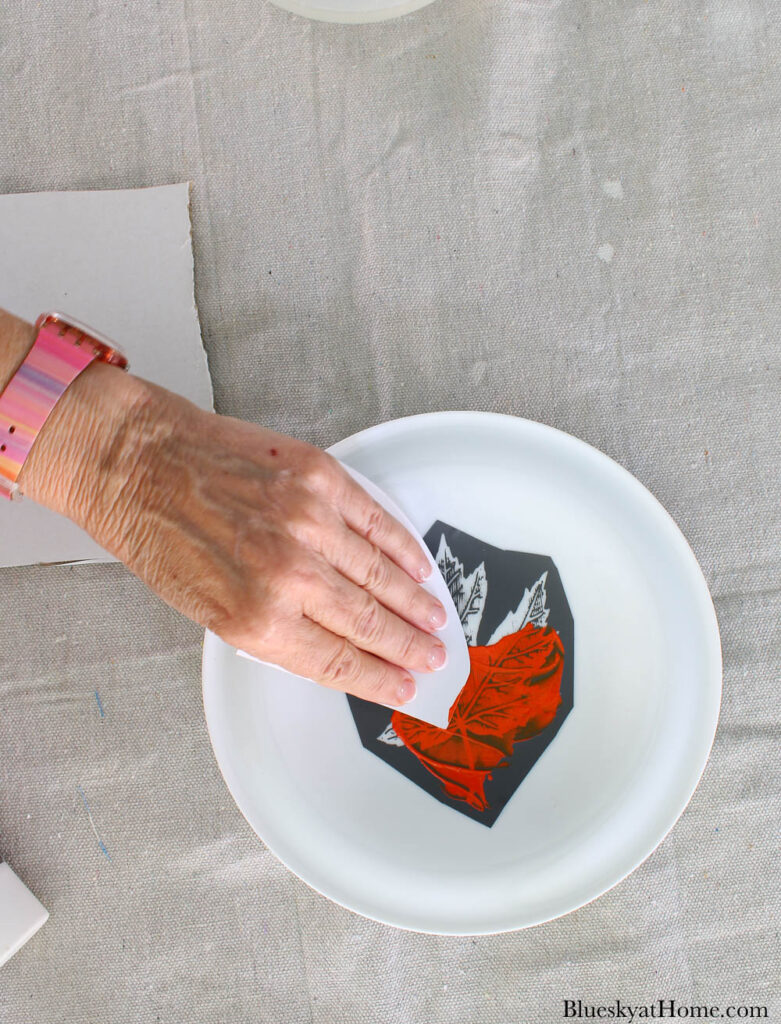
Be sure to cover the design completely.
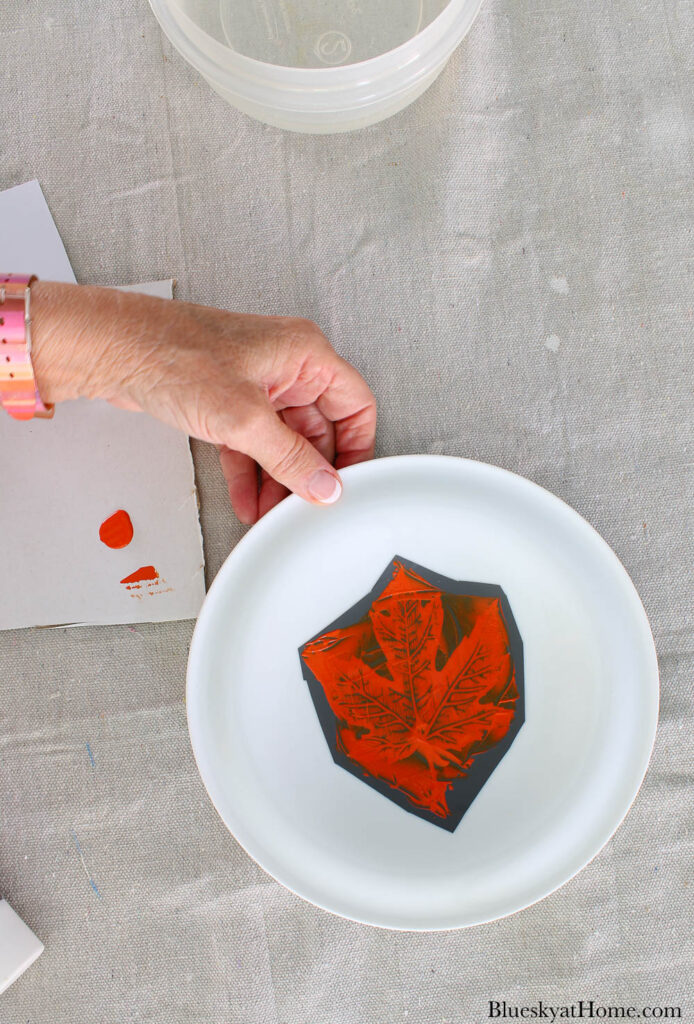
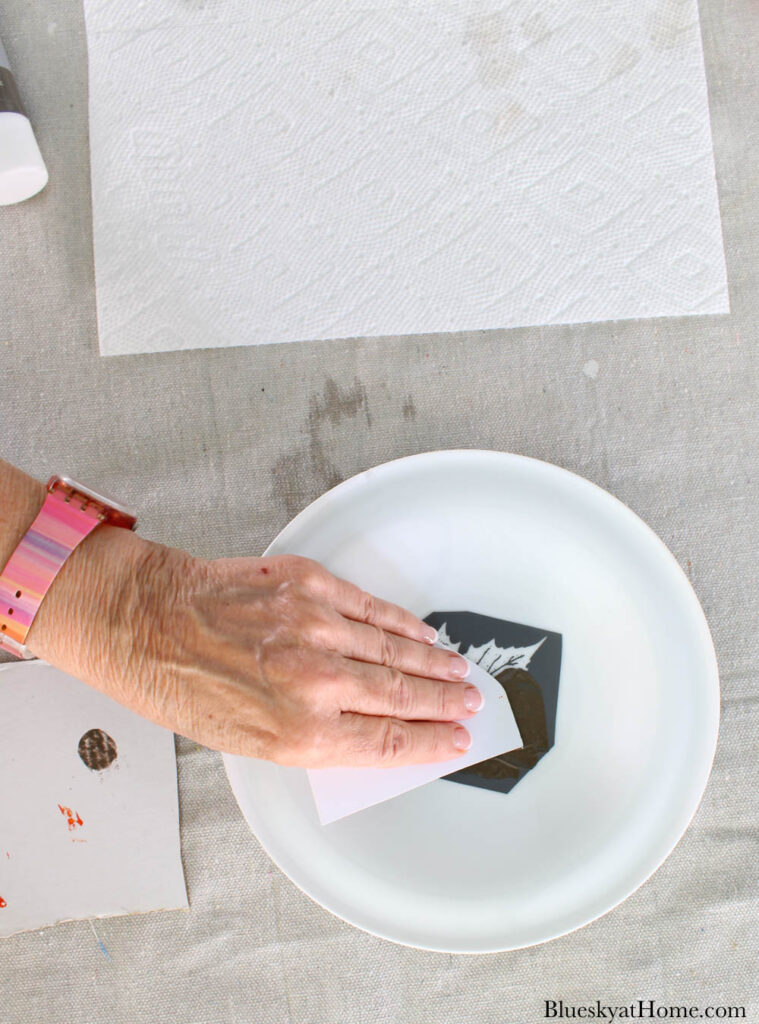
Remove the Stencil from the Surface
Carefully remove the stencil from the surface. Use your scraper to “pick up” a corner of the stencil and pull it back from the surface to reveal your design.
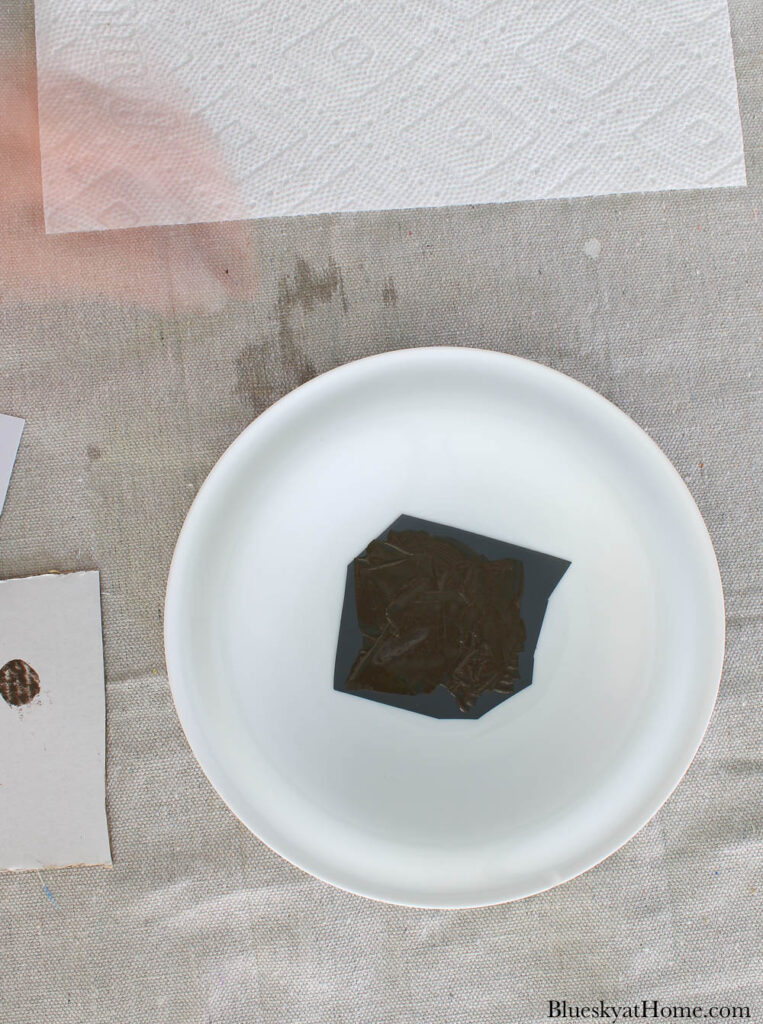
Cleaning Your Stencils
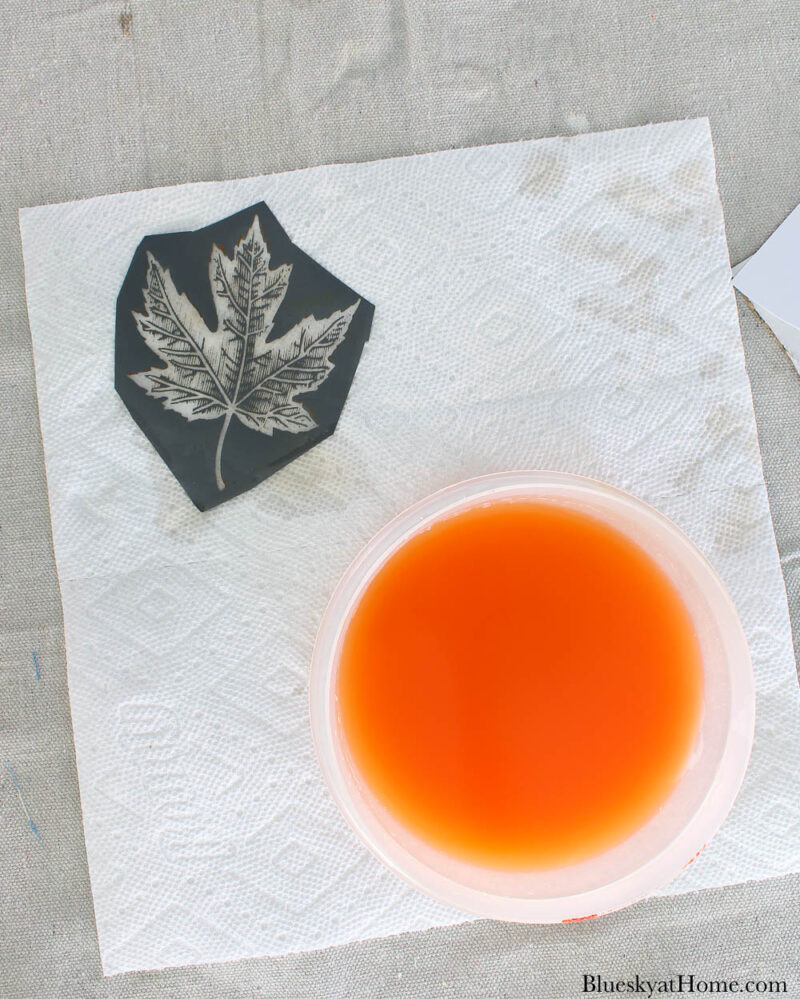
Have a bowl of water in a container ready. As soon as you remove the stencil from the surface, place it in the water.
Use your fingers to rub off the paint from the stencil. When you have removed all the paint, remove the stencil from the water. Place the stencil, design side down, on a paper towel to dry.
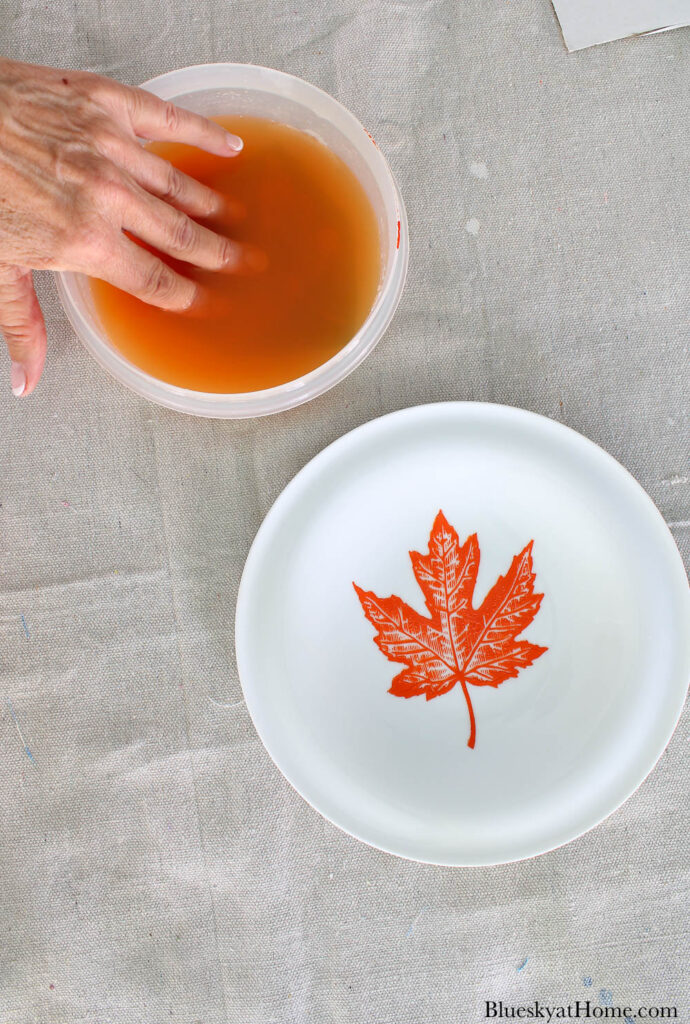
Discard the colored water and refill your container with fresh water.
Repeat this process with your remaining plates and stencils.
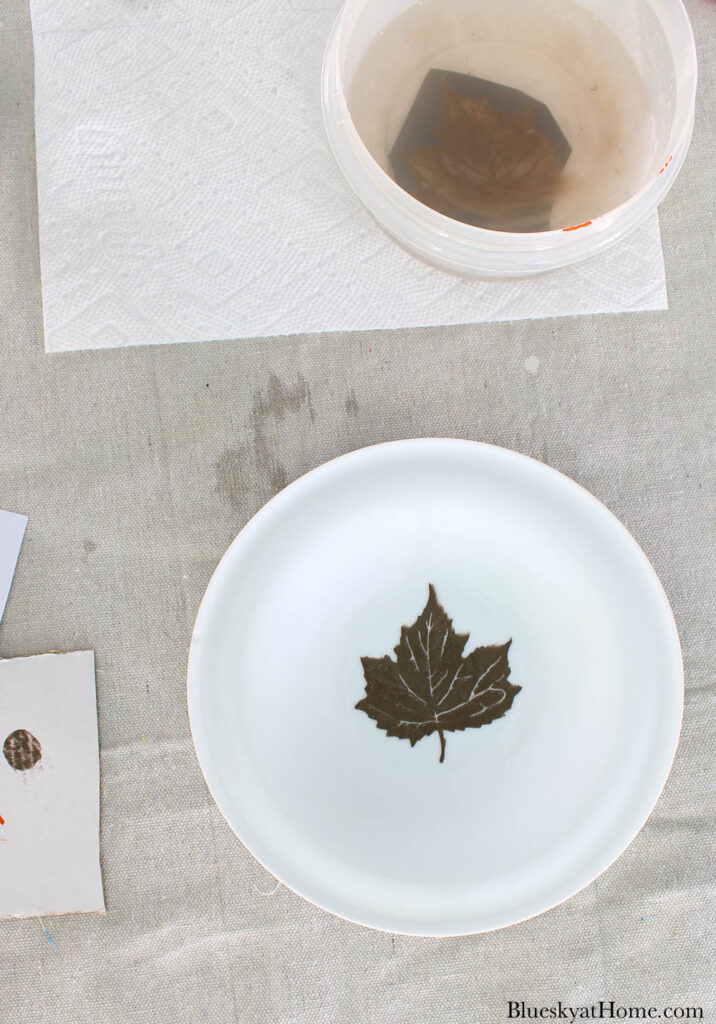
After you finish applying the Ceramic Paint to the stencils, allow the paint to thoroughly dry. I let mine dry overnight.
Finally, return your cleaned stencils to the paper backing and store them in the plastic envelope that the stencils came in.
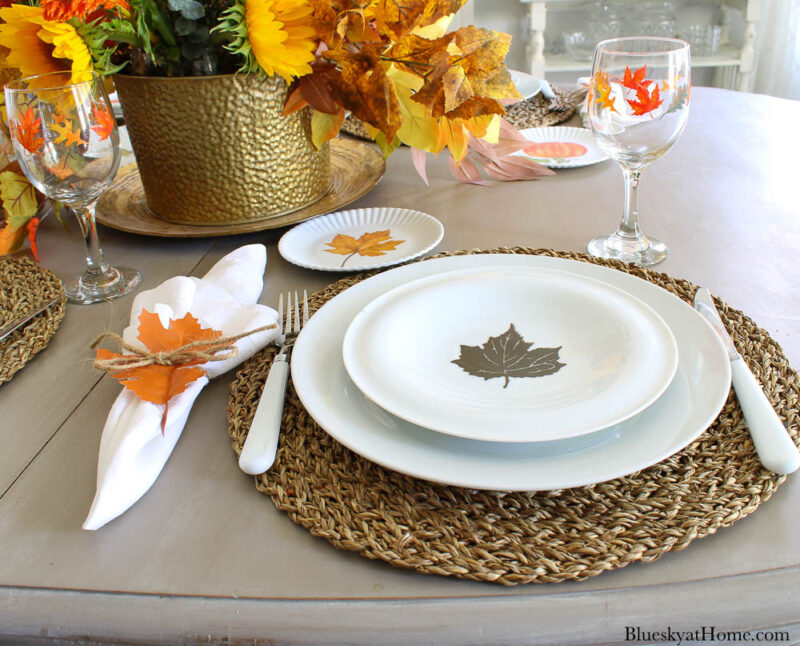
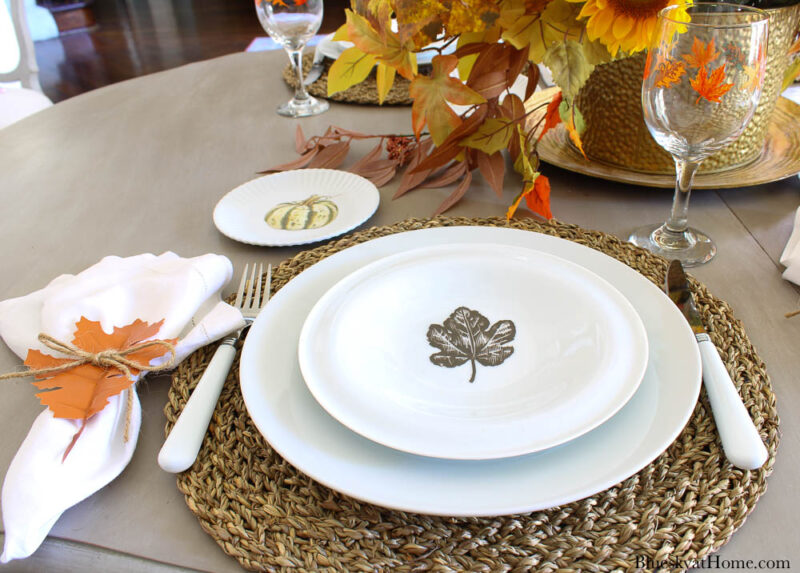
Using Your Decorative Fall Plates
You could use the decorative fall plates as a decor accessory. You could also attach a hanger to the back of the plate and hang it on a wall or cabinet.
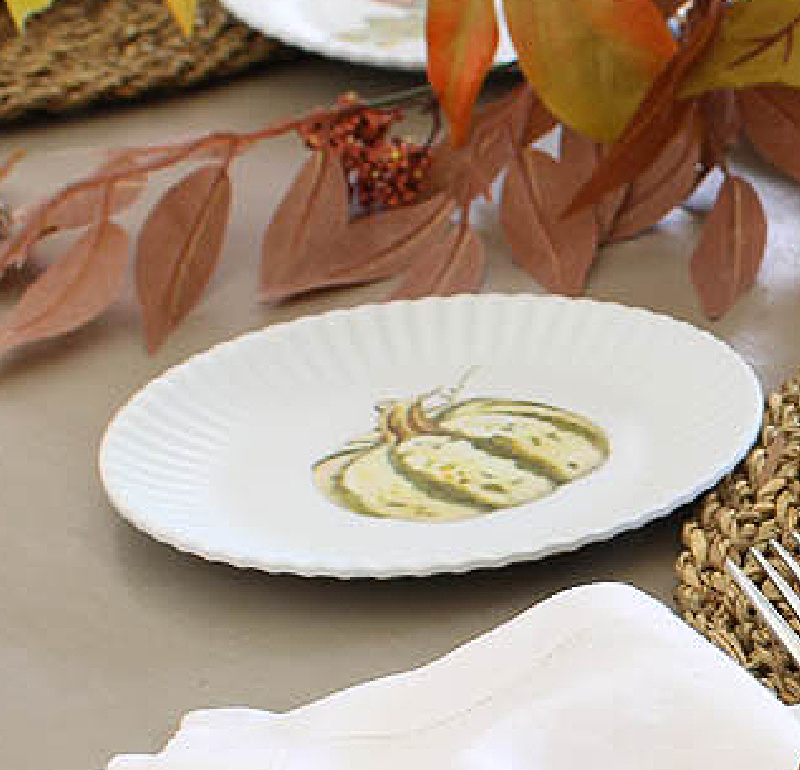
I chose to use mine as actual dishes on my fall tablescape.
Want more fall decor with a leaf theme?
- How to Make Leaf Art on Canvas
- How to Make Easy Leaf-Inspired Air Dry Clay Coasters
- How to Use DIY Paper Leaves 5 Ways
That’s how easy it is to make decorative fall plates. You can pick different designs to have completely customized plates or bowls of your own.
TIP: If you don’t want to use stencils, you can use the Ceramic Paint and paint freehand designs on the plates.
More Ideas for Using Ceramic Paint
I love using Ceramic Paint and Stencils to make decorative items for our home. Would you like to see some more projects like this one?
How to Paint Glass with Ceramic Paint
Have you ever painted glass? Let me show you how to how to paint glass with ceramic paint for your home. Learn how to create your own custom dishes, vases, and glasses with vibrant pops of color and custom designs.
How to Make Farmhouse Decorative Tiles
Decorative tiles for floors, backsplashes and accessories were really popular. As you might know, they can be expensive, depending on the materials, the source, and the design. It’s so easy to make farmhouse decorative tiles.
How to Stencil Tile Coasters
Would you like coasters that are prettier than a napkin? Here’s how to stencil tile coasters for home decor with a pretty design. Learn how to stencil tile coasters that are pretty and practical.
You could have these lovely decorative fall plates for your own. Just pick out your favorite stencil and Ceramic Paint colors. Order them now. And don’t forget to think ahead to Halloween, Thanksgiving and Christmas.
Be sure to PIN these Ceramic Paint projects for inspiration.


So you said these ceramic paints are food safe, but don’t need to be baked on? you just let them dry and you can eat off the plates/bowls/cups what have you? These are awesome!
Yes, but if you are concerned, I would seal them with a food-safe clear sealer. Mod Podge has one that is dishwasher safe (https://amzn.to/3U9VMrr – affiliate link). I’ve used the little plates for pastries and then wiped them off with light soap and water. Thanks for the comment and question.
These are FABULOUS! Thank you for the detailed how-to. Featuring when my link party opens!
What a great tutorial for DIYing fall decorative plates, Carol! Thanks for sharing at Tuesday Turn About! Always happy when I get to feature a former co-hostess! Pinned!
Super decorative and love the color – so vibrant and bright. Aswesome
Thank you for sharing your links with us at #274 SSPS Linky. See you again next week.
GORGEOUS upcycle, Carol!!
Don’t forget to join us over at the Creative Crafts Linky Party every Wednesday through Sunday
https://creativelybeth.com/creative-crafts-linky-party/
Followed and Pinned!
Creatively, Beth
Your plates are so cute! I’ve seen your inspiration plates. . . our little mountain getaway is just about 20 minutes from Mast General Store in Boone. (By the way, have you been to the original Mast General Store in Valle Crucis? It’s worth a trip if you’re ever back in that area!) Thanks for the inspiration!
Thanks so much for joining the Grace at Home party at Imparting Grace. I’m featuring you this week!
These are adorable! I didn’t know that ceramic paint was food and microwave safe. I’ll definitely be trying this! I’ll be featuring your post on tomorrow’s Crafty Creators. Thanks for sharing!
HI Carol, I did this with glass plates, but I love the ceramic plates! Pinning!
laura in Colorado
I love the idea of using these as wall and shelf decor. Thanks for sharing.
I really love how your fall plates came out. I never even thought about grabbing some thrifted plates and painting on them. Such a great idea and so pretty. Pinned!