Simple DIY Fall Wood Signs to Decorate a Ladder
Do you like signs for the seasons? How do you make simple DIY fall wood signs? You start with a piece of wood. Then you add words, paint, stencils, and ribbon.
Where do you find wood signs? Just about in any craft store. Or at your local dollar store. Or online.
What do you use to decorate your fall wood signs? Paint, stencils, leaves or any fall thing that tickles your fancy.
What can you decorate with your wood signs? Just about anything.
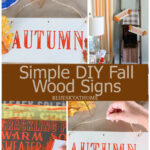
I took simple wood signs from Dollar Tree and used them to decorate my vintage wood ladder.

Wood signs can be made from supplies found at a dollar store, craft store, or your wood stash.
This project is the second of my Autumn in August review: great projects to inspire you for a new fall season.
DIY Fall Wood Signs
I love the vintage ladder that I found in Atlanta. My daughter brought it to Dallas in her van a few years ago.
I thought fall signs would be a fun decor addition for my vintage ladder. It always holds a few throws for decor and keeping warm.
I didn’t even have to make a trip to Dollar Tree. I went through some of my craft supplies and found a package of two wood signs.
Supplies for Fall Wood Sign Project
This post contains affiliate links to products used in this project. If you should order any product from this site, I may be compensated, but you will not pay a penny more.
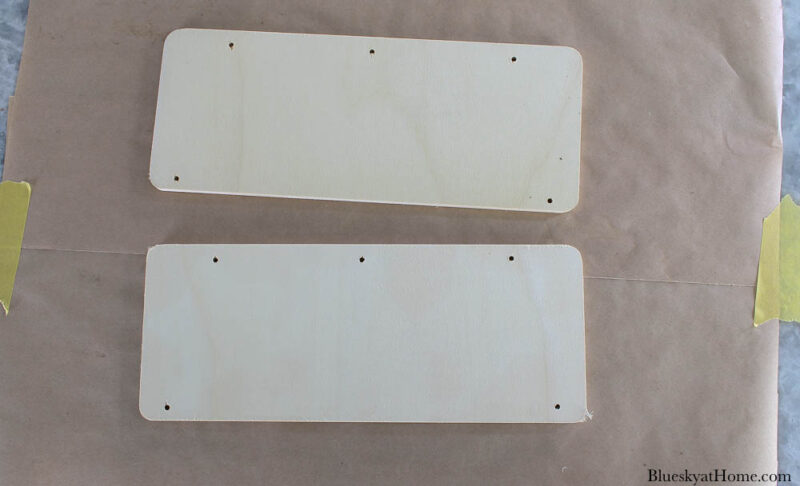
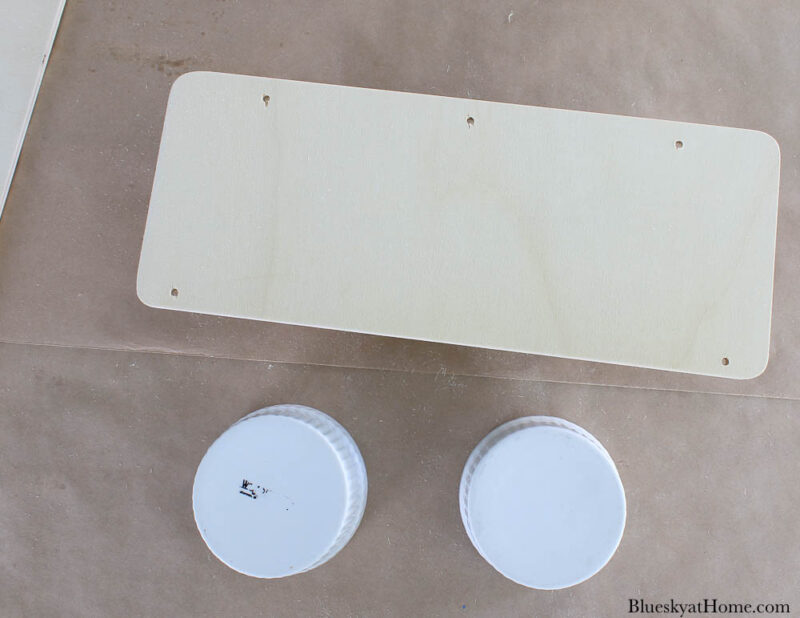
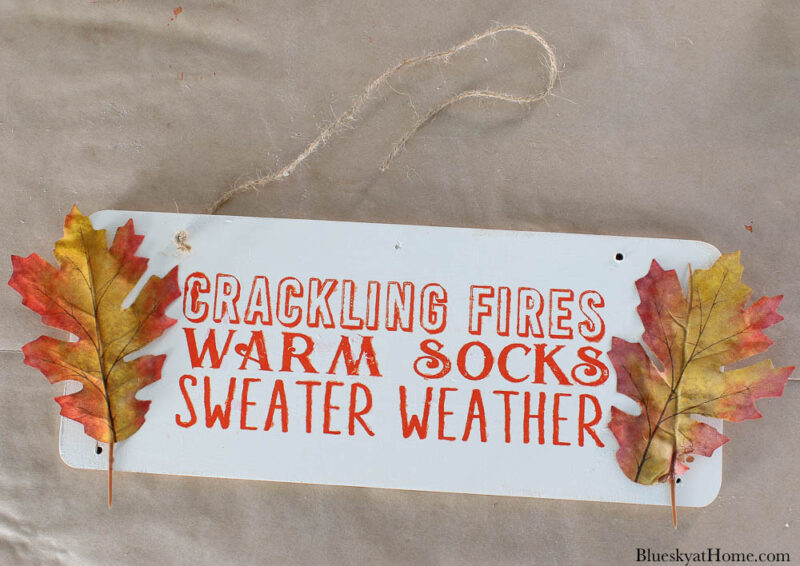
- Obviously, any wood sign in any shape or size can be used. It just depends on the project you have in mind. These signs were 12 inches X 4 1/2 inches. They also came with a bundle of thin twine.
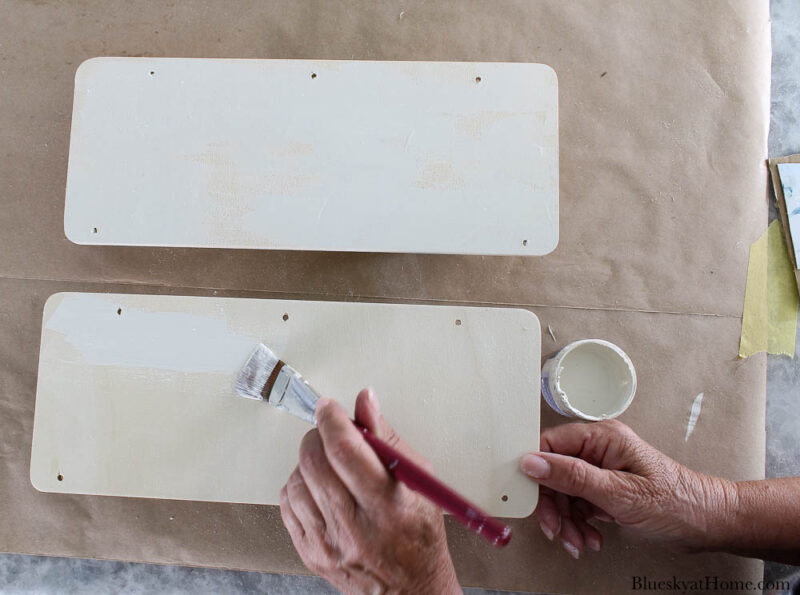
- Your paint of choice: I had on hand Rescue Restore Chalk Paint in Biscuits & Gravy from A Makers’ Studio. I like to buy this paint in 2~ounce jars for craft projects and testing a paint color. This color is truly the color of cream gravy.
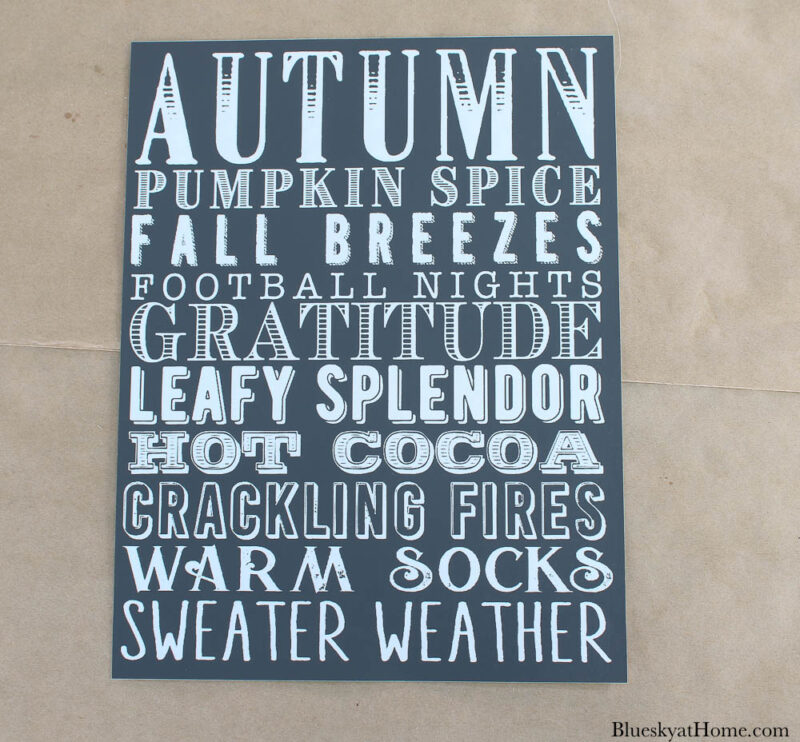
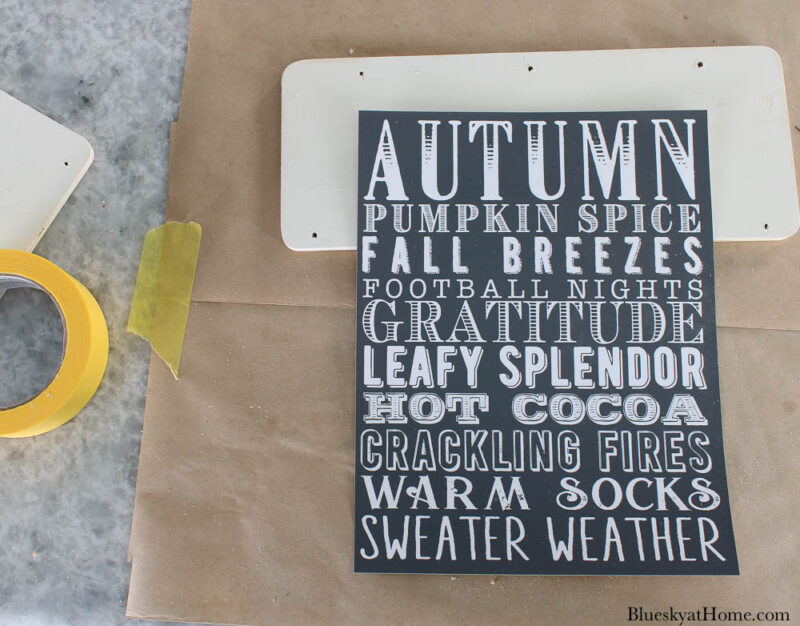
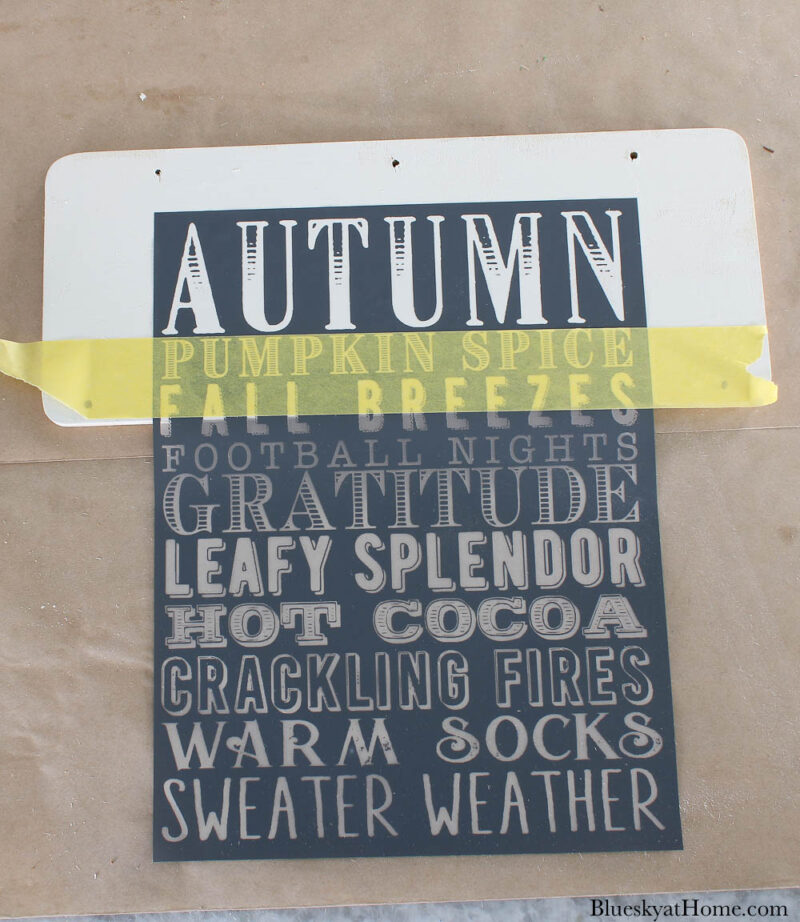
- Stencil of your choice: I already had Fall is My Favorite Season stencil also from A Makers’ Studio. This stencil has 10 word/phrases.
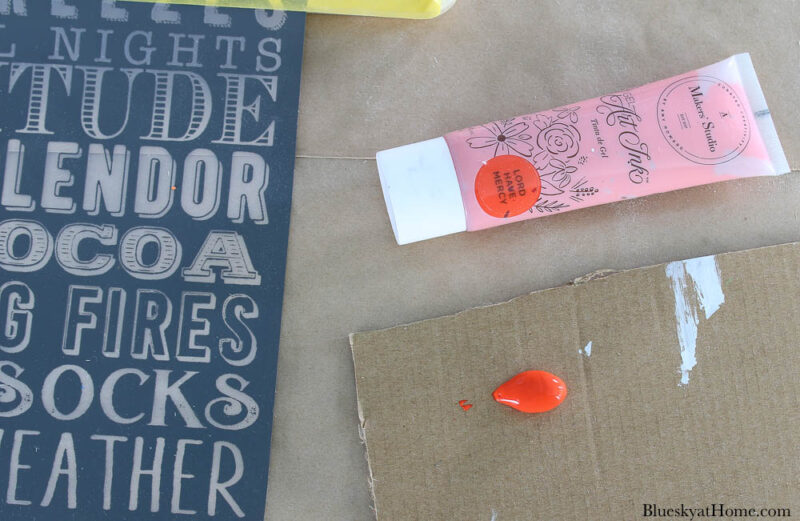
- A paint medium for stenciling. I wanted a bright orange so I chose Gel Ink Art in Lord Have Mercy. This paint can be used on wood, fabric, paper and other surfaces.
- Sandpaper
- Scissors
- Painter’s tape
- Paintbrush
- Plastic scraper


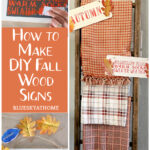
Painting your Wood Sign
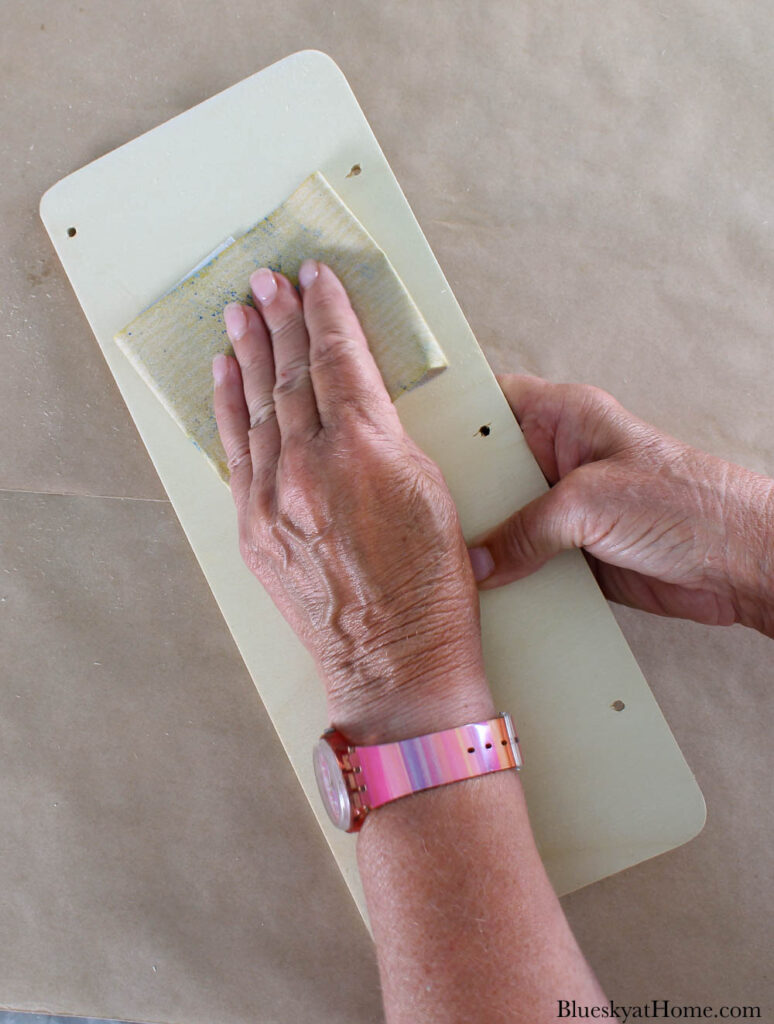
- The wood on these signs is very soft and a little rough. It helps to give them a light sanding on the flat surface and around the edges. Wipe away the dust with a rag.
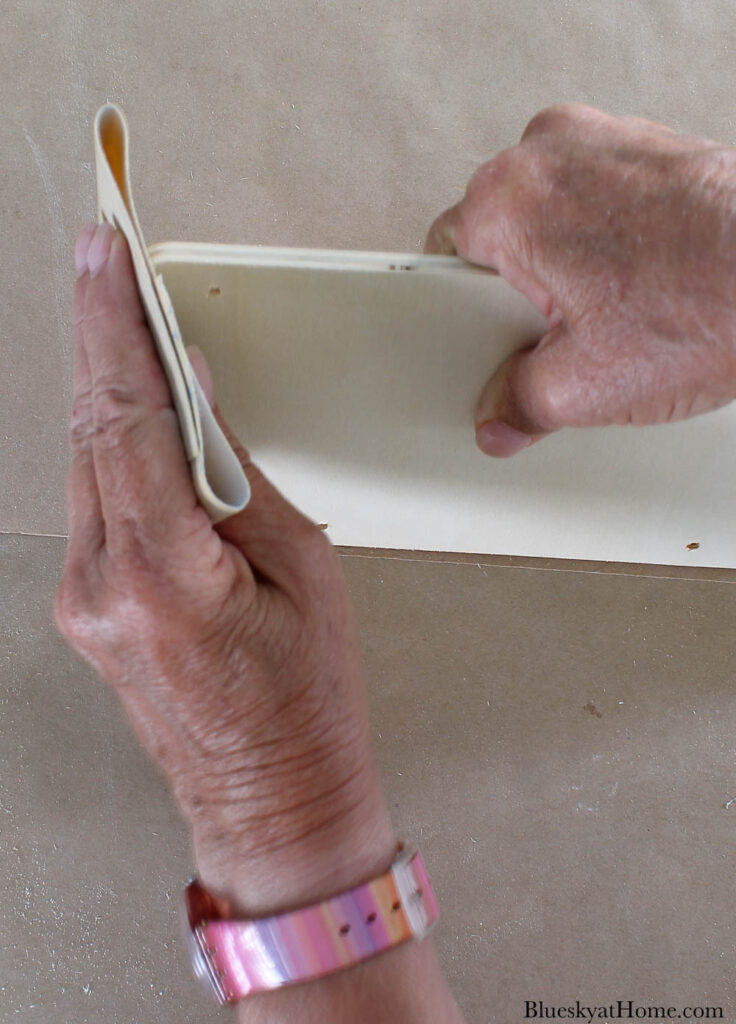
- To hold the signs off the work surface, I first set them on small ramekins.
- Apply paint to the wood surface with a small brush. I applied two coats, allowing both to dry thoroughly. With Rescue Restore paint, it takes about 20 minutes for the paint to dry.
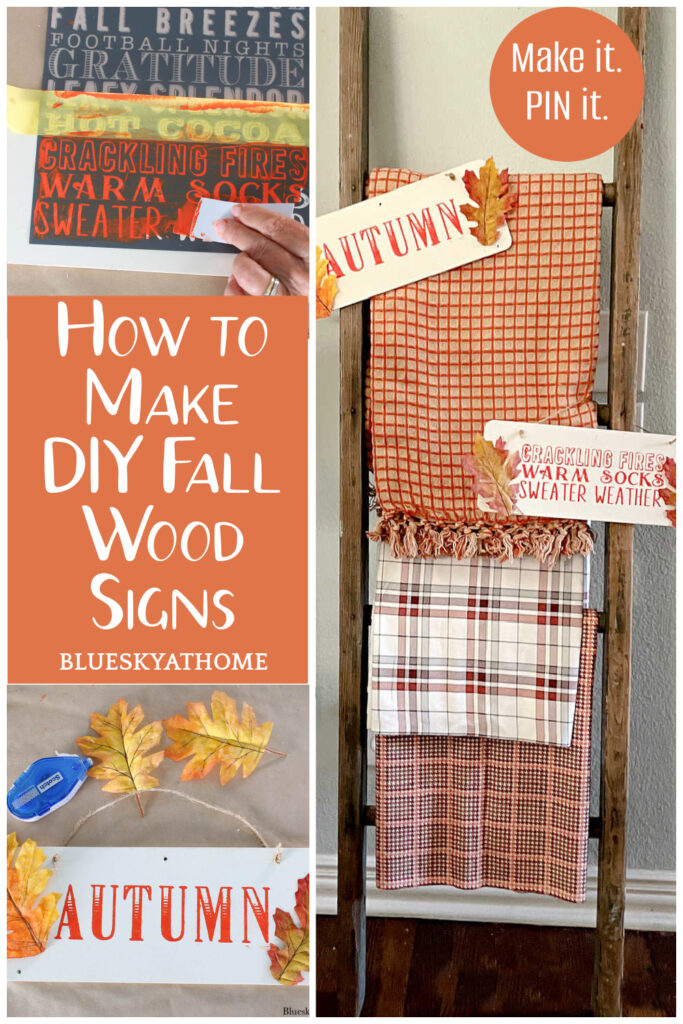
Stenciling your Wood Signs
You may remember that all stencils from A Makers’ Studio are tri~mesh (That’s what gives them a depth of design.) and have an adhesive backing. They will adhere where you place them, but you can also reposition them.
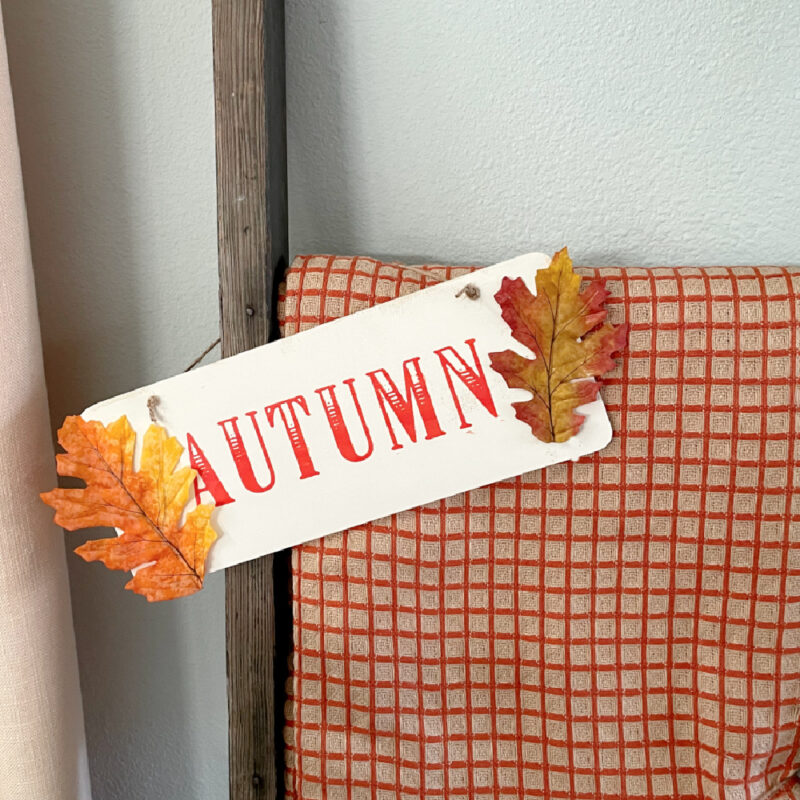
I decided not to cut apart the words on the stencil.
- Place the stencil on your surface and adjust as needed.
- Remove the stencil from the paper backing (set aside). Smooth the stencil down to adhere to the surface.
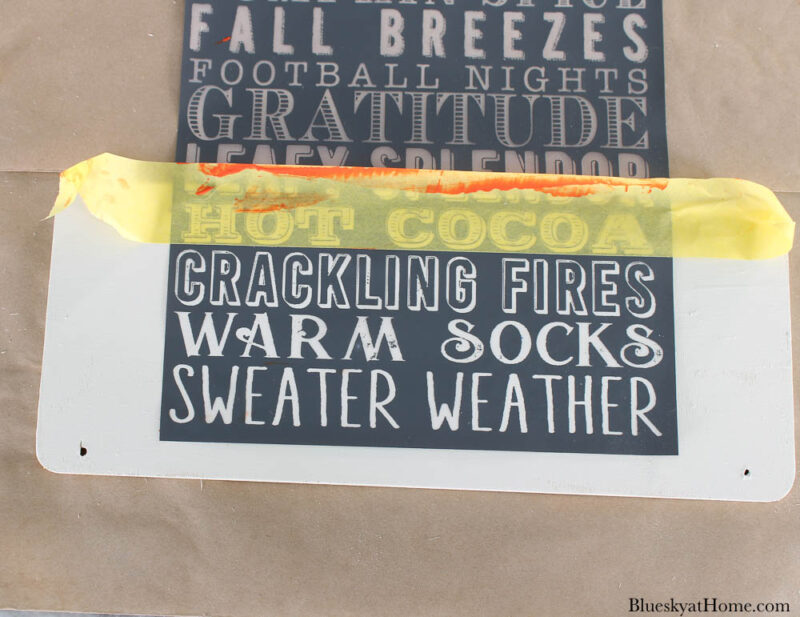
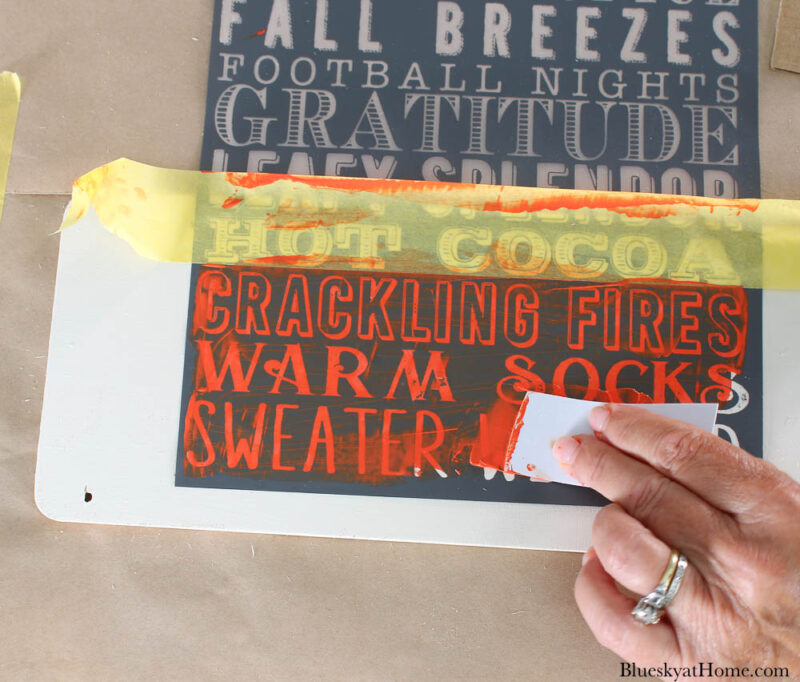
- For this wood sign, I just wanted to use the word AUTUMN. To make sure I didn’t get any Gel Ink Art on the wood surface, I placed a piece of Painter’s tape below my word to cover the other stencil words.
- Squeeze a small dollop of Gel Art Ink on a piece of cardboard (I keep cardboard packaging for this.)
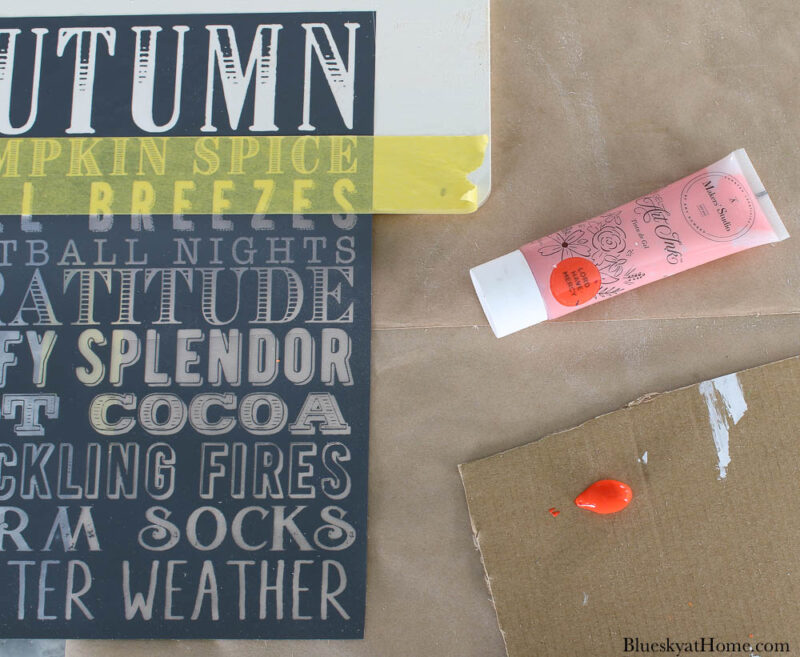
- Use the plastic scraper to apply the Gel Art Ink. Scrape the paint across the stencil, pressing the paint into the design. As the stencil design appears, scrape and remove excess paint.

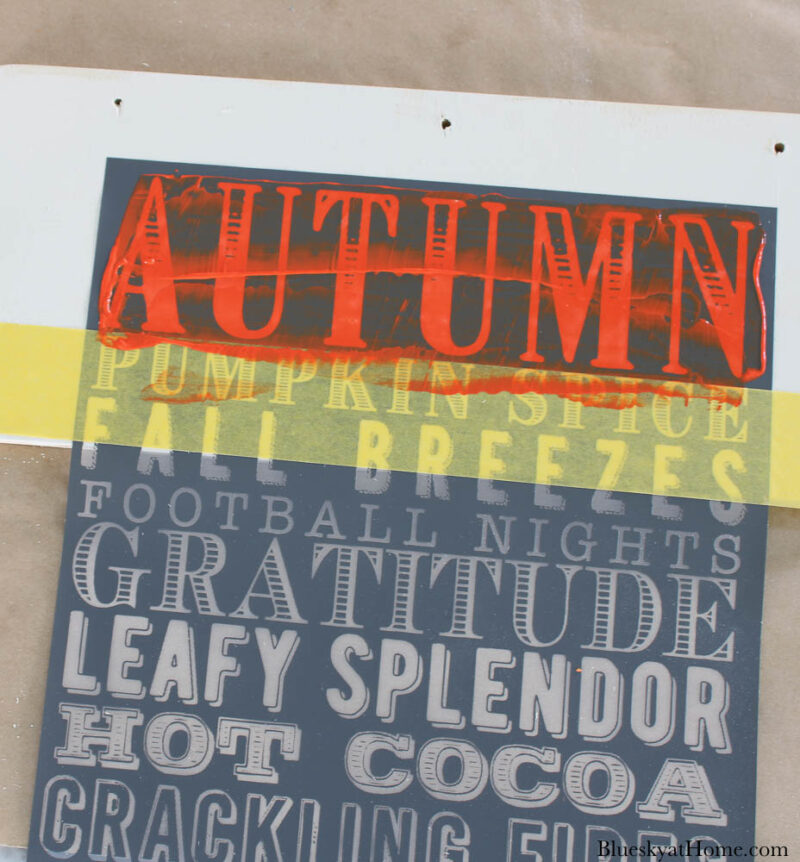
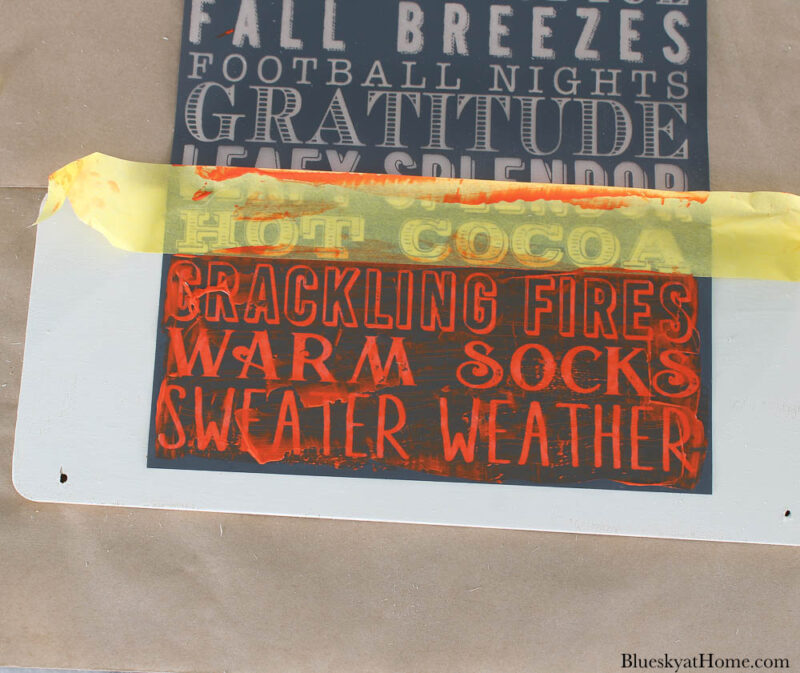
- Carefully remove the stencil by peeling it back from the surface to reveal your stencil design. Set aside the wood sign to dry.

- Repeat the process for the second sign.
NOTE: When you are through with your stencil, wash off the paint in the sink under running water. Allow the stencil to dry on a towel with the adhesive side up. Then attach it to the paper backing for storage.
Add the Hanger and the Embellishments
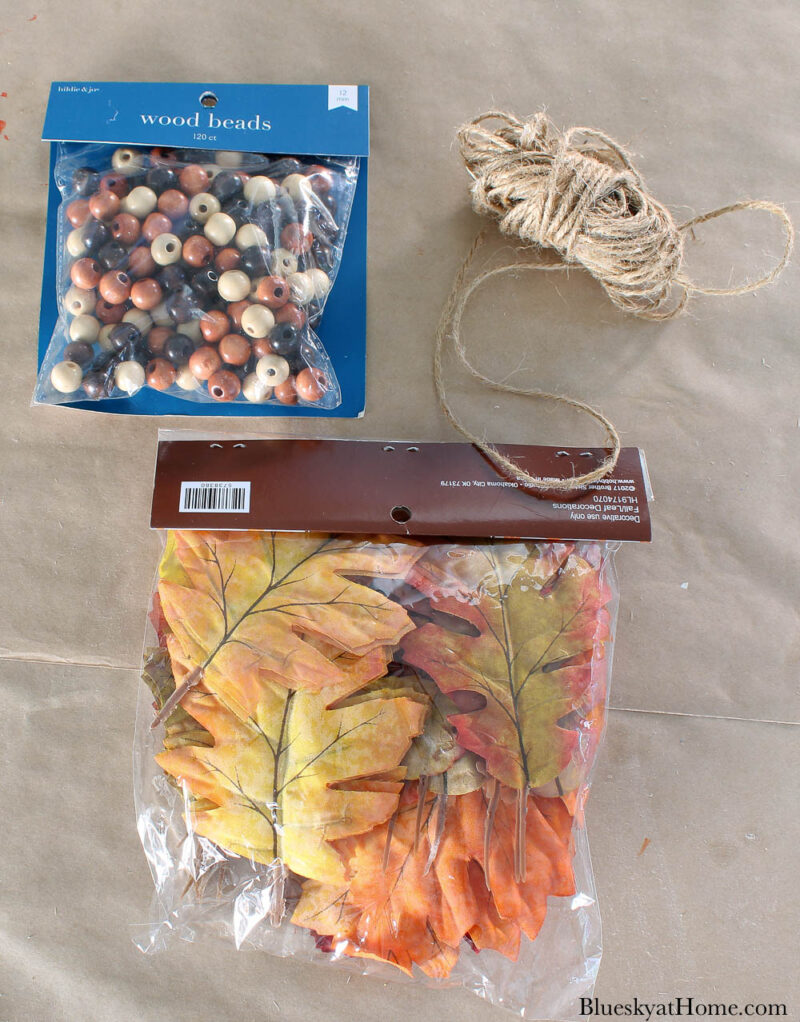
Besides twine for hanging, I had some faux leaves and wood beads to try.
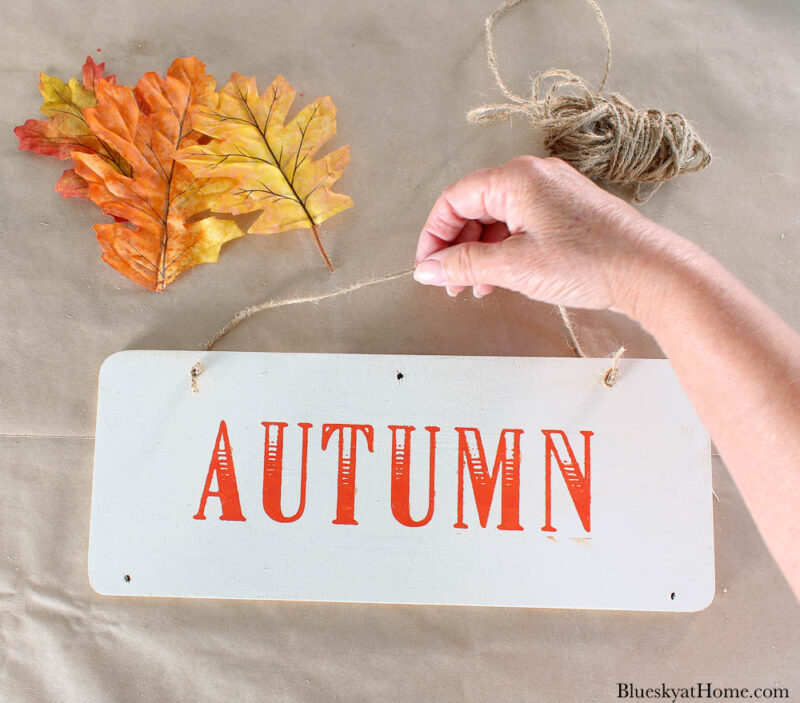
The next step is to add your twine to make a hanger.
- Start on the back of the sign and push the twine through the hole. You may have to twist it and a little “spit” to get it through the hole.
- Double knot on the front of the sign.
- Determine how much twine you need and repeat on the other side of the sign.
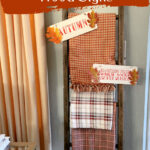
Add embellishments to your sign.
- faux leaves
- feathers
- twigs
- acorns
- ribbon
I used double-stick tape to adhere the faux leaves to the signs. I decided to just use the leaves.
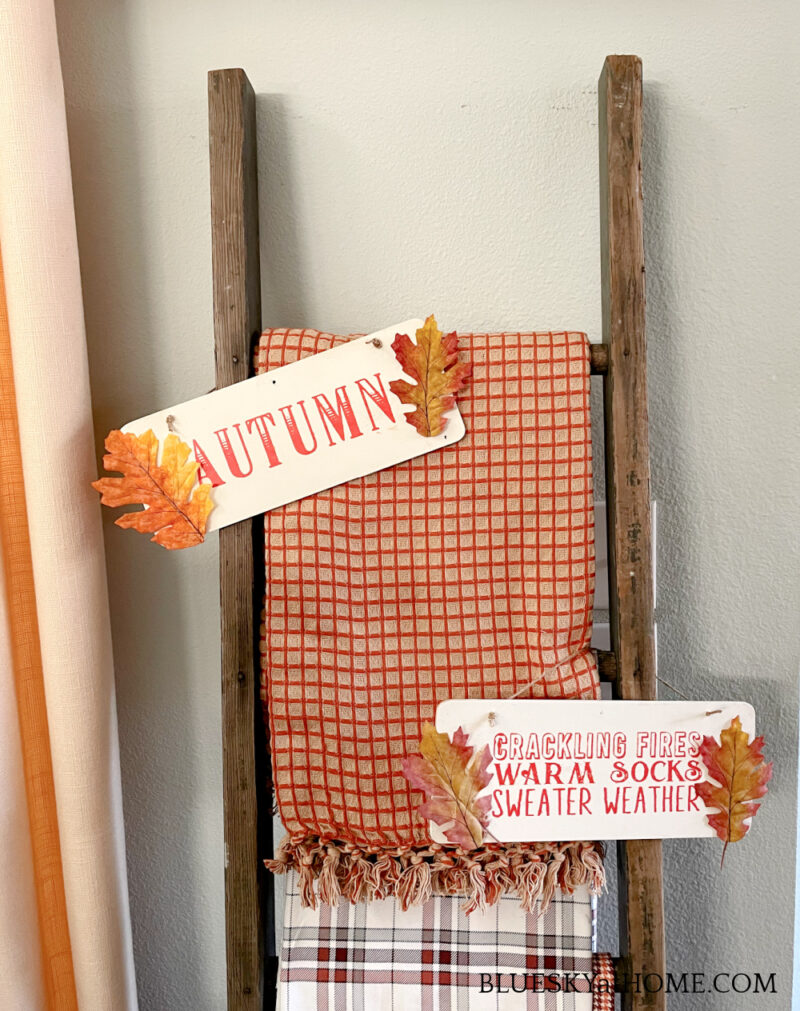
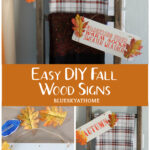
Decorate the Ladder with the Fall Wood Signs
This ladder stays in our living room. The throws change depending on the season.
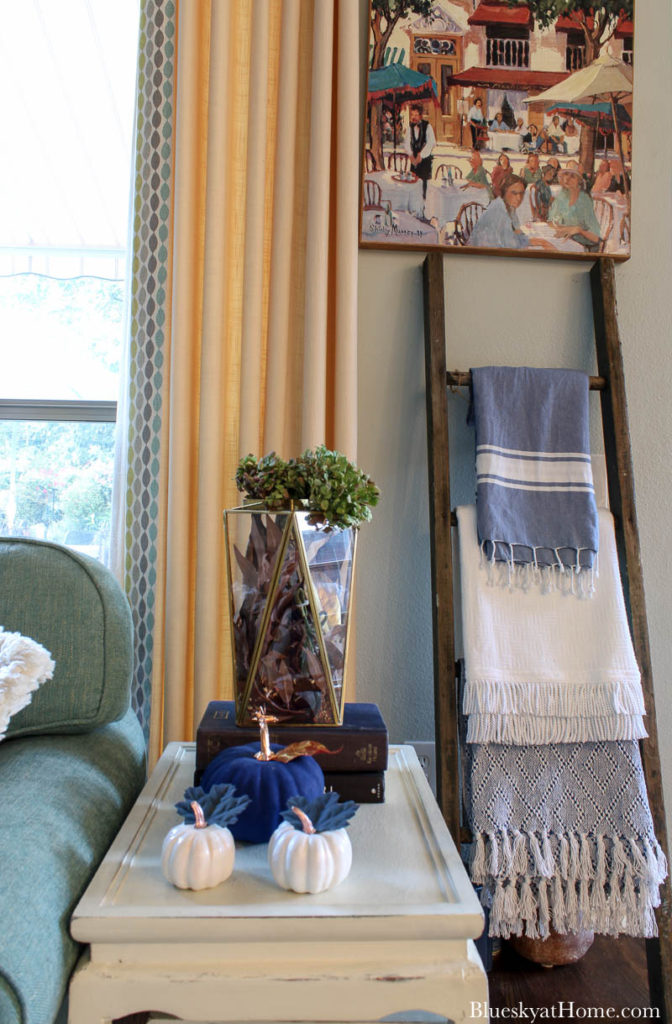
To the ladder, I added two pieces of flannel fabric. I also added a new throw. It is actually a tablecloth but looks like a large throw.
I placed the two fall wood signs, one on each side of the ladder.
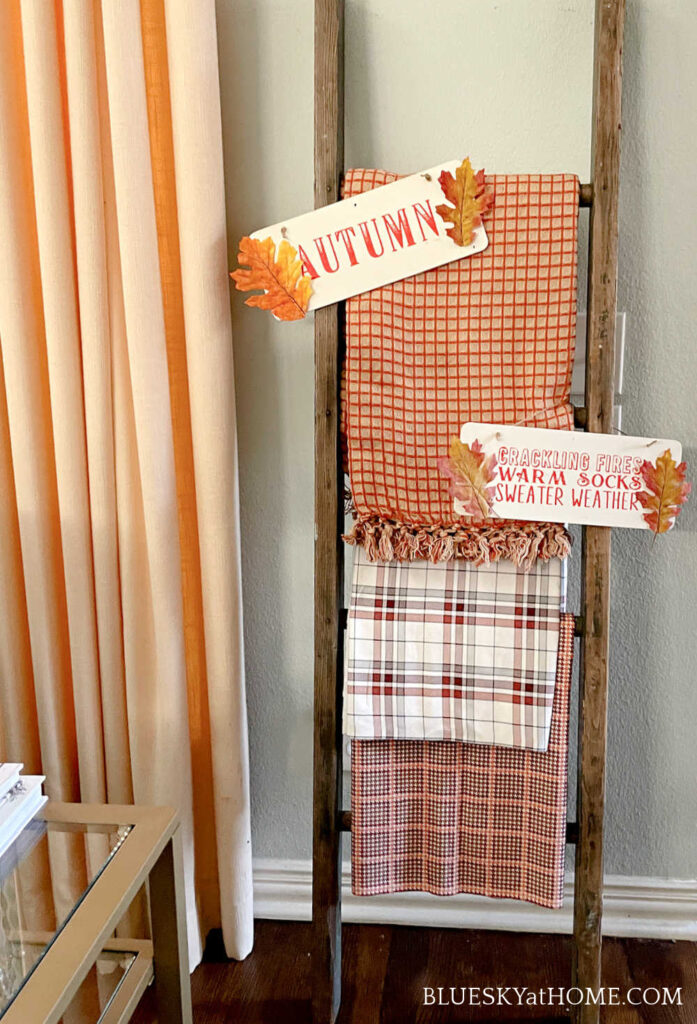
I love the combination of patterns in fall colors.
The signs add that extra touch of fall.
This was obviously an easy project. You could make any sign you like to add to your fall decor.
These signs can be moved in the future to a door, wreath, or mantel. The leaves can be removed for a different look.
Other Wood Sign Projects for You
Need more wood signs you can try?
I hope that you will use this fall wood sign idea as inspiration for your own. And if you have a ladder, as a way to decorate yours.
PIN this post so you don’t forget the instructions.


Those turned out so cute and I love the blankets. I should get some new fall colored blankets. On your last post loved the tip reminding us to replace, repair and wash the fall blankets. It’s still on my list!
Adorable signs. I love your Maker’s Studio projects. Thanks for linking up this week. #HomeMattersParty
Carol your signs are super cute! I can see making a few of those myself. Thanks for sharing!
I love your signs! They looks so cute hanging on the blanket ladder.
I enjoy learning from other crafters. Do you know whether or not a scraper will work for all stencils? I see this with Chalk Couture and now A Maker’s Studio. Both seem to have beautiful stencils. Your signs really dressed up your ladder for the fall. Will you use the back for some Winter signs?
Hi, Kelli. Thanks for reading and your question. I have only used stencils from A Makers’ Studio for the past 3 1/2 years and the best way to way apply paint medium to the tri~mesh stencils is with a scraper. (A credit card will work well, too.) Before, when I made vinyl stencils with my Cricut I used a sponge pouncer; the same for the plastic stencils. There is just no comparison in terms of depth of design and ease of application to using tri~mesh stencils with a plastic scraper. I most definitely will use the back of the wood sign for another stencil!
Your signs are so cute and I love your ladder! What a fun idea! I never would have thought of hanging signs from the laddder.
Niky @ The House on Silverado
Thanks, Niky. I gave myself a pat on the back for thing of that.
Your blanket ladder is perfect for the season.
Cute signs
Thank you, Cindy. I love it all year round.
I love your signs Carol! They are the perfect size for a ladder and add so much of the season mixed with your fall throws! Thanks so much for the great tutorial! Have a wonderful day.
Such a cute idea for fall. I love budget-friendly seasoal decor.
What a great idea to add handcrafted signs to your blanket ladder, Carol! It certainly takes the appearance of your ladder up a notch for a decorative effect! You can make and add different themes to suit the season or holiday! You are very creative!
Thank you for sharing this, I love the pictures to really get a step by step of the process!! This is amazing
These turned out beautiful and really added a Fall touch to your ladder.
Isn’t it so fun decorating blanket ladders? I love your signs you placed on your ladder, they are perfect Carol. Thanks for sharing.