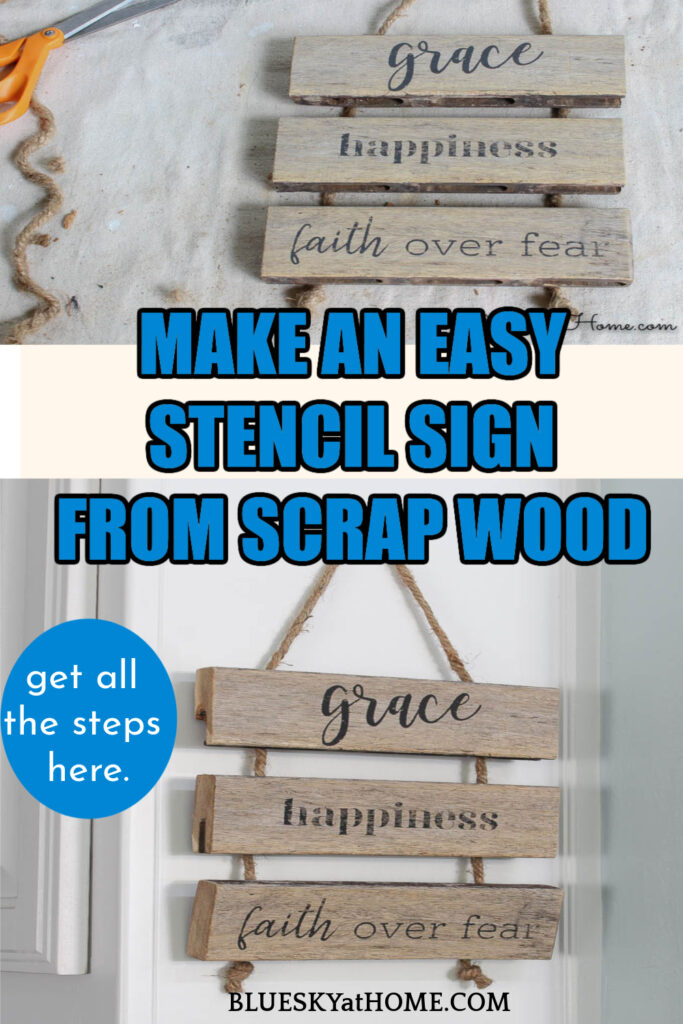
How to Make a Stencil Sign with Scrap Wood
Don’t you love it when you have all the supplies for a project already on hand? I love when I have supplies on and that come together for a project. Or when I have an “ingredient that I’ve wanted to use, but just needed a little push to do it. Like, figuring out how to make a stencil sign with scrap wood.
Scrap wood. Yes, scrap wood. A project using scrap wood. Who would have thought of that!!
I had exactly the piece of scrap wood that I have wanted to use in some way.

My stencil sign with scrap wood is not only easy, but it’s also fast and you will end up with some signage that you will want to display in your home. You can and should personalize it. You should brag about it. But first, you have to make it, so let’s get started.
USE SCRAP WOOD TO MAKE A STENCIL SIGN
This post contains links to products used in this project that I love, use, and highly recommend. If you should order any product from this site, I may receive compensation, but you don’t pay a penny more.
Of course, you will need a few supplies. I hope you have a piece of scrap wood in the garage or in your stash of “to be used for future projects”. Here’s a general list and I’ll give more details as we proceed with this easy stencil sign with scrap wood.
SUPPLIES:
- a piece of scrap wood ~ the length you need will depend on your project
- saw for cutting wood
- pencil and ruler for measuring
- sanding block
- stencils
- ChalkArt
- plastic applicator for ChalkArt
- jute twine for hanging your completed scrap wood project
- staple gun
- hanger for completed project
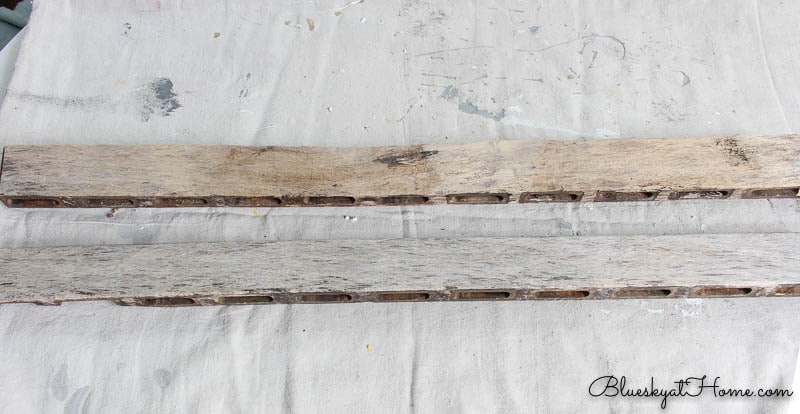
As it turned out, I had a couple of pieces of scrap wood that I had been wanting to use in a project. They were part of the teak table that I bought at an estate sale. Sweet Shark and I restored the teak table, but we removed the 2 leaves since we didn’t need a 10~foot table in the backyard.
One of the leaves was in great shape and I’ve been using it as a backdrop on our breakfast room console table. (It’s now part of our early fall mantle.
These 2 boards were leftover from my patio tabletop project this past summer. They have a very weathered look ~ because they really had been left out in the elements. They have been in the garage just waiting for the right moment to be rescued and reused.
I thought the wood would be perfect to make a stencil sign for our kitchen and I had the perfect place ~ the side of one of our cabinets that was blank and bare.
STEP 1 ~ CHOOSE YOUR WOOD
I’m assuming that you have an idea for a project, just as I did, and that it involves some wood. Hopefully, this is scrap wood that you have and can now use. If you have a project in mind and don’t have wood on hand, you can always buy the wood at your local Home Depot or Lowe’s.
TIP: Before purchasing wood, check in the store’s lumber area. They often keep scrap lumber and they will give it away. I’ve just gone in and asked (nicely and with a smile) and I almost always walk out with some scrap wood.
For this project, you could also easily use a 1 X 4 piece of wood.
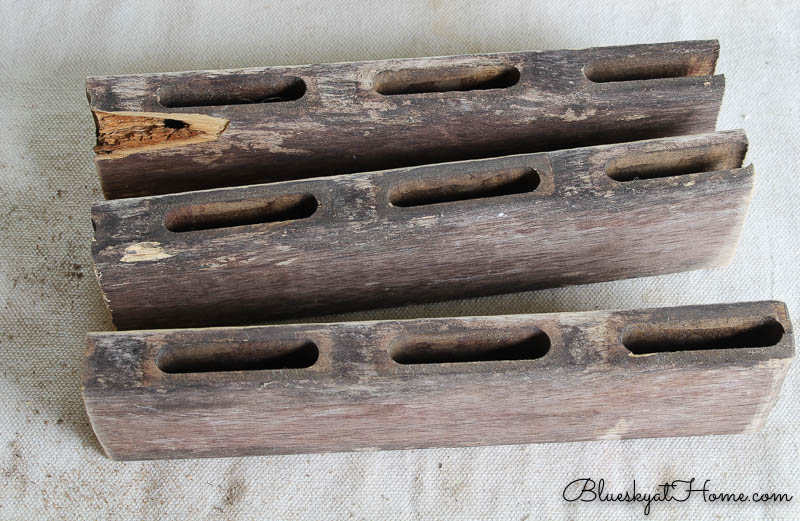
Fortunately, I had the perfect piece of scrap wood and I love that it had a story and didn’t cost me a penny. These former table slats were 2 1/4″ wide and 30 1/2 inches long. One was in perfect condition. The other was a little warped and still had a piece of hardware on the back. As it turned out I didn’t even need the second piece.
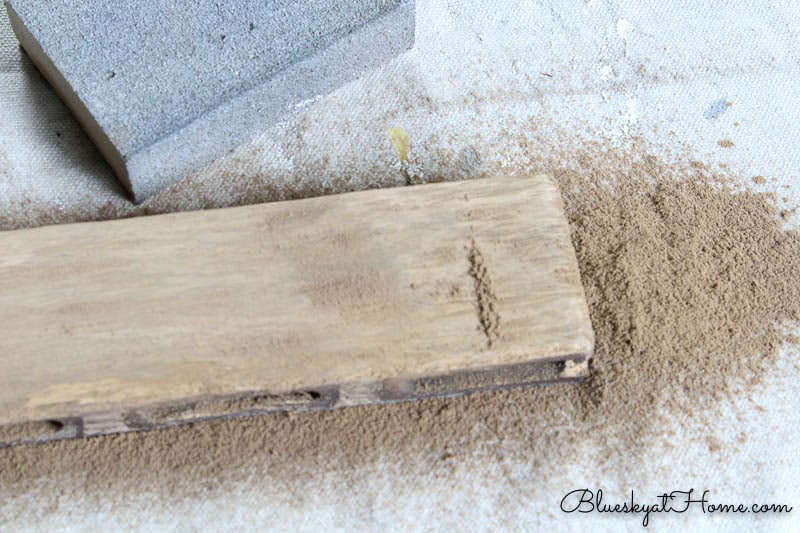
STEP 2 ~ SAND AND PREP YOUR WOOD
You need to sand the wood slats so that you will have a smooth surface for the stencils. Using a sanding block, I couldn’t believe how much stuff came off. Fortunately, it sanded easily. Then I wiped the surface with a tack cloth to remove any dust.
TIP: If you are using a 1 X 4 piece of wood for this project, I would sand it to make sure you have a smooth surface.
NOTE: if you are using raw scrap wood for this project, you will need to paint it first before you stencil it. I highly recommend Rescue Restore Paint from A Makers’ Studio. It has great coverage and goes a long way.
STEP 3 ~ CHOOSE THE WORDS FOR YOUR SIGN
I have a few stencil packages from A Makers’ Studio that have inspirational words. I wanted a mix of fonts and I had to find words that would fit on my 2 1/4″ wide slat.
The space on the side of my kitchen cabinet allowed me to have a sign that was 10″ wide, so which also determined the maximum width of my stencils.
After trying several different combinations, I decided on these 3 stencils.
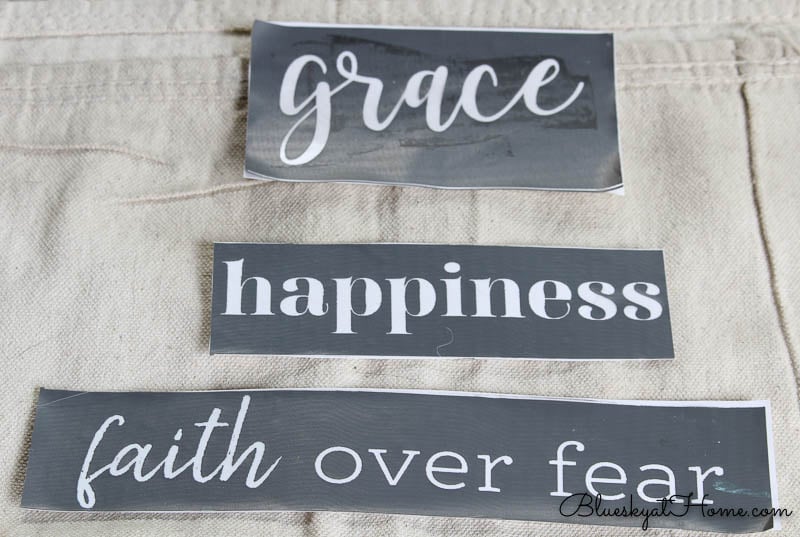
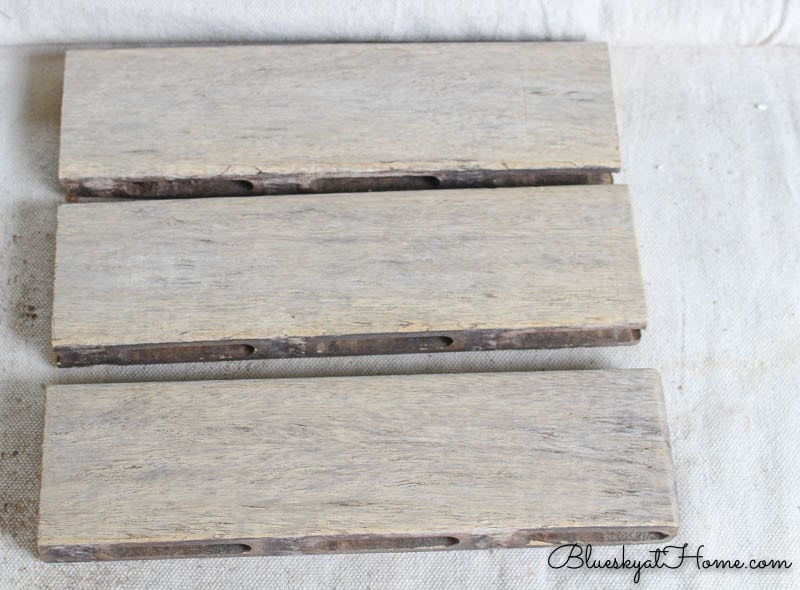
The widest stencil was 8 inches wide so I decided to cut my slat into 8 1/2 ~inch widths. I measured the “good” board and that’s when I realized I wouldn’t need the other slat.

You can use a hand saw and miter box as I did or an electric saw. Out in the garage, I cut the slat into 3 pieces. I had one piece about 4~inches long leftover, which I ended up using later.
This is the pretty, sanded, and smooth side of the slat.
Here are the back and bottom of the slat. You can see where 1 part was deteriorating.
Sand the cut edge of the wood with your sanding block.

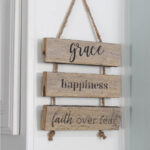
STEP 4 ~ STENCILING YOUR WOOD SIGN
This is my favorite part because I love to stencil with these tri~mesh stencils.
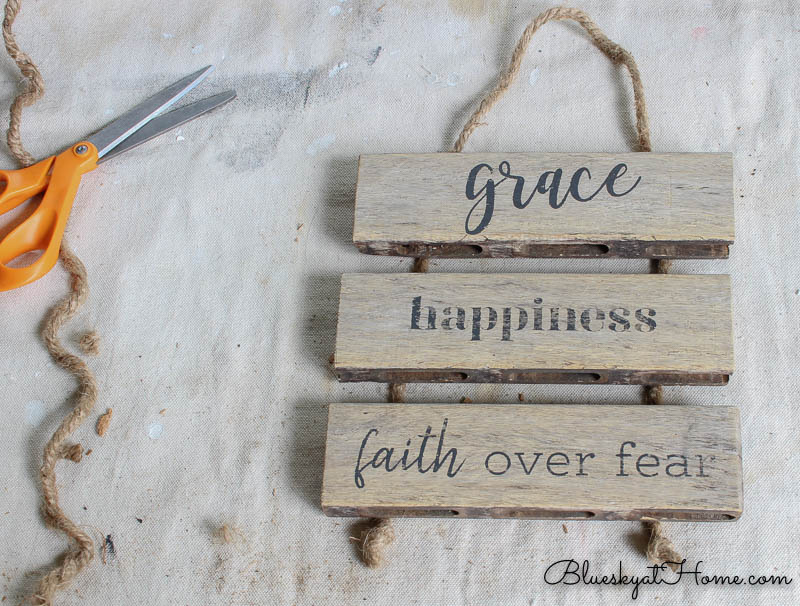
For the farmhouse look I wanted, I used ChalkArt in Preaching to the Choir ~ black. I centered the first word ~ grace ~ and pressed it down on the wood. Using the plastic scraper, I applied the ChalkArt. Then I peeled back the stencil to remove it from the wood. I placed the stencil in the sink and ran a little water over it.
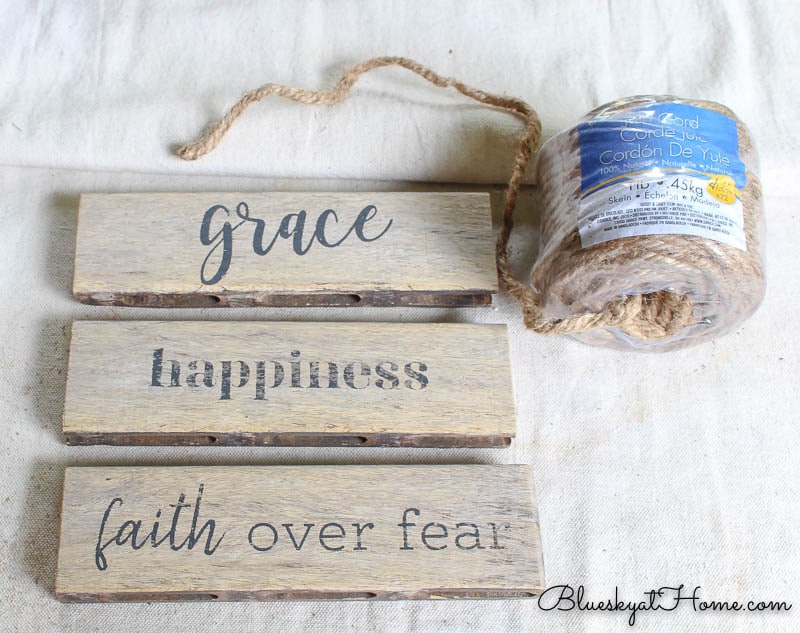
Next, I repeated with the “happiness” stencil and the “faith over fear” stencil.

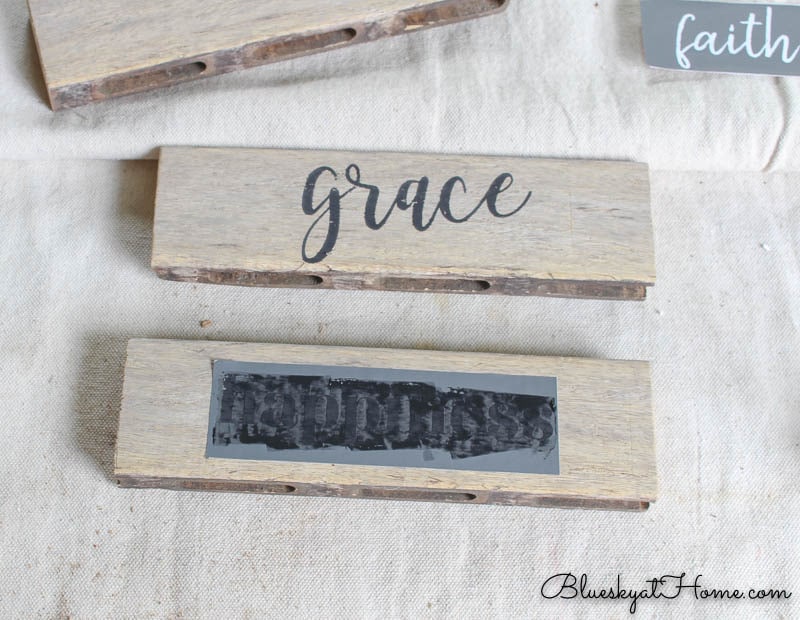
I loved the combination of fonts and words.
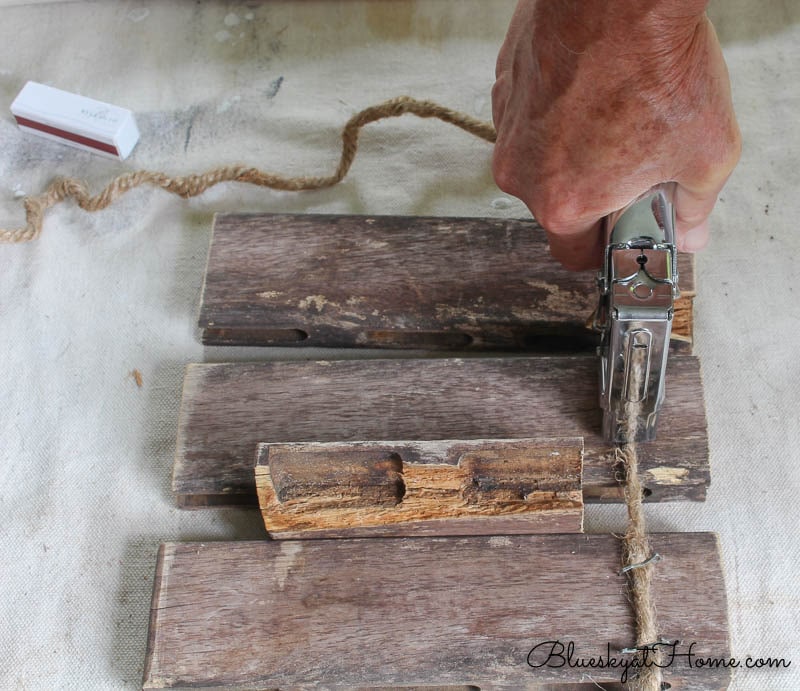
STEP 5 ~ MAKE A HANGER FOR YOUR STENCIL SCRAP WOOD SIGN
To continue the rustic, farmhouse style of stenciled scrap wood sign, I used the thick jute I had on hand. You’ve seen me use this on several occasions. This package will go a long way for many projects.
I tied a knot at one end. Sweet Shark was a big help for this step of the project. I really don’t have the strength to press down on the staple gun.
NOTE: Be sure to start at the bottom slat.
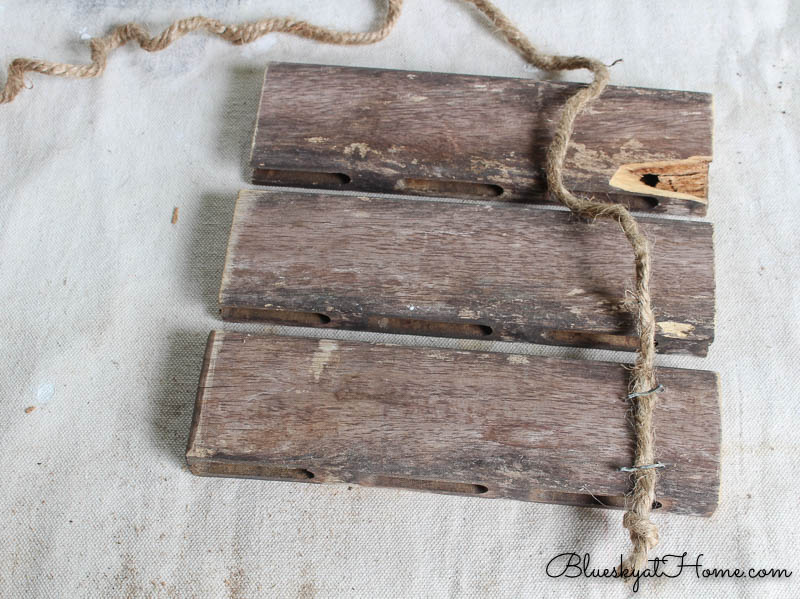
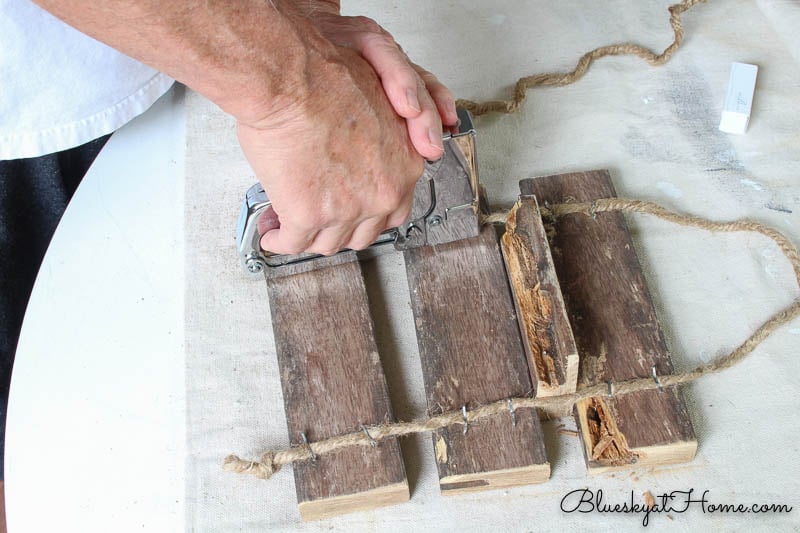
Here’s where the extra piece of 5 inches of wood came in handy. We used it as a spacer between the stenciled slats, pulling the jute tight as he stapled it.
After we stapled the 3 slats on the right side, I created the hanger by pulling up on the jute and making a “^”. Then we started down the left side of the slats. When we finished stapling, I cut off the jute and tied another knot.
And my stenciled sign with scrap wood was finished.
STEP 6 ~ HANGING YOUR STENCIL WOOD SIGN
This last step was super easy. I found a gold nail with a rounded head in my picture hanger box. I had 10 inches of space on the side of the kitchen cabinet. So I measured 5 inches in for the center. The distance from the top of my jute ^ to the bottom of the sign was 14 inches. I measured up from the bottom of the cabinet 17 inches and hammered in my nail.
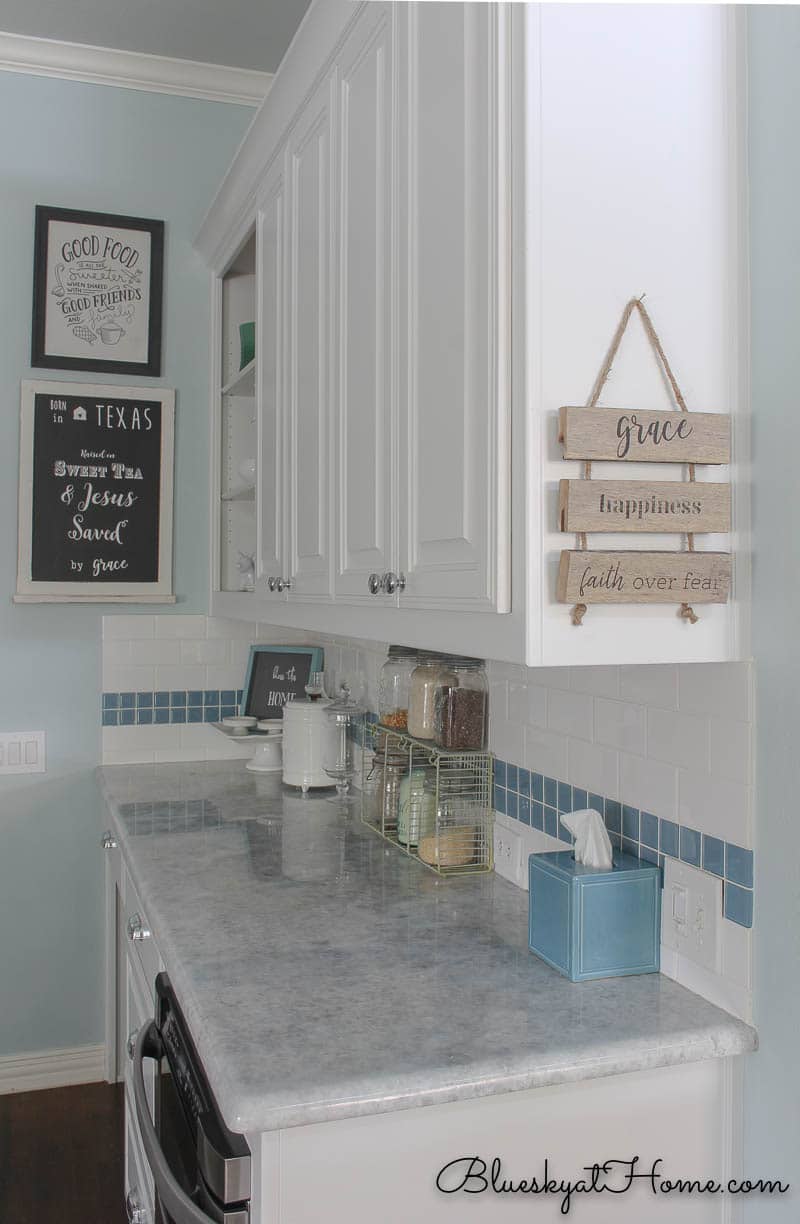
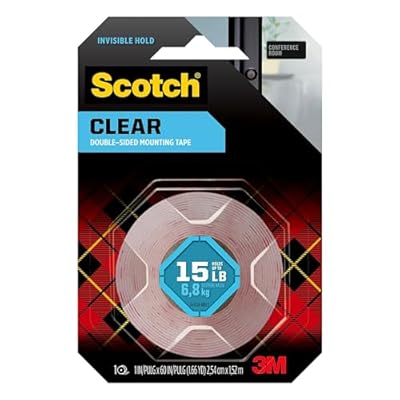
I realized that there was so much empty space above my stenciled scrap wood sign that something else was needed to fill in space. Fortunately, I had 2 signs that I had made last year that would fit: the “bless this house” sign and the SIMPLY be Happy sign. I used Scotch Clear Mounting Tape to hang one of these signs and another small gold nail for the other.
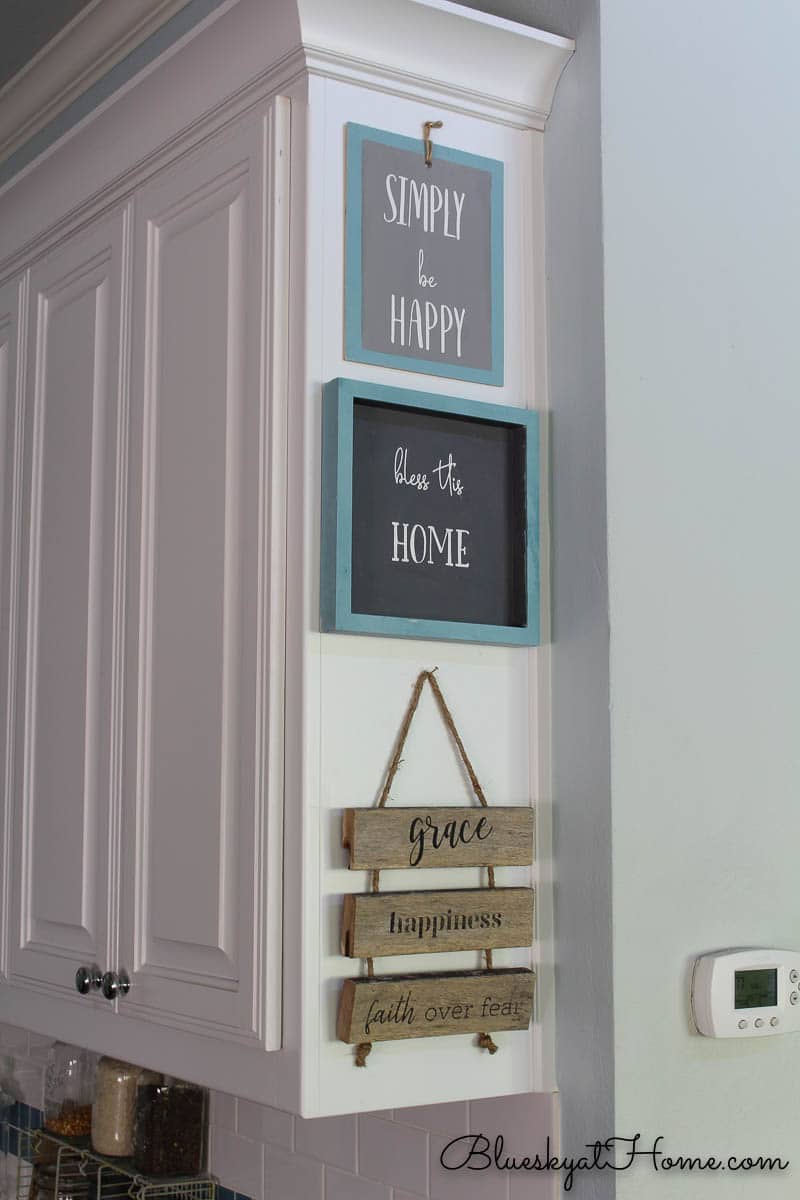
Here you can see my collection of signs on this side of the kitchen.
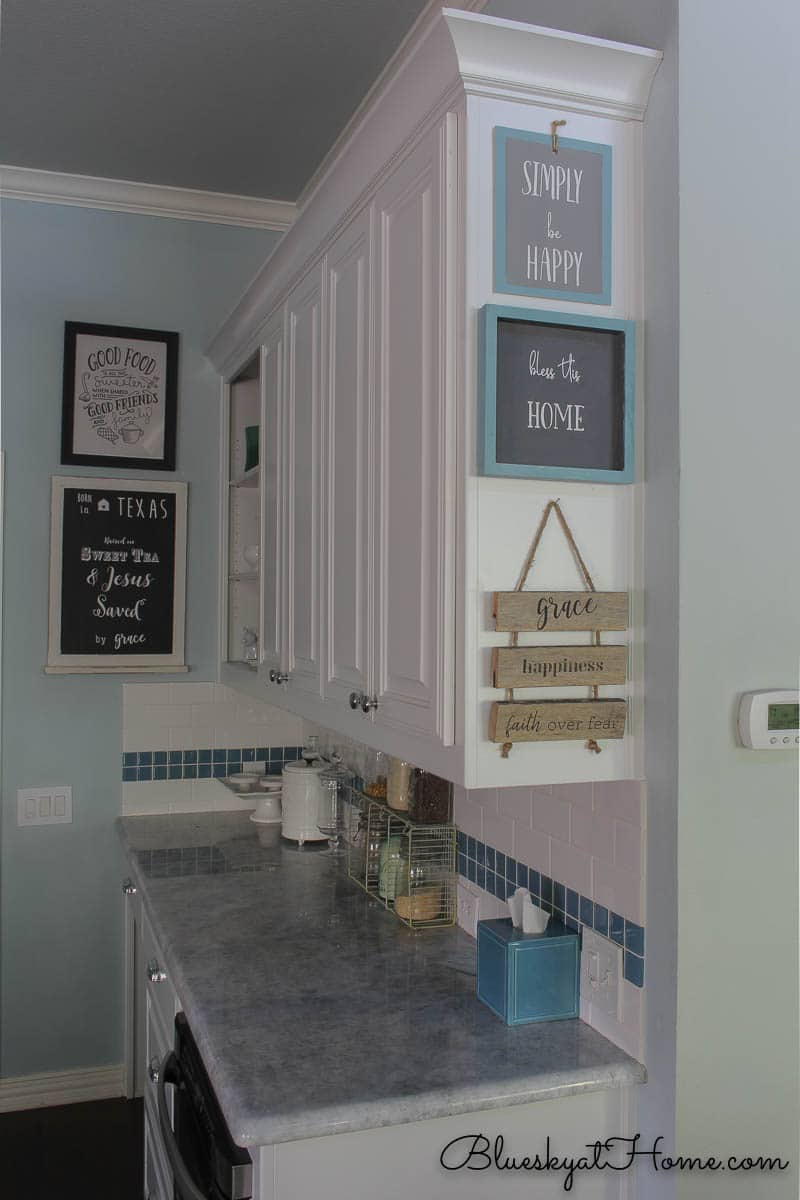
To be honest, this was one of the easiest and fastest DIY Challenge projects. I (or should I say we?) completed the stenciled sign with scrap wood in less than an hour. I love how my blank side cabinet is now filled with color, farmhouse style and inspiration. And I got to use one more part of our rescued and restored teak table.
I hope that if you have some scrap wood, you’ll be inspired to make a wood sign with stencils for your home.
SUPPLY RESOURCES


If you don’t want to miss any DIY projects, be sure to sign up to receive them in your inbox. I love you for it.


Great job Carol! I just love your little collection fo signs. I appreciate that you used what you had on hand- use up that wood! I love it when items have a story to tell. So happy to have found you and your blog.
Jackie, I love to reuse things I already have. Thank you so much for visiting and commenting. Hope to see you again and again.
I love the tone of the wood you had to work with. This turned out so nicely!
Thanks Tara. The wood tone is the natural weathering of the wood. It is overly.
This turned out perfect!!
Thank you.
This sign is so cute! I love this idea!
I absolutely love it so much!!
Very nice Carol! Love all of your signs. This months challenge was perfect for a lot of us, encouraging us to do projects that we have been wanting to for awhile! I like how you hung it with a rope and used different lettering. Such a great custom piece!
This is so cute!! I love how you decorated above it, too.