Easy DIY Mantel Idea for Christmas
With the jingle of bells just around the corner, it’s time to transform your living space into a festive space. One area that can instantly elevate your holiday decor is your mantel. Let me show you how I decorated our mantel with an easy DIY mantel idea for Christmas.
Christmas mantels play a pivotal role in holiday decor, acting as the focal point that ties the entire room together.
A roaring fire topped with Christmas stockings and evergreen garland creates a beautifully adorned mantel that can steal the spotlight.
Whether you’re sipping cocoa by the fire or enjoying a glass of wine while listening to Christmas music, a thoughtfully decorated mantel adds that extra touch of holiday spirit.
This year I created a new look for our mantel with an easy DIY mantel idea. It’s one that you still have time to create for your own home.
This DIY mantel project is also so versatile that you can customize it to your own style and color scheme.
Christmas Mantel Decorating Plan
Beautiful Christmas mantels may be planned out well in advance of decorating day. I knew which items would be a part of my Christmas mantel decorating plan.
My plan began a few weeks before Thanksgiving when the idea for my DIY project was hatched.
Inspiration for Your Christmas Mantel
A stunning Christmas mantel should shine throughout the holiday season. What are elements that create a stunning Christmas mantel?
- A consistent color palette creates a cohesive theme. Classic red and green never fail to evoke traditional Christmas vibes, but consider a modern twist with silver and blue or gold and white for a chic look.
- Textures and layers add visual interest to your mantel. Metallic finishes mixed with natural elements like wood and greenery create a balanced and elegant aesthetic.
- Consider incorporating a statement piece, such as a large framed mirror or a festive sign, to anchor your design.
- And, of course, include something homemade that you crafted for a personal touch.
As you begin your DIY Christmas mantel plan, let your creativity shine and infuse your personality into every element.
Whether you prefer a traditional, rustic, or contemporary look, the key is to have fun and make it uniquely yours.
Transforming your mantel into a festive focal point is not only a joyful expression of the holiday spirit. It is also a timeless tradition that you will cherish for years to come.
Color Scheme for Our Bright Cozy Christmas Mantel
First, I chose a color scheme of bright jewel colors. You can see the inspiration for the color scheme in this recent post about my Christmas coffee table vignette.
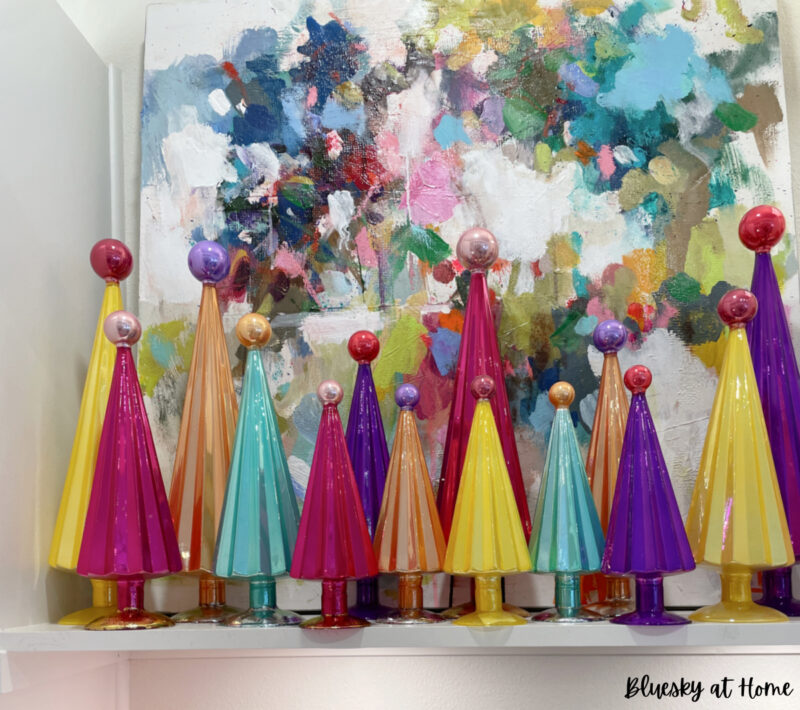
After I completed decorating our coffee table, I was ready to tackle the mantel. Our fireplace and mantel are a large space that commands your attention in our living room.
I started with a classic homemade wreath. I made this bright-colored ornament wreath a few years ago. It’s been in our entry and on our front door.
Because of the bright colors on the wreath, I used it as the starting point for this year’s mantel.

If you prefer fresh wreaths, you could certainly add one to your Christmas holiday decorations on the mantel. Just add ornaments in the colors of your choice to the wreath.
My DIY Painted Christmas Houses
It seems that houses of all types are popular this year. Sweet little houses would infuse our mantel with festive charm.
Fortunately, I didn’t have to buy new houses to decorate.
In a drawer where I keep all things wood for projects, I found two sets of wood houses. I bought them a few years ago at the Target Dollar Spot. They were still in the packaging.
One more house – I think from Dollar Tree was also in my stash.
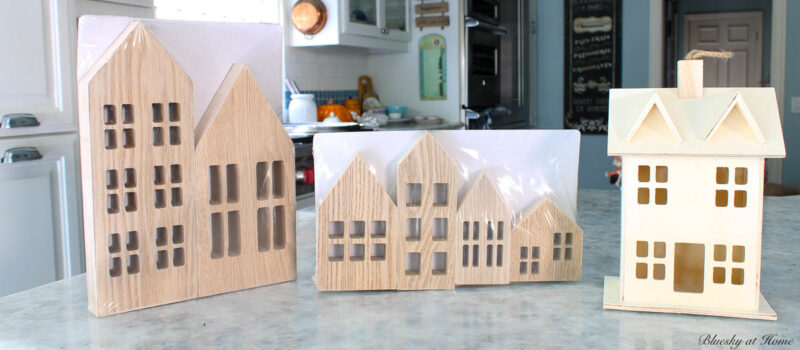
I thought these would be perfect for decorating a festive Christmas mantel.
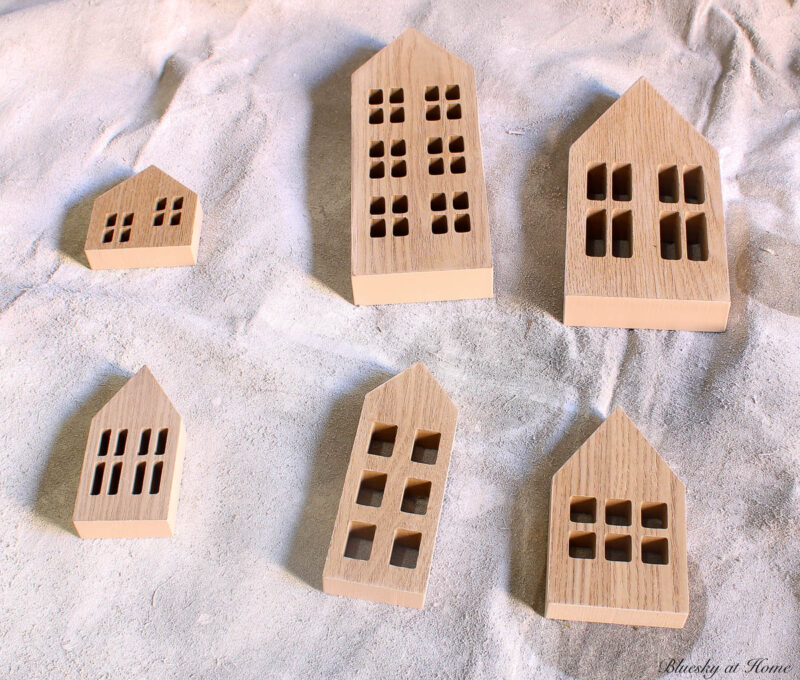
Even better, I had all the supplies I needed to transform the plain wood blocks into cute Christmas decorations.
Just so you know, I started this mantel project back in early November of 2023. The first thing I made was the Christmas houses.
Supplies for Painted Christmas Houses
- wood houses – there is a wide variety of wood houses and shapes available
- white gloss spray paint
- spray paint can gripper
- fine point Sharpie Permanent Marker
- clear plastic ruler
- metallic acrylic paint
- Duck Tape
- small paint brush
Here’s an extensive list of great Christmas DIY supplies to have on hand for projects and decorating:
Steps to Paint Your Christmas Houses
Creating these Christmas houses is such an easy way to insert holiday cheer into your mantel decor.
Step 1 – Spray paint the wood houses with two coats of paint, drying in between coats. I used white Glossy Spray Paint that I had on hand.
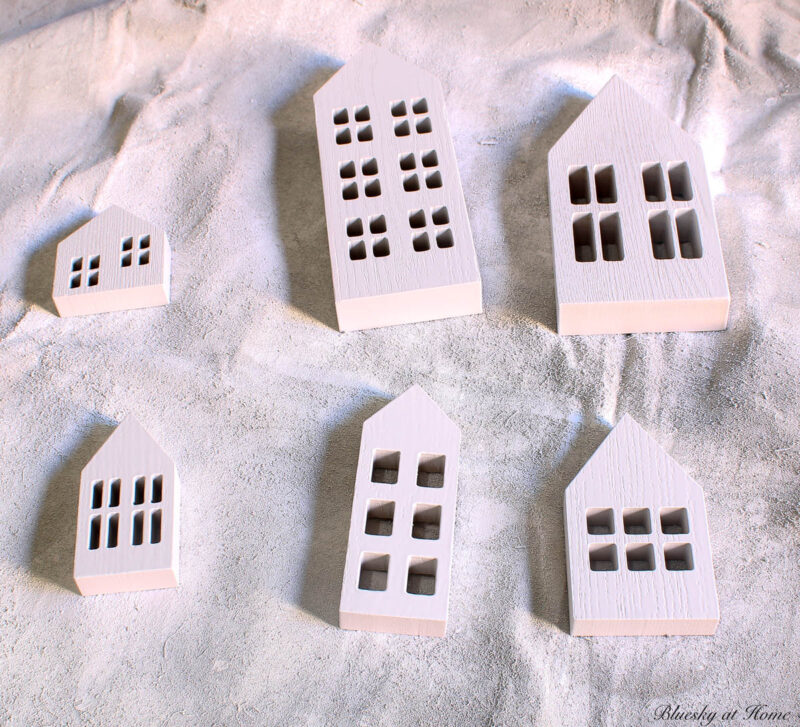
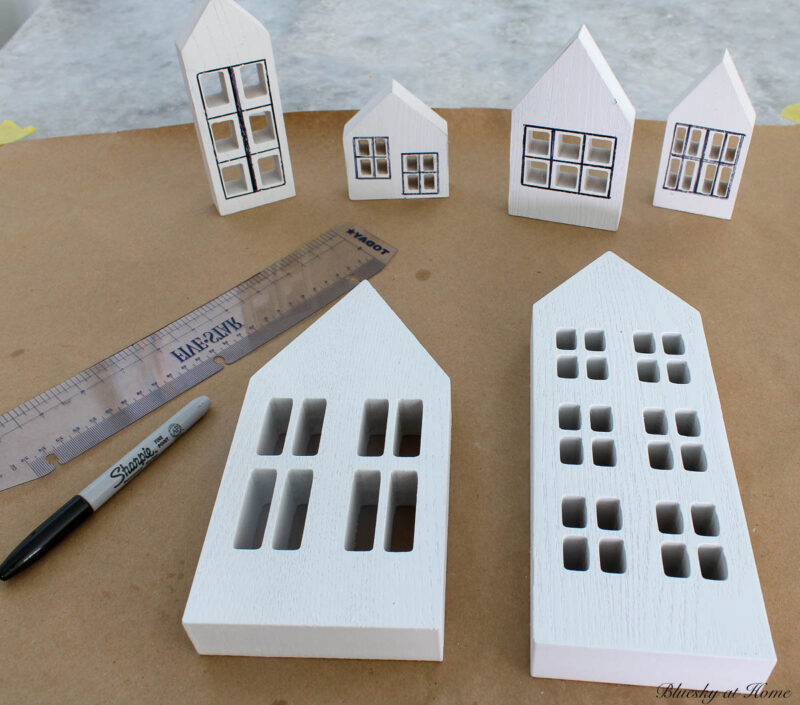
Step 2 – Using the Sharpie marker and the plastic ruler, draw “frames” around the windows of the houses. If your wood blocks don’t have cut-outs for windows, you could paint on the windows in a contrasting color.
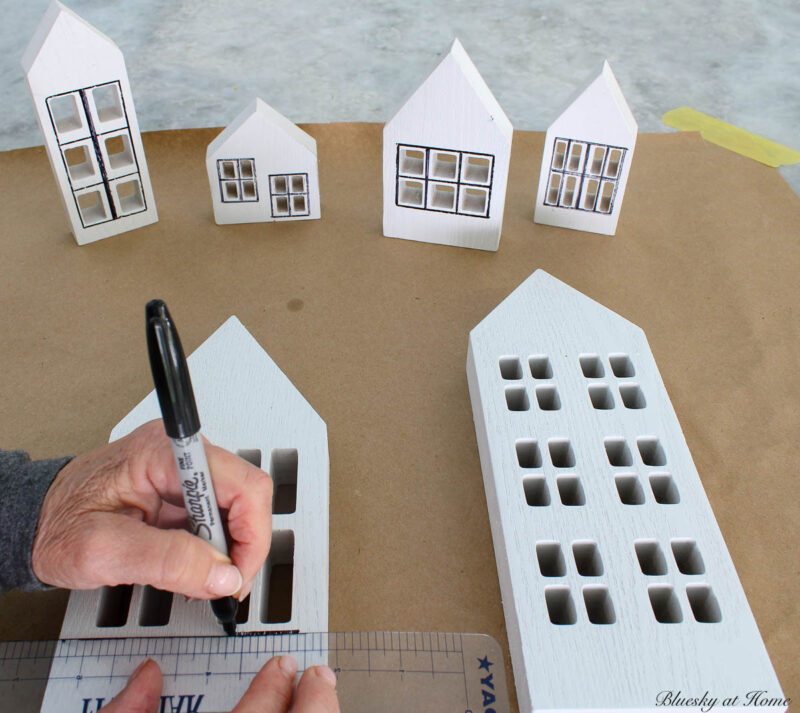

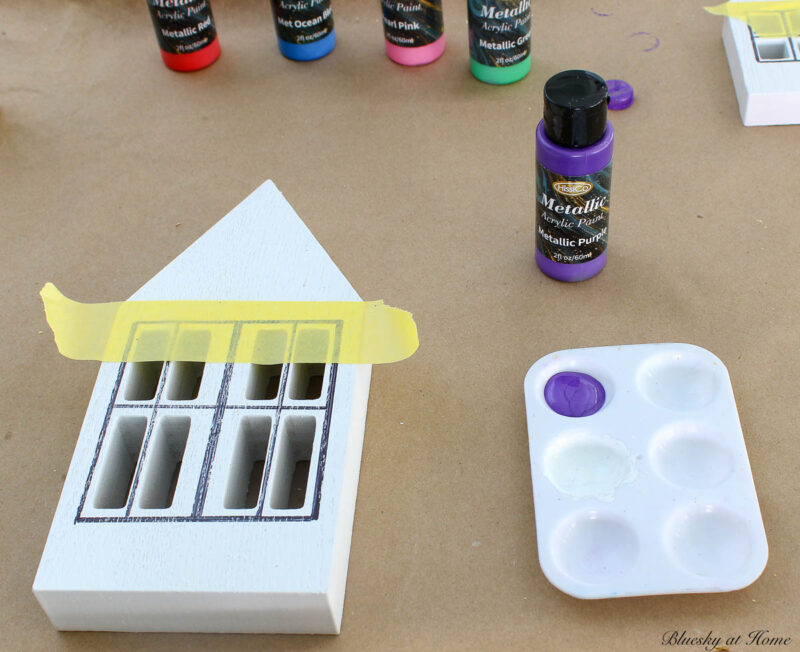
Step 3 – Use the Duck Tape to mark off the portion of the house you want to paint as the “roof”.

Step 4 – Apply two coats of metallic acrylic paint to the roof portion. Remove the Duck Tape and allow the paint to dry. I used the same six colors for the houses that I used for the coffee table Christmas trees.
I love this paint. It goes on so easily and the colors are rich and have depth.

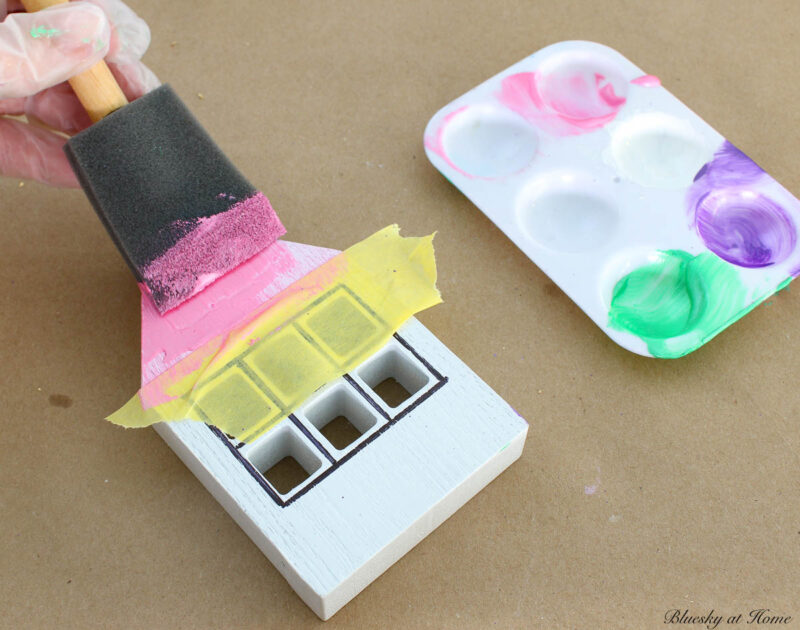
It’s amazing what a transformation the metallic acrylic paint makes.

Now that my Christmas houses were painted, it was time to add the other Christmas mantel decorations.
Other Christmas Decorations for the Mantel
In addition to the Christmas houses, here is what I included on our holiday mantel:
- candle holders
- battery-operated tapers
- white fairy lights
- multiple strands of Christmas garland in different styles: evergreen garland, eucalyptus garland, pine garland.
- faux green picks in various styles, such as snowy looks, pine branches, or forest pine stems.
- a large ribbon bow (I added three tails to a previously made bow in bright colors.)
Adding the Garland to the Mantel
Once my houses were painted, I could begin adding garland to the mantel. Normally, I would just set one strand of garland on top of the mantel.
In the past, we have set the garland on top of the mantel, securing them with small wire hooks or pipe cleaners to small nails in the back of the mantel.
However, I saw a video on YouTube from The DIY Mommy that changed my mind.
She used Command Strip Cord Bundle Holders to secure her garland to the front of the mantel. The difference was amazing.
I decided to order two packages of the Command hooks. The only problem? The cord bundle holders were on back order and didn’t arrive until about December 8th. (Remember, this was before Thanksgiving when I was putting my mantel together.)
Not wanting to wait that long, I searched online and found 3M Cord Bundlers at Walmart. I went ahead and ordered one package of those. They arrived on December 3 so I decided to start with those.
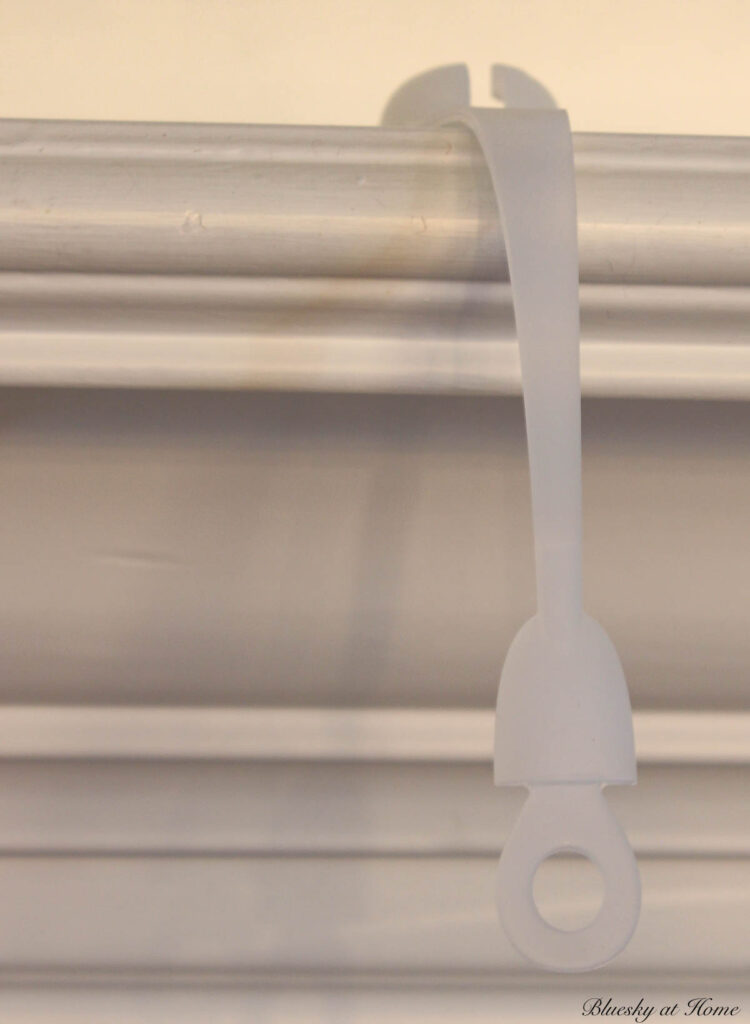
The cord bundle holder is easy to apply to the top of your mantel. I applied three across the width of our mantel.
Another change this year: when I did a round-up of Christmas mantels a few weeks ago, I noticed several that used an asymmetrical balance for the garland.
Since the right side of our mantel is a bit crowded with an end table and lamp, I thought I would try an asymmetrical look with garland draping off only one side of the mantel.
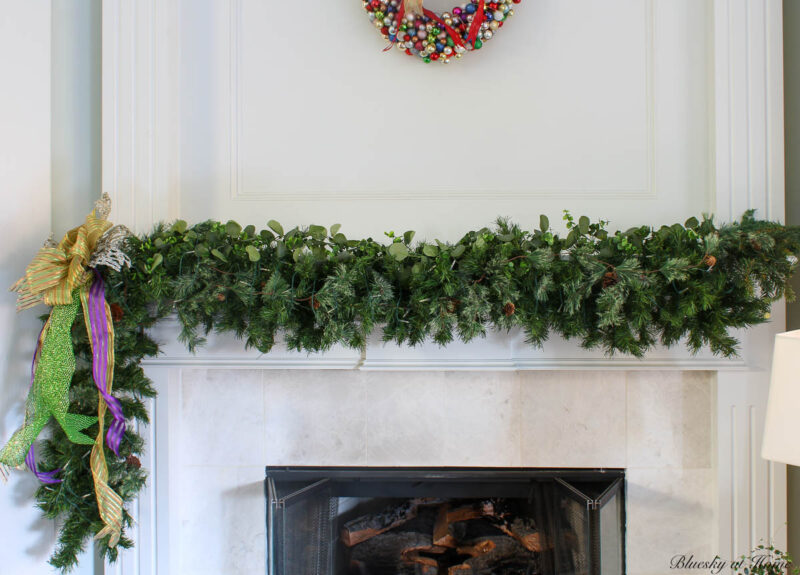
I think it worked well.
I had multiple garlands in various styles and several floral picks I could use. I added three strands of garland: evergreen pine, eucalyptus, and frosty style with pine cones.

Then I tucked in a dozen or so floral picks in different textures to fill in and give the mantel a fuller look.
Lighting on the Mantel
Lighting on a mantel is a must. I like to use a combination of candles and fairy lights.
Ironically, I discovered the ideas for the candleholders at the same store I found the inspiration for the glass-colored Christmas trees I made for the coffee table.
A set of gold candle holders were displayed on a faux mantel in the store. They were $24 a piece. Knowing I wanted at least six for our mantel, that was $150 that I didn’t want to spend.
Right there in the store, I opened the Amazon app on my phone and found the perfect gold candlesticks. They were $24 for a set of three and I bought two sets.
I didn’t want real candles up on the mantel, so I found tapers that look real and are battery-operated with a remote in a set of six. I liked them so much that I bought a second set for our dining room table.
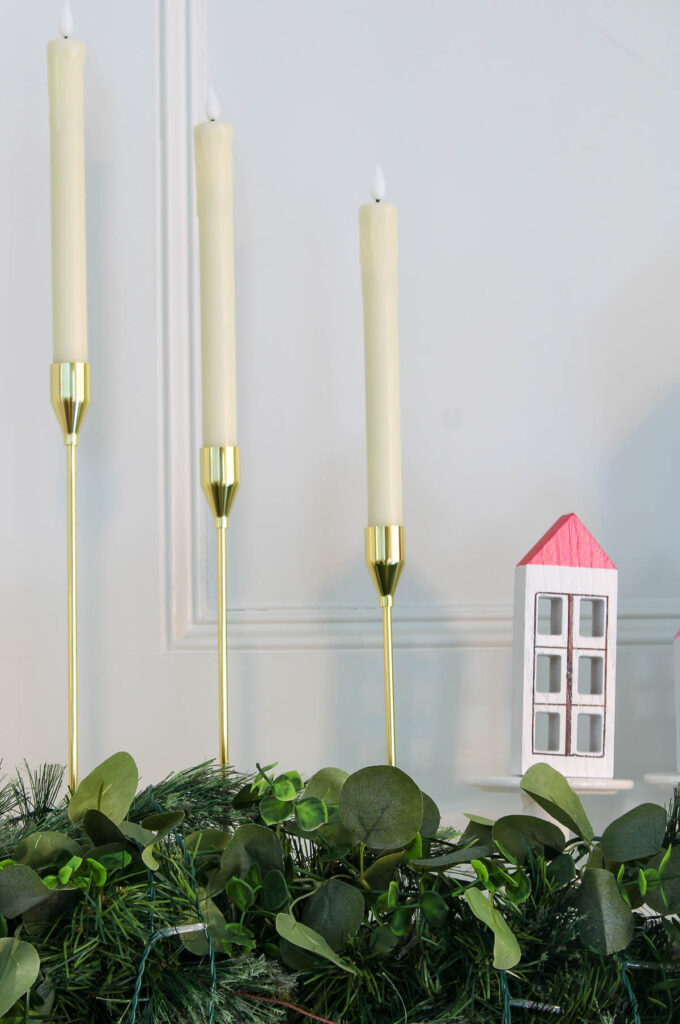
I also made sure I had plenty of clear white fairie lights. I added several strands of battery-operated lights to the garland. Every few days, I’ve been adding another strand of lights – I think I have ten strands now.
Enhancements for the Mantel
Unless you are going with a minimalist look, the perfect Christmas mantel needs embellishments to make it shine.
I added a big bow to the left side of the mantel that matched the bow on our wreath. I did add three long tails in bright green, gold, and purple to the bow. Wired ribbon is a must!

The final addition to the garland was some gorgeous vintage-like ornaments I found at a local antique mall.
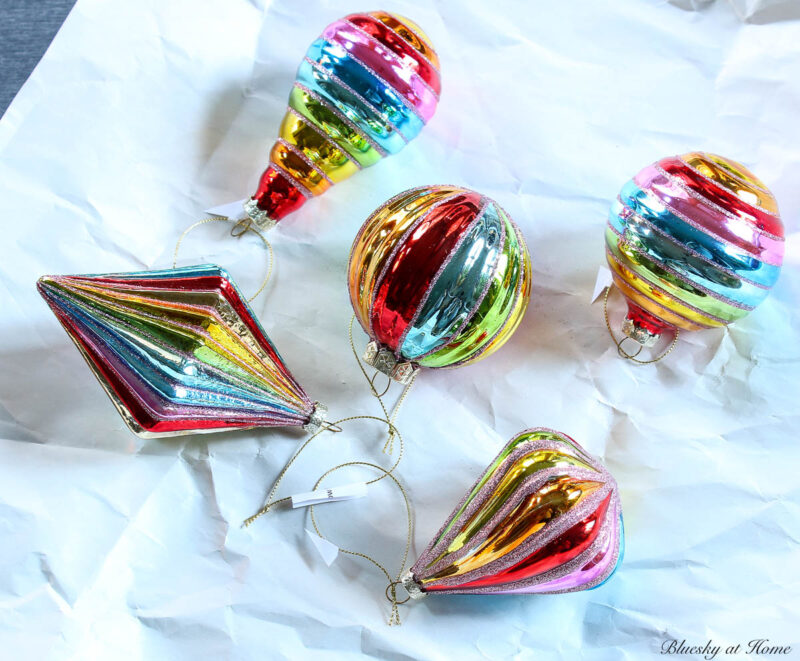
These jewel-colored ornaments brought color and pizazz to the mantel greenery.
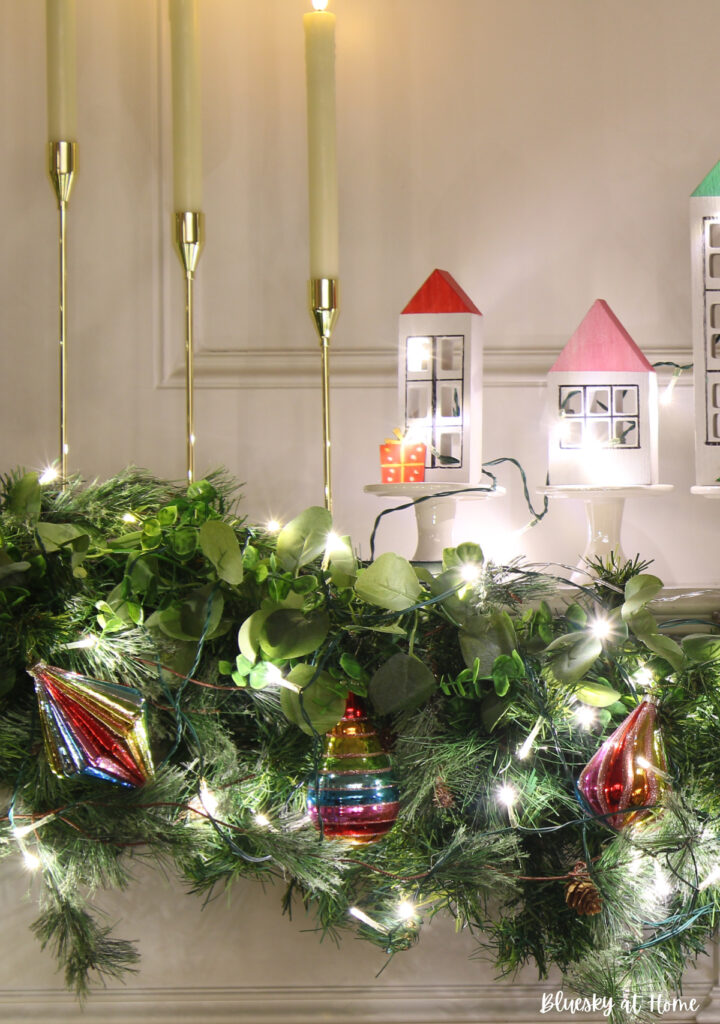
I started with five and then went back and bought four more.

You could also add pine cones, holly berries, stockings, or ornaments to your garland.
I also added two faux green Christmas trees with white lights to each end of the mantel. You could use mini trees or bottlebrush trees in different colors if you like.

Adding the Painted DIY Christmas Houses
The last addition to make this the perfect mantel were my painted Christmas houses.
To make them stand above the Christmas mantel garland, I set the big center house on a stack of books. I used cupcake stands to raise the other house.
To add a touch of whimsy, craft your own miniature Christmas village using recycled materials or simple crafting supplies. It’s a delightful way to create a winter wonderland right on your mantel.

And finally, I added one more strand of white string lights and weaved them throughout the Christmas houses. That step made the lights come through the “windows” for a fun fireplace mantel.
TIP: Incorporate LED fairy lights or candles to bring a warm, cozy glow to your DIY masterpiece.

This Christmas mantel had plenty of greenery and a lots of color – perfect for the Christmas holidays.
Now, my DIY Christmas mantel ideas are finished. I love the lush look of the garland and the bright jeweled colors. It truly is the perfect example of a wonderful Christmas mantel.

Having the garland in front of the mantel allows you more space on the mantel for embellishments. Knowing that the garland is securely hung makes decorating easier, too.
We love it when the Christmas lights on the mantle magically come on. It bathes our living room and mantel in bright lights. This year’s mantel is one of the best Christmas mantel decor ideas I’ve designed.
One thing I plan to do for next year: our fireplace surround is so big that my wreath is a bit small. Next year I plan to make a much larger wreath with bigger ornaments.
I hope you enjoyed how I made this easy DIY Christmas mantel idea come true. If you need more ideas for your Christmas mantel, here are 15 Best Ways to Decorate a Mantel for Christmas.
Check out more of my Christmas Pinterest boards for inspiration: Christmas DIY Ideas, Christmas Home Decor, and Christmas Inspiration.
Spice up your mantel with these easy DIY Christmas decor ideas! Whether you love traditional or modern vibes, find inspiration for a festive focal point that’ll make your Christmas mantel feel like a winter wonderland.






Beautiful mantle Carol! Love those little houses.
Thank you so much, Debbie. We are certainly enjoying it.