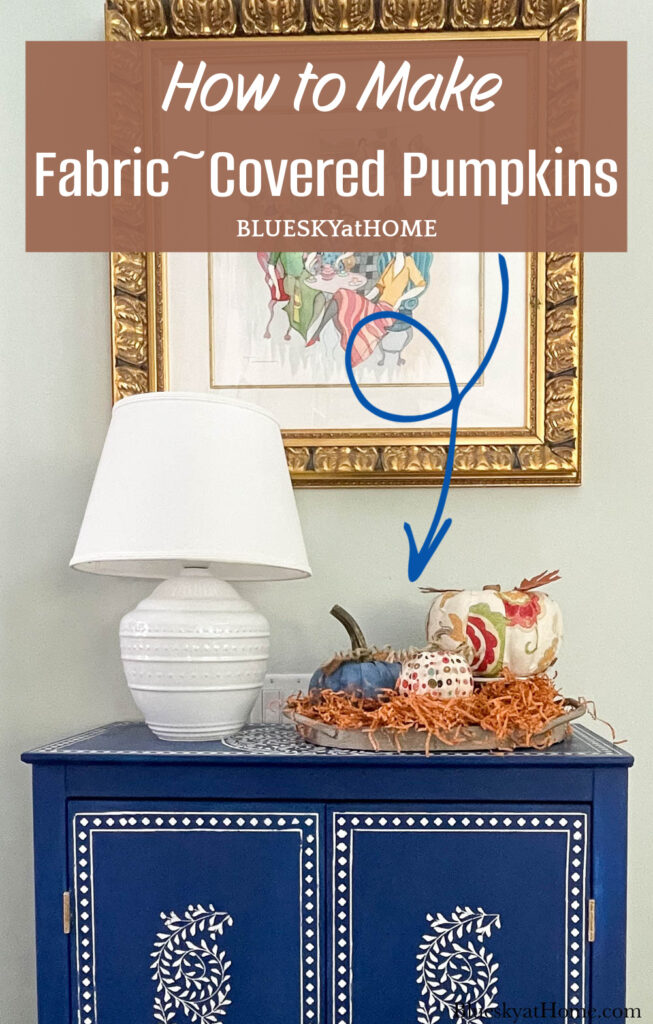
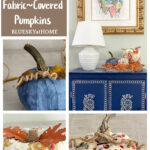
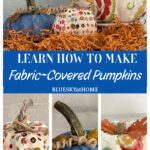
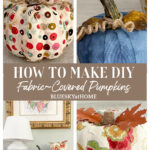
How to Make DIY Fabric-Covered Pumpkins
Pumpkins are the most iconic fall decoration. With dozens of ways to decorate them for fall, it’s hard to choose which method to try. Let’s look at how to make DIY fabric-covered pumpkins.
We love making pumpkins unique and special. That’s what makes decorating pumpkins so much fun.
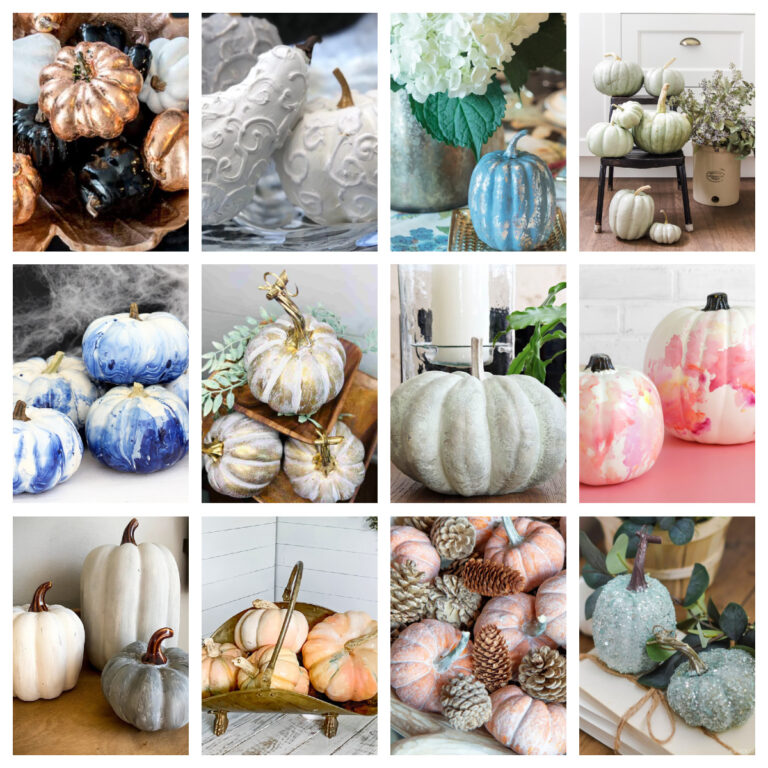
We are only limited by our imagination. After gathering 10 different DIY pumpkin crafts, I knew I wanted to try a few of the projects I found.
I decided the first pumpkin project would be how to decorate pumpkins with fabric. I’ve used fabric for many DIY projects in the past, but this is the first time that I’ve made DIY fabric-covered pumpkins.

Easy DIY Fabric-Covered Pumpkins: the Inspiration
This post contains affiliate links to products used to create this project. If you should order any item from this site, I may receive compensation, but you do not pay a penny more. Your purchase is greatly appreciated as it helps support the continued publication of this site.
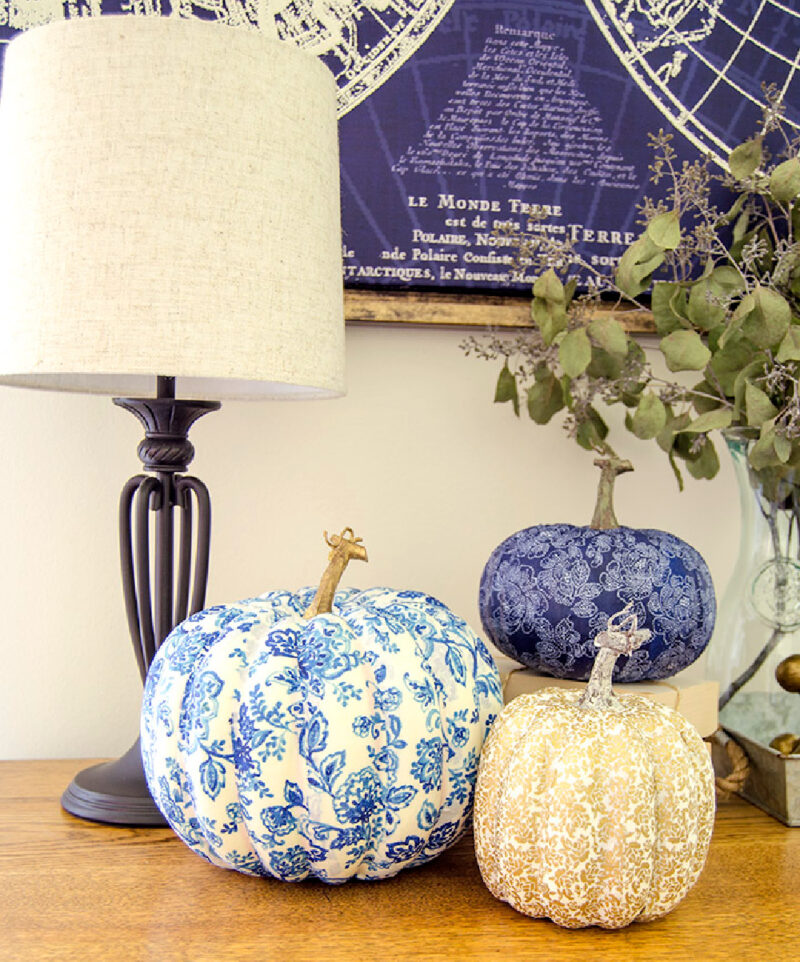
When I discovered Meredith of Unoriginal Mom‘s fabric-covered pumpkin project last week, I knew I wanted to make my own version of a DIY fabric-covered pumpkin for a few reasons.
- I love to use Mod Podge to decoupage anything
- I had all the supplies on hand ~that is always a plus
- I was ready for some new fall projects.
- This project is so inexpensive
Here are Meredith’s fabric-covered pumpkins.
Supplies for Covering Craft Pumpkins with Fabric
You don’t need too many supplies. Like me, you may have most of them on hand.
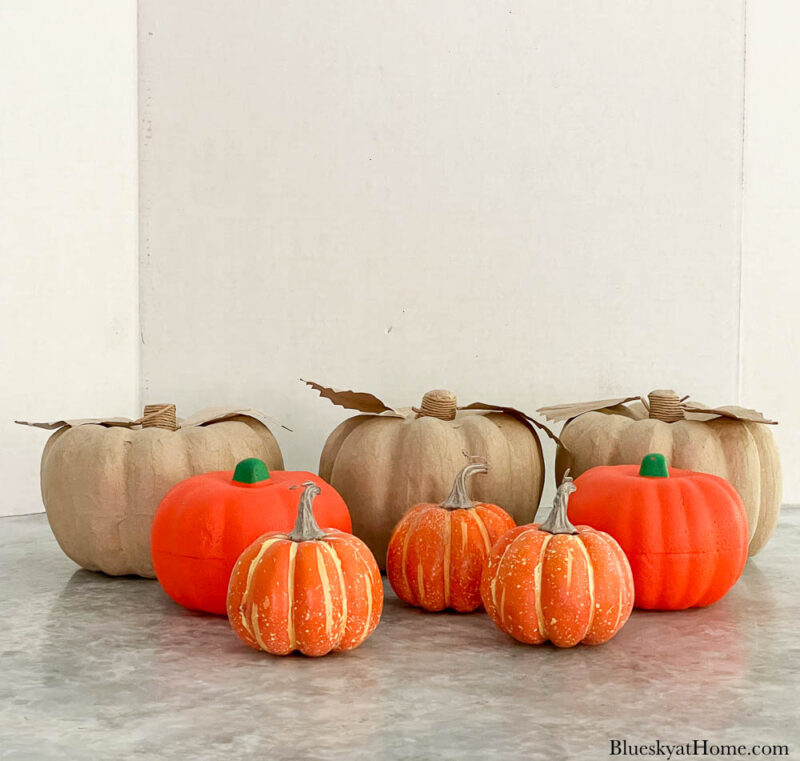
- Craft pumpkins ~ foam, styrofoam, plastic, paper maché ~ I had plenty of pumpkins to choose from. I would use one of each kind.
- Variety of fabrics, preferably cotton
- Mod Podge – preferably Fabric style
- Mod Podge brushes
- Scissors, ruler
- Rotary cutter
- Cutting Mat
Choosing Fabric for Your DIY Pumpkin Project
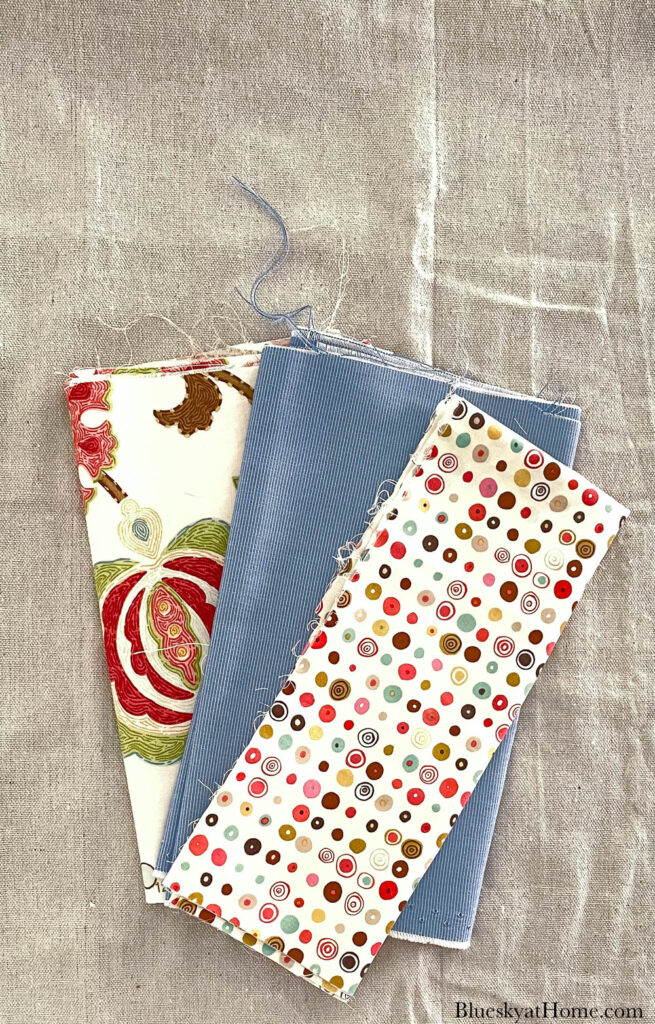
Once you have all your basic supplies, you’ll want to pick your fabrics. Depending on how many pumpkins you are going to decorate, you will need at least 3 different fabrics for the best combination of colors and patterns.
I went through my fabric stash and found three fabrics that coordinated. Two with patterns and one that is basically a solid.
The fabric on the left is from the curtains and pillows I made for our grandkids’ guest room. I used the fabric on the right to make my now-11-year-old granddaughter a dress when she was three.
The two pattern fabrics have enough fall colors ~ browns, greens, tans, and dark red ~ to work for this project. The center blue fabric pulls the blue out of the other fabrics.
TIP: I like to place a drop cloth on the counter so my other supplies don’t move around.
Preparing Your Fabric for the Pumpkins
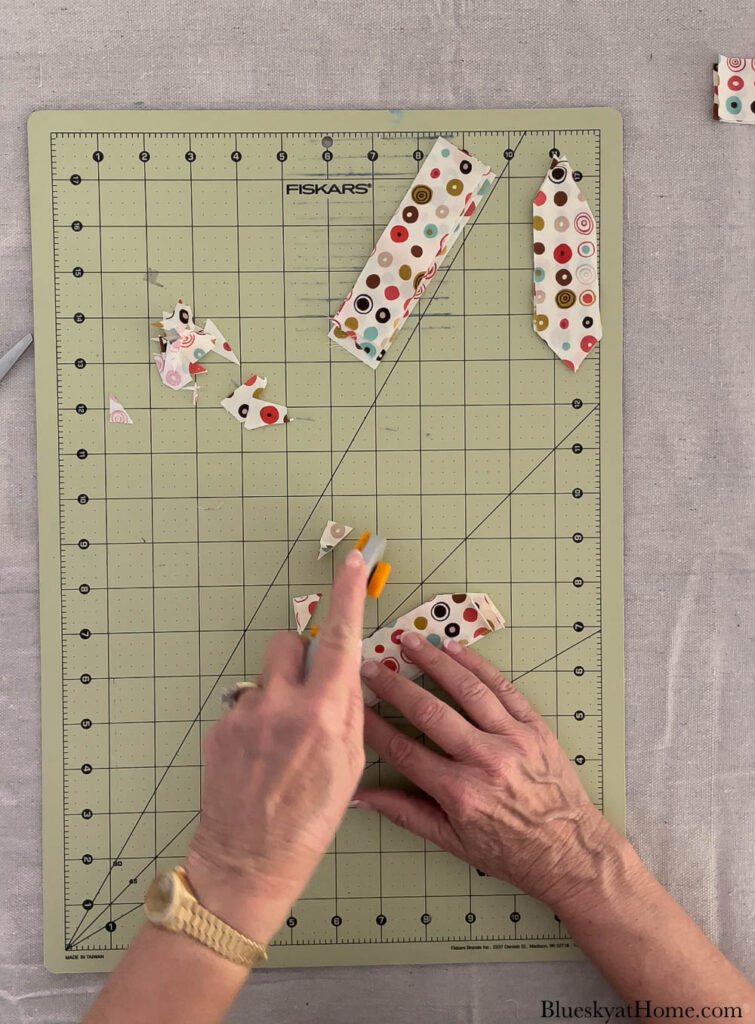
To prepare your fabric for the DIY fabric-covered pumpkins, you have to make strips of fabric.
- Measure your pumpkins ~ the width of the “seams” and the length from the stem to the bottom of the pumpkin.
- Use the rotary cutter, the cutting mat, and the ruler to cut your strips. It is so much easier and faster than measuring, marking and using scissors.
NOTE: Always be sure to close your rotary cutter blade when you are not using it: no cut fingers!
I started with this fabric on the smallest pumpkin. The width for this one was 1 1/2 inches.
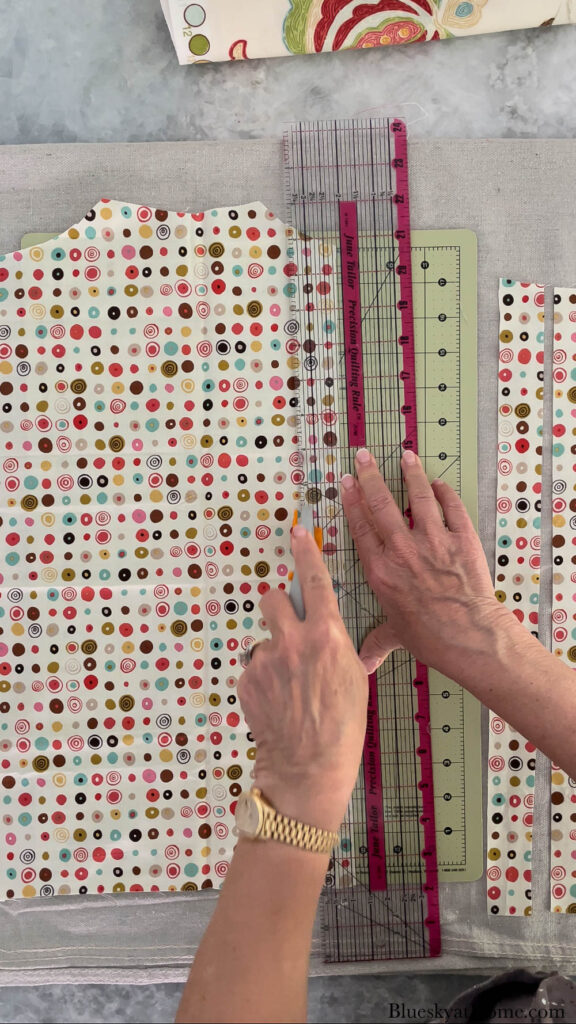
Then cut the length you need. My length was 5 inches.
One suggestion that Meredith made was to cut off the corners of the fabric on each end.
Prepare the Pumpkins
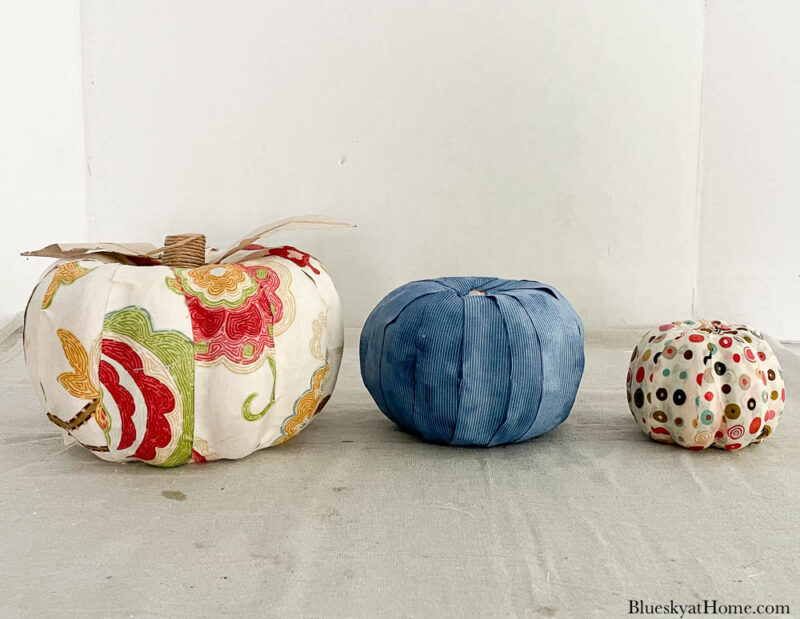
I would use one each of the different type and size of pumpkins I had.

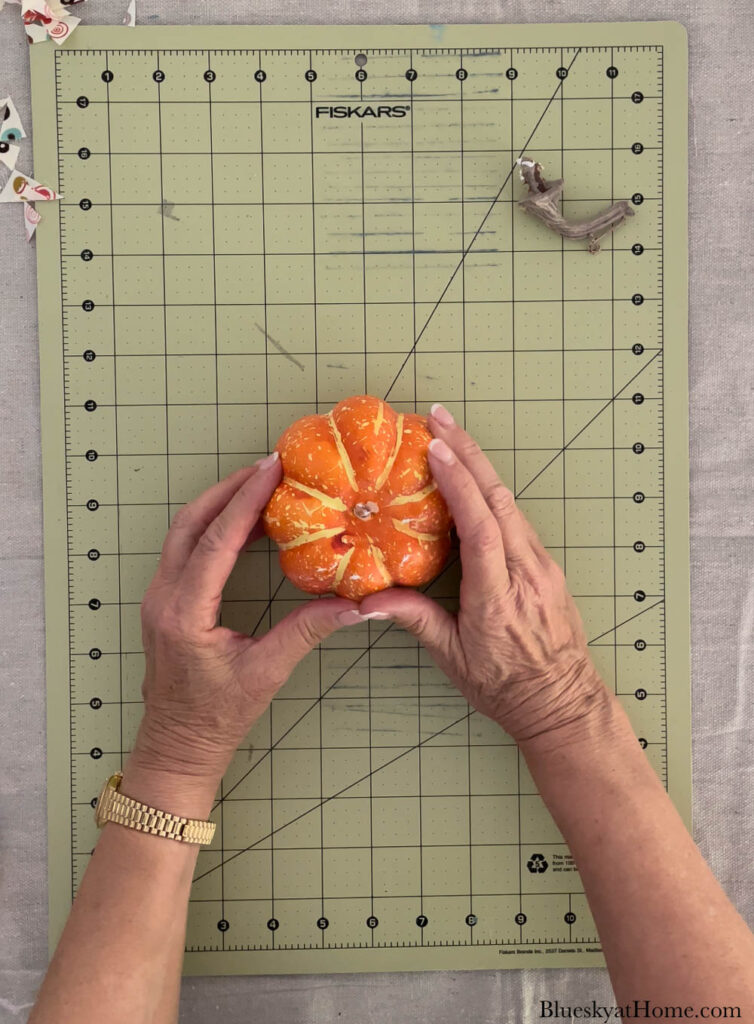
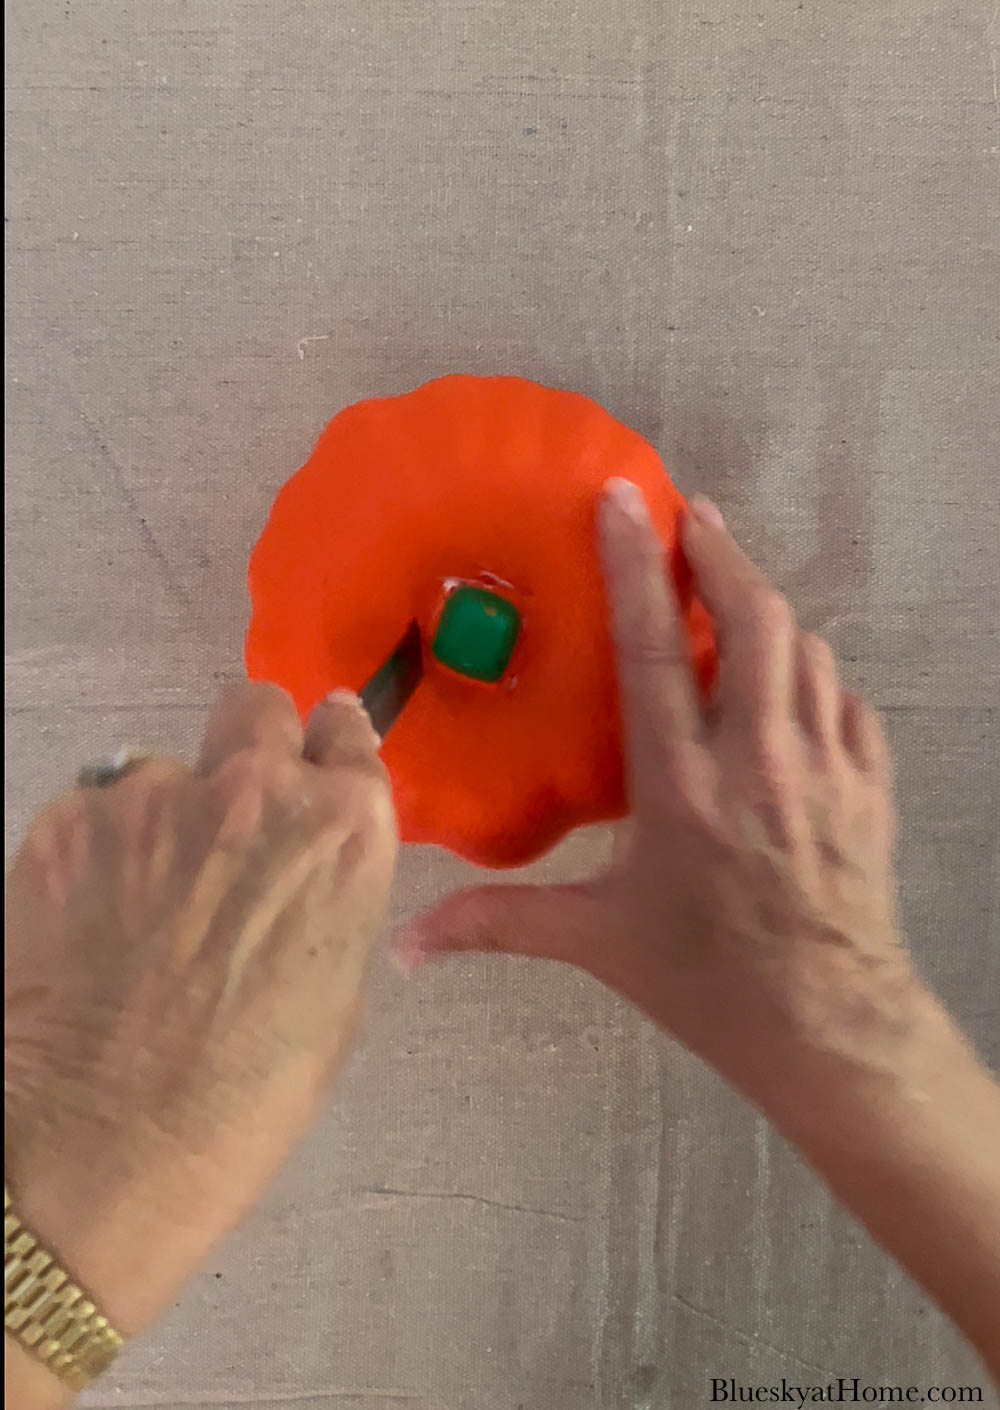
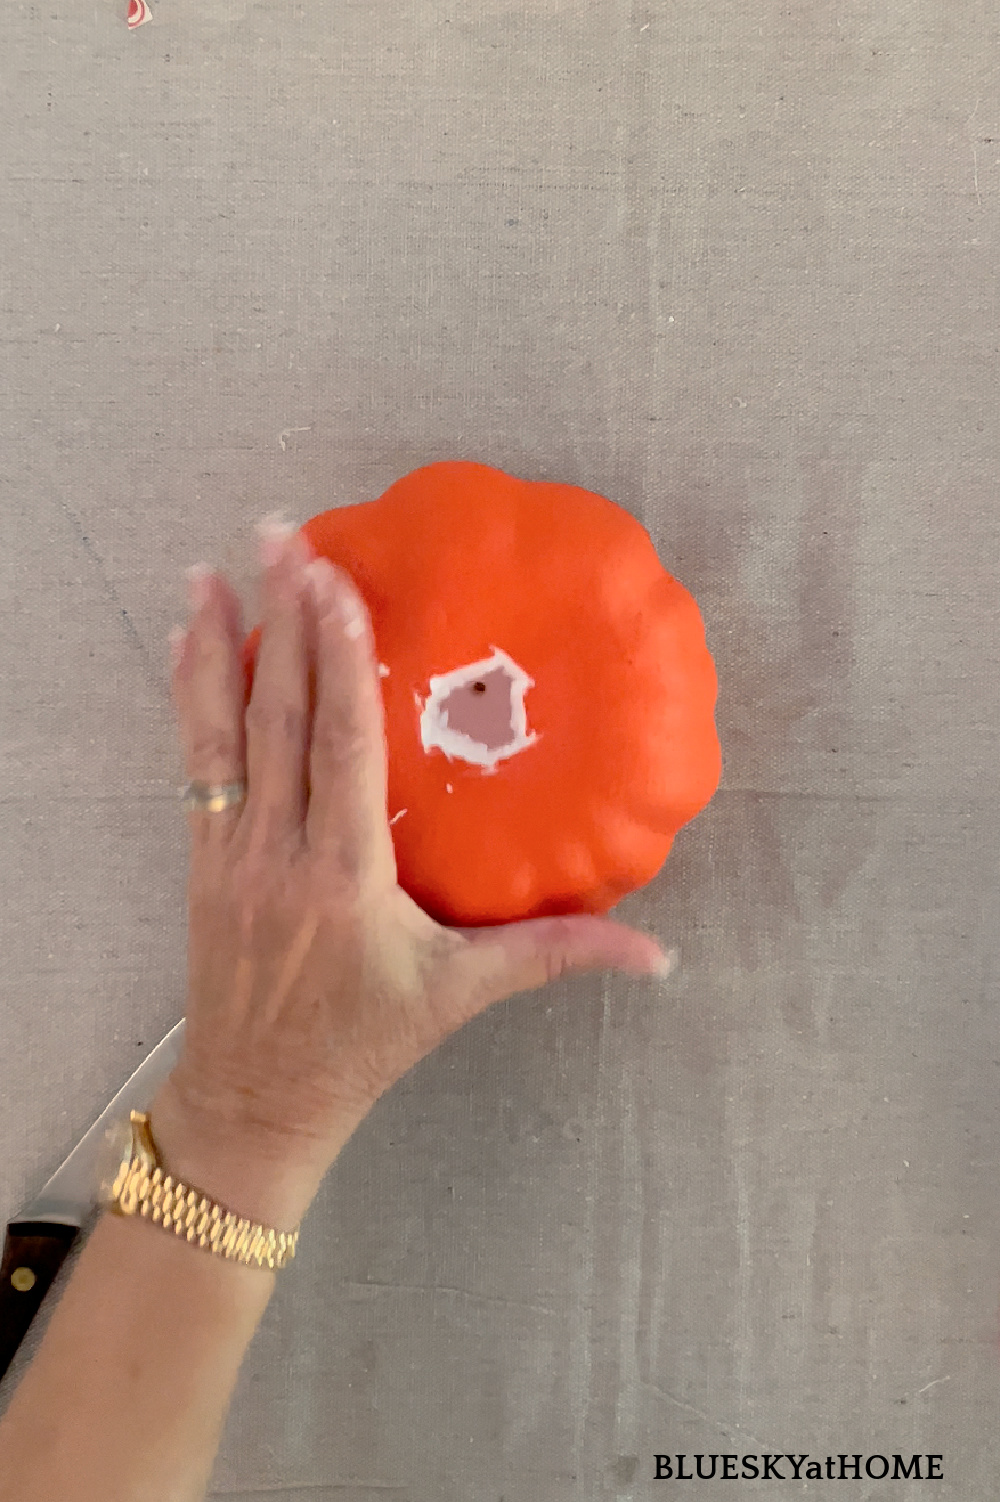
If needed, remove any stems from the pumpkins.
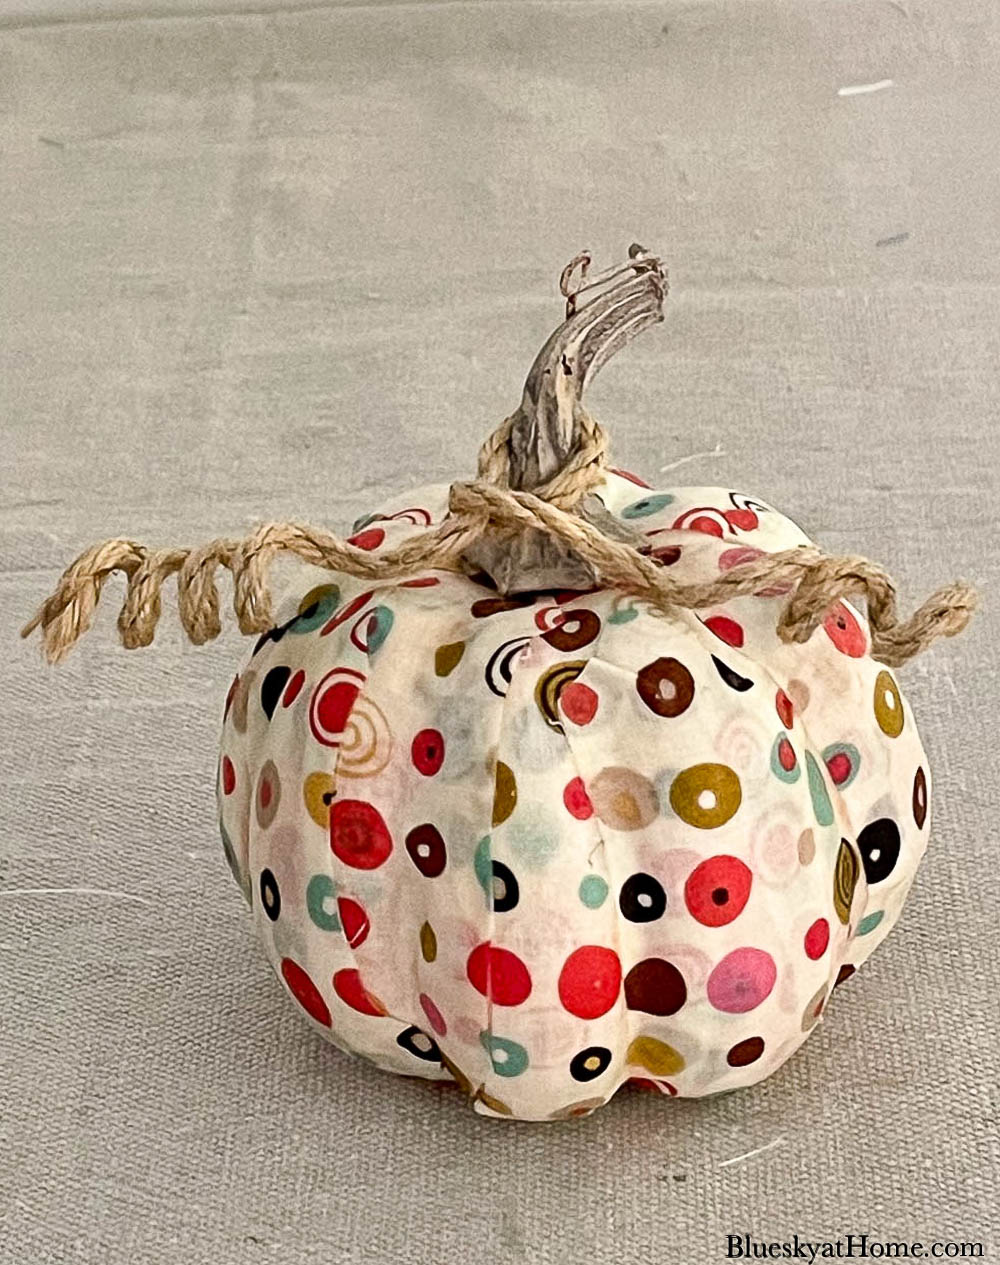
For the smallest pumpkin I simply pulled out the stem. This pumpkin would use the pattern with the small colored circles.
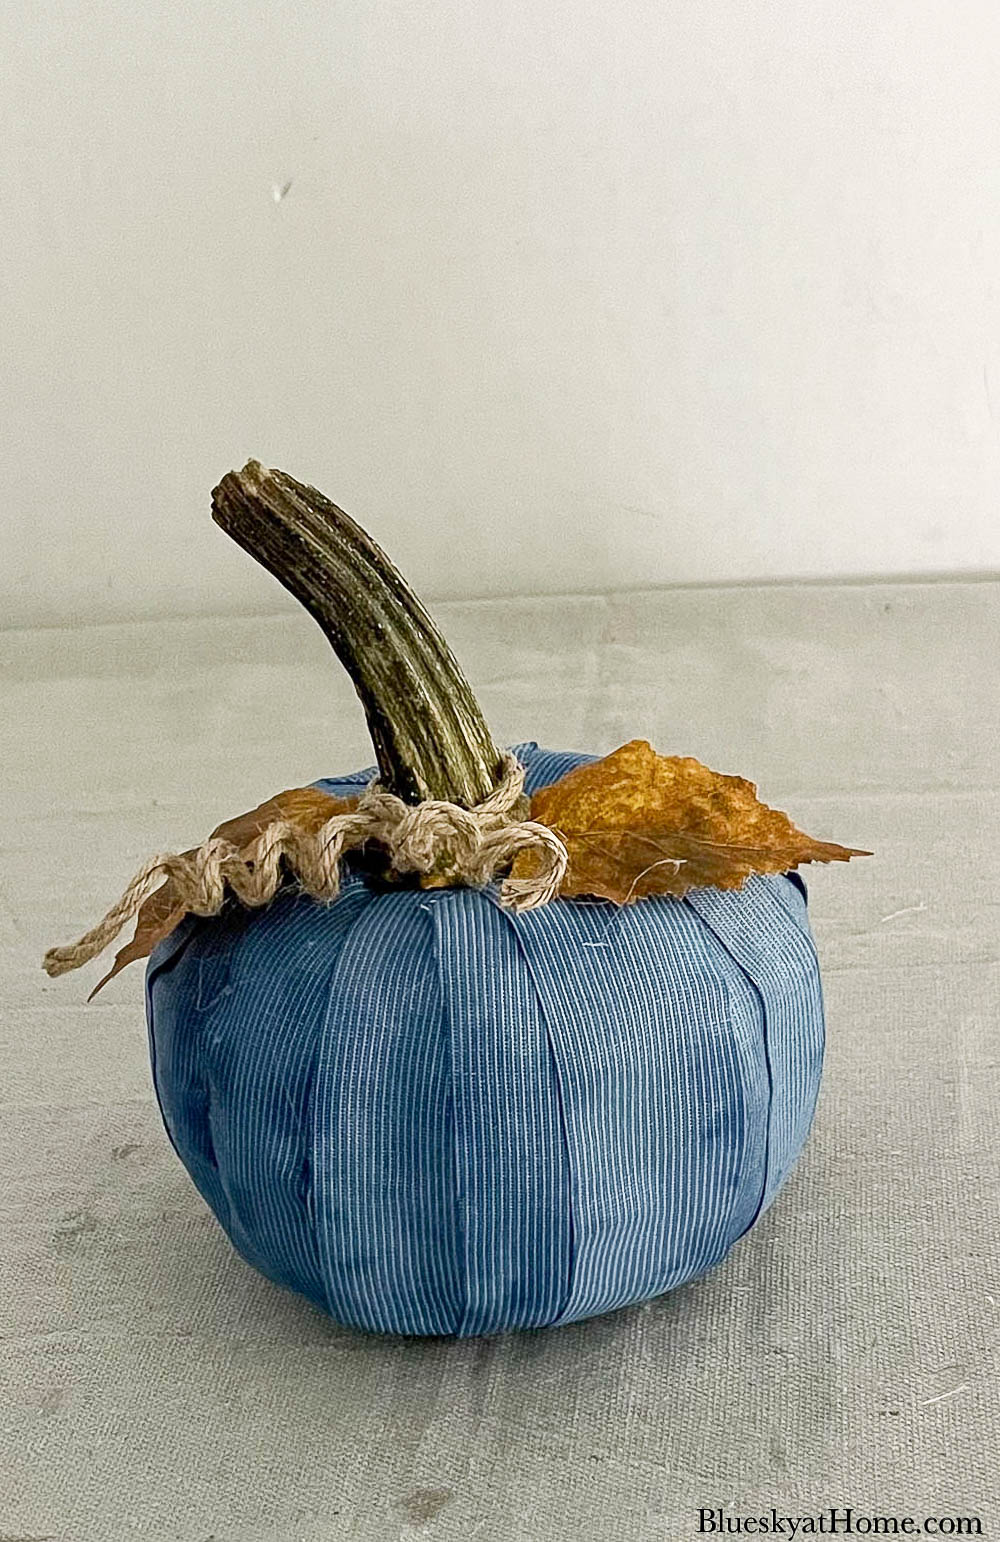
For the medium pumpkin, you have to cut out the green stem. I would use the blue fabric on this pumpkin.
Adding Your Fabric to the Pumpkins
I like to pour a small amount of Mod Podge into a container. It’s easier to get the Mod Podge on your brush that way.
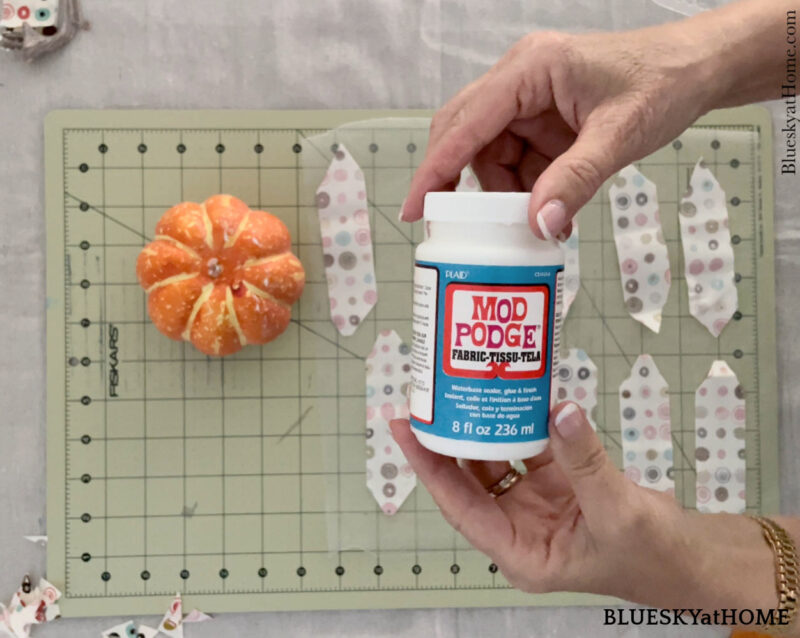
I love using the Mod Podge brush.
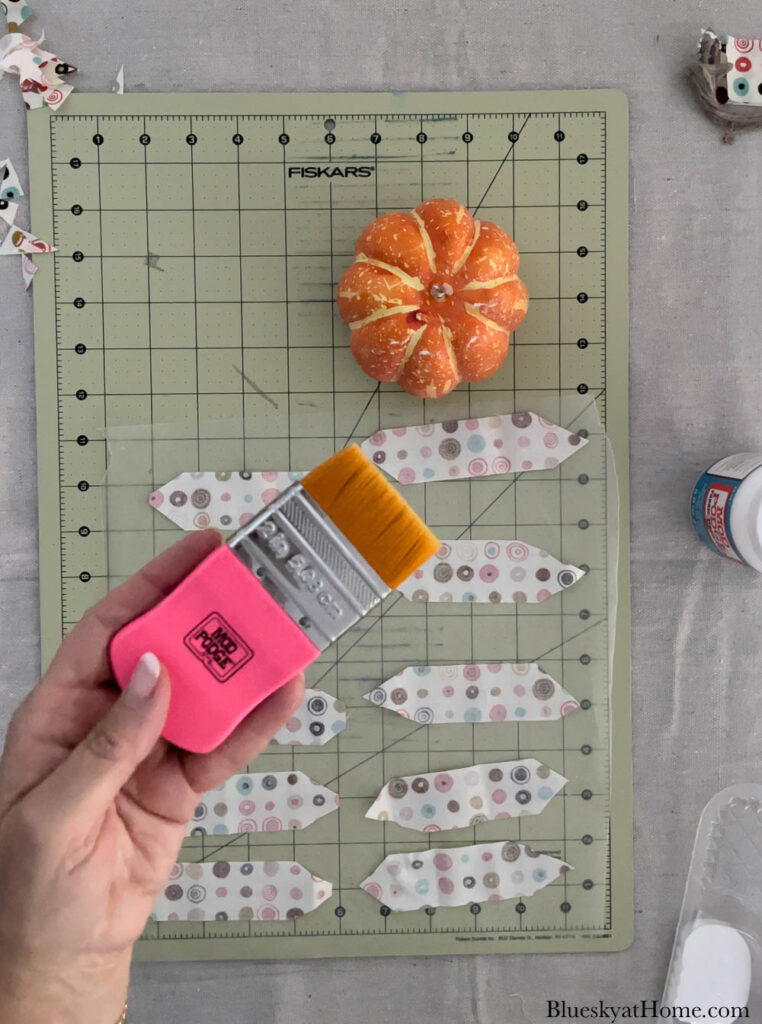
I placed a piece of wax paper on the drop cloth. Place some strips of fabric right side down and liberally brush the Mod Podge on the wrong side.
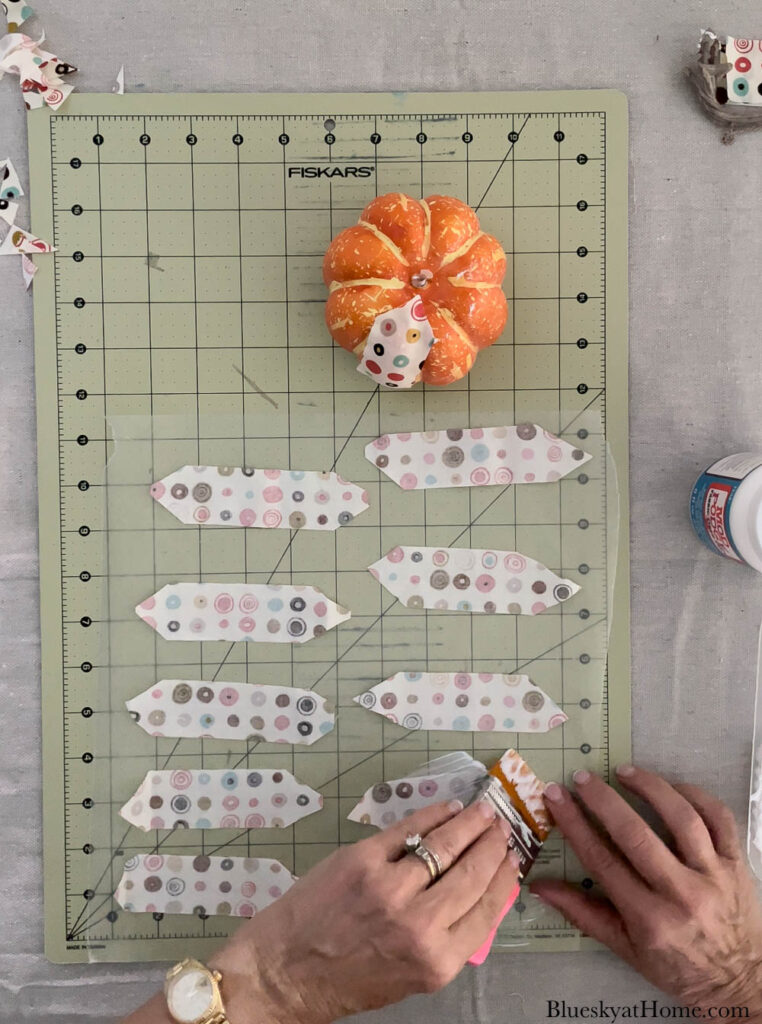
Place one end of the fabric at the stem end and stretch it down to the bottom of the pumpkin. Press the fabric down with your fingers to the pumpkin.
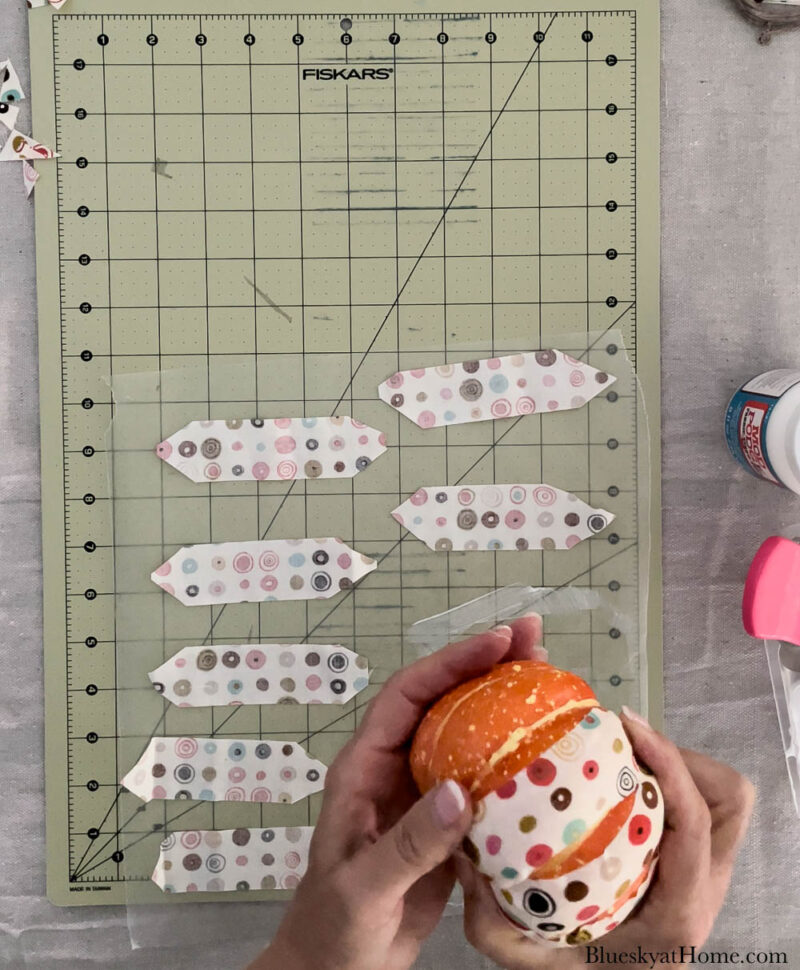
Continue adding fabric strips all around the pumpkin.
For the first pumpkin ~ the smallest one ~ the fabric was thinner and the orange of the pumpkin showed through. I had to layer the fabric 2 ~ 3 times to get full coverage.
TIP: Depending on the thickness of the fabric and color (orange) of the pumpkin, you might need to paint the pumpkin first.
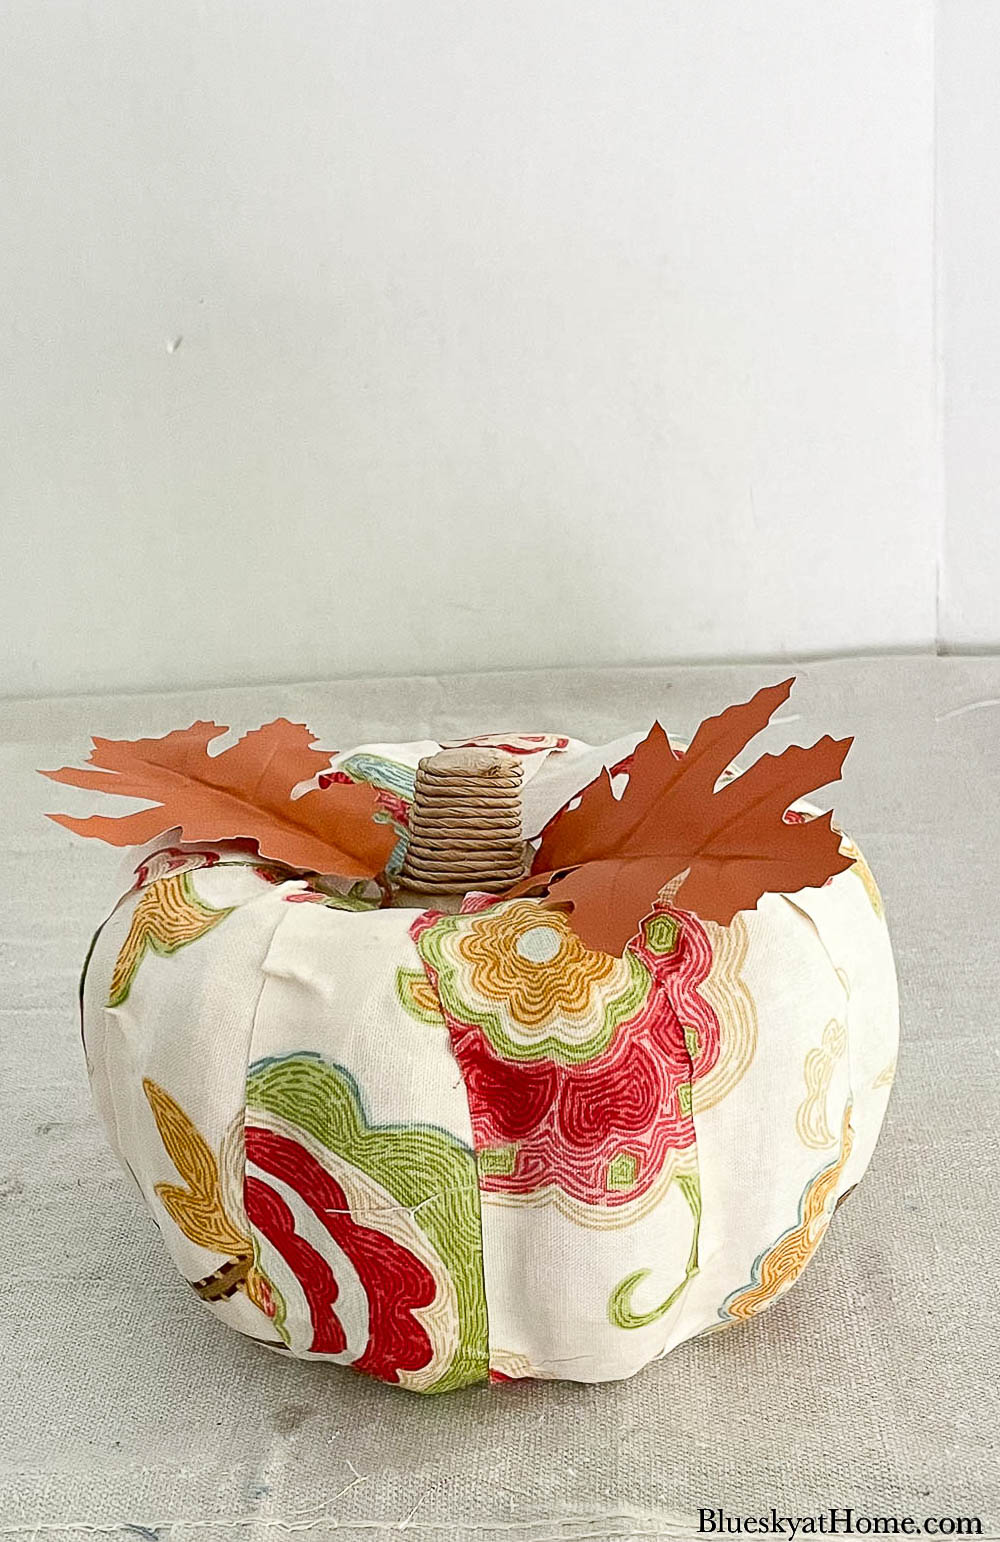
For the largest paper maché pumpkin, the fabric was thicker and the brown of the pumpkin didn’t show through. It only took one layer of fabric. This pumpkin was the easiest one.
For the blue fabric, I used the orange styrofoam pumpkin.
After you finish decoupaging your fabric-covered pumpkins, I recommend letting them dry overnight.
The blue fabric had some darker spots from the glue. I actually thought it added more character to the pumpkin ~ like the darker spots were part of the pattern.
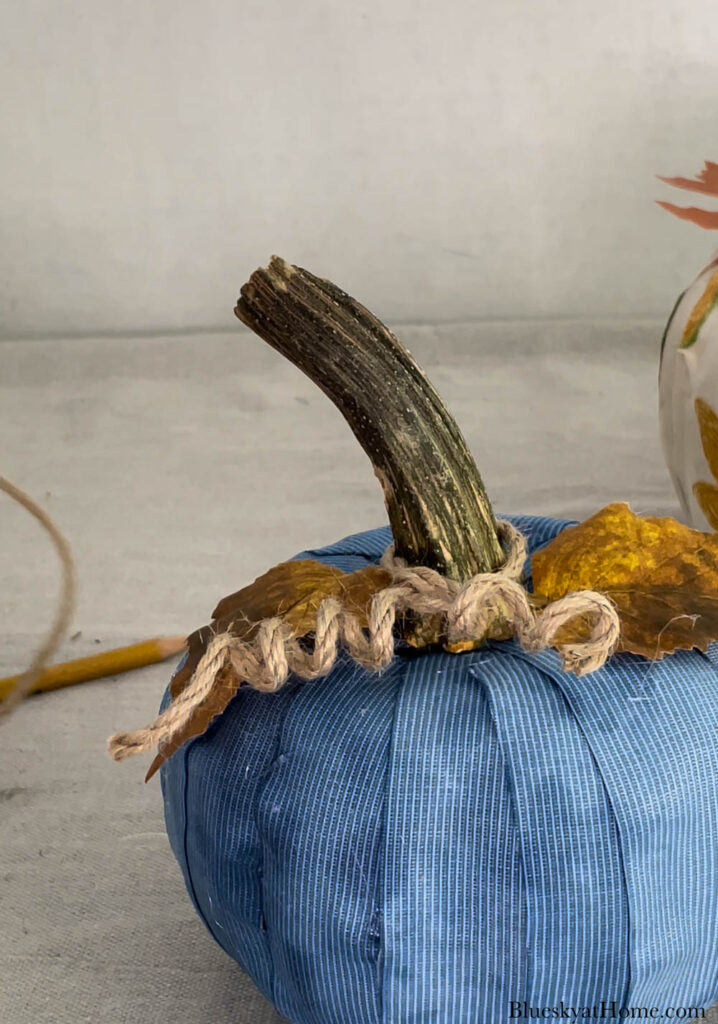
Adding Embellishments to the Fabric-Covered Pumpkins
Each pumpkin needed a stem.
For the smallest pumpkin, I simply put the stem back in the hole on the top. Then I twisted wired jute twine around it.
For the medium pumpkin, I glued on a real pumpkin stem that I saved from last year. Then I added a couple of faux foliage leaves and wired jute twine to it.
TIP: When you go shopping for real pumpkins this fall, look for stems that have fallen off. I still have a few more from last year to use.
For the largest pumpkin, I clipped off the original leaves, which I didn’t think had enough color. Using my glue gun, I replaced them with rust~colored leaves from Dollar Tree.
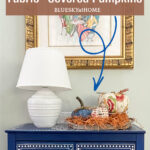
Styling the Pumpkins
I knew where I would use the pumpkins before I ever began the project: on the cabinet in the living room that I painted blue and stenciled.
I began by placing an oval tray on the cabinet.
Then I added the pumpkins. I set the smallest and largest ones on cupcake stands to add height.
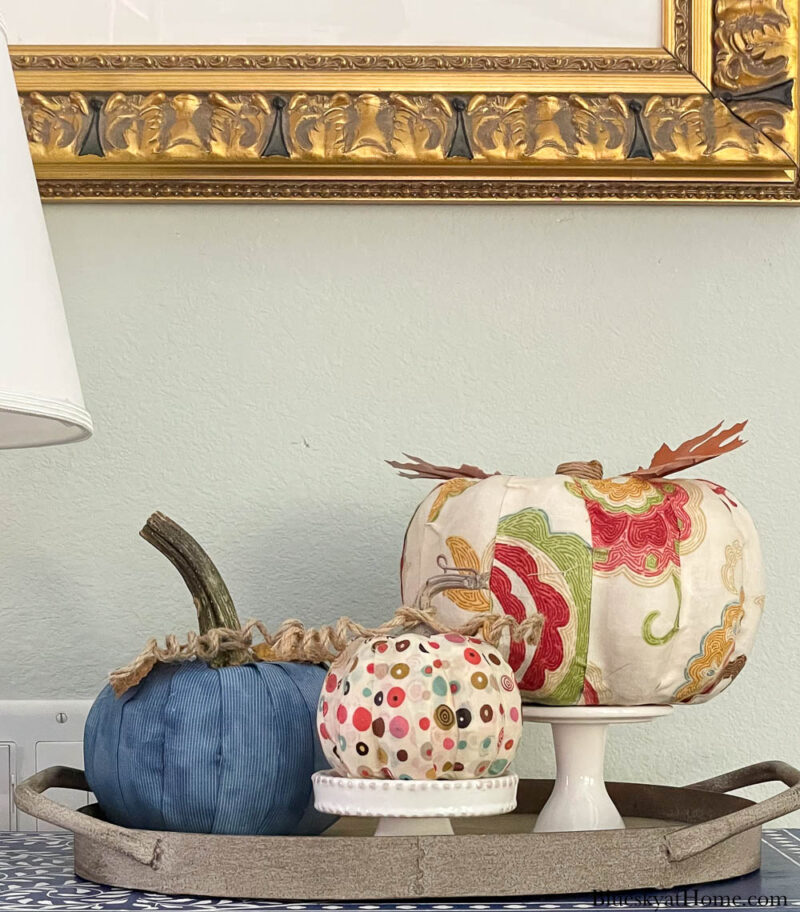
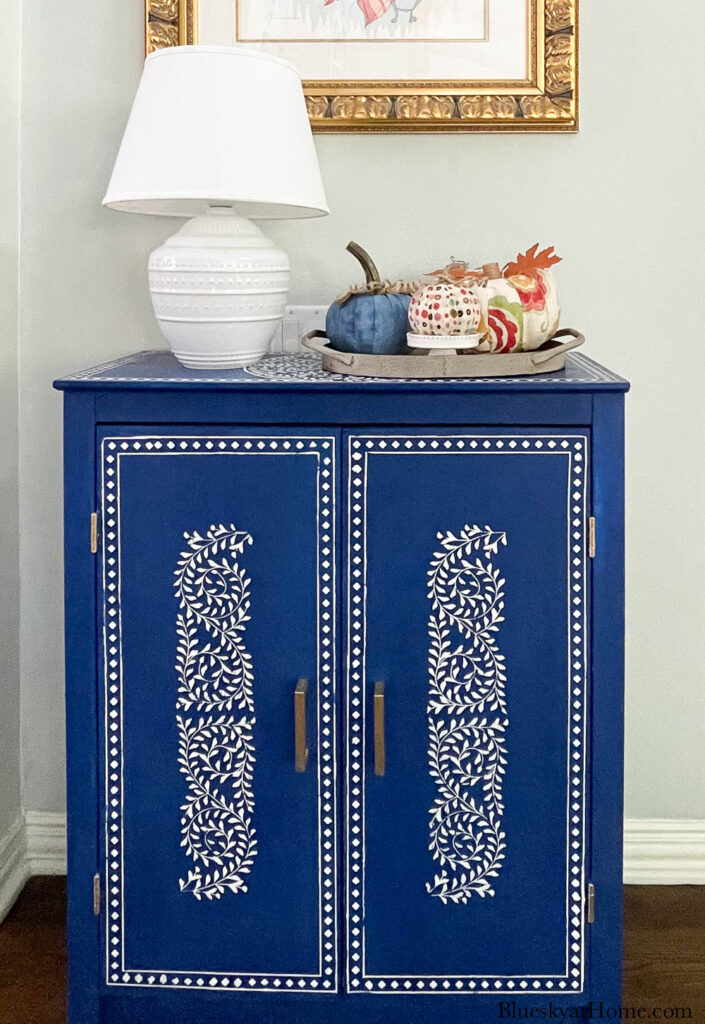
Then I used orange paper shred to fill in around the pumpkins. The arrangement was that simple.

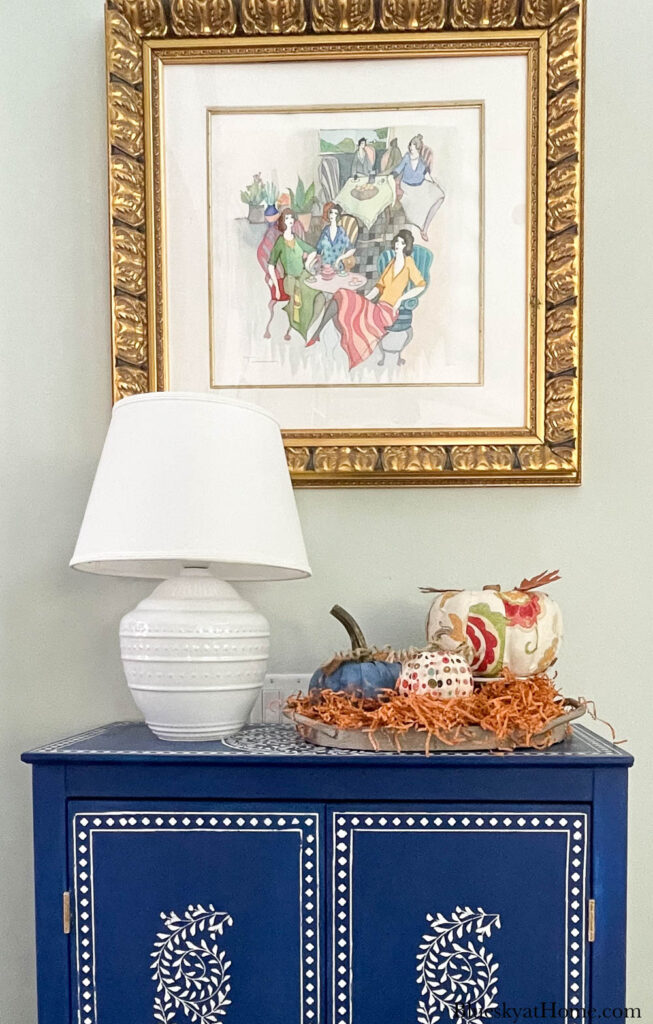
I’m really happy with how these DIY fabric-covered pumpkins turned out. Next time I would not use as thick a fabric as the blue one. I would also paint the small pumpkin before adding the fabric.
Here are the basic supplies you need for this project.


What do you think of these DIY fabric-covered pumpkins? I hope that you will make these them. Make them your own. Every pumpkin will look different.
I would love for you to PIN this fabric-covered pumpkin project. Please share it with others.


These are so pretty, Carol! I love the variety of fabrics you used! Thank you for sharing at Tuesday Turn About!
Great Fall pumpkins! I really like the fabric you chose for them. So colorful and fun!
Carol
I love these adorable pumpkins!
These pumpkins are so pretty, Carol! My favorite is the blue one — that’s because I’m a blue gal!
Your pumpkins look so nice in your tray vignette. I like how you used the orange shreds around the pumpkins. This is a great idea.
Thanks, too, for the great instructions to make these fabric pumpkins. I have to check my fabric stash and make some of these pumpkins for our home — and for friends.
Thank you so much, Mary~Ann. I always appreciate your feedback. I do hope that you’ll make a fabric-covered pumpkin.
Love your fabric pumpkins, Carol! Such a great idea for fall!
Glad you like them, Kim. I’d love to see how you would make them.