Dress Up Your Mantel with Two Easy Fall DIY Crafts
Do you like to add a touch of personal creativity to your seasonal decorating? I have two easy fall DIY crafts for your decor. You can transform your fireplace mantel into a stunning autumn focal point with these two simple fall DIY crafts that capture the warm, cozy essence of the season.
Whether you’re looking to add rustic charm with natural elements or create elegant seasonal decor on a budget, these easy mantel decorating ideas will help you achieve that a perfectly affordable fall aesthetic.
From rich autumn colors to textured seasonal accents, these quick weekend projects use readily available materials to bring the beauty of fall indoors.
Not quite ready to begin making projects for fall? Then Pin this post to your fall DIY Pinterest board so you can pull it out when you are ready
This DIY fall mantel decor will easily last from September through Thanksgiving. Add a turkey here and there or leave as is. You’ll love showing the mantel decor off all season long.
No advanced crafting skills are required, just a little creativity and an afternoon to spare.
These two fall DIY crafts can be used together in a seasonal vignette or separately. I love how they complement each other on the mantel.
Both fall crafts use organic materials – wood and burlap ribbon – as their foundation. Add some paint and stencils, and you have two wonderful focal points that will last year after year.

Did I mention that these fall crafts are easy to make? You’ll see as I walk through the process.
Two Easy Fall DIY Crafts for your Home Decor
I made these easy fall DIY crafts for a new look for our mantel. With Thanksgiving around the corner, I wanted a mantel design that could bring out the idea of thanks.
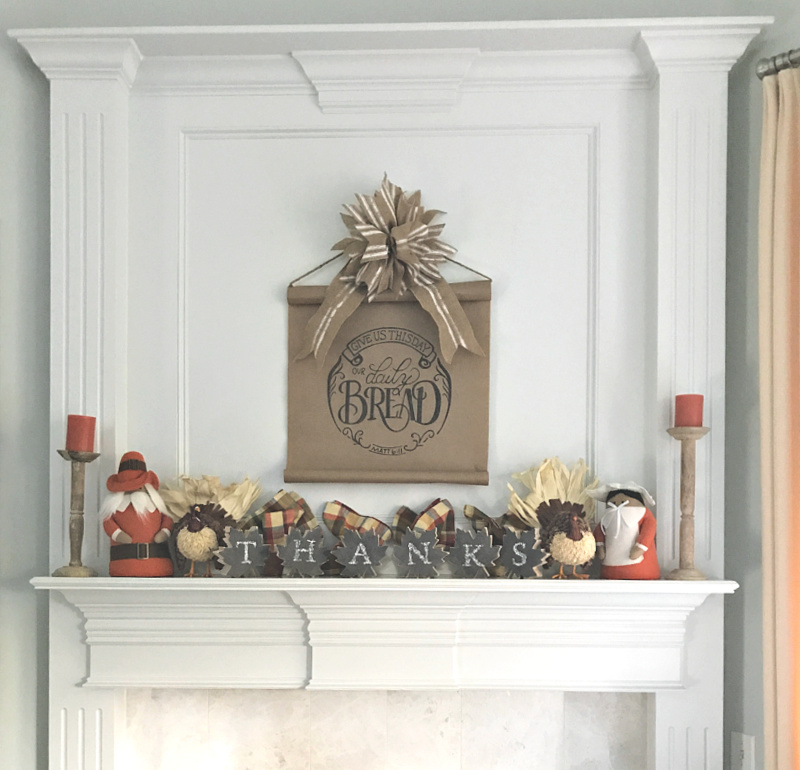
You can probably guess what the 2 easy fall DIY crafts are: the wood thanks maple leaf sign and the new burlap bow above the farmhouse-style scroll sign.
Let’s start with the maple leaf thanks sign.
Maple Leaf Wood Sign
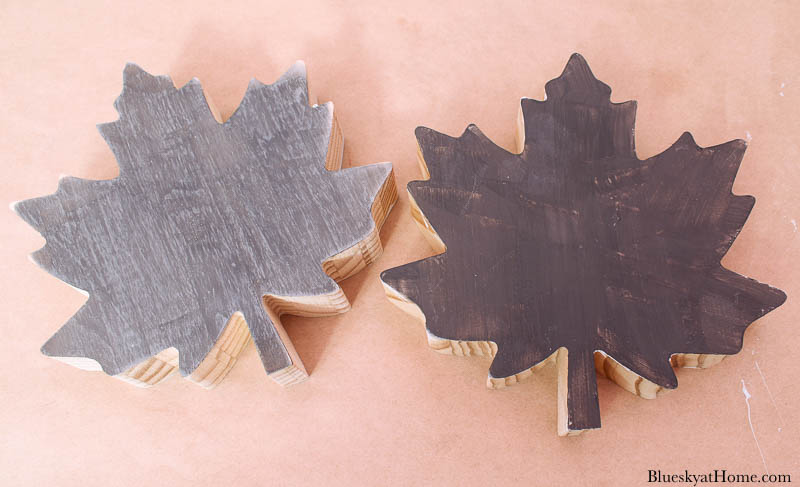
I found the 6 maple leaf blocks at Target. There were only 6 of them and I bought all of them. At about 5 X 6 inches, they are a nice size for use on a mantel, dining table or console. What’s cool is that they stand up at an angle.
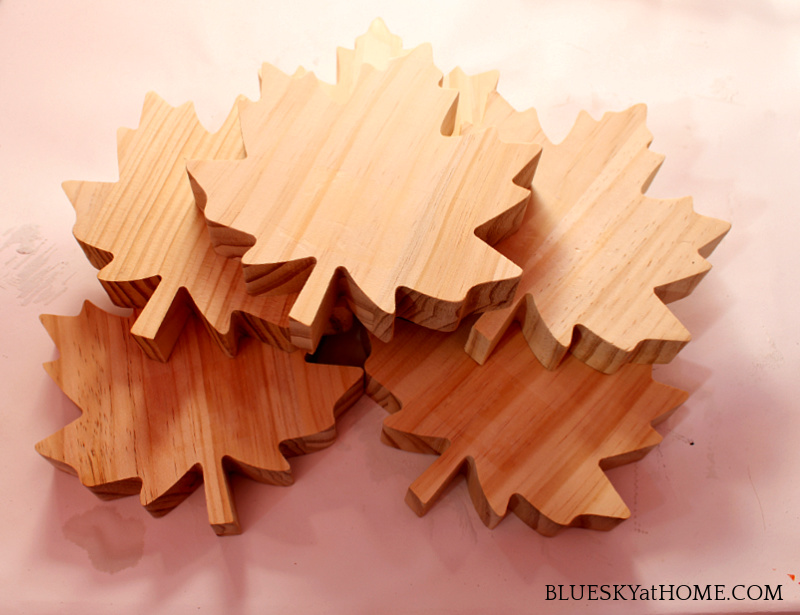
The wood was very smooth so no sanding was required. Ready to get started on this Thanksgiving maple leaf sign?
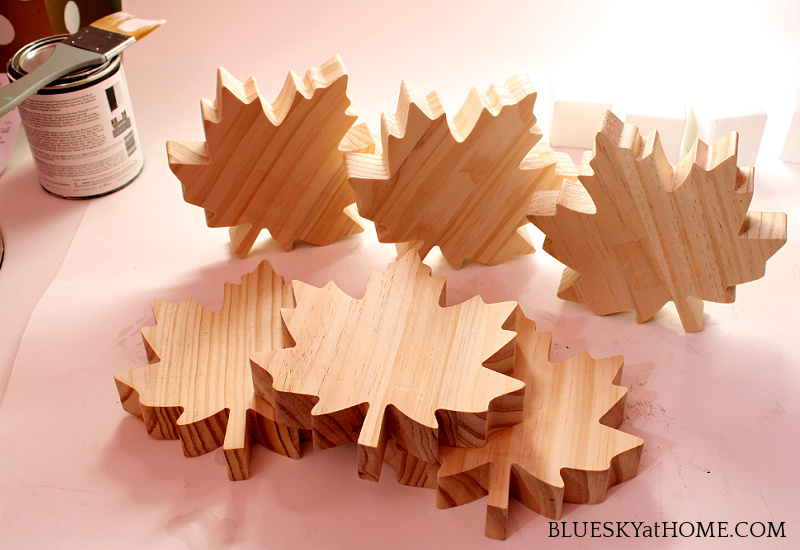
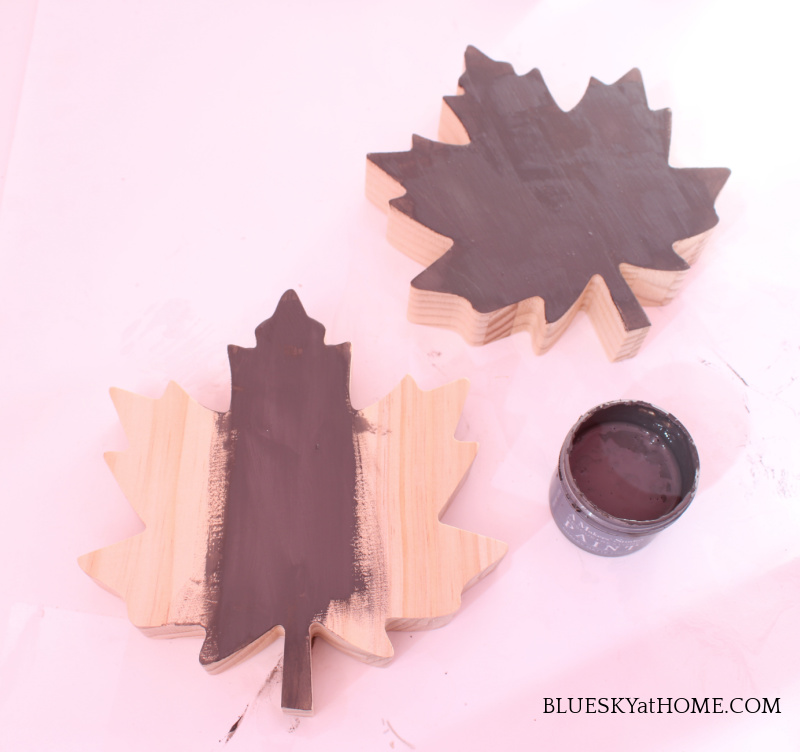
Step 1 ~ Chose a paint color for the maple leaves. I chose Rescue Restore paint in Bold Prayers, a light taupe brown, from A Makers’ Studio. This paint is perfect for crafts and any furniture restoration project. It will take very little paint for this project.
Step 2 ~ Use a chip brush to give the maple leaves 2 coats of paint, lightly sanding in between coats.
After all the leaves were painted, I gave them a very light sanding. I ended up loving the more rustic, lighter shade which brought out some grain.
Step 3 – Choose your word and a stencil font that you like. I already knew that I want to use Alphabet 5 from A Makers’ Studio. The size was just right and I loved the design.
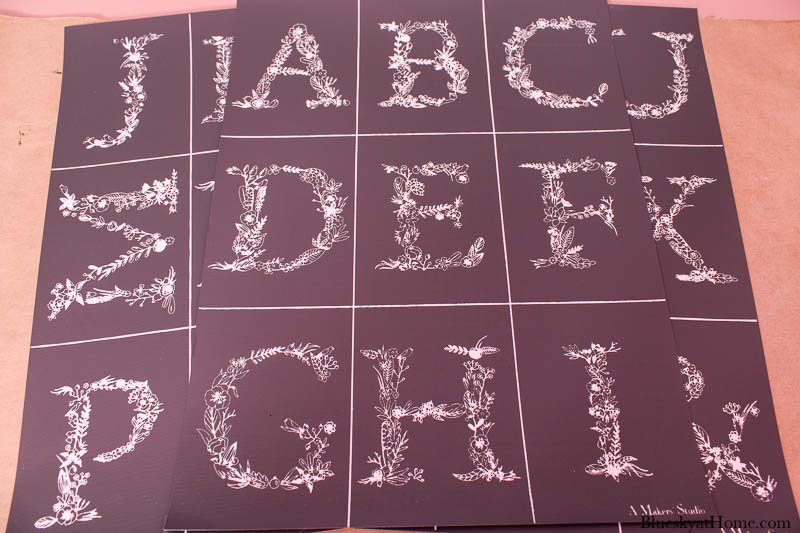
Step 4 – Apply the stencil with your ChalkArt color of choice using a plastic scraper. I’m using Peace & Joy which is white.
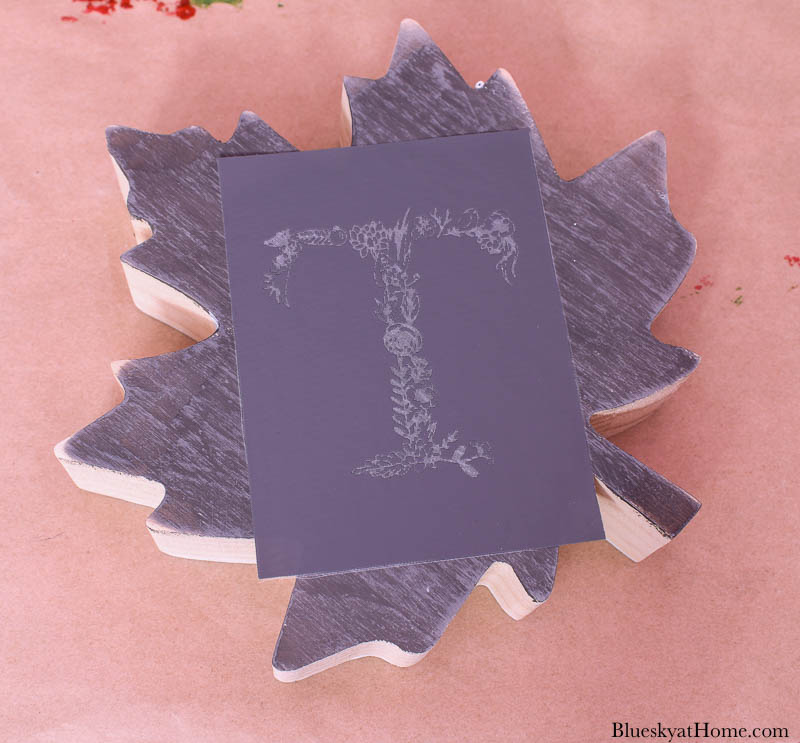
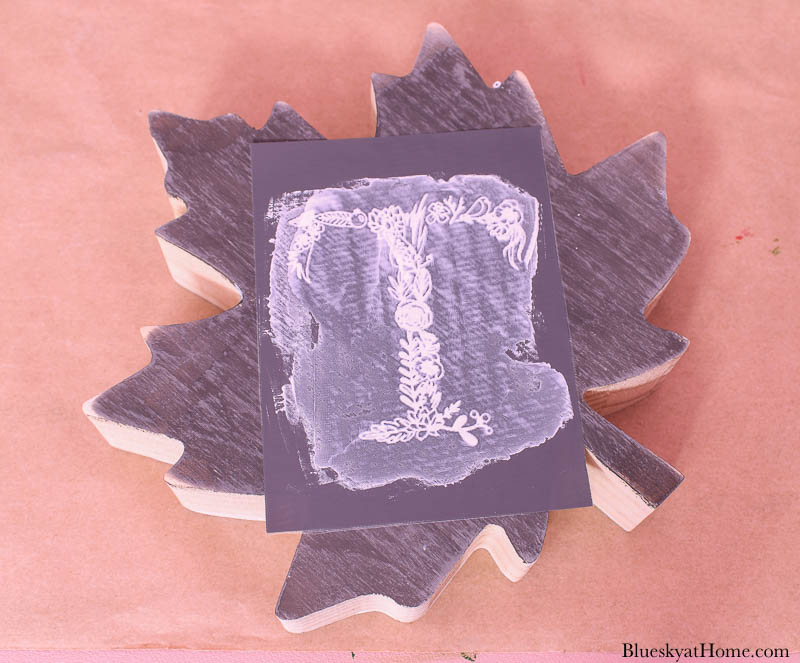
Step 5 ~ Remove the stencil and allow the ChalkArt to dry, about 10 minutes. Repeat with your remaining wood maple leaves.
That’s it. You have completed your fall DIY wood sign. You can use it on the mantel, as I did, or on a table top or dining table.

Now let’s look at the other easy fall DIY craft.
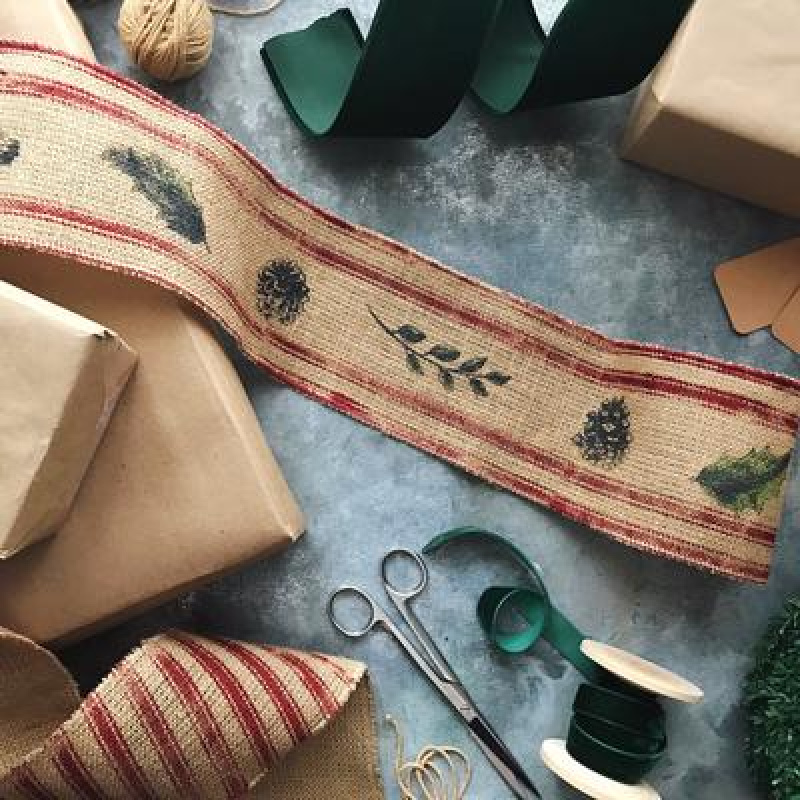
Burlap Ribbon Bow Craft
The farmhouse scroll sign is a project that I made last year and I still love. I definitely wanted to use it again this year, but it needed a new bow.
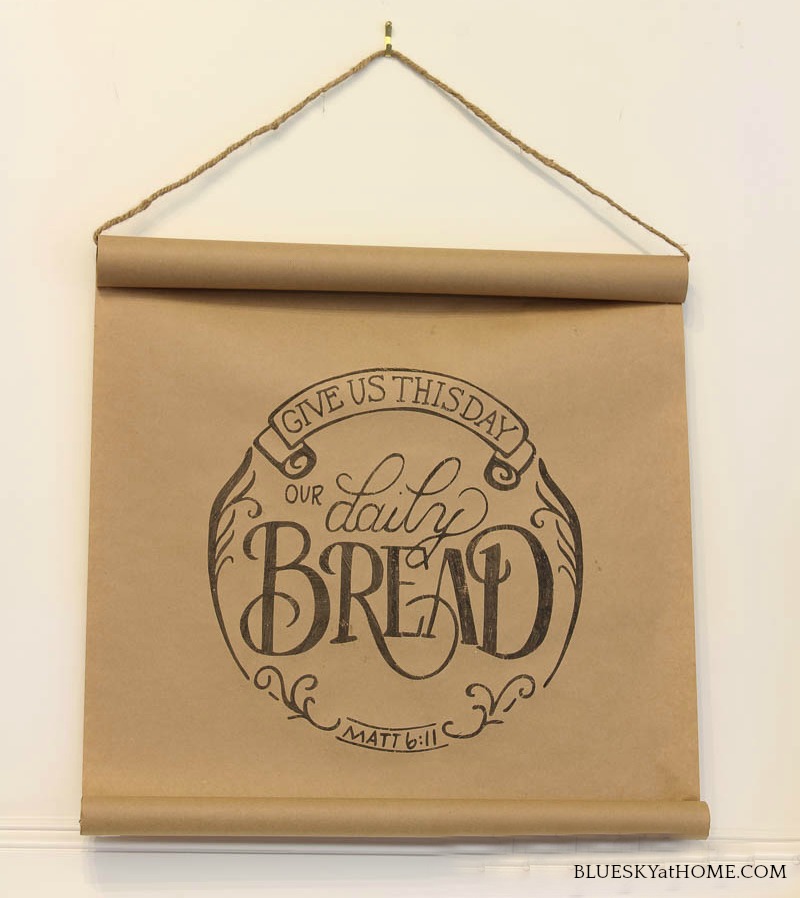
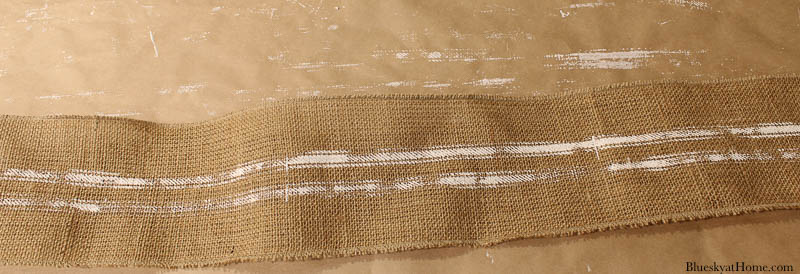
The wire burlap ribbon and this grain~sack stencil is part of a kit from A Maker’s Studio that I had to have. It was the spark for this bow for my sign.
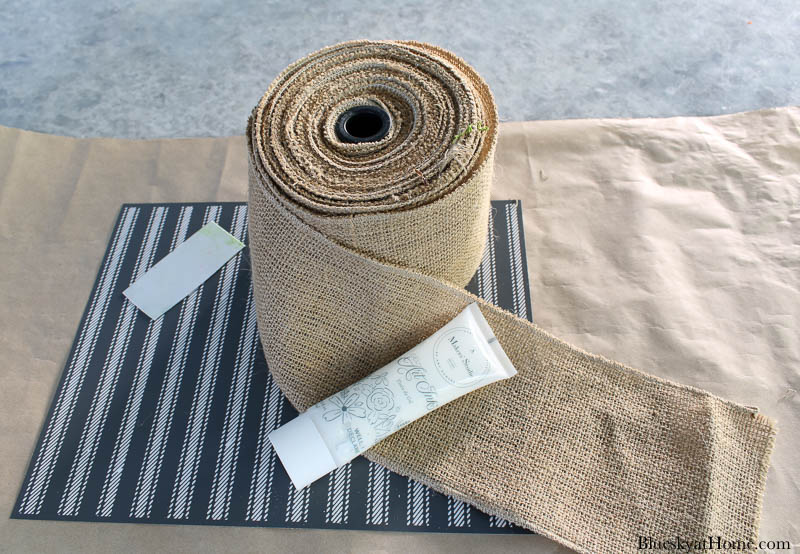
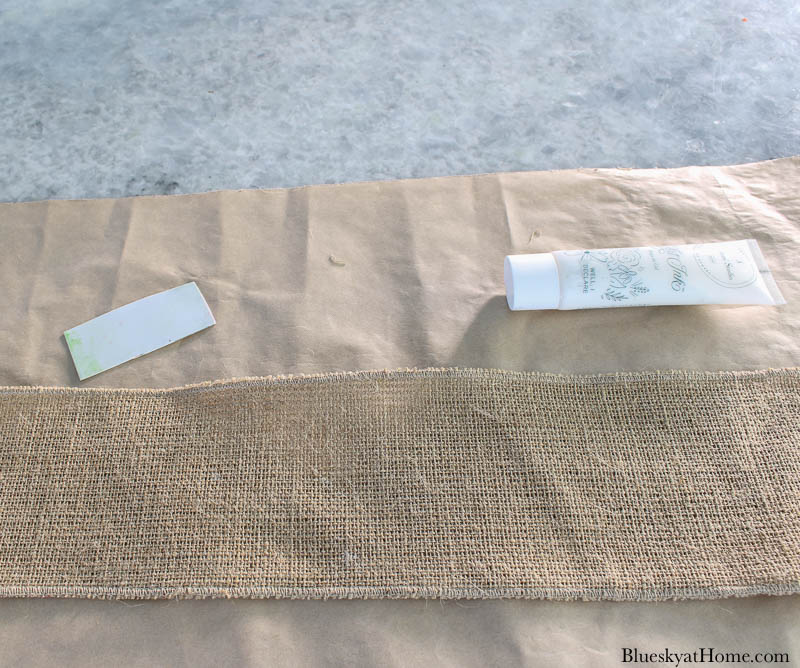
All you need is a tube of GelArt Ink in the color of your choice. I used Well, I Declare in white. GelArt Ink is the perfect medium for fabric.
Here is how to make this burlap ribbon topper DIY fall craft.
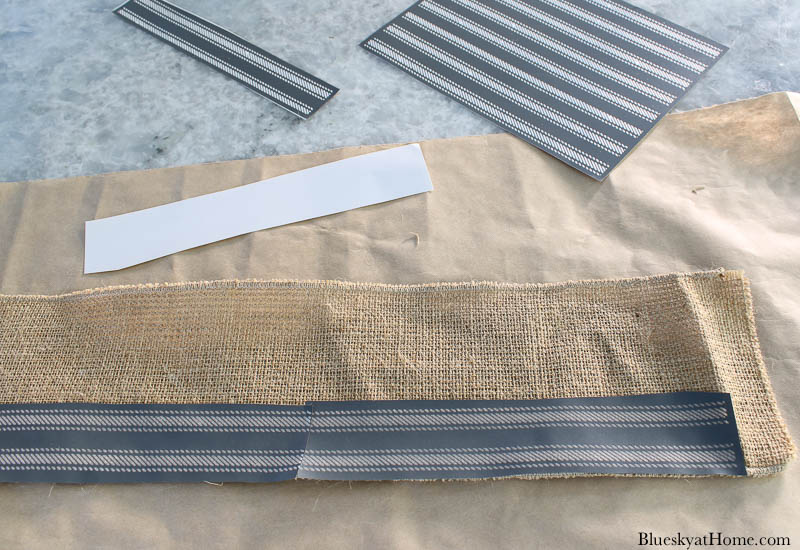
Step 1 ~ First, roll out a few feet of the ribbon on your work surface.
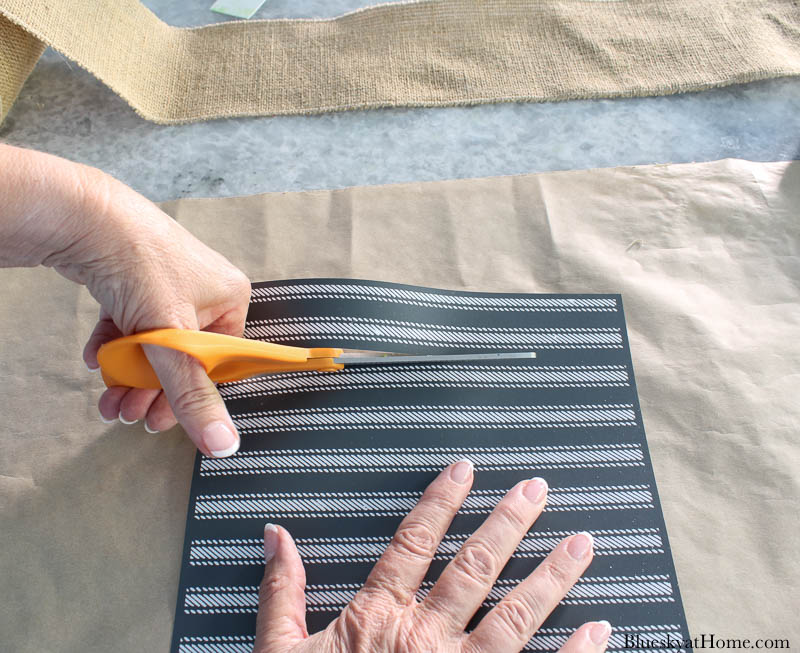
Step 2 ~ I decided to cut part of the grain sack stencil into 3 strips. I also cut off the ends of each strip.
Step 3 ~ I laid out the stripes of stencil on the burlap ribbon, end to end, on the edge of the ribbon.
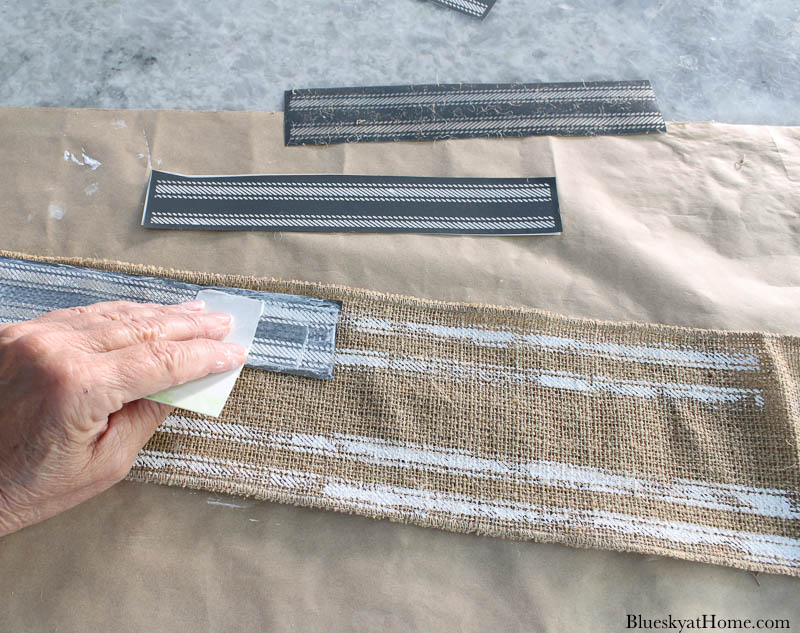
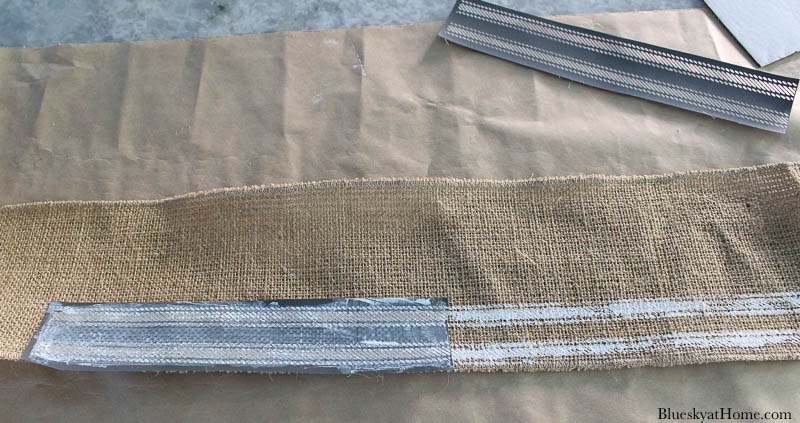
Step 4 ~ Then I applied the GelArt Ink to the stencil with a plastic scraper, using both a long motion and an across motion. As you can see, I applied the stencil to both edges of the burlap ribbon.
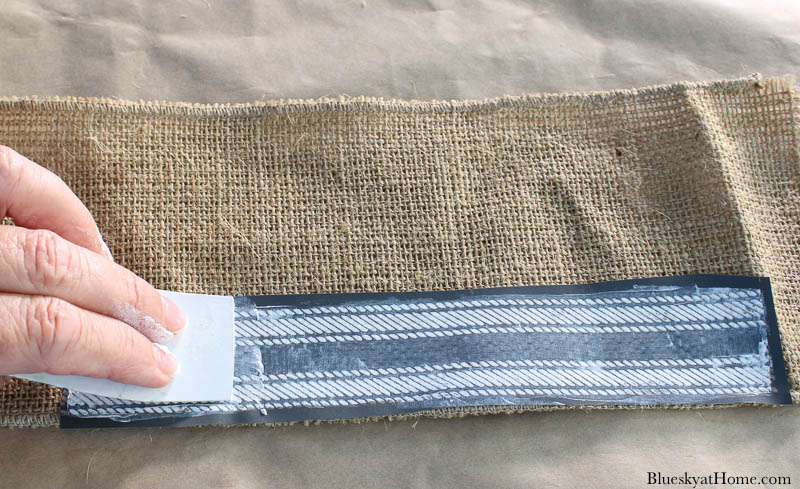
Remember: this is a DIY craft: it will not be perfect like a fabric woven grain sack; that’s the charm of it.
For a little variety, I also stenciled one section with a stencil down the center.
NOTE: I was pleasantly surprised that the burlap fibers stuck to the back of the stencil came off easily when I washed the stencils.
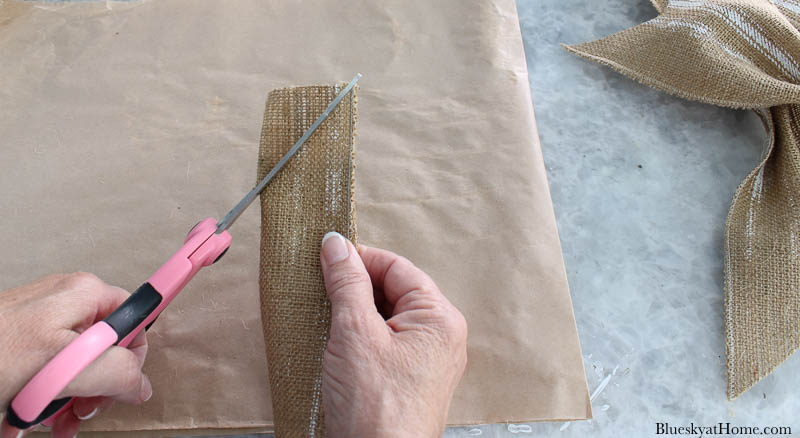
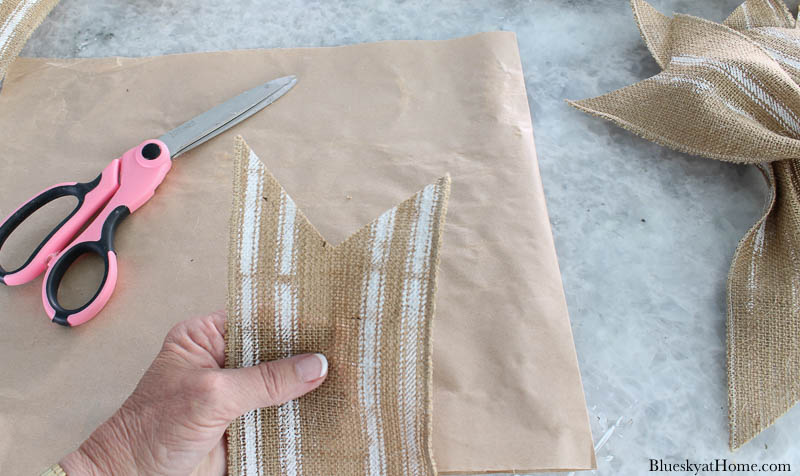
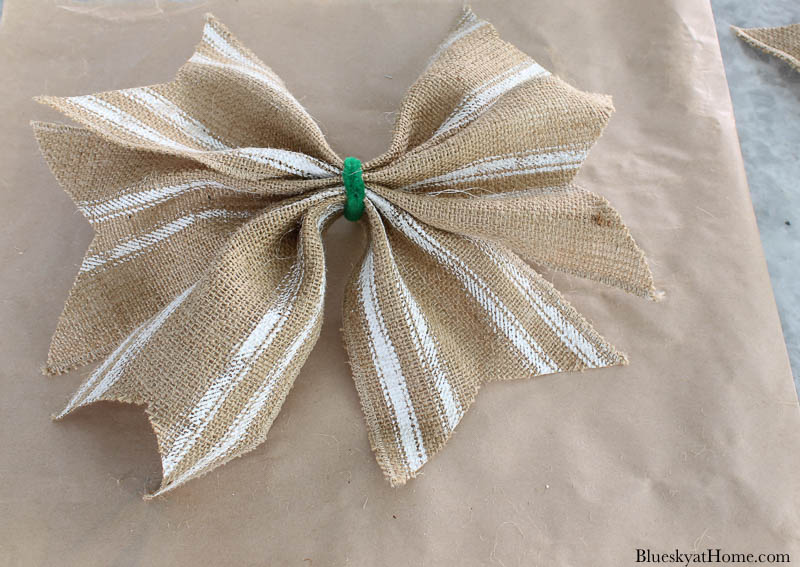
Step 5 ~ For this bow, I cut the stenciled burlap ribbon into different lengths: 3 12~inch, 3 14~inch, 3 16 ~ inch. For my tail, I cut a 30~inch length.
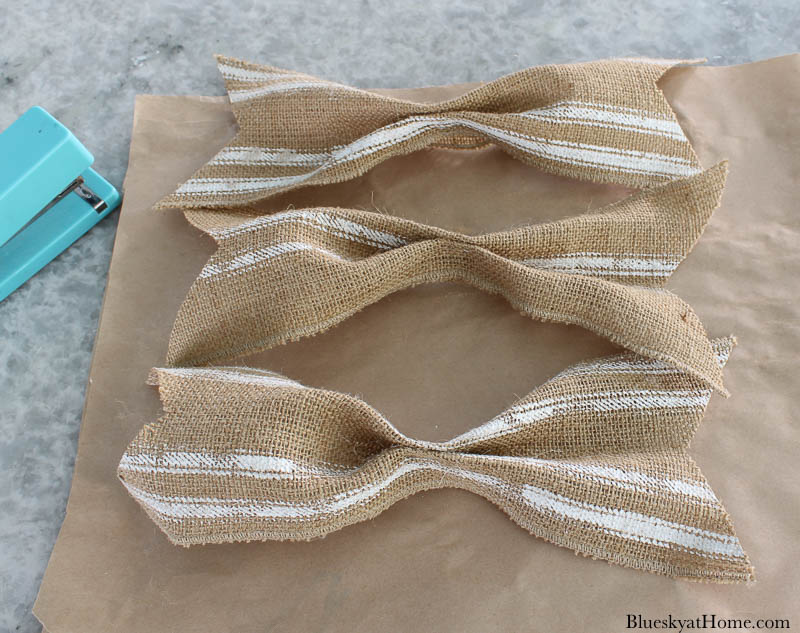
I had 3 groups of 3, each with 1 length with a center design.

Step 6 ~ Notch the ends of all the pieces.
Step 7 ~ To connect all the 9 pieces of ribbon, I stapled (yes!) each length together.

Step 8 ~ Then I attached each group of 3 together with pipe cleaner. Cut off the excess pipe cleaner.
TIP: Remember to twist the pipe cleaner tightly.
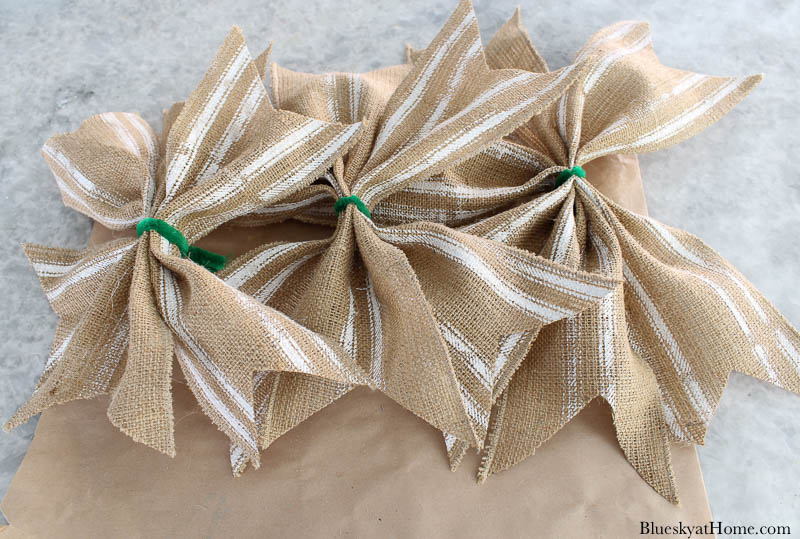
Step 9 ~ Use 1 pipe cleaner to join all 3 ribbon groups.
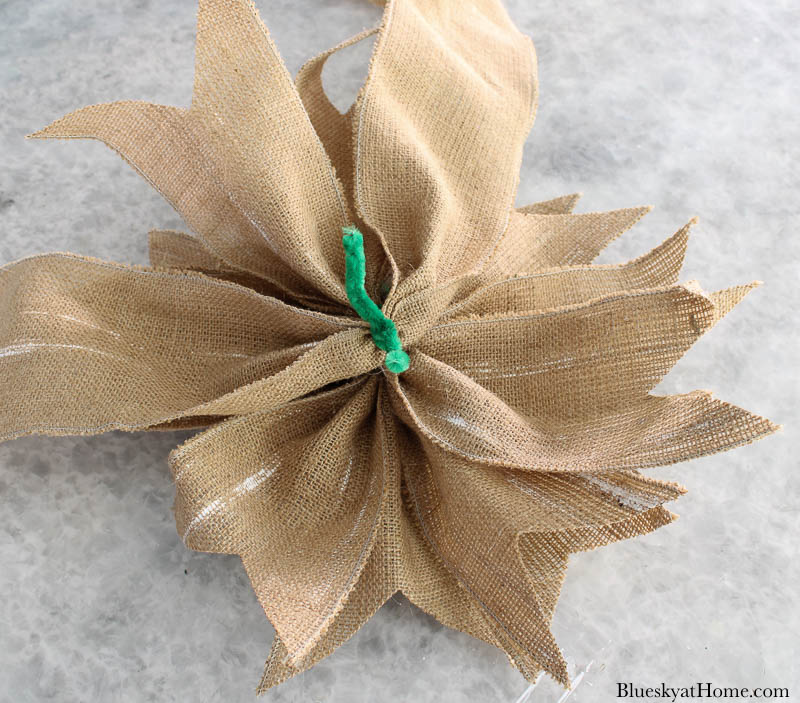

Step 10 ~ Next, attach the long tail to the back of the bow with the excess pipe cleaner.
You’ve finished your burlap bow! Making a bow using this method uses much less ribbon. All you have to do is place the burlap bow/topper where you want it.
Displaying Your Burlap Bow
Finally, I placed the bow on top of my farmhouse scroll above the mantel by wrapping the end of the pipe cleaner around the hanger.
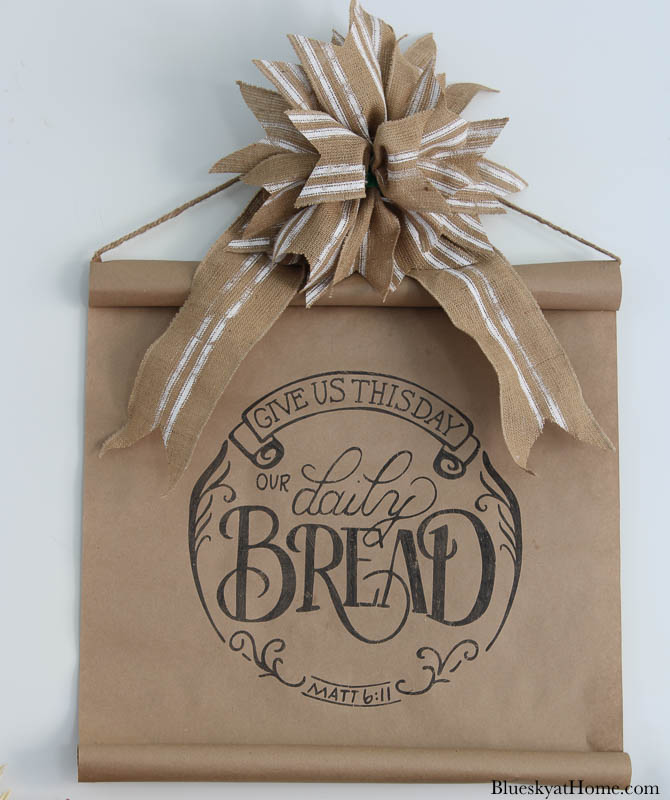
I love the farmhouse, rustic look of this burlap bow. I can envision using it for different applications.
Wouldn’t a bow in red or green be awesome? Here’s the one suggested by A Makers’ Studio. It’s perfect for Christmas.
If you have any questions about either of these projects let me know. I’m here to support your DIY efforts.
Thanks for visiting Bluesky at Home and letting me share new DIY ideas with you. Please PIN to share and keep for your future projects.


I love both of your crafts for your home! I especially love how you made the bow – I suck at making bows so I’m always looking for ways to make them easier! Thank you so much for sharing this with us at Farmhouse Friday!
Love the crafts you’ve made for your home, Carol!! I made a small wooden Happy Thanksgiving sign years ago and cut it out with my scroll saw… I need to pull that out! 🙂
Happy almost Thanksgiving to you and YES! moving over to WP worked with your photo… Happy to share this post at this week’s Share Your Style #282. <3
Happy hugs,
Barb 🙂
Thank you so much Barb!!
I really like how you stenciled the burlap ribbon. So pretty. Pinned for inspiration as well. Thanks so much for sharing again this week. #HomeMattersParty
Really great ideas for stencils, Carol! I love the stenciled burlap ribbon, and that font on the leaves is so pretty!
These both turned out great! I will be coming back and making the scroll sign with the bow! Pinned.
That’s wonderful, Cherryl. You will love it.