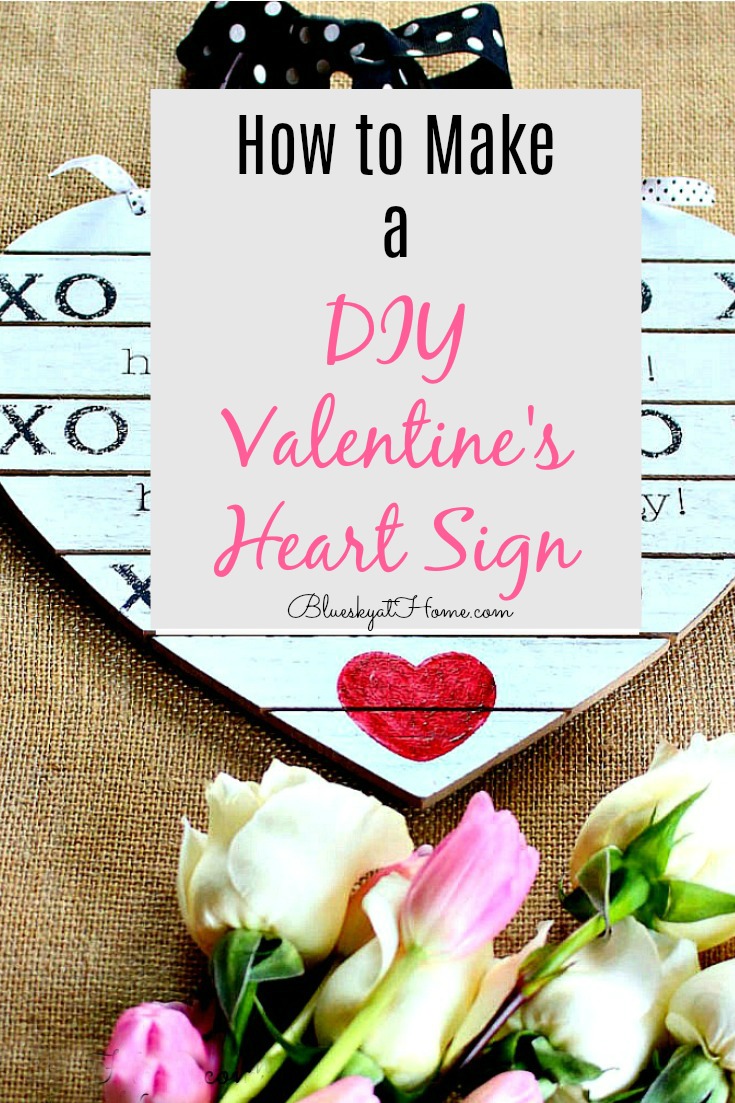
How to Make a DIY Valentine Heart Sign
I am still so in the mood ~ maybe a little obsessed ~ with making DIY Valentine decorations this year. It’s so tempting when you have super cute Valentine stencils at your fingertips. If you don’t have good calligraphy or lettering skills (I certainly don’t.), then stencils should be your go~to way to create signs and other decorative items for your home or as gifts or party embellishments. So let me show you how to make a DIY Valentine heart sign.

This project was what I call a random act of DIY ~ I didn’t plan on making a DIY Valentine heart sign like this one. It just happened ~ blame it on Target.
How to Make a DIY Valentine Heart Sign
This project uses products that I love, use and highly recommend. If you should order any product from this site, I may be compensated, but you don’t pay one penny more.
Every project starts either with a need (I need a new table.) or some item that sparks an idea for a project. In this case, the project started with a trip to Target for paper towels and glass cleaner. At my Target, the dollar section is at the front of the store and you have to pass right by it to get to the rest of the store. The dollar section is like a magnet. I can’t walk by without stopping to see what’s new. Enough said?
Inspiration for the DIY Valentine Heart Sign
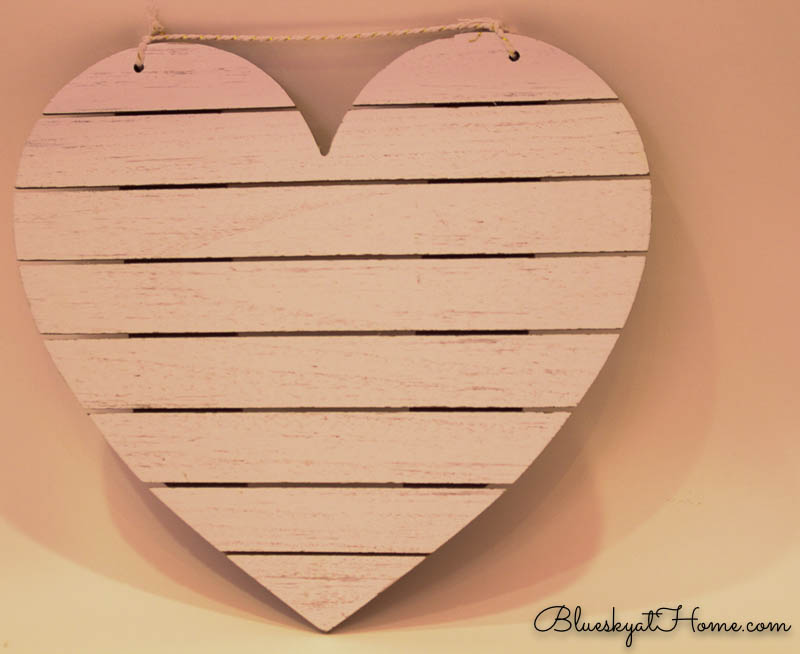
The idea for making a Valentine heart sign came when I found this “shiplap”heart~shaped wood sign in the dollar section at Target. It was actually $3, but whose counting? It was too cute and I knew exactly what I would do with it. I would use stencils and ChalkArt to make a DIY Valentine heart sign.
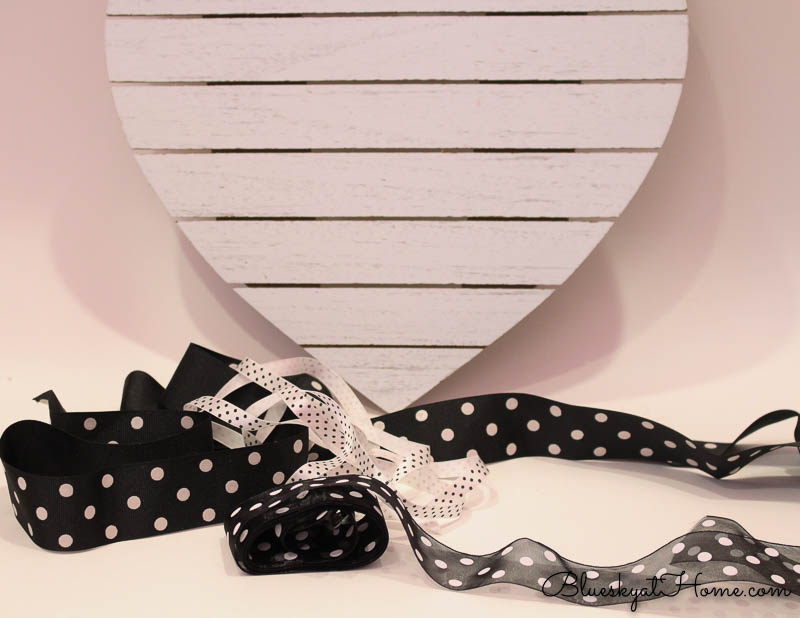
My second inspiration for the Valentine heart sign were 3 types of black and white polka~dot ribbon that I found in my ribbon box. The black and white would be my color theme.
Supplies for the DIY Valentine Heart Sign
Obviously, the wood heart sign and the ribbon to hang it were my major supplies. For my design, I used 2 stencils from A Maker’s s Studio:
- XOXO stencil ( used this one for my Pinterest~inspired Valentine wreath.)
- I Love You stencil ~ our special Valentine stencil
In keeping with my black and white theme, I used ChalkArt in Preaching to the Choir.
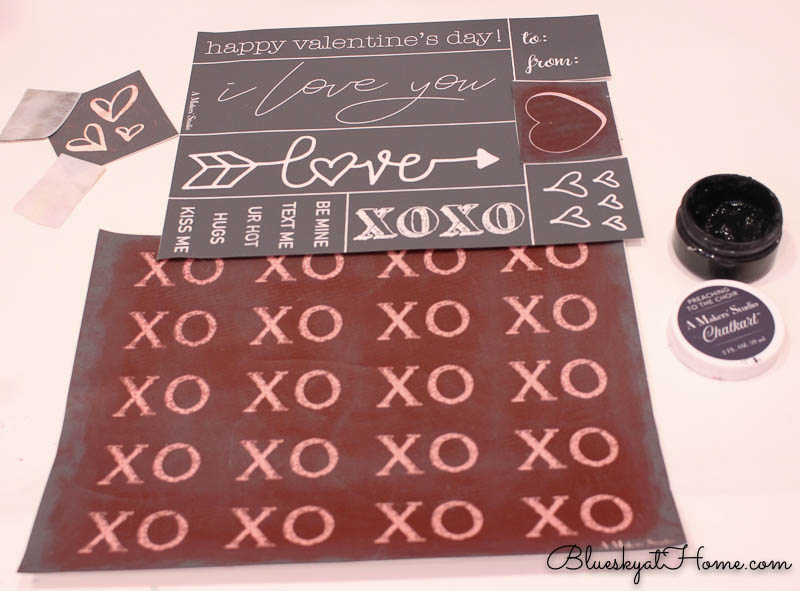
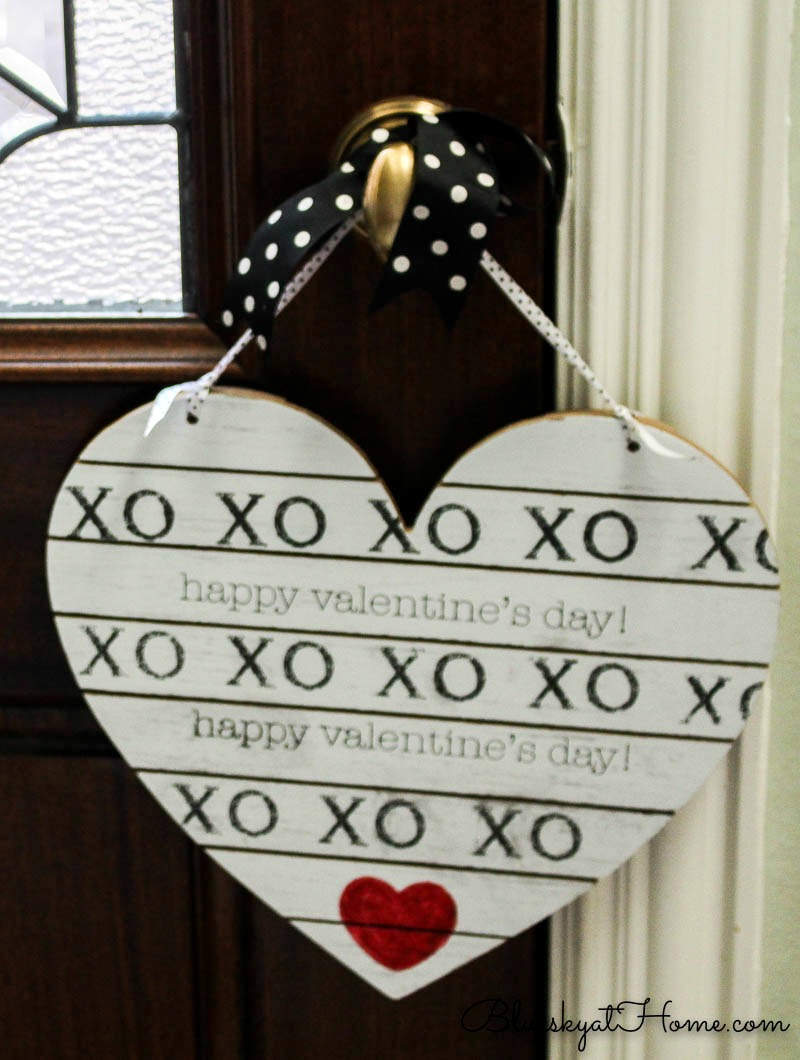
Before painting, I removed the existing piece of string on the wood heart sign. Then I placed the first line of XOXO in the top row of “shiplap” and spread the ChalkArt on the stencil with my plastic spreader (which comes with ChalkArt orders).

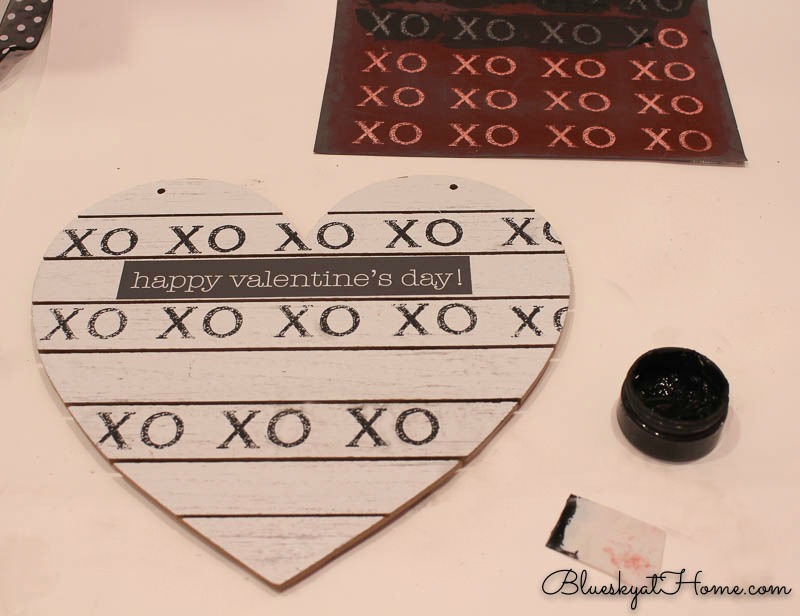
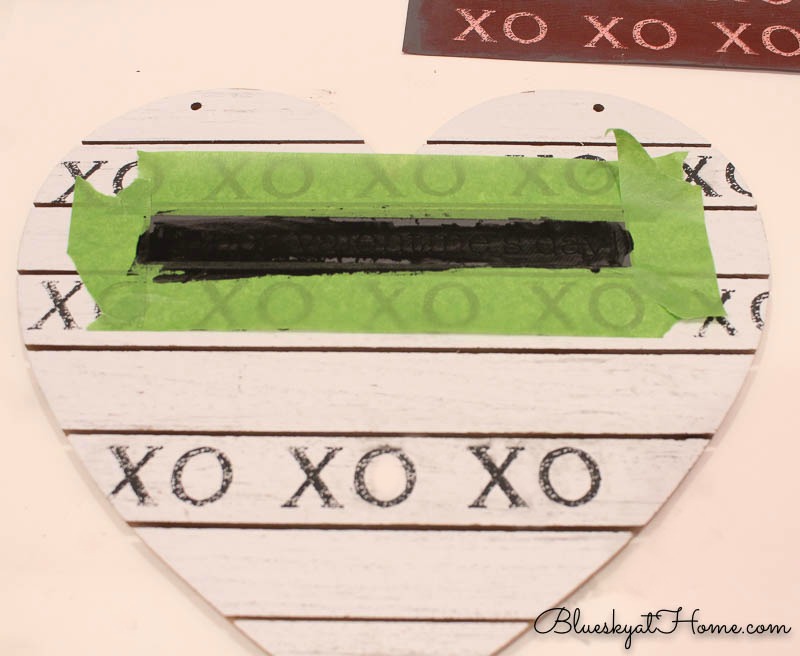
I repeated the XOXO 2 more times on alternating wood slats. Then I used the “happy valentine’s day!” stencil on the alternating slats. Since the stencils are adhesive, you just have to smooth it down to adhere to the wood surface.
I’ve found that surrounding a narrow border around certain stencils with painter’s tape gives you “breathing room” when applying the ChalkArt. This one little step makes the application faster and easier because you don’t have to be so methodical about applying the ChalkArt.
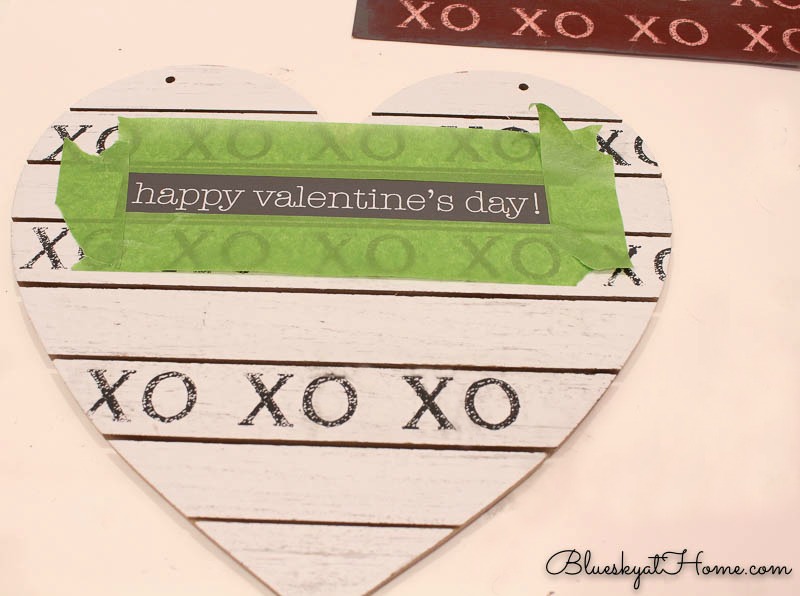
Surrounding the stencil with painter’s table means you can spread the ChalkArt more freely without a chance of painting on your surface.
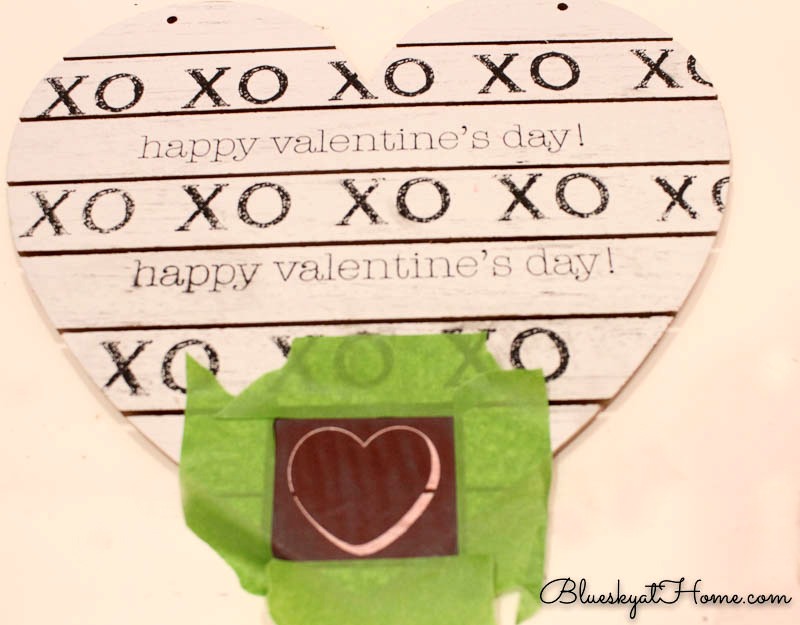
At the very bottom of the wood heart, I decided to use a heart from the I Love You stencil. To give a little pop of red (and not wanting a black heart), I used our Gel Ink in Bless His Heart. Although Gel Ink is designed for fabrics, it also works very well on paper and now on wood.
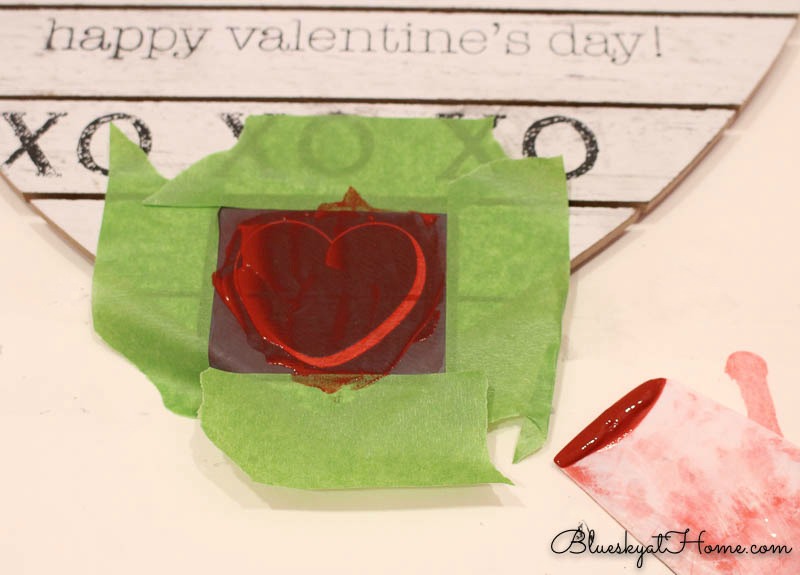
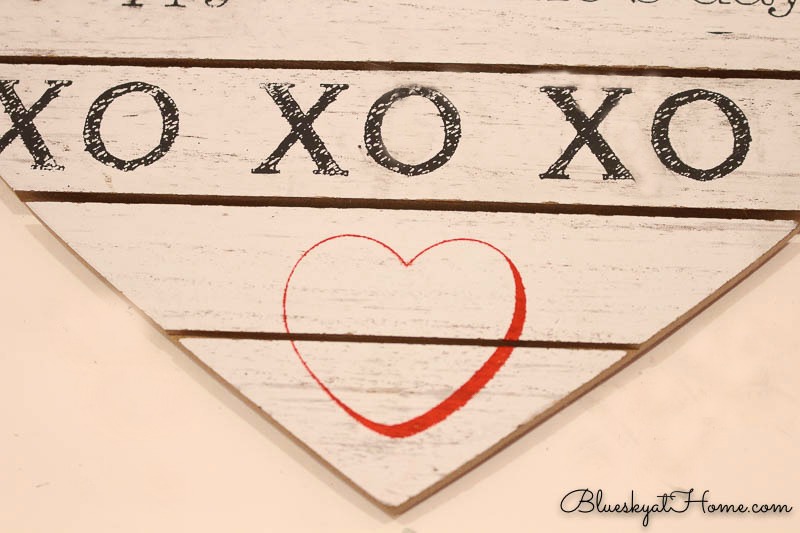
To make a solid heart, I used a small paint brush to fill in the heart with more Gel Ink.
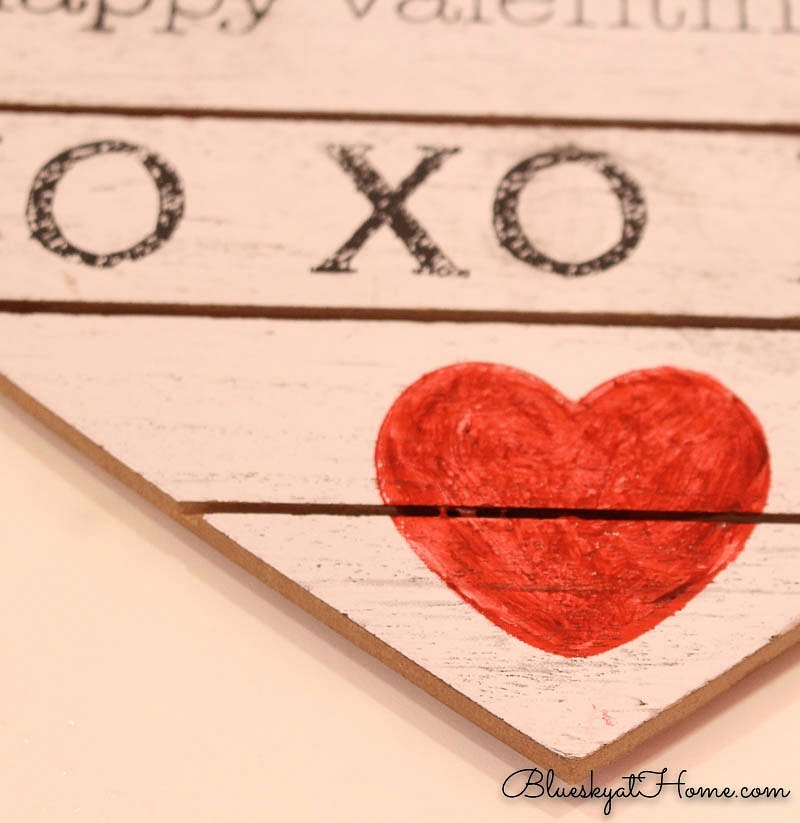
And the painting portion of my DIY Valentine heart sign was complete. The paint dries so quickly, but I finished that part at night so I left it to finish in the morning.
Finishing and Hanging the DIY Valentine Heart Sign
I really wanted to use the white on black wide ribbon, but the holes were just too small, so I opted for the narrow black on white ribbon as my hanger. I used a wooden skewer to push the ribbon through the holes from back to front.
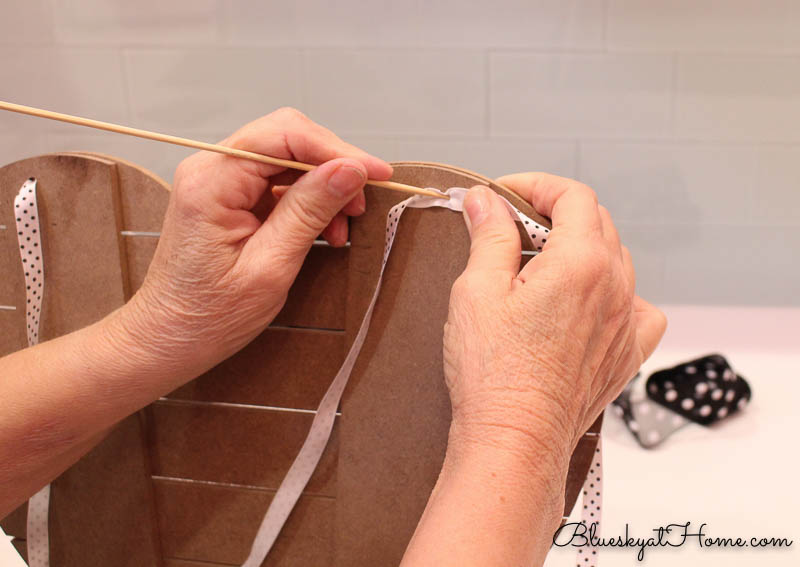

Once the ribbon was through both holes, I determined how much I would need for a hanger and cut the ribbon and double knotted it on both holes. I really wanted to use the wider white on black polka dot ribbon, so I made a bow and tied it around the smaller ribbon. And I was done.

Hanging the Valentine Heart Sign
I already decided that this heart sign would serve as a door hanger on our front door. That way Sweet Shark would see it when he went out to get the paper in the morning and the mail in the late afternoon. He also leaves through the front door to take Layla for a walk, so he will see it 3 times every day for the next 2 weeks.
This DIY Valentine heart sign took me about 40 minutes to make and 5 minutes to make the hanger.
If you order the I Love You stencil and your choice of ChalkArt color today, you can be making your own stencil probably by the weekend, depending on shipping times in your location.
If you need some inspiration, try browsing through these Valentine creations.
Have fun creating and enjoy the bragging rights. PIN this project so you don’t forget it.


Super cute. I’ve been doing a lot of crafting too. Those are cute stencils.
Katie, thanks for your feedback. You really should give the stencils a try now during my contest giveaway. I know you would love using them in your own projects.
This is so pretty and simple to get together too.
Julie, Yes, it is. I’d love for you to try our the stencils and ChalkArt from A Maker’s Studio. With my contest going on through Saturday, this is the perfect time.