Quick and Easy DIY Paint Projects for the Holidays
I don’t think a good DIY paint project should go to waste. If you can create a paint project for 1 holiday, that project can be replicated for other holiday decorations. The past 2 weeks have been full of Halloween decorations and Halloween tablescapes, each with some quick and easy DIY paint projects.
A sign.
A candle holder.
A container.

Since today is Halloween, I’m not suggesting that you run out and make these projects today. I’m here to show you 3 quick and easy DIY paint projects that I made for Halloween that can easily be changed for Thanksgiving and Christmas. I just want you to be thinking forward and realize that projects can be reused. You can Pin this post and save it for next year!
Quick and Easy DIY Paint Projects for the Holidays
This post contains links to products that I use, love and highly recommend. IF you purchase any product from this site, I may receive compensation, but you don’t pay a penny more.
Let’s Start with a Sign
During the Launch of A Maker’s Studio that I attended a few weeks ago, we made a few DIY projects ~ all of which I wanted to take home. The last one on Sunday was making a large sign 18″ square made of Masonite. We painted it with Rescue Restore Paint in Bold Prayers, a pretty soft, medium brown. (I was having so much fun, I forgot to take pictures.)
Next we used our stamps to make a border. Using ChalkArt (yes, the ChalkArt can be used for painting and stamps, not just stenciling!) and our large Wreath Sections Clear Stamp, we made ovals or circles or a mix to create a border.
Then we used stencils and ChalkArt to write a message in the center. It was amazing how everyone’s projects looked different and unique. Mine looked great and I couldn’t wait to get it home and display it.
My suitcase was waiting at the door of headquarters to go to the airport at the end of Launch. I had already packed my other projects which were much smaller. Fortunately, I had a large suitcase, but I had to stuff my sign in between clothes to get it to fit.
Here’s what it looked like when I returned home and unpacked.
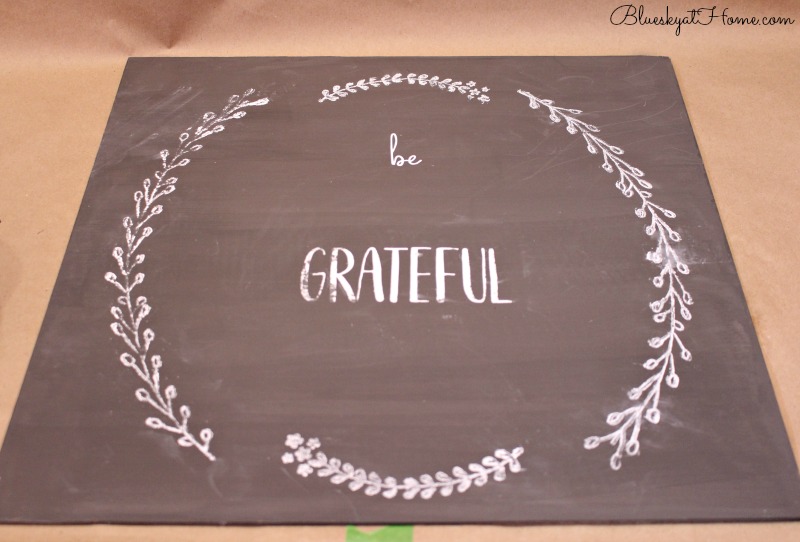
In some places my pretty stamp motif (I used 2 different ones to create an oval.) and my “be GRATEFUL” stencil (again, a combo of 2 different stencils), had smeared and rubbed off. I’ve used the ChalkArt enough to know that it will stay in place until you intentionally remove it with a damp paper towel (Isn’t that the coolest thing?). I guess being stuffed in a suitcase and thrown around in an airplane was too much.
I wasn’t worried because I know I can wipe off the ChalkArt and make a new sign.
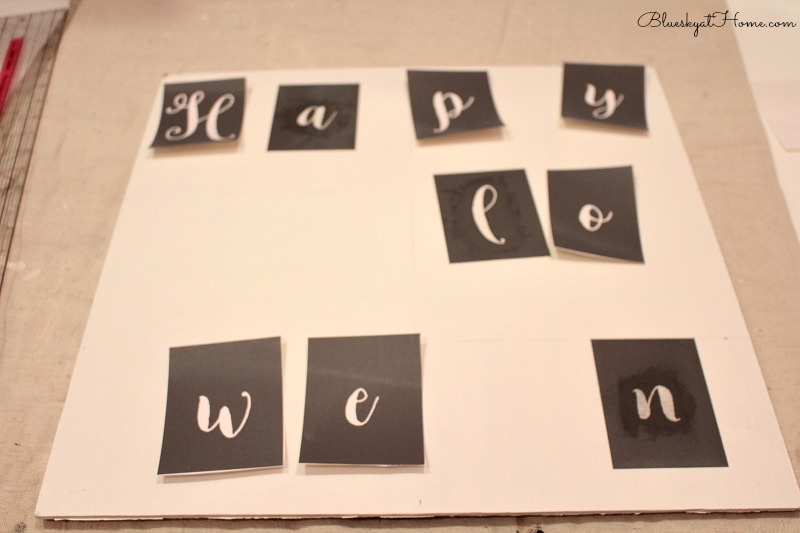
But for now I decided to use the other side of the masonite to make a Halloween sign. I started by painting the back side in Rescue Restore paint in Blessed, a soft clean white that is so versatile ~ it’s my go~to white. Because the Masonite is absorbent and dark, it took 2 coats.

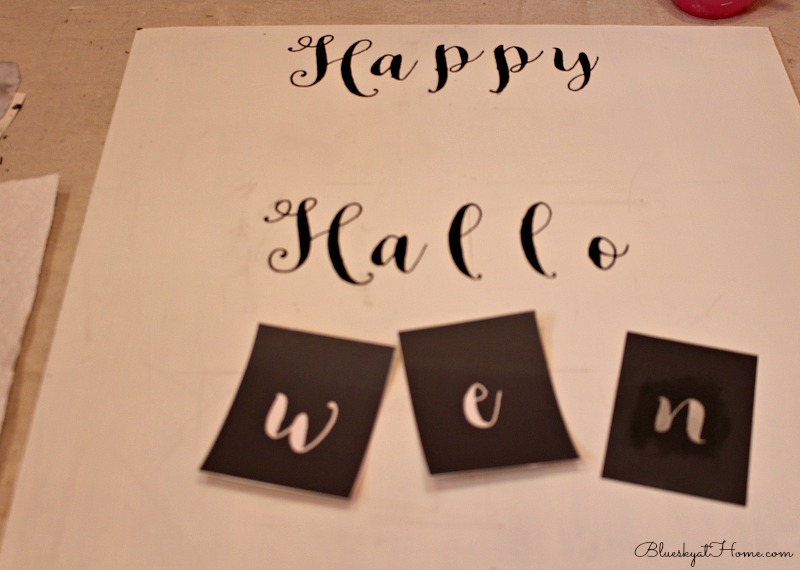
I wanted a simple sign and used my stencils in Alphabet 2 (lowercase) and Alphabet 3 (uppercase) to spell Happy Hallo ~ ween. I used ChalkArt in Peace and Joy which is white. Each letter is about 3 ~ 4 inches, so you have plenty of room around them to stencil.
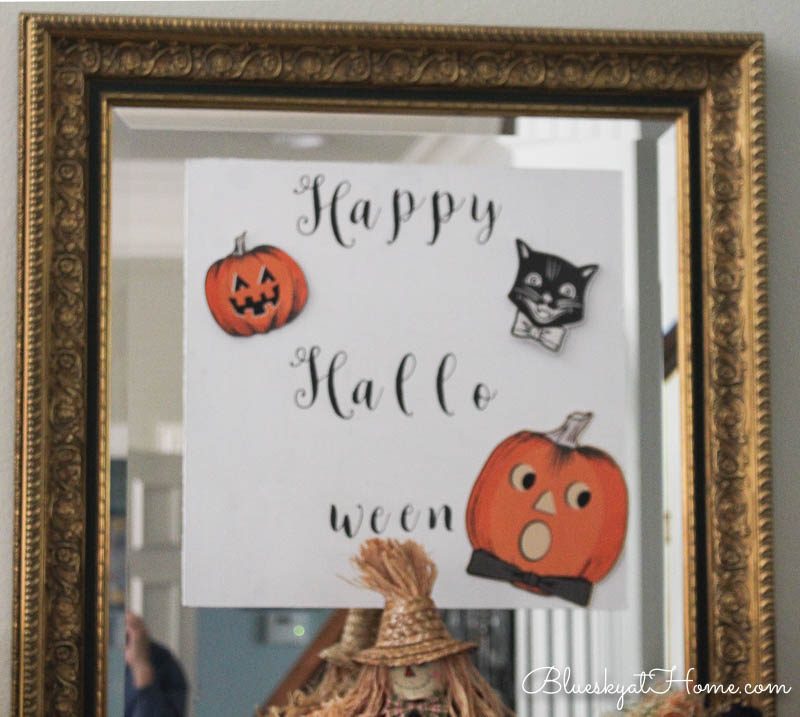
Here’s the finished sign. I added a few paper Halloween decorative items from another project. I hung it on our entry mirror using 3M Clear Mounting Tape ~ this stuff is great when you don’t have a hanger or want to nail holes. It comes right off when you are ready to remove your sign or picture.
To change this sign, all you would have to do is wipe off “Hallo~ween” and use a different stencil and different ChalkArt color. Our Bon Appetit Mesh Stencil has “Merry Christmas” included. With our Metallic ChalkArt in Gold and Silver, the sky is the limit.
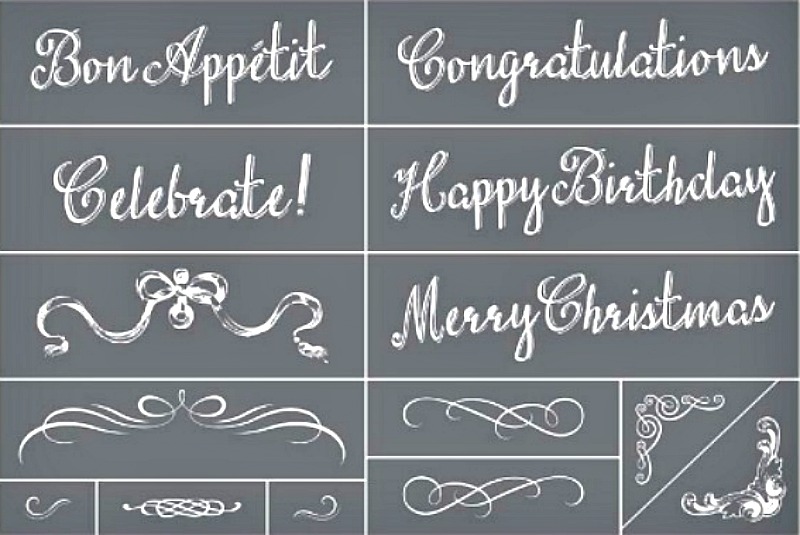
Season Mesh Stencil would also be perfect for Thanksgiving and Christmas.
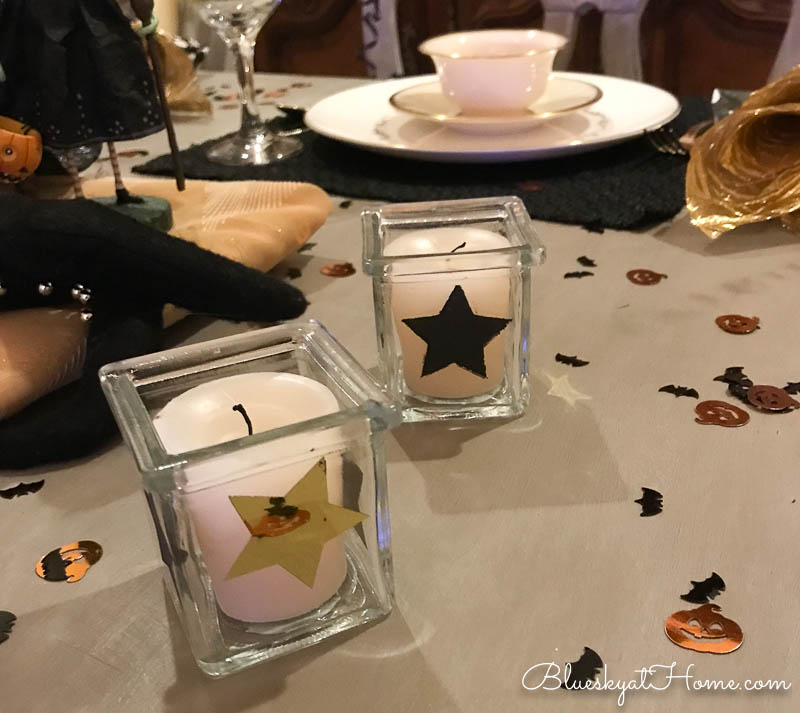
A Candle Holder
In the past, I’ve made stickers with my Cricut for holidays. I love embellishing candle holders with seasonal colors. For my Halloween Tablescape Blog Hop last week, I wanted gold and black star stickers for the 6 square candle holders. I had shiny gold adhesive vinyl, but no black. So I decided to use the negative star as a stencil. ChalkArt in Preaching to the Choir fit the bill for my black.
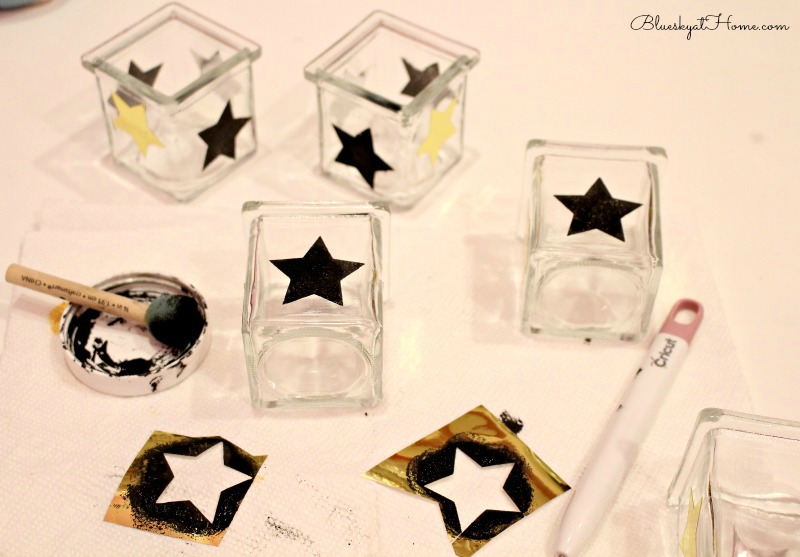
Rather than use our plastic spreader to apply the ChalkArt, I used a small foam dome brush which worked really well.
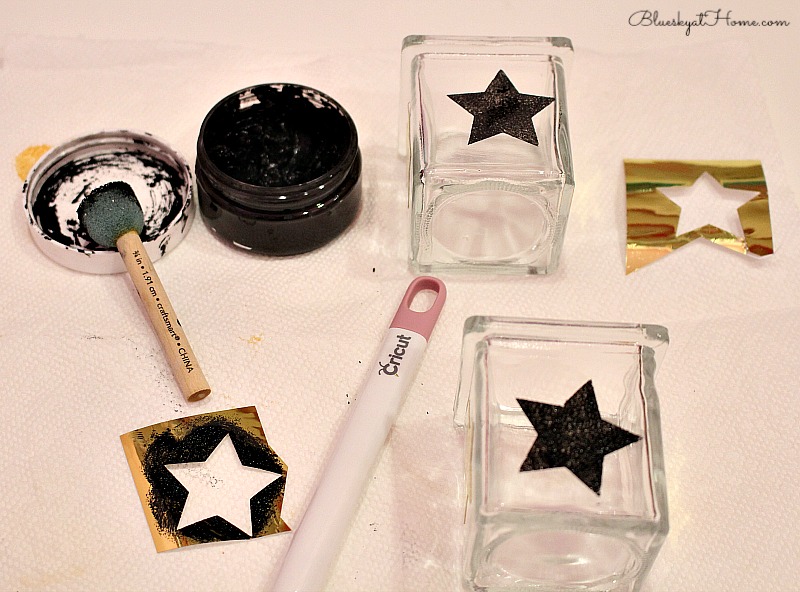
I loved the result on the Halloween Table. After I pack away the Halloween Table, I pull off the gold stickers and wipe off the black star and I’ll be ready to use the candle holders for Thanksgiving and Christmas.
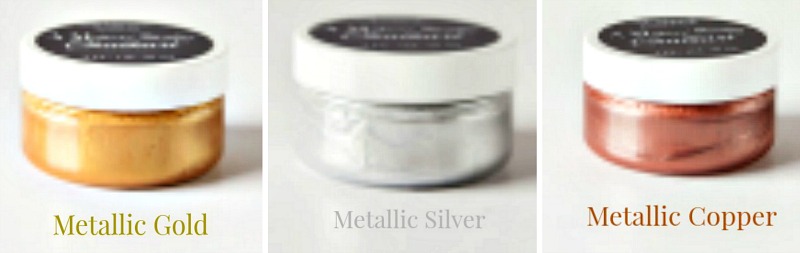
Once again Metallic Gold, Metallic Silver or Metallic Copper will be perfect for the holidays.
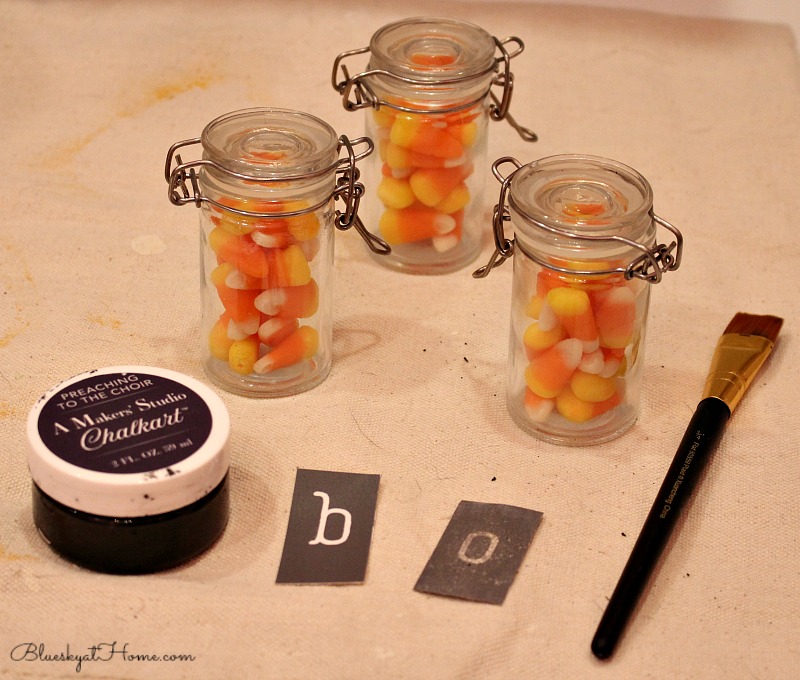
Cute Containers
This project from A Maker’s Studio was the inspiration for my next project.

I didn’t have large jars like these, but I did have really cute smaller ones with clip lids. All I needed was candy corn! Once again, I used ChalkArt in Preaching to the Choice and Alphabet Mesh Stencil.
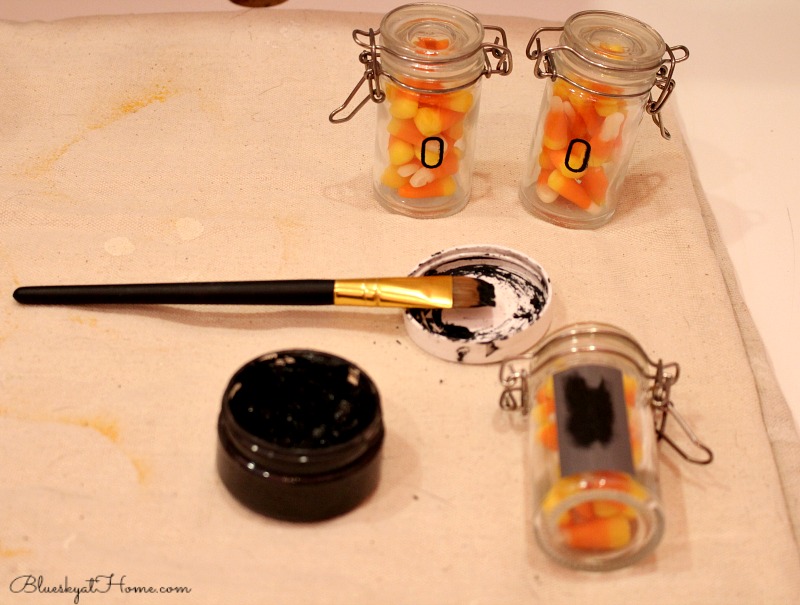
Since the jar is round, I decided to use a small brush to apply the ChalkArt.
It was really easy. I painted the ChalkArt on the stencil and made sure that all areas were covered.
Here’s my little jars.
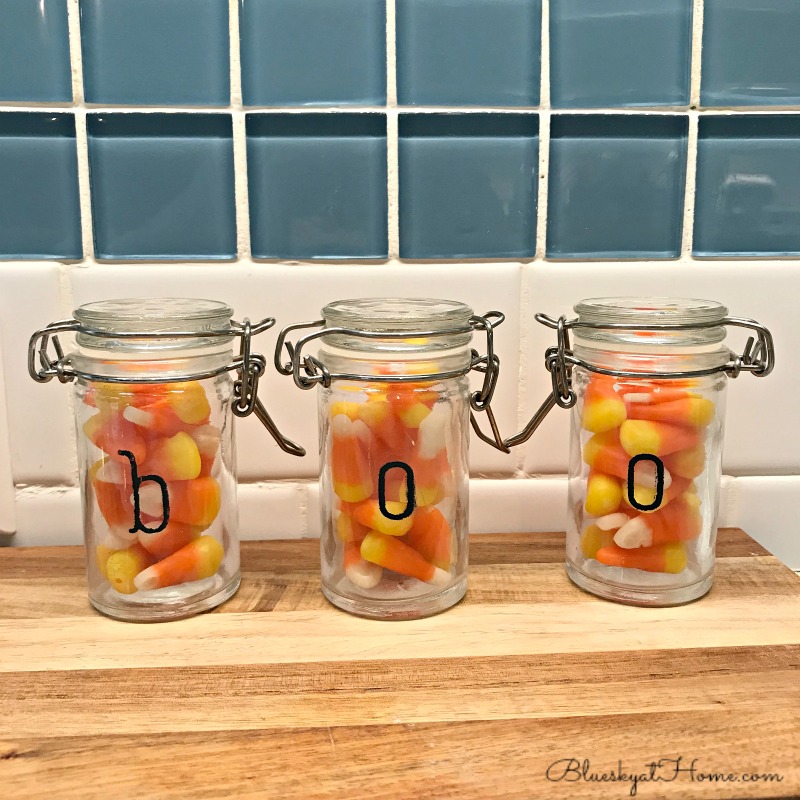
I can already think of ways to use this idea for Thanksgiving and Christmas: fill jars with M & M’s, write THANKFUL, GRATEFUL, TURKEY, SANTA, ELF, the list goes on and on. Use as place cards or party favors or stocking stuffers or just as little gifts.
I have some great news. A Maker’s Studio has just released new colors in Rescue Restore paint: Goodness Gracious ~ a beautiful sage blue; Hissy Fit ~ a yummy yellow; HighFalutin ~ a mossy green. I’ll be sure to share as soon as mine arrive.
In other exciting news (drum roll please!) an extra dose of adhesive backing has been added to all stencils ~ 58% more ~ for stronger adhesive, easier cleaning and simpler transfer between surfaces. I love that the company keeps improving already great products.
Have a fabulous, fun and safe Halloween.


All such cute ideas! My favorite is the laurel wreath on the black background. You’re right, these can easily be switched up for different holidays. Thanks for sharing at Vintage Charm! Pinned! xo Kathleen|Our Hopeful Home
It’s time to switch out Halloween for Thanksgiving!