Easiest Glass and Paint Project for a Home Accessory
If you love creating accessory items for your home, you will love this one. This is the easiest glass and paint project. It makes the prettiest accessory for displaying all sorts of things in your home decor.
Painting glass is so easy. There are many methods to create great crafts with glass and paint. I wanted a super easy method.
I can promise that this DIY project is one of the easiest glass painting projects you’ll ever see. It is a glass project that is not only easy, but it is also inexpensive.
Even better, you can customize clear glass pieces into a style or color that fits your particular home decor.
I have stenciled glass and tinted mason jars with paint. This project was even easier.

Where to Find Glass for DIY Projects?
Recycling glass pieces is a great way to keep stuff out of the landfill. Fortunately, used glass objects are readily available.
- garage sales
- flea markets
- estate sales
- thrift shops
- the dollar store
What Pieces of Glass are Good for Painting?
Any piece of glass can be the basis for reusing and updating with paint. Try these:
- plates
- drinking glass
- wine glasses
- sherbet glasses
- glass vase
- flat glass – from a picture frame
- bowls
- glass mason jars or other glass jars
- old glass bottles
- glass lamp base
The type of glass you use is totally up to your imagination and needs.
My glass and paint project started with this piece as inspiration.
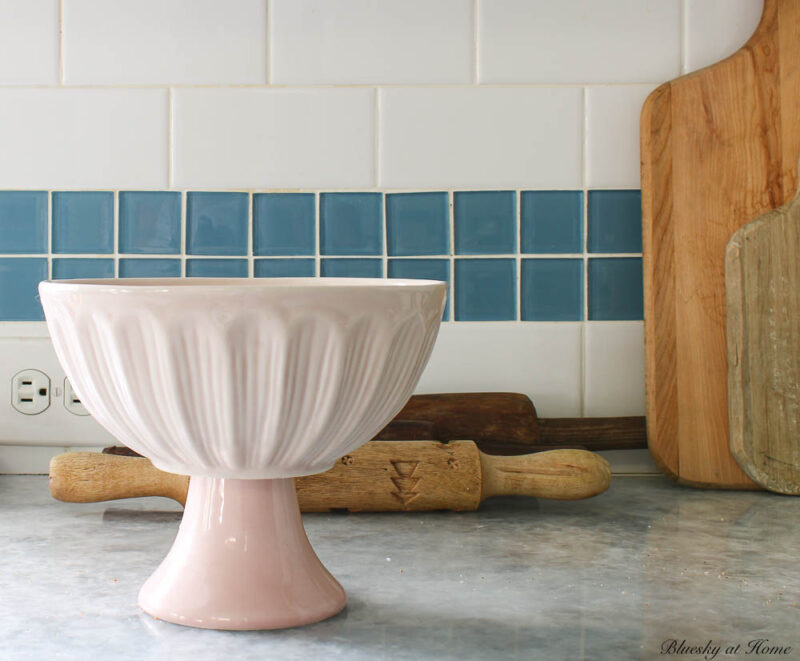
This blush pink pedestal bowl was a find at HomeGoods a few years ago. I loved it for spring decor, but I wanted a different color that would be more versatile for my home.
Supplies for this Glass and Paint Project
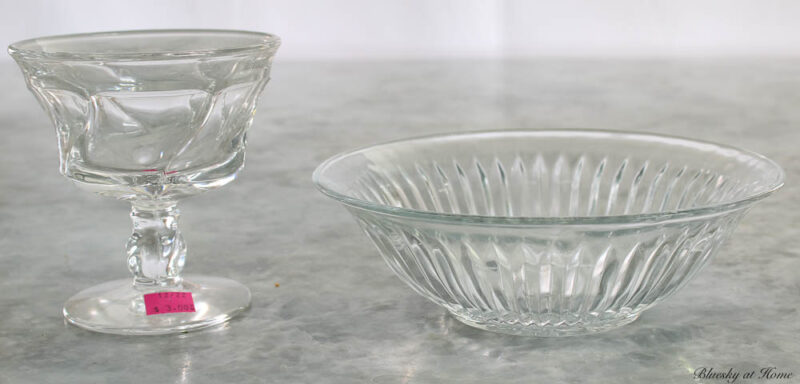
Obviously, the first thing you need is your glass piece. For my project, I would need two pieces to make the pedestal-style bowl.
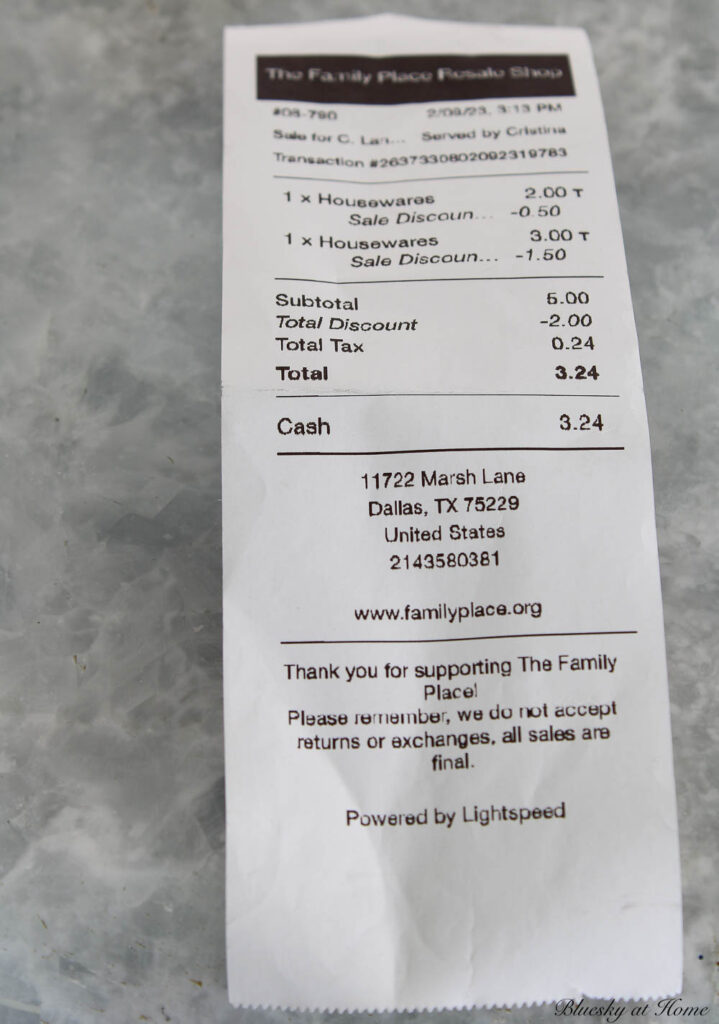
A trip to one of our local thrift stores yielded the perfect pieces.
The Family Place is a charity-based store that I like to support. They have a really nice area of glass pieces.
I found these two pieces – a glass bowl and a sherbet dish that would combine into the pedestal piece I wanted.
I liked the shape and the size of both pieces. The fact that they both had flat bottoms would be great for my project.
The price was great too – $3.24 for both pieces.
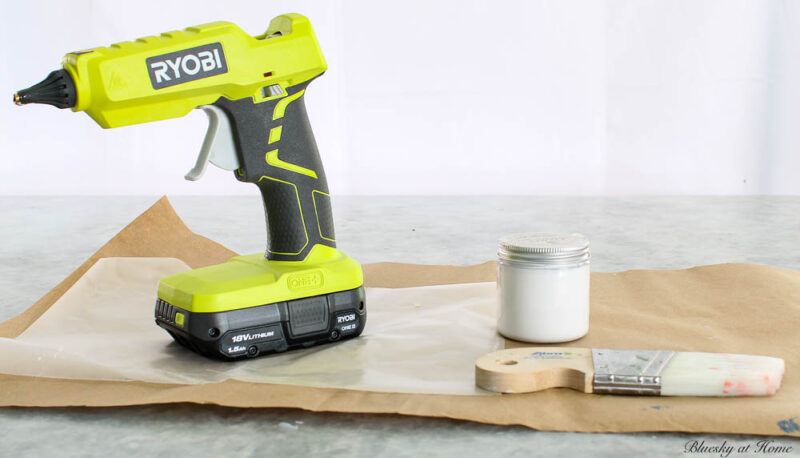
You may already have most of the supplies for this glass art project:
- glass piece/s of choice
- dish soap
- hot glue gun
- paint of choice
- paint brush
- paper to cover the work surface
- wax paper to place under the glue gun
What Type of Paint to Use for This Glass Project?
Unless you are looking for a specific look, I think you can use just about any paint for these projects. I don’t think there is one right paint for painting glass.
- acrylic paint
- glass paint
- chalk paint
- craft paint
- ceramic paint – the paint that I have used for stenciling glass is Ceramic Paint from A Maker’s Studio. It’s perfect for any project with glass, ceramics, or porcelain.
- glass spray paints
- water-based paints
- acrylic enamel paint
- oil-based paints
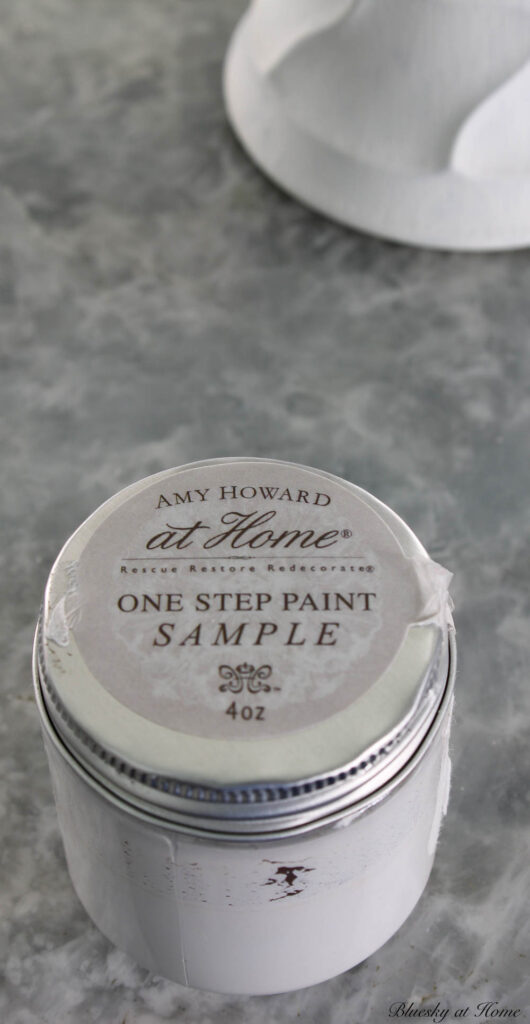
I had several different types of paint on hand that I could use for this paint project, I chose One Step Paint in Bauhaus Buff from Amy Howard at Home, which is a chalk paint. This is a true warm white, which is the color I wanted.
You could paint your glass in pretty colors of your choice. You could also use different colors of paint for a fun, funky look. To do that, you can use painter’s tape to create a design.
Steps to This Easy Glass and Paint Project
This project is easy and it doesn’t take long. Remember that I’m using a bowl and a sherbet glass. I thought about diluting my paint for a translucent look. In the end, I wanted more of a milk glass look so I used the paint full strength.
Step 1 – Remove any stickers from your glass. Wash your glass piece in soapy water and rinse well. Dry with a cloth towel. (A paper towel may leave a lint residue.)
Step 2 – Set up your work surface with craft paper or a drop cloth. Place a piece of wax paper on it for any glue drips.
Step 3 – Heat up your hot glue gun. My new Ryobi hot glue gun is so easy to use.

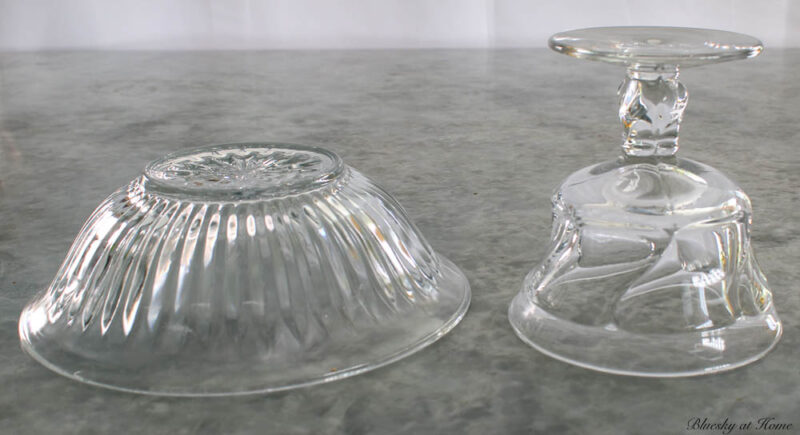
Step 4 – Place the bowl upside down. Cover the base of the bowl with hot glue.
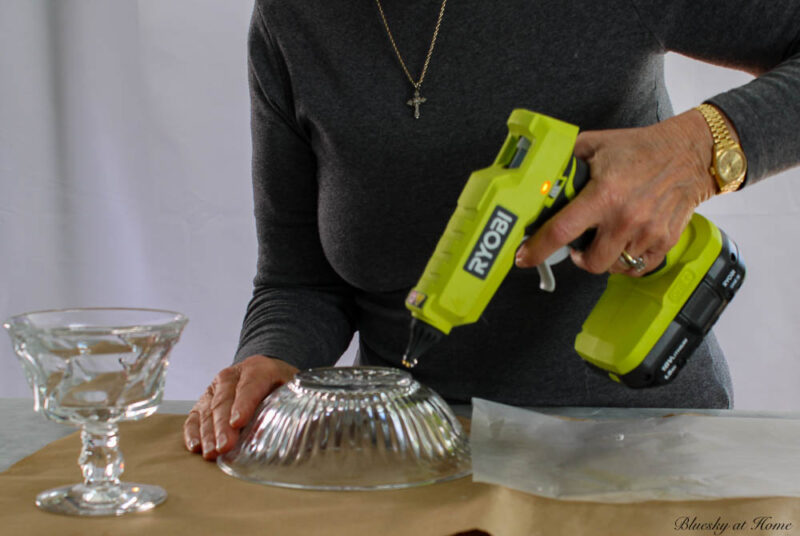
Then, place the bottom of the sherbet dish on top of the glue and press down to adhere.

Step 5 – Place something heavy – like a can on top to increase pressure on the glue. Allow the glass to set for about an hour.

Step 6 – Turn the glued piece right side up. Using, long strokes, paint the inside of the glass surface of the bowl. Don’t worry about painting the rim right now.
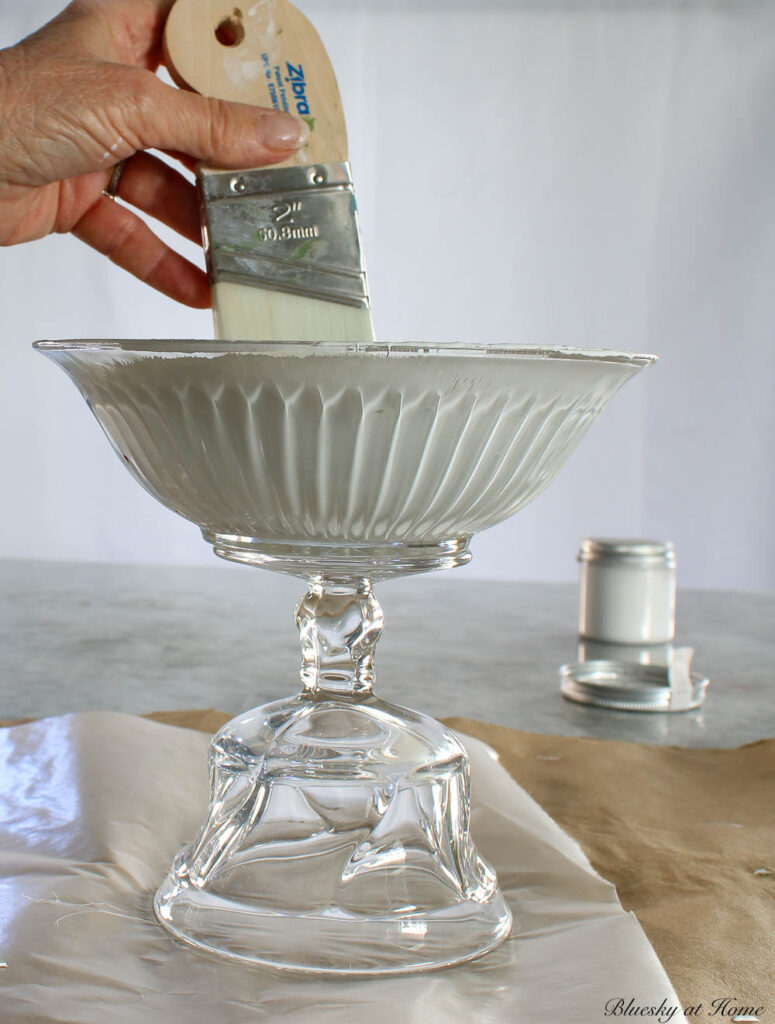
Step 7 – Turn the dish upside down. Paint the entire surface of the outside of the dish. Paint the rim of the bowl. Allow to dry for about 30 minutes.
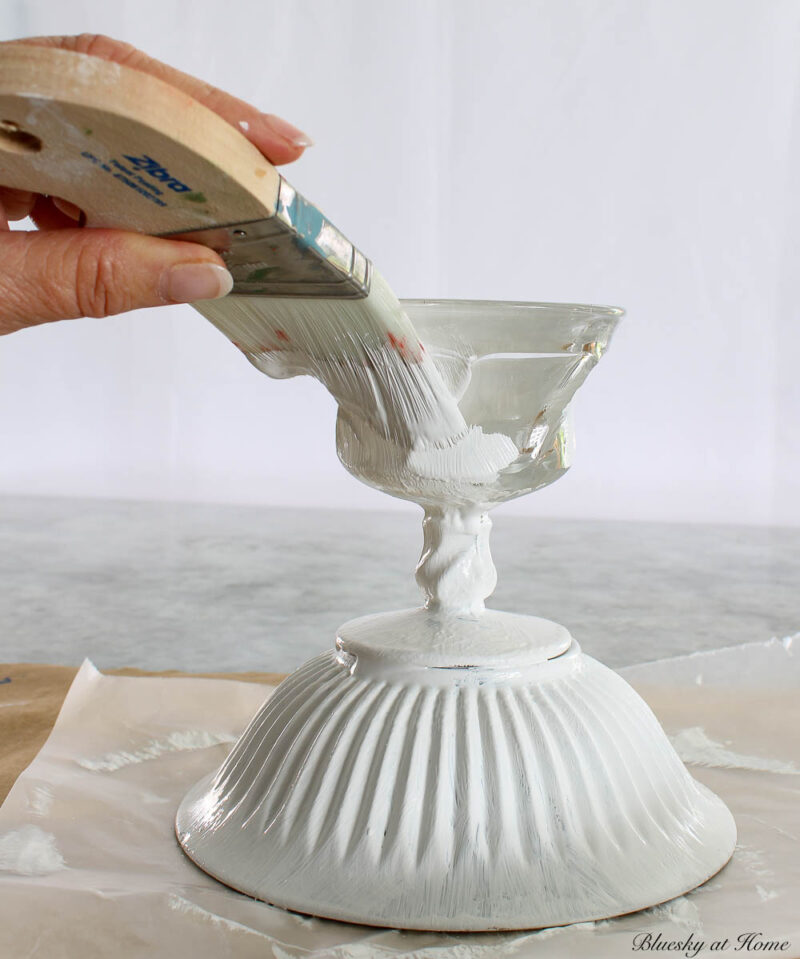
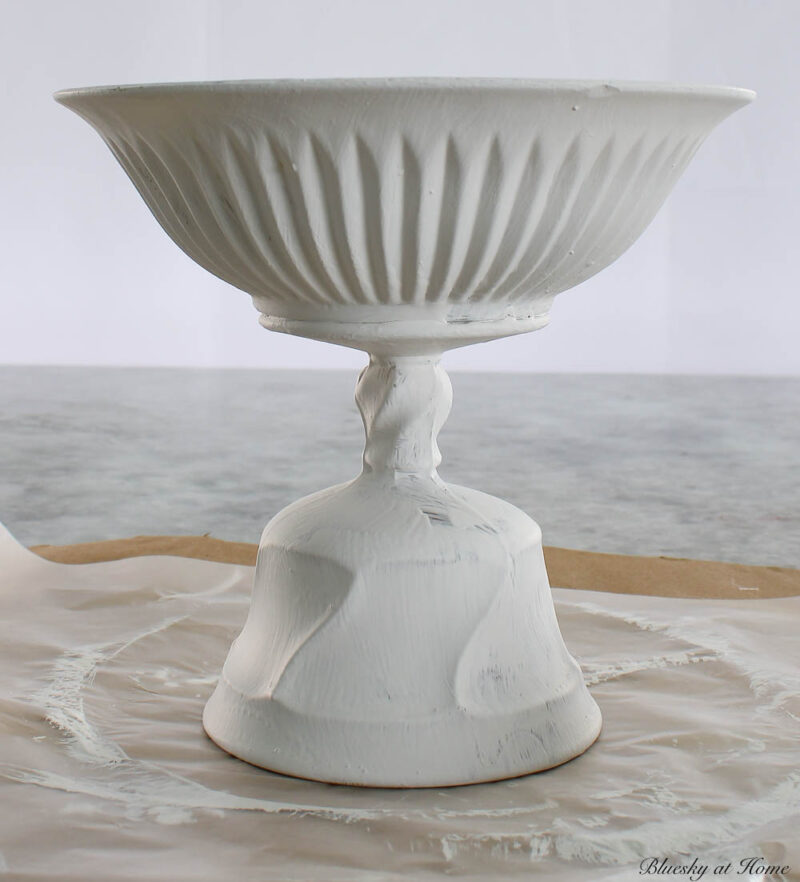
Step 8 – I gave the dish a second coat with a wet brush (like whitewashing), thoroughly coating it. Allow it to dry completely, about 30 minutes.
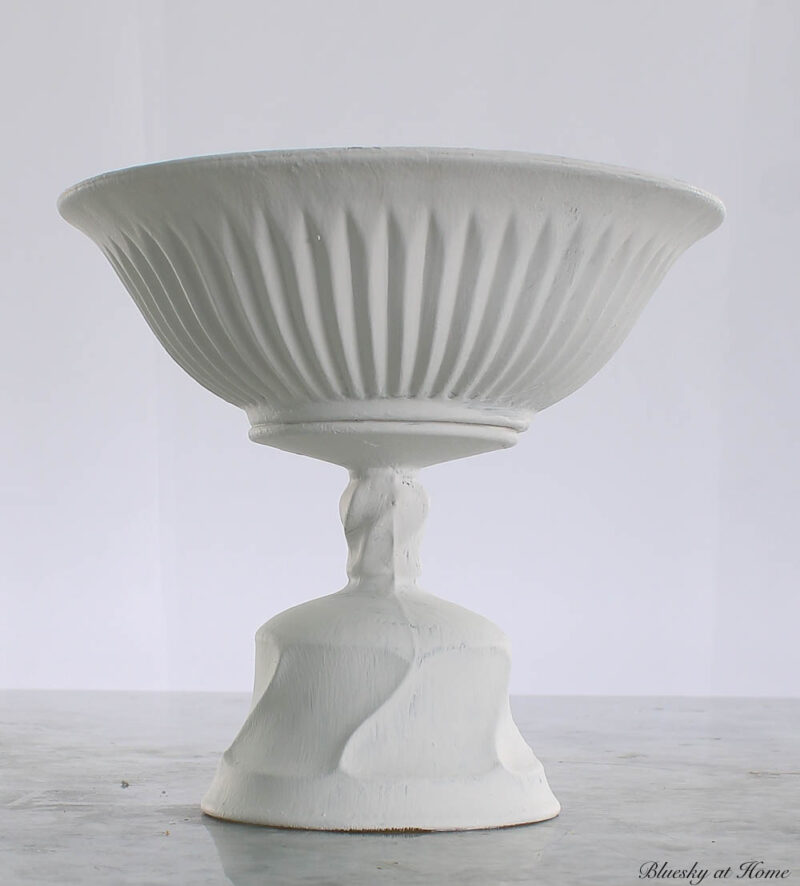
That’s it! I told you this glass painting project was easy! It doesn’t take much paint to complete it.
Now you are ready to use your painted dish.
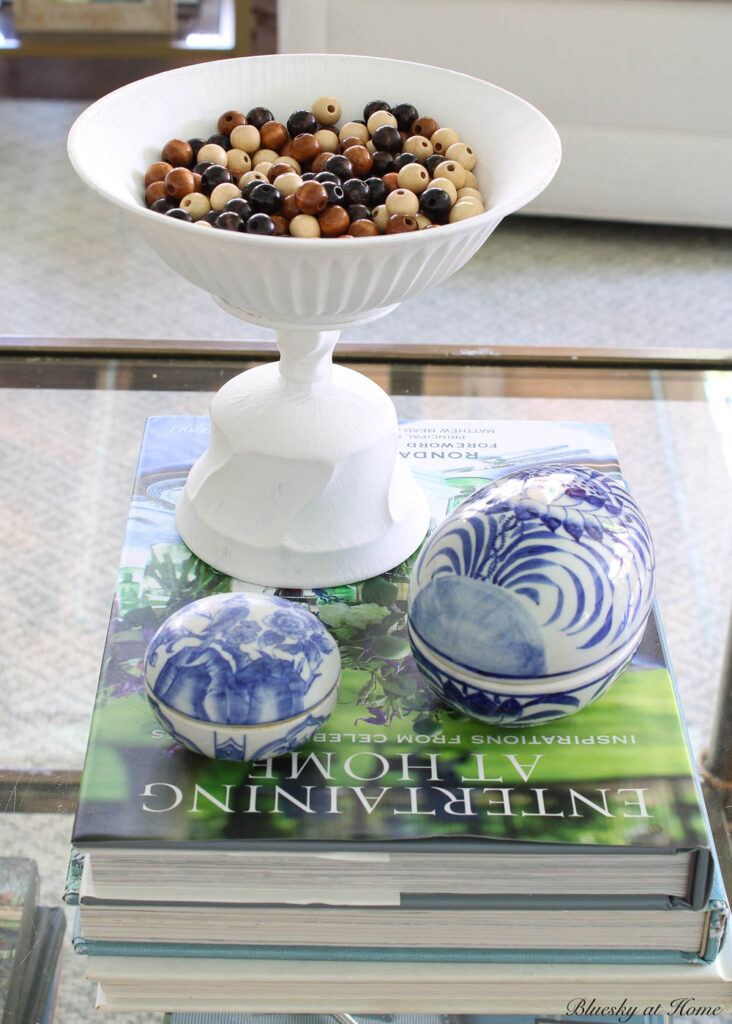
What You Can Put in Your Glass-Painted Dish
This dish is so versatile as an accessory. The size of your bowl determines what and how much you can put in it. Here are some ideas:
- glass beads or marbles – I couldn’t find my bag, but I would definitely use this idea.
- wood beads in one color or a mix in whatever size you like.
- a boxwood ball
- a moss ball
- balls of twine
- twig balls
- small grapevine wreaths
- painted balls
- decoupaged balls or eggs
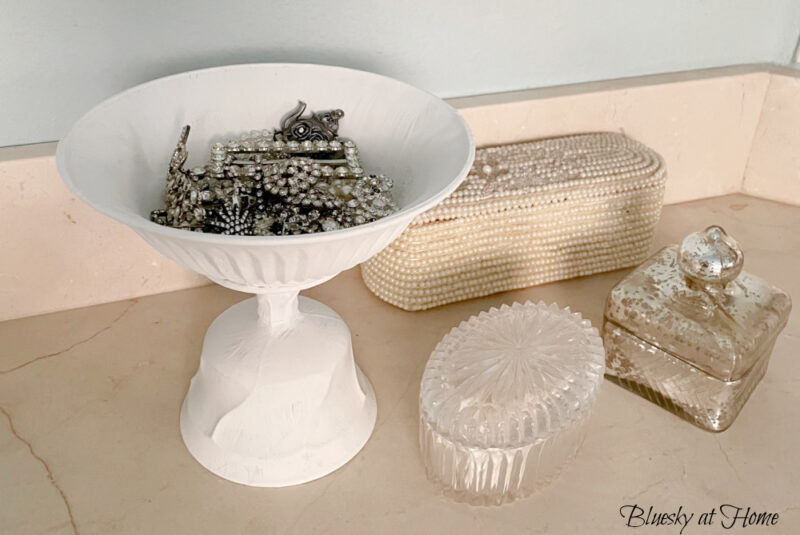
- vintage pieces of jewelry
What other ideas do you have? I just thought of using it as candy bowl with chocolate kisses or M&M’s for Easter.
Displaying your Glass Painted Dish
Here’s my dish with beads. I had two bags of these small multi-colored stained beads.
A boxwood ball.
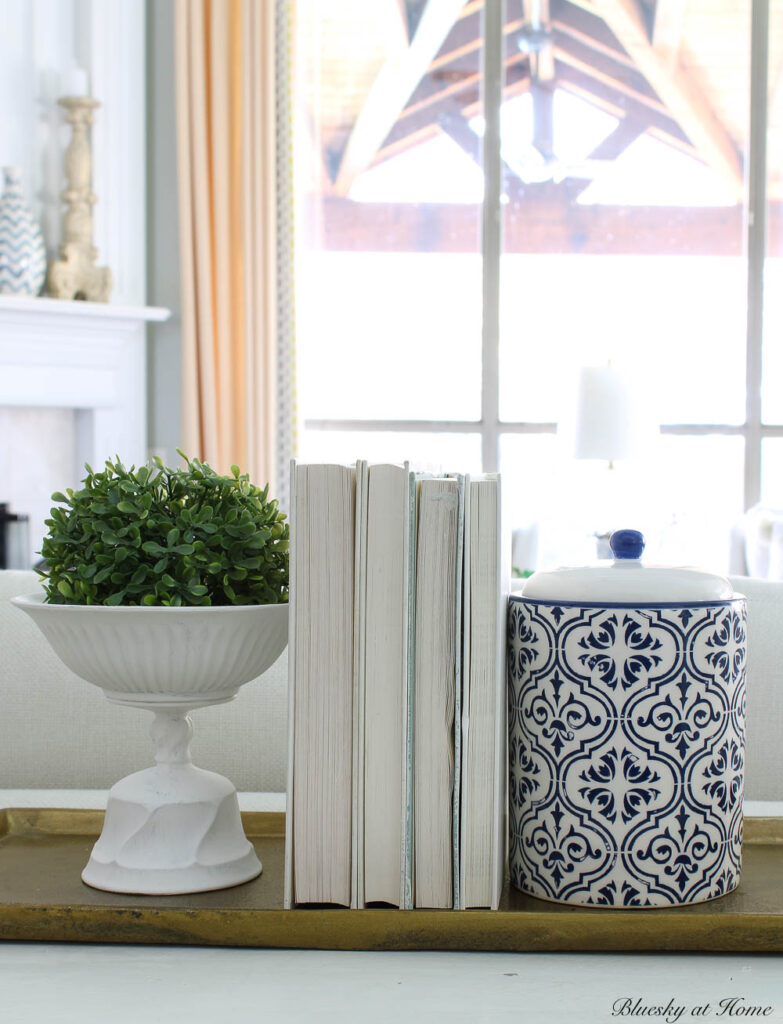
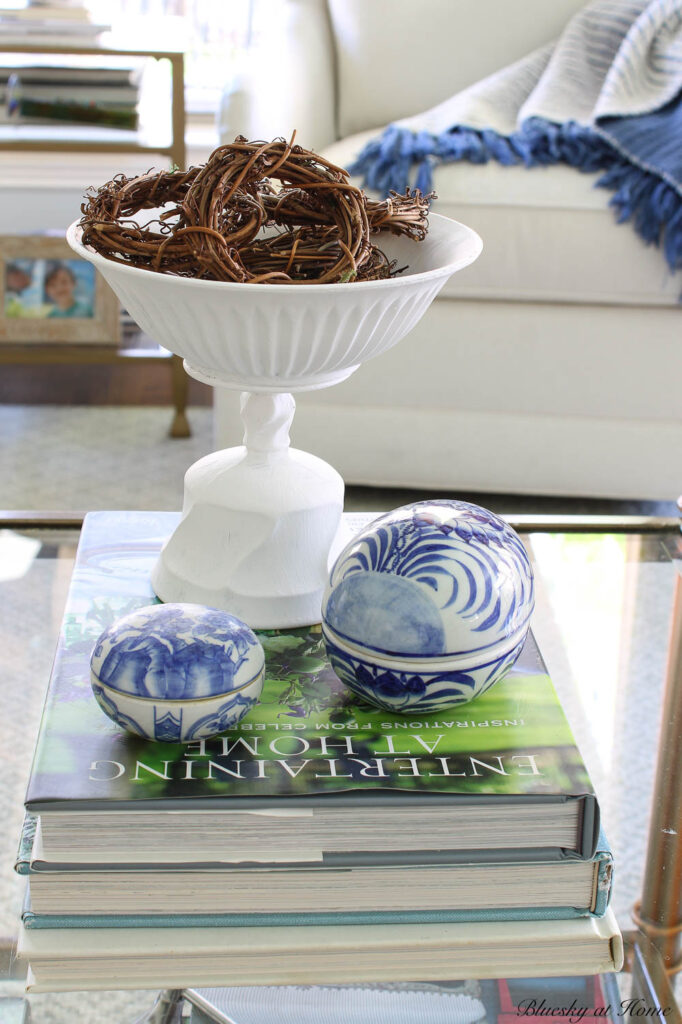
A stack of mini grapevine wreaths.
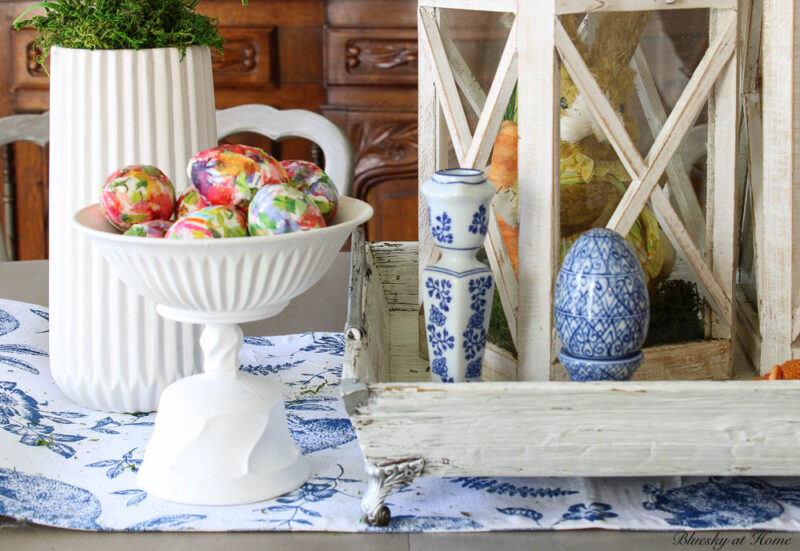
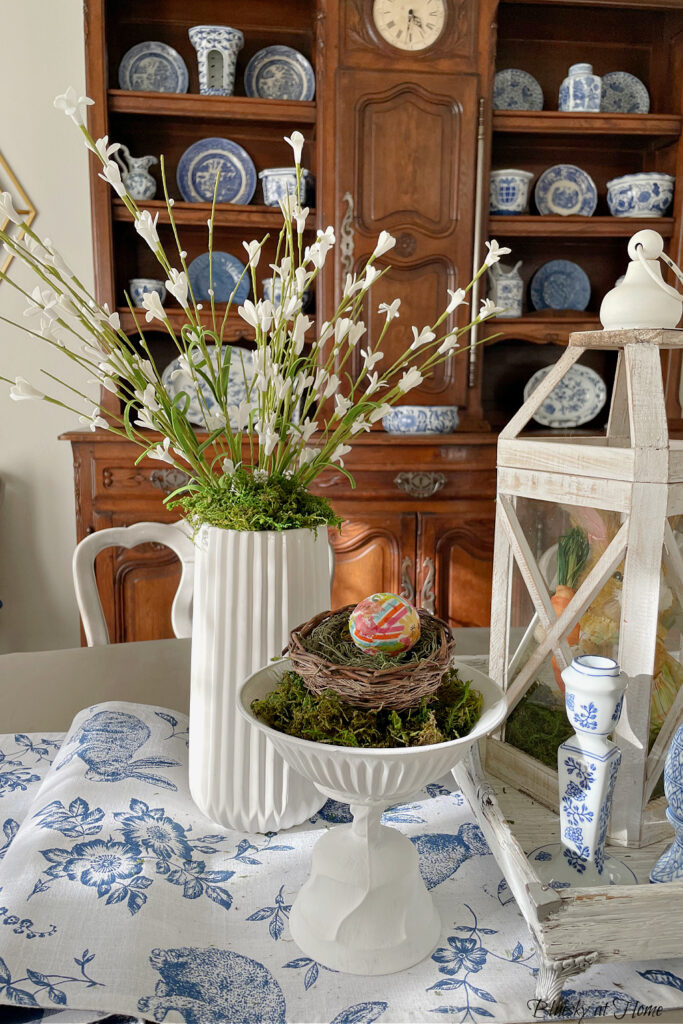
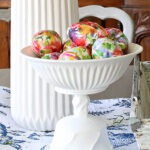
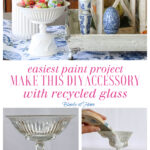
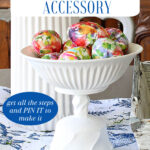
Filled with floral decoupaged Easter eggs. I added the dish to my Easter arrangement with lanterns and bunnies. I love how this approach adds more color and pattern to the scene.
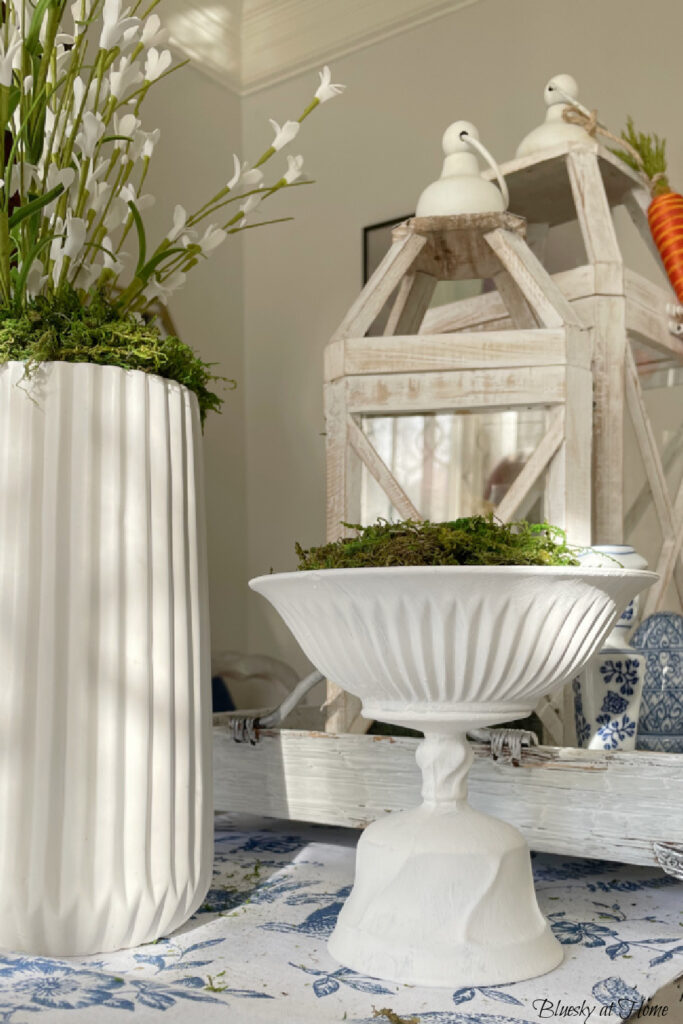
Moss – by itself . . .
or with decoupaged Easter eggs.
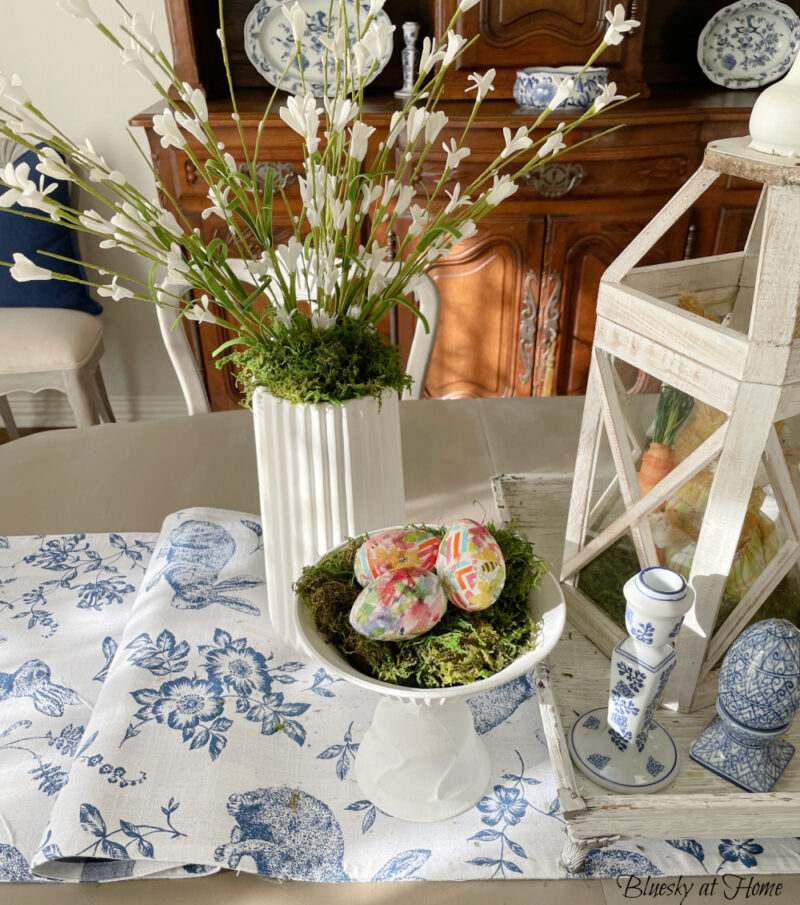
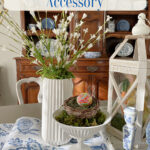
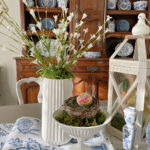
With a bird’s nest and egg.
With vintage jewelry.
This project was so easy and I found so many ways to use the finished project that I want to hit the thrift stores again to find more glass pieces for painting projects.
I have one more project to fill my glass and paint project piece that I’ll share in a future post.
Would you make a glass and paint dish for your home? Do you have glasses pieces already at home that you can paint? If not, then head for your local stores and find some cool pieces.
Like this project? Then please PIN it so you have the directions easily available. Share it with other DIYers.


I love this project Carol and we will be featuring it on the Fabulous Friday Link Party this week.
This upcycle is beautiful. I would love to make one to hold bulb blossoms. It would be nice for countless things. Thanks for the idea.
Leanna, you are so welcome. Bulbs would be a lovely thing to display.
love this carol! I love to paint glass – it’s easy and transforms! I even painted glass window panes on my hutch! xo laurs
Wow, Laura, I’m impressed. I’ve never thought about painting window panes. Next thing, you’ll be painting stained glass!