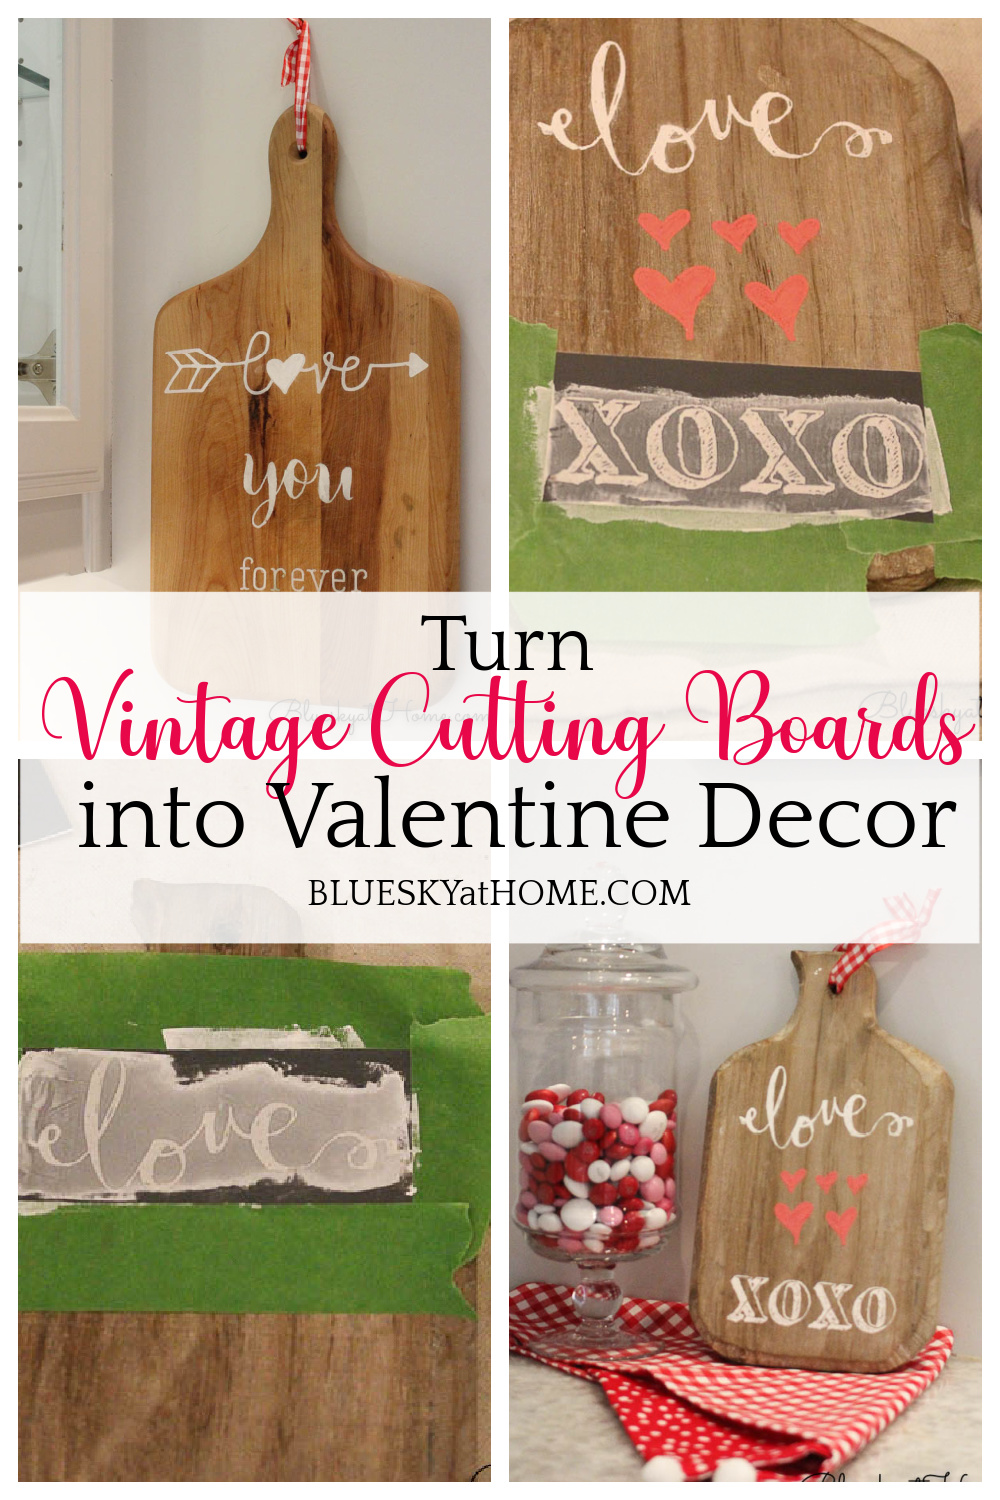
Vintage Cutting Boards for Valentine Decor
Do you shop flea markets? Antique malls? Garage sales? Your grandmother’s attic? On a recent flea market shopping spree in Atlanta, I hit the jackpot when I found some vintage cutting boards that I could make into Valentine’s decor.
For those of us who love to find old or vintage items to rescue, restore and repurpose, these places are our go~to treasure troves. I was thrilled when I found the perfect vintage cutting boards for Valentine’s decor.
Fortunately, they fit into my suitcase. It was the perfect discovery: I had been searching for some old cutting boards and here they were. Just the inspiration for a Valentine DIY project.
These cutting boards fill all the criteria: vintage, Valentine decor, Valentine DIY project.
So you may ask, how do vintage cutting boards become Valentine decor? Have a seat and I’ll show you.

Vintage Cutting Boards Become Valentine Decor
This post contains links to A Maker’s Studio. As a Maker Boss, I will receive compensation if you order any product from the site.
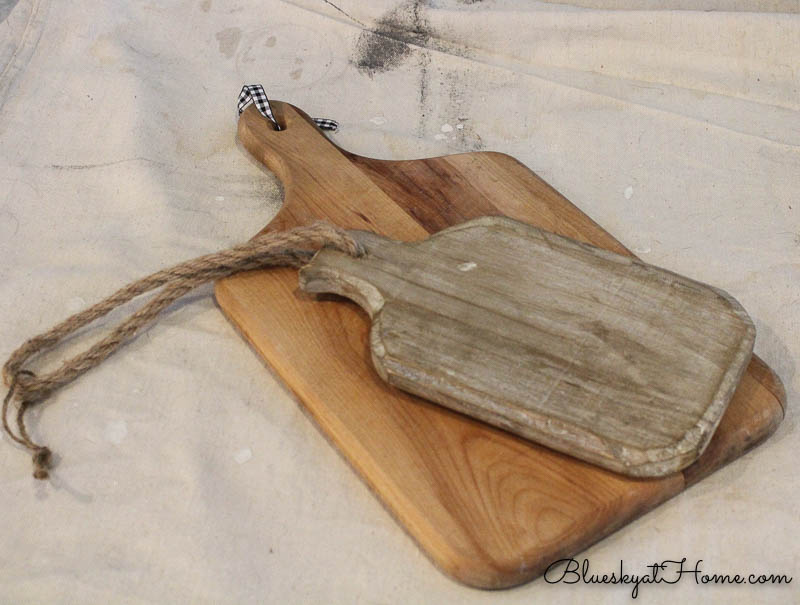
If you read articles like “the 10 top most popular flea market finds”, then you know how popular vintage cutting boards are. I was so excited to find 2 that were in great condition, good sizes, and a good price. The small one was $14 and the larger one was $16. I didn’t know if those were reasonable prices, but it was fine with me so I didn’t hesitate.
If you are in the Atlanta area, I urge you to stop by the Queen of Hearts Antique Mall in Alpharetta. I could spend days in there browsing their wonderful selection.
As you can see, each one has a different finish and a little bit different shape in the handle. The smaller one has a twine loop, which I removed for my Valentine decor project, but I’m saving it for later. I also removed the piece of ribbon on the larger cutting board.
Making the Valentine Decor
You know I can’t resist a cute Valentine stencil. I love the stencils from A Maker’s Studio and they were my inspiration for making the vintage cutting boards become Valentine decor.
I used a combination of our I Love You stencil and designs from other stencils. I used the size of the cutting boards as my guideline. To protect the surface of the cutting boards, I wiped on a light coat of our Light Antiquing Wax, rubbing it on both sides of the boards. This wax is more liquid than other waxes you might have used and goes on easily with a clean no~lint cloth.

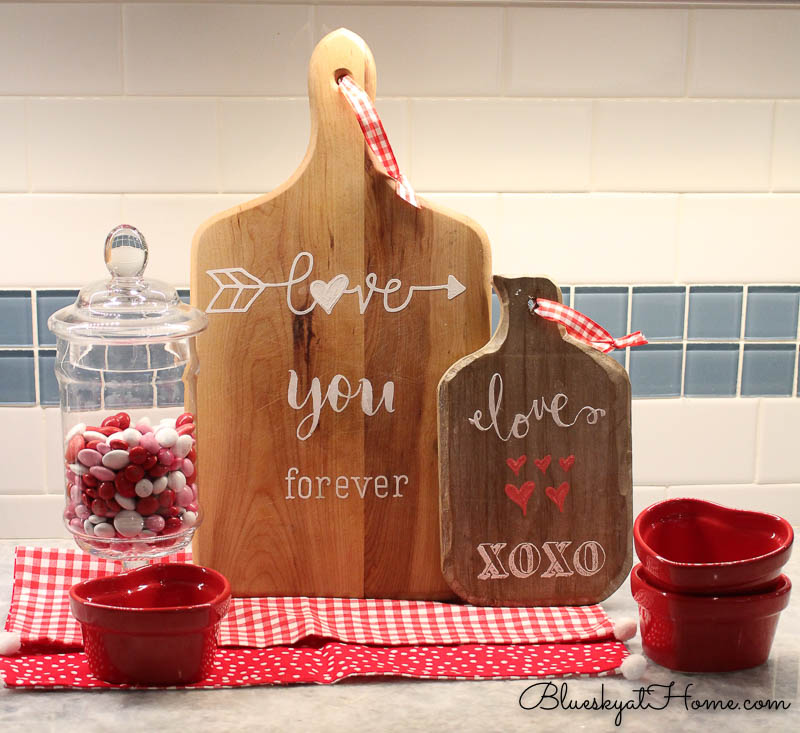
Valentine Decor for the Larger Cutting Board
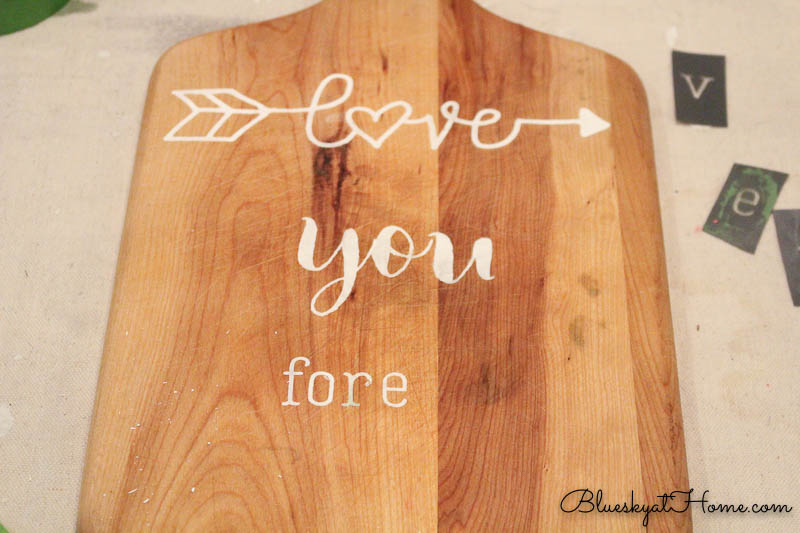
For the larger cutting board, my inspiration was the Beatles’ song, “I Will Always Be in Love with”. The chorus is “love you forever and forever”. It’s the sweetest song ~ great for Saturday night kitchen dancing with your sweetheart. If you aren’t familiar with it, search for it on YouTube. I cut out the stencils that I want to use and laid them out on the larger cutting board.
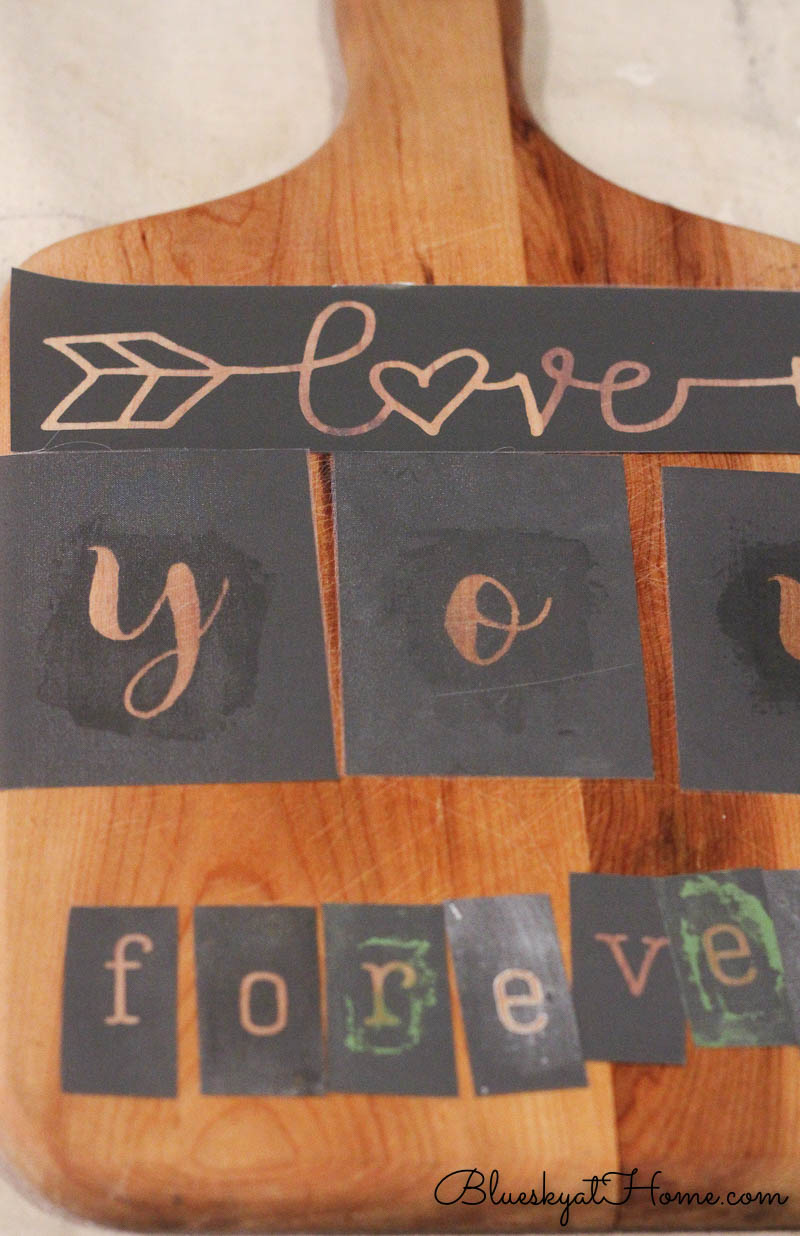
The “love with arrow” design is from our I Love You (Valentine) stencil. Spelled out “you” with Alphabet 2. Forever with Alphabet 4.
Since after Valentine’s Day, I will want to use the vintage cutting boards for other designs, I’m using ChalkArt which can be wiped off with a damp cloth.
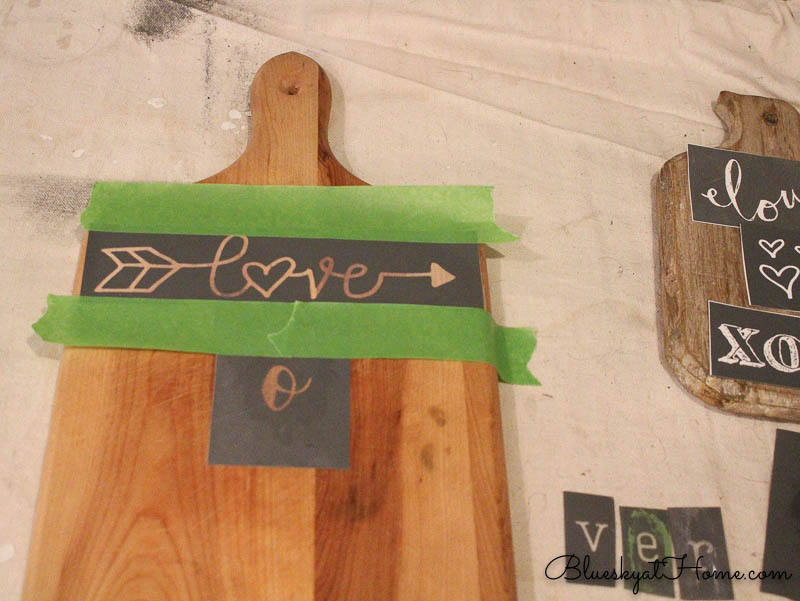
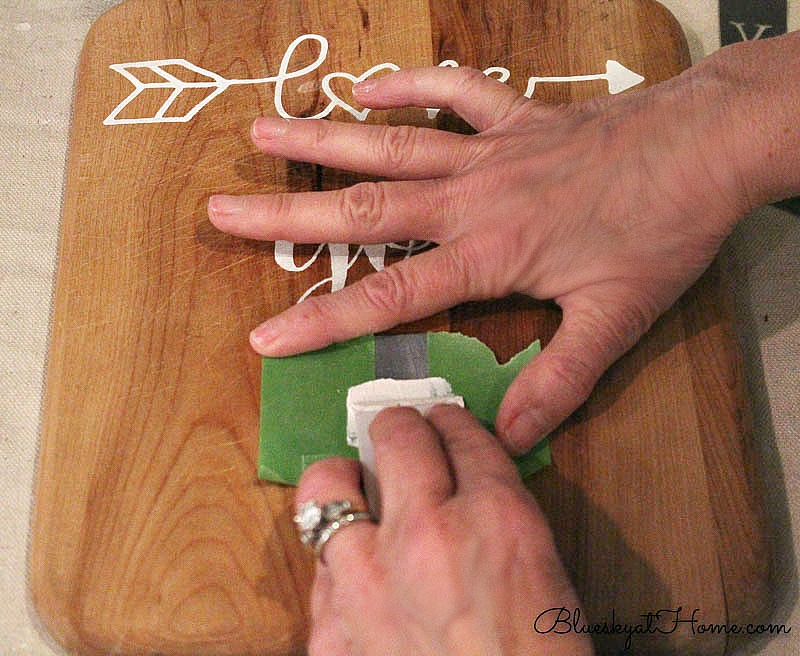
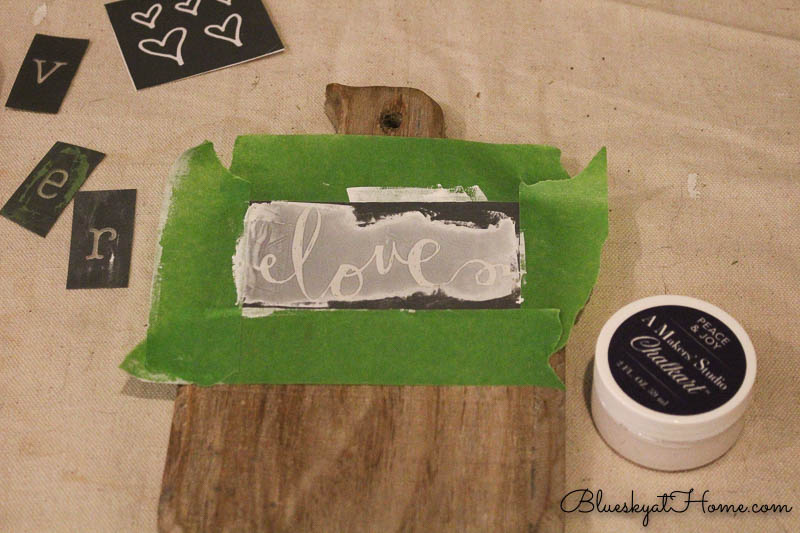
After pressing down the stencil to adhere to the surface (all stencils have adhesive backing to make sure they stay in place ~ what a great idea!), I have found that using painter’s tape around the stencil gives you extra room for applying the ChalkArt. I shared this tip in my DIY Valentine Heart Sign. This one little step allows you to have a freer hand and keeps you from accidentally painting over your surface.
Using my plastic spreader, I “smeared and spread” the Chalkart in Peace & Joy over the stencils, starting at the top in the center.
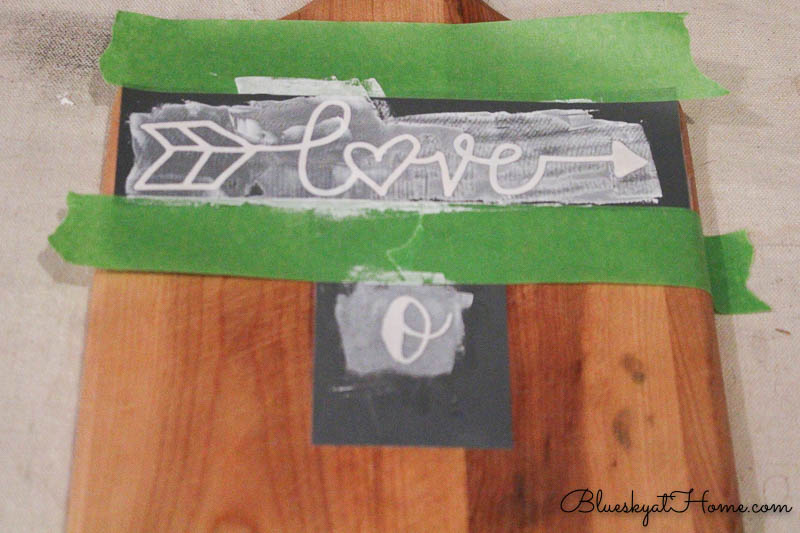
As I finished one stencil, I removed it and the painter’s tape. Wait a minute or 2 before adding another stencil and edging with more painter’s tape.
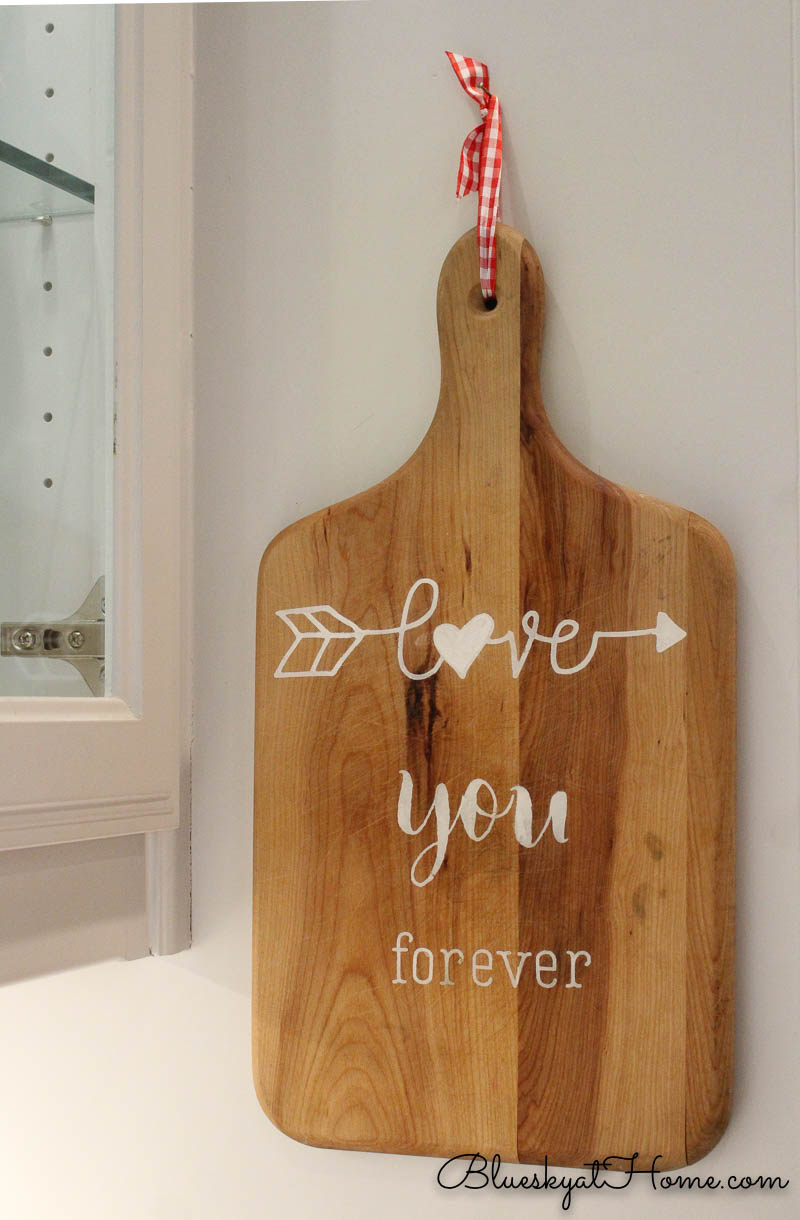
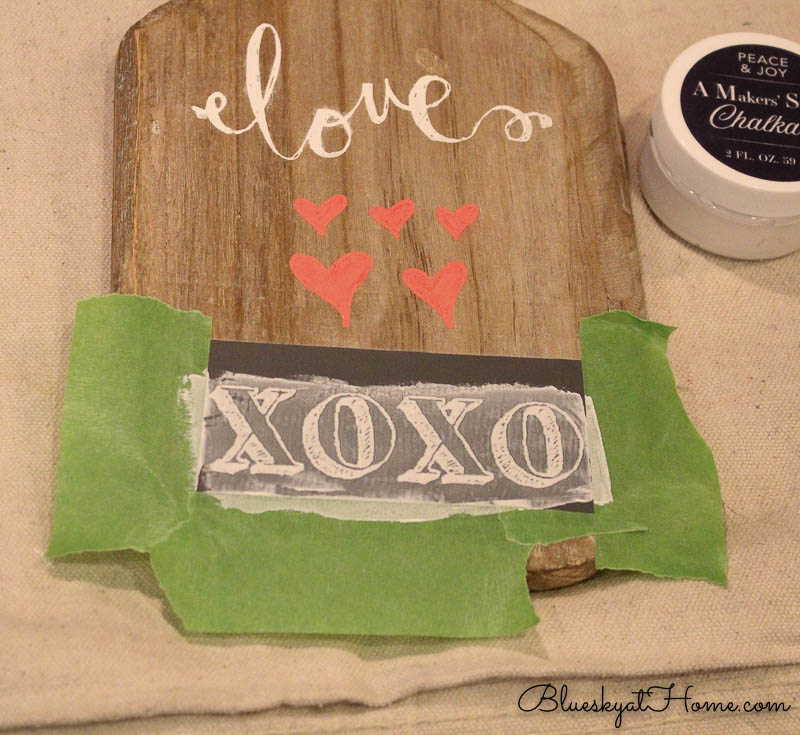
I decided to fill in the heart in the word love with Peace & Joy. I used a flat brush to apply the ChalkArt. To finish this vintage cutting board, I used a piece of red and white checked ribbon. Pretty cute, uh?
I might go back and add another heart at the bottom of the cutting board. What do you think? Heart or no heart? Would you do it in white or red?
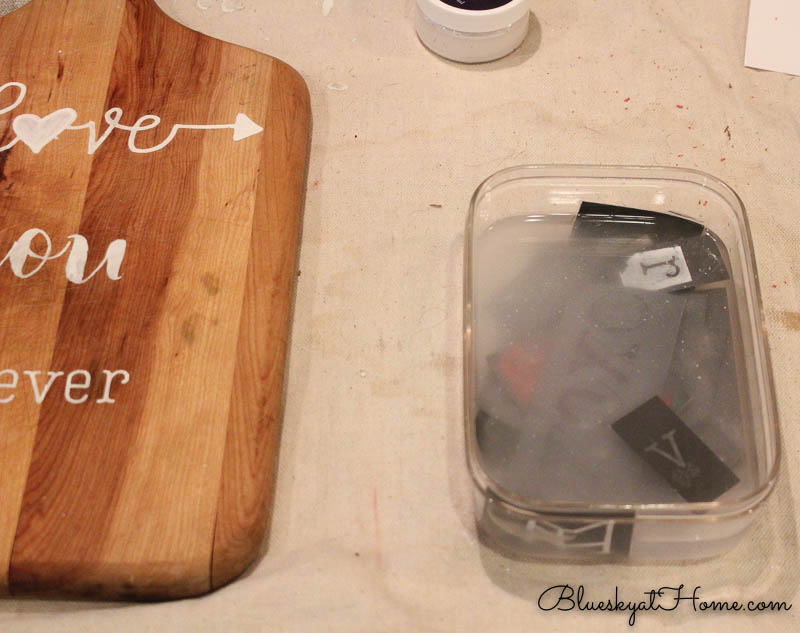
TIP: To make cleaning the stencils easier, I filled a small plastic container with water. As I finished using each stencil I placed it in the water. This got the stencils out of the way and kept the ChalkArt from drying on the stencil before I could start washing them.
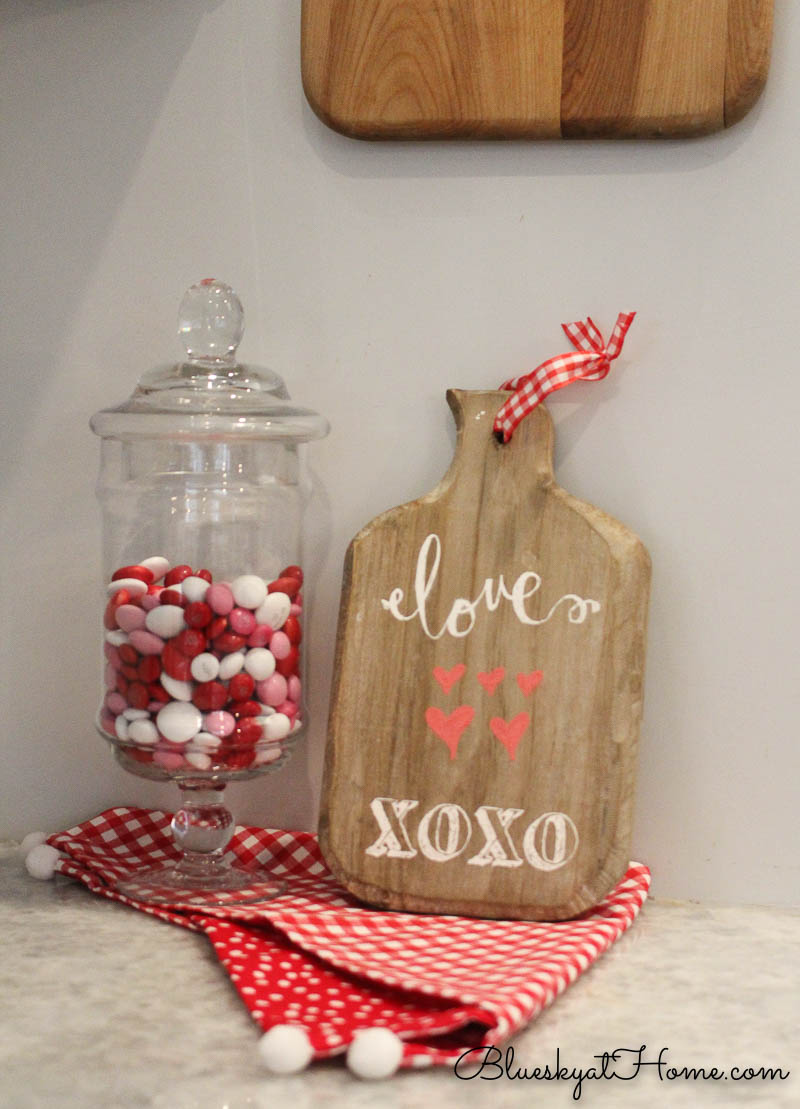
The Small Vintage Cutting Board
For the smaller vintage cutting board, I used a combination of 3 stencils.
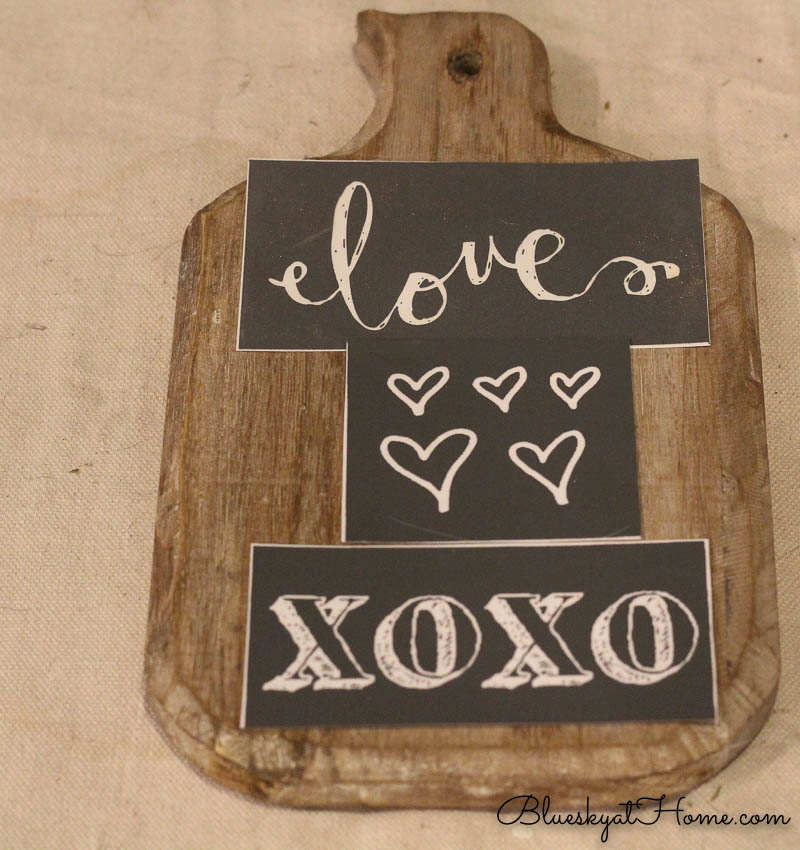
- Love script from the Nest stencil.
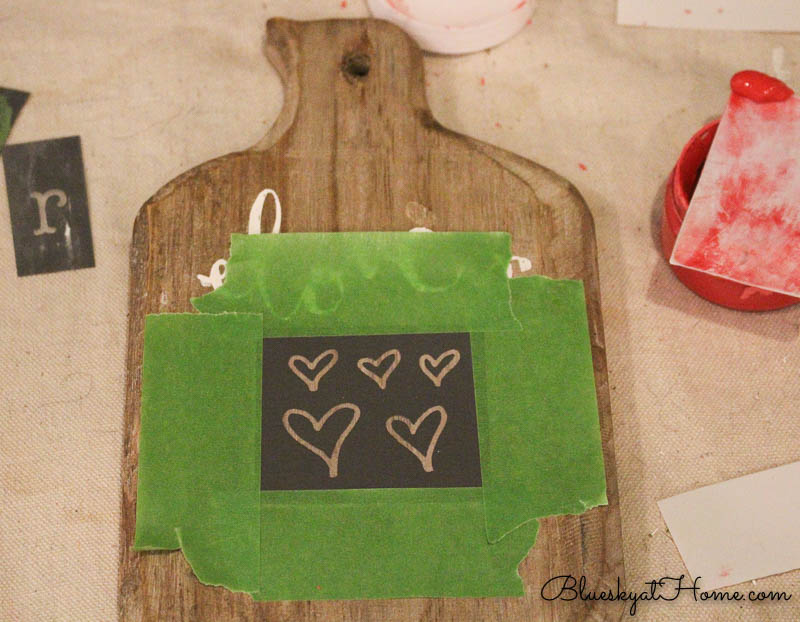
- Group of hearts from the I Love You (Valentine) stencil.
- XOXO from the I Love You (Valentine) stencil.

For the group of hearts, I used ChalkArt in Love Is.
The smaller cutting board also got a ribbon loop for hanging.
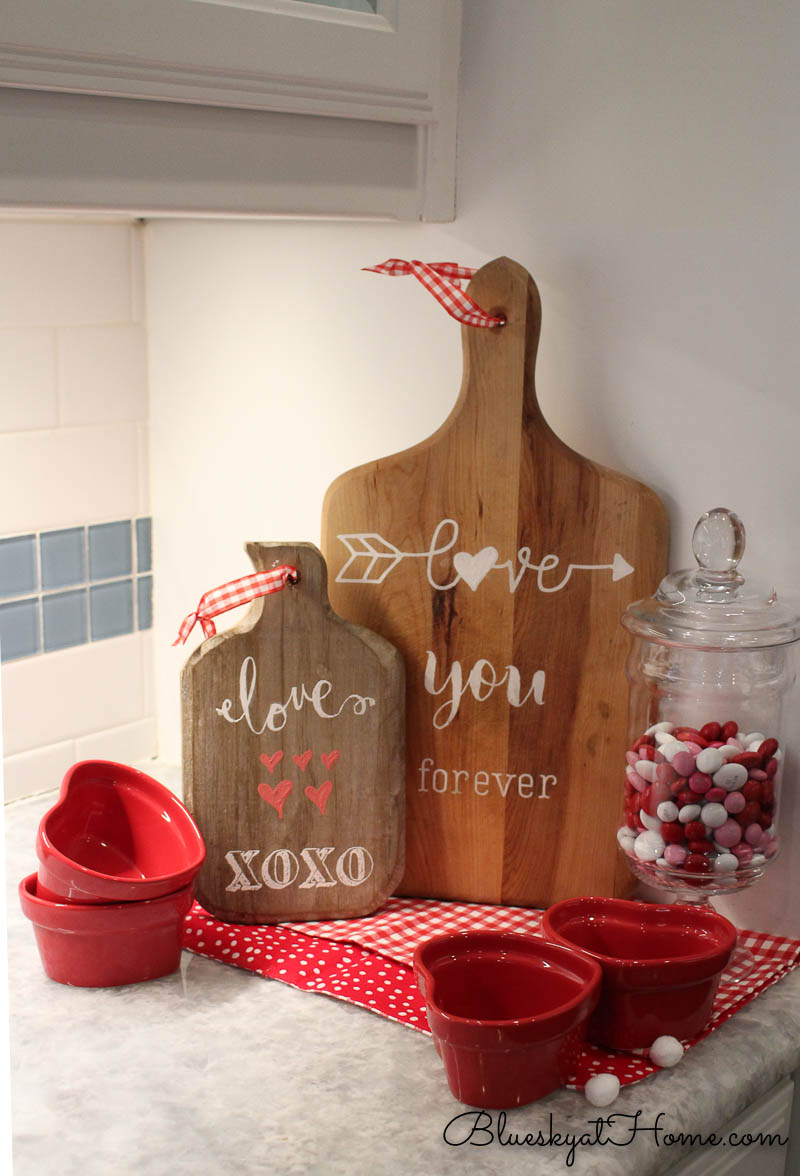
Displaying the Vintage Cutting Boards
Obviously, you can hang the cutting boards.
Or set them on your kitchen counter with napkins. You may remember the napkins with pom~poms that I made. Some Valentine candy makes the scene even better. I’ve had the red heart~shaped baking dishes for years.
This was an easy project, thanks to the stencils and ChalkArt. You will probably see these vintage cutting boards in other DIY projects over time. They will be like a canvas to use over and over. If you have some vintage cutting boards, I hope that you’ll try to dress them up in whatever seasonal or home decor theme you choose.
I hope that you will want to PIN this Valentine idea for future reference.

These are darling. They are so trendy and cute.
Thanks,Katie, I’m already trying to decide what to stencil them next.
These are gorgeous – the fact that you’ve used chalks so you can reuse the boards is very clever. Not that I’d ever want to change it! And yes an extra pink heart on the bottom of the large one for sure!
Wren x
Thank you so much for your compliment and input. I think another heart is coming!
These cutting boards are absolutely perfect!! I love this idea so much!! So cute and so creative!
Hope you have a wonderful weekend!!!
~Emily
Thanks Emily,it’s been a fun week or creativity.
These are adorable! I love using thrifted cutting boards for projects as well. Love it. Thanks for sharing at Vintage Charm. Pinned!
How absolutely adorable Carol! I love the cutting boards you found and how you upcycled them! They look so cute styled in your Valentine vignette. I always keep my eye open for cutting boards during yard sale season. Now I have new ideas for what to do with them too!
Thank you so much for joining our hop. I hope you have a Happy Valentine’s Day!
Amber, thank you for hosting. Hope you are feeling better. I’ve been looking for cutting boards and these were the first I found that were in great shape, right size and were very reasonable.
I love upcycle ideas that turn something that looked shabby into something beautiful. Thanks for linking up at #OMHGWW and hope to see you next week!
Alice, thank you for visiting and commenting. I’ll definitely be back.
Carol, your vintage cutting boards are adorable! Thanks for the tutorial. It has been so much fun blog hopping with you this week! Happy Valentine’s Day!!!
Hi Shannon. Thanks for the feedback. Always love to see what you are up to. Have a great week.
This turned out really cute! i love it. I’ll have to keep my eyes open for one of those cutting boards! 🙂
Here from O My Heartsie!
Blessings,
Babychaser
mamasbrush.wordpress.com
Carol, I don’t own any wood cutting boards and am starting to feel like I should! I love the idea of painting signs on them; so cute! So glad to be hopping with you! Happy Valentines!
Lora, I’ve looked for a long time because I love the idea of vintage and farmhouse anything. Especially signs of any kind. I was lucky to find them. Happy Valentines back.
Carol,
Your Valentine cutting boards turned out so cute. The heart in place of an “o” in love is eye-catching, especially since you filled it in.
Happy Valentine’s Day,
Judith
I am loving this idea! Such a great tutorial. Thank you for sharing and Happy valentine’s Day!
Thanks so much Kelly. Enjoyed being on the hop with you and Happy Valentine’s back.
Love the upcycle and turned out so very cute. Can you still use them to cut on and serve food on with this upcycle, or are they more for decoration? Thanks for sharing.
Chas, I never intended to use these cutting boards, but just have them for decorative accessories. If you wanted to keep the same stencil design, you would have to seal them with our Matte Sealer. I think there are food safe sealers on the market too, but I don’t think I would do that. I love just imagining who used them.
Carol, I love your cutting boards! They are something I am always on the look out for as well. My sis, friend, and I made one into a pumpkin for fall, but I love your sweet Valentines one. I have always loved to stencil!
hugs,
Jann
Your cutting boards are fabulous. I love this idea. I have a board with a heart cutout, so I need to copy you.
Marty, Imitation is the height of flattery, so feel free to copy. We all hope to provide ideas and inspiration.
Using several stencils. So creative. I am on the lookout for old stencils and you have just given me some ideas of what to do once I find them. TFS.
I love this!!! So much fun and so pretty! My eyes will be open for cutting boards!!
Kristin, I was lucky to find these after looking for quite awhile.
What a great way to repurpose these cutting boards into cute Valentine’s Day decor that you can use for years to come.
This is such a cute project, Carol! I never thought of using some of my cutting boards for art! Thanks for sharing! It’s been fun joining you in the hop!
Linda, art can be anything that is decorative that brings you pleasure ~ including cutting boards! Let’s do this again soon.
These cutting boards are so cute! Happy Valentine’s Day!
You are so clever with those stencils Carol! The boards turned out fantastic but I never doubted it a bit. I would have never thought to do that and love it! Hope you and Sweet Shark enjoy your Valentine’s Day!
What a fun to create a Valentine’s Day display, Carol! We’re always on the lookout for vintage cutting boards and these were at such great prices too. I love the stencils you chose and how they add a festive touch to your kitchen. Happy Valentine’s Day, CoCo
CoCo, thanks so much. Great to be on the blog hop with you.
Carol, these turned out so cute! It makes my heart happy to be joining you on this hop! Blessings, Cecilia @My Thrift Store Addiction
Carol I love the idea of finding old cutting boards and making them cute like you just shared. Great inspiration!! Happy Valentine’s Day to you and your family Carol!
Hi Carol, what a great way to recycle vintage cutting boards. Love the Chalkart paint and stencils!
Carol, these are beautiful! I am so impressed with your creativity and crafting skills. Cute red checked ribbon too! It’s great blog hopping with you today. Enjoy your week!
Shelley
Thanks Shelley, I don’t think I’m a natural DIYer, but have been happy to develop those skills over the years. Happy to be hopping with you too.