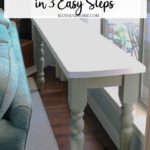
How to Repaint a Tabletop in 3 Easy Steps
Have you ever painted a table or a bookcase or a frame? Then you decide you want a different finish or a different color? Let me show you how to repaint a tabletop in 3 easy steps.
Think it will be hard and time-consuming? How do I know how easy it is to repaint a tabletop in 3 easy steps? Because I just did it.
And here is the best part: No sanding. No stripping. No priming.

This is a project that I have put off and put off. And now I wonder why. Once I started, I was done in a few hours and that included break time.
Because it was only 3 steps. And even better? I only used 3 products. Just 3.
How to Repaint a Tabletop in 3 Easy Steps
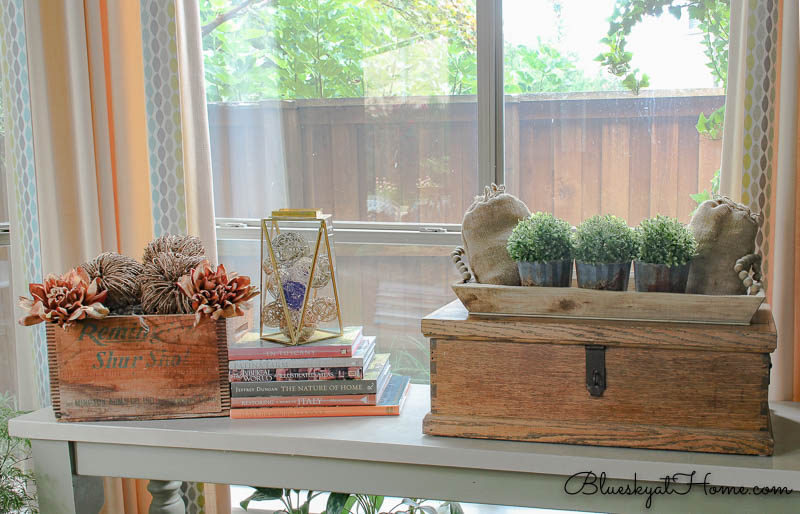
What was the tabletop that I wanted to repaint? The console table in our breakfast room. This table was originally our reclaimed wood pine breakfast room table for many years.
Then it was a table in our game room before it was my desk for 3 years. In planning our move to our present home, I had it cut down down to a sofa table. That’s when I painted it with the crackle finish.
Why did I want to repaint this tabletop? For 3 reasons.
- I wanted to move it behind our sofa in the living room.
- I was really tired of the creamy, crackle finish that I had originally painted this tabletop.
- I wanted a clean, crisp, white finish on the table.
So, you may ask, how were there only 3 steps to repaint the tabletop? How did it require only 3 products? And, I know you are dying to know: how did I do it without sanding, stripping or priming?
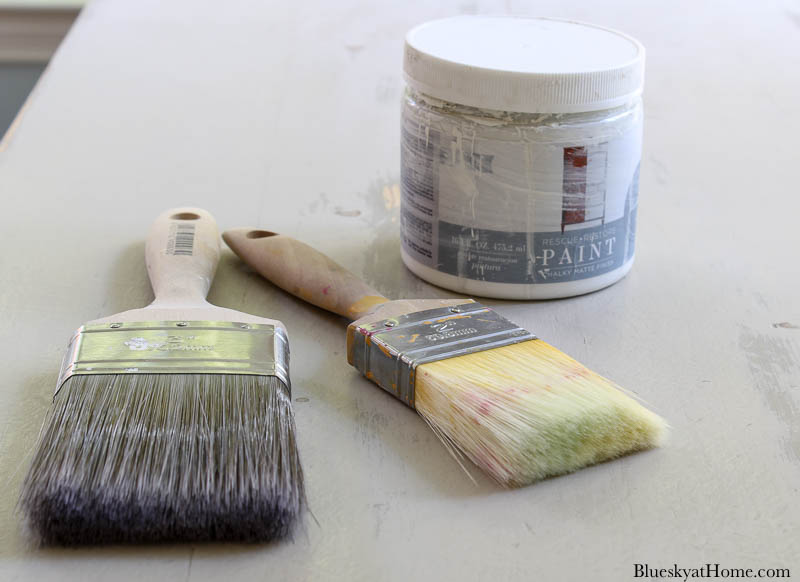
Supplies to Repaint the Tabletop
It always amazes me when I read about people repainting a piece of furniture and the supply list is a mile long and the steps are almost as many as the ones on my morning walk (3500 – 5500, on average).
Here is my supply list and the exact products I used to repaint the tabletop:
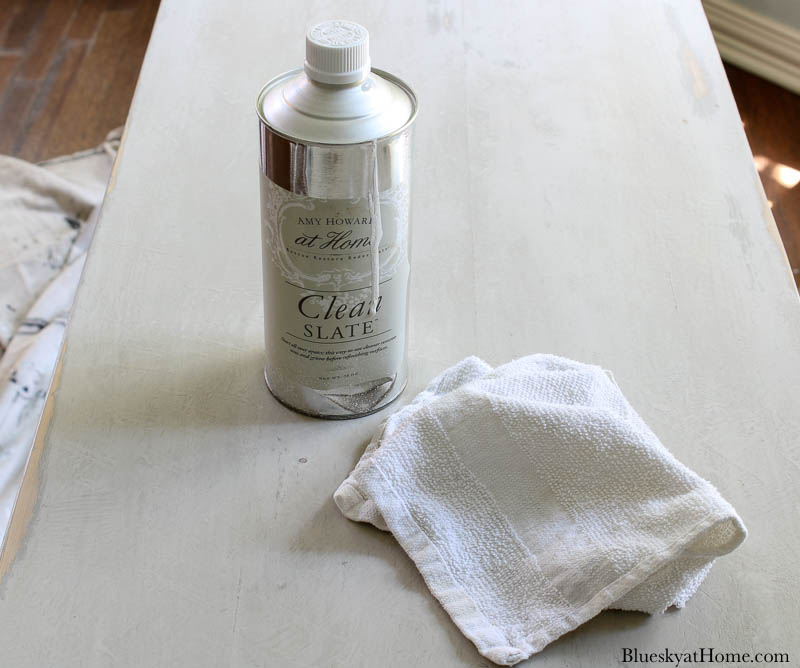
- Clean Slate – you have to remove any wax, grease, dirt and grime, fingerprint build up before you begin to paint. If you don’t, your paint will not adhere properly. This furniture cleaner does it all.
- Paint: One Step Paint from Amy Howard at Home.
- A Liquid Wax to seal and protect your tabletop. I used Mind Your Own Beeswax for this repainted tabletop
That’s it. Just 3 supplies.
No smelly, yucky primers or strippers. No additives to your paint. No waxes that smell and feel like butch wax, take forever to set and have to cure for days and days.
Tools to Repaint a Tabletop
- dropcloth to protect the floor
- lint-free cloth for applying the Clean Slate
- good synthetic paintbrush
- lint-free cloth for applying the wax
No sandpaper, no sanding blocks, no scrapers, no nothing else. Think of the money and the time you will save.
The Step before the 3 Steps to Repaint the Tabletop
Right here, I have to call timeout, yell uncle, and state a disclaimer.
Normally, using the three products above would not require sanding the tabletop to get it ready for repainting. We are not painting raw wood or wood with rough and peeling veneers. We’re talking about a painted piece of furniture, which this console table is.
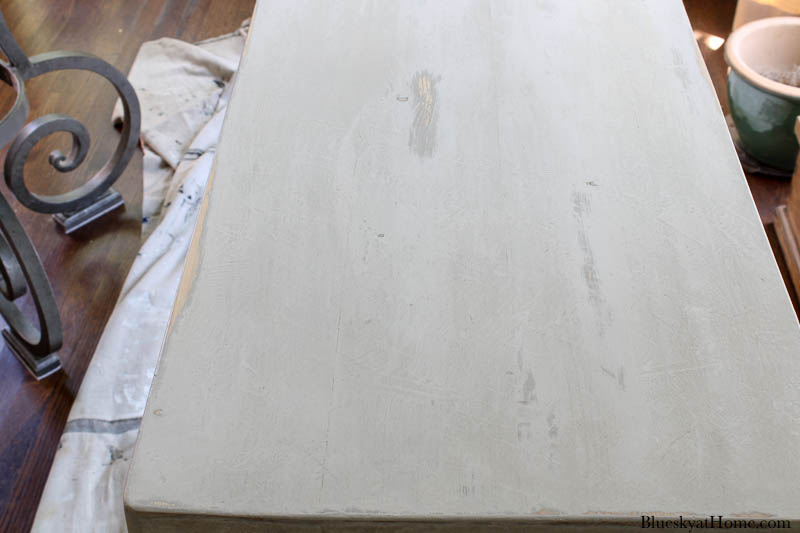
Years ago, I gave this console table a very thick, crackled finish that I wanted to get rid of. I applied that finish using multiple thick layers of paint. Then I dried the layers with a hair dryer to create the crackle effect. The last step was to add dark wax and rub it in.
I’m not sure if you can tell in this picture the crackle finish, but it is there. You can definitely tell when you run your hand across the top.
Did I mention it was beige?
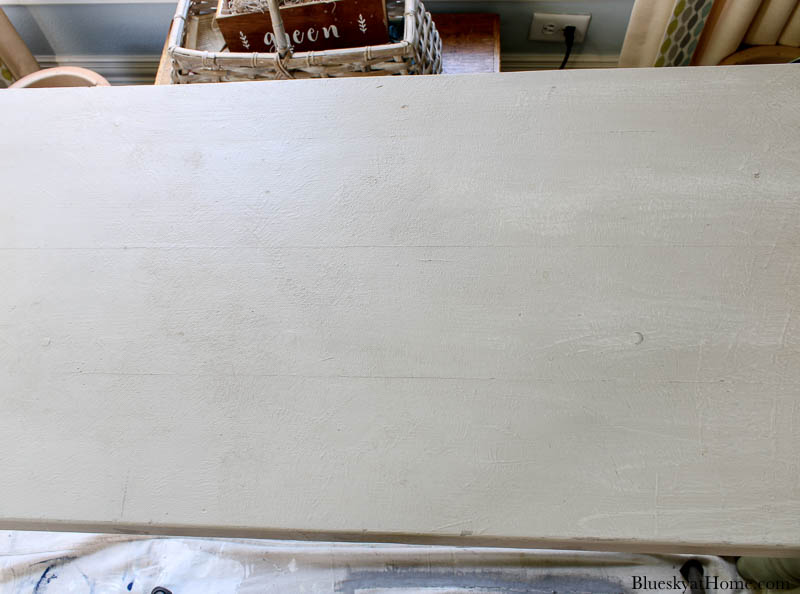
What’s my disclaimer? To get rid of the rough, bumpy crackle finish, I did sand the top. I wanted a smooth, clean finish.
I’ve sanded furniture before like the vintage French doors we made into a barn door for our laundry room makeover. Or the thrift store bookcase for our living room.
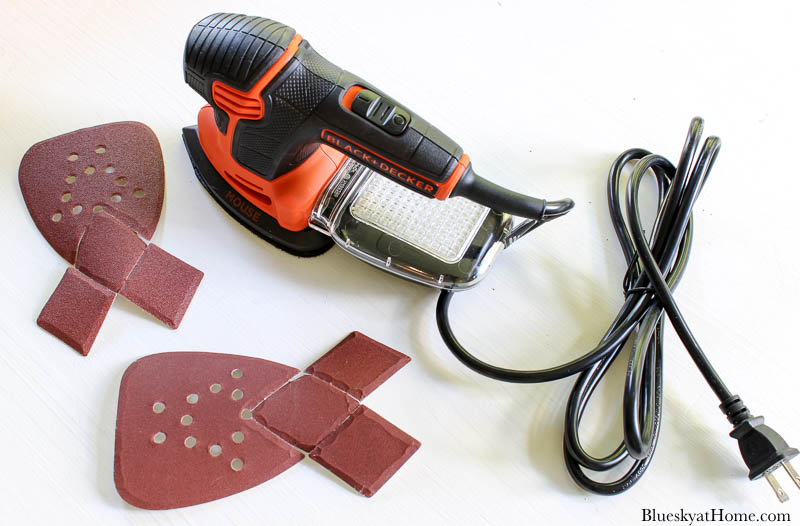
A couple of years ago I bought a Black and Decker Detail Sander at Lowe’s on a whim. This is the first time I even opened the box.
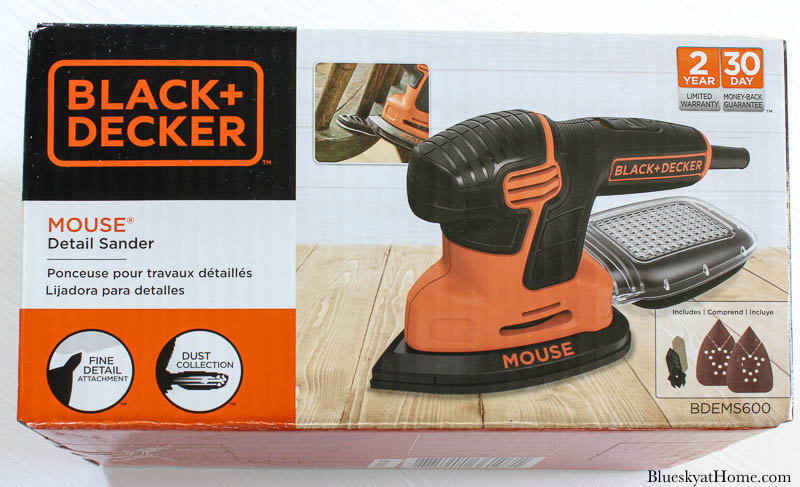
This small sander fits right in your hand and comes with 2 sanding pads. It also has a dust collection attachment.
I had never used an electric sander, but now I have died and gone to sanding heaven.
TIP: Sweet Shark and I placed the table on a painters’ dropcloth first to protect our hardwood floors from dust and paint drips.
I will say that the electric sander made quick work of getting rid of the crackle finish on the table. Over a couple of hours, I sanded in sections and emptied the container of dust every 10 minutes. I had to use the coarser sanding pad to get rid of the crackle finish.
There were a few places where I pressed too hard on the sander and got down to raw wood. I wasn’t worried about that because I knew my paint would cover it.
When I was happy with the smooth texture of the tabletop, I wiped it down with a painter’s cloth.
TIP: Don’t buy a sander that doesn’t have one of these dust collectors attached to it. You will have a mess on your hands.
3 Steps to Repaint the Tabletop
Now to the fun part.
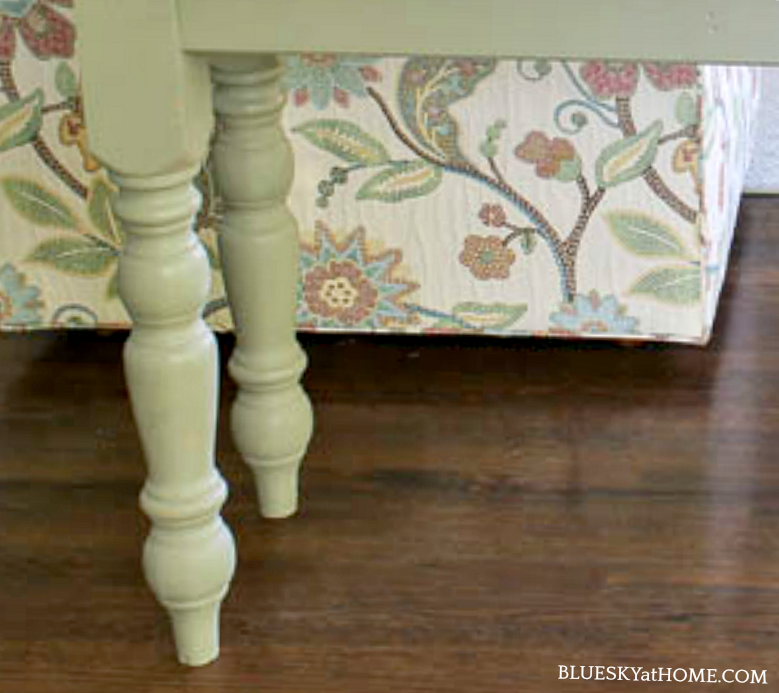
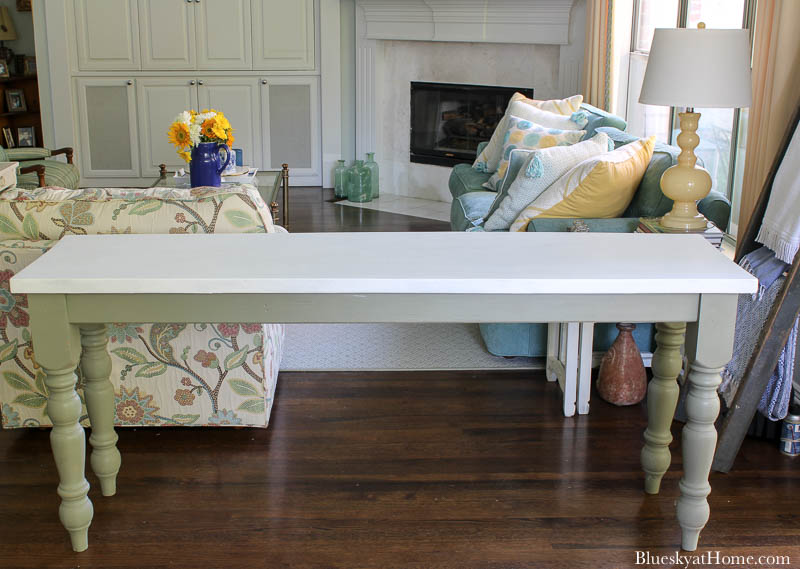
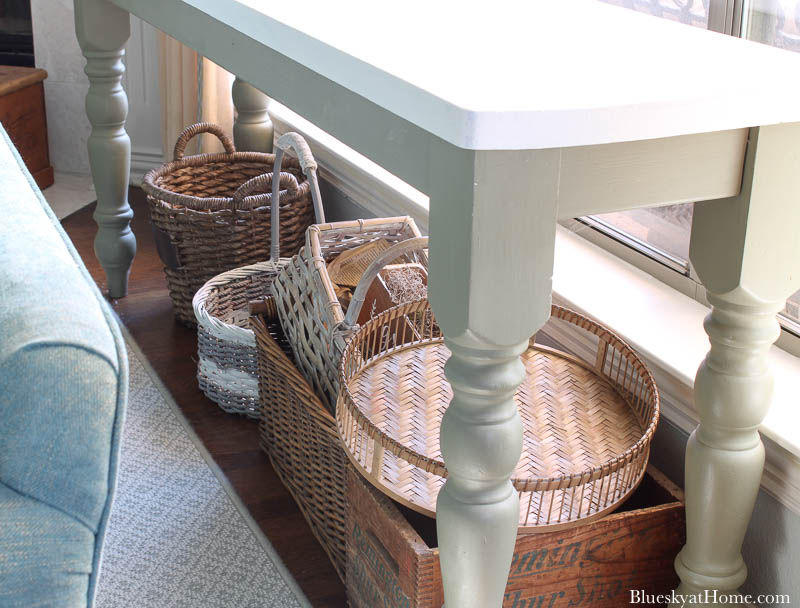
FYI: The base of the table was a soft sage green that I still liked and the finish was very smooth. Since the table would be behind the sofa, the legs wouldn’t show so I didn’t need to paint them.
Step 1 – Saturate a cloth rag with a generous amount of Clean Slate and begin to wipe down your tabletop. Wax and oils will absorb into the cloth. Turn the rag over occasionally and continue to cover the entire table.
NOTE: If your piece of furniture is very grimy and dirty, you may want to go over it twice.
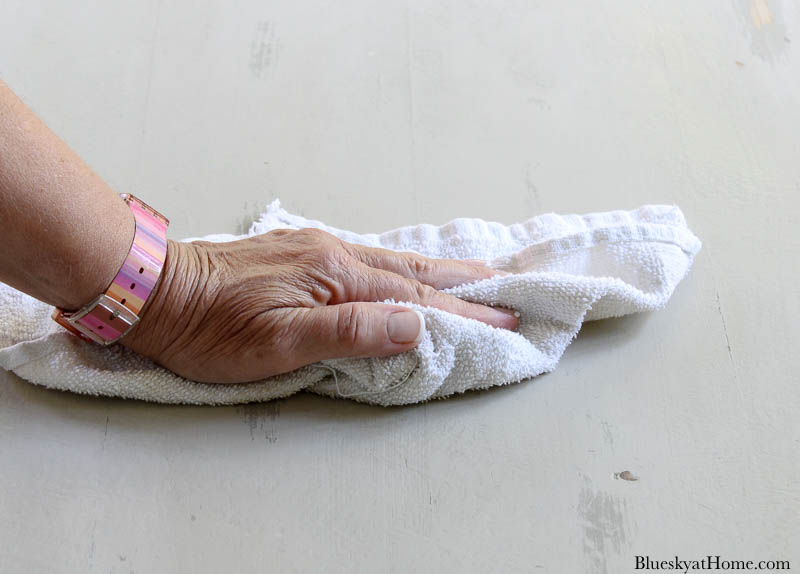
Let the piece of furniture dry for about 5 minutes before proceeding. I just throw these rags away.
Step 2 – I used Rescue Restore Paint in Blessed, a clear bright white. This paint has a chalky matte finish. I was at the end of my jar of paint and afraid I might run out. Fortunately, this paint goes a long way.
NOTE: Rescue Restore Paint has been retired. Today I would use One Step Paint in Bauhaus Buff.
I’ve used it on DIY projects and other pieces of furniture, most recently giving our breakfast room table a fresh coat. (It was originally painted with another brand of paint using a paint sprayer.) It has no smell, no VOCs, and glides on easily and covers beautifully.
Using a synthetic paintbrush, paint your tabletop. Use long strokes, flipping your paintbrush as needed. Paint with the grain of the wood.
Bad me! – I literally forgot to take pictures of painting the tabletop. Here is after one coat of Rescue Restore.
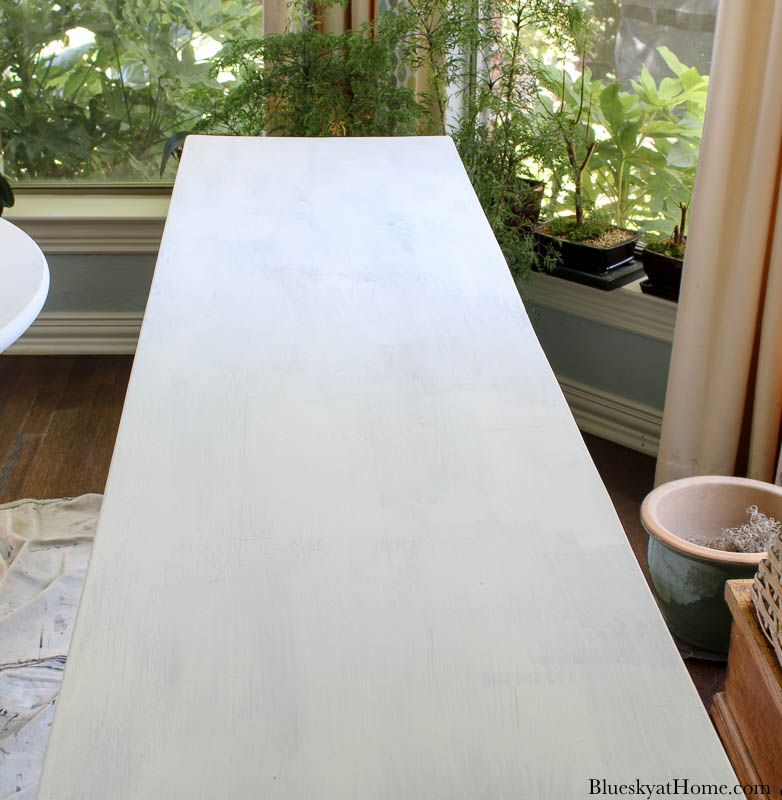
TIP: Remember to paint from wet to dry sections.
After one coat, allow the paint to dry for at least 30 minutes. Apply a second coat – this is where the coverage magic happens.
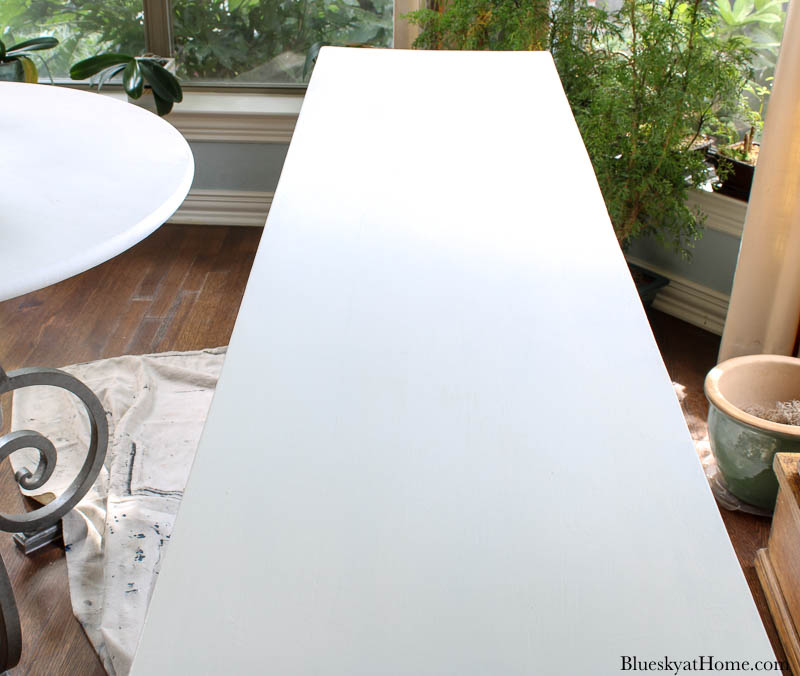
You can definitely see how light and bright white the tabletop is. I love the fresh, crisp look of it.
After you have applied your second coat, allow the paint to dry for at least one hour or even overnight.
Step 3 – This step is optional. If your tabletop is going to get a lot of wear and tear, I like to seal and protect it with a liquid wax because it goes on so smoothly.
For this tabletop project, I used Mind Your Own Beeswax from AHAH. It is a squeezable soft wax that hardens to a durable, satin patina.
To apply it, squeeze a small amount onto a soft, lint-free cloth and wipe it on in a uniform, circular motion. It is like spreading softened butter on your repainted tabletop. Let it dry for 30 minutes to 1 hour.
Finally, with another lint-free cloth, buff the tabletop to a beautiful sheen.
NOTE: The longer you allow the wax to dry, the easier it is to buff.
Decorating my Repainted Table
My newly repainted table would go behind our sofa in front of our large living room window.
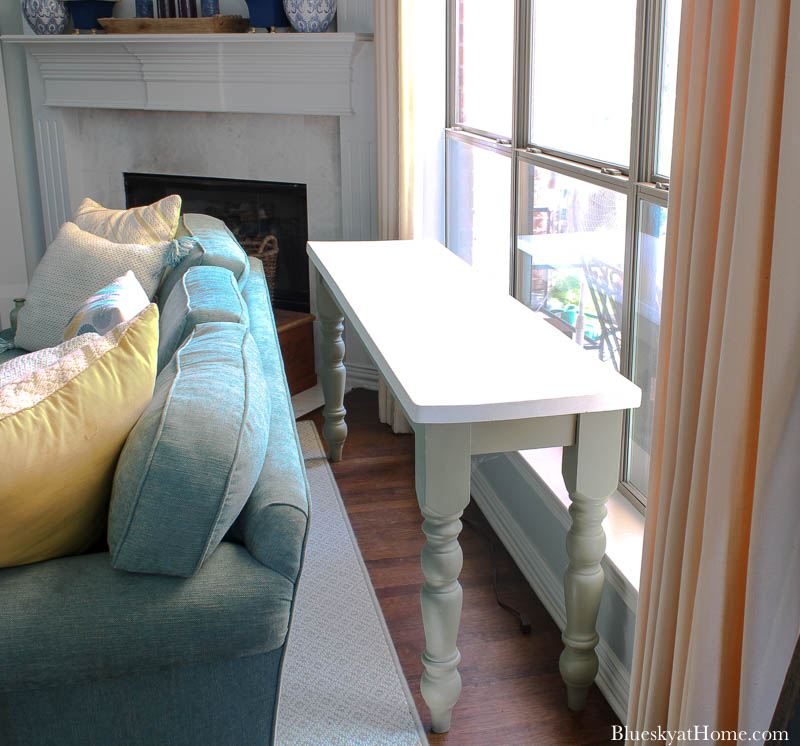
My table would also be a place to store several baskets.
Now that our repainted table was in place, it was time to decorate it. I will show you that process in a later post.
That’s how easy it is to repaint a table in 3 easy steps using just 3 supplies. I really hope that you will try these products and this process. You will be so glad you did.
If you have any questions, leave them in the comments and I will get back to you. So you don’t forget, PIN this post for later.


Great makeover. I have never used any of those projects but will certainly be looking for them on my next furniture makeover. Thanks so much for sharing this week. #HomeMattersParty
Glad you thought they were useful, Donna. The products are the best on the market. You should check them out on my site. Thanks for visiting.