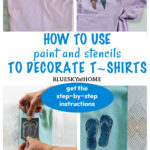
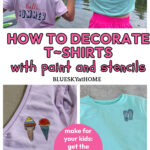
How to Decorate a T-Shirt with Paint and Stencils
Do you like to customize inexpensive t-shirts? This is a fun and easy project. Here’s how to decorate a t-shirt with paint and stencils for a fun summer craft.
How do you decorate a t-shirt with paint and stencils? You need the right kind of paint and the best stencils.
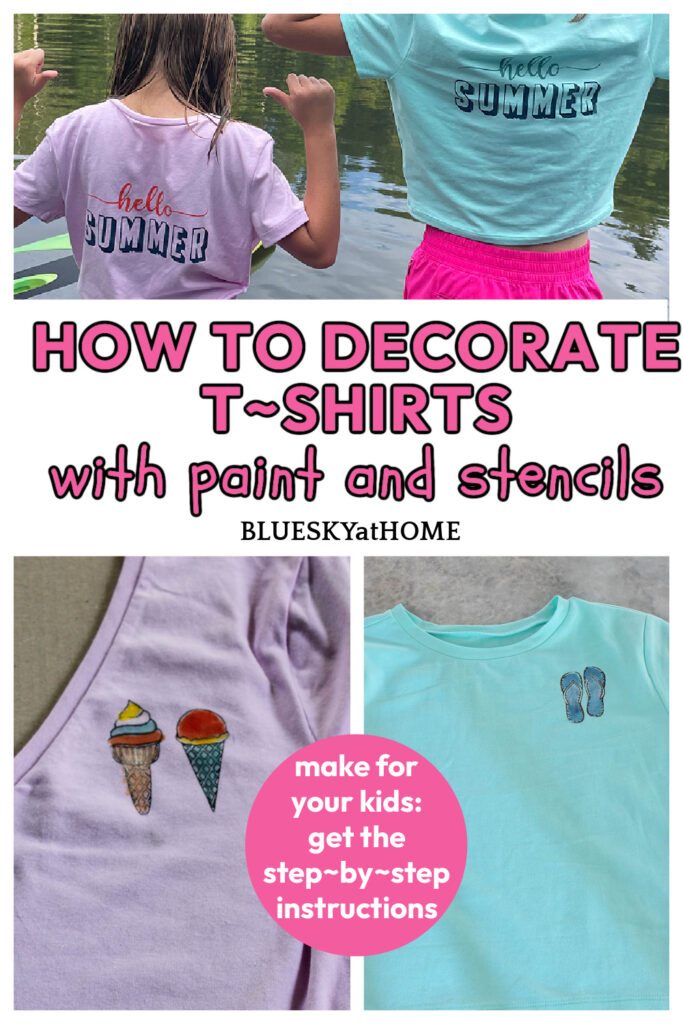
Who do you decorate a t-shirt for? Anyone! I’m decorating two t-shirts for my granddaughters for camp.
I’ll give you all the steps and show you exactly what are the best supplies to use.

Decorating T-Shirts: Using Gel Art Ink and Stencils
First, this is a fun project. You could make dozens of different ones, depending on the color and style of your t~shirts, the stencil design and placement, and the colors of your Gel Art Ink paint.
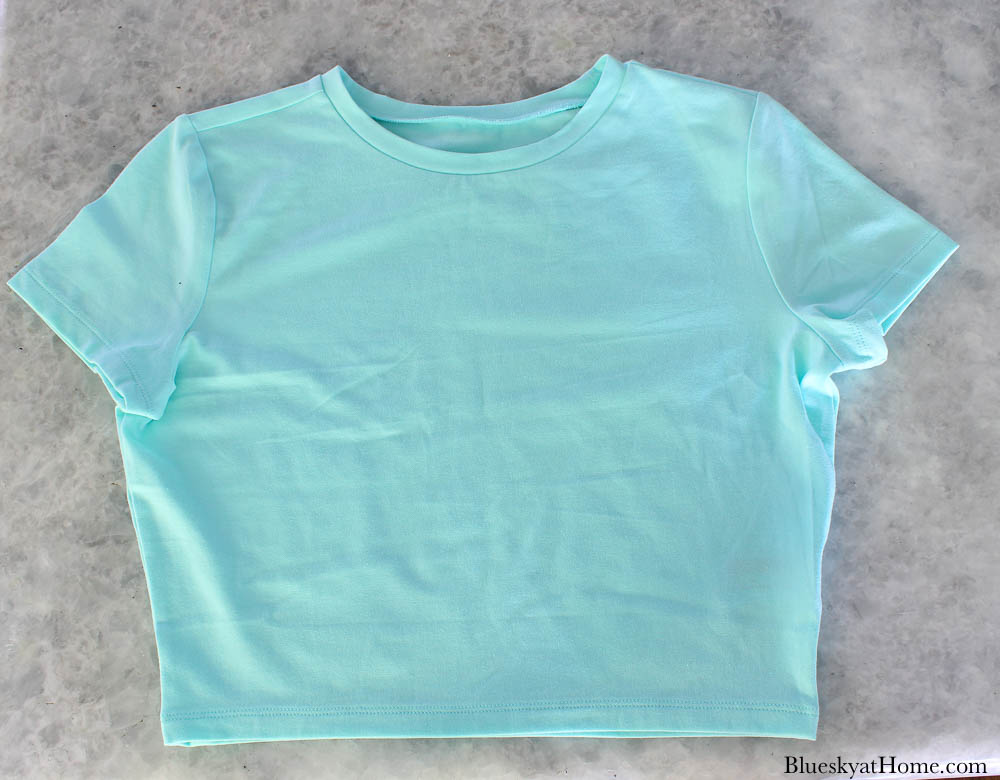
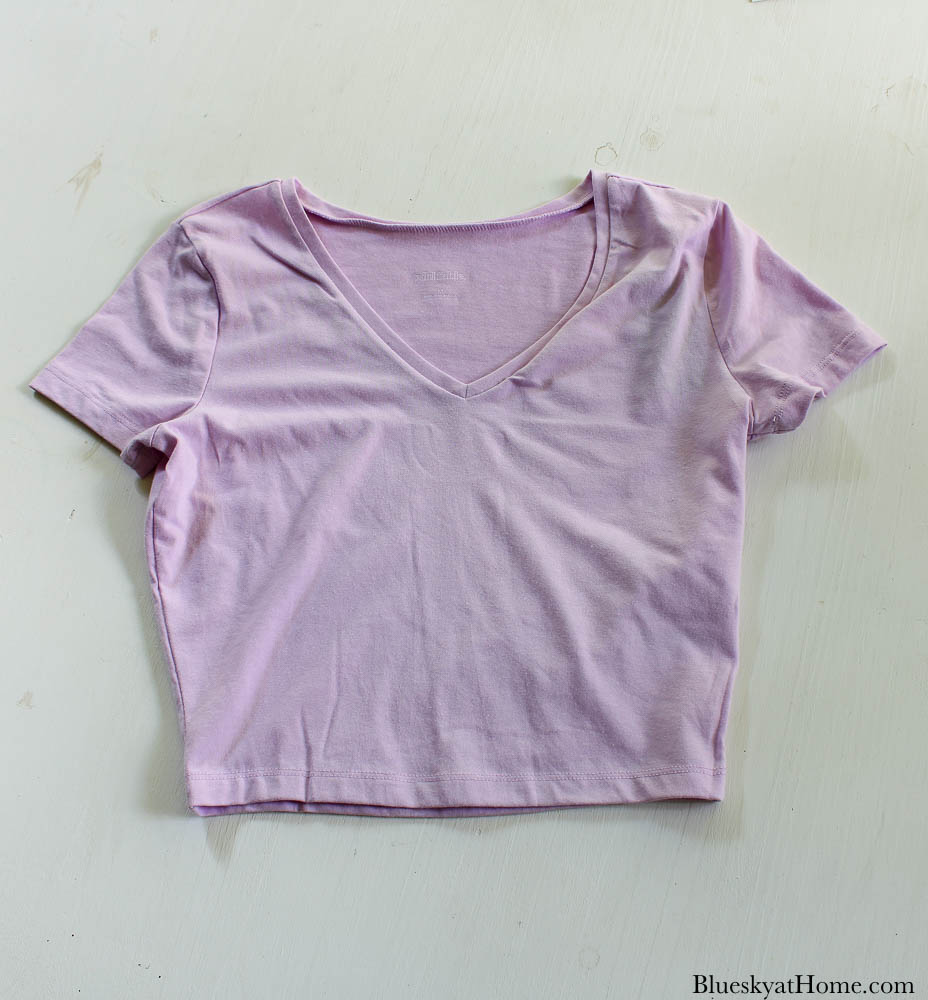
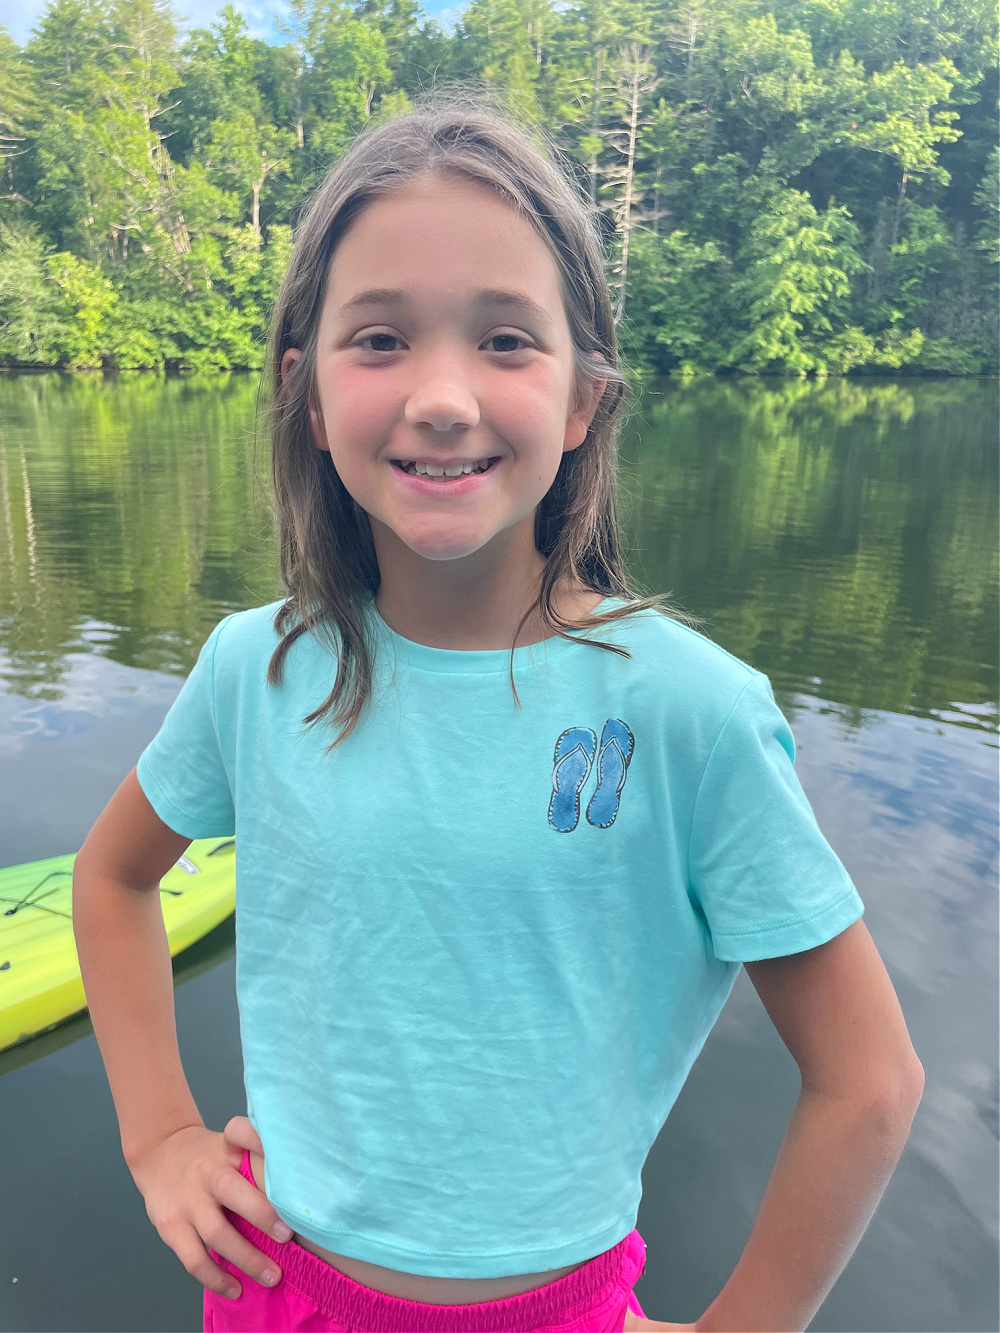
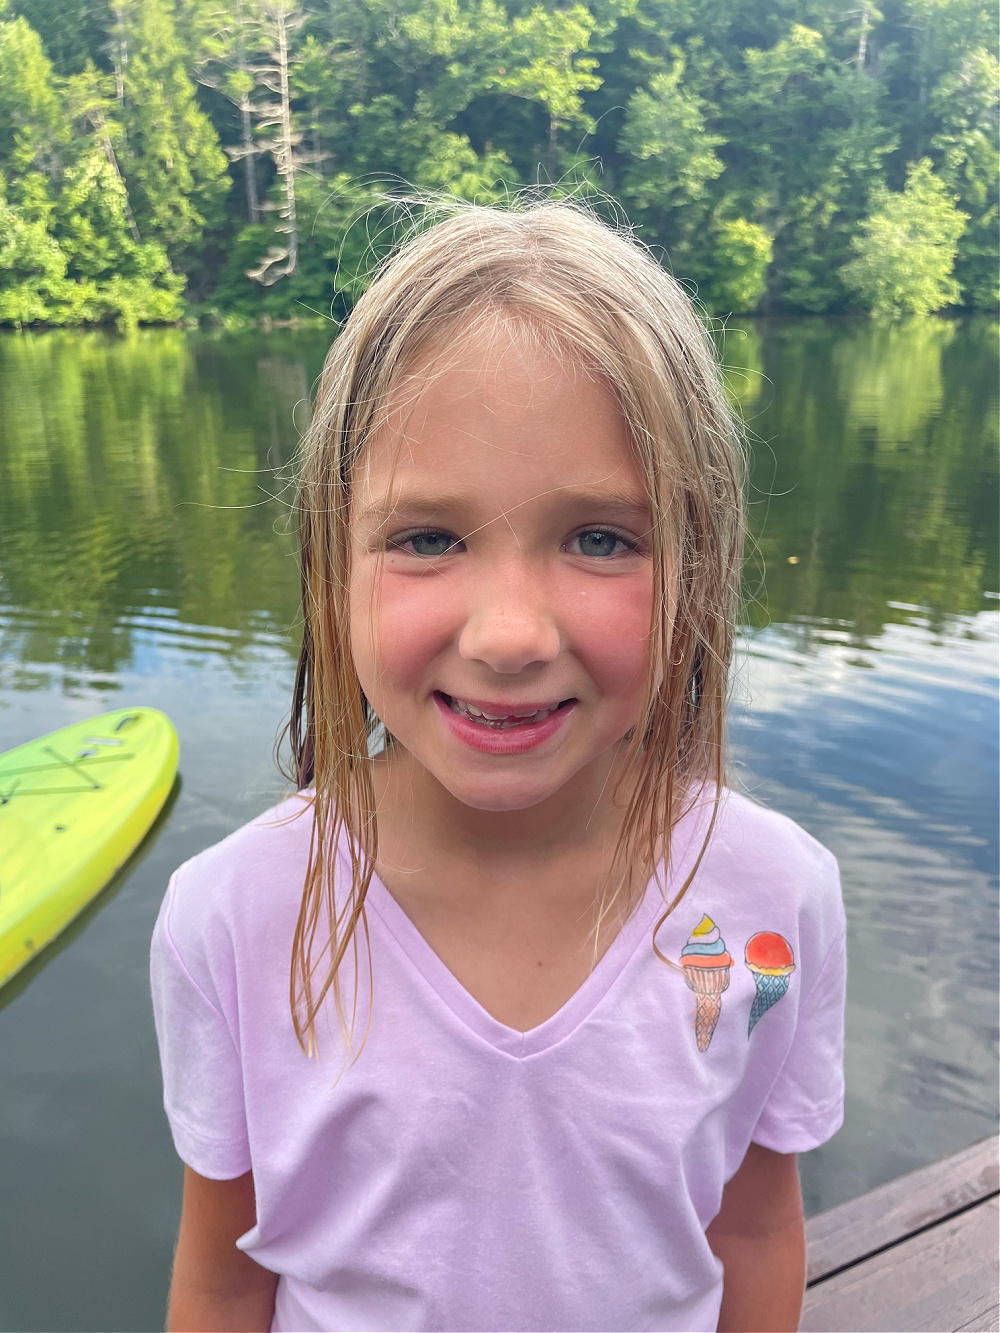
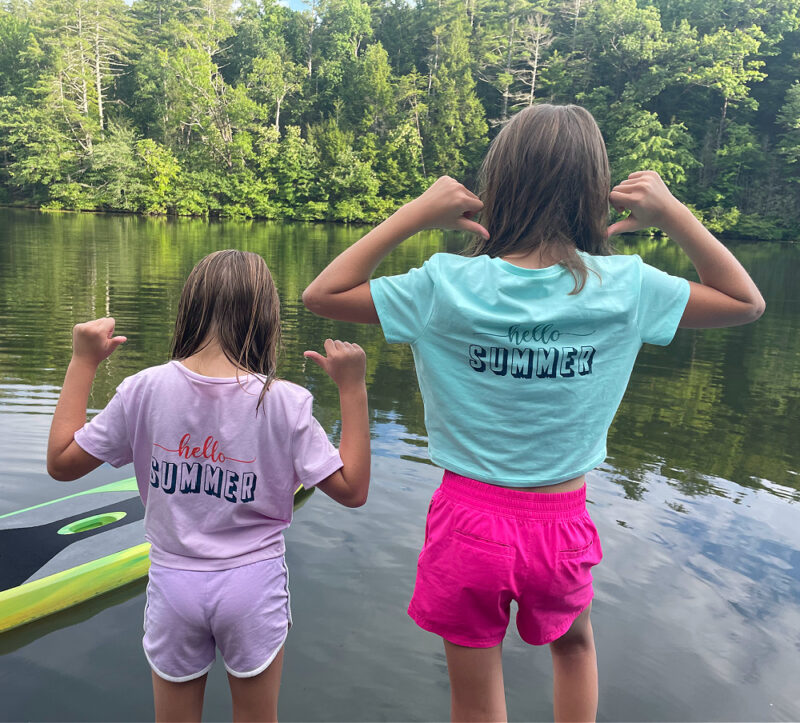
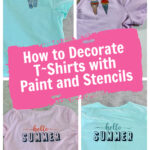
Since these t~shirts were for my granddaughters, my only requirements were the size and the colors. Annabelle requested blue and Lilah wanted purple.
Choose Your T-Shirts
I found these t~shirts at Target. They were $5.00 each.
- Choose a t~shirt that is cotton or a cotton blend.
- Choose a fabric with a smooth finish.
- Keep in mind how the color of the t~shirt will work with the colors of paint you want to use.
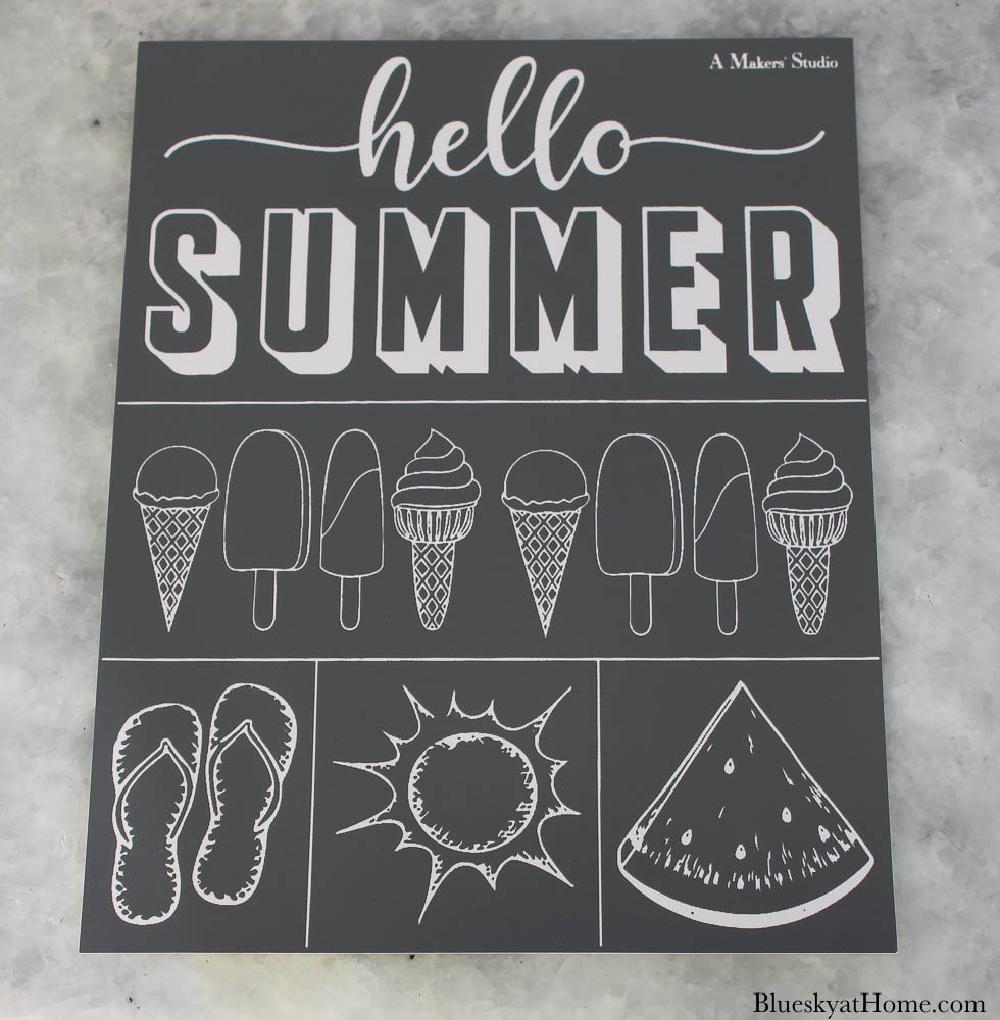
Chose Your Stencil
When I saw this particular stencil design, I knew it would be perfect for girl t~shirts.
This is a tri~mesh adhesive stencil from A Makers’ Studio. I love these stencils for their extensive design choices, their quality, and their ease of use.
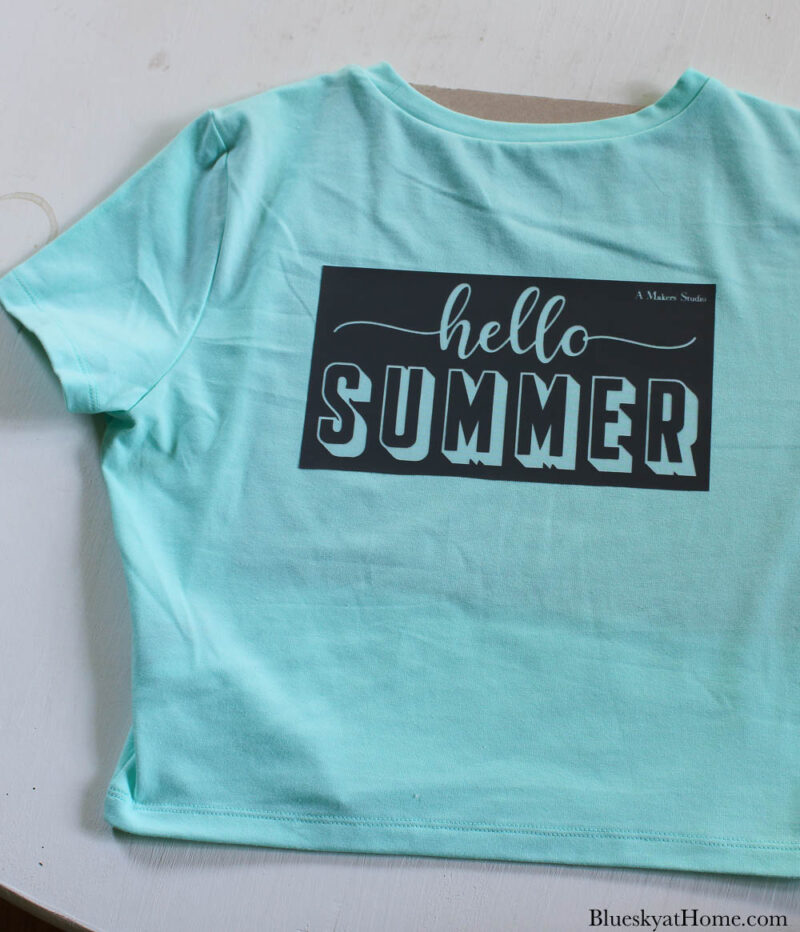
This new Hello Summer stencil, like all A Makers’ Studio stencils, has so many different ways to be used.
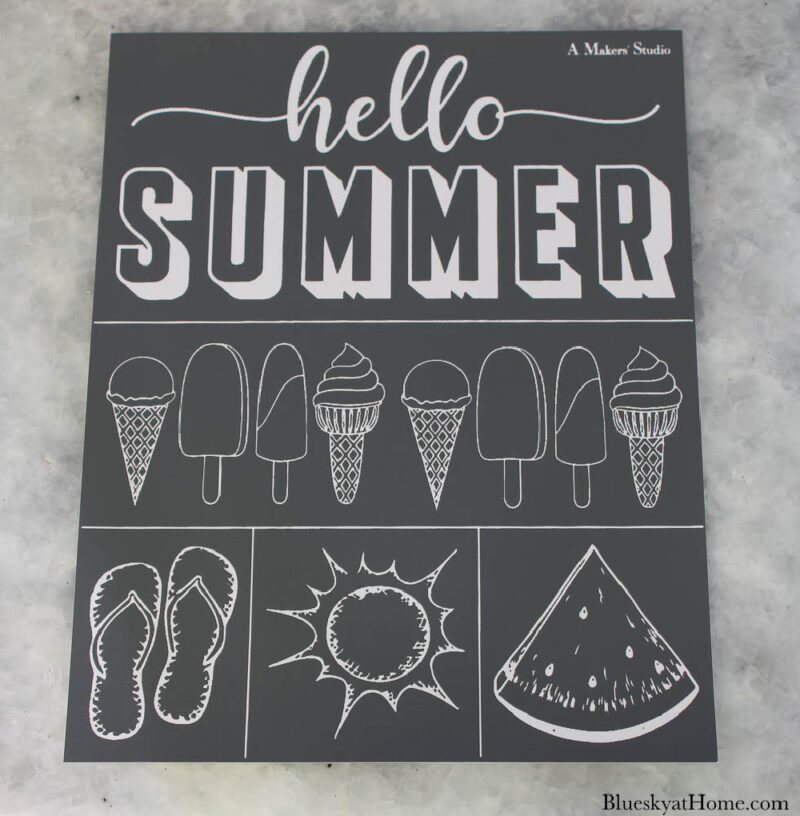
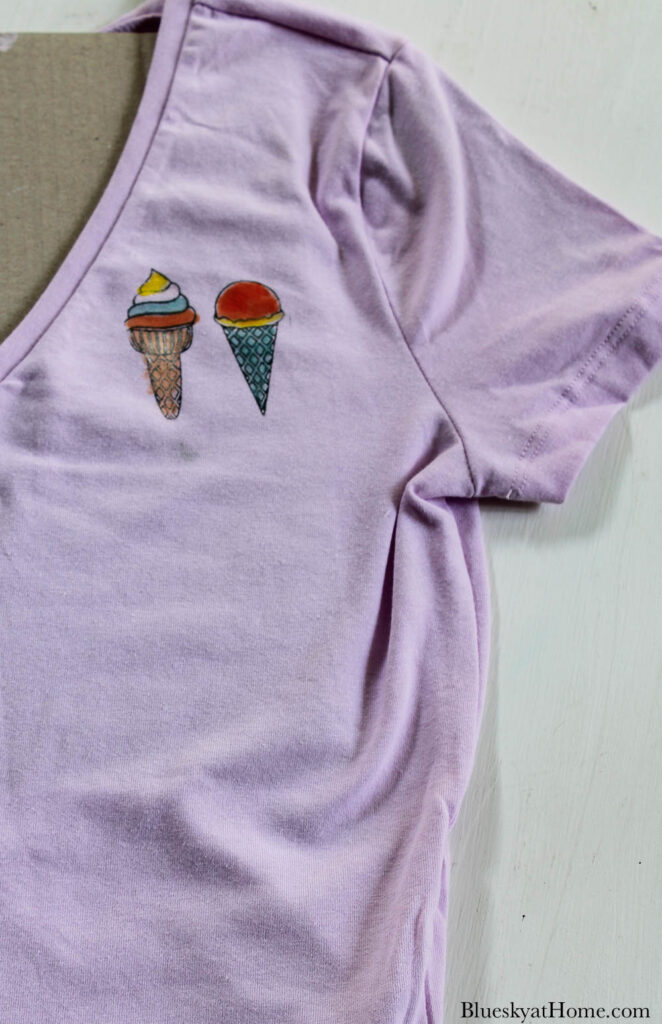
I’ll be using the “hello summer”, part of the ice cream cones, and the flip-flops for these t-shirts.
See the lines on the stencil? You can use those to cut apart the designs.
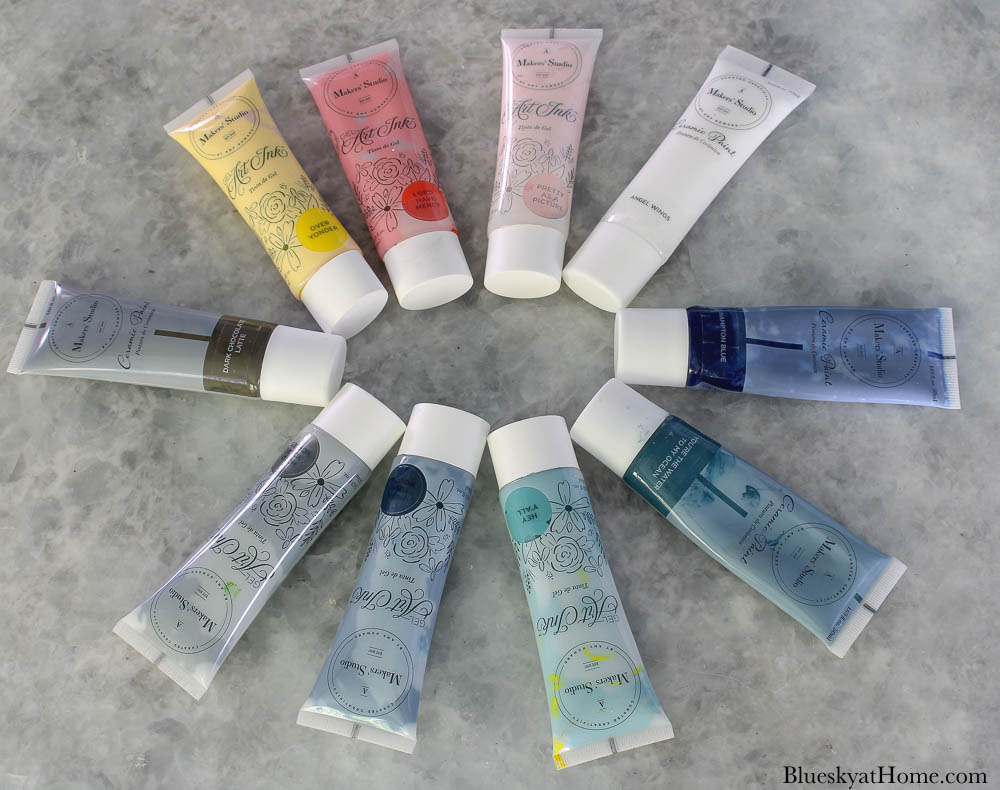
Choose Your Paint
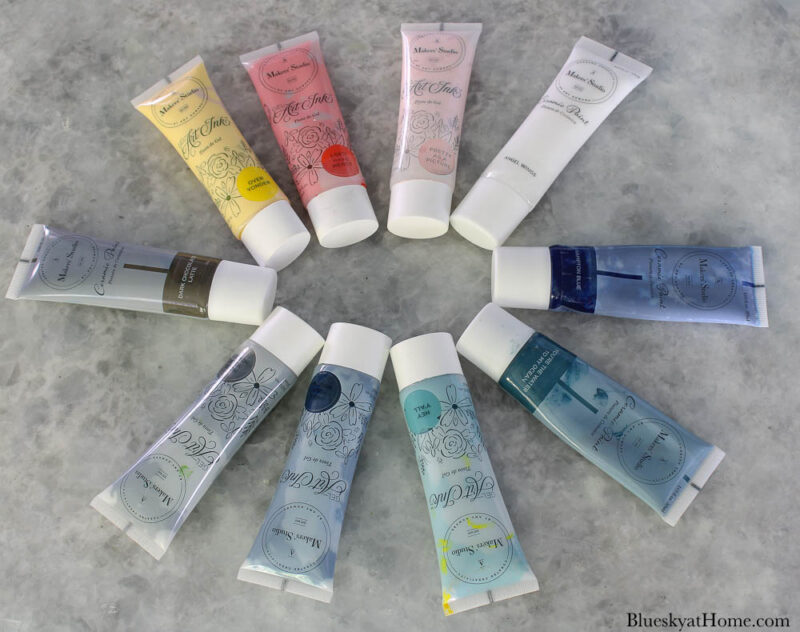
There are all types of paint that can be used with stencils: ChalkArt, Ceramic Paint, and Gel Art Ink.
There are fabric paints and acrylic paints. I choose to use Gel Art Ink paint. It lays rich, permanent color on fabrics, apparel, upholstery, and most soft surfaces. It can also be used on paper.
The colors are vibrant. The consistency is “queeze~able”. It goes a very long way.
What I love best is its versatility. As you will see, it can be used with stencils and made into a watercolor.
NOTE: Some of the paint tubes below are Ceramic Paint, which also comes in tubes.
Here are a couple of projects with Ceramic Paint:
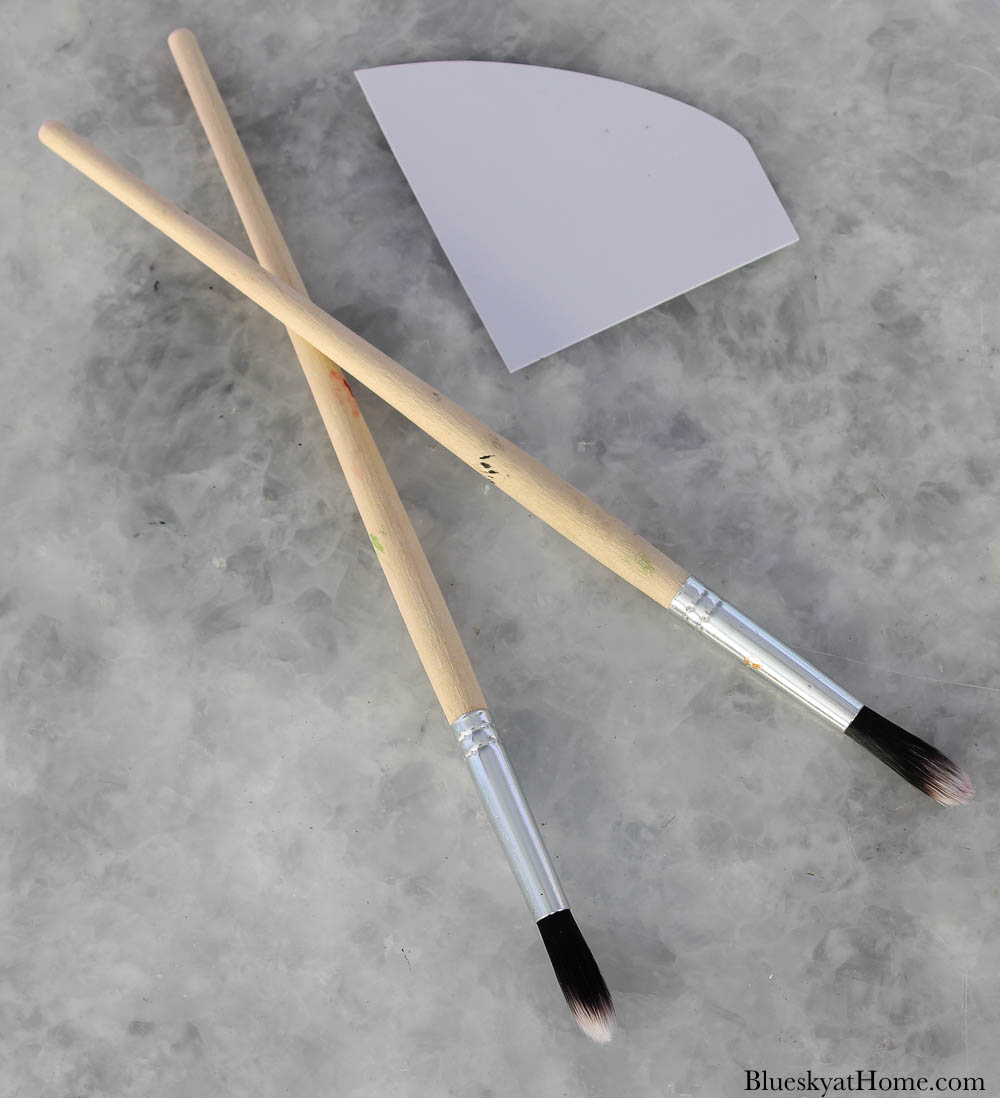
Other Supplies You Will Need
- a plastic scraper for applying the Gel Art Ink to the stencils
- artist brush for using the Gel Art Ink as watercolor

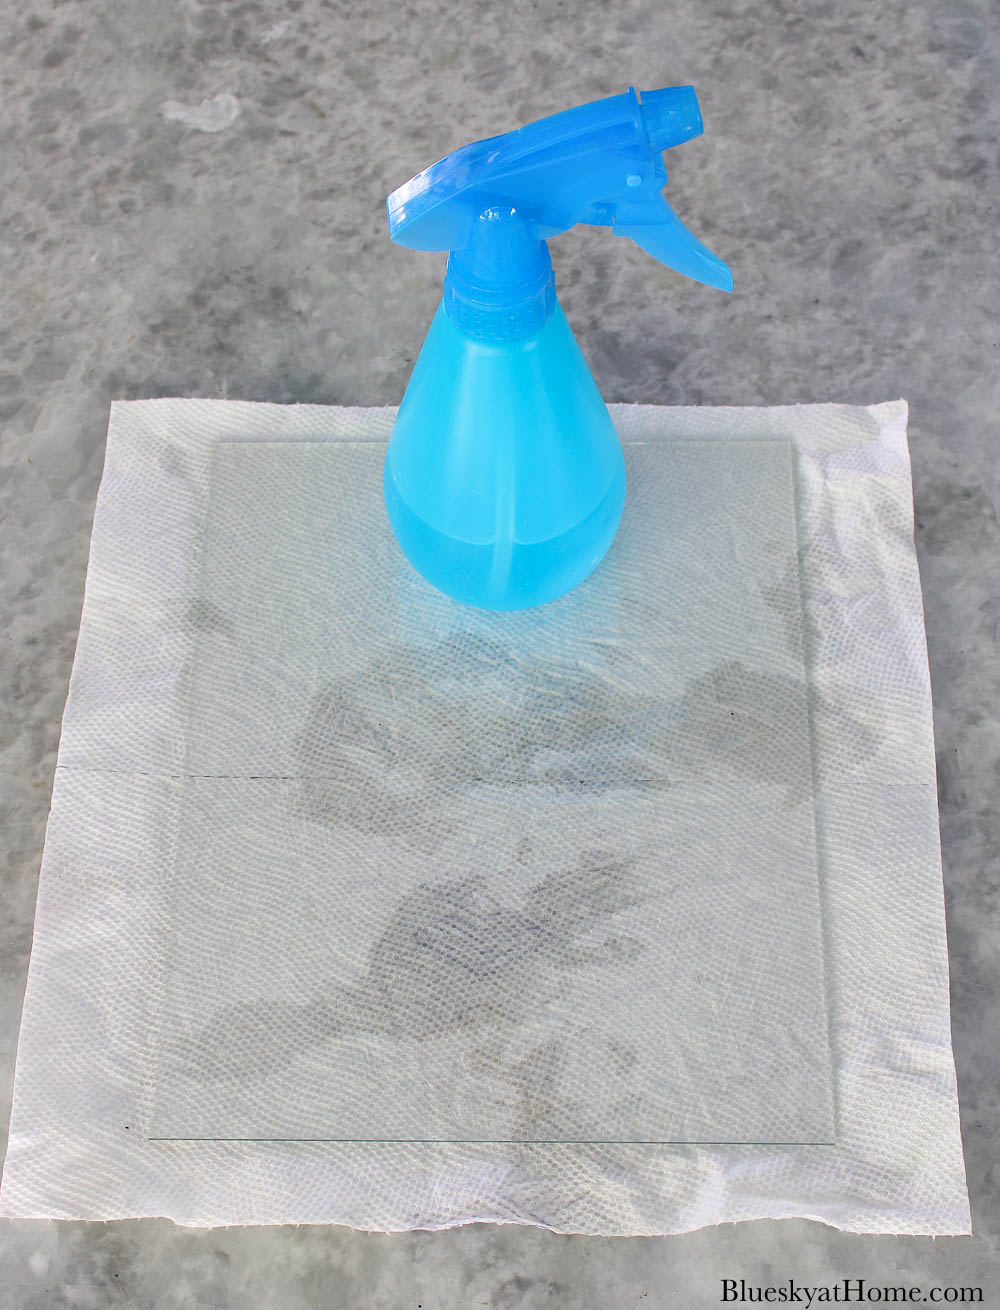
- water, preferably in a spray bottle
- a piece of glass for mixing watercolor. I used a piece from an old frame.

Stenciling Your Designs
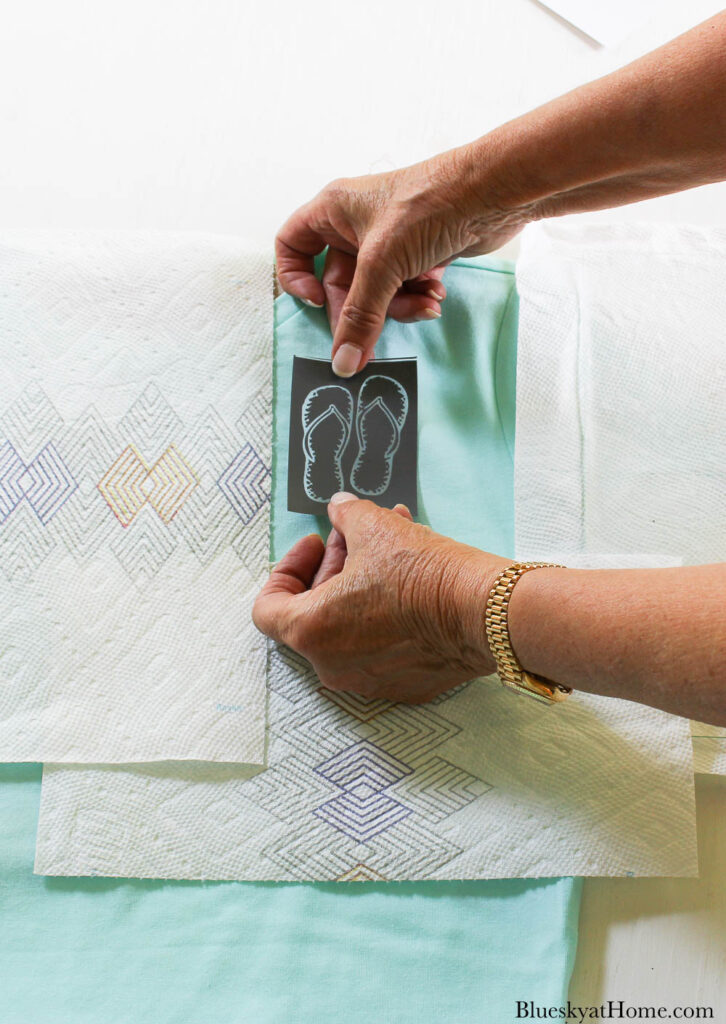
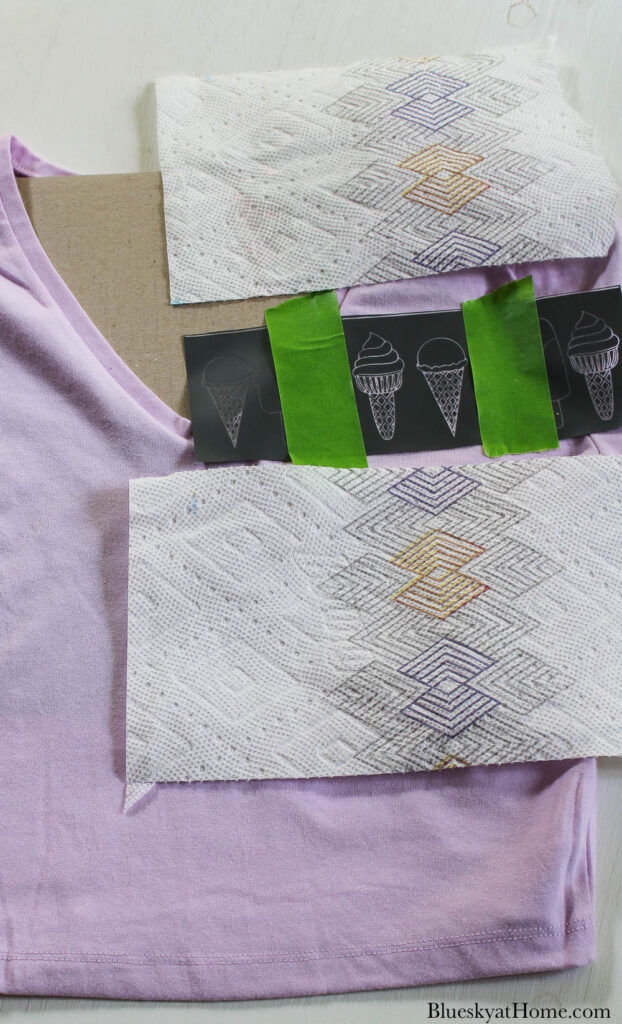
Step 1 ~ To protect the fabric, place a piece of cardboard inside the t~shirt. Smooth the t~shirt over the cardboard.

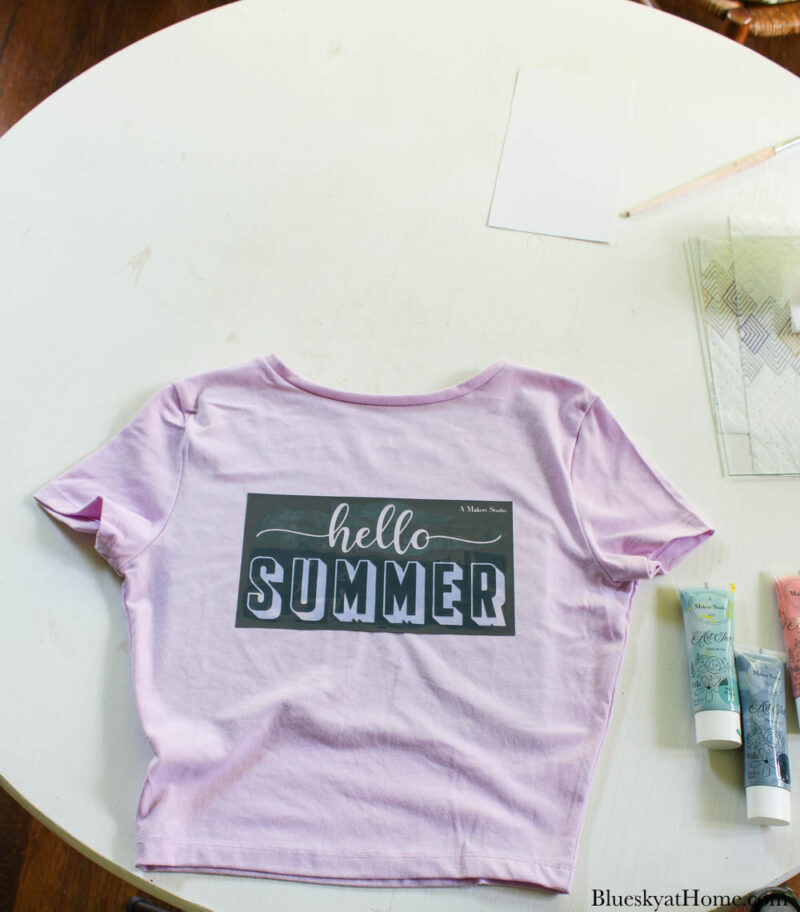
Step 2 ~ Cut out your stencil. Remove the paper backing (keep it for storing your stencil) and place the stencil where you want it. Smooth the stencil on the fabric.
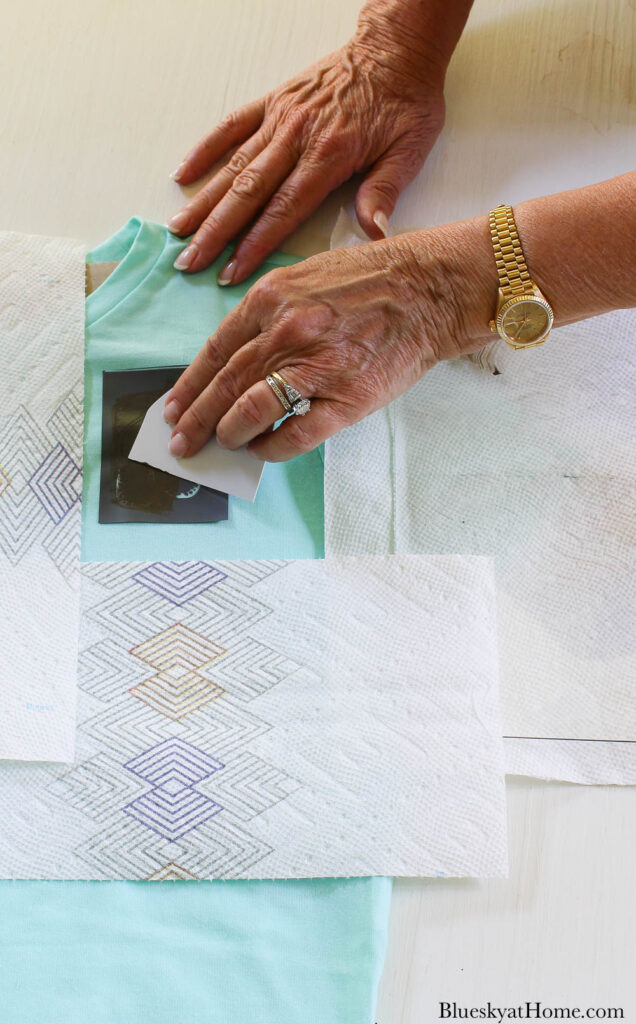
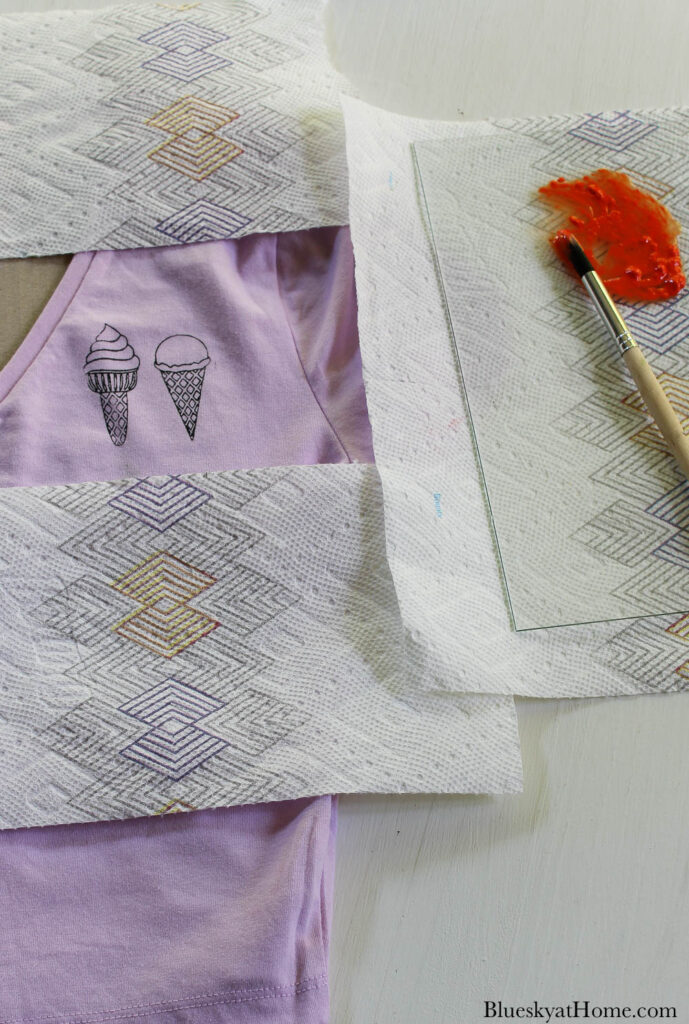
Step 3 ~ Squeeze out a small amount of Gel Art Ink onto the plastic scraper and place it on the stencil. Spread the paint across the stencil, pushing it down into the stencil. I used a grey-brown color.
Here’s a more in~depth tutorial on stenciling.
TIP: It is best to work quickly.
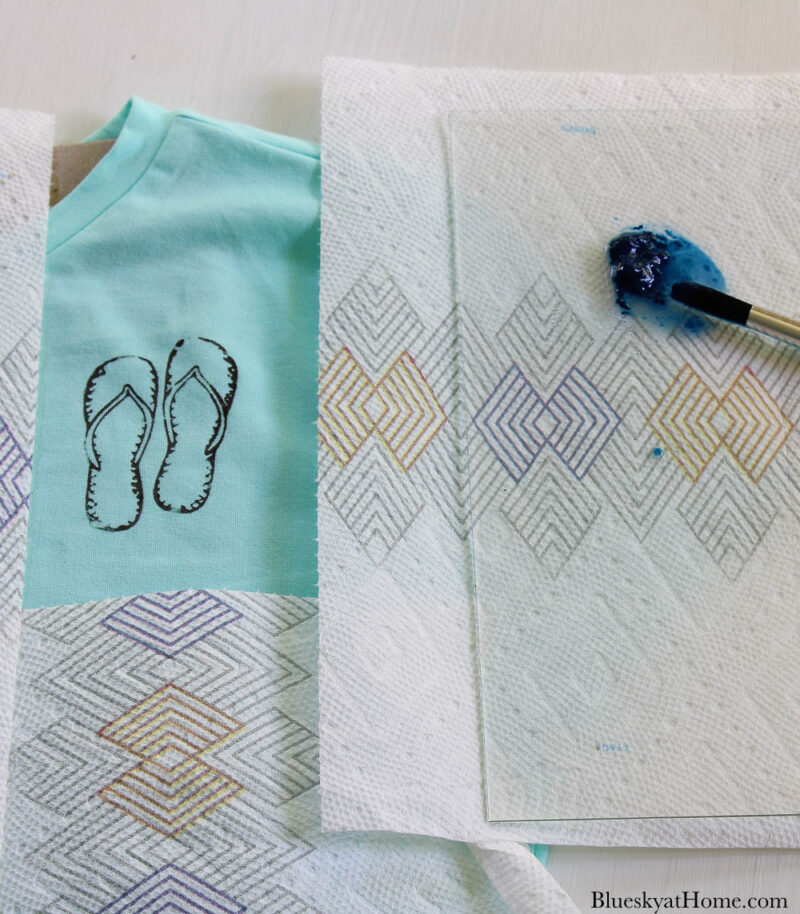
Step 4 ~ Gently remove the stencil by lifting a corner and peeling it back from the fabric. Allow the Gel Art Ink to dry for about 20 minutes.
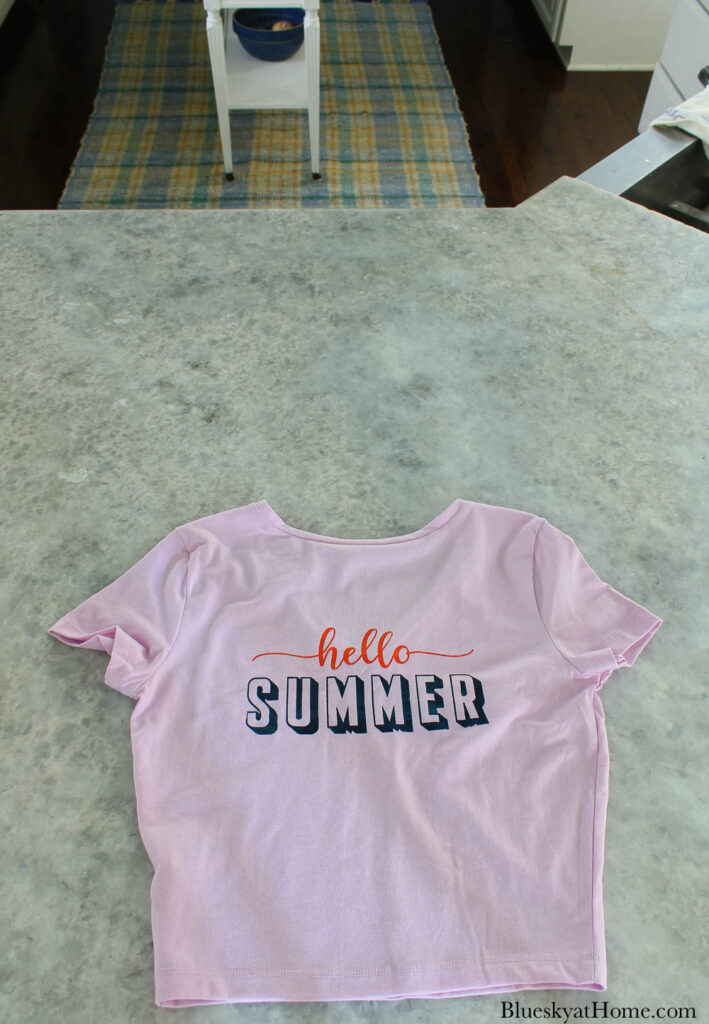
I repeated the process with the second purple (really lavender) t~shirt.
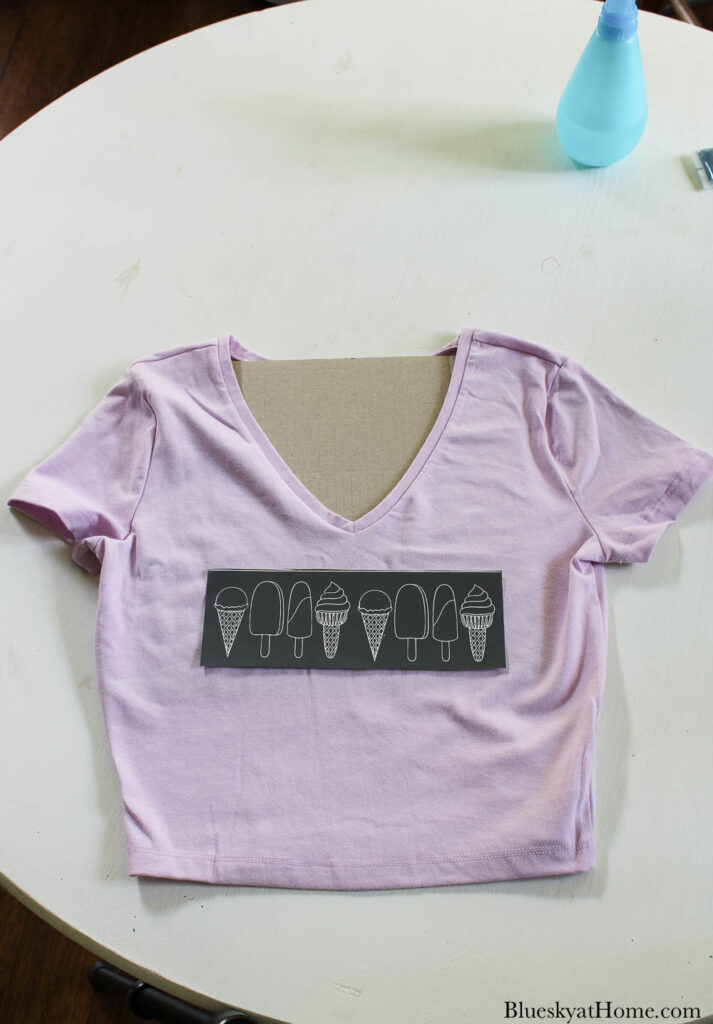
I didn’t want to cut the strip of ice cream cones, so I just used Frog Tape to block off the ones I wanted to use.
NOTE: Because I’m a messy DIYer, I used pieces of paper towel around the stencil to protect the t~shirt.
Aren’t those cones the cutest?
Now I was ready to use the second stencil on the back of the t~shirt. For the blue t~shirt, I used two shades of blue: light blue ~ Hey Y’All and dark blue ~ Hush Your Mouth
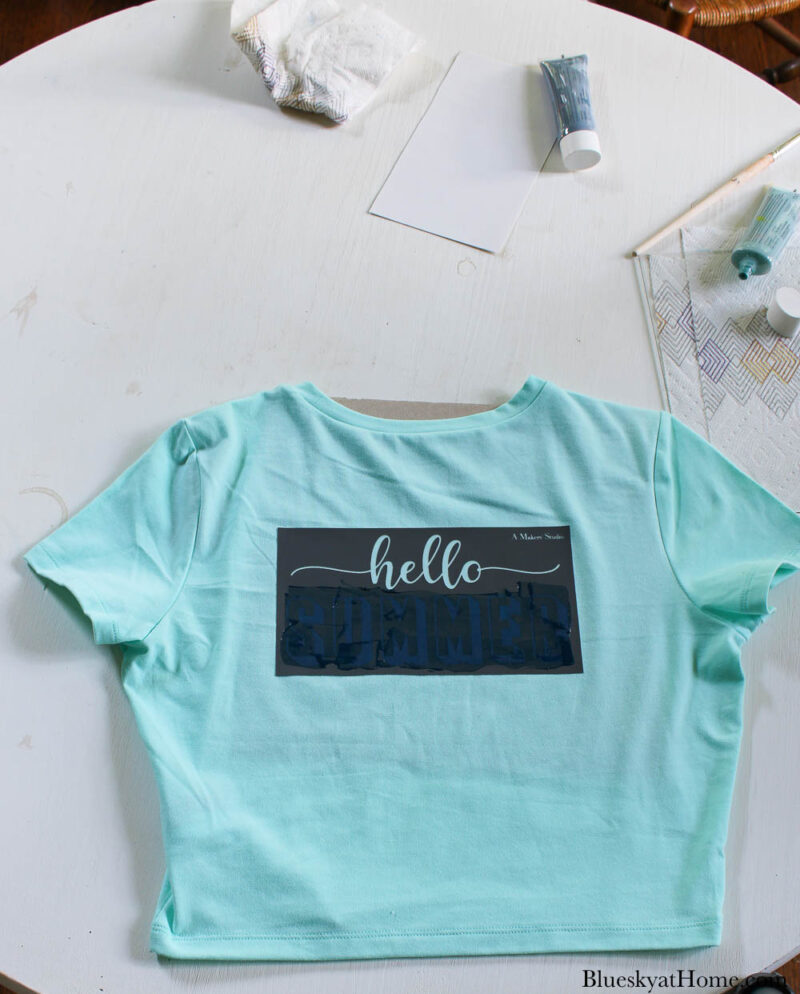
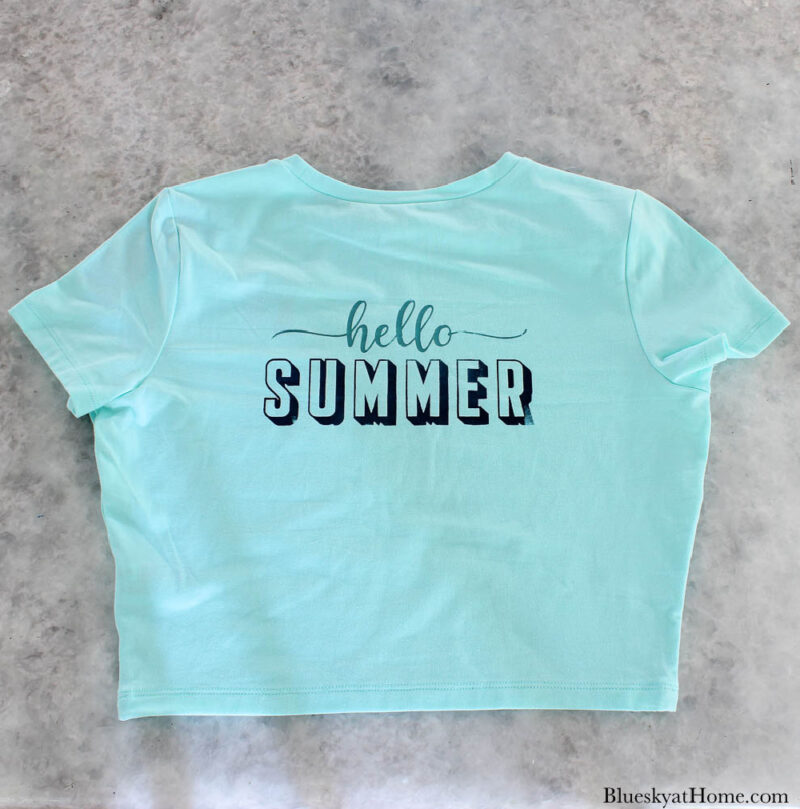
Repeat for the second t-shirt: again, I used dark blue ~ Hush Your Mouth.
For “hello”, I used an orange ~ Lord Have Mercy.
Decorating Your T-shirts with Watercolor
Another great thing about Gel Art Ink is that you can use it like watercolor. By adding more water, you can change a color to make it lighter.
You can mix the Gel Art Ink paints to make more colors, like red and white to get pink.
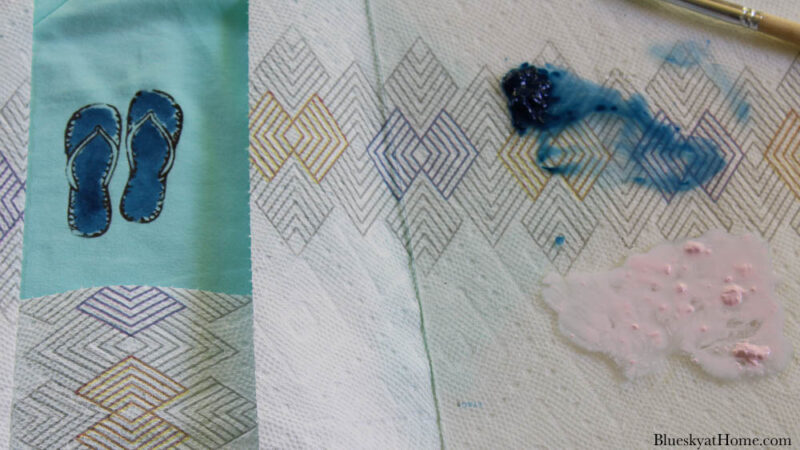
For coloring the blue flip-flop stencil:
Step 1 – Squeeze out about 1/2~inch of Gel Art Ink onto your piece of glass. Again, I used a dark blue.
Step 2 – Spray water on the paint. Use your artist brush to mix the paint and the water until it is the consistency of watercolor.
Step 3 – Use your artist brush to dab the paint into your stencil.
TIP: On fabric, dabbing rather than brushing is the way to apply the paint. It’s better to have less paint than too much.
TIP: You can use the flat side of the artist brush or the tip of it, depending on the size of the area you are painting.
Step 4 ~ I like to let the Gel Art Ink watercolor dry for at least 1 hour.
For the ice cream cone stencil:
For the ice cream cones, I used 5 different colors:
- light blue ~ Hey Y’All
- orange ~ Lord Have Mercy
- bright yellow ~ Over Yonder
- pale pink ~ Pretty as a Picture
- a mix of orange and white Well, I Declare for one of the cones
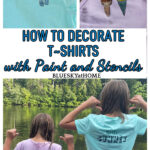
Modeling the Decorated T-shirts
I made these decorated t-shirts for my beautiful granddaughters. They were spending a couple of days at their other grandparents’ lake house in Northern Georgia, so that’s where I mailed the t-shirts.
I’m thrilled that the girls modeled the t-shirts on the dock.
Annabelle, 11, our fearless and wise child, is on the left. Lilah, 8, our little blondie, is on the right.
The girls never miss a chance to show off their humor and their best sides.
I hope that you see how easy it is to decorate t-shirts with paint and stencils. It’s a really fun DIY project.
Want more summer craft ideas?
- 11 Fun Summer Crafts to Stay Busy and Creative
- 10 Great Ideas for Summer DIY Projects
- Easiest Way to Paint Glass for Summer Decor
Supplies for Decorating T-shirts
- t-shirts, preferably cotton or blend. They should have a smooth texture.
- tri-mesh adhesive stencils of choice
- fabric paint in colors of choice
- plastic scraper
- artist brush
Let me know if you like this project. Will you try it? Be sure to PIN it.


First, what a wonderful grandma to send them t-shirts. Second, such a cute idea and how nice of them to wear them. I remember my grandma making things for us and only at a certain age did I want to wear it. But that was back in the early 70’s and it was the thickest polyester she could find. Good fabric for rough housing kids but not for the San Antonio summer heat. We’d get heat rashes. LOL! Thanks for sharing this on Farmhouse Friday and bringing back some great memories. Those girls are quite the models and so adorable.
Cindy, you’re so sweet. That’s so funny about thick polyester. The girls do like to model.
SO fun! And yes, those models are the cutest! 🙂 What a wonderful grandma you are! Love your picture with the puppy too. Hope you’re all having a lovely summer!
You’re so sweet, Barbara. Thanks for the feedback.