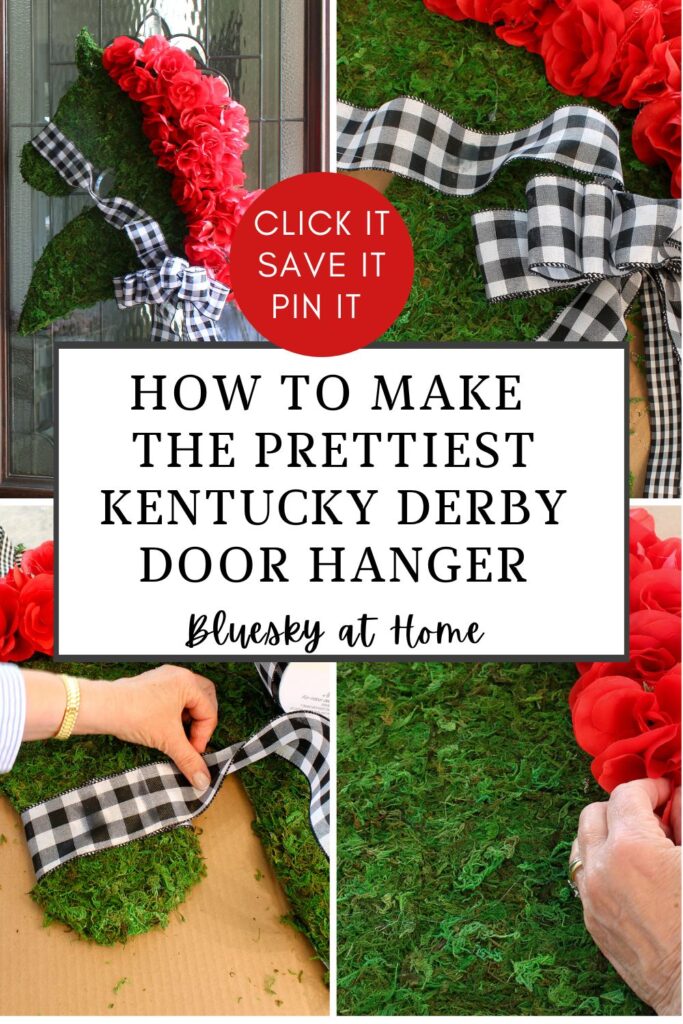
How to Make the Prettiest Kentucky Derby Door Hanger
Kentucky Derby season has arrived. Our 10th Kentucky Derby party is coming up and I can’t think of a better way to welcome our guests to our Kentucky Derby party than with the prettiest Kentucky Derby door hanger.
It’s time to get into the spirit of this iconic event with some fabulous decorations.
This door hanger reflects the charm and excitement of the most famous horse race in history. The first Saturday in May at Churchhill Downs is a once-in-a-lifetime experience, We were there in 2001 and it is still one of the highlights of my life.
For the 150th Kentucky Derby, I wanted a new door hanger to welcome our guests.
Creating a Kentucky Derby door hanger is not only a fun and creative project, but it’s also a fantastic way to set the tone for your gathering.
As your guests approach your home, they’ll be greeted by an iconic horse head that evokes the hero of the Kentucky Derby – the beautiful thoroughbred horses that run the race because they love to run.
It’s like giving them a sneak peek of the festivities that await them inside!
Beyond just adding to the aesthetic appeal of your party, a welcoming decoration like a Kentucky Derby door hanger serves a practical purpose too. It lets your guests know they’re in the right place.
It adds that special touch that makes your party stand out and ensures everyone feels excited and welcomed right from the start.
Even before you hand your guests their first mint julep, they will be ready to enjoy the Derby festivities.
So, if you’re ready to infuse your Kentucky Derby party with some DIY charm and Southern hospitality, join me as I show you how to make a door hanger that’s sure to make a statement and get everyone in the Derby spirit!
Are you planning a Kentucky Derby party is year? Then try your hand at making a door hanger to celebrate the 150th anniversary of our truly American love of horse racing and horses.

I’m pleased to share this Kentucky Derby door hanger project on Creative Craft Day. Donna of Modern on Monticello is our hostess this month. Welcome to Bluesky at Home. I’m so happy you are here.
Types of Kentucky Derby Door Hangers
To welcome your guests, a Kentucky Derby door hanger could take many forms:
- DIY Horse Shoe Wreath: Create a horseshoe-shaped wreath using faux or real horseshoes adorned with silk flowers, ribbons, and miniature horse figurines. Hang it on your door to symbolize good luck.
- Derby Hat Door Hanger: Fashion a door hanger shaped like a giant derby hat using lightweight materials like foam board or cardboard. Decorate it with colorful ribbons, fabric flowers, feathers, and even faux jewels to capture the flamboyant style of Derby fashion.
- Jockey Silk Banner: Craft a banner resembling the vibrant jockey silks worn during the race. Use colorful fabric or felt to create the banner and embellish it with numbers, patterns, and trimmings representing different stables.
- Racing Silhouette Cutout: Cut out silhouettes of racing horses and jockeys from sturdy cardstock or wood. Paint them in bold colors and attach them to a wooden or metal hoop to create a dynamic door hanger that captures the excitement of the race.
- Derby Garland Door Decoration: String together miniature derby hats, horseshoes, and horse-shaped charms to create a festive garland. Hang it horizontally across your door for a playful and whimsical touch.
- Winning Ribbon Door Hanger: Craft a large ribbon rosette reminiscent of the winner’s garland presented to the victorious horse. Use satin or grosgrain ribbon in traditional Derby colors like red, blue, and yellow, and add embellishments like faux flowers or a miniature trophy for extra charm.
- Kentucky Derby Chalkboard Sign: Paint a wooden plaque or use a chalkboard to create a customizable door hanger. Write festive messages, race predictions, or welcome greetings in chalk, allowing you to change up the design for different occasions or guests.
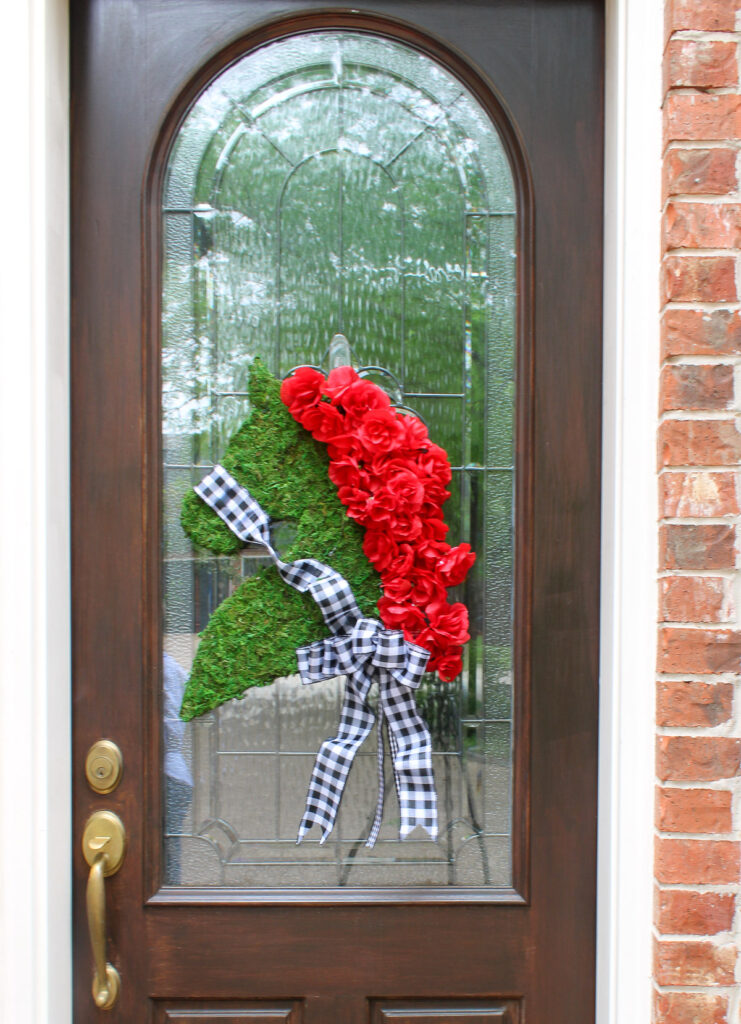
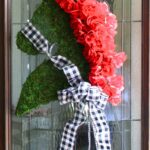
I chose to create a horse head silhouette with faux red roses. Now I’m going to show you how to make this Kentucky Derby door hanger to welcome guests to your home.
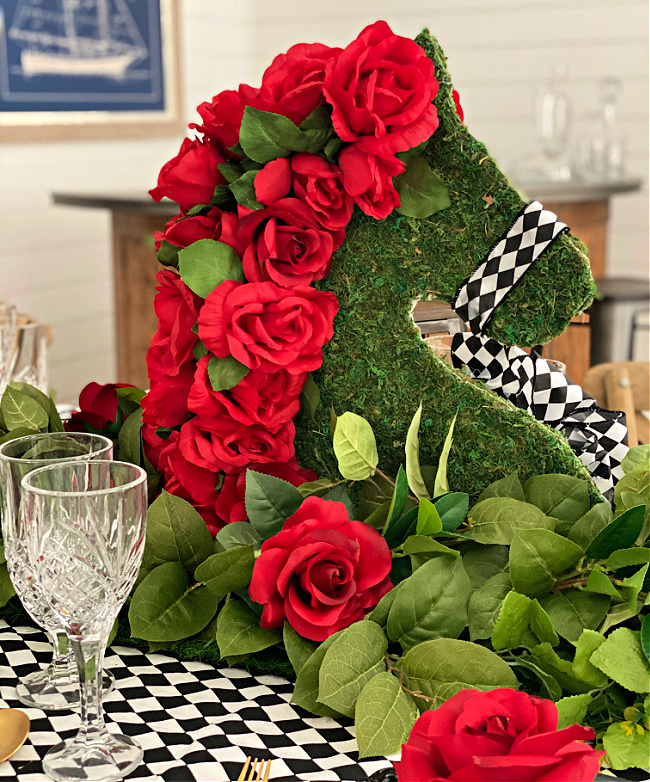
My Kentucky Derby Horse Head Inspiration
To give credit where credit is due, I have to thank my friend Chloe of Celebrate and Decorate for the inspiration for my horse head door hanger.
A few weeks ago, Chloe shared her horse head Kentucky Derby centerpiece. Isn’t it beautiful?
I already had a horse decoration to use as a centerpiece or as a decoration on our mantel.
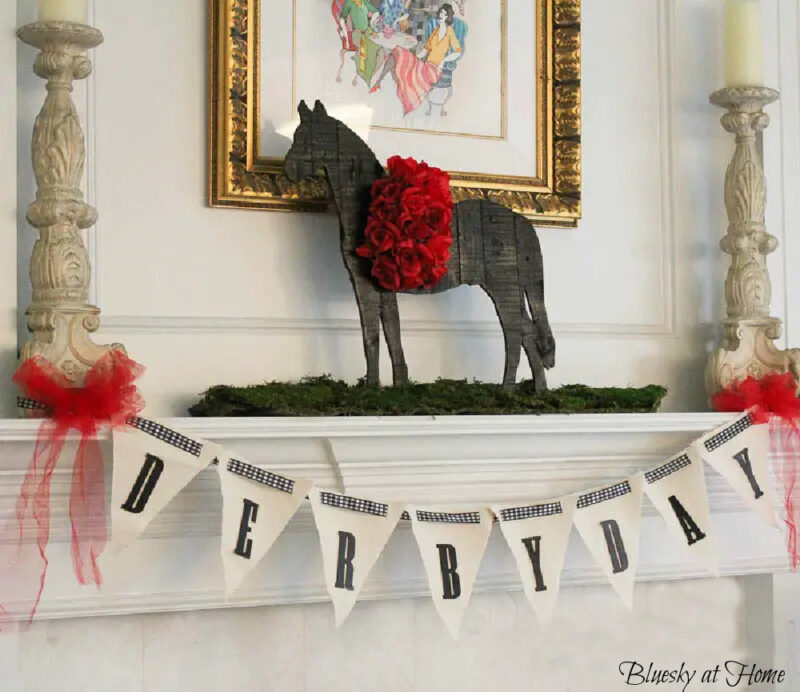
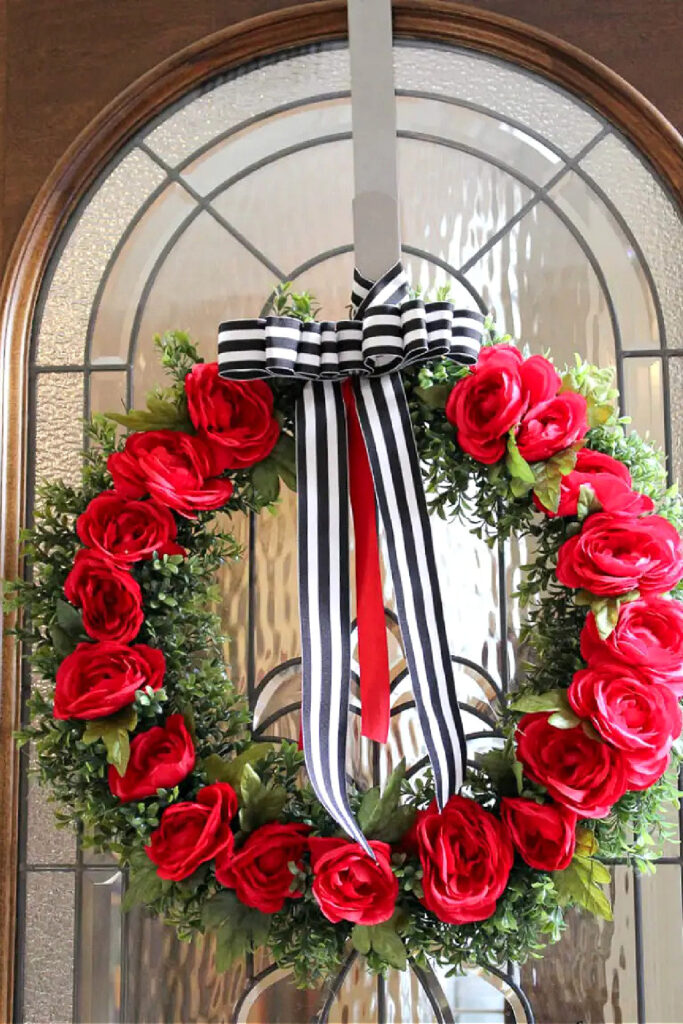
For a few years, I used this wreath on our front door. I was ready for a new front door hanger.

When I saw Chloe’s centerpiece, the idea to use the horse head as a front door hanger was born.
Supplies for the Horse Head Door Hanger
This post contains affiliate links to products used to create this project. If you should order any item from this site, I may receive compensation, but you do not pay a penny more. Your purchase is greatly appreciated as it helps support the continued publication of this site.
- Wood Horse Head: I ordered the horse head from Etsy. It came in several different sizes. I chose the 2-foot tall size and the 1/8-inch thickness. It was the perfect size for our front door.

- Adhesive-Back Sheet Moss: I had some scrap pieces of sheet moss but not with adhesive. You could use spray adhesive to attach the sheet moss to the horse head (I’ve done that for other projects.), but I thought an adhesive-backed option would be so much easier. I found this option online and it worked like a charm. A package of this sheet moss comes in 5 1/2-inch X 51 inches long. (It’s made at a family business in Vietnam. The head of the family business is Lulcy and she wrote the sweetness note.) For the horse head project, you will need 2 packages of moss. You will have some left over for other projects.

- Electric Drill: To make a door hanger, you will need to drill small holes in the top of the horse head.
- Faux Roses: I’ve had these roses for several years and they have been used many times.
- Glue Gun and Glue Sticks: You will need a glue gun to glue the faux roses to the horse head.
- Ribbon: I used two widths of black and white check ribbon that I already had; a narrow 1/2 one for hanging the horse head and a 2 1/2-inch width for making a bridle.

- Small, Sharp Scissors: They are for trimming the sheet moss. These are my very favorite when you need to get into small spaces.
- Sewing Scissors: For cutting the ribbon.
Steps to Making a Horse Head Kentucky Derby Door Hanger
There are four main steps to making your horse head Kentucky Derby Door hanger. I would allow 2 – 3 hours total for this project.
Step 1 – Covering the Horse Head with Sheet Moss
Decide which direction you want the horse to face. This will be the front of your horse head.
I faced my horse head to the left because that’s the side of the horse you always approach and mount. I placed it on a few sheets of newspaper to protect our kitchen counter.
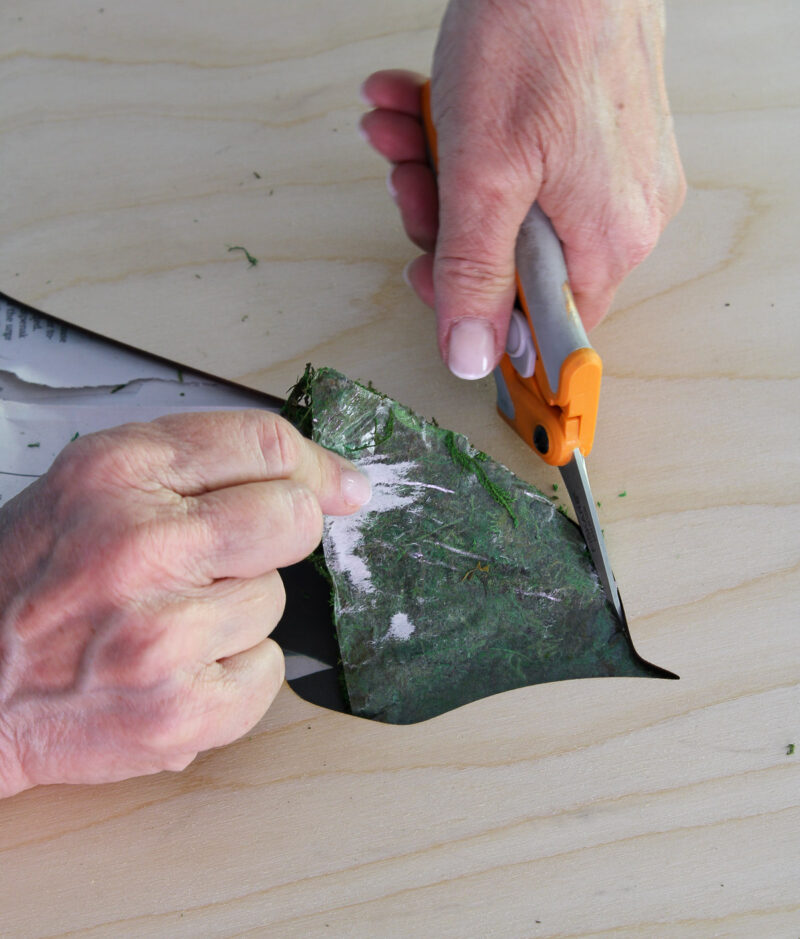
The great thing about this adhesive-backed sheet moss is the white backing. You don’t have to use any type of glue or spray adhesive.

- Separate a corner of the white backing from the layer of moss. Pull the white backing away from the moss several inches at a time.

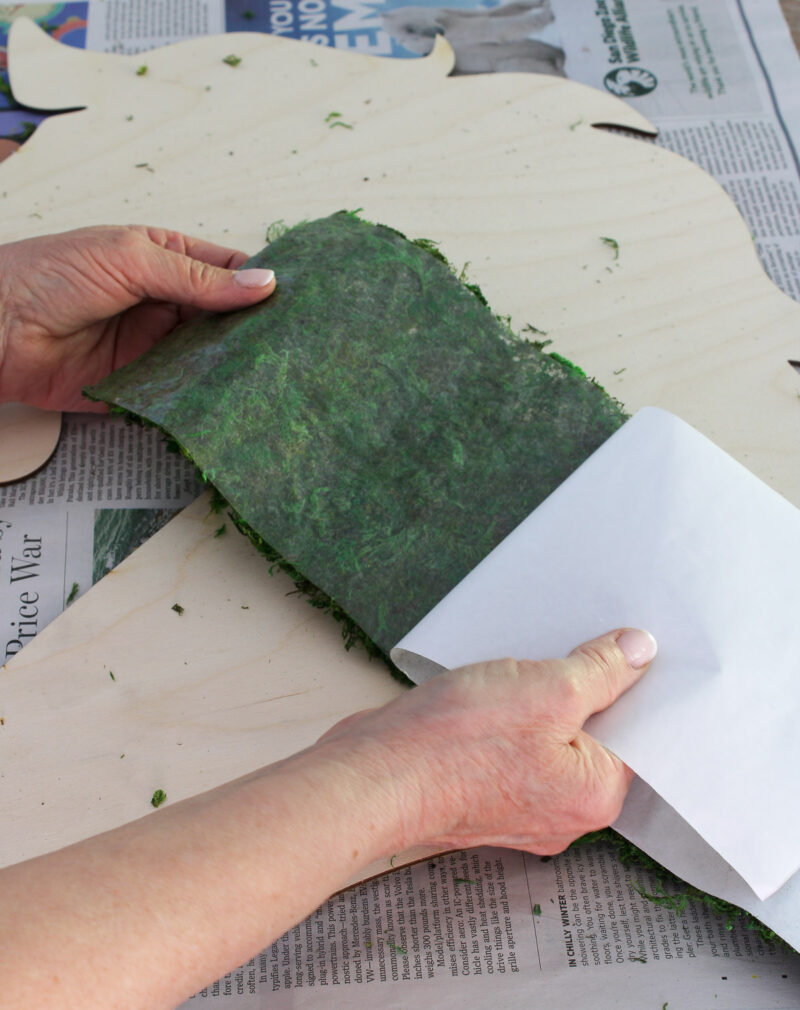
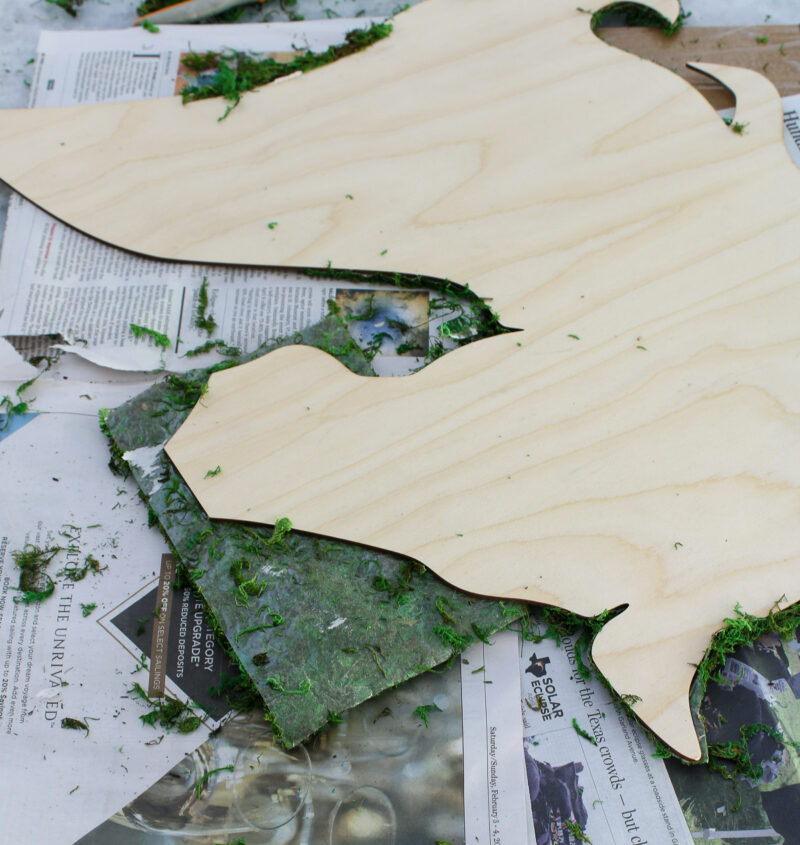
- Start with a long piece of sheet moss. Cover a long section of the horse head first, then fill in the sides and smaller areas, like the ear and the mane.

- Press down on the moss to adhere it to the wood.
- Slowly continue to pull the backing away from the moss.

TIP: Don’t let the exposed adhesive on the back of the moss touch your work surface. It will stick.
- When you’ve covered a portion of the horse head, cut the excess moss close to the edge of the horse.
- Use the small, sharp scissors to cut off extra pieces of the moss.
TIP: Keep the white backing. You can use it to put extra pieces of moss on the backing.
Place those pieces on the white backing to use to fill in small areas of wood.

- Continue covering the wood horse head with pieces of moss.

- You can “roll up” the moss and press against the edge of the wood.
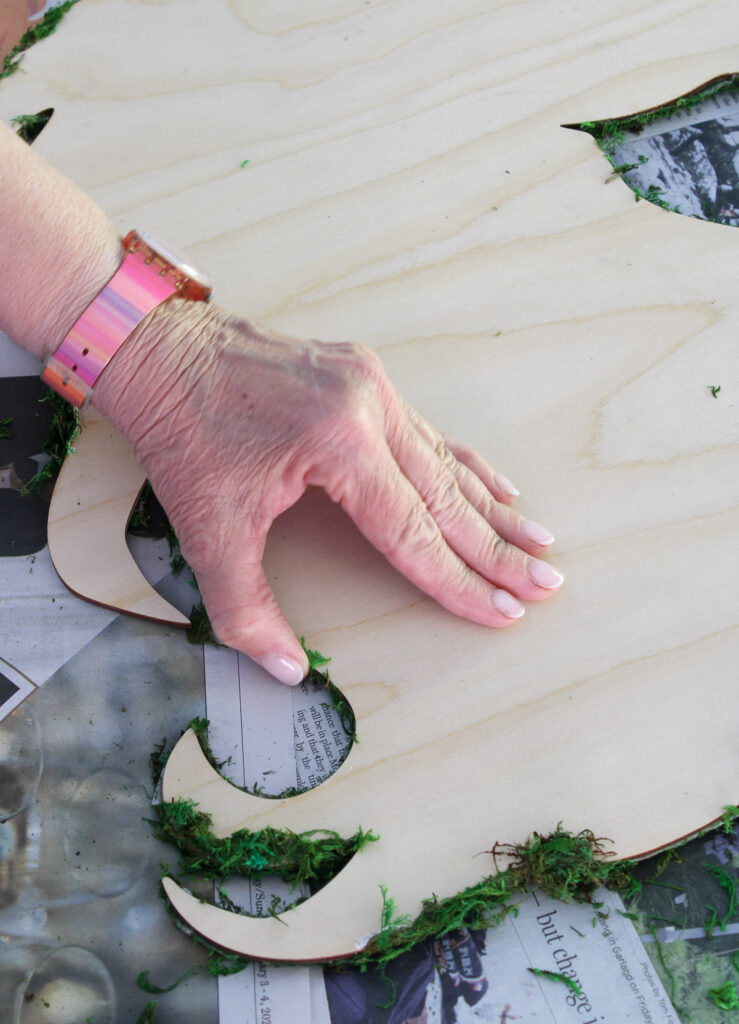
Once you have finished covering the front of the horse head, turn it over and repeat on the back side of the horse head.
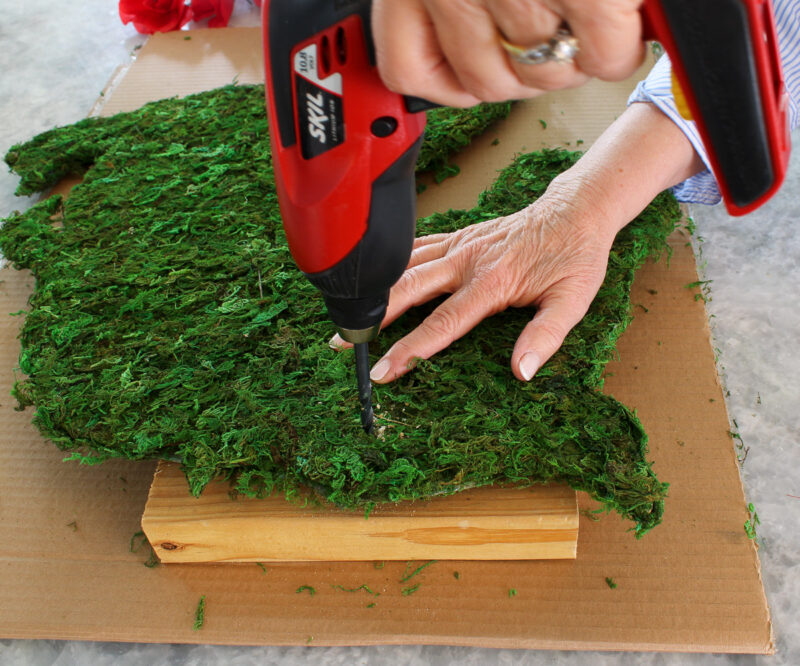
Step 2 – Making Holes for the Hanger
Once you have covered the horse with moss on both sides, you are ready to add the hanger.
- Decide where you want to place holes for the ribbon hanger.
- Place the top of the horse head on a piece of wood for support.

- Place a large drill bit in your electric drill. Place the drill bit on the horse head and drill a hole. You may have to pull back the moss. Repeat with a second hole about 3 inches from the first hole.
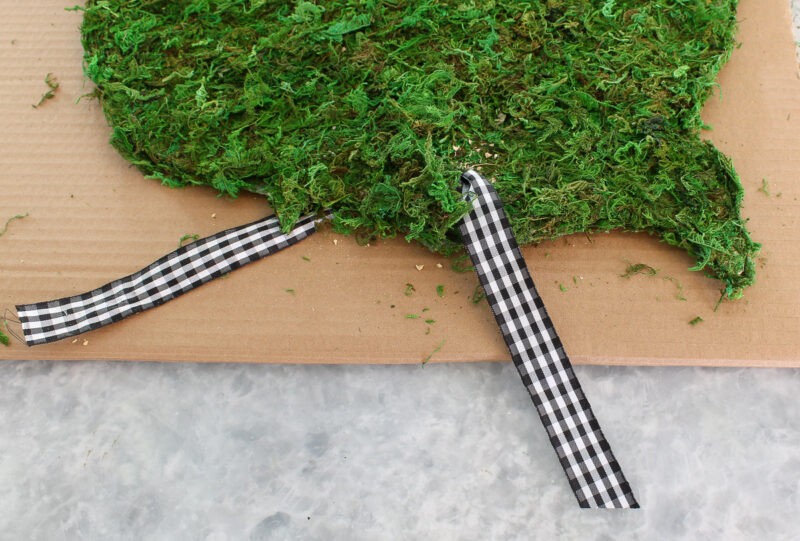
- Use a wood skewer to push the 1/2-inch ribbon through the holes.
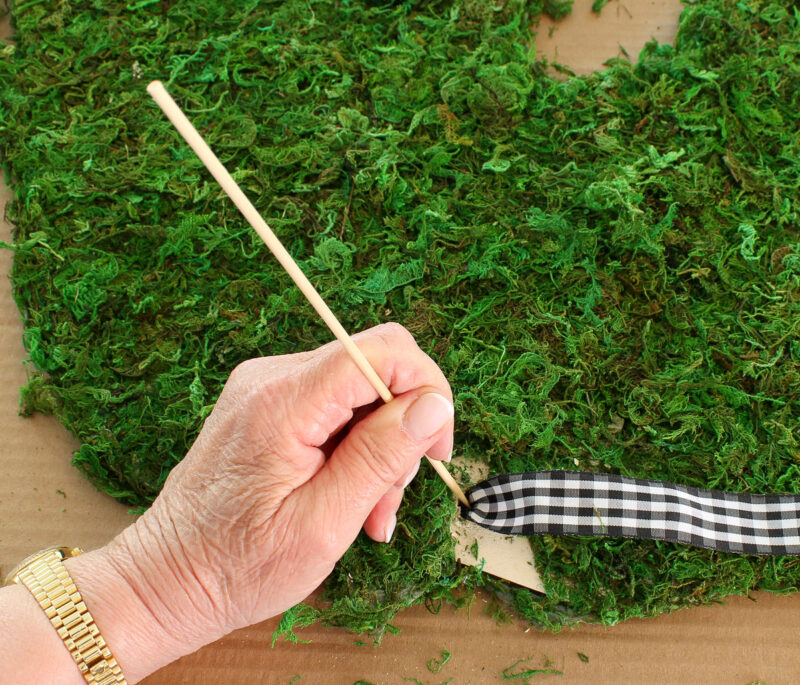
- Pull the ribbon to the back of the horse head and cut off the ribbon with about 8 inches of excess.

- Re-glue the moss to cover the ribbon.
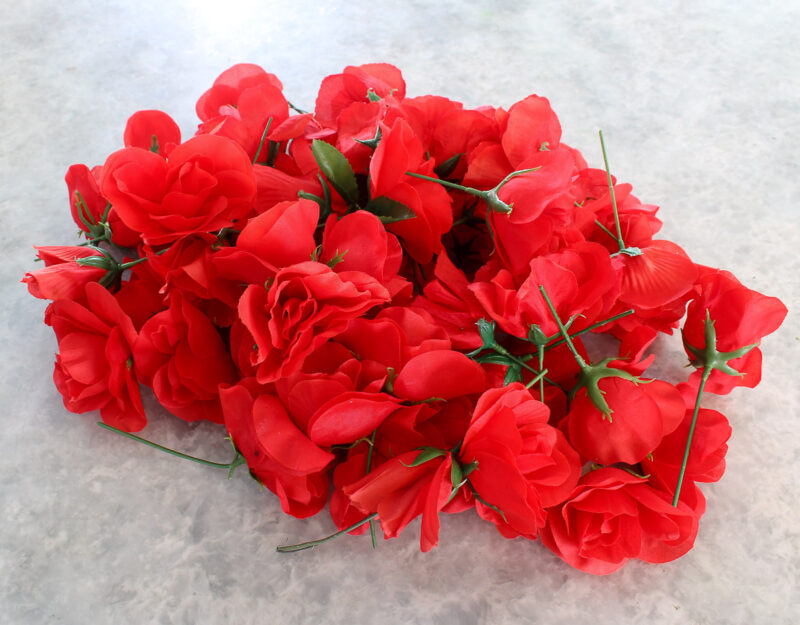
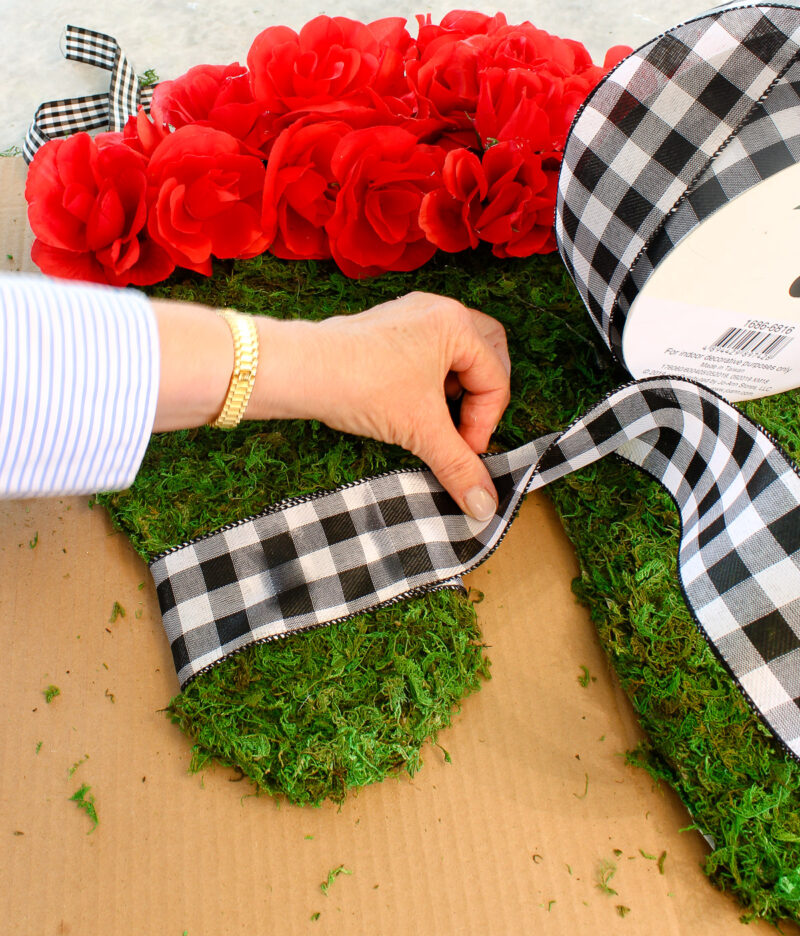
Step 3 – Add the Red Roses for the Mane
- Remove the roses from the stems. Most of them will come right off. I can’t tell you exactly how many roses I used to cover the mane. I did use all the ones that I removed the stems, but had a few dozen roses left over to use for other decorations.

- Using your glue gun, start behind the horse’s ear gluing the roses.
- Add your glue to the back of the rose in several spots.
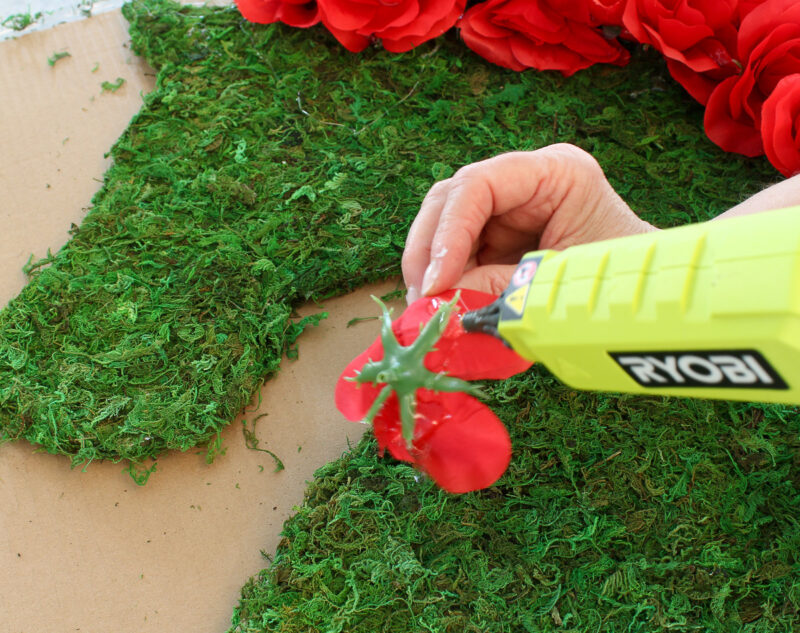
- Then grab the center of the rose and press it down to the horse head.

- Continue until you have covered the mane to your liking.
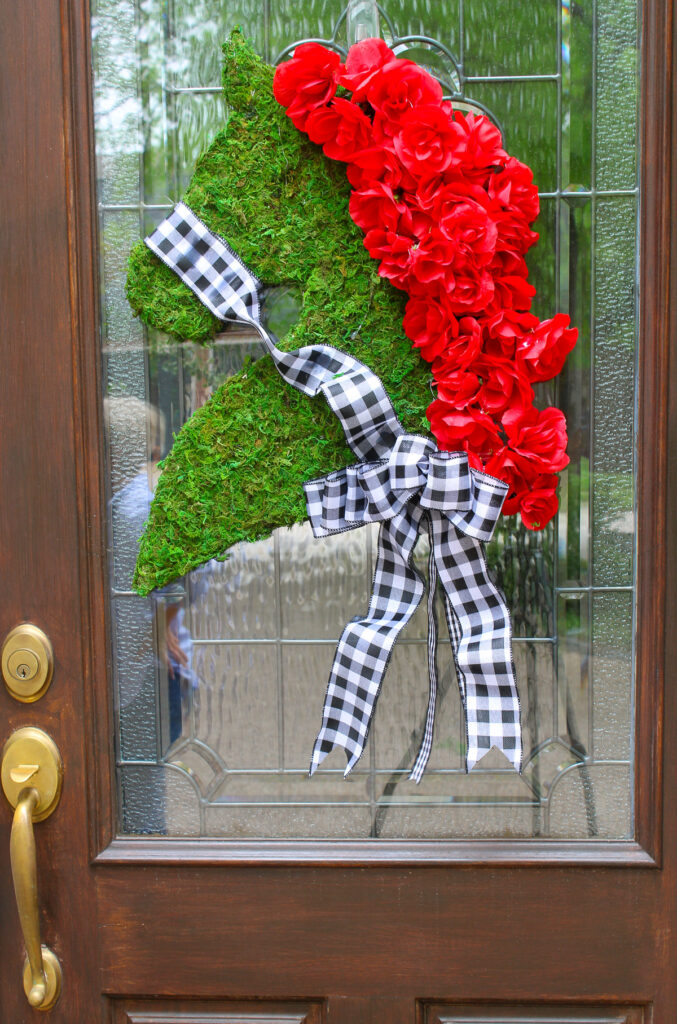
Step 4 – Make the Bridle, Rein, and Bow
I used 2 1/2 inch wired ribbon for the bridle and rein.
- Place the end of the ribbon on the nose and glue it to the down. I used a wood skewer to hold the ribbon down until the glue adheres to the moss.
- Wrap the ribbon around the nose and add more glue to make the bridle.
- Unroll the ribbon and glue it down in a couple of places to make a rein. Cut off the excess ribbon.

- Make a bow the size you want. I used the 1/2-inch ribbon to tie the bow. Add tails if you like.
- Glue the bow to the bottom of the horse head in a few places.

Hanging Your Door Hanger
On the back of the horse head, tie the narrow ribbon to make the hanger.

For several years, I used an over-door wreath hanger for our front door Kentucky Derby wreath. It worked fine, but then I decided to try a command hook.
The top part of our front door is leaded glass and the command hook was an easy addition. You can’t see it when there isn’t a wreath or door hanger.
The last step is to hang your Kentucky Derby Door Hanger. I’m so pleased with how this project turned out.

Our Kentucky Derby party guests will be impressed as they approach our front door. They will know they are at the right place.

The Kentucky Derby door hanger is easy to see from the street (I checked!). It will set the tone for our festive party and is the perfect accent for our gathering.
We may not be a Churchill Downs, but we will be celebrating Derby Day.
We will all be cheering as the winner crosses the finish line.
This pretty Kentucky Derby door hanger adds a dash of Southern charm and excitement to your party preparations.
I hope that you will try crafting the perfect door hanger to welcome your guests to the Derby festivities!
Here are more Kentucky Derby ideas.
More Kentucky Derby Ideas
I hope that you enjoyed this Kentucky Derby door hanger project and will save it for future Derby decorations. PIN it to save it.
Here are more Creative Craft ideas for you. Next up is the talented Jenna of The Painted Apron with a cute wine glass project.


Upcycle Plastic Container Into Basket
Dinosaur Wall Art
A Wine Bottle Gets a New Life
Embroidery Hoop Pocket Wreath
Paper Mache Bowl DIY
Hammered Flower Art Gift
DIY Cooking Utensils
Make Fun and Creative Pens with Beads (Instead of Jewelry)
How to Make the Prettiest Kentucky Derby Door Hanger
Special Occasion Blooming Wine Glass


Love this so much, Carol! It would be so much fun to use it for the entire Triple Crown season and for polo parties and birthdays too. Can’t wait to try this too and will share on Thursdays FTFP. It’s fabulous! Big hugs, CoCo
You’ve outdone yourself with this door hanger, Carol. It’s absolutely beautiful and so original.
Thank you! What a nice thing to say. I’m loving it, too.
So pretty Carol! I remember Chloe’s horsehead~ I love the moss covering and of course the roses! We have an annual Kentucky Derby party every year, so much fun~ I need to get busy and start planning for this year! How lucky you were able to attend one year~ Your guests are going to love being greeted with your fabulous creation!
What a beautiful and clever way to greet your guests! I love this so much. Great job Carol. Hope that you have a wonderful time at your party.
This turned out so cute Carol! Very inventive too, I always enjoy looking at all of the wonderful hats at the derby.
That is so cool and absolutely gorgeous, Carol! Love your idea of using the shape of a horse head to make this lovely Kentucky Derby door hanger! And it looks very classy, too, just like the derby!
Thanks so much, Gail. I love how well this project turned out. I love that you called it classy.
This is perfect for the event that is around the corner. Love how it turned out.
Thank you, Terrie. Glad you liked it.
Your door hanger is beautiful; what a fun way to celebrate 150 year of the Kentucky Derby!
Thanks so much, Sara.