How to Transform New Terra-Cotta Pots for a Vintage Look
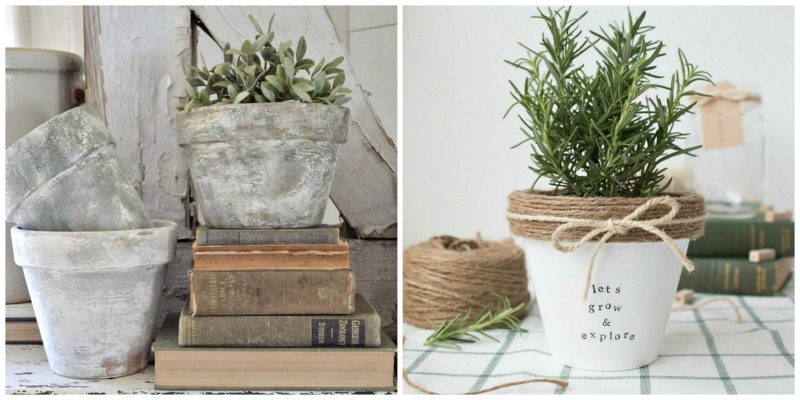
Do you like terra-cotta pots? Terra Cotta pots are iconic planters for the garden and home decor. How about giving them a different look? Let’s figure out how to transform new terra-cotta pots for a vintage look.
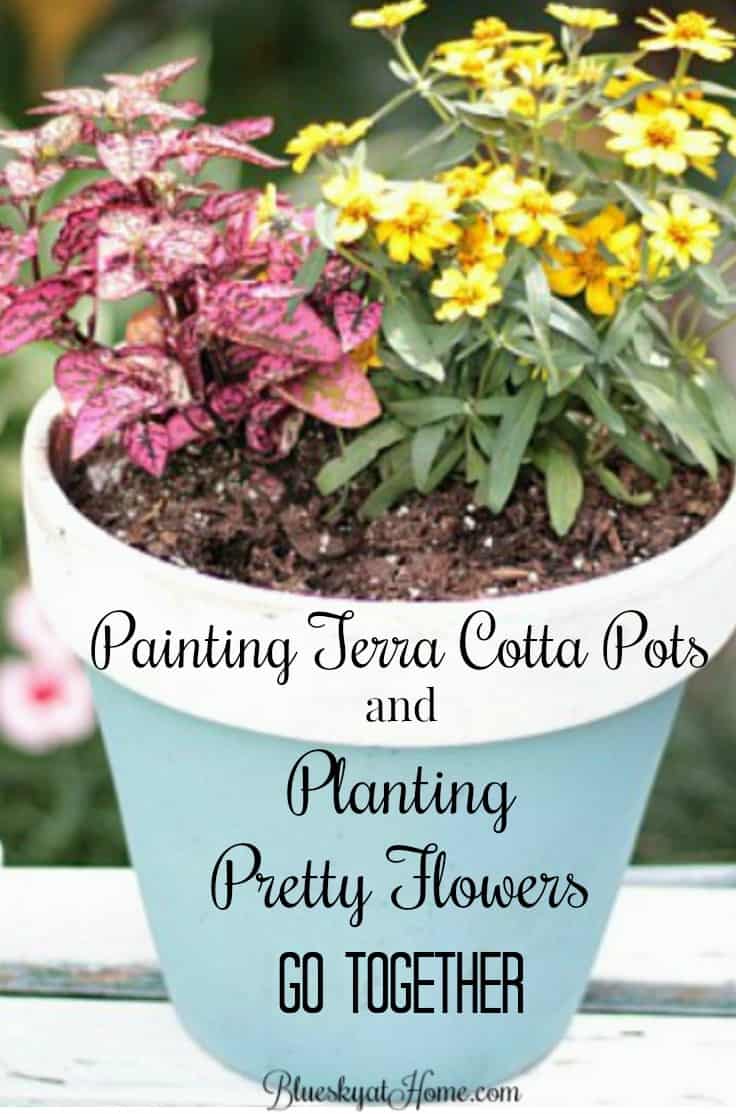
Since I’m not a big fan of orange terra-cotta pots, I wanted a softer, more natural look. What to do? Find a way to give new terra cotta pots a vintage look.
Most of the time, orange terra-cotta pots are not my favorite look. I’ve used them occasionally, but I usually paint them.
I love to make DIY projects for our home decor, my tablescapes, and patio. This project, giving new terra-cotta pots a vintage look, gave me pots I could use in different ways.

We all seem to love the vintage look rather than burnt orange (except for Halloween, maybe?).
After I found a style of terra-cotta pot that wasn’t the traditional shape and didn’t have a rim around the top, I knew that this style was perfect for a transformation. It just took me a few minutes to figure out how to give new terra~cotta pots a vintage look.
Now I know that there are many ways to transform plain orange terra-cotta pots from, well, orange to something more stylish for today’s home decor. I’ve done it before myself a few times, including using decoupage to transform these terra pots.
Give New Terra-Cotta Pots a Vintage Look
This post contains affiliate links to products used to create this project. If you should order any item from this site, I may receive compensation, but you do not pay a penny more. Your purchase is greatly appreciated as it helps support the continued publication of this site.
I actually saw a few terra-cotta pot transformations on Pinterest that showed different techniques for giving terra-cotta pots an aged look. Adding texture was often part of the process. I loved that idea.
You can see several transformations on my Pinterest DIY board.
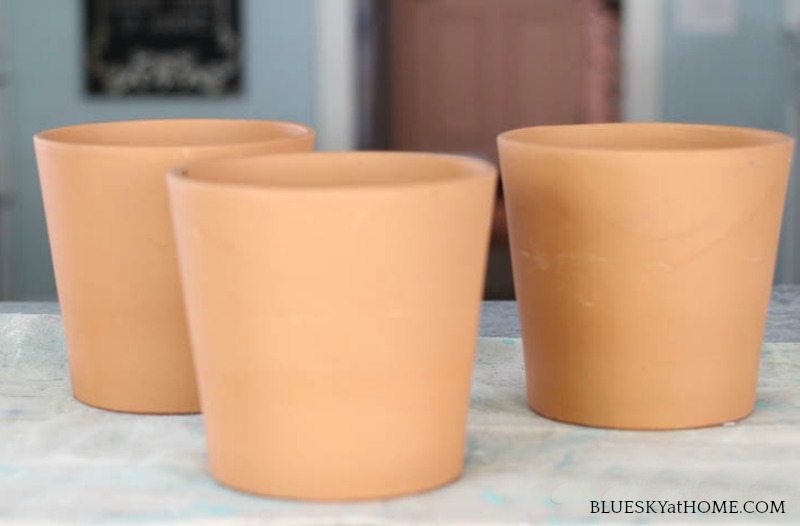
Since I didn’t have any extra pots on hand, I made a trip to the home improvement store. This rimless style was a new one that I had never seen before. I bought three, knowing that the style and size would be just right for a centerpiece or pots for the patio.
I was certain that I could find different ways to give the pots the aged look I prefer.
Have you ever had a DIY epiphany? You have a vision, but aren’t sure how to accomplish it?
I knew the type of paint and the colors I would use. I just didn’t know how to make them look old. They needed texture, something to make them look like I dug them out of an abandoned garden (maybe in a French country cottage?).
And then it hit me. I knew what would give them a roughness, a texture, a grittiness that spoke to the vintage look I wanted. Here’s how I changed the pots from new and orange to old and neutral.
Supplies to Give the Terra-Cotta Pots a Vintage Look
Obviously, you need terra-cotta pots in the size and style you like. Maybe you have some pots that need a major change or you’ve picked up at some garage sale. If not, you may have to make a trip to the home improvement store as I did.
You may have these simple supplies on hand. If so, this project could cost nothing to make.
- terra-cotta pots – new or used that have been thoroughly cleaned
- paint in neutral colors
- synthetic chip paint brush or foam brush
- plastic cup and spoon for mixing paint
- drop cloth or other protective material for painting
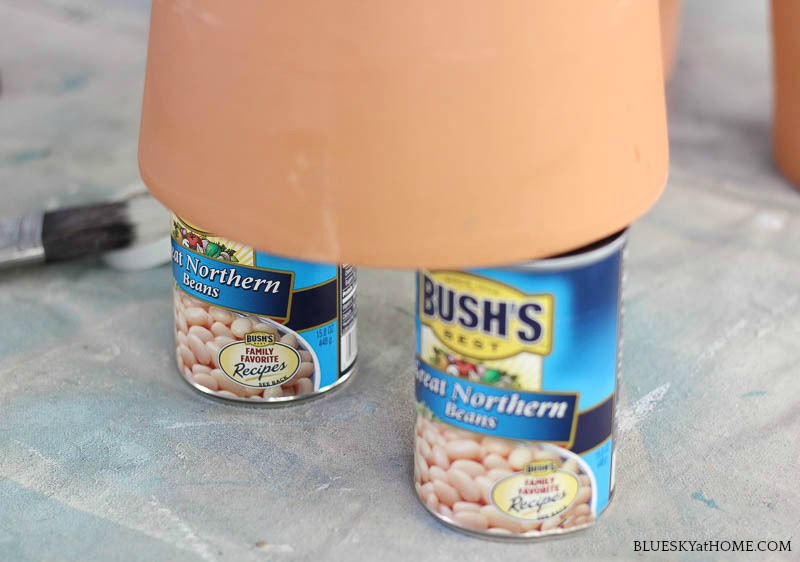
- something to set your pots on (I used 2 cans of Bush’s Beans!)
- mystery ingredient (saving this for later!)
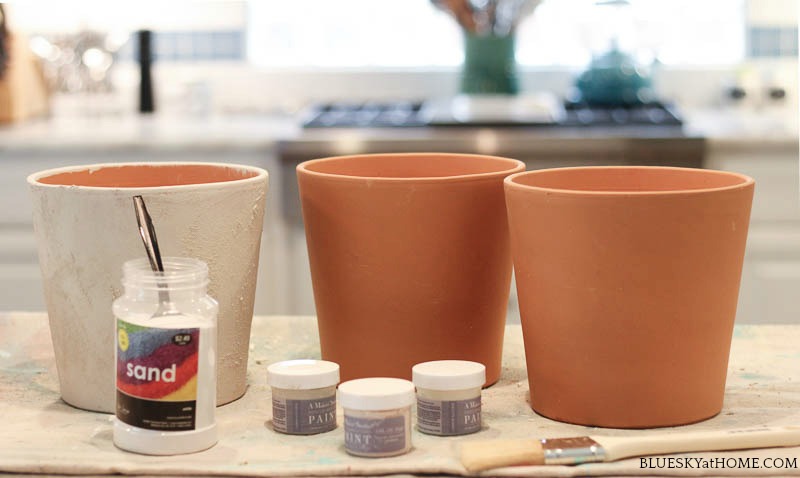
O.K. that picture just gave away the mystery ingredient.
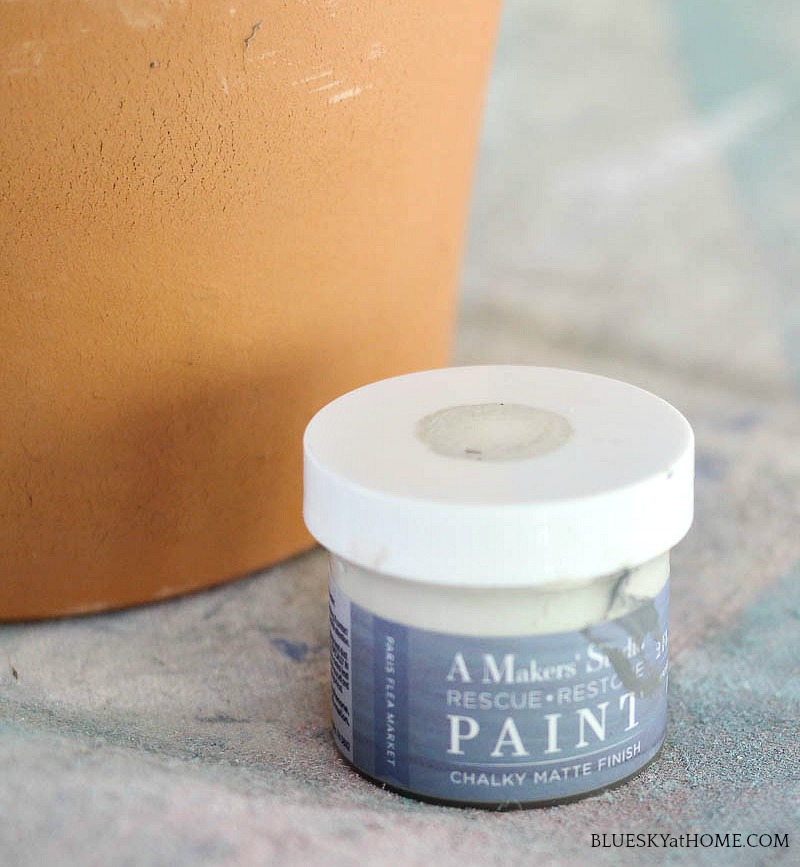
White Paint for This Project
White paint would be the right color for this paint project. I didn’t want bright cold white, but warm, soft cream and beige shades.
I used Rescue Restore paint from A Maker’s Studio. You could also use chalk paint or any paint that you have on hand. I love this paint for several reasons:
- the excellent coverage
- the ease of application
- the quick drying time
- it’s water-based
- has no VOCs
- smells good so you can use it inside.
I used 3 colors – Paris Flea Market, Biscuits & Gravy, and Bella’s Blush – which are all soft, neutral colors in shades of warm white and cream.
NOTE: Rescue Restored Paint has been retired, so now I use One Step Paint. It’s a fabulous paint with all the same qualities as Rescue Restore.
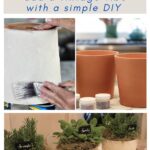
Easy Steps to Painting Your Terra-Cotta Pots
- The first step is to set up your work area with a drop cloth or other protective covering.
- Gather your supplies.
- Set your pots upside down on the cans.
4. Paint in a hashtag pattern; you don’t have to cover the entire pot. Set aside to dry for about 10 minutes.
NOTE: Remember that terra cotta is porous, so the paint dries quickly. The first pot dries while you paint the second pot.
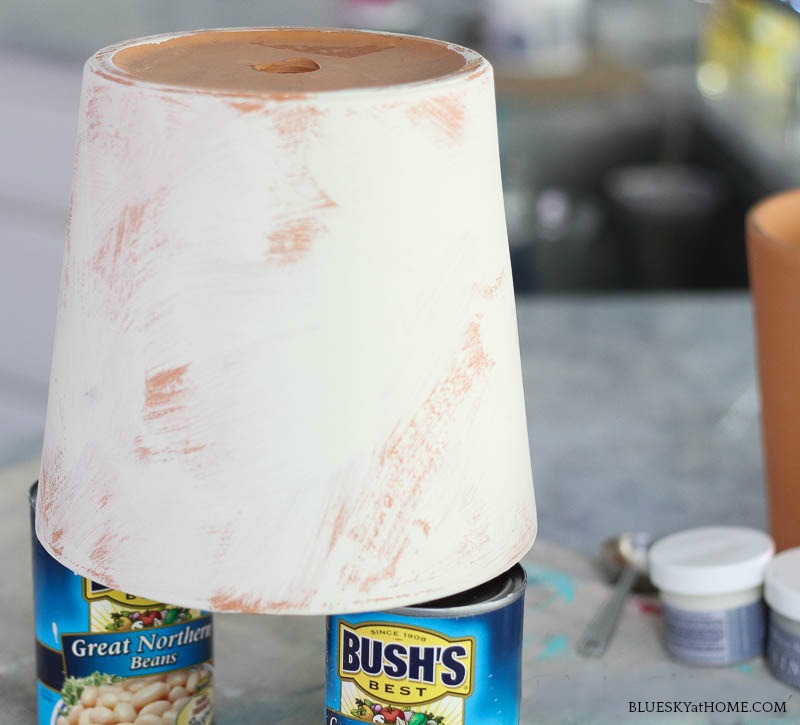
Yeah, the orange color is gone.
How to Give the Terra-Cotta Pots Texture
Texture is so important for transforming new clay pots to the vintage garden pots I wanted.
One article on Pinterest suggested using a grout compound or plaster paste to give the terra-cotta pots an old, textured finish. I really did not want to buy something I wasn’t familiar with that would take up space in the garage when I was finished transforming the pots.
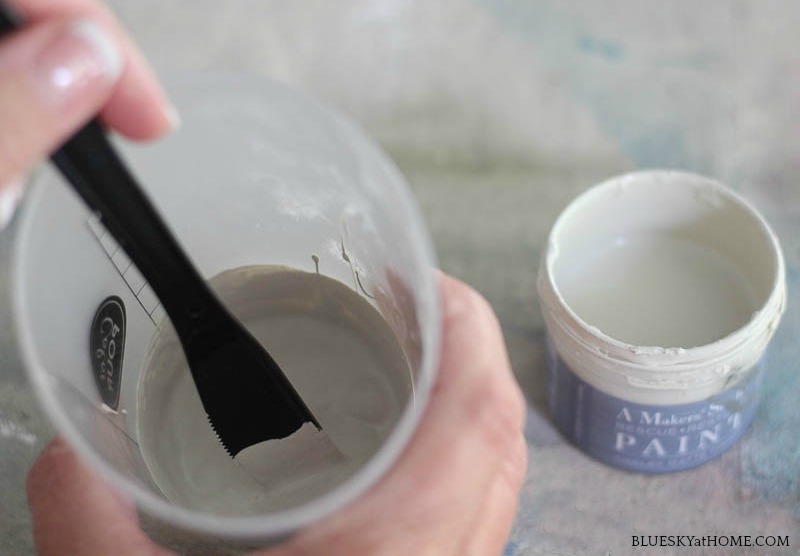
As I finished painting the first pot, I suddenly thought of sand (I almost shouted Eureka!).
I had a jar of white decorative sand that I bought at Joann several years ago for a centerpiece. I’ve used it for tablescape centerpieces a couple of times. When I’m through with it, I just pour it back into the jar, so I have plenty.
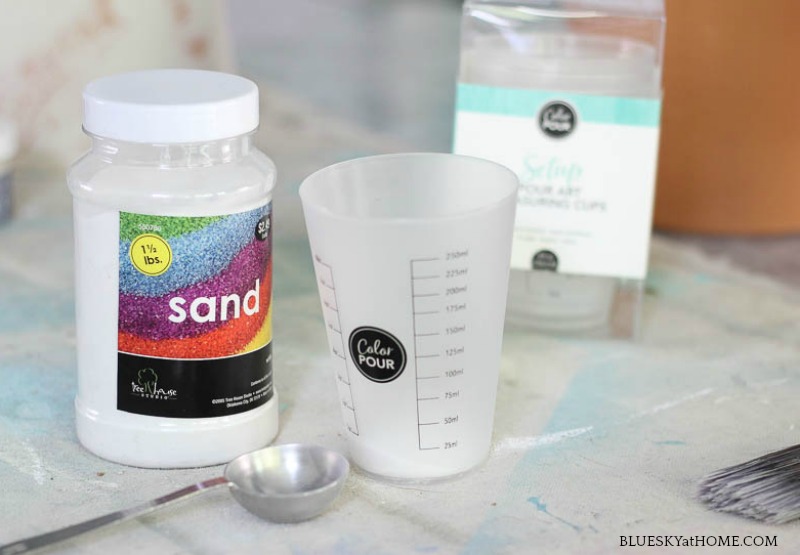
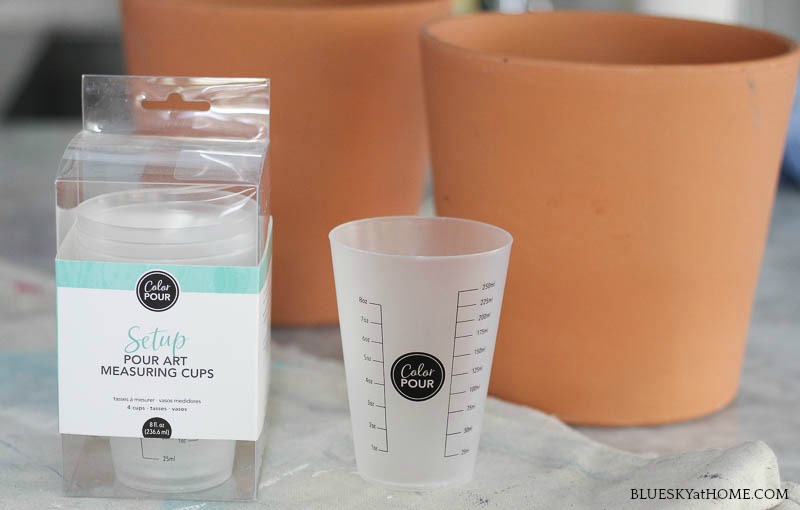
I found these cool plastic mixing cups at Joann a few weeks ago and they were perfect for mixing the sand and the paint. I know I’ll find other uses for them.
The next step is to mix 1 tablespoon of the sand with 1 tablespoon of paint in the plastic cup. Thoroughly to combine the paint and sand. The paint became gritty (you’ll hear the grittiness) as you stir it.
If the mixture becomes too thick, add a little water to the cup and stir.
I used my chip brush to apply it to the pot in a “slap-dash” motion, placing it randomly over the pot.
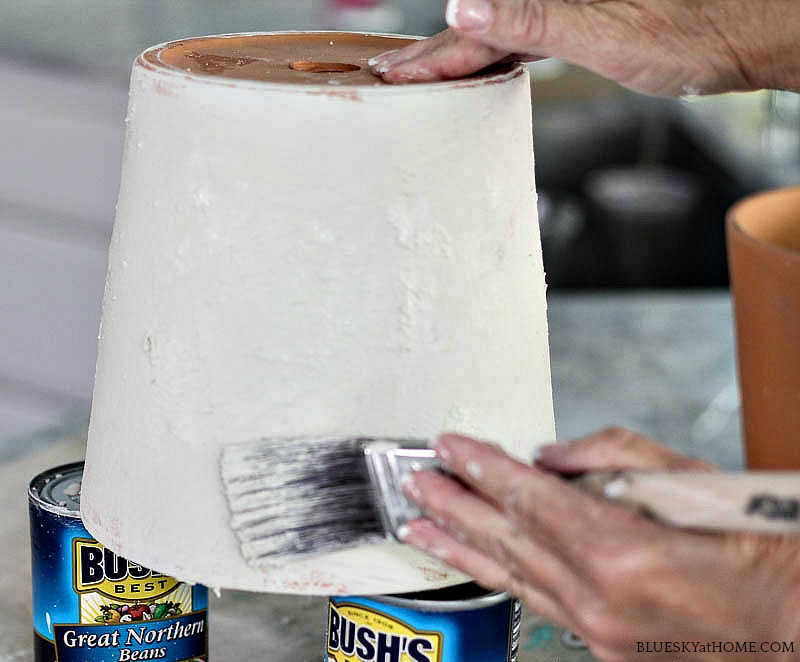
This technique gave me exactly the textured, old vintage look I wanted. The application was easy and fast – I literally finished the first pot in 15 minutes and 10 minutes of that was waiting for the first coat of paint to dry.
If you want more texture, add another coat of the water/sand mixture to the clay pots.
TIP: The past way to tackle this project is assembly line style.
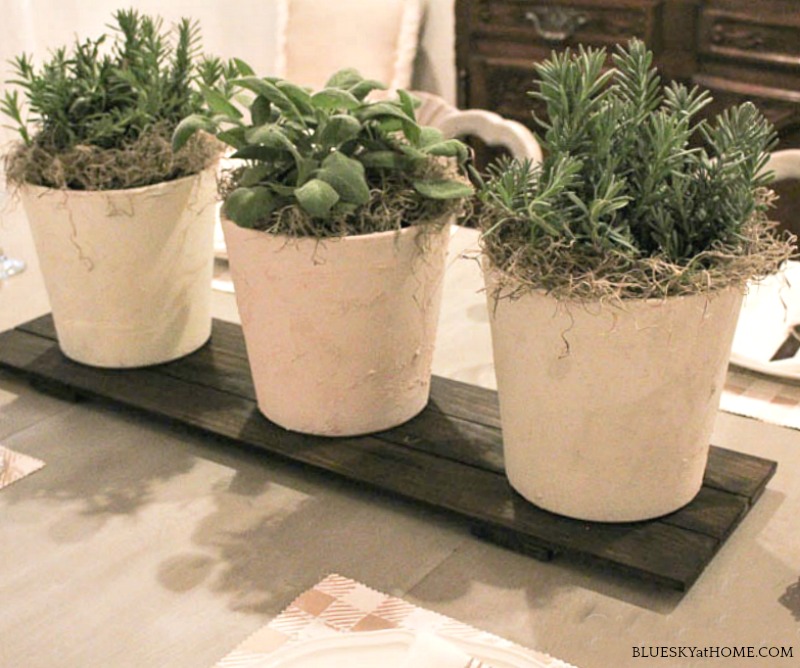
I love how they turned out. No sealing, no wax. Just let the second of “sand-paint” dry. Then you are ready to add whatever plant you like.
The Cost of this Project
The only thing I bought specifically for this project were the terra cotta pots:
- The 3 terra-cotta pots were $3.69 each minus our 5% Lowe’s discount so my total cost was $10.52.
I know that if you had to purchase all the supplies just for this project it would be more, but you would have plenty of leftovers for other projects. If you needed to purchase the other items, here’s the breakdown.
- I already had the paint (Rescue Restore 2-ounce jars are $7.99 each) and I have plenty left over for other projects.
- The decorative sand ($2.49) which I had already used several times.
- The plastic mixing pots which can be used over and over.
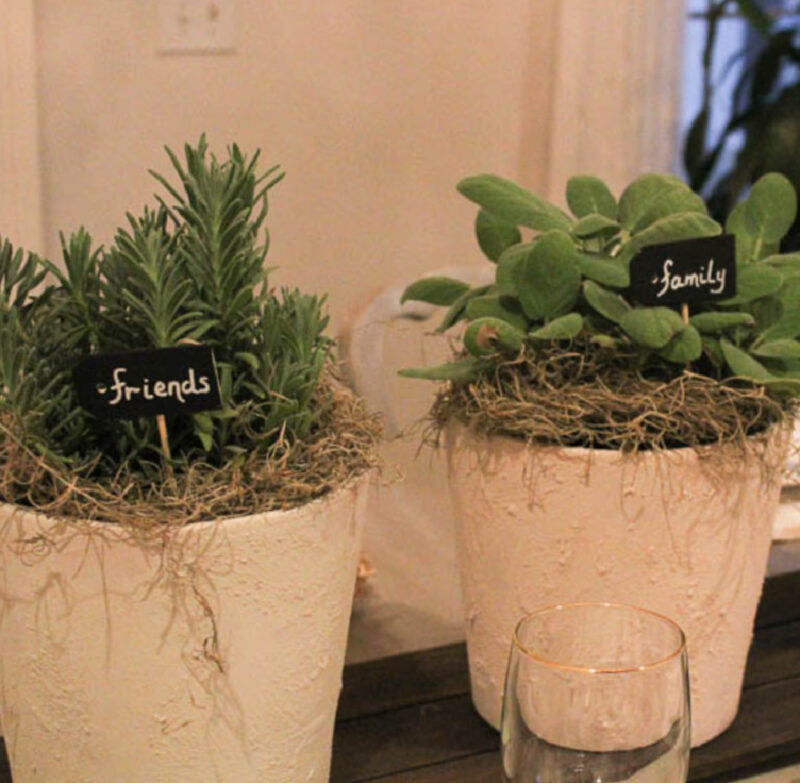
How to Use the Aged Terra Cotta Pots
You have several options for using these newly aged terra cotta pots in your home decor or patio spaces. They can be filled with flowers, herbs, or succulents.
- as part of a tablescape centerpiece
- an arrangement on the kitchen counter
- grouped on a patio table
Adding Plants to the Vintage Pots
For the first time I used these vintage terra-cotta pots I wanted plants that mimicked that same soft, natural feel.
I made a trip to my favorite garden center and picked out one pot of sage and two pots of lavender. Both had a pale green color and soft texture that contrasted the rough texture of the vintage pots.
Another plus is that with the warmer weather I can transplant them to our herb garden in a few weeks.
Have you ever thought of mixing sand with paint to give terra-cotta flower pots a vintage look? I gave myself a pat on the back for thinking of this treatment. The result was just the old-world, vintage look I wanted.
I hope you’ll want to try this DIY project. Save it, PIN it, share it.


I love the color and shape of the clay pots ! I also like the wooden tray the pots are sitting on. Did you make it ? I was wondering what color the paint or stain was.
Hi, Robin. No, I didn’t make the tray. I’m not that talented! Thanks for visiting.
These are so great looking, Carol! I love the addition of the sand texture – thanks for the tutorial!
Hi, Janet, I surprised myself by thinking up that process.
Congratulations! Your post was my Most Clicked at #OverTheMoon this week. Visit me on Sunday evening and to see your feature! I invite you to leave more links to be shared and commented upon. https://www.marilynstreats.com. Please be sure to leave your link number or post title so we can be sure to visit!
I love it, they turned out so good! I am going to have to try this on some of mine!
These are beautiful! Thanks for sharing on To Grandma’s House We Go!
Oh, my pleasure. Thanks for feedback.
Really pretty. I love your project. I decoupage them as well.
Clearissa, I should decoupage more. i remember my mom doing that when I was in junior high and high school. She was ahead of her time.
Carol- you continue to raise the bar with your blogging and your tutorials.
I love what you did to those simple pots.
What a cute project! I love the finish…
Carol I’ve never seen this product before but really like the result. The planters look like real terracotta now.
I love a weathered pot. This is a great idea. Thanks for sharing with us at Ten on the Tenth.
I’m not a big fan of terra cotta pots either, although I have quite a few and have been painting and “disguising” them for years.
Awesome job. So pretty!
Those look great, Carol! The texture really adds a lot.
I’ve never loved terra cotta pots either, although they are considered classic. I like them with a little patina. 🙂