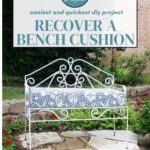
Easy and Quick Way to Recover an Outdoor Bench Cushion
Have you considered revamping your outdoor furniture yourself? Specifically, an essential element of comfort – the bench cushion. Stick around, because I’m going to show you an easy and quick way to recover an outdoor bench cushion. The benefits may surprise you!
Whether you’re sprucing up your patio, garden, or backyard seating area, giving your outdoor bench a fresh look can breathe new life into your outdoor spaces.
It’s a fantastic opportunity to update the look of your outdoor space, whether you’re aiming for a fresh seasonal vibe, an update or a complete makeover.
My last outdoor bench cushion project was about three years ago. As expected the cushion fabric had begun to show wear and tear. It was time to recover it.
Once again, I did not want to go to the hassle of cutting out fabric and sewing it to make a semi-permanent cushion cover.

This is not my first bench cushion redo rodeo. I shared my first attempt at making a bench cushion from scratch a few years ago. Here are my first 3 bench cushion makeovers.
This project is part of another Creative Craft Blog Hop, hosted by Sara of Birdz of a Feather. If you are joining me from Jenna of The Painted Apron then welcome.
Why DIY a Bench Cushion?
Outdoor bench cushions endure a lot of wear and tear. They face the elements head-on, from scorching sun to torrential rain, not to mention the occasional bird dropping or spilled drink.
Why go through the “hassle” of a DIY project when you can easily buy a new cushion?
- Over time, these patio cushions can show signs of wear and tear, with fading colors, stains, and frayed edges detracting from their appearance and comfort.
- You might have found an amazing deal on some cushions but the fabric is not in your color or pattern of choice.
- I hate to bash the big box garden stores, but I find their fabric choices woefully lacking in nice color or pattern options.
- I also think the store-bought cushions are never thick enough or firm enough for comfort.
Recovering an outdoor bench cushion offers a practical solution to these issues. Instead of investing in brand new cushions, which can be costly and time-consuming to find the perfect match, recovering allows you to breathe new life into your existing cushion with minimal effort and expense.
So, if your outdoor bench cushion is looking worse for wear, don’t toss it out just yet – give it a makeover and enjoy a stylish and comfortable outdoor seating area for seasons to come!
Advantages and Benefits of Recovering a Bench Cushion Yourself
Once you see how quick and easy this DIY bench cushion makeover is, you’ll want to make new cushion covers for yourself.
- Cost-effective: DIY recovering allows you to save a significant amount of money compared to purchasing new covers.
- Customization: You can choose the fabric, pattern, and colors that perfectly match your outdoor decor and personal style.
- Sustainability: By reusing the existing cushion and simply giving it a makeover, you reduce waste and promote sustainability.
- Creative expression: DIY projects offer a fantastic opportunity to use your creativity and add a unique touch to your outdoor space.
- Personal satisfaction: There’s a sense of pride and accomplishment that comes with completing a project yourself, knowing that you’ve transformed something old into something beautiful.
- Quick turnaround: With the right tools and techniques, recovering a bench cushion is a quick and straightforward task, allowing you to enjoy your revamped outdoor seating area in no time.
- Learning experience: Whether you’re a seasoned DIYer or a novice, tackling a bench cushion project provides valuable hands-on experience and the chance to acquire new skills.
- Maintenance convenience: Knowing how to recover a bench cushion means you can easily refresh it whenever needed, whether due to wear and tear or simply a desire for a new look.
Although this is a bench cushion makeover, you can apply these same steps and supplies to a simple sofa or seat cushion.
Recovering a bench cushion isn’t just for outdoors. Here is one that I did for our bedroom bench that turned out great.
Supplies for Your Bench Cushion Makeover
This post contains affiliate links to products used to create this project. If you should order any item from this site, I may receive compensation, but you do not pay a penny more. Your purchase is greatly appreciated as it helps support the continued publication of this site.
This bench cushion project is so easy. And you need just a few supplies – which greatly lowers the cost of the project.
- Outdoor fabric (See below on how to calculate how much fabric you’ll need).
- Soft-leaded pencil, tailor’s chalk, or disappearing fabric pen
- Measuring tape/ruler/straight edge
- Dressmaker sewing pins
A note about outdoor fabric: Outdoor fabrics are heavier, thicker and sturdier than regular fabrics. They have special weather-proofing treatments, so they are water resistant. One of the great things about outdoor fabric is that it holds its shape beautifully. For several years, interior designers have been recommending outdoor fabric for interior use, especially in kids’ rooms or high traffic areas.
If you are making the cushion from scratch, you will need:
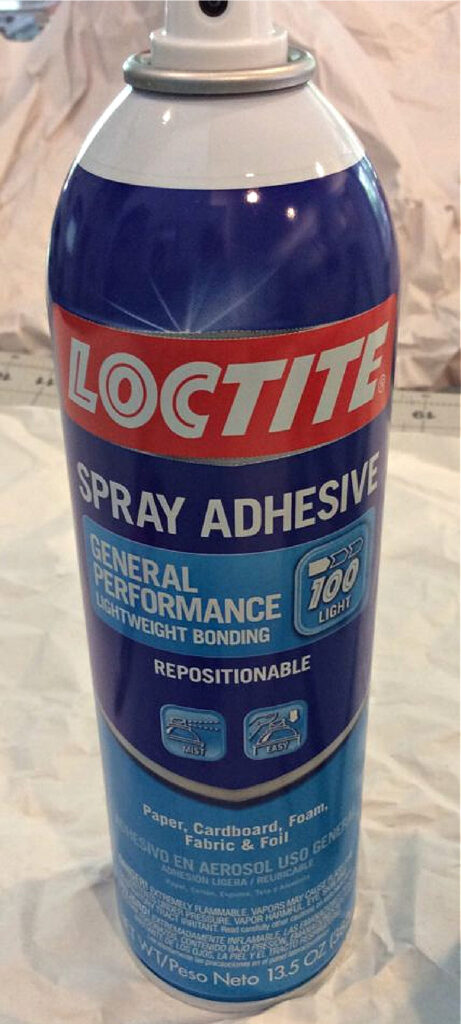
- Spray adhesive
DId you notice that this easy cushion project doesn’t require a sewing machine, sewing needles or thread? No hot glue. No staple gun. No piping or zipper.
I should have called this project the easiest bench cushion makeover. It may also be the quickest.
How Much Fabric Will You Need
The amount of fabric you need depends on the size of your cushion and the width of the fabric.
Since there are no seams for this cushion cover, you don’t need to worry about a fabric repeat, UNLESS the width of the cushion is longer than the width of the fabric. If that is the case, then you will need to purchase extra fabric
For example, most outdoor fabric is 54 inches wide. My cushion was 37.5 inches long. (To allow for enough fabric at both ends to cover the foam base, your cushion shouldn’t be more than 46 inches wide.)
That gave me 8.25 inches of extra fabric at each end. (54 inches – 37.5 = 16.5 inches/2 = 8.25)
- Measure the depth of the foam from front to back. Then multiply that by 2.
- Measure the height/thickness of the foam and multiply by 2.
- If you are adding batting, measure the depth of the batting and multiple by 2.
- Add these numbers together. My number was 43. That is the minimum amount of fabric you need. You need to add extra fabric for wrapping the cushion. I would add 1/2 – 1 yard.
- If you are making multiple cushions, when you have an estimate for one cushion, multiply by the number of cushions you need to recover.
Why Am I Recovering Our Outdoor Bench Cushion?
I made this original bench cushion from scratch a few years ago. I had the bench for many years and wanted to use it by our front door. Here was the finished project.
I looked at some local stores and online, but couldn’t find a premade cushion that fit the size I needed. My bench cushion needed to be 37 1/2 inches wide X 16 1/2 inches deep.
I figured I could make a cushion myself.
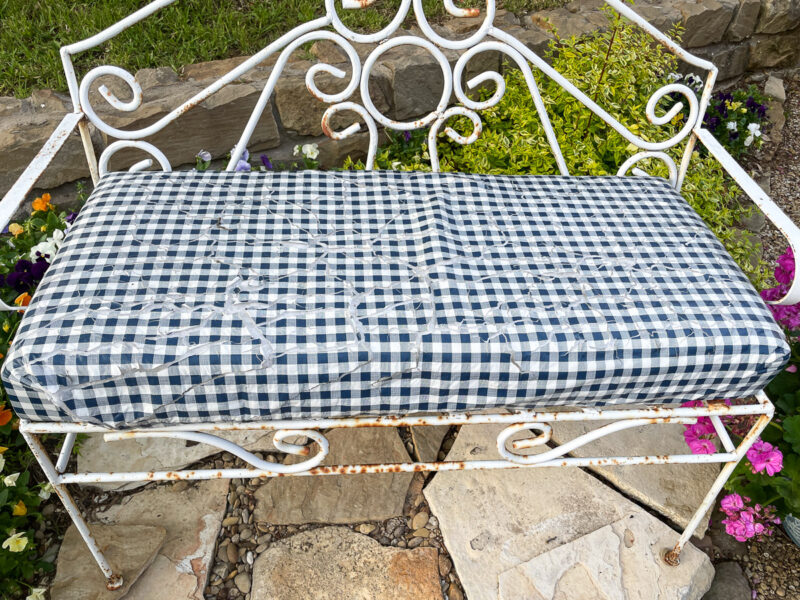
For fabric, I found a blue check fabric at Jo Ann. This is picnic table fabric. Since the top was a polyester vinyl, I thought it would be weatherproof.
Four years later the fabric had started to crack. Not a nice look for the front of our home.
It was also time to repaint the bench.
So that’s why it was time to recover the bench cushion.
Recovering the Bench Cushion
I would look at how I made the original foam base and bench cushion before seeing how I recover this replacement cushions.
You will not need to cut any fabric for this project. The fabric stays in one piece. That’s why I love this easy way to cover a bench cushion.
You don’t have to cut the fabric into fabric pieces or glue the fabric together.
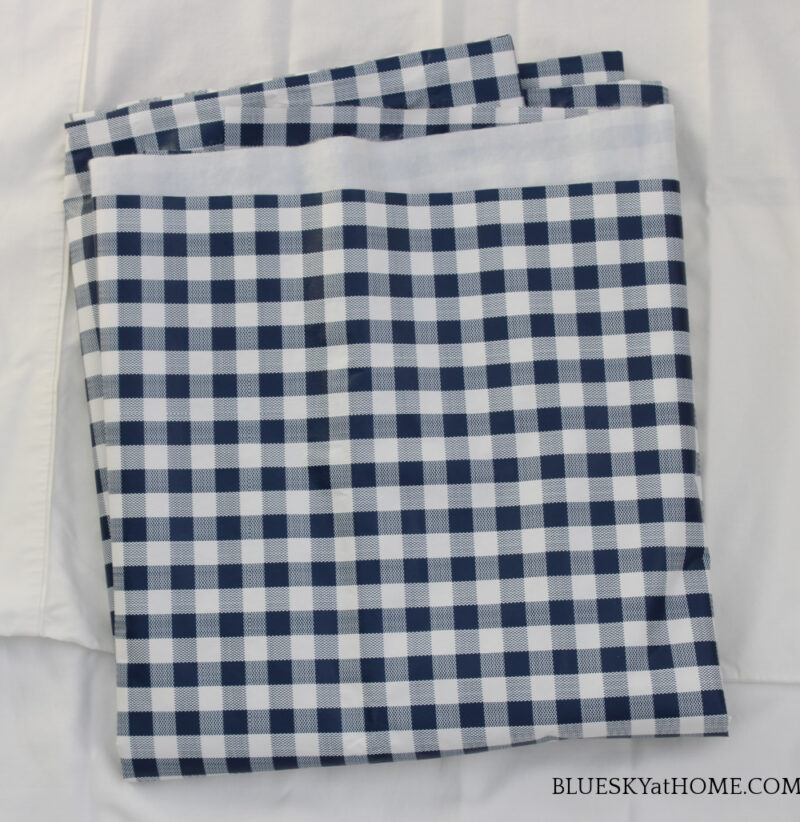
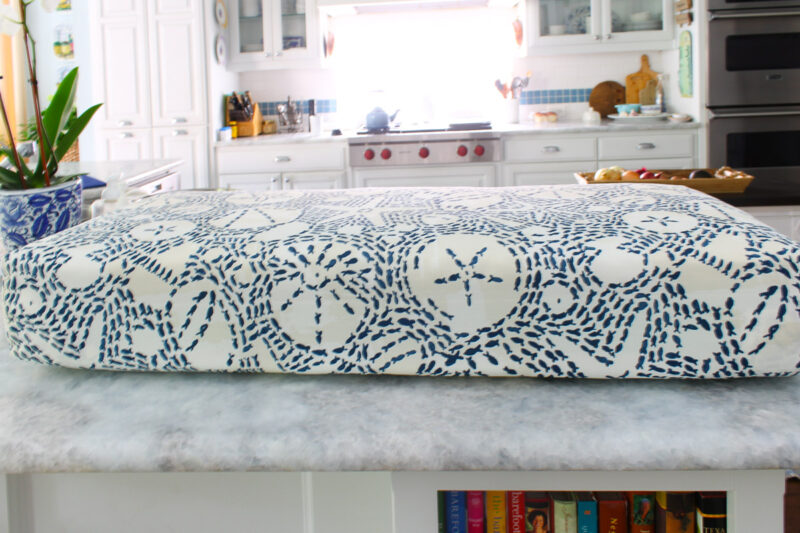
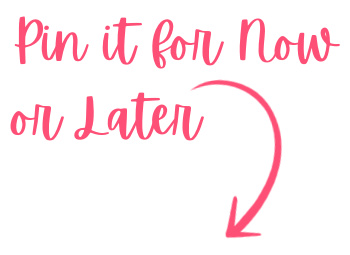
Step 1 – The first step is to select your outdoor fabric. I found my fabric at Joann. The abstract blue and cream design was interesting. The fabric was 54 inches wide. I bought 2 yards. If necessary, iron the fabric.

Step 2 – Remove the old pins from the original cushion; then remove the old fabric. Discard the fabric and the pins.
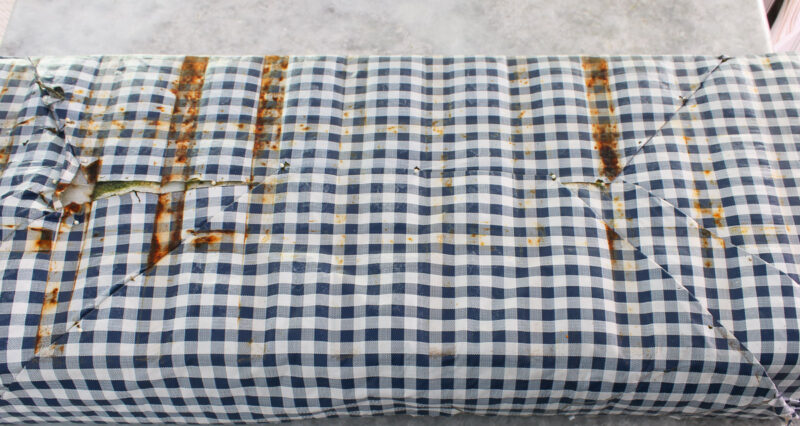
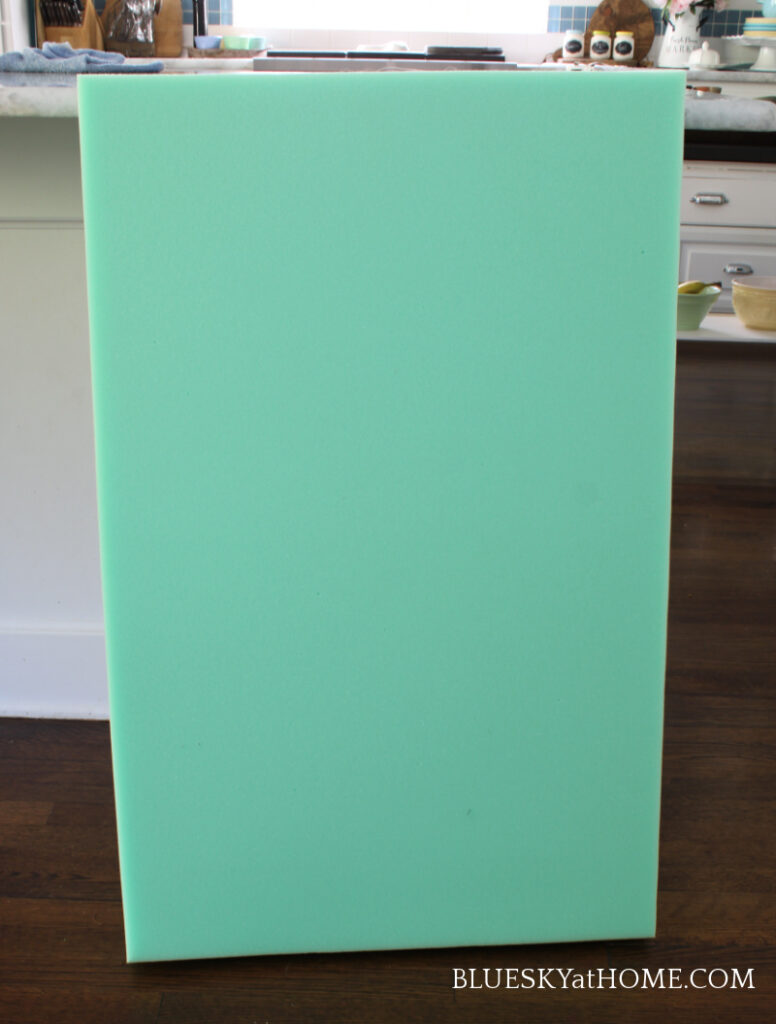
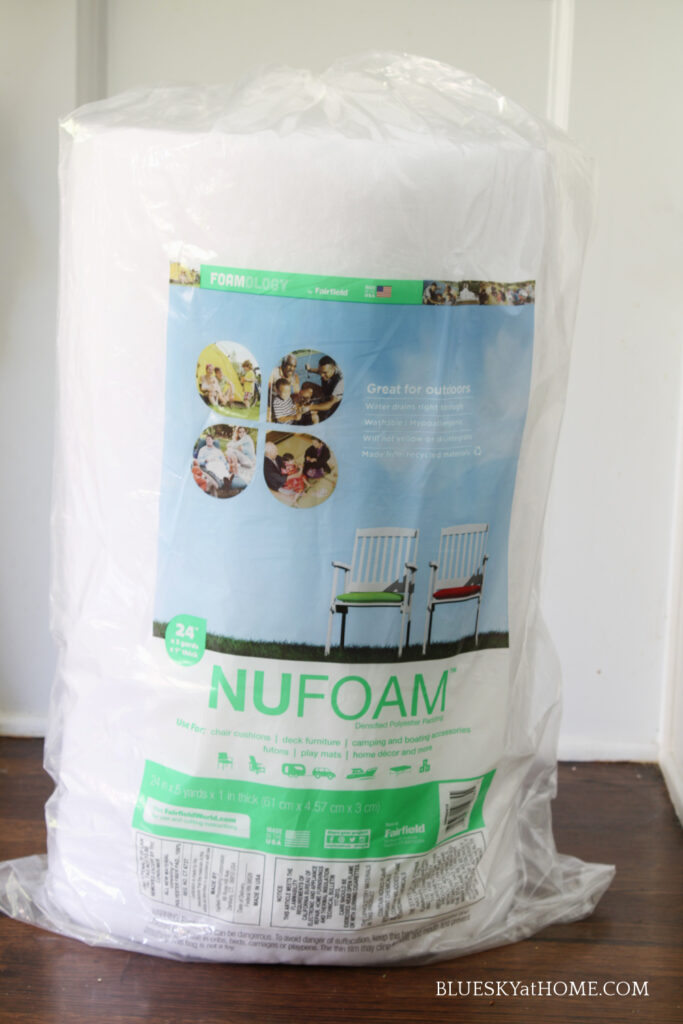
The batting was stained in a few places that you can see in this photo. I thought it would be a good idea to add another layer of batting to both sides of the foam base. Fortunately, I still had outdoor batting from the first project.

Step 3 – Unroll the batting and lay it on your work surface.
Line up the entire cushion on top of the batting. Line one raw edge of the foam with the long side of the batting and the end of the batting. This way you only have to cut two sides of the cushion batting.
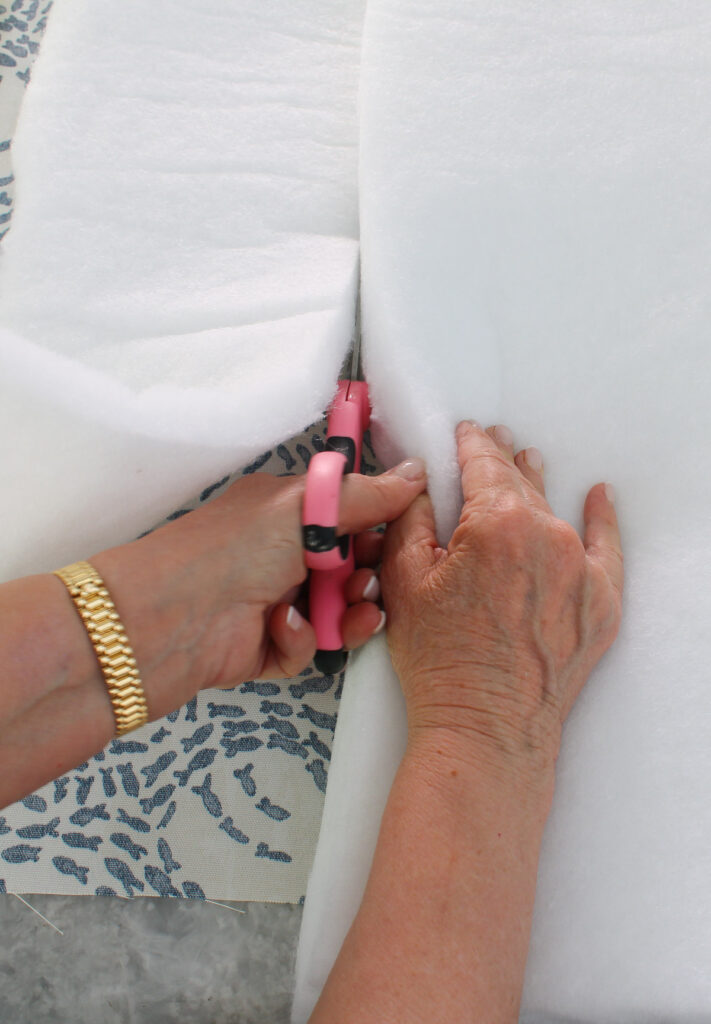
Step 4 – Using your pencil, mark a straight line on the batting where to cut it.
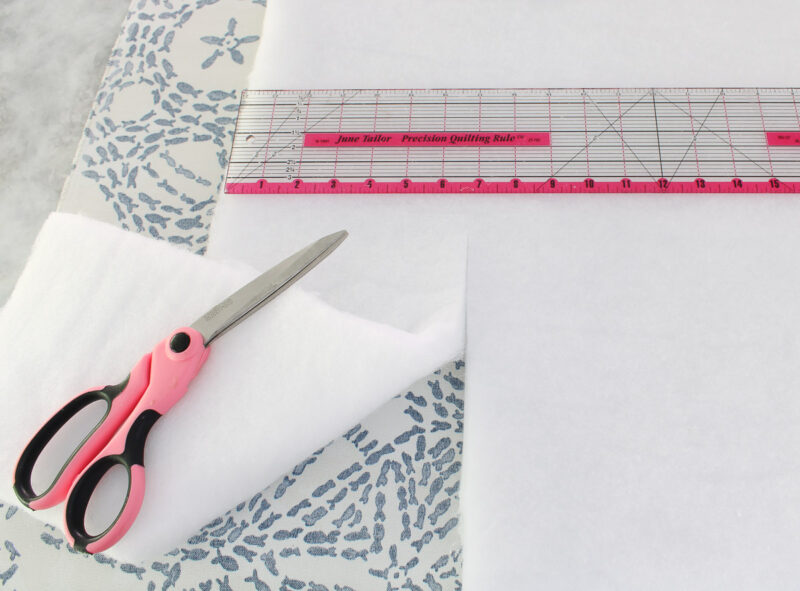
Step 5 – Cut your batting. Repeat and cut a second piece of batting.
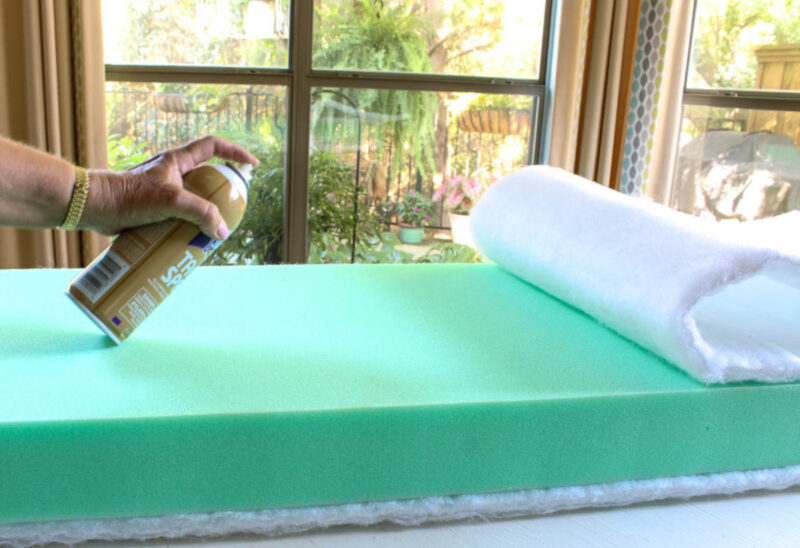
Step 6 – Cover your work surface to project it. (These photos are from the original project.) Using your spray adhesive, spray the original batting in sections. Place the new adhesive on top, pressing it down to adhere to the original batting. Repeat on the other side of the cushion.
Step 7 – Lay out the new fabric on your work surface, wrong side up. Place the cushion on top of the fabric. Lay it so that it is centered from side to side. (The width of the cushion.) Adjust the cushion to allow the fabric to completely cover the circumference of the entire cushion.
Step 8 – Have your dressmaker’s pins at hand. Think of wrapping the cushion with the fabric like you are wrapping a present.
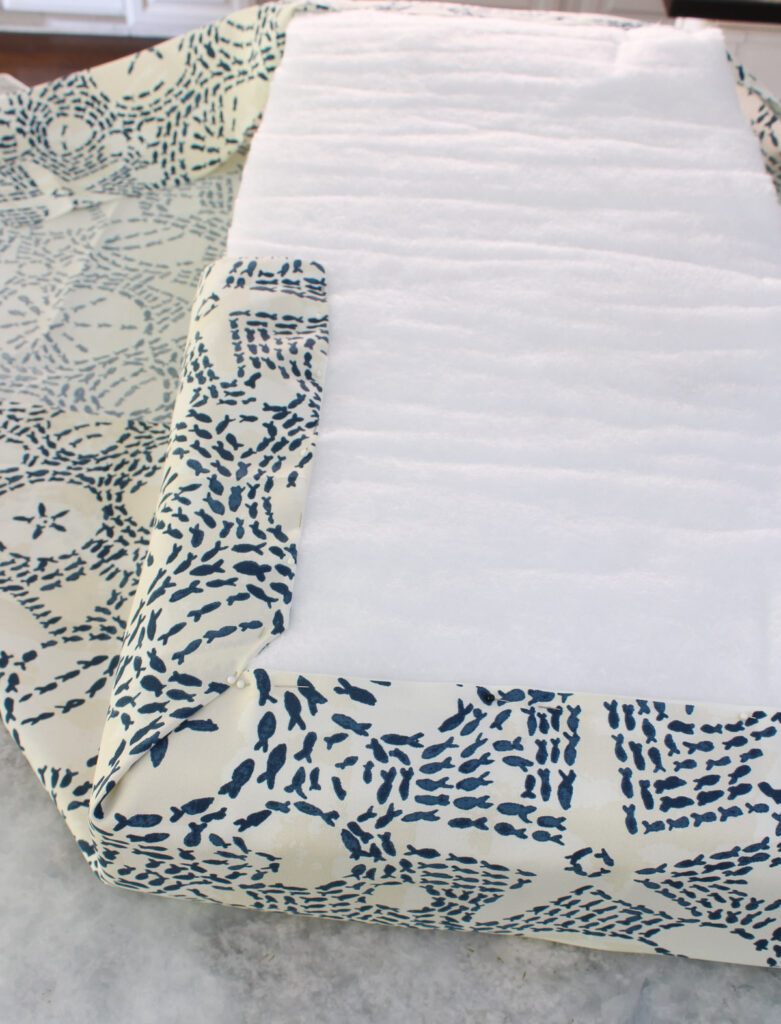
Start at one end of the cushion. Pull up the fabric and fold over the top side of the cushion. Use the pins to attach the fabric to the batting. Push the pin in the batting at an angle. Use enough pins to secure the fabric across the width of the cushion.
Pull the fabric taut at the other end of the cushion and pin that end of the cushion.
NOTE: When you pin the fabric, keep the pins almost parallel to the cushion. Pin on the fabric folds. You should be able to feel the pin go through the fabric and into the batting. The small white balls at the end of the pin will show.
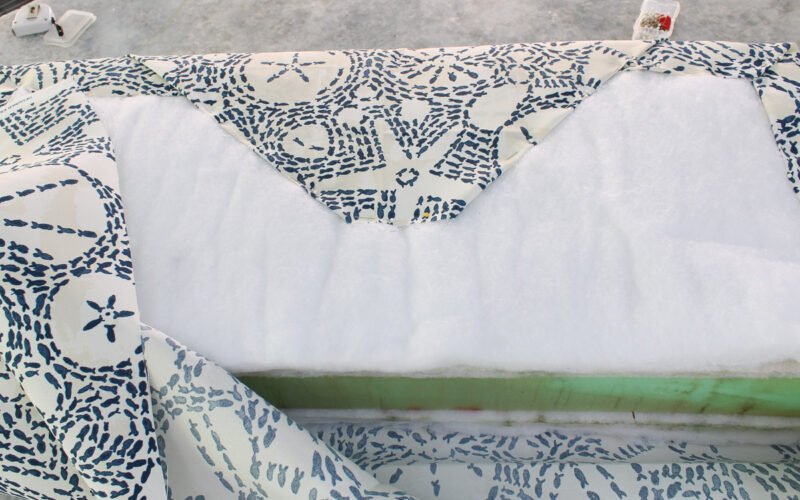
Step 9 – On the long end of one side of the cushion, pull up the fabric. Fold in the fabric like you are wrapping the cushion like a present. Pin the folded edges of the fabric as you go, smoothing the fabric and pulling it tightly. Continue pining the fabric on the folds to the fabric underneath. Repeat on the other side of the fabric.
Step 10 – On the other long side on the cushion, repeat with the remaining fabric until the cushion is completely covered in fabric. You will probably have to unpin and repin as you go to ensure that the fabric folds are smooth and the fabric is tight.
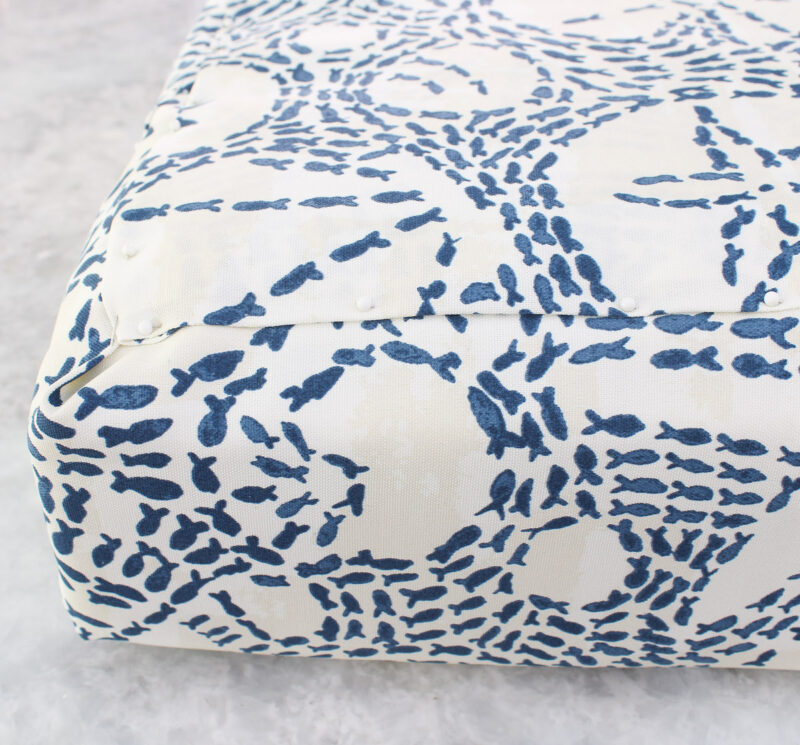
When you have finished pulling the fabric tight and the pins are all inserted and holding the fabric securely, turn the cushion over. You will see that the fabric is nice and tight. There will be no seams on the front side of the cushion. No pins will be showing.
Pins will be seen on the sides and bottom of the cushion. They will not show when the cushion is on the bench.
It will take less than an hour to recover the cushion.
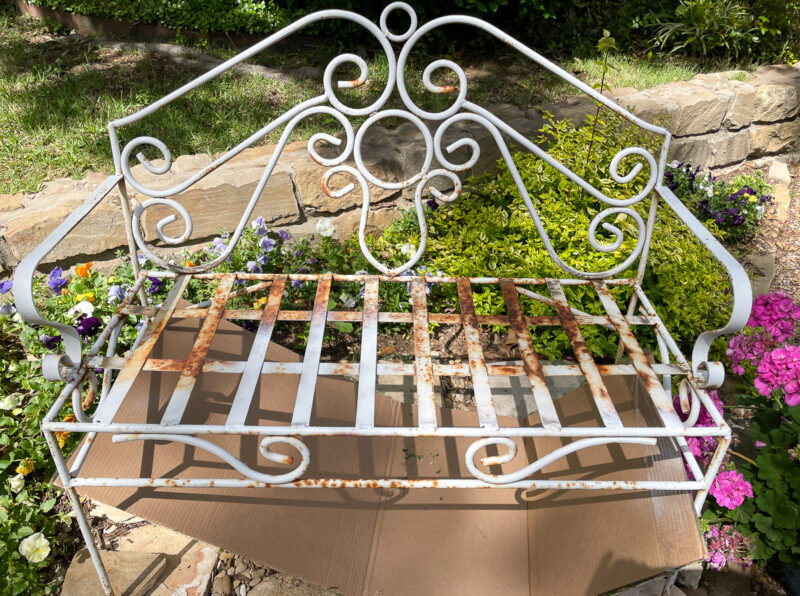
Painting the Bench
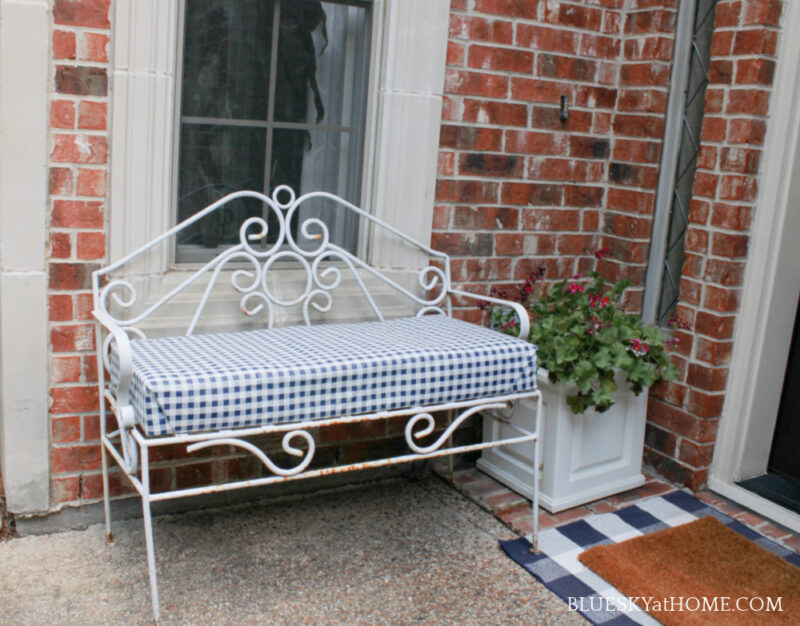
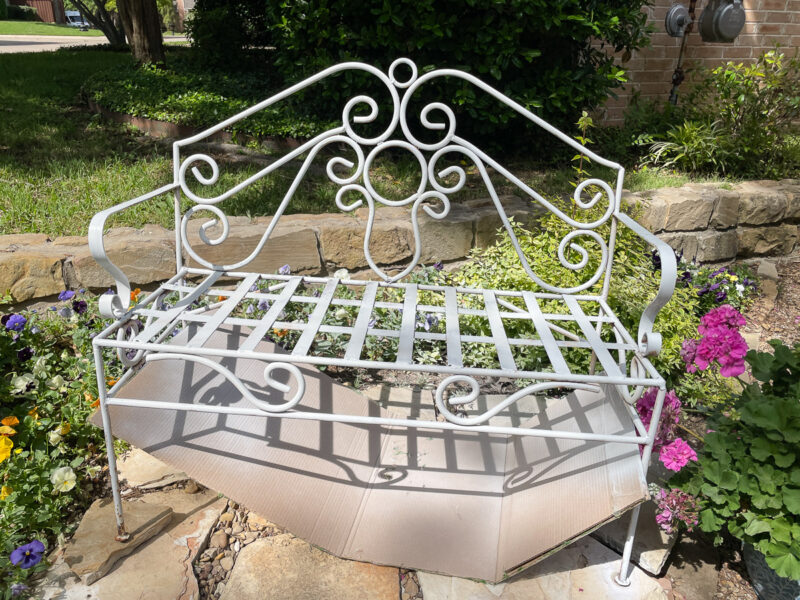
When I removed the old outdoor cushion from the bench, I knew it was time to repaint it. It had been at least three years since the last time I painted it.
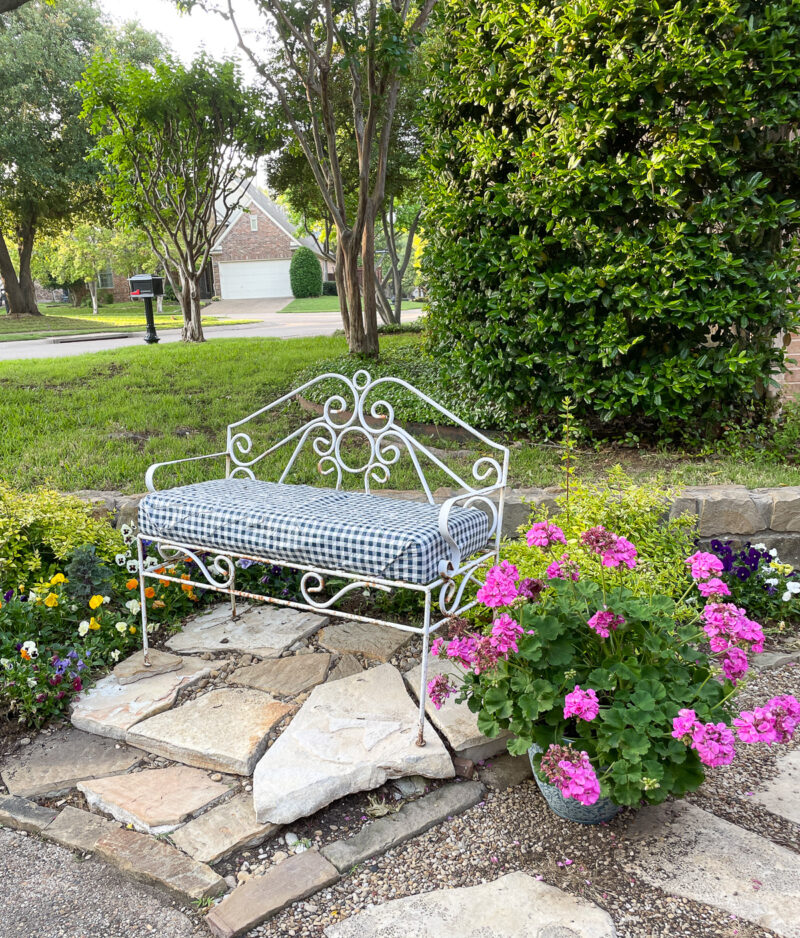
Two years ago, we had a new stone and gravel path laid from our driveway to the backyard gate. I also asked that a small stone “patio” be built for the bench.
We placed a big pot of pink geraniums next to the bench for color and ambiance.
Fortunately, I had a couple of cans of Rust-Oleum white gloss spray paint.
First, I placed a large piece of cardboard packaging under the bend to protect our stone platform.
Then I applied two coats of paint to the bench.
NOTE: I alternated painting the bench and working on the cushion.
To be extra sure that the paint on the bench was completely dry, I waited until the next day to place the cushion back on the bench.
New Outdoor Bench Cushion
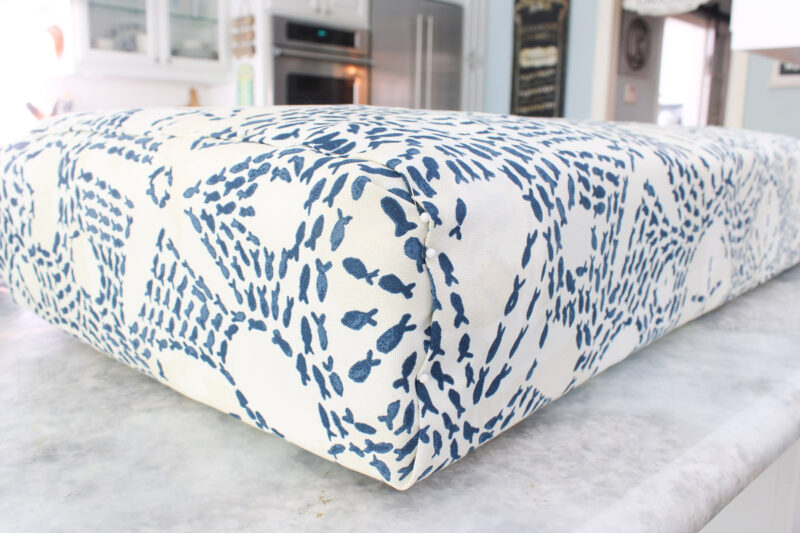
The next day, I placed the new cushion on the bench.
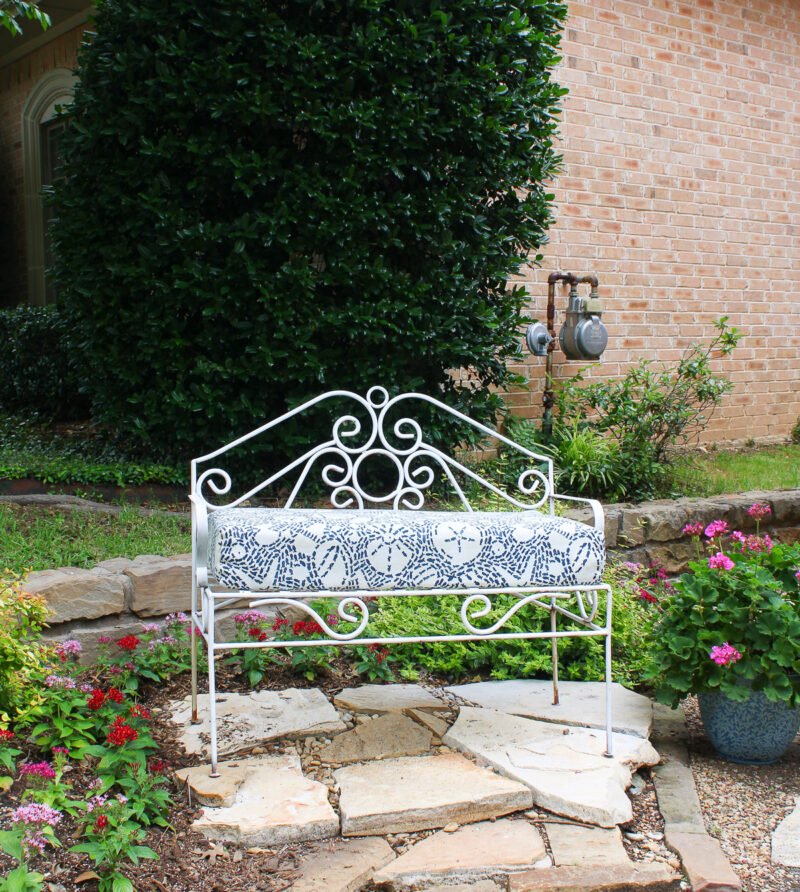
I love how it looks! The fabric has exactly the color and pattern I wanted.
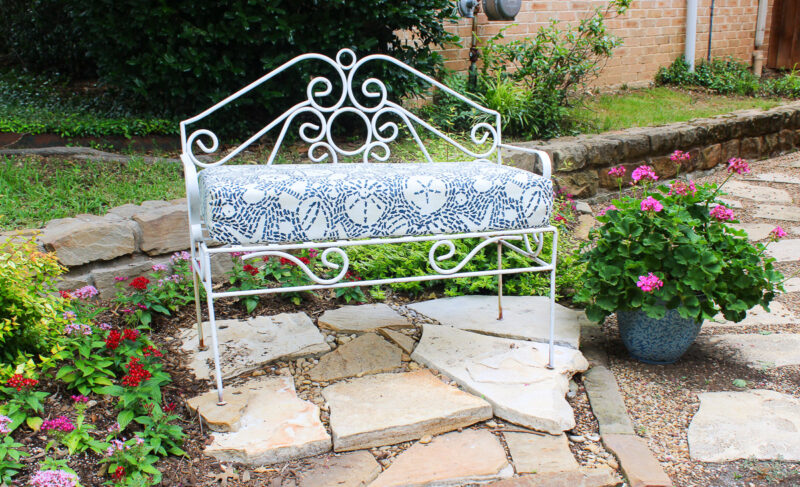
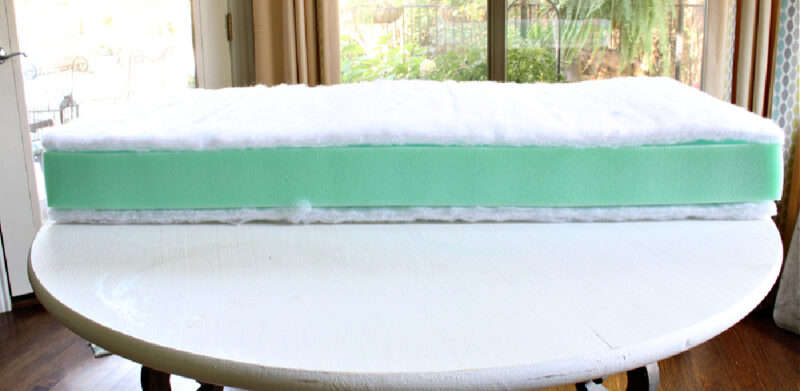
You can see that the cushion is thick. It is now 5 inches thick. That includes 3 inches for the original foam cushion and 2 inches for both layers of batting (old and new).
The thickness makes it very comfortable to sit on the cushion.
We have had quite a bit of rain weekly since I finished the new cushion. I’m amazed that the next day the fabric and cushion are completely dry.
I hope you see how easy it is to make outdoor cushion covers with fabric, foam, batting, and dressmaker pins.
You can use this process to make any cushion cover, such as a window seat for a banquet or an outdoor sofa cushion.
If you are on a budget or want the ability to change the fabric easily, I hope you give this method a try. Be sure to safe this project to your Pinterest Boards.
Ready to look at the other creative DIY projects? Start with Gail of Purple Hues and Me. The rest of the list is below.

The Painted Apron – Glue Gun Caddy
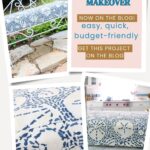
Bluesky at Home – Easy and Quick Way to Recover an Outdoor Bench Cushion
Purple Hugs and Me – Lavender Frost Daisy Catchall Dish
Decorate and More with Tip – Repurposed Old Window
Birdz of a Feather – Word Art Design
Modern Monticello – DIY Painted Rocks For Grandkid’s Garden Area
My Thrift Store Addiction – Fragrant Honeysuckle and Rosemary Luminary
The Apple Street Cottage – Easy Inexpensive Swing Frame Art


Wow, what a save Carol! It is beautiful. It’s amazing what a little creativity can do 🙂
Thank you for your sweet comment, Christina. I love sitting on my bench!
Your outdoor bench makeover looks really good. I especially like the more whimsical fabric. I didn’t realize that they make outdoor batting. Good to know My current cushions are only a year or so old so I will keep that little nugget in mind when I need to recover them. Thanks for participating in the link party this month.
Carol, your cushion re-do looks lovely! I’ve recovered lots of cushions in a variety of ways, but I haven’t tried the adhesive you used. Thanks for the inspiration!
Thanks so much, Cecilia. This is the easiest way I’ve found to recover a cuhion.
Great tutorial and a beautiful new cushion. What a lovely place to sit and enjoy the flowers!
It looks great Carol! Wow, it was easy! Thanks for the idea~
Jenna
btw, the Glue Gun Caddy is from the Painted Apron not Patina and Paint
Well done and so easy, too, Carol! I love that you’ve given us an in-depth solution on making a no-sew outdoor cushion! Thank you! Your cushion and bench look quite lovely in your cozy home setting!
Love the new look; the bench looks beautiful in its place of honour on the small stone patio!