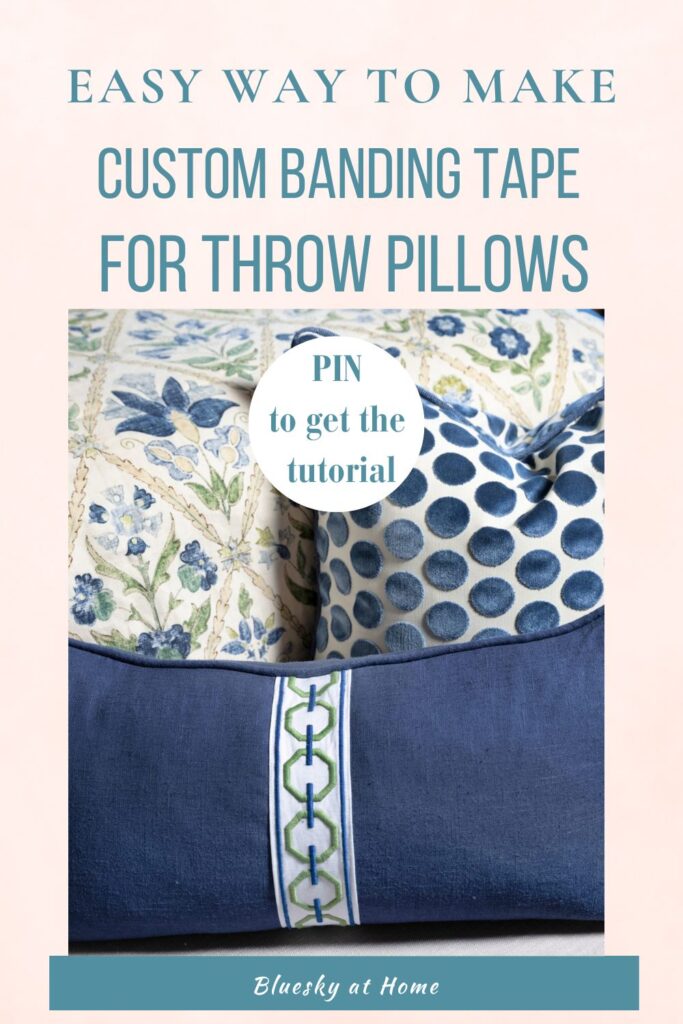
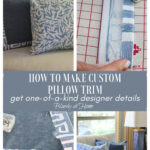
Easy Way to Make Custom Banding Tape for Throw Pillows
Who doesn’t love to use throw pillows to add style and comfort to the living spaces in our homes? I’m excited to dive into a fun and creative DIY project that will add a touch of personality and style to your throw pillows. We’re talking about an easy way to make custom banding tape for pillows.
Whether you’re an experienced crafter or just starting out, this project is a fantastic way to elevate the look of your living space. Trust me, it’s simpler than you might think.
Throw pillows are like the icing on the cake when it comes to home decor. They’re the perfect item to infuse your personal flair into your living room, bedroom, or any cozy nook you’re looking to spruce up.
While selecting ready-made pillows can be convenient, adding custom touches to a pillow takes your decor game up a notch. And what better way to do that than with unique and eye-catching banding tape?

Why use Trim on a Pillow?
It’s all in the details when it comes to creating decorative accessories that are uniquely yours. One of the easiest ways to create a layered, detail-filled design is with your decorative throw pillows. Pillows can be simple, have a little detail, or be over-the-top ornate.
Why is trim a powerful ornamental tool?
- It can help you express your personality
- It can make a statement
- It can embrace a theme
- It can create a particular feeling within your home.
- It gives your decor a “designer’s touch”
- It can add a level of visual interest to your space.
Trimmings and embellishments are a favorite of interior designers to create a cohesive, aesthetically pleasing look in your home. One of the easiest ways to add a custom touch for the crafter or sewer is to add a custom band tape to throw pillows.
These additions allow you to incorporate your favorite patterns, colors, and designs, making your pillows truly one-of-a-kind.
What Types of Trim Are Used for Pillows?
Have you ever heard the term “passementarie”? It’s a French word (of course).
Passementerie or passementarie is the art of making elaborate trimmings or edgings (in French, passements) for the purpose of embellishing clothing or decorative accessories, such as pillows or drapery.
Styles of passementerie include tassels, fringe, ornamental cords, ribbons, or tape.
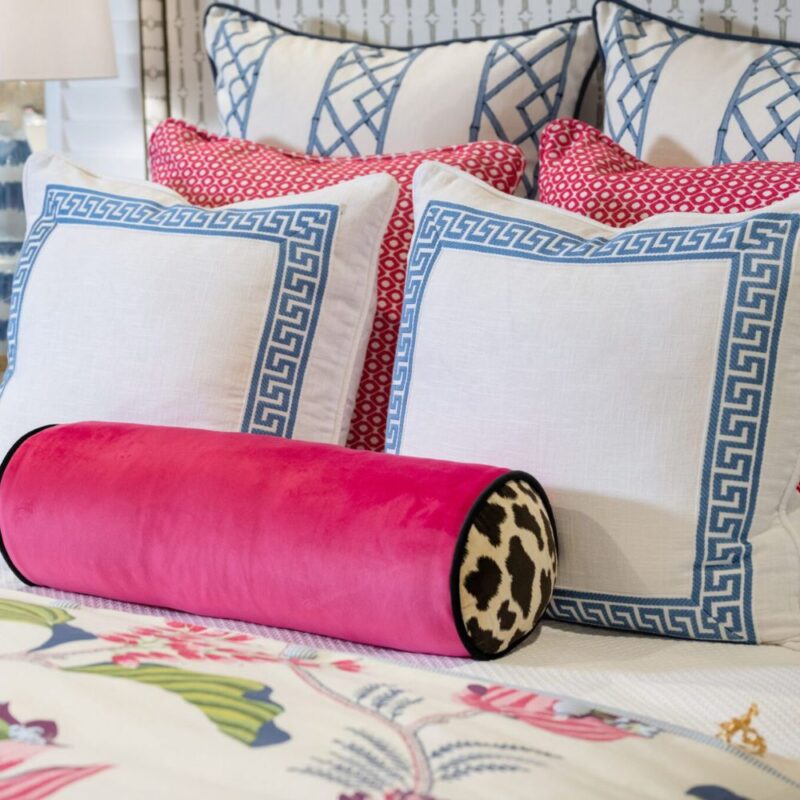
Trim is a subtle yet impactful embellishment that completely transforms the look of your pillows. There’s a wide array of trims to choose from, each with its own distinct charm.
There are three main categories of decorative trim: tape, hanging, and cording (piping).
You can use fringe, pom-poms, or banding tape. Each one is attached to the pillow face in a slightly different way. That gives you lots of options to help turn your next custom project from something ordinary into something extraordinary.
Tassel fringe adds a touch of boho chic, pom-pom trim brings a playful vibe, and classic piping exudes timeless elegance. And of course, there’s our focus today: banding tape. This type of trim offers a clean and tailored finish that’s perfect for achieving a polished, professional look.
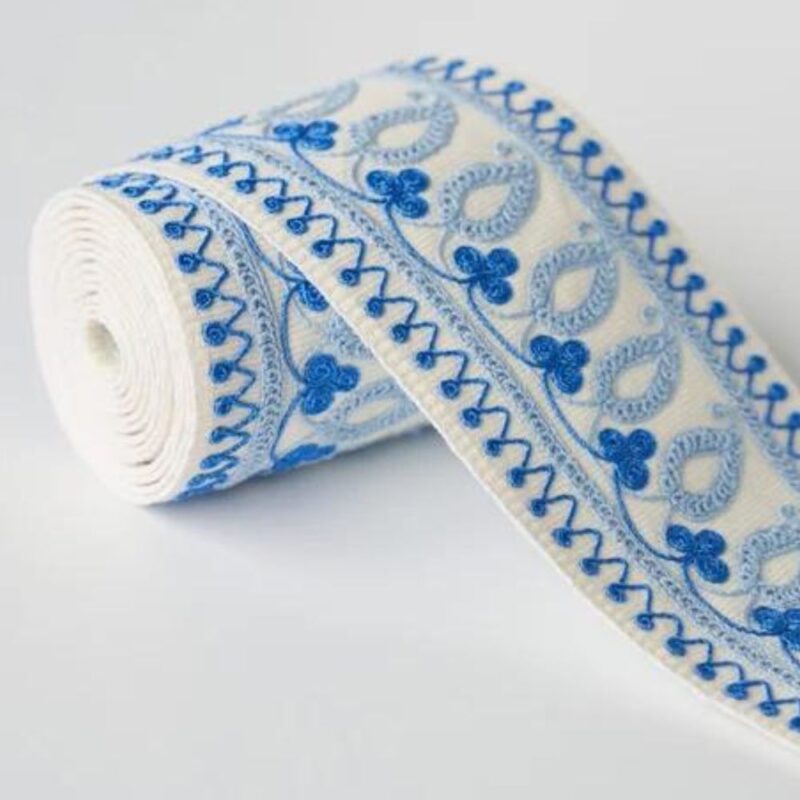
Banding tape is a flat, smooth tape generally used to create borders on pillows, slipcovers, draperies, bedskirts, sofa skirts, and upholstered furniture. It can be made from a solid piece of fabric or by weaving together pieces of fabric.
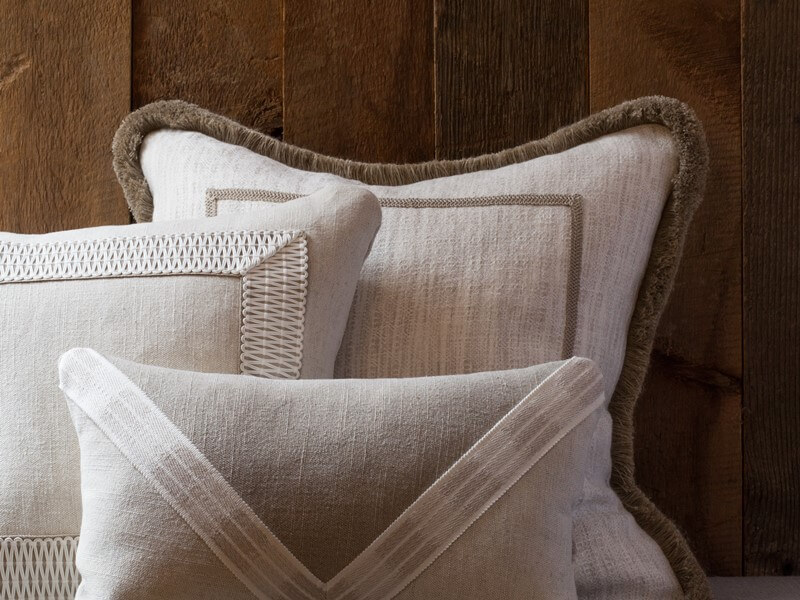
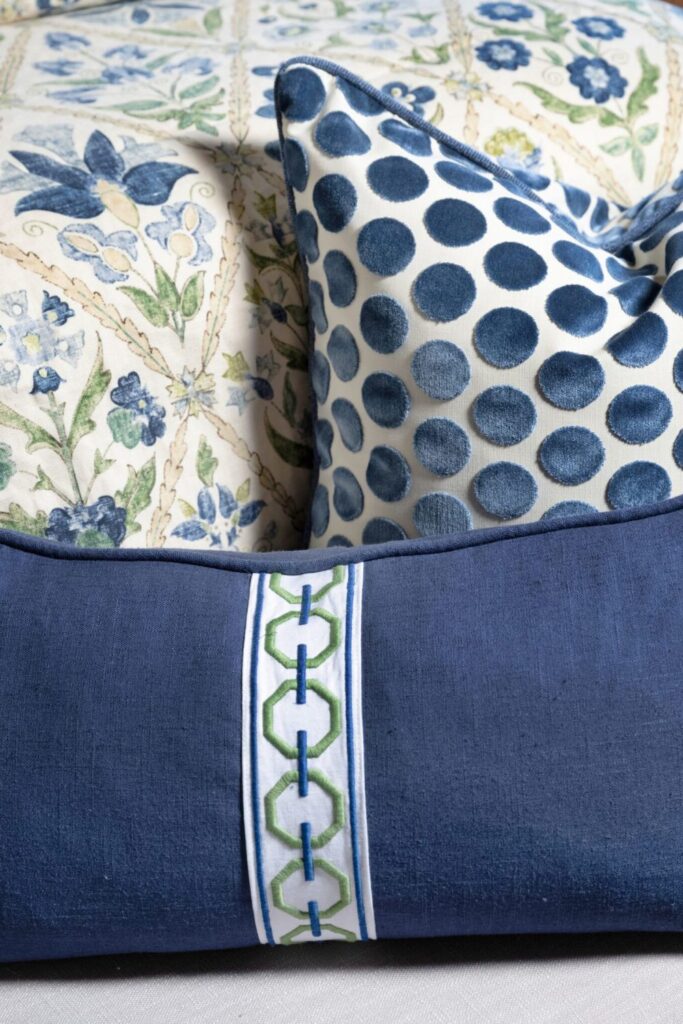
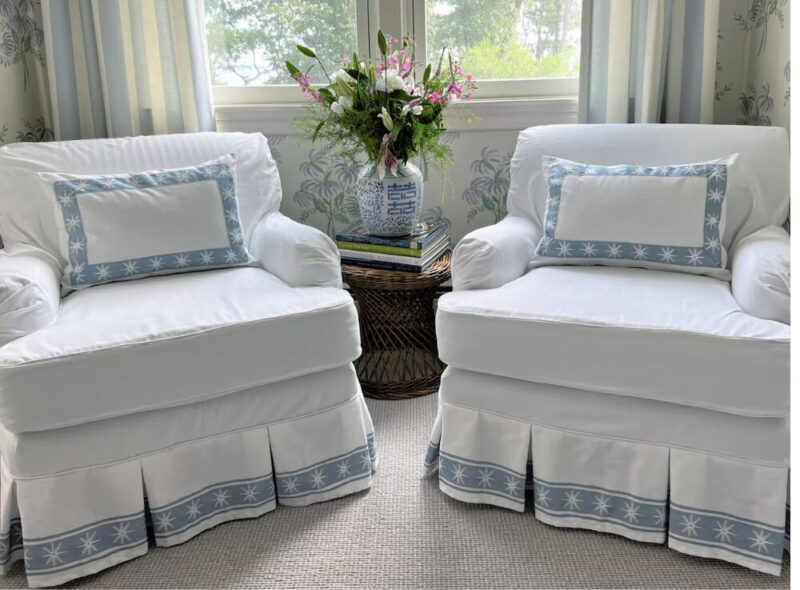
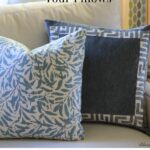
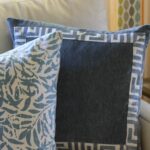
What Does Banding Tape Look Like in Real Life?
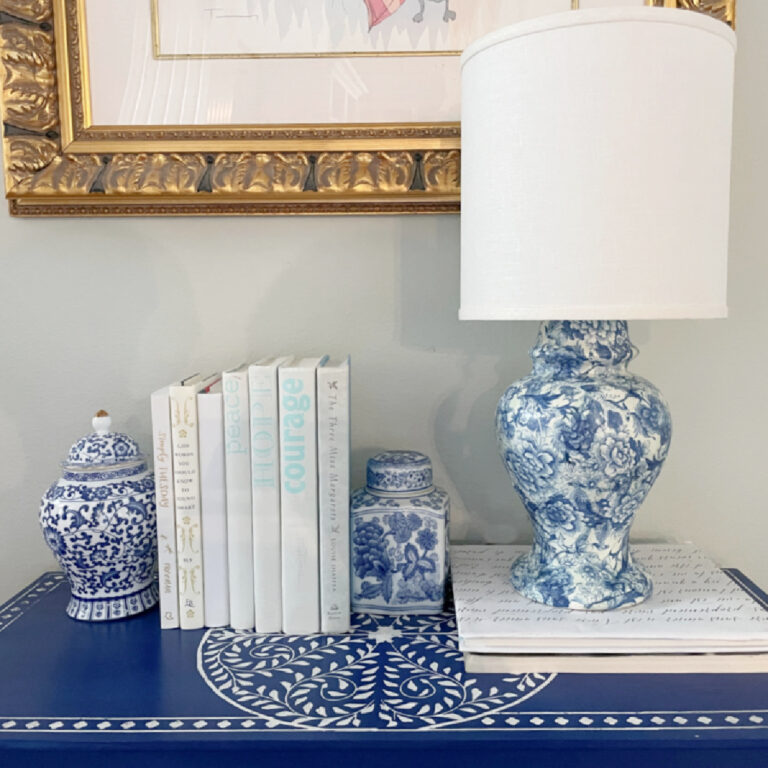
Here are examples of banding tape used on decorative pillows:
As you can see, banding tape is a decorative strip of material that is sewn onto the front of a pillow. The tape can be applied on the face, edges, bottoms, or even on the flange of a pillow. The possibilities are endless!
Banding tape is certainly available in fabric and interior design stores. There are many resources online.
I’ve seen decorative trims that will make you drool, they are so beautiful. Some are simple and some are very ornamental and may have small “jewels” or beading woven into the tape.
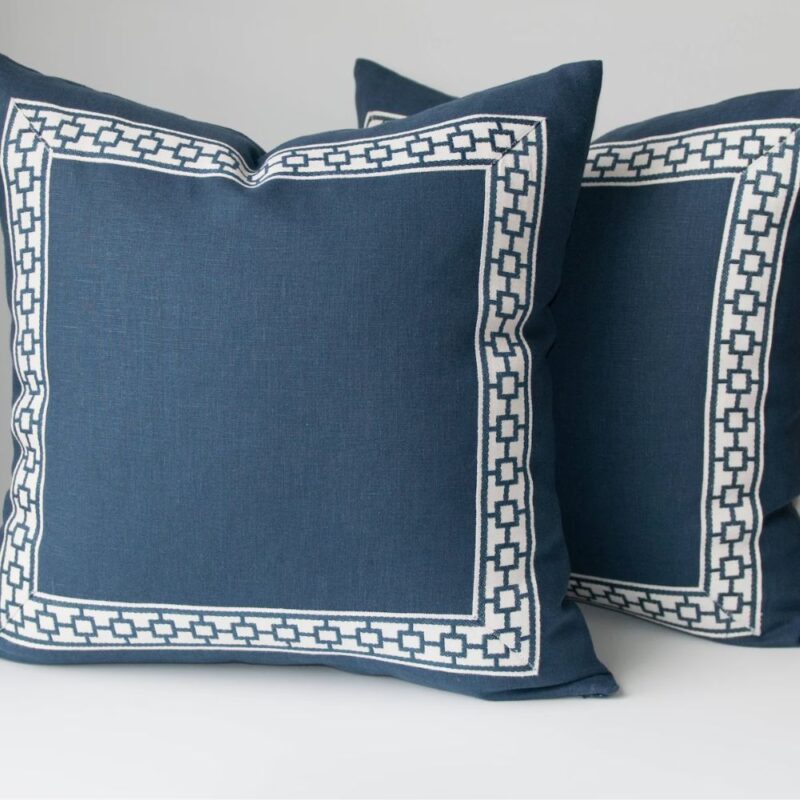
Banding tape can be used to “outline” a pillow. It can also be used in a center stripe and two stripes.
Banding tape is best applied to rectangular or square pillows.
Where to Use Banding Tape?
Banding trim is so versatile. Here’s a list of creative ways to use banding trim to enhance your home decor:
- Pillow Front: The most traditional use of banding tape is to embellish the front side of throw pillows. This adds a decorative and polished finish to the pillow cover and can complement or contrast with the fabric for an eye-catching effect.
- Curtains and Drapes: Use banding trim to accent the edges of your curtains or drapes. This can bring a cohesive look to your window treatments and tie them in with your overall decor theme.
- Table Linens: Elevate your tablescapes by adding banding trim to tablecloths, placemats, and napkins. It’s a subtle yet elegant touch that can enhance your dining experience.
- Upholstered Furniture: Consider applying banding trim to the edges of upholstered furniture, such as the arms or skirts of sofas and chairs. This can give your furniture a tailored and custom appearance.
- Dining Chairs: Add a stripe of banding trim down the middle of the chair seat.
- Blankets and Throws: Add a pop of color and texture to blankets and throws by attaching banding trim to their edges. It’s a great way to make these cozy essentials even more inviting.
- Lampshades: Transform plain lampshades into stylish decor pieces by gluing or sewing banding trim along the top and bottom edges. This can tie the lampshade design into your room’s aesthetic.
- Towels: Upgrade your bathroom or kitchen by adding banding trim to the edges of hand towels, bath towels, or dish towels. It’s a small detail that can make a big impact.
- Napkin Rings: Create unique napkin rings by making mini banding trim loops. Wrap the trim around a piece of cardboard tube (like a used paper towel). Slide them onto folded napkins to impress your guests during dinner parties.
- Picture Frames: Glue or attach banding trim around the edges of plaint picture frames to frame your favorite photos or artworks in a creative way. This is a great decoupage project.
- Shower Curtains: Make your bathroom decor stand out by applying banding trim to the bottom edge of your shower curtain. This can add a touch of luxury to your daily routine.
- Clothing: Take your fashion game up a notch by using banding trim as an embellishment on clothing items like jackets, jeans, or skirts. It’s a trendy way to customize your wardrobe.
- Bags and Totes: Transform plain bags or totes into personalized accessories by sewing banding trim along the edges. This can give new life to old bags or make new ones truly unique.
Remember, the versatility of banding tape knows no bounds. Let your creativity run wild as you explore different ways to incorporate this charming detail into various aspects of your home and life. Obviously, we are going to focus on creating your own custom banding trim, which can be used in the same way as store-bought trim.
Why Make Your Own Custom Banding Tape?
If you can find retail banding tape that has the style, color, and pattern to fit your project, that’s great. However, three things may make you think twice about making your own custom banding tape:
- the cost – banding tape can be very expensive. The better-made, the more embellished trims can be quite pricey – in the $100/yard range. A 20 X 20-inch pillow can require over two yards of trim. Even at $30-$50/yard you’re talking about $60 – $100 for one pillow.
- you may not be able to find the exact color or pattern that you want. If you are trying to repeat a color and pattern that you already are using in another place in your room, making custom tape adds a beautiful custom detail.
- you want a custom look – repeating a color scheme, pattern, and texture on a decorative pillow ties different elements together for a designer look.
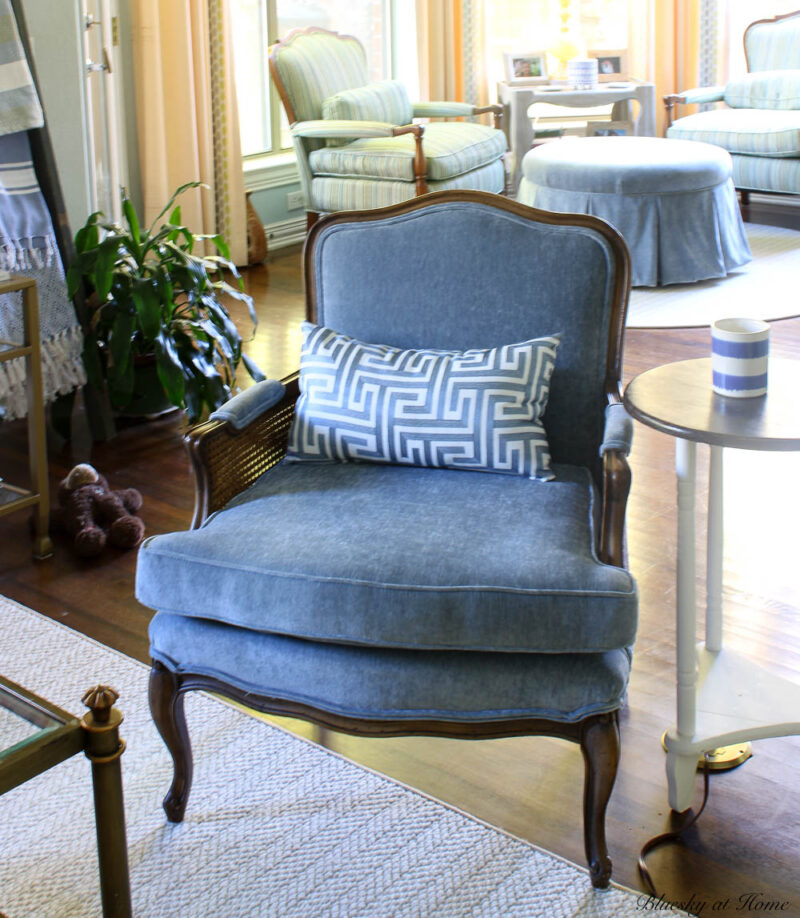
This custom banding tape project started when I was planning to make custom-zippered pillows for our living room:
- three 20 x 12-inch lumbar pillows in a blue and white fabric
- two 20 x 20-inch pillows in a blue and white coordinating graphic patterned fabric
- two 20 x 20-inch blue velvet pillows.


I wanted to make custom band tape for a few reasons:
- I wanted to add a decorative trim to the two 20 x 20-inch blue velvet pillows for our sofa.
- I had plenty of patterned fabric left over from the three lumber pillows that I made. I loved this almost “Greek key-looking” pattern. I thought it would be a great band tape for the blue velvet pillows.
- I knew I could use the leftover fabric to tie the blue velvet pillows and the lumber pillows for a custom look.
- Using the leftover fabric would save me a considerable amount of money on purchasing retail banding tape.

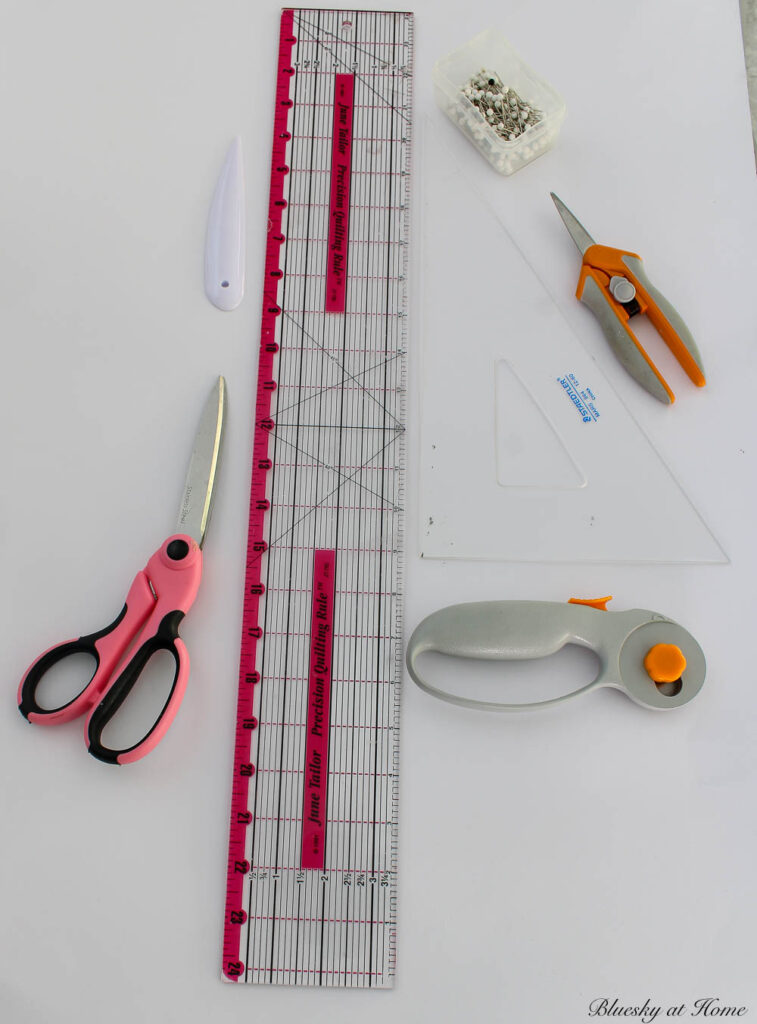
Crafting Your Custom Banding Tape: Supplies You’ll Need
Here’s a list of supplies you’ll need to get started on creating your own custom banding tape for throw pillows. If have any sewing skills, you probably have these on hand:
- Fabric: Choose a fabric that complements your pillow cover. This could be a solid color, a pattern, or even a contrasting fabric for a bold statement. It may be a fabric that you have previously used in other pillows. That was my reason for making my custom pillows.
- Acrylic Straight Edge with Measurements*: Accurate measurements are key to a well-fitted trim. Useful for ensuring your trim lines are straight and even.
- Scissors or Rotary Cutter*: For cutting your fabric into strips with precision. A rotary cutter is my preference for accuracy and precision.
- Cutting Mat*: To use with the Rotary Cutter.
- Sewing Machine: A basic sewing machine will work perfectly for this project.
- Thread: Opt for a thread color that matches your fabric. You will use the thread for basting your custom banding tape and to attach the tape to the pillow.
- Straight Pins: These will help you hold the fabric in place while sewing.
- Iron and Ironing Board or Ironing Mat: Essential for neatly pressing your fabric.
*You might want to take a look at this 3-piece set of supplies.
With these supplies on hand, you’re all set to begin making your custom banding tape.
Supplies For this Custom Band Tape Project


Making Your Custom Banding Tape
The step-by-step process creates your very own banding trim and adds that extra oomph to your throw pillows. Trust me, this DIY project is about to become your new favorite way to give your accent pillows a personalized touch. Get ready to be amazed at the big impact such a small detail can make!
Before actually starting this DIY project, you have to make a few decisions:
- select a fabric that will complement the fabric of the pillow. This is a great way to use extra fabric from other pillows you have made.
- decide on the width of the banding trim. Depending on the size of the pillow, the pattern on your chosen fabric, your banding trim should be 1 – 3 inches wide.
- decide how far from the raw edge of the pillow front you want your banding trim to be. I recommend at least 2 inches. One-half inch will be the seam allowance on the pillow.
NOTE: We’ll assume that you have already cut the front and back of your pillow cover. See this post on how to make a zippered pillow cover first.
For now, you only need the front of the pillow. After you have added your banding tape to the front of the pillow, you will add your invisible zipper and finish the pillow.
STEP 1
Gather your equipment: the cutting mat, acrylic straight edge, rotary cutter, and ironing mat and iron. If necessary, iron the fabric on medium without any steam.
STEP 2
Lay your fabric on the cutting mat to measure the width of the band tape fabric want. First I cut off the white selvage.

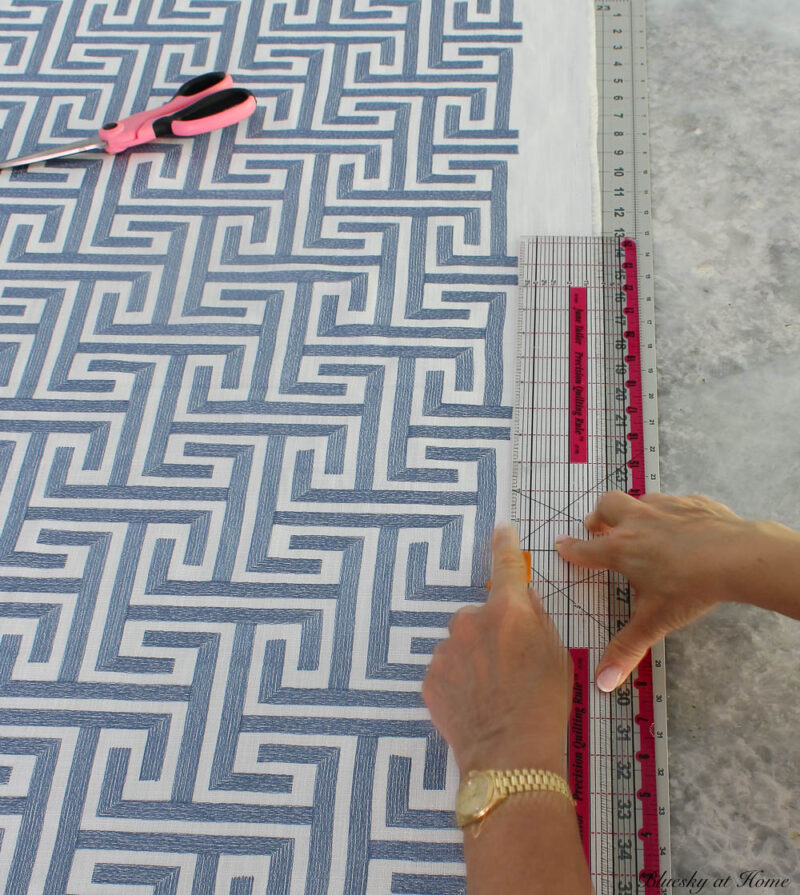
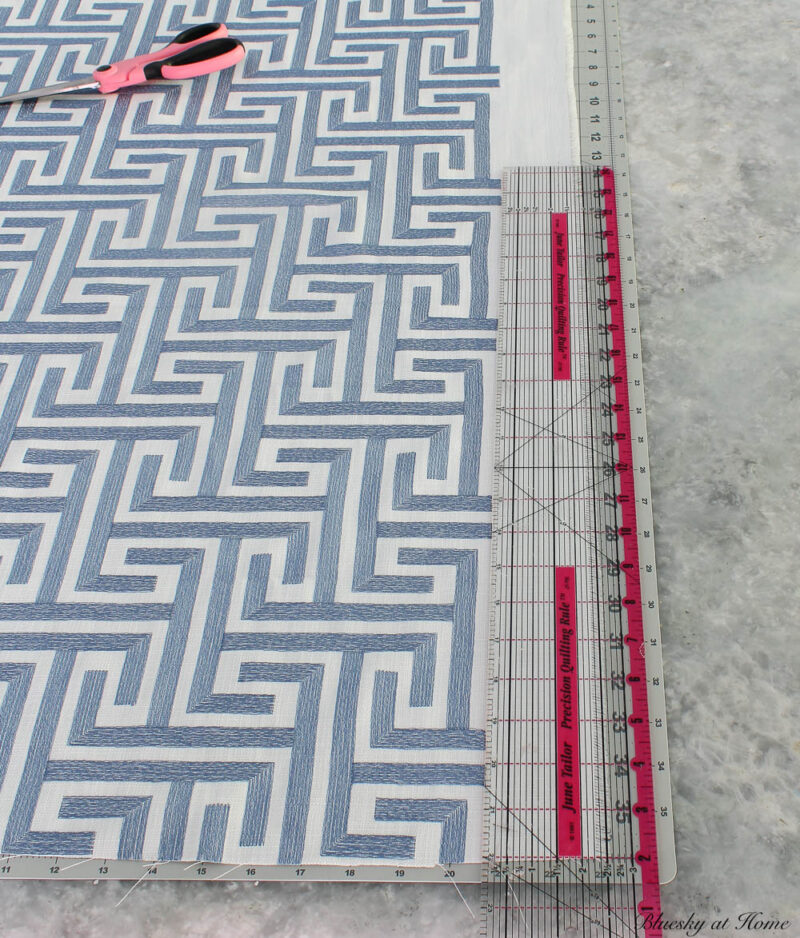
I wanted my finished trim to be 1 1/2 inches wide, so I made my fabric strips 2 1/2 inches wide.
Use the measuring straight edge and the rotary cutter to cut the strips. Make them as long as you can. My strips were about 33 inches long. Since the banding tape would be 18 inches on all 4 sides, I would need 72 total inches plus more for turning the corners on the diagonal. I estimated a total of 80 inches.
NOTE: Add 1 inch to the finished width of your banding trim.
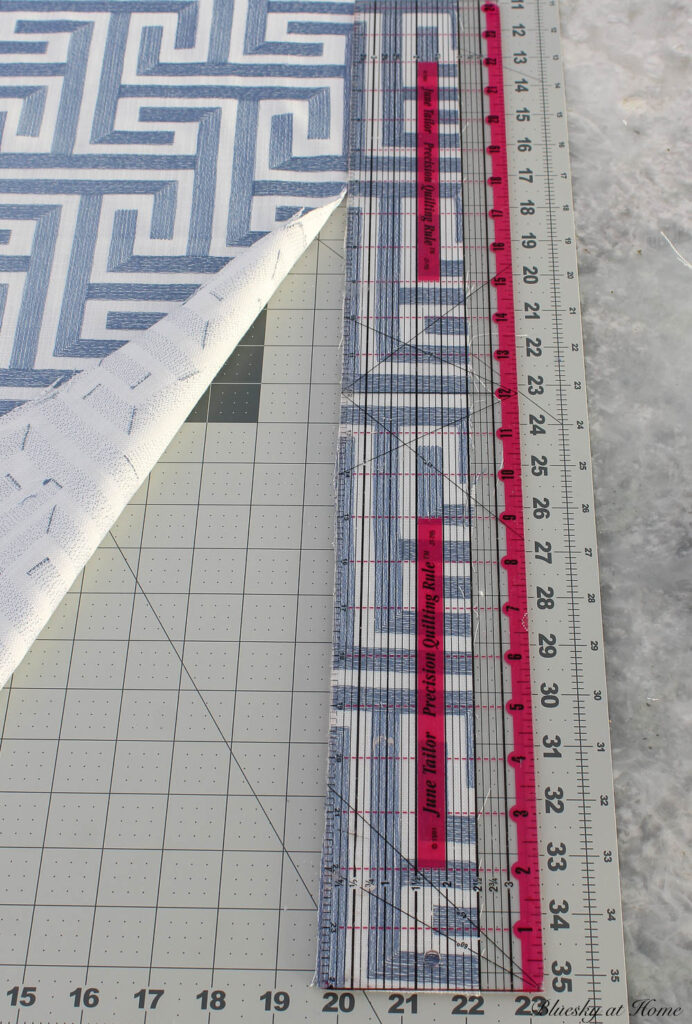
STEP 3
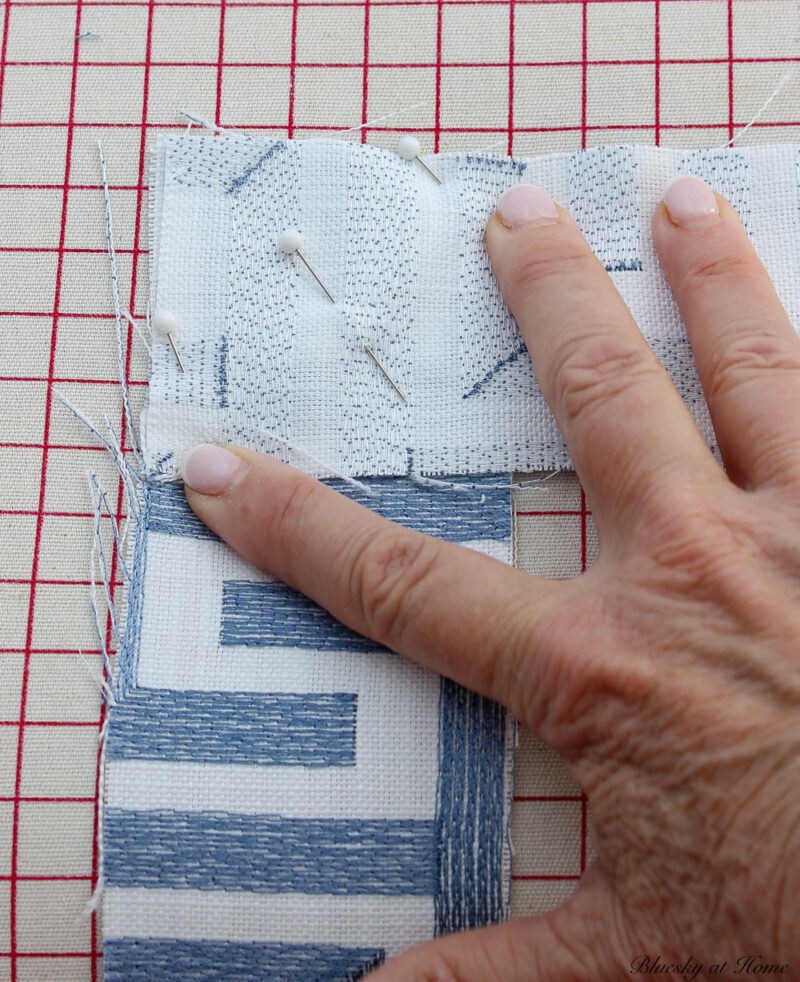
Take two strips and place them right sides together at right angles. Pin across the diagonal from corner to corner. Add as many strips as you need for your pillow trim, repeating the diagonal placement.
STEP 4
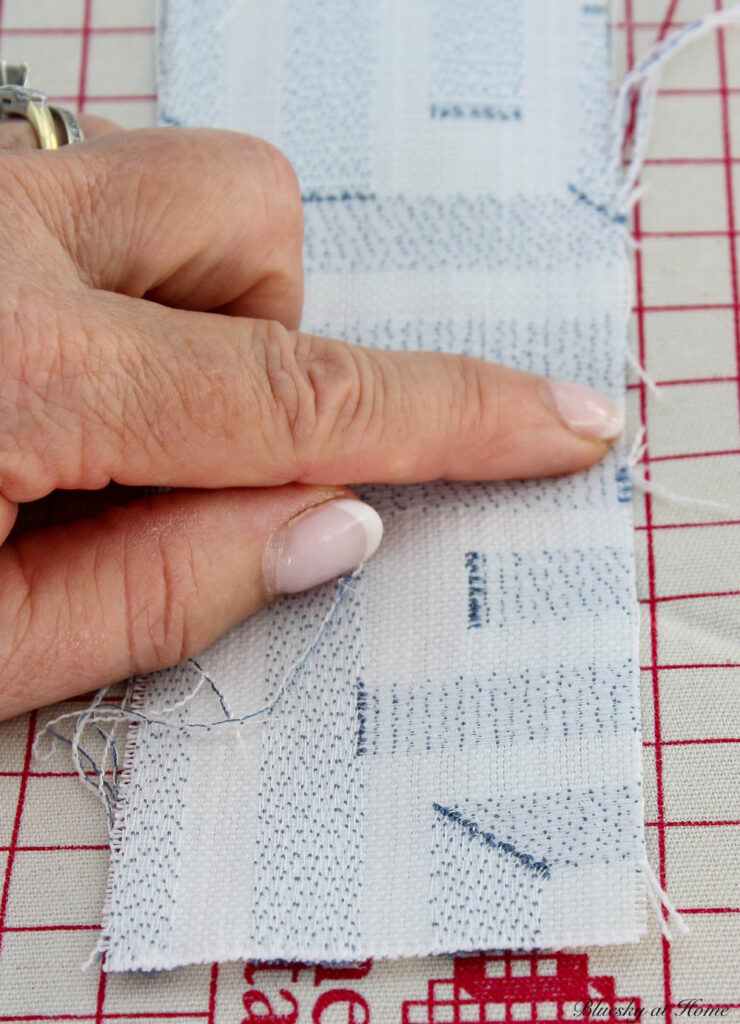
On the sewing machine, stitch a steam on the diagonal from the outer corner to the inside 90 degree angle, back-tacking at the ends. Trim half the seam allowance. Iron the seams open.
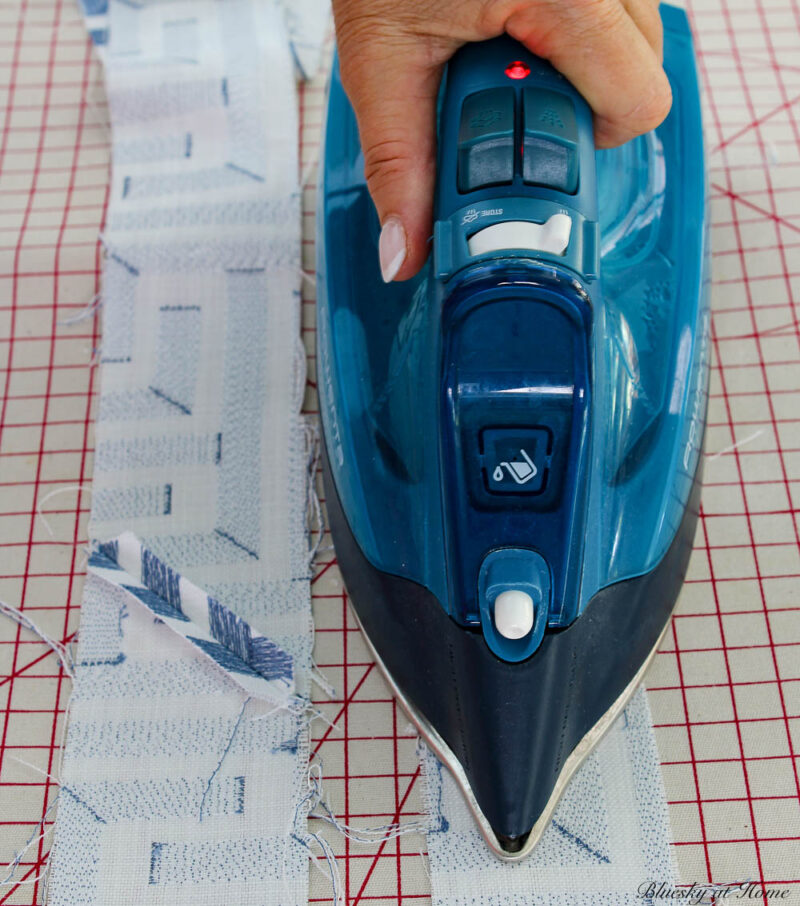
STEP 5
Lay the strips of fabric on the ironing mat. Have your iron ready.
My ironing mat, which I have had for years, is measured in 1/2 inch squares.
NOTE: I am able to use these 1/2-inch squares and lines as a guide to turn over 1/2 inch on both sides of the strip. If your ironing mat does not have measurements, use the clear acrylic straight edge to guide you to make straight lines to turn over your extra 1/2 inch.
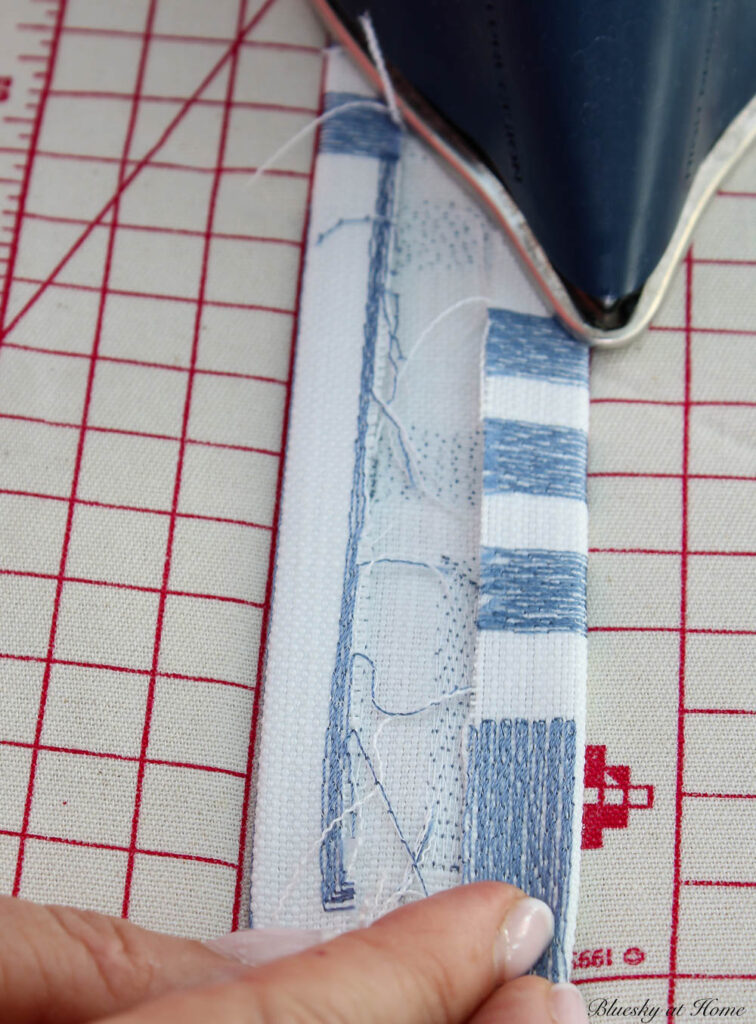
Iron the allowance down as you go. Repeat the process until the length of the fabric is finished. When you are finished turning the allowance in, turn the fabric strip over and press again to get a good sharp edge.
Attaching the Fabric Strips (Banding Tape) to the Pillow Front
STEP 6
Lay your pillow front fabric on your ironing board or cutting mat. I like to use the ironing mat better.
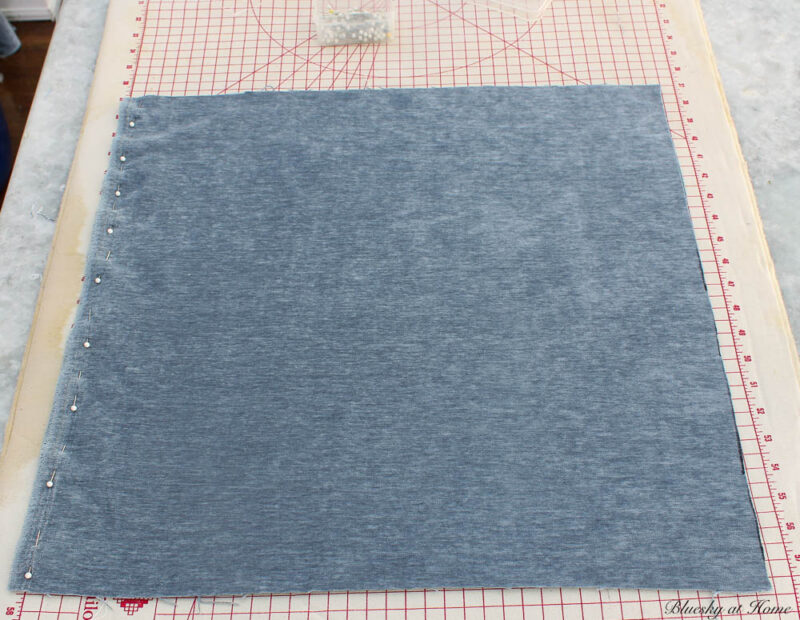
Place one end of the fabric strip 2 inches from one of the pillow edges and 2 inches in from the perpendicular edge. Line the measured straight edge 2 inches from the raw edge of the fabric to keep the fabric stripe straight.
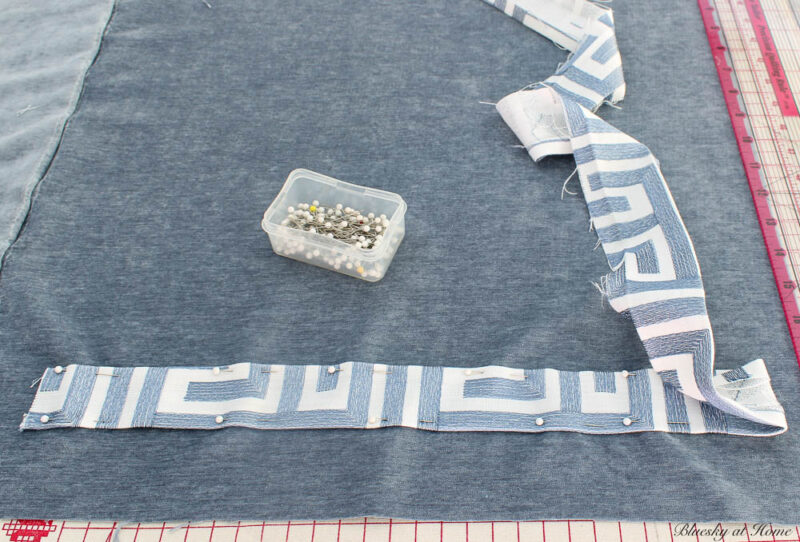
Pin the fabric strip to the pillow front as you lay it on the front. Stop 2 inches from the opposite raw edge. Turn the excess strip back over the Pinned strip. Iron the fold down.
Step 7
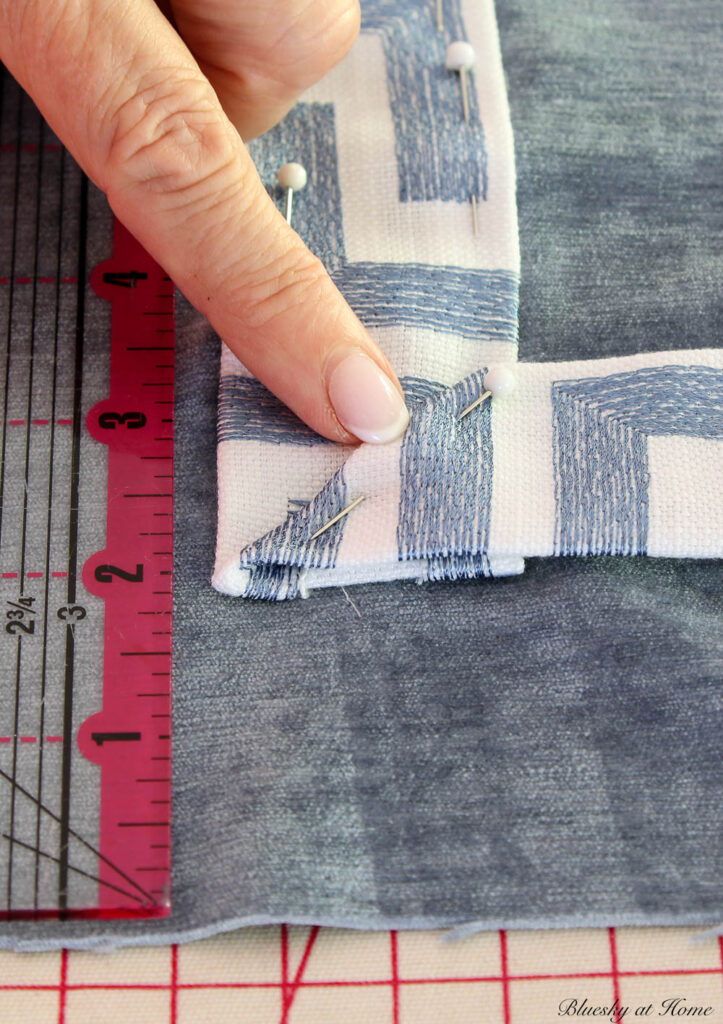
Turn the fabric strip on the diagonal toward the empty side of the pillow. Make sure the strip is 2 inches from the raw edge of the pillow front. You want to make a diagonal line at the corner. Use the iron to press down on the diagonal fold. Pin the fold.
Step 8
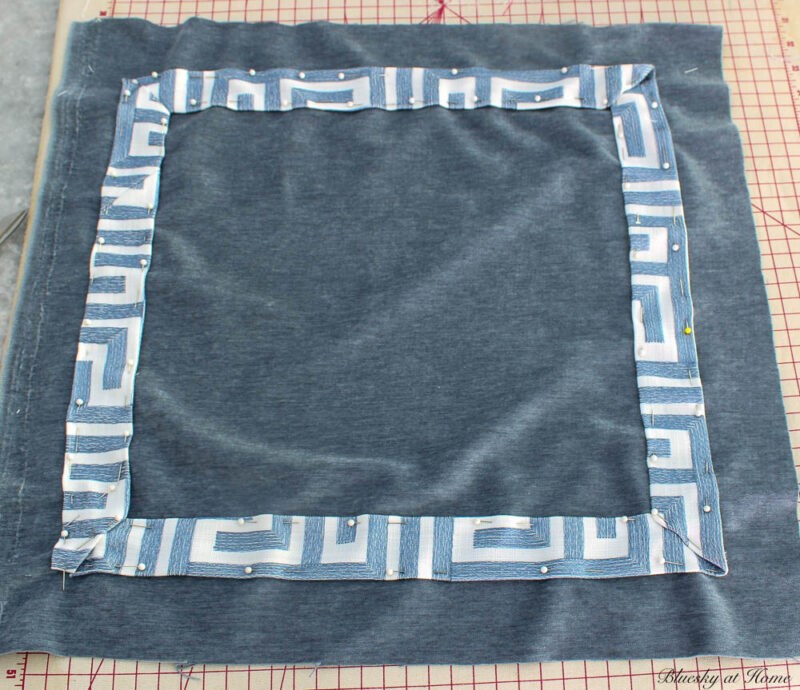
Continue lining up, measuring the strip, Pinning it to the pillow front, and turning on the diagonal on the next two corners.
Step 9
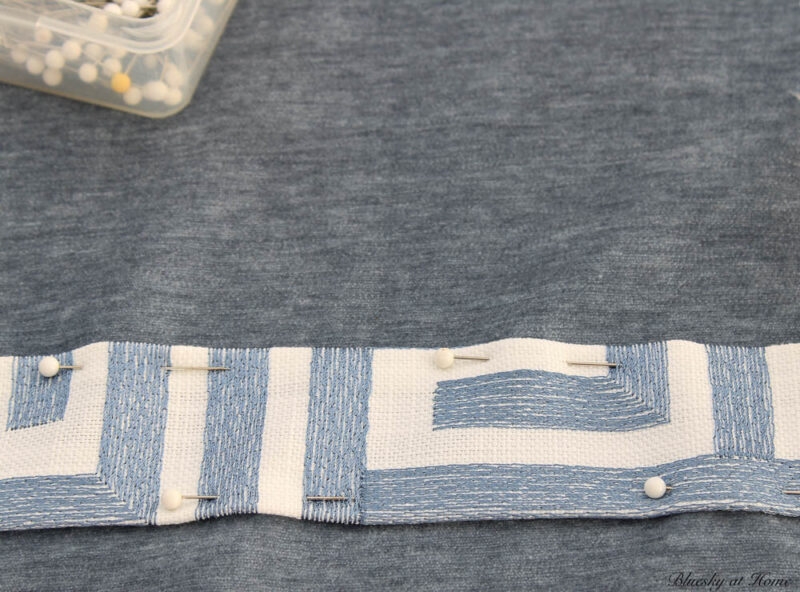
When you have come back to where you started, fold the fabric strip on the diagonal to cover the raw edge of the tape. Press the fold down. Turn the fabric back, wrong side up and cut off the access fabric, leaving about 1/2 inch of fabric on the underside. Pin the top fabric strip to the bottom strip.
Step 10
Using your thread and needle, baste the fabric banding tape to the front of the pillow cover on the inner and outer edges. Tack down the band tape on the diagonal corners. Remove the straight pins.
Step 11
On your sewing machine, sew the band tape to the pillow cover, ending with the diagonal corners.
You’ve finished making and adding your band tape to your pillow cover.
Finishing Your Pillow
Now you can add your invisible zipper and finish your pillow. Follow the instructions on how to make an easy zippered pillow cover.
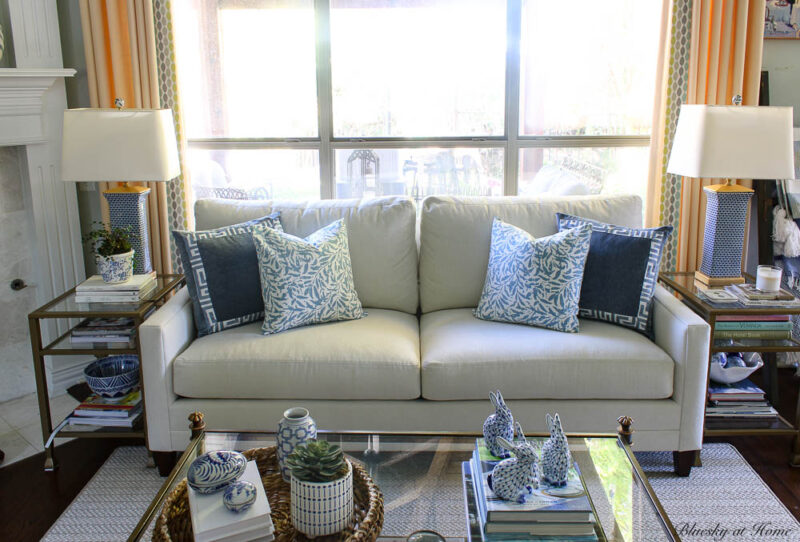
Admire your beautiful pillows. Remember that you can make custom banding tape for a variety of applications.

In the background of this picture, you can see our custom-made drapes in our living room. The vertical design on the leading edge of the drapes is a custom banding tape made from fabric. This is another great way to use decorative trim for a custom detail.

The banding tape adds that touch of detail that evokes an extra level of color and pattern.
Do you need to save this banding tape tutorial? Then be sure to PIN it to your DIY or sewing Pinterest Boards.


Your pillows look beautiful. I’ve never heard of this banding tape so I’ll have to check it out. Thanks for sharing it!