How to Make a Silverware Pouch for Your Place Settings
I’m back with another easy DIY project for you. I love to set a pretty when we are having friends over for dinner. I like to always include something that I made, a personal addition to dishes and glasses and silverware. For our recent fall tablescape blog hop, I wanted to recreate my version of a little something that I saw in a restaurant. So let me show you how to make a silverware pouch for your place settings.
Setting a lovely table is one of my treasured memories of my mom. She always used her best china and crystal, silver and napkins (beautifully starched and ironed) and placemats. I was in charge of helping her set the table, a task that I grew to love because it was mom and me time. I learned where the forks and knives and spoons should be placed. Where the water glasses and wine glasses belonged. How to fold a napkin.
As an adult, with my own home, whatever the occasion, I’ve tried to create a table that says to my guests, “you’re special and I’m so happy you are here.” (Here’s the steps I take to create a tablescape.)Adding that extra personal touch in the form of a DIY makes me feel like I’m giving our friends a little hug. So I want to give you a little hug and show you how to make a silverware pouch for your place settings.

How to Make a Silverware Pouch for Your Place Settings
This post contains affiliate links for your convenience to products that I use, love and highly recommend. If you order any product through this site, I may receive compensation, but you do not pay one penny more.
This fall tablescape included more DIY elements than usual. I showed you how to turn terra~cotta pots into vintage looking ones for my centerpiece. Then how to make fabric placemats using paint and a stencil. This is the third DIY for this particular tablescape theme. The great think about these tablescape DIY projects? They all can be used over and over.
The Inspiration for the Silverware Pouch
Several weeks ago Sweet Shark and I had dinner at a fairly new restaurant in town called Sachet. I will tell you that we loved the food and the atmosphere. But you know that caught me attention the minute we sat down? The place settings. In particular, the sweet fabric pouch holding the silverware.
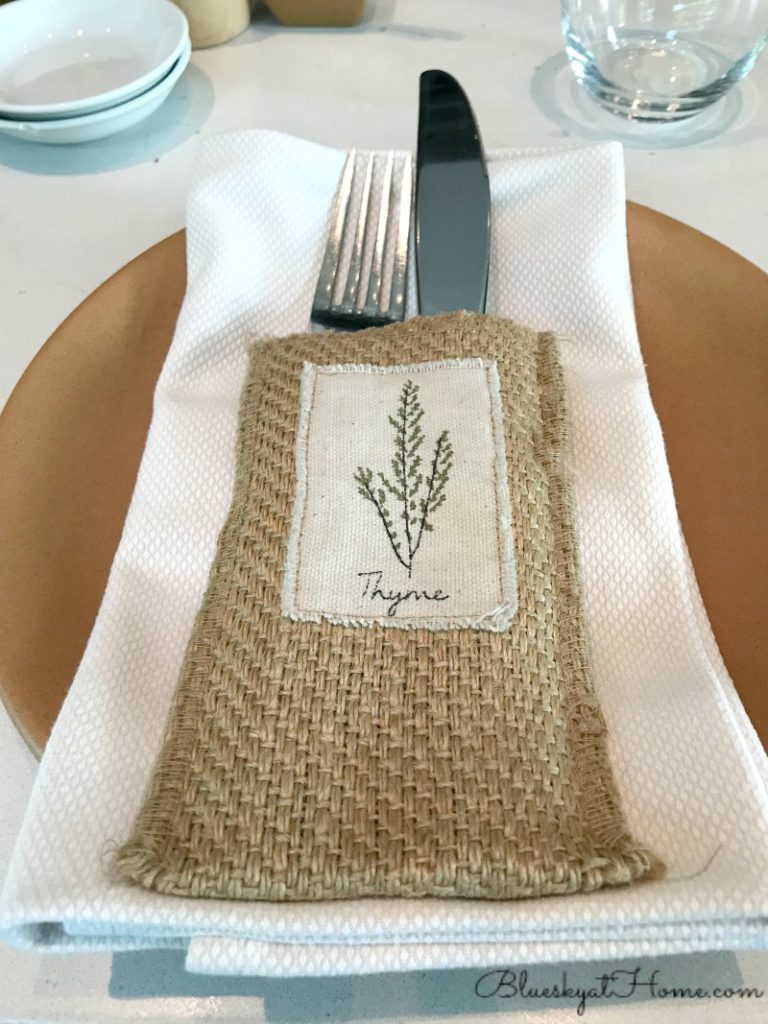
When it came time to think about designing my fall tablescape for our blog hop, I couldn’t stop thinking about those cute little pouches. I knew I wanted to include them in my tablescape. Since they were custom-made for the restaurant (I asked.), I knew I would have to figure out how to make a silverware pouch for my place settings.
Since my theme was soft and natural, I thought of repeating the live plants from my vintage pot centerpiece on each place setting. I had plenty of herbs in our garden that I could use, but they would wilt quickly and I wanted something that would last for the month of October.
The next best thing? Putting an image of leaves on my silverware pouch. And how would I do that? I could use a stencil, but I had already done that to make my placemats. Let’s try a different tool. DIY is all about trying new products and I had one in my office ready for a trial run.
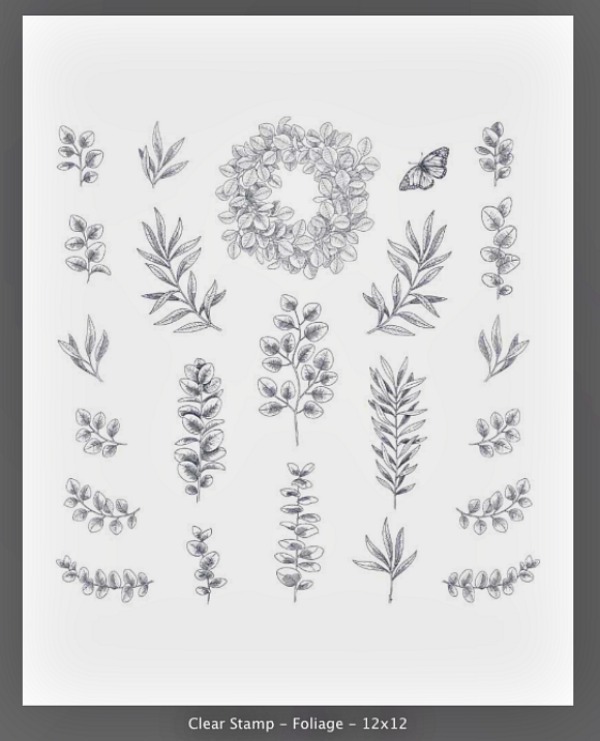
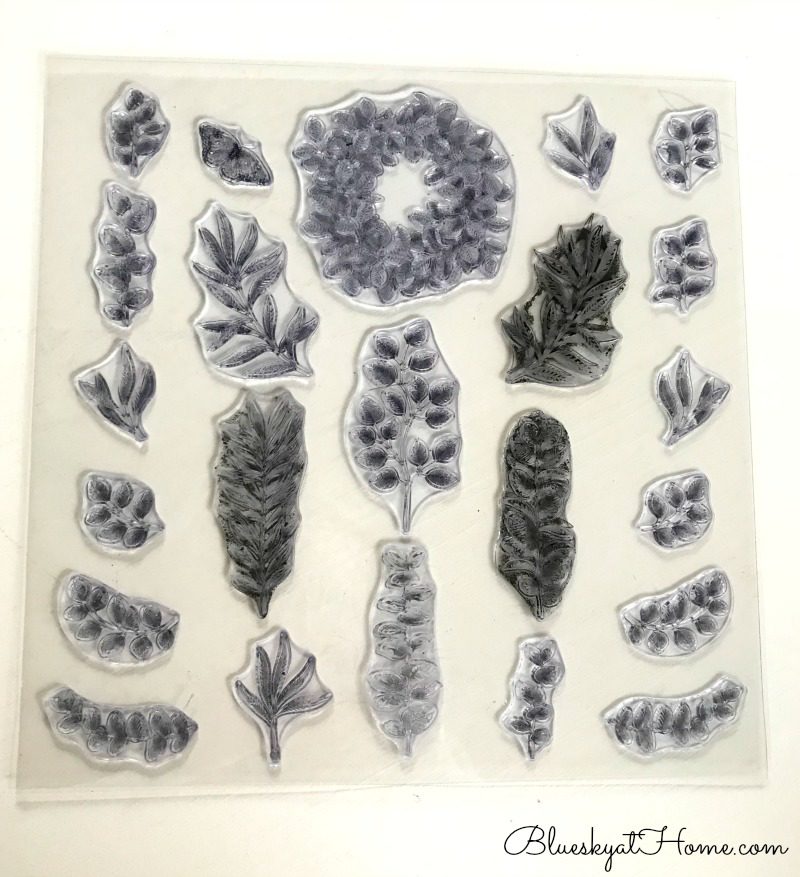
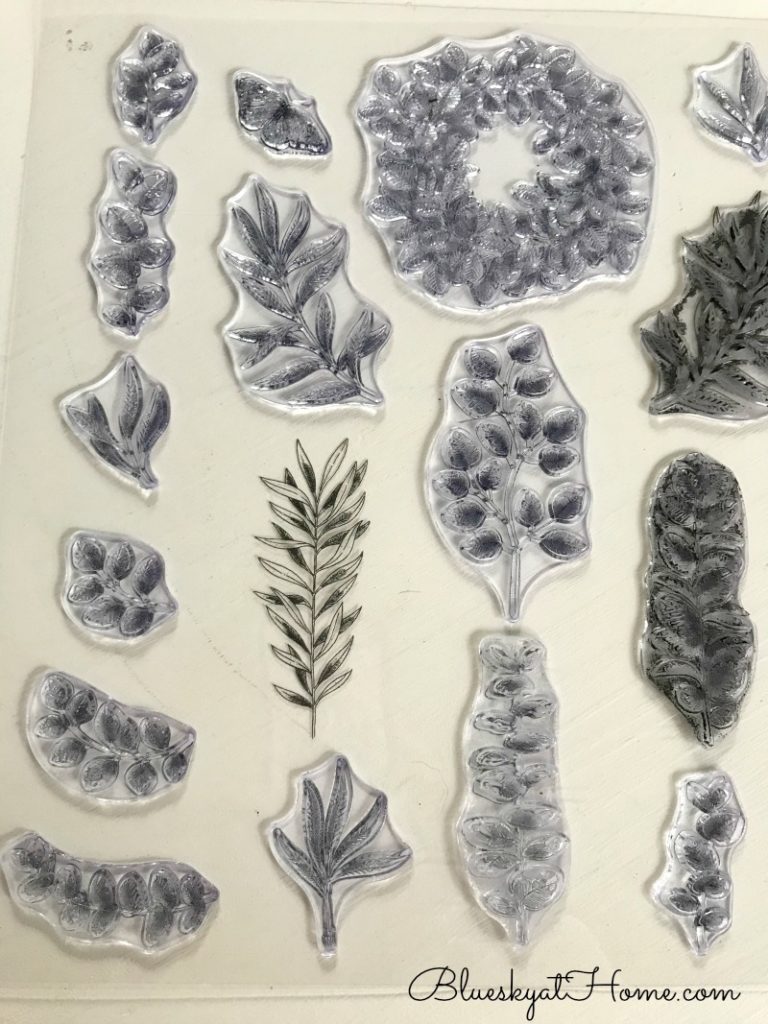
Leaf Stamps from A Maker’s Studio
I had watched a video of Amy Howard using the stamps and thought they were really cool. I’ve never used stamps so I ordered one. I chose the leaf design with fall projects in mind ~ and now I had one. The leaf designs would fit in perfectly with my natural, organic table theme.
A Maker’s Studio has 8 different stamp designs. Each one has multiple stamps on each sheet so you actually have 4 to over a dozen stamps on each sheet. The leaf stamp design I chose is called “Foliage”.
Supplies to Make Your Silverware Pouch
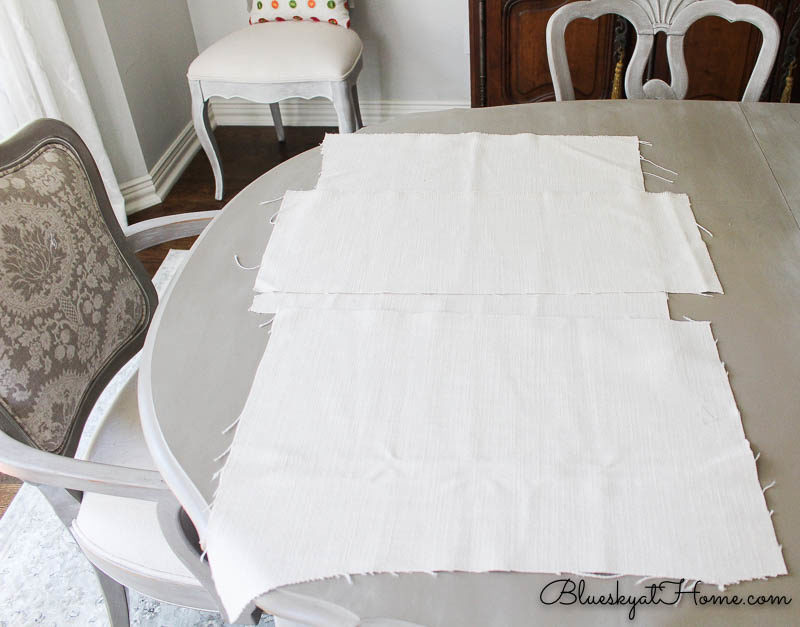
- Fabric ~ I keep remnants, scraps, pieces of fabric from past projects. I can usually find a use for them. The first thing I did was go through my stash. I wanted a neutral color, something soft like the color of biscuits & gravy or oatmeal. I found several pieces left over from upholstering our vintage dining room chairs. It was the perfect color, although maybe a little heavier than I needed. Any cotton or linen fabric would work; canvas, denim or sailcloth would be great too. I wouldn’t use felt, flannel or burlap because of the nap and “fuzzy” feel.
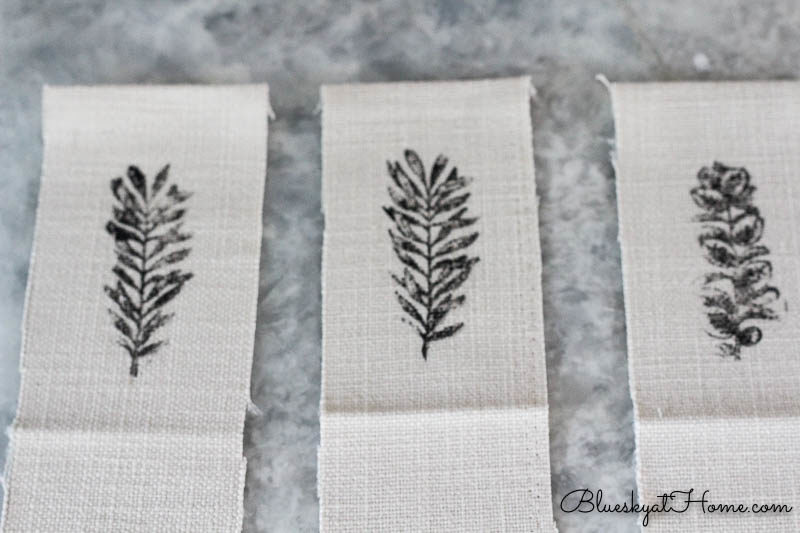
- Stamp from A Maker’s Studio ~ whatever design you want, you’ll find. These stamps can be used over and over on a variety of surfaces, even fabric. As I said, the “Foliage” sheet of stamps actually has 23 different stamps on it. I picked 3 stamps and used each 1 twice.
- Paint ~ once again I am using Rescue Restore Paint. I really wanted each leaf to show up against the oatmeal color of the fabric. Since I already had so many shades of white, cream, and taupe, I decided to use black for contrast. I chose Little Black Dress, which is a true black.
- Piece of cardboard to offload paint
- Small pouncer sponge applicator
- Scissors, pins, thread
- Iron
- Sewing machine. Using a sewing machine to stitch up your pouch certainly is easy, but if you don’t have a sewing machine, you could certainly use fabric glue.
Preparing Your Fabric for Your Silverware Pouch
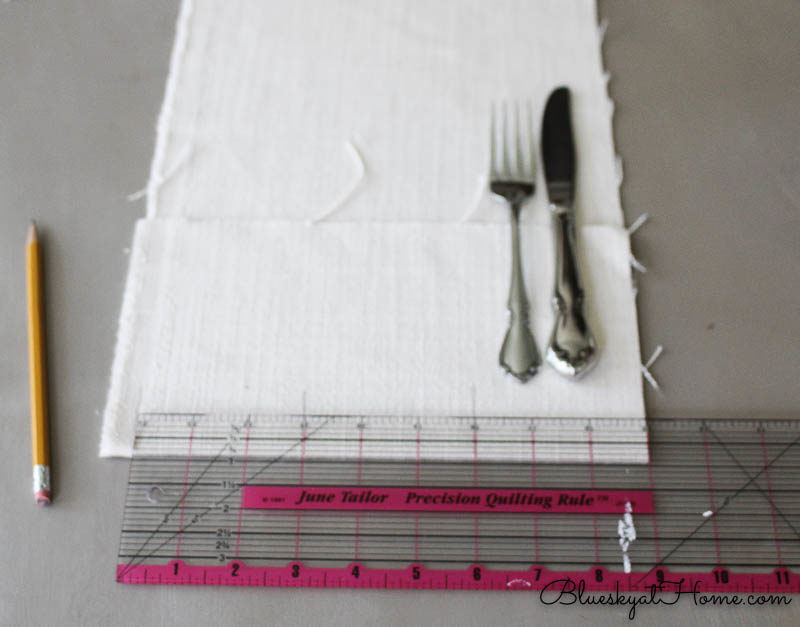
- Measure your fabric ~ I only needed a pouch large enough for a fork and a knife. I set out a fork and knife on a piece of fabric and folded it over. I used a ruler to determine the dimensions of each pouch, which would be 13″ X 3″, allowing for a small seam. I drew lines with my large sewing ruler.
- Cut out your fabric. You will need 1 piece for each silverware pouch. I needed 6.
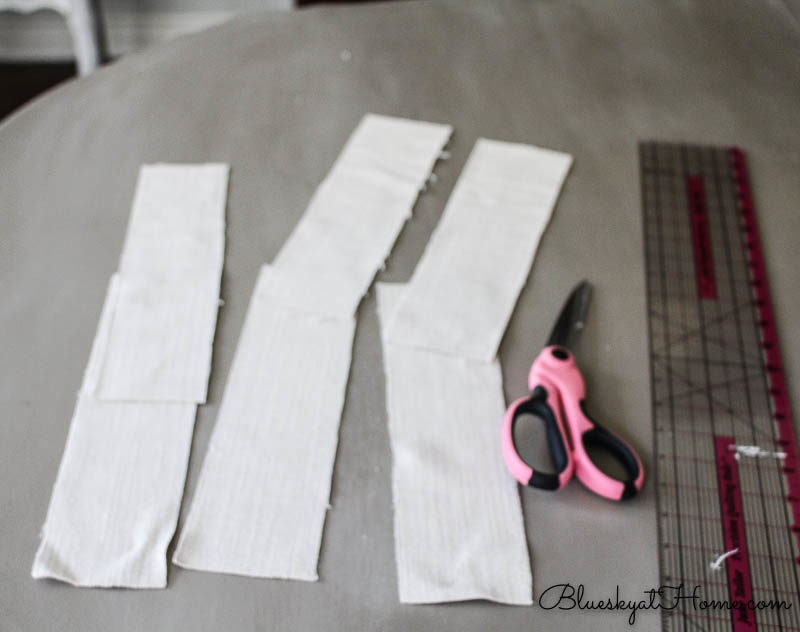
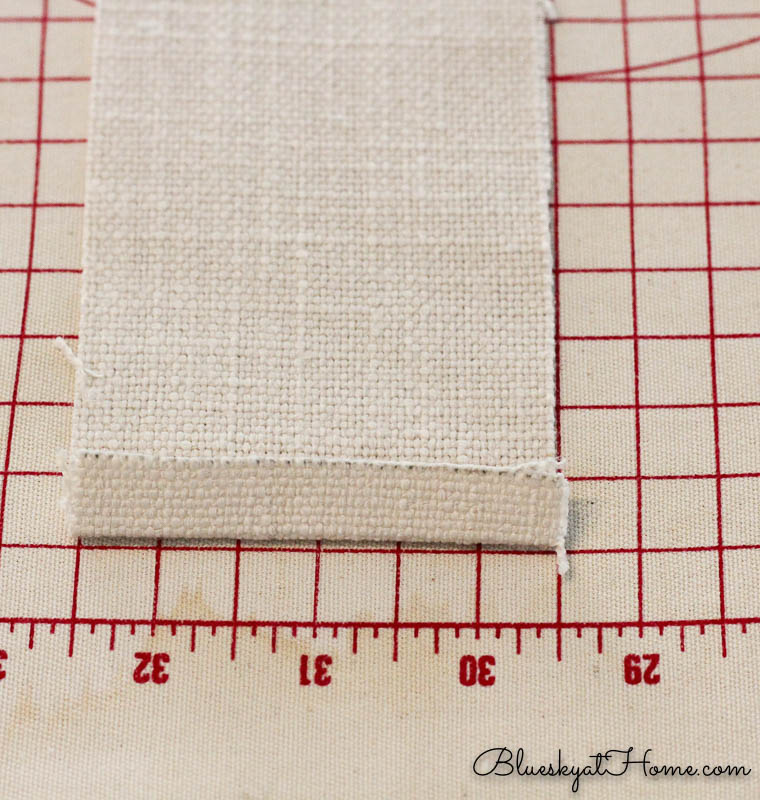
- Use your iron to make a 1/2~inch fold on both short ends of each pouch.
NOTE: I explained in my tutorial on making the gingham placemats that I use a roll~up ironing pad (which also has a measurement grid printed on it) for ironing tablecloths, fabric and working on sewing projects. I’ve had mine for 20+ years and it’s 20″ X 60″, but this one is the same brand; it’s just smaller. I highly recommend it. It’s easier than getting out your ironing board and you have a much larger work space. It will last forever.
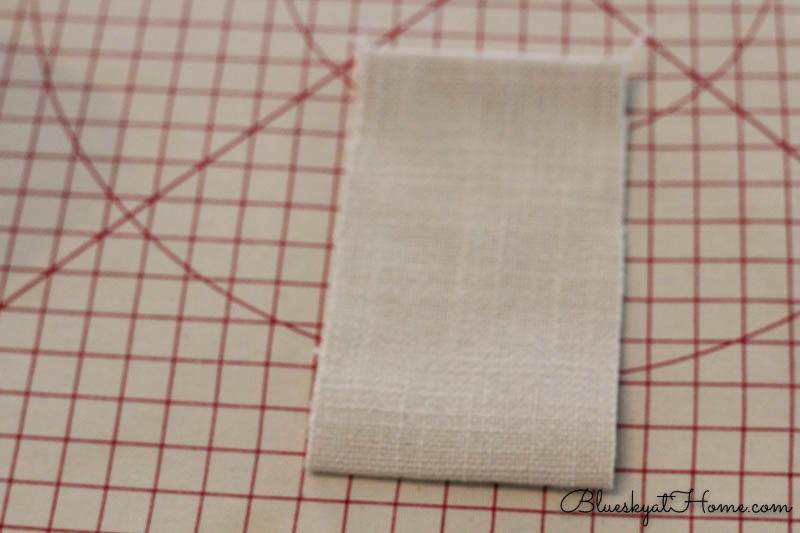
- Fold the fabric in half lengthwise with the folded hems even. Lightly press with the iron on the fold. This way you will see exactly the space for your stamp design.
Applying the Design to Your Fabric
I have a video at the end of the post to show you exactly how to make the silverware pouch and make the stamp design.
- Peel the top plastic sheet away from the top of the stamps and set aside. Peel the stamp of your choice from the plastic backing. It takes a bit of pulling to do this as the stamps are very secure.
NOTE: You will notice that there is an imprint of each stamp design on the plastic backing so you know exactly where to return it when you have finished your project. A nice touch, I thought.
- Place the sticky side of the stamp down on the top piece of plastic. This step is what makes applying the stamp so easy and keeps you from getting any paint on surrounding areas.
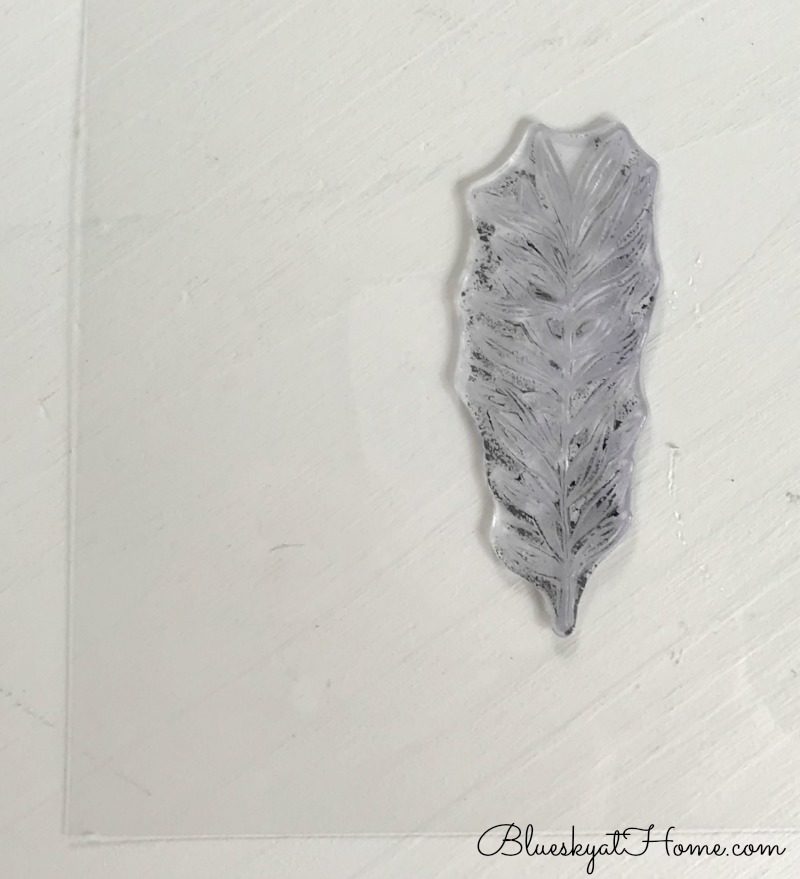
- Open your jar of paint and dab the bottom of the pouncer sponge brush in the paint. Then off load excess paint onto the piece of cardboard.
- Dab the paint onto all raised areas of the stamp. Don’t worry if you get a little paint on the recessed area of the stamp since that part won’t touch your surface to be painted.
- If you get any paint around stamp on the plastic sheet, just wipe it off with a damp paper towel.
- Turn the plastic sleeve over and place the stamp paint side down on the RIGHT side of your fabric. Be sure to place it exactly where you want it because you can’t move it around.
- Using the plastic sheet press down on the stamp to transfer the paint to the fabric.
- Gently lift the stamp off your fabric by lifting the plastic sheet straight upward.
That’s all there is to it. Repeat until all your fabric pieces have been stamped.
Assembling the Silverware Pouches
- Turn your fabric RIGHT side together and line up the sides.
- Pin just the sides of your pouches, making sure that the folded ends are flat.
- Sew the sides of the pouches with a scant 1/4~inch seam.
- Cut a tiny diagonal at the 2 bottom sides of your pouch.
- Turn the pouch right~side out. Use the point of a skewer or seam ripper to push the bottom corners out.
- Iron the pouches flat, trying to get the side seams as open as possible.
NOTE: If you don’t have a sewing machine, fold the fabric lengthwise WRONG side together and use your fabric glue to attach the sides.
NOTE: you could sew the fabric WRONG side together and then trim your sides with pinking shears. If I did it this way, I would make my fabric about 3 1/2~inches wide to allow for a bigger seam and more area to trim. This option would be cute with fabric that wasn’t very thick.
OPTIONAL: After I finished my silverware pouches, I wanted a little more black, so I used thick thread and hand sewed near the top of the folded over edge. I really like this look.
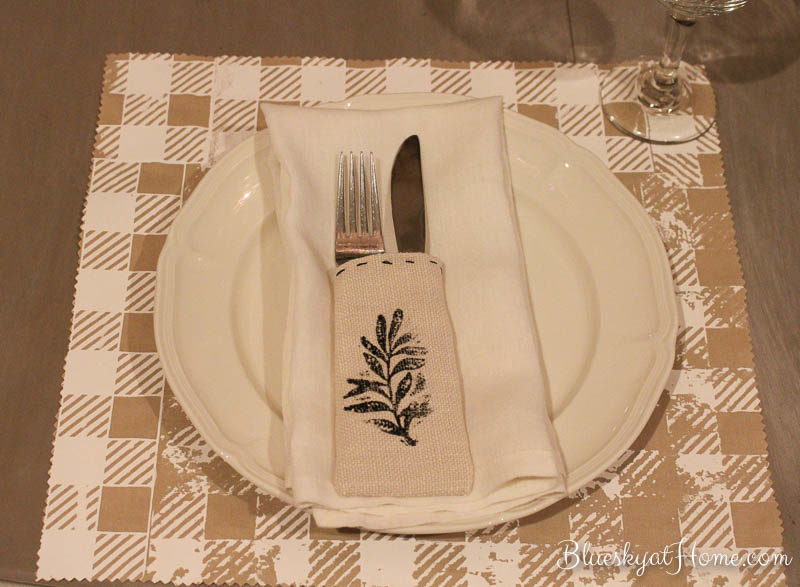
Now you can place your silverware pouches on your table or on your plate and napkin as I did. Place your silverware inside the pouch and you are done.
Your guests will think the silverware pouches are so cute and you can tell them that you made them. Enjoy the bragging rights! Please tell them where you discovered how to the pouches.
Now here’s my video tutorial to show you how to make a silverware pouch for your place settings.
If you have comments or questions, please leave in the comments. I love hearing what you think of these DIY projects. I love creating them. You can bet that I’ll be using my stamps and my Rescue Restore paint to make many other projects. If you would like to know more about A Maker’s Studio, please let me know. I would love to share this opportunity.

Well isn’t this a lovely idea! Simple too which is my perfect sewing level.
Thank you. Simple is good!
These are so cute! Thanks for sharing on To Grandma’s House We Go!
Hi Carol! I love how your little silverware pockets turned out!!! Those stamps are pretty cool, too. Sharing {and pinning} on FB for you. <3
Thanks for a fun project,
Barb 🙂
HI carol, These turned out great! I love your cute pic on your videos! laura