How to Make Beautiful DIY Signs with ChalkArt
Signs are everywhere. On walls, on mirrors, on trays, on plaques. Signs that look like they are written in chalk are so popular, but how many of us can write in chalk with beautiful typography? I’m here to show you that you can have those sought~after chalk signs. You just have to know how to make beautiful DIY signs with ChalkArt.
Everyone loves heartfelt messages and quotes in pretty fonts. Most of us don’t have the ability to create beautifully hand~written signs. We have to resort to using stencils for our DIY sign projects. I’ve even created my own stencils with vinyl on my Cricut machine. It works really well, but you don’t get that chalk~written look that you might want.
What if there were a better way to create beautiful signs that look like you wrote them in chalk? With beautiful messages and fonts? That you could keep or discard if you wish? Well, I have the solution. It’s called ChalkArt and along with a new, special type of stencil, you can make beautiful DIY signs of your home decor dreams.

How to Make Beautiful DIY Signs with ChalkArt
This post contains affiliate links to products that I love, use and highly recommend. If you should purchase any product from this site, I may receive compensation, which helps me keep bringing projects and ideas to you.
As you know, stencils can be expensive. You have to buy a spray adhesive to keep your stencils from moving around. And then you have the issue of paint bleeding through underneath. Or smearing when you remove the stencil.
To be honest, I have so many home decor and DIY projects that I want to complete for our home. But sometimes I get in a rut and just can’t get excited about a project. Have you ever felt that way? Several weeks ago when I was introduced to the new line of products from A Maker’s Studio, I started feeling excited about the possibilities of these new and unique products: ChalkArt, gel stains, Rescue Restore paint, and stencils. All these products offered benefits and features that other products didn’t have. I felt myself getting excited and ready to tackle my long bucket list of DIY projects ~ of which involve paint.
Last week I shared the first project on that long list of projects ~ staining the table tops for two patio tables. I’m really glad I waited because the gel stain from A Maker’s Studio was a wonderful product.
So What Exactly is ChalkArt?
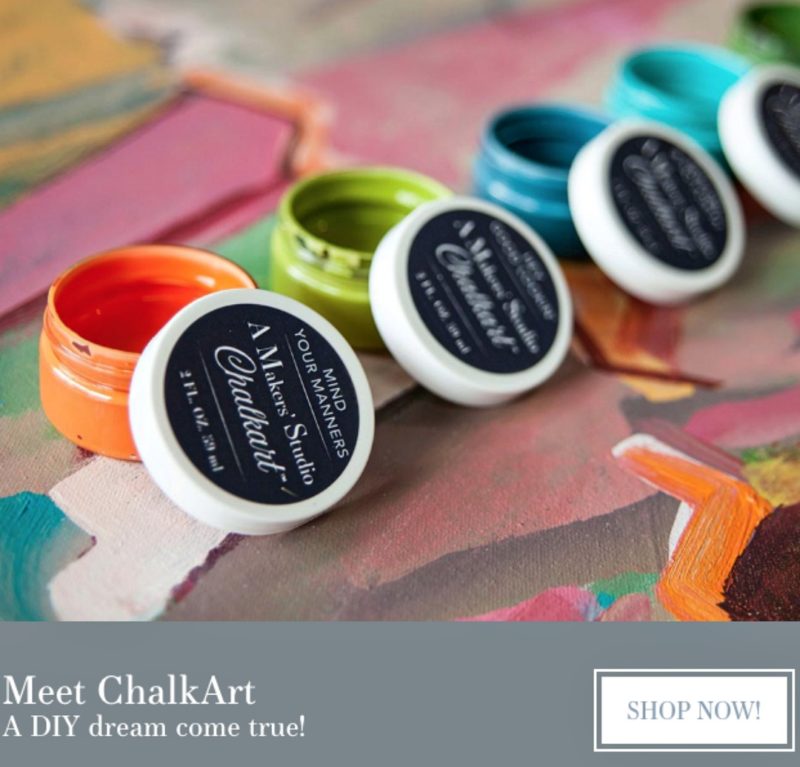
ChalkArt is a patented product created by A Maker’s Studio, the brain child of Amy Howard. Amy created ChalkArt to give crafters, painters and DIY lovers the ability to create professional looking designs that resemble those written by hand with chalk.
ChalkArt has a paste consistency that allows you to “smear” it rather than brush it. It can be thinned with a little water, applied with a brush and used as a paint. Currently, it’s available in 15 colors in addition to metallics. The colors can be mixed within 1 stencil pattern to add interest and depth.
3 ChalkArt Projects
I considered these 3 projects my “practice” projects, although I soon realized that the technique was so easy, I got results the first attempt and I bet you will too.
For all 3 projects, I used:
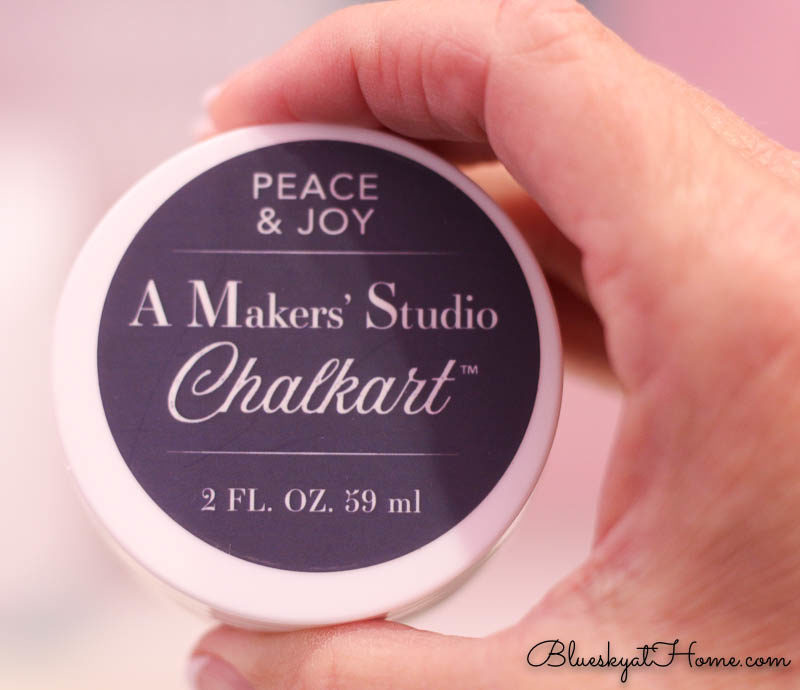
- ChalkArt in Peace & Joy
- Rescue. Restore. in Southern Gentleman
- Stencil “Home”
For tools, I used a 1 1/2~inch chip brush to apply the Rescue Restore paint and a plastic pastry scrapper and a business card (yes, you read that correctly) to apply the ChalkArt. That was it ~ oh, soap (I used a little Dawn.) and water to clean the brush.
Project Number 1
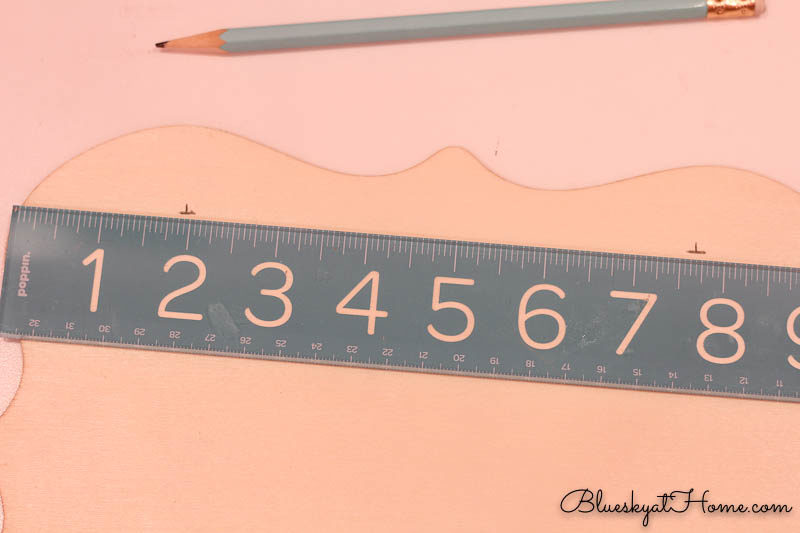
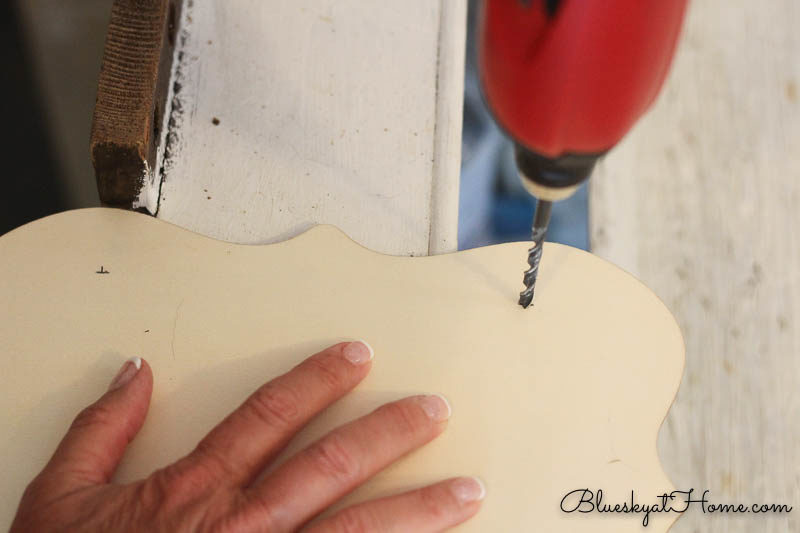
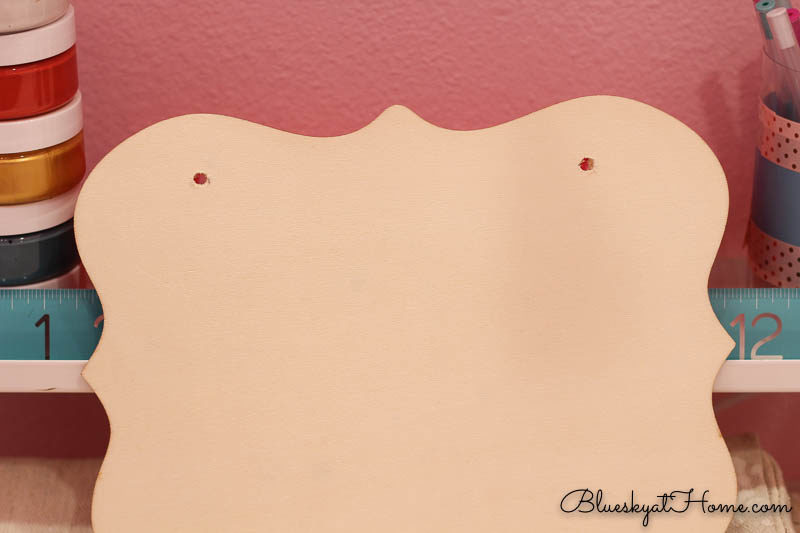
I bought a very inexpensive wood plaque at JoAnn. It didn’t have a way to hang it, so I measured and drilled 2 small holes.
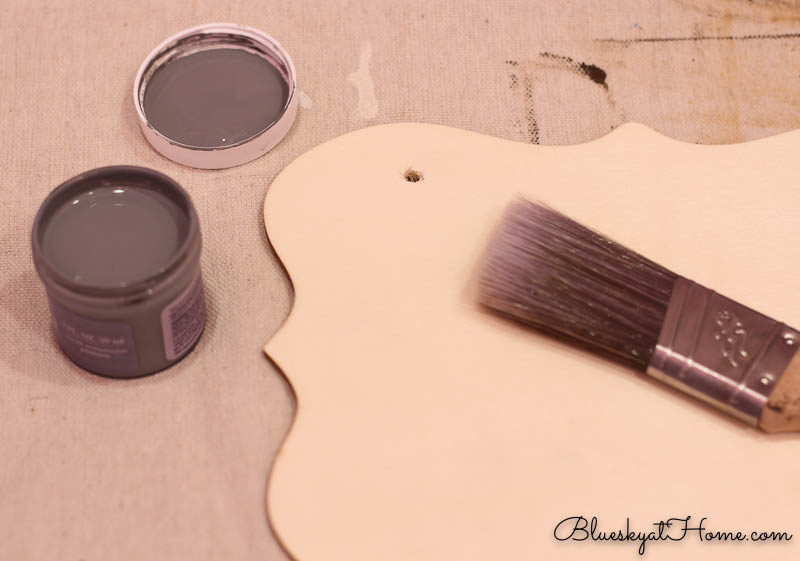
It’s best for your surface to be painted first. I used Rescue. Restore. paint in Southern Gentleman for all 3 projects. I used the chip brush, applying the paint in long strokes, going with the grain. Just one light coat was all that was needed. Allow 15 ~ 20 minutes to dry.
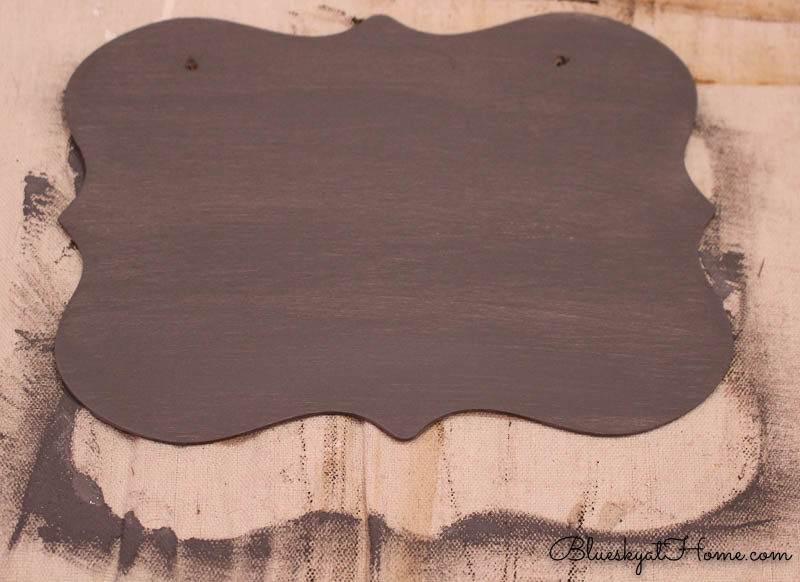
All the A Maker’s Studio stencils come in a plastic cover. They are attached to a paper backing. Gently peel the stencil away from the backing (keep it for restoring the stencil).
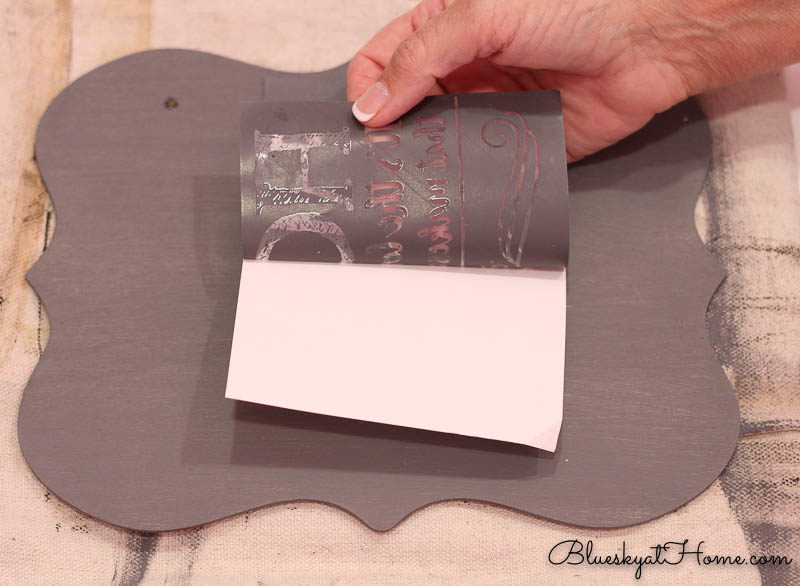
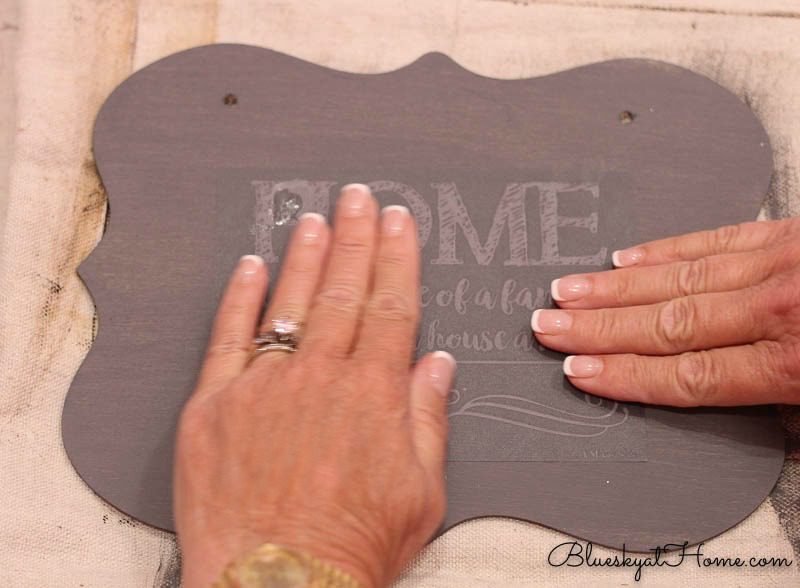
Determine where your stencil should go on your project piece and lay it down. The stencil has a light adhesive backing so you don’t have to use a spray adhesive (That’ another big benefit of these stencils!) Press the stencil all around to adhere it to your piece.
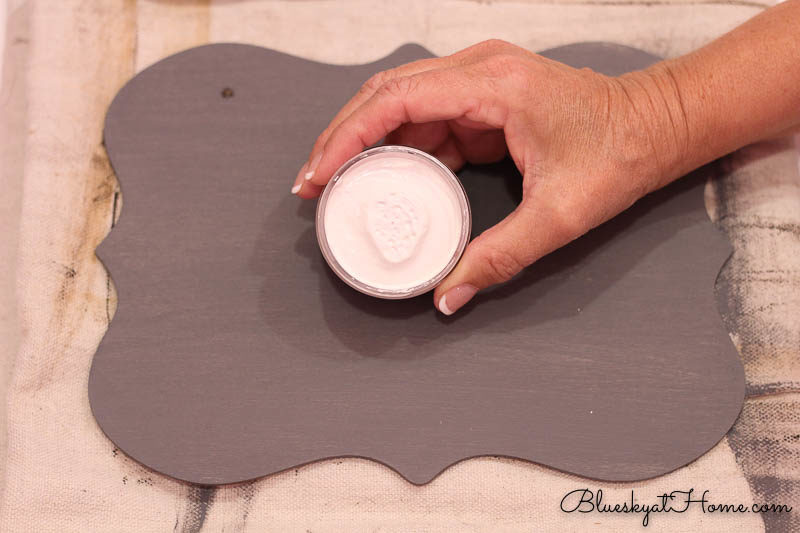
You can see the paste consistency of the ChalkArt. It reminded me of marshmallow fluff, but it’s not sticky. It’s not going to drip and you use it straight from the 2~ounce jar.
I first used a plastic pastry scraper to smear the ChalkArt over the stencil, making sure to cover it. As you “scrape” across the stencil, the design will appear.
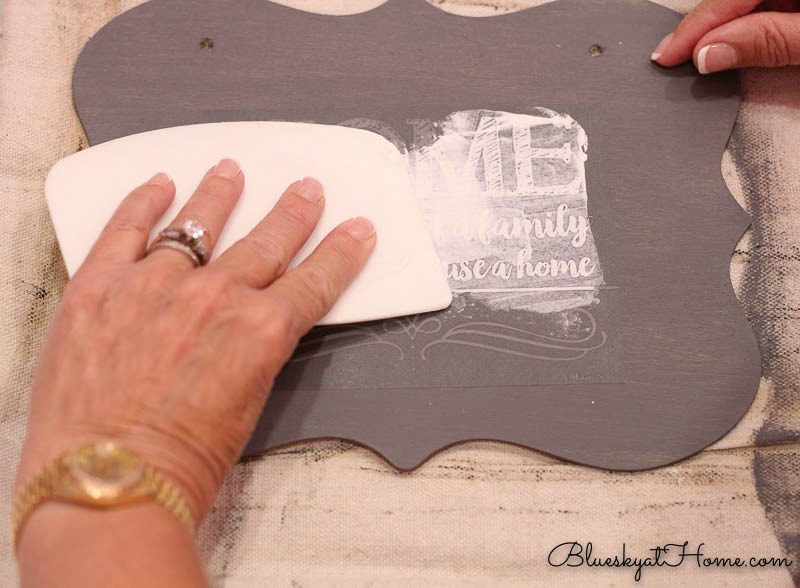
And then I discovered that A Maker’s Studio has a spreader that is the perfect size for applying the ChalkArt.
When you have everything covered, grab a corner of the stencil and gently pull it back from your surface. Your beautiful ChalkArt creation will appear. If you want it to be permanent, you can use the Matte Sealer to seal it. Or you can leave the design as is and remove it later with a damp paper towel.
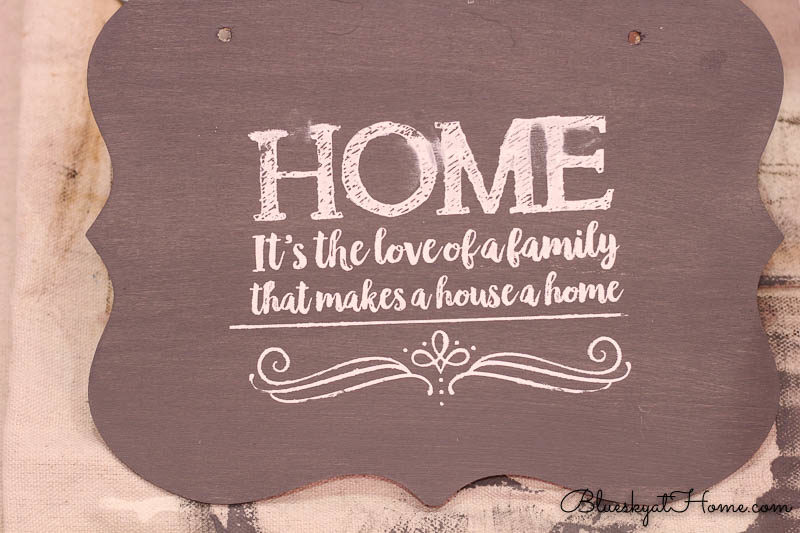
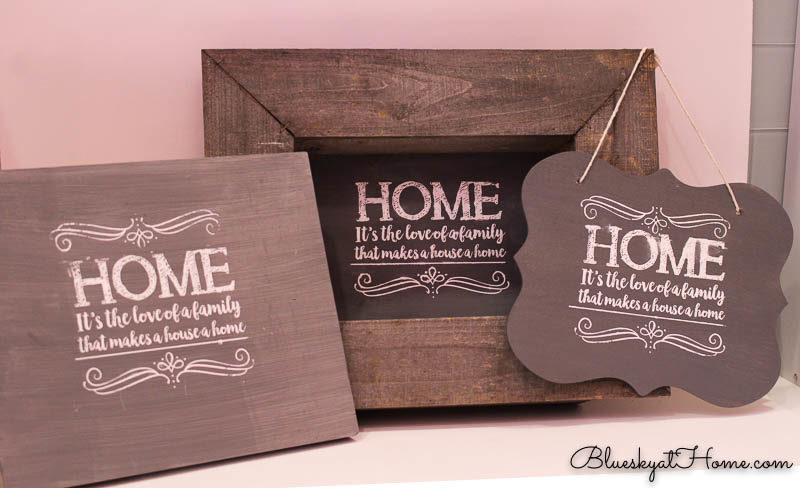
I decided to turn the stencil upside down and add the decorative scroll to the top ~ which you can see in the finished photos.
I used a piece of kitchen string to make a hanger for the plaque.
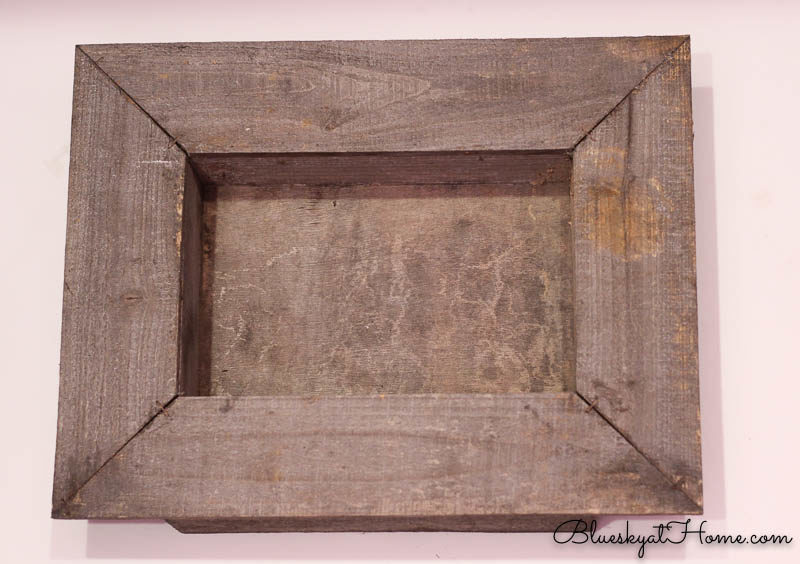
Project Number 2
For my 2nd project, I used a weathered~wood box frame that originally had succulents in the bottom. My son gave me this a couple of years ago for Mother’s Day. I killed the succulents after a year, but I kept the frame, knowing someday I’d find a purpose for it.
The first step was to paint the back of the box in the Rescue. Restore paint.
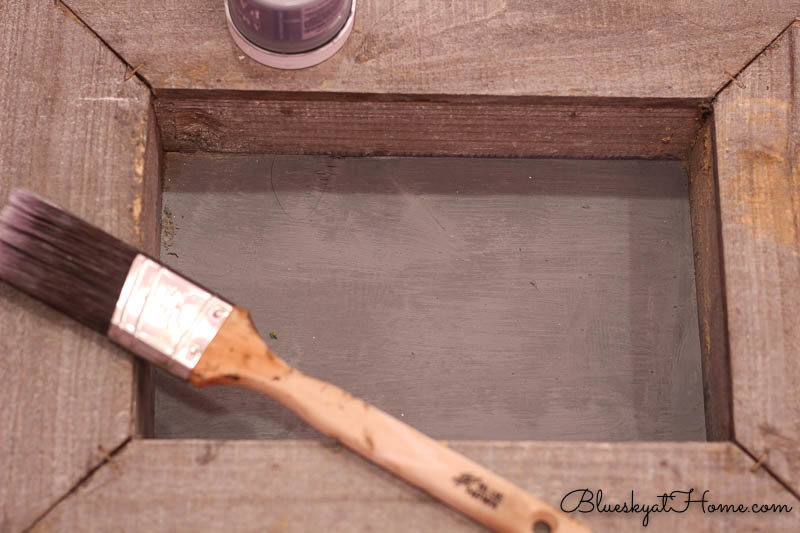
Then I proceeded as I did for the first project. This one was more of a challenge because of the depth of the box, but it still turned out quite well. This is when I switched to using a business card to smear on the ChalkArt. I think an old credit card or gift card would work really well.
Project Number 3
For my final practice run, I used a flat piece of 1~inch thick wood that was 11 1/2 by 9 1/2. It was already painted using 3 different finishes ~ another paint experiment. So I gave it a light coat of Southern Gentleman. To see a beginning~to~end video of that project and some tips for projects in general, please watch the video below. I think it will be very helpful to you.
All 3 projects took less than 1 hour. I could have shorted that time if I had done the 3 projects assembly line style, painting all the backs first and then using the ChalkArt and stencil.
I can’t remember the last time I was so excited about DIY projects and products. The ChalkArt goes on so easily and the stencil was a dream to work with. It really is now so easy to create beautiful DIY signs.
Take Away after Using the Rescue.Restore. Paint, the ChalkArt and Stencil
- The clean up for the Rescue. Restore. paint is so easy to clean with just soap and water.
- The stencils are meant to be washed with water after each use and reused. (See in the video how easily I did this.)
- There is no clean up with the ChalkArt. Just scrape off any product from your applicator (business card, credit card, etc.) back into the jar and close the lid.
- The method has a very short learning curve ~ in fact, you should have a beautiful completed piece of decorative art the first time.
I really, really hope that you enjoyed this tutorial and the video about how to make beautiful DIY signs. If I seem overly gaga about these products, it’s because I am. And it’s not just because I’m a Maker Boss. It’s because these products are truly wonderful.
If you have any questions about any product or being a Maker Boss, please ask in the comments or email me or Direct Message me. Or if you would like to make a project with your friends at a Creative Gathering, I’d love to tell you more about that.
This week’s A Maker’s Studio new Promotion comes out today. Check out the info and to order on my sidebar. I’ll also post on my Facebook page. It’s a good one!!


Just FYI I’ll be featuring you at tomorrow morning’s Vintage Charm party! Congrats!
xo Kathleen|Our Hopeful Home
Thank you so much Kathleen. How exciting.
Beautiful! I have two quotes that I wanted to paint onto canvas, but you just changed my mind! I’ve got tons of scraps of wood and I’m going to do this instead. I love the step-by-step you gave us! Pinning!
Lisa, I love scrap wood ~ never throw anything away because it can be the inspiration for a new project. You definitely should try the ChalkArt for your projects.
Such neat projects! And a great new product! Thanks for sharing at Vintage Charm:) Pinned,
xo Kathleen|Our Hopeful Home
Kathleen, If you love creating DIY, this ChalkArt is a must in your tool box!
Great post Carol. Love the completed projects too. They turned out great!
Thanks Cindy. These new products make the project so easy with great results.
Cindy, you should try it! Thanks for the feedback.