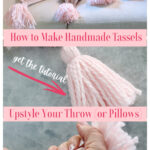
How to Make Tassels to Dress Up a Throw
There’s nothing more inviting than a cozy throw blanket neatly draped over a couch or bed. Would you like to give your throw a custom look? I wanted to dress up a new pink throw that I bought for our living room sofa. I didn’t know how to make tassels, but I decided to learn.
While throw blankets offer comfort, adding handmade embellishments can elevate their style and attractiveness.
Originally, I was going to make pom poms to add to the throw. Unfortunately, I didn’t have a pom pom maker big enough.
That’s when I saw a picture online of a throw with tassels. It caught my eye. Why not make some myself? It couldn’t be that hard and it would be a creative way to infuse personality and flair into our living space.
Since I bought this pink throw with Valentine’s Day decor in mind, I wanted it to be extra special. Yarn tassels at the corners would transform an ordinary throw into a statement piece that reflects my style.
Now that I’ve made my first handmade tassel, I want to share the process with you. Believe me, anyone can add this cozy, stylish touch to cozy blankets anywhere in your home.
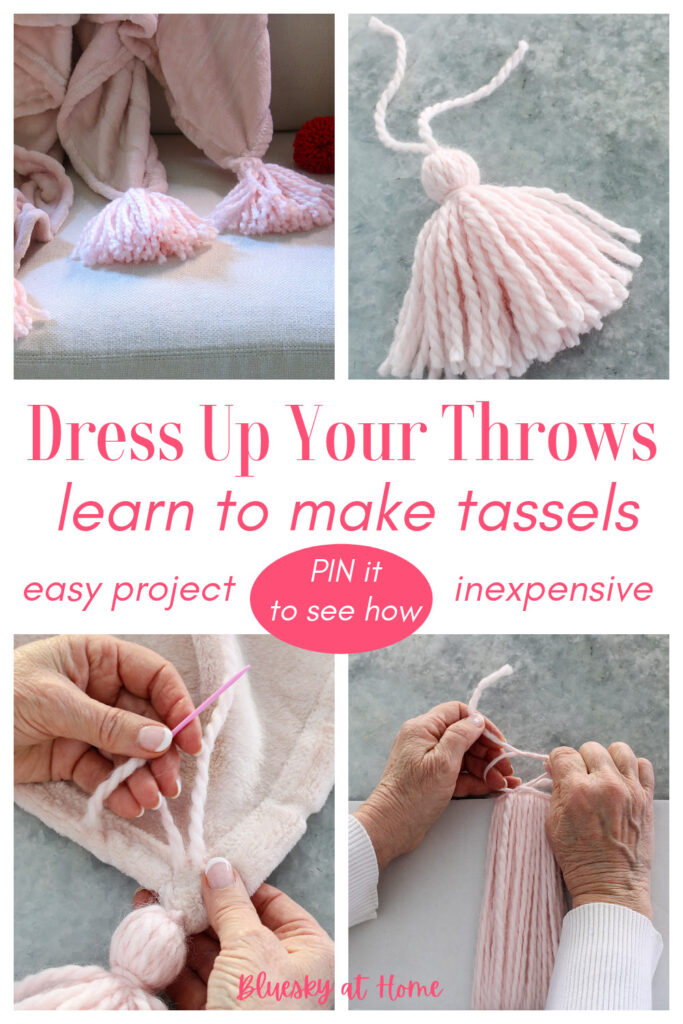
I made this chucky white tassel as a trial practice piece.

Why Make Tassels?
- Enhance Your Home’s Ambiance: Tassels add a unique touch to throw blankets, enhancing the cozy ambiance of any room.
- Personalized Touch: DIY tassels allow for personal customization, making each throw an expression of individual style.
- Seasonal Comfort: Tasseled throws are perfect for offering both warmth and a stylish flair to home decor.
A Little Tassel History
So, what is a tassel? It’s one of many ornamental embellishments (called “passementerie which includes tassels, fringes, ornamental cords, galloons, pompons, rosettes, and gimps, as well as other forms.” Wikipedia).
The first mention of tassels is in the Old Testament. You’ve probably seen them on military uniforms. In the 1600’s, France brought modern passementerie into the world of fashion and decor.
- Tassels are one of those unique additions to fabric that are called dressmaker details.
- They can be simple, like the ones I made, or very elaborate and very expensive. Styles changed throughout history depending on the popular styles of the day.
- They can be small, like mini tassels or big tassels. They can be “skinny” or thick.
- Tassels can be one color or multiple colors.
- Tassels can have elaborate designs woven into them.
- Tassels can have other embellishments, like beads or jewels added to them.
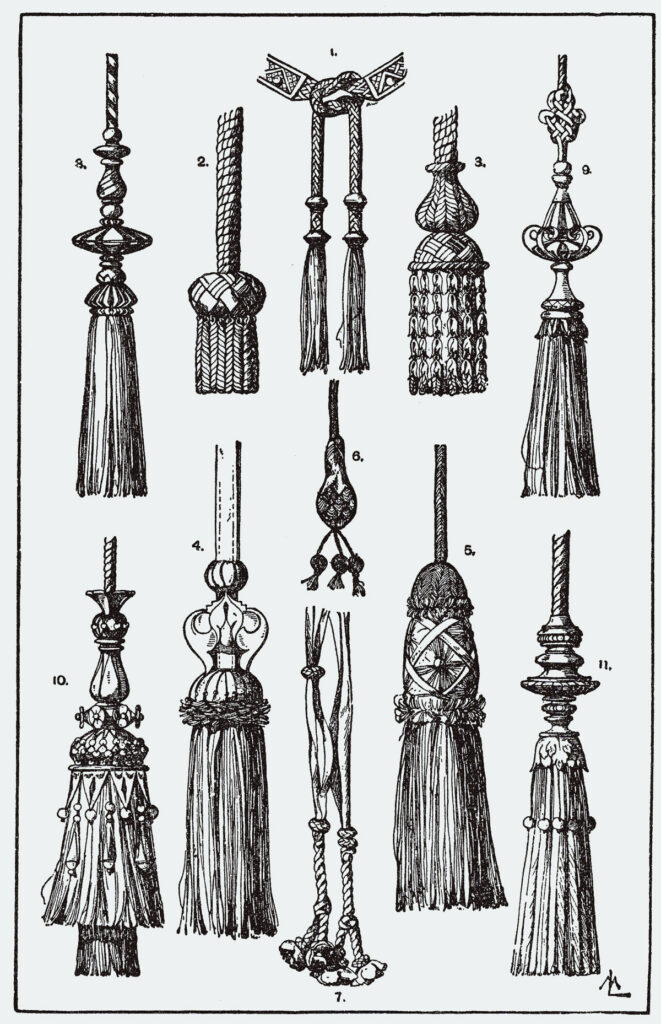
This old diagram (via Wikipedia) shows how elaborate tassels where in past times.
You might remember the tassel that we all flipped over our mortarboard at the end of graduation ceremonies.
At their most simple, tassels are multiple pieces of string or thread or strands of yarn gathered and tied together.
Where Can You Use Tassels?
Tassels are so useful in home decor, not to mention in fashion. Here are places you can add a tassel. We have several tassels in our home.
- obviously, at the corners of throw blankets
- at the corners of throw pillows
- embellishment on a lamp
- attached to keys on hutches or cabinets
- hanging from door knobs or cabinet knobs
- on drapery tie-backs
- added to shoes, purses, or clothing
- made into necklaces or earrings
Before starting to make my tassels, I watched at least a dozen videos on YouTube. There are many different ways to make a simple tassel. I took what I thought were the best suggestions and combined them to make my tassels and this tutorial.
Choosing Materials and Tools for the Tassels
To get started making your tassels, first decide on the style, color, and size you want. I wanted a simple tassel that was chunky.
1. Decide on the material and color you want to use:
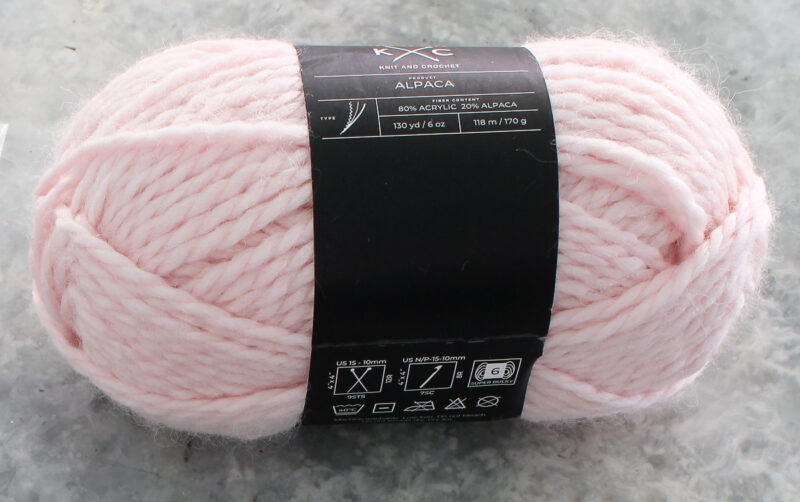
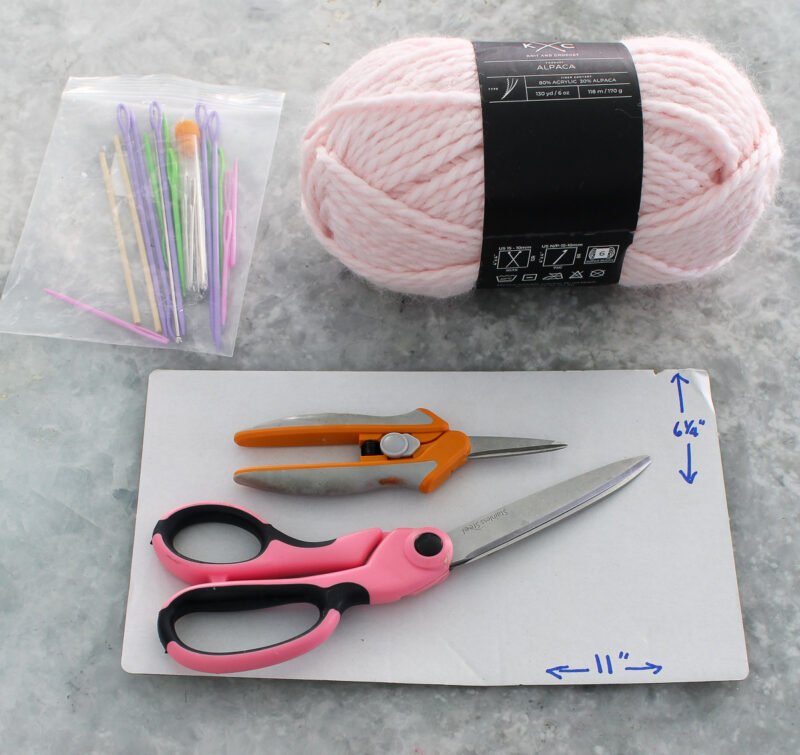
- Yarn – Selecting the right yarn is crucial. The thickness of your yarn will directly influence the final appearance of your tassels. Thick yarn results in fuller tassels, ideal for a statement piece, while thinner yarn creates more delicate tassels.
- Once my throw arrived, (It was the second one I ordered. The pink shade wasn’t what I wanted the first time, so I reordered. The second throw was the perfect soft pale pink I wanted.) I went to Joann and picked out the color match and size of yarn I needed.)
- Embroidery thread
- Twine
- String
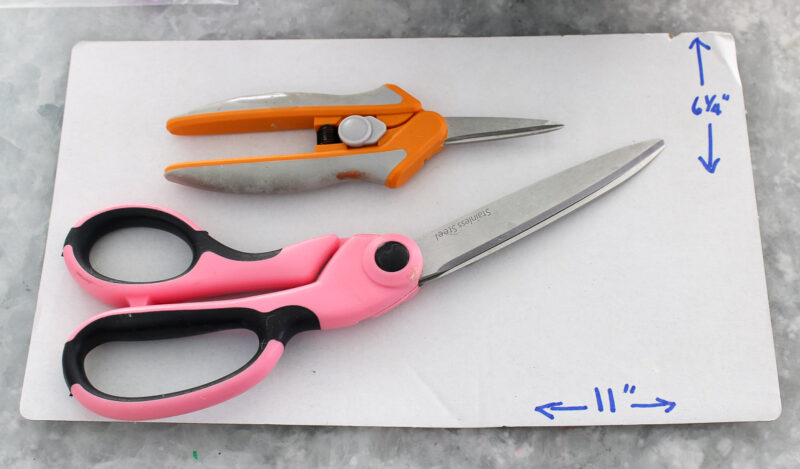
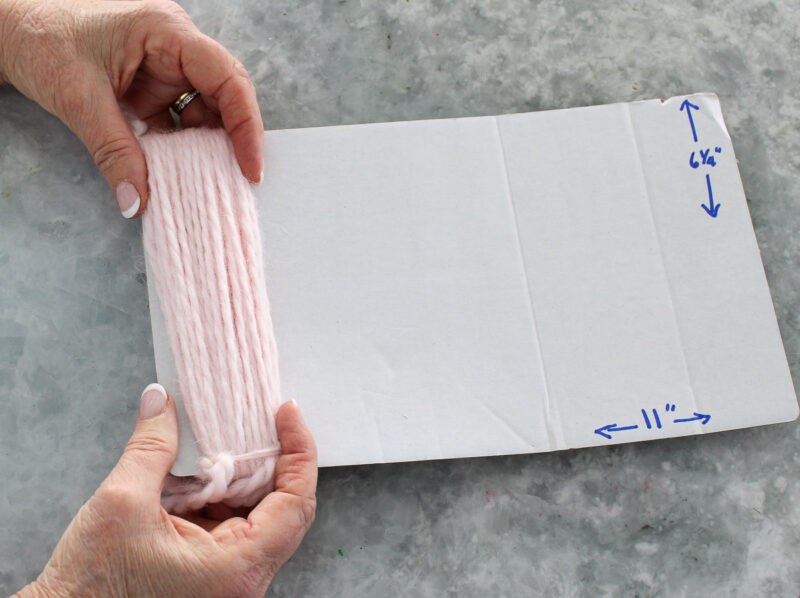
2. A piece of cardboard acts as a template for your tassels. The cardboard’s size should match the length you envision your tassels to be, providing a consistent template for each creation. I found a piece of cardboard that was 6 1/4 inches X 11 inches. It happened to be perfect for the size of tassel I wanted.
I used the 6 1/4″ side as the length for my tassels.

3. Sharp scissors are essential for clean cuts, giving your tassels a polished look. My small pointed scissors worked best.
4. Lastly, two separate pieces of yarn will be used to secure each tassel.
5. Yarn needles to thread your extra pieces of yarn and attach to the throw. I love this set. The plastic needles are flexible and make them easy to use.

Your choice of tools also matters. Ensure your scissors are sharp enough to handle the yarn for seamless cutting.
Create the DIY Tassels
Step 1 – Cut two pieces of yarn. As a rule of thumb, I would cut them 1 to 2 times the length of your tassels. My tassels would be about 6 inches long, so I cut my pieces 12 inches long.
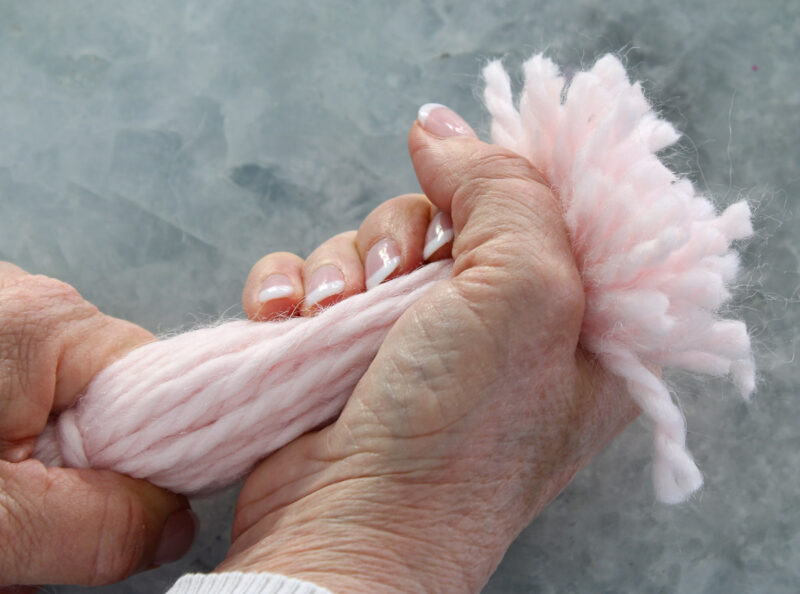
Step 2 – Holding the end of the yarn to the cardboard, begin by wrapping the yarn around the cardboard multiple times. The number of wraps determines the tassel’s thickness. I wrapped my yarn 50 times around the cardboard. It doesn’t take long.
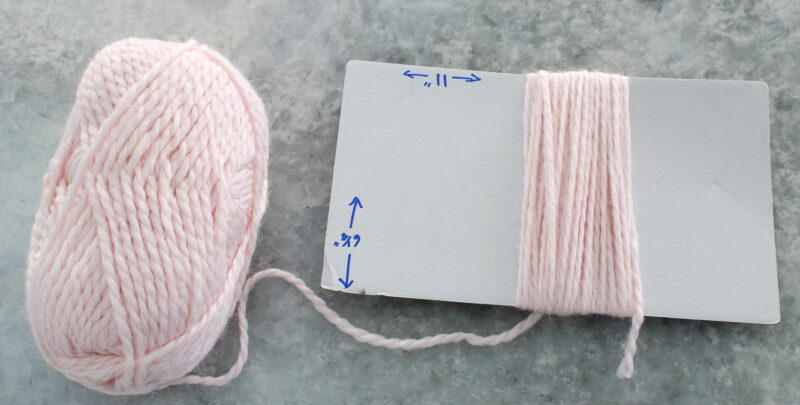
NOTE: I recommend keeping your wrapped yarn as straight as possible to ensure even lengths of yarn. I found it best to keep the wrapped yarn in as narrow a width as possible.
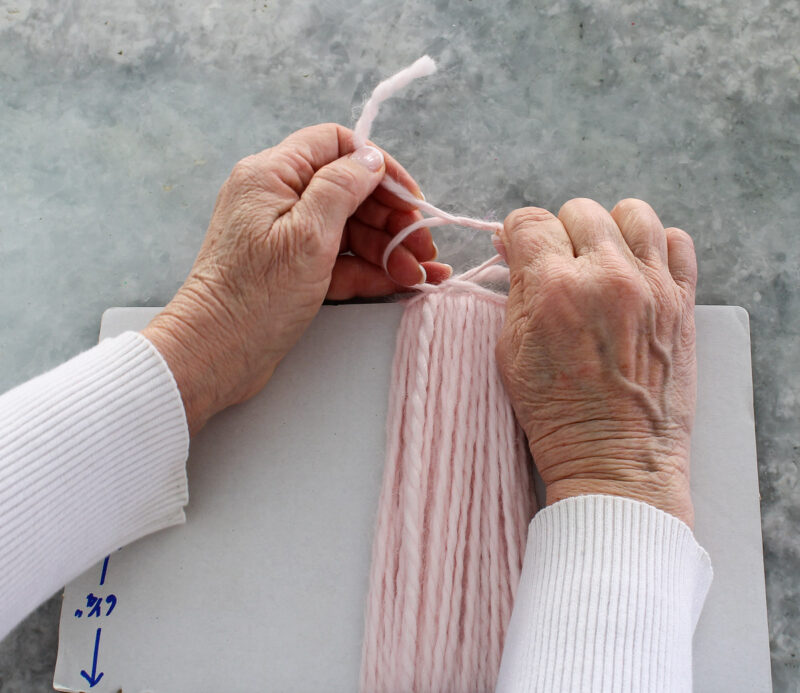
Step 3 – Slip one of your pieces of yarn under the wrapped yarn. Slide it to the top of the cardboard under the yarn. Make a tight double knot in the top of the yarn bundle. A tight knot is important. This forms the head of your tassel.
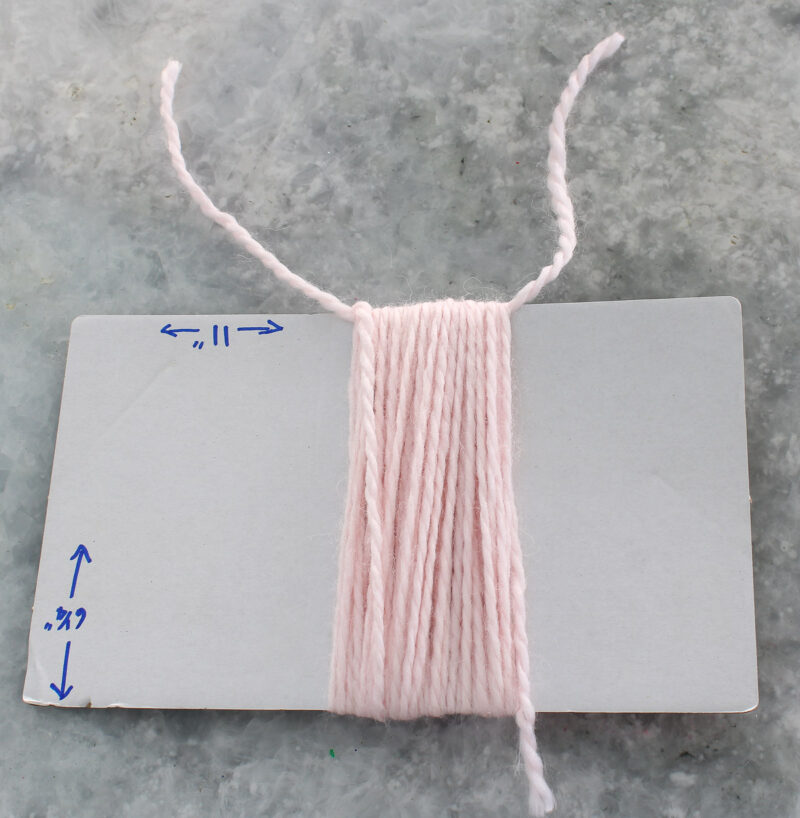
DO NOT cut off the excess yarn. You will use them to attach the tassel to your throw blanket.
Step 4 – For my first tassel, I slipped off the yarn before clipping the bottom of the tassel.
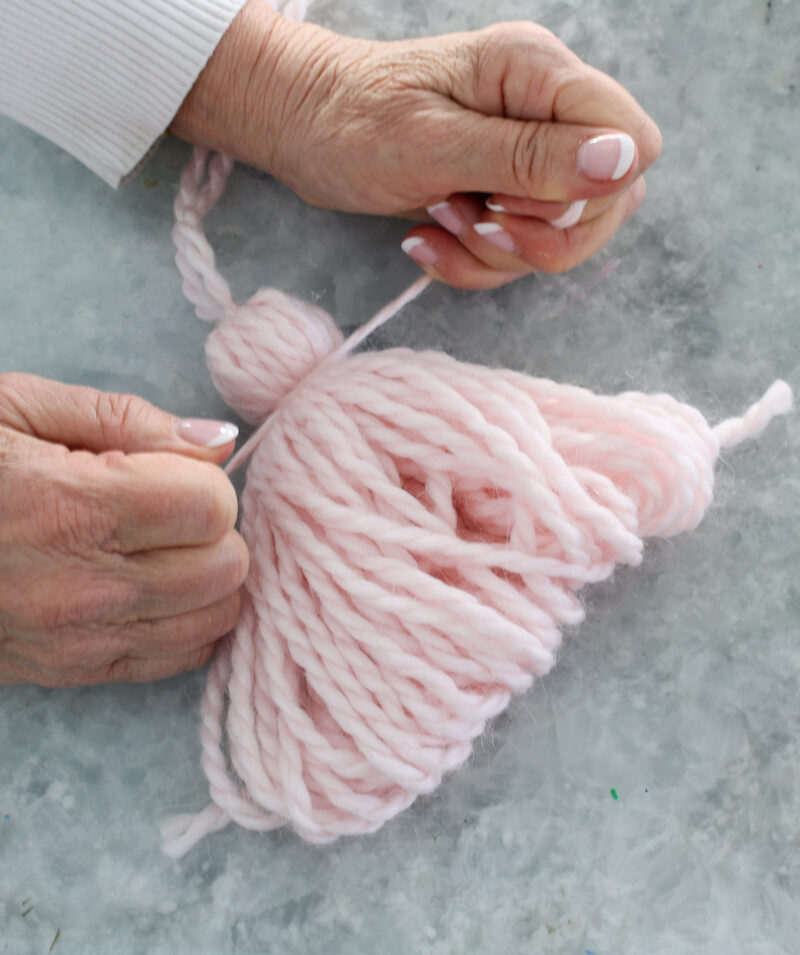
Then I cut the loops.
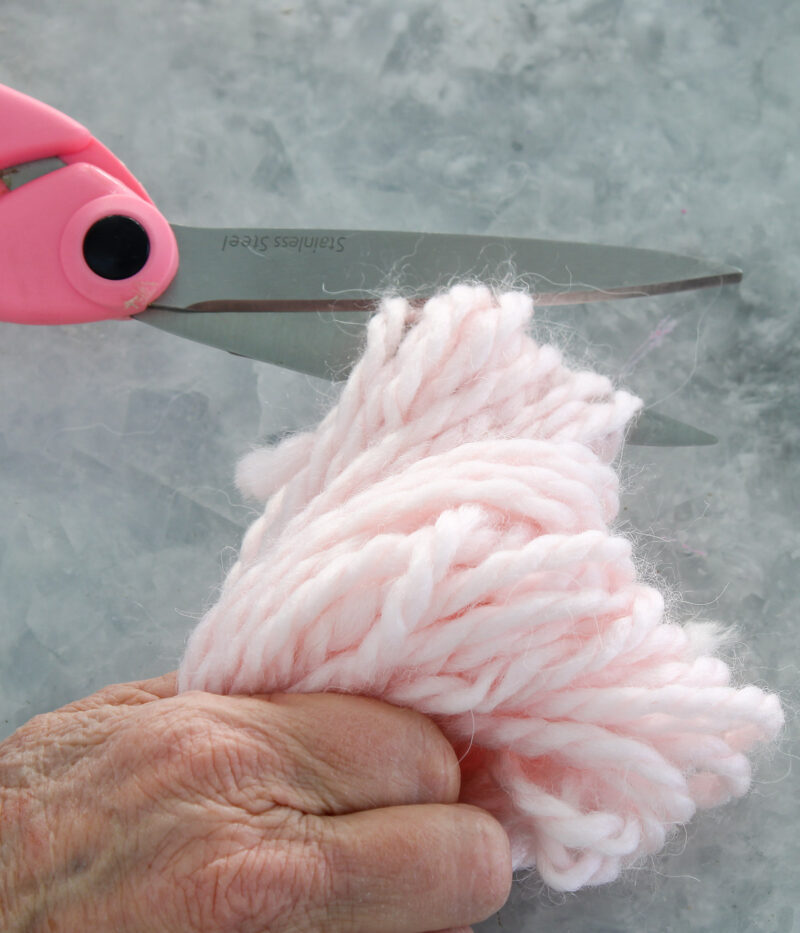
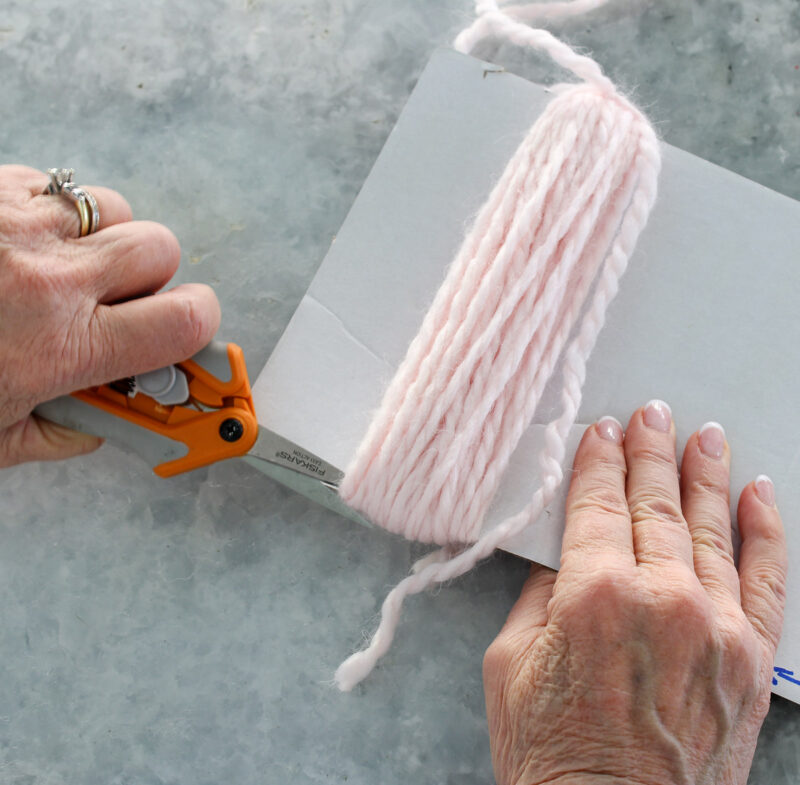
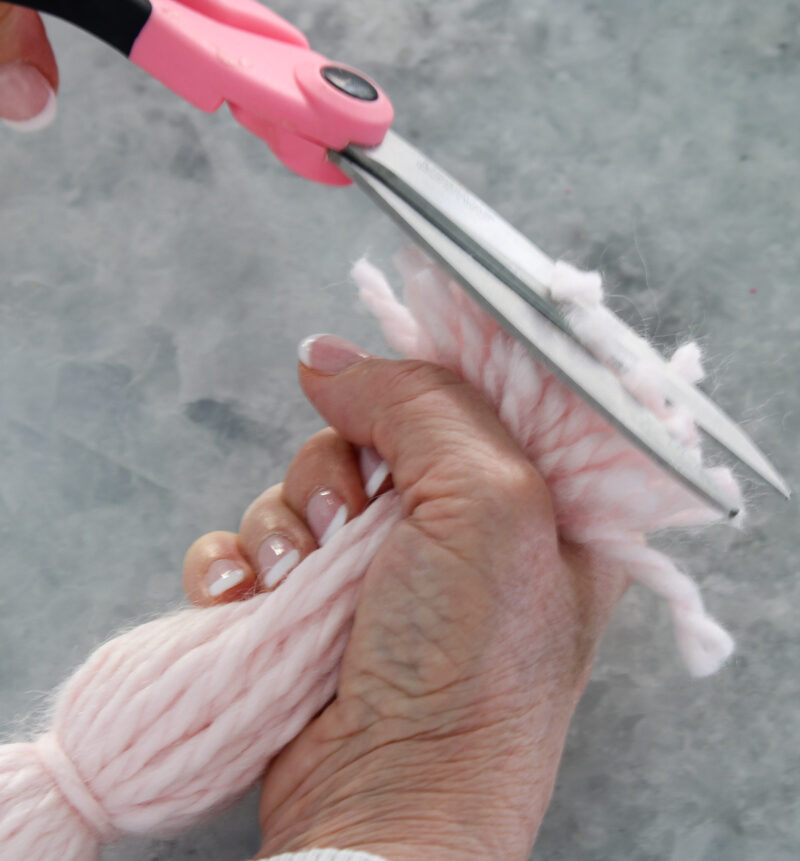
I tried a different method for the rest of the tassels. Using your sharp scissors, on the bottom of the cardboard, slowly cut the bottom of the yarn apart.
I think the second method – cutting the loops while the yarn is still on the cardboard – works best.
This creates the tassel’s fringe. To ensure a neat finish, lay your tassel flat on your work surface and smooth out the yarn fringe. Trim any uneven ends.
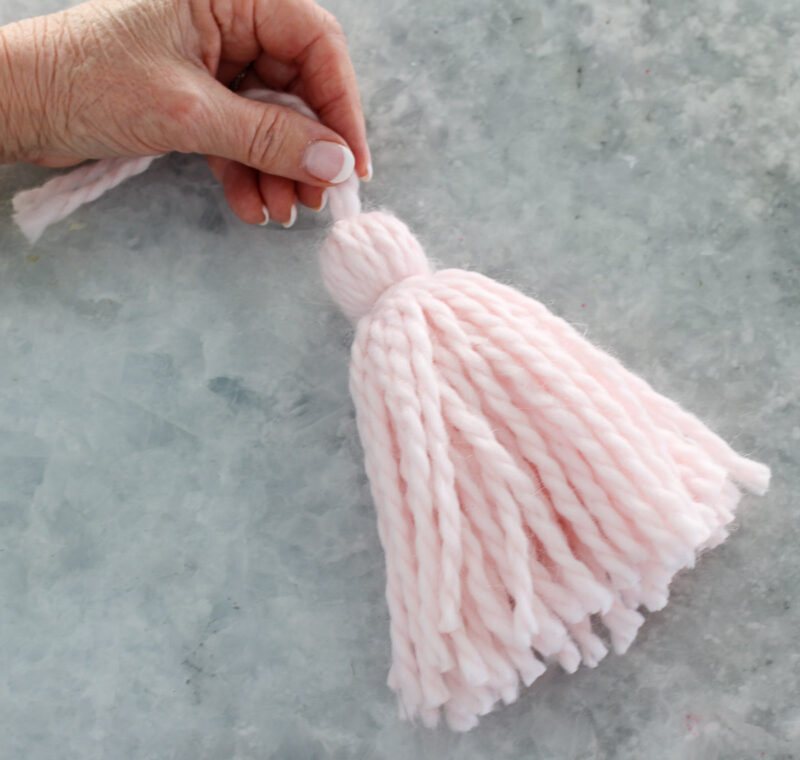
Step 6 – Use the second extra piece of yarn: place the piece of yarn under the tassel about 1 – 1 1/2 inches from the tied top with equal amounts on each side.
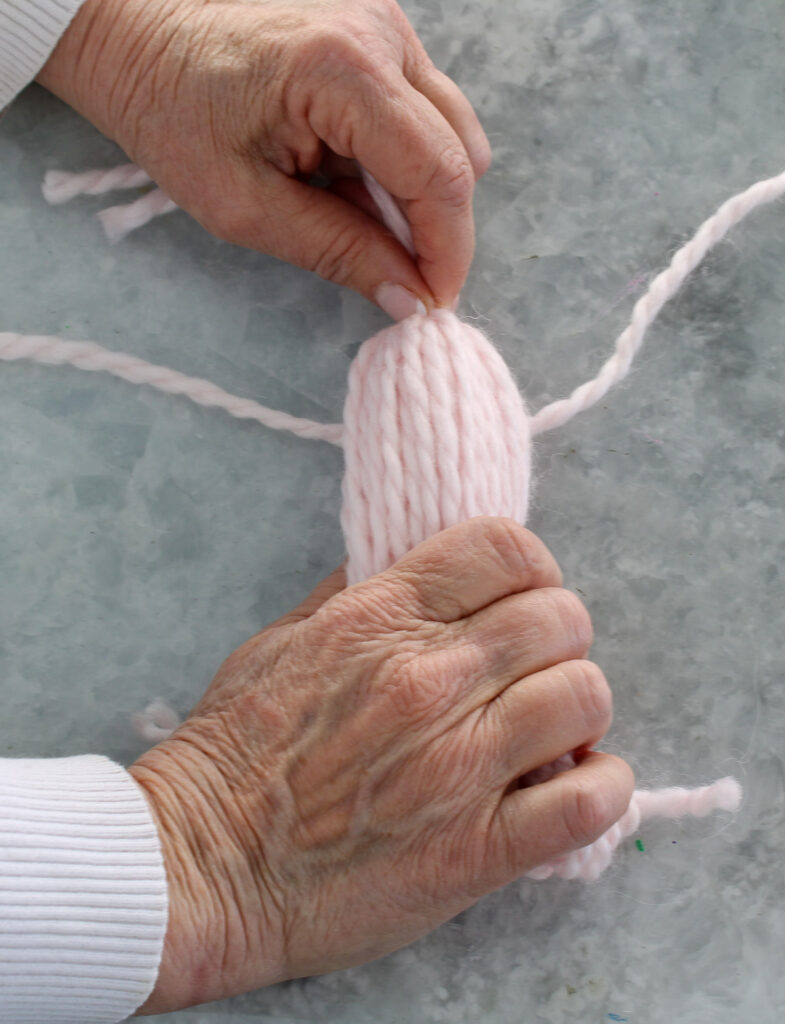
Loop the piece of yarn and pull tightly. I flipped the tassel over and looped the yarn on the opposite side. Then I flipped it again, looped the yarn and this time made a double knot.
Step 7 – To hide and secure the excess yarn: Use a yarn needle to thread the excess yarn, one at a time, through the wrapped yarn into the “body” of the fringe. There’s no need to cut it off. The two pieces become part of the fringe.
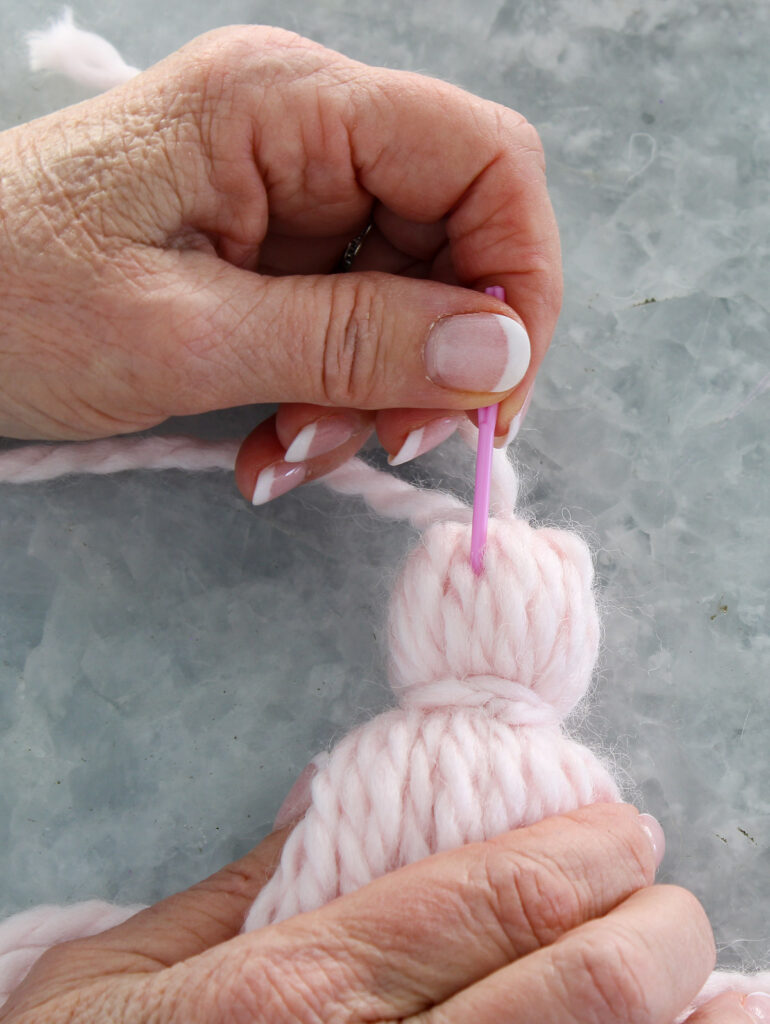
Step 8 – Smooth the fringe on the bottom of the tassel and hold it tightly near the cut ends. Trim any excess yarn again with your sharp scissors. Check the ends of the fridge from different angles.
Because of the fuzziness of the yarn, it doesn’t have to be perfect.
You have completed your tassel.
Attach theTassels to the Throw
Once you’ve crafted your tassels, attaching them to the corner of the blanket is the exciting next step.
A yarn needle is the best tool for this task because it navigates through blanket fabric with ease.
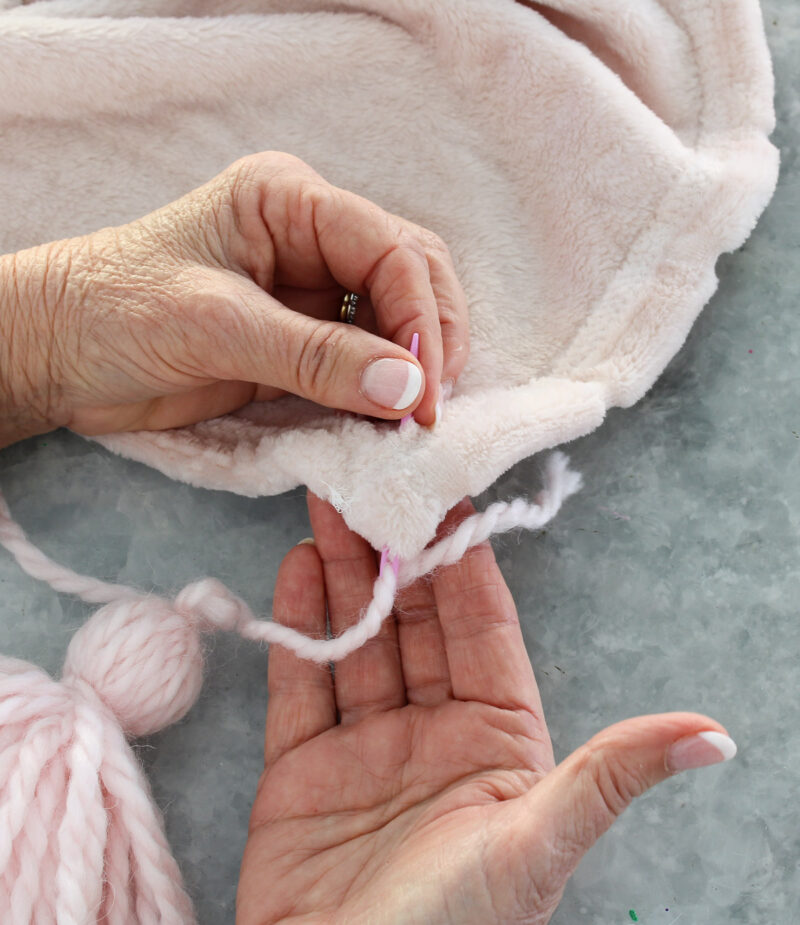
Step 1 – Begin by threading one of the top loops of your tassel through the eye of the yarn needle.
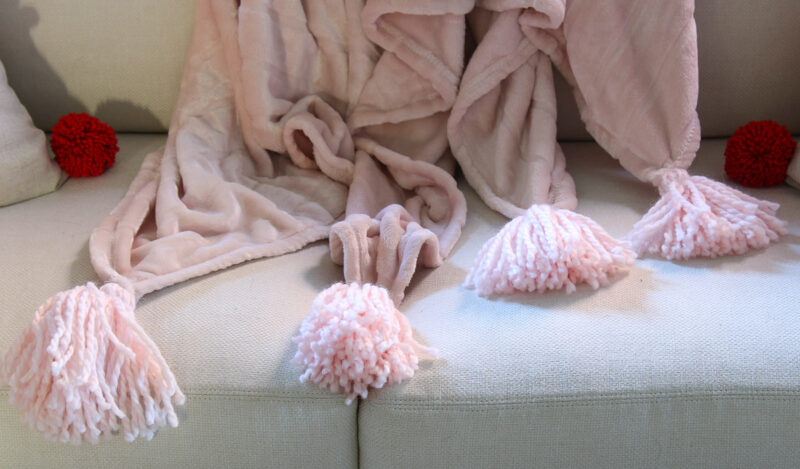
Step 2 – Then, carefully choose the position where you want the tassel to hang from the blanket. I wanted my tassels at the four corners of the throw.
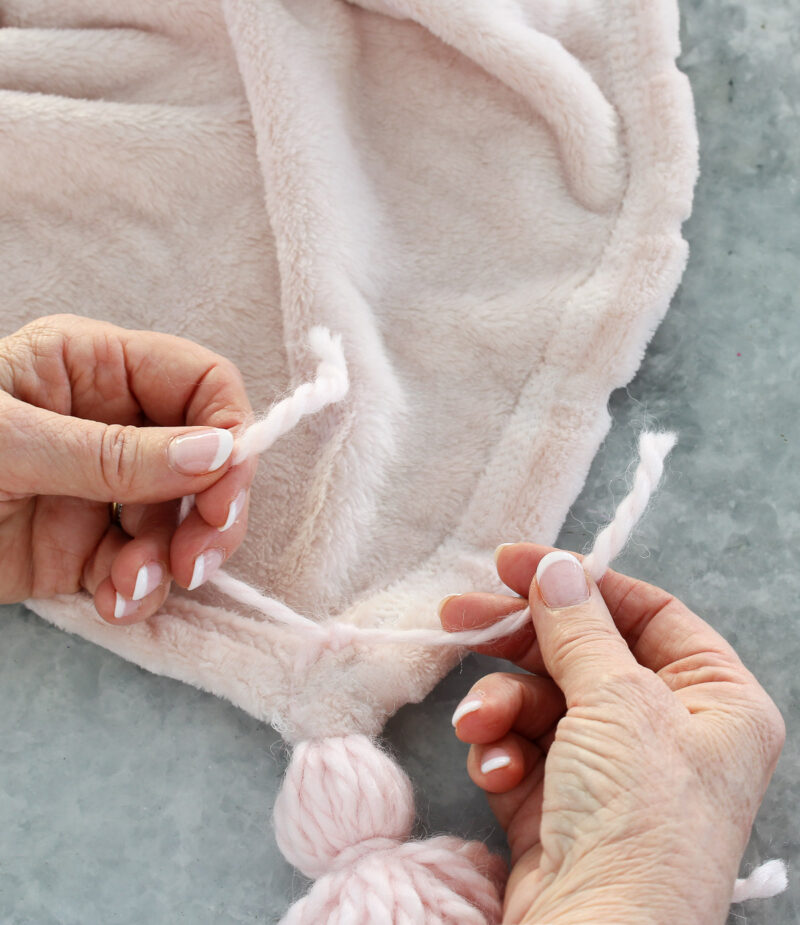
Step 3 – On the back side of the blanket, pierce the blanket with your needle at the chosen spot. Repeat with the second loop of yarn. Pull both pieces until the tassel is close to the corner of the throw.
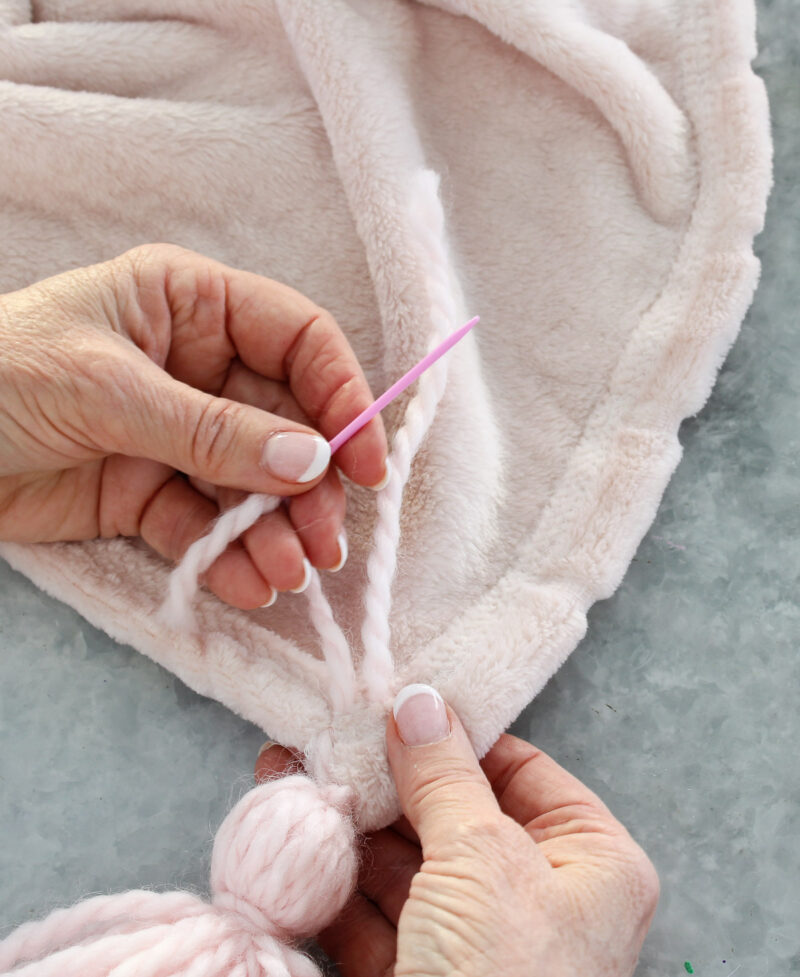
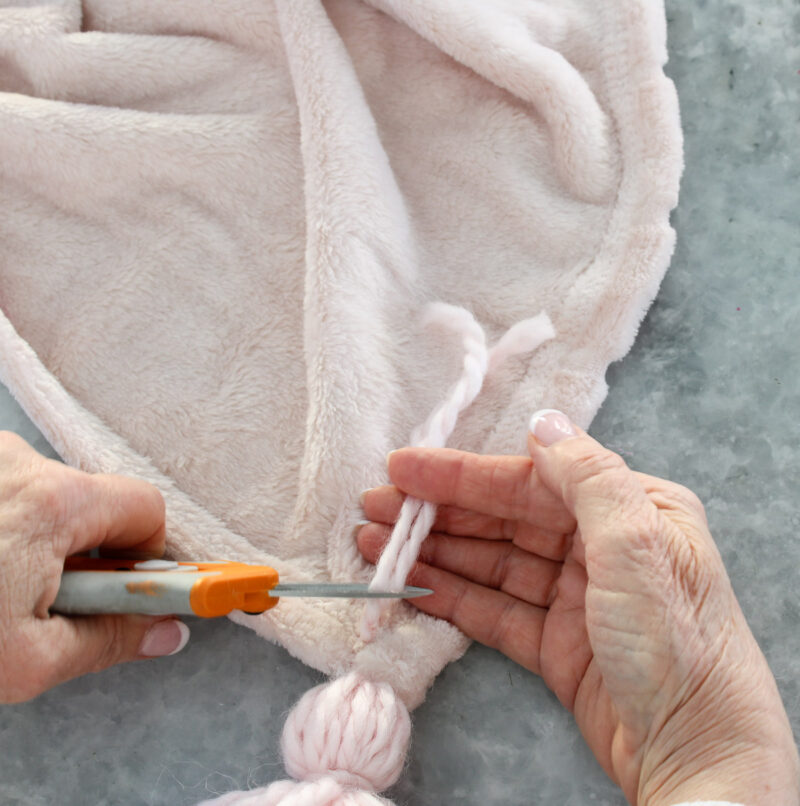
Step 4 – Double knot the two ends of the yarn. Lastly, trim any long threads from the knots to maintain a tidy appearance.
By following these steps, you ensure your tassels are not only aesthetically pleasing but also durably attached, ready to accent your cozy throw beautifully.
Styling the Tasseled Throw
The last step is to add your tasseled-decorated throw to your sofa (or the foot of your bed). Make sure your tassels are visible. The transformation a DIY tasseled throw brings to a living room or bedroom is both immediate and fun.

Simply draping this adorned blanket over a chair or couch injects a layer of warmth and texture into the room. You could also hang the throw on a blanket ladder. Fold it into a large tote or basket. Drape the tassels out of the tote or basket so they can be seen.
The tassels add an element of playful sophistication, merging effortlessly with various decor styles.
Through these simple styling techniques, the tasseled throw provides a personal touch and creative vision in DIY home decor.

Sharing the Experience
The appeal of adding a personalized, cozy touch to my living room was exciting. With each tassel, I grew more confident. Making the tassels themselves, selecting the yarn, and attaching them to the throw was so easy.
I made all four tassels in about an hour while watching the Australian Open Men’s final Sunday afternoon.
I will definitely make more tassels of different materials, sizes, and colors. I hope that you will try your hand at making these special embellishments.
Want more DIY projects? Try these out.
- How to Make Pretty Bookmarks with Pressed Flowers
- Make a DIY Pom Pom and Heart Garland
- How to Make Valentine’s Day Pillows with Pom Poms
Want to keep this DIY project for your future home decor projects? Be sure to PIN it. Also, check out my DIY Projects Pinterest Board for more inspiration.