How to Stencil a Painted Cabinet for a New Look
Remember last week when I showed you how I painted an old cabinet? Now I’m going to show you how to stencil that painted cabinet for a totally new look.
Sometimes just painting an old piece of furniture will give it new life. I’ve done that many times with great results. This is the first time that I’ve stenciled a piece of furniture. I can’t wait to share with you how to stencil a painted cabinet.
Since I’m not an artist, I go to stencils as a way to add beautiful designs to signs and accessories. Stenciling this cabinet was my first attempt at stenciling a piece of furniture. That was my intention from the moment I found this old cabinet at an estate sale.

How to Stencil a Painted Cabinet for a New Look
This post contains affiliate links to products used in this project. If you should order any product from this site, I may receive compensation, but you don’t pay a penny more.
First, I should say that almost any piece of furniture can be stenciled. My inspiration pieces for this project are all dressers.
INSPIRATION FOR MY STENCILED CABINET
What was the inspiration for this final look I wanted for my painted cabinet? The image below I saw at an interior design store here in Dallas.
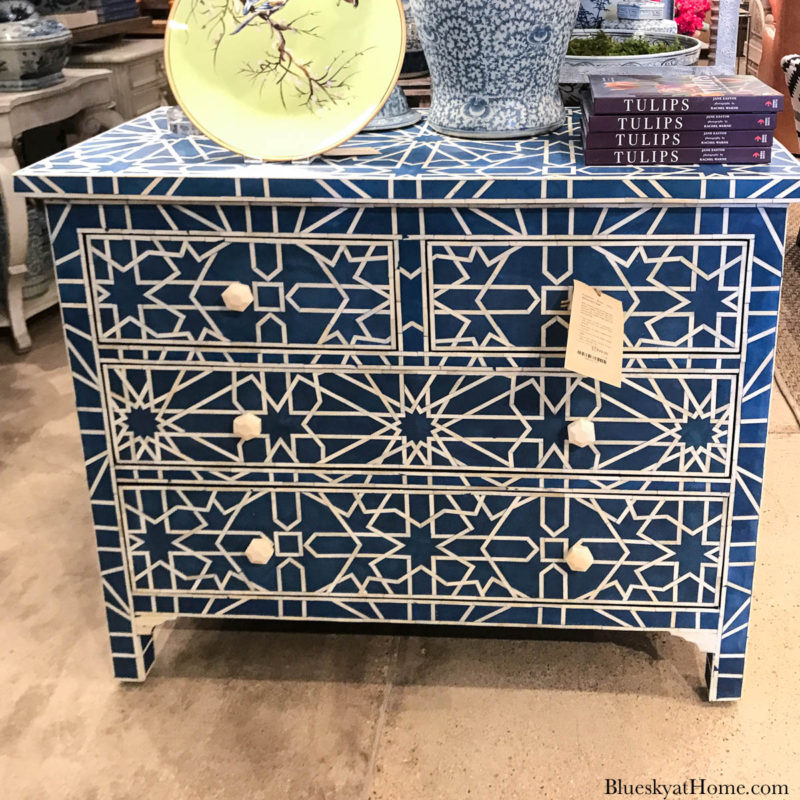
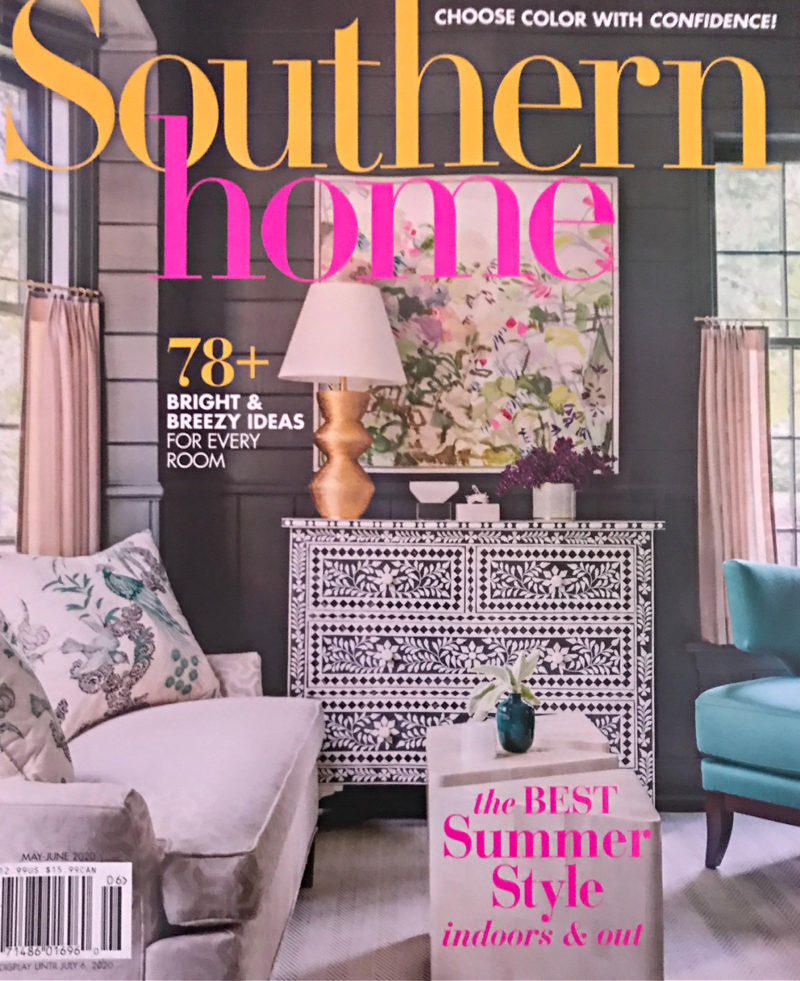
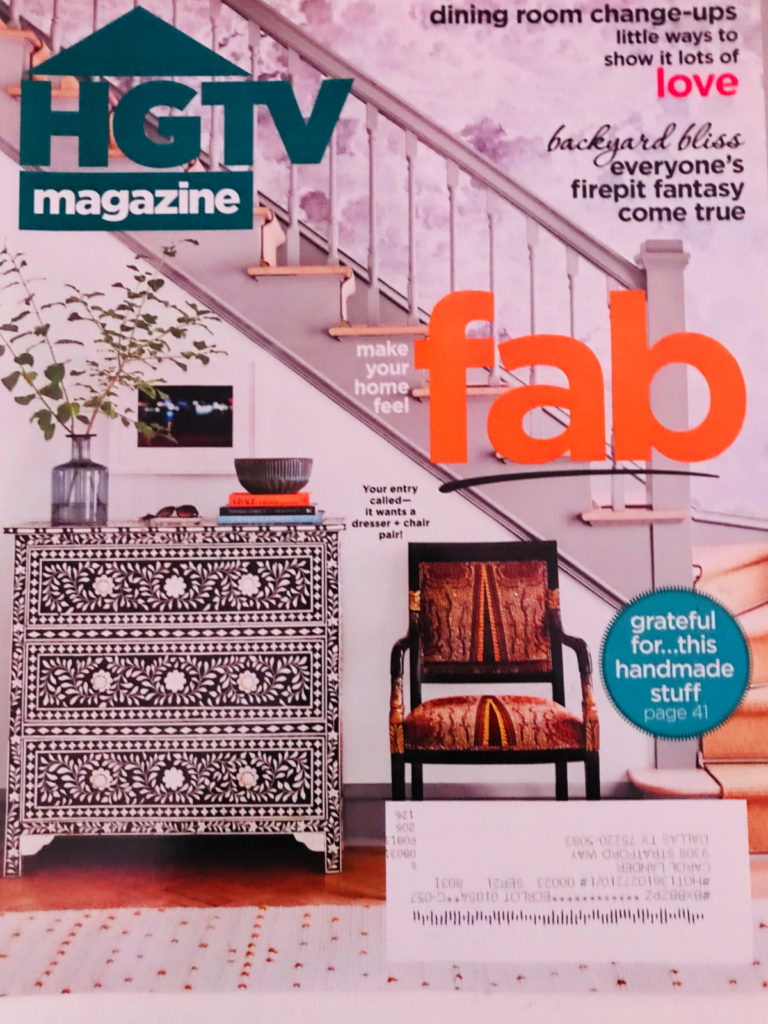
Notice that all three pieces have a different design. All of these inspiration pieces are made with an inlaid technique and they are very expensive. The one I saw at the design store was over $3000. That was not going to happen in this lifetime.
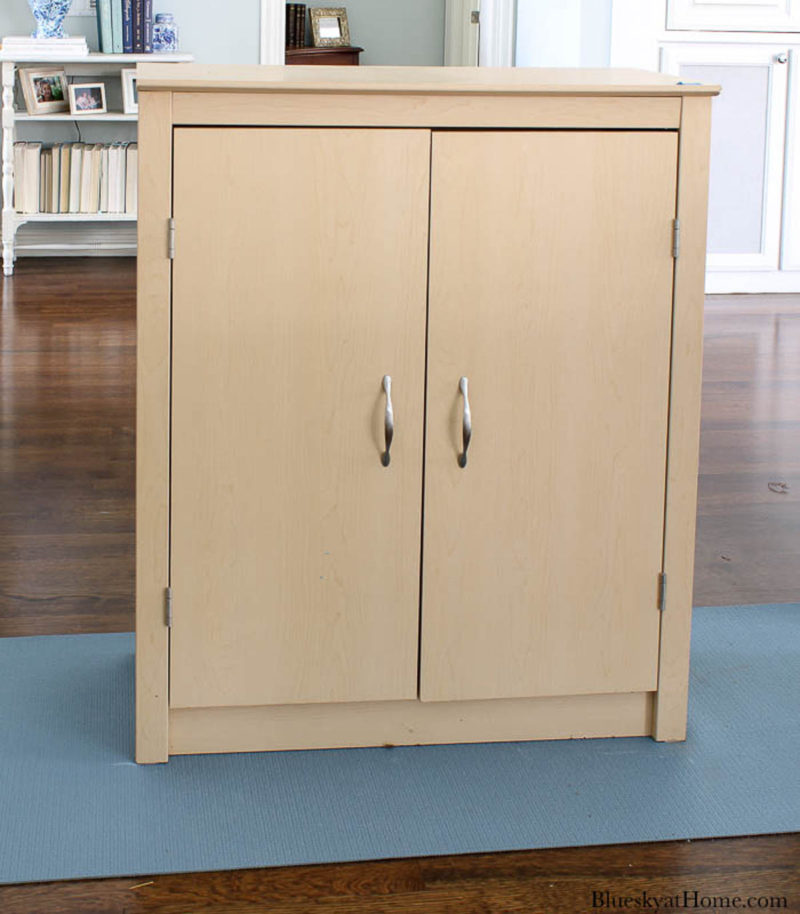
I felt confident I could find the right piece of furniture for a DIY paint-and-stencil project. When I found the plain Jane, inexpensive cabinet at an estate sale, I knew I had the right piece.
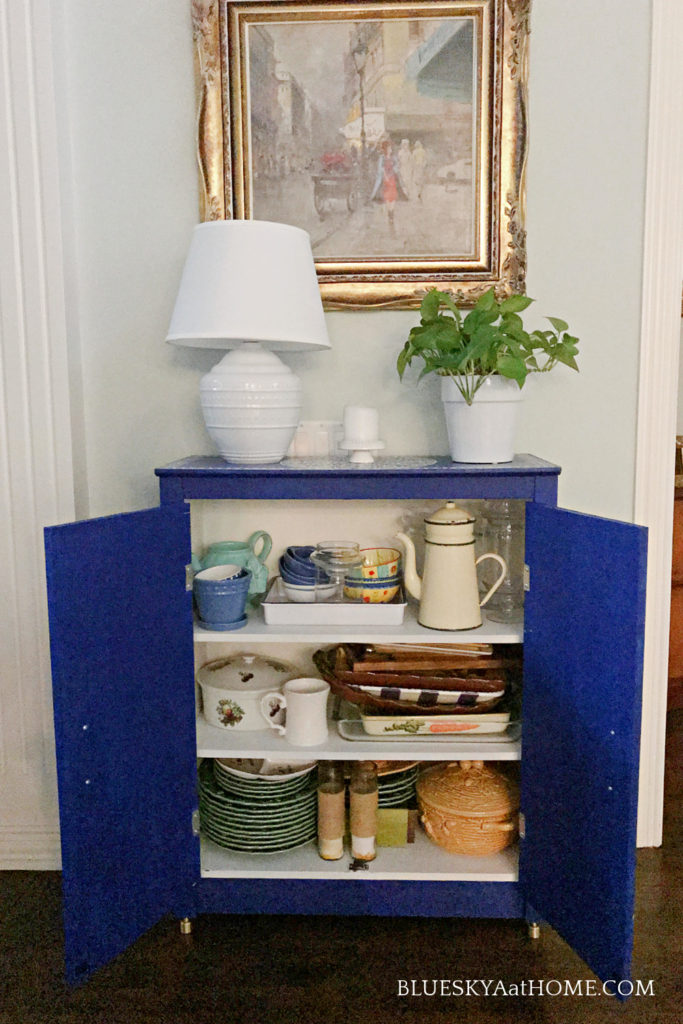
- As a cabinet, it would be a great place to store extra serving pieces.
- Since it was inexpensive, it was a good piece to paint and stencil.
- It had flat surfaces that would be easy to stencil.
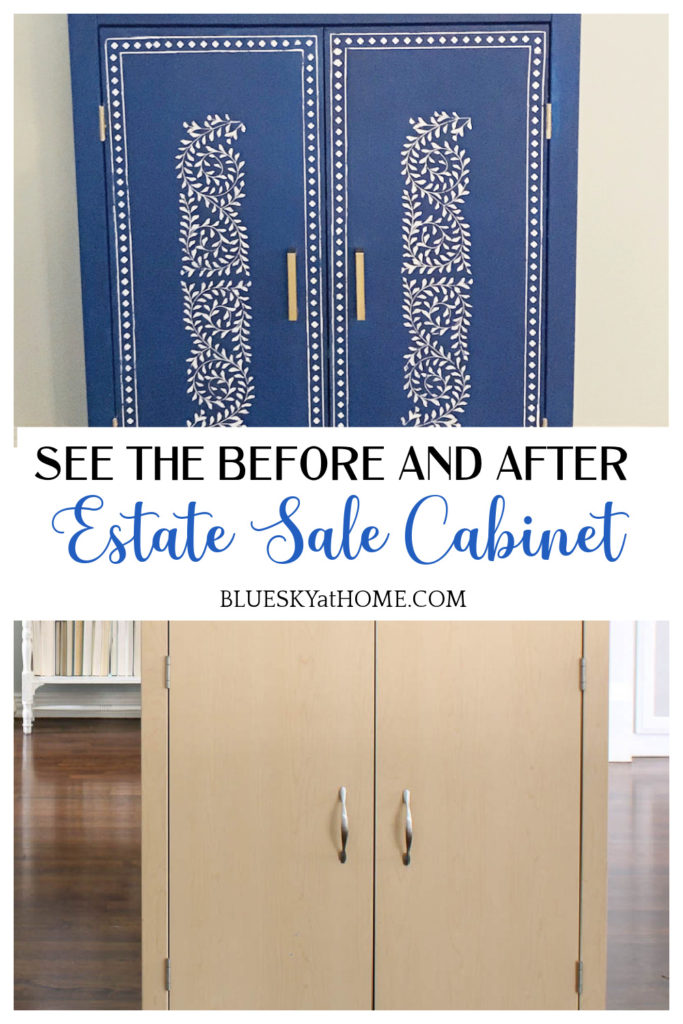
Let’s first look at the cabinet before I painted it.
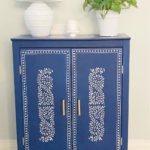
And here is the cabinet after I painted it. Here was the process for painting the cabinet.
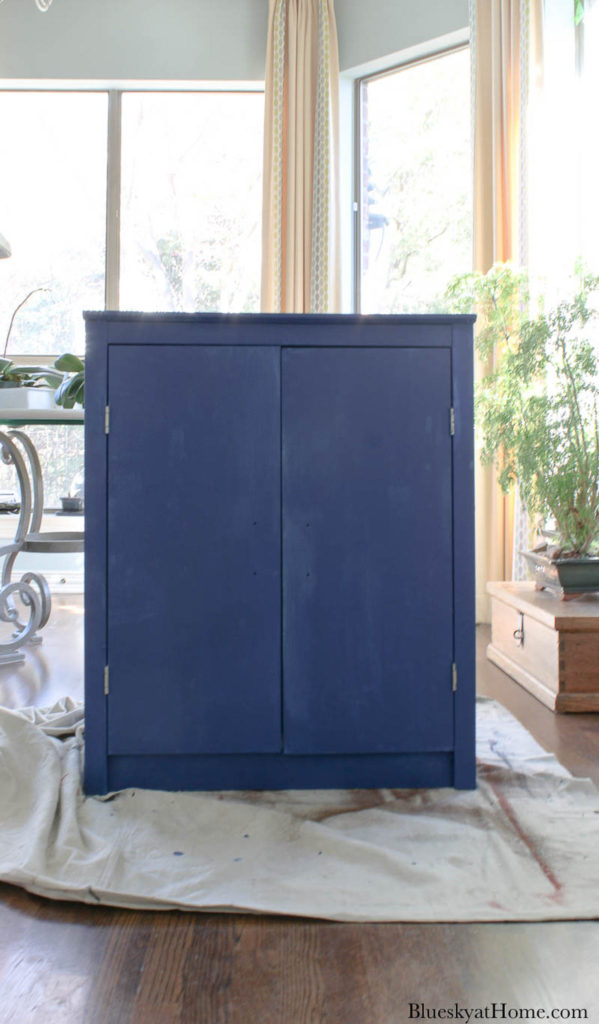
I would view the entire process of how I painted this $20 estate sale cabinet and the supplies I used.
After I show you how to stencil the cabinet, I’ll show you how I embellished it with hardware and Gold Leaf.
CHOOSING YOUR STENCIL DESIGN
The first step to stenciling your cabinet is to find the right stencil. With so many choices, this was the hard fun part. I chose the stencils from A Makers’ Studio. The tri-mesh and adhesive stencils offer a greater depth of design and ease of use than vinyl and plastic stencils.
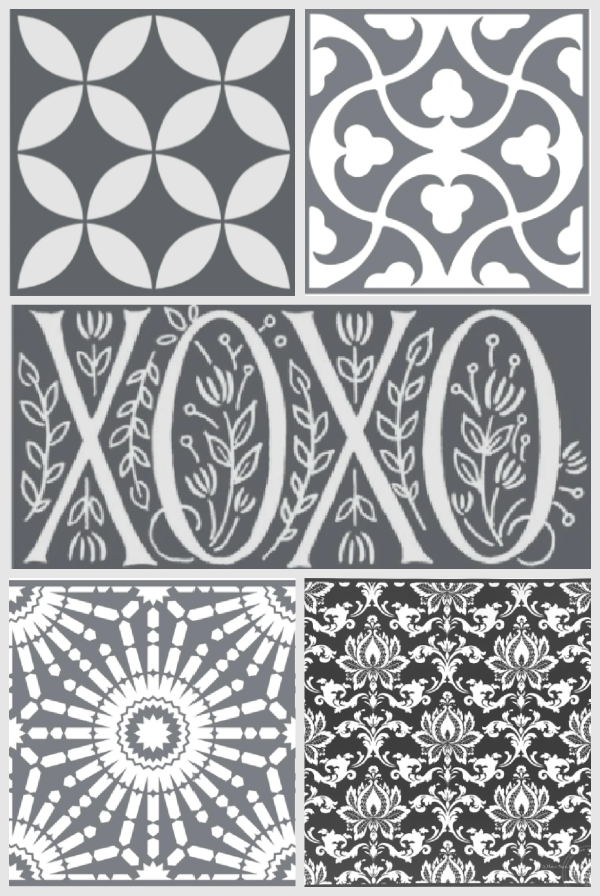
I already had a few stencils on hand that I considered:
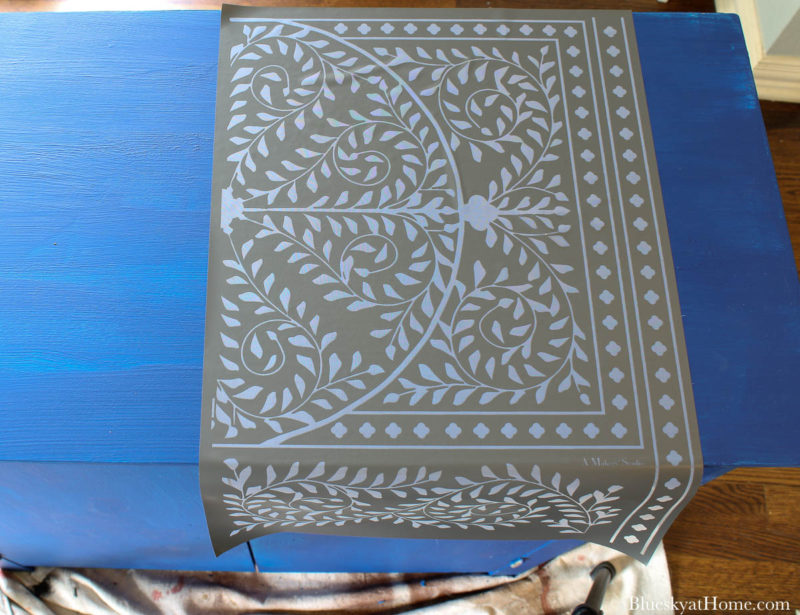
I found a stencil I really liked. Notice that there are four separate designs on this stencil. I would use all of them on my cabinet.
- The main leaf design is a half-circle.
- A leaf design with a diamond border design
- A diamond design with a border
- A leaf design
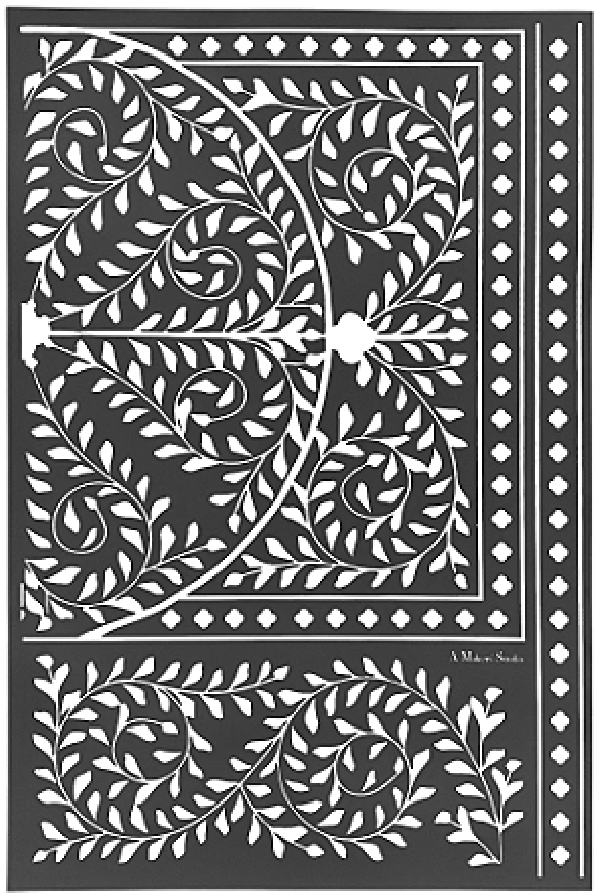
I loved the combination of the leaf motif and the variety of ways I could use the stencil on my cabinet.
SUPPLIES FOR STENCILING THE CABINET
- Your stencil(s) of choice
- ChalkArt in your color of choice – I used white.
- Painters Tape
- Plastic Scraper
- Matte Sealer
- Container for Matte Sealer
- Paint Roller
STEPS TO STENCILING THE PAINTED CABINET
I had a plan for using this design. The circle design would be on the center of the top of the cabinet. You’ll see the process better as I go through the steps.
NOTE: Remember that all the stencils can be cut into different parts for multiple uses.
This project was a little intense. To get the look I wanted required moving stencils around, washing stencils in between use, and letting the ChalkArt dry. It was well worth the effort.
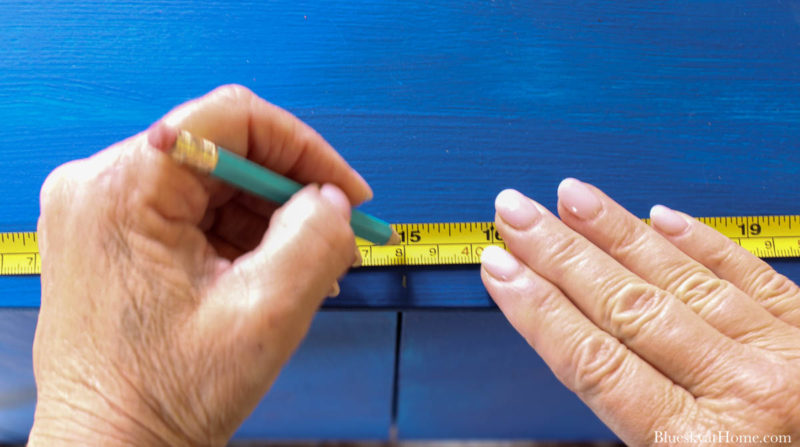
Step 1 – Measure the center of the cabinet top and mark with a pencil. This will determine where I start with the half~circle.
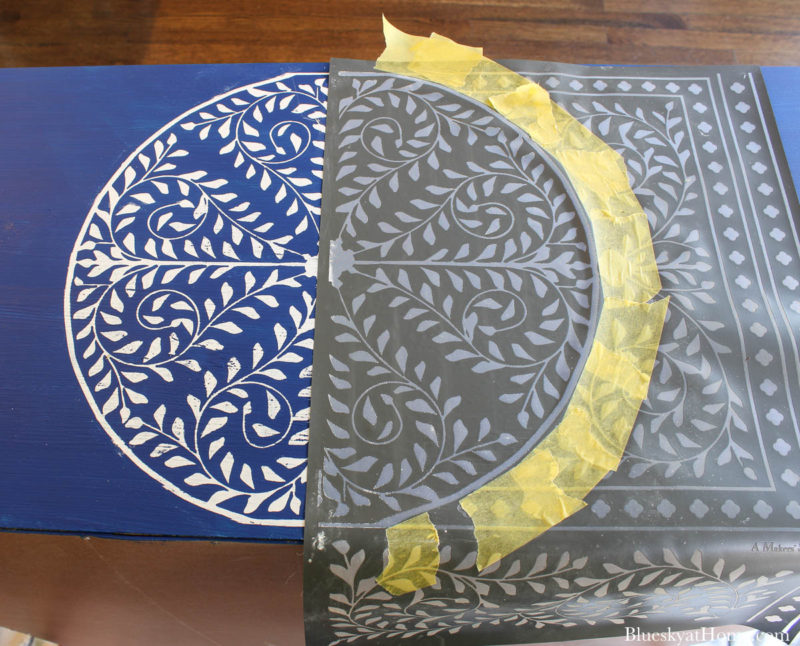
Step 2 – I placed the stencil on the top of the cabinet, lining up the half circle with my center mark.
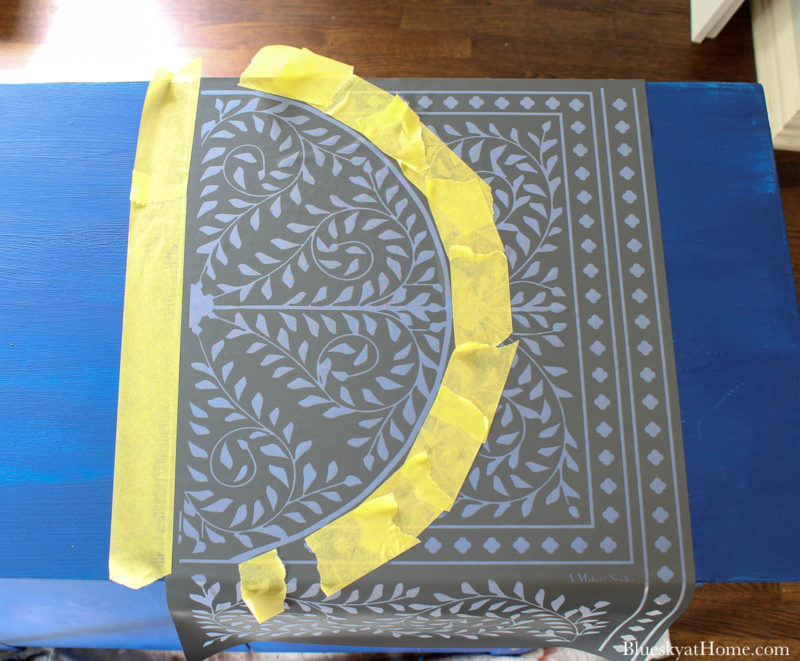
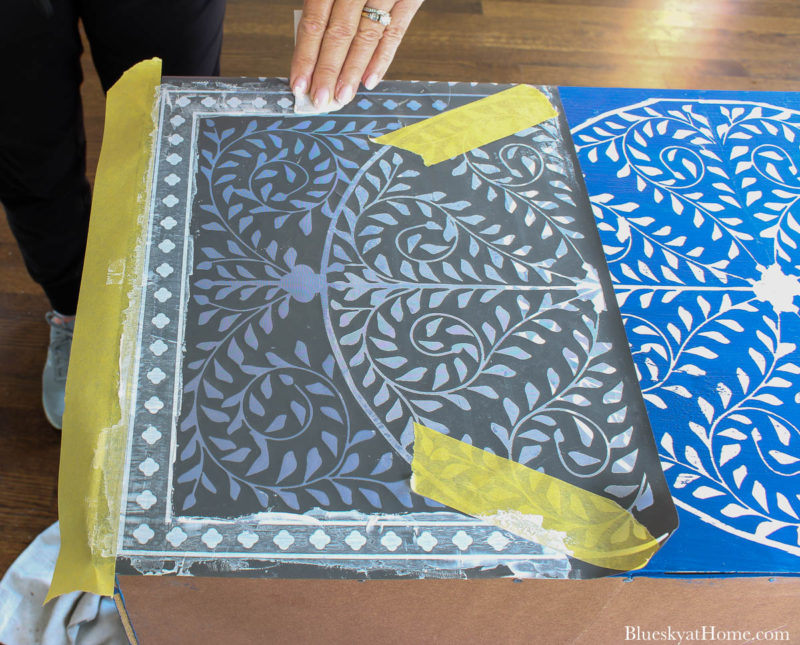
Step 3 – Since I wanted only the half-circle, I used painter’s tape to mark off the parts of the stencil I didn’t want in the design.
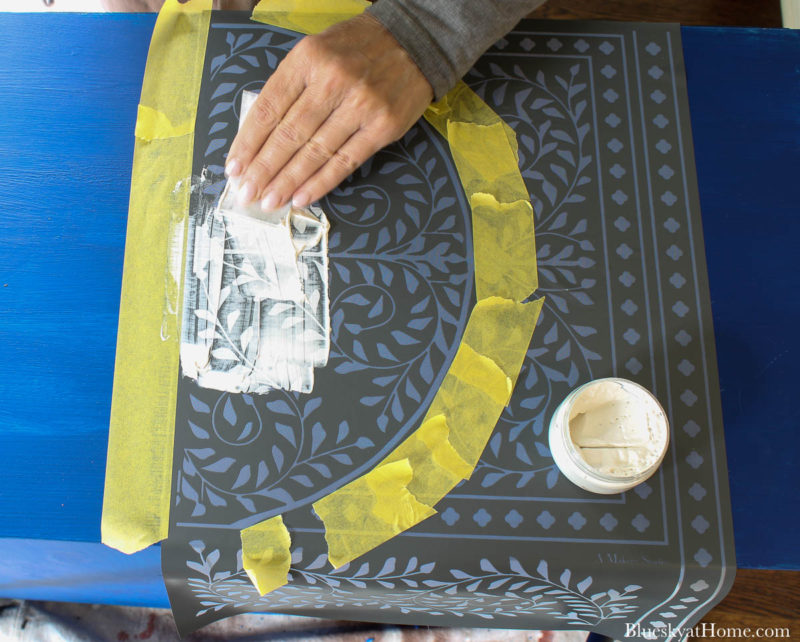
Step 4 – Use the plastic scraper to apply your ChalkArt.
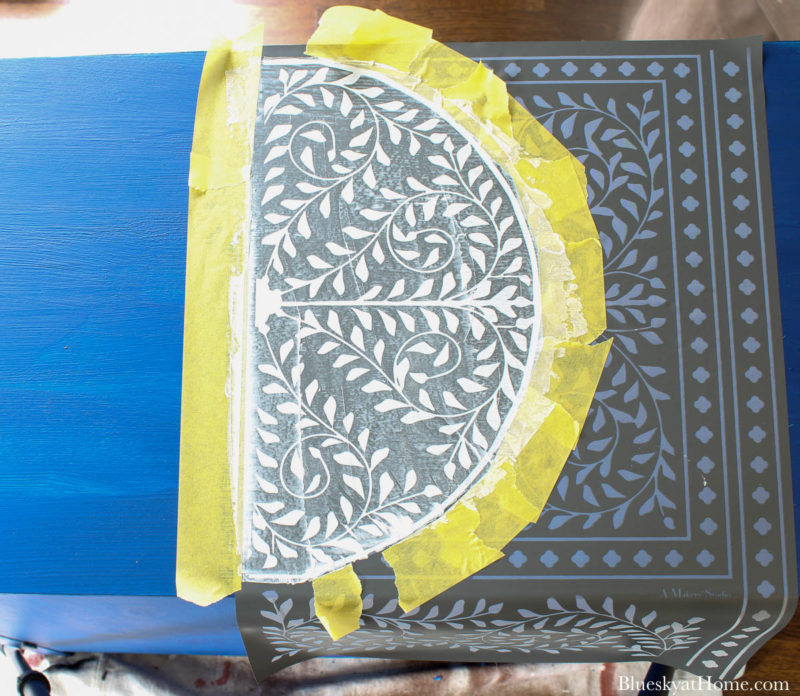
Here’s the completed half-circle.
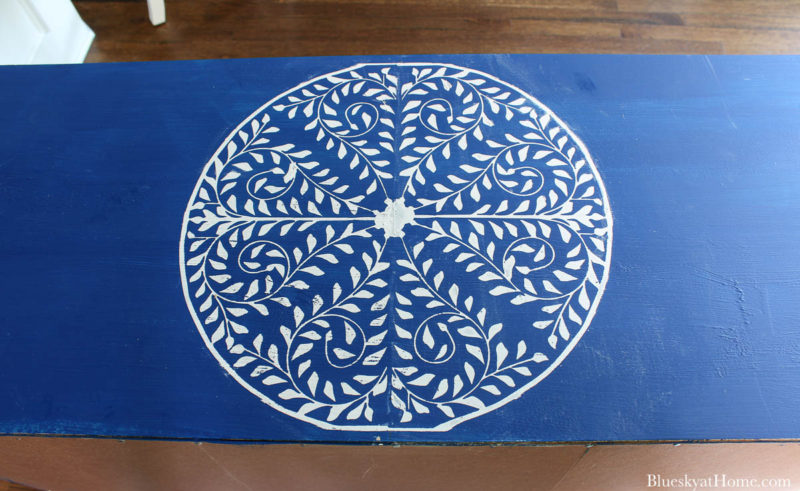
Step 5 – Carefully remove the stencil from the cabinet. Wash off the ChalkArt from the stencil. Since this stencil is large, I put it in the kitchen sink and washed it under running water. Place the stencil, design side down, on paper towels and allow to dry. At the same time, the ChalkArt on the cabinet will dry.
Step 6 – Position the stencil on the other side of the cabinet top, aligning the stencil with the first side.
Step 7 – Apply the ChalkArt as you did the first side.
TIP: If there are areas where you had ChalkArt you don’t want, use a damp cotton swab to “erase” it.
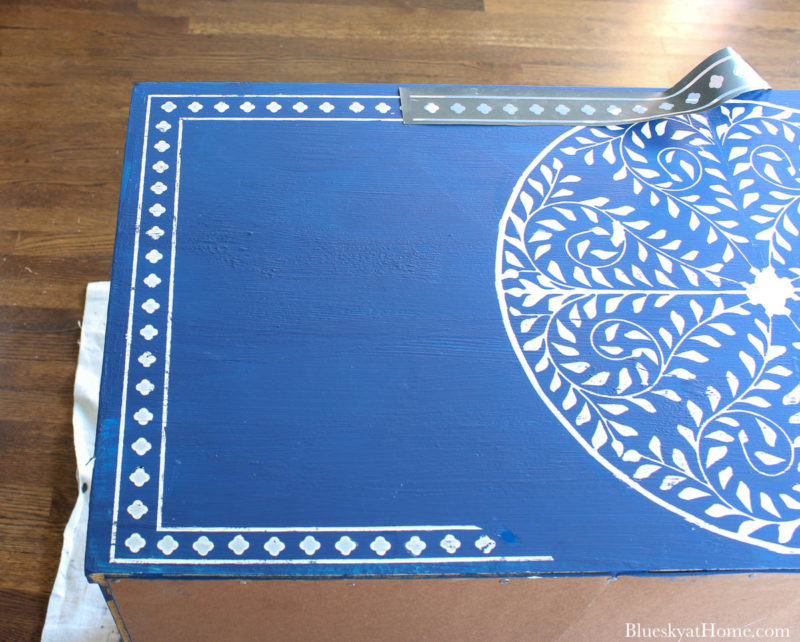
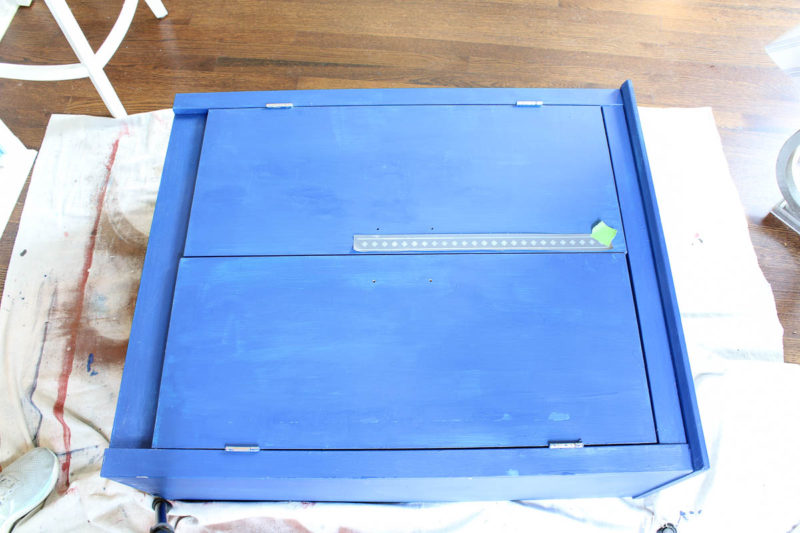
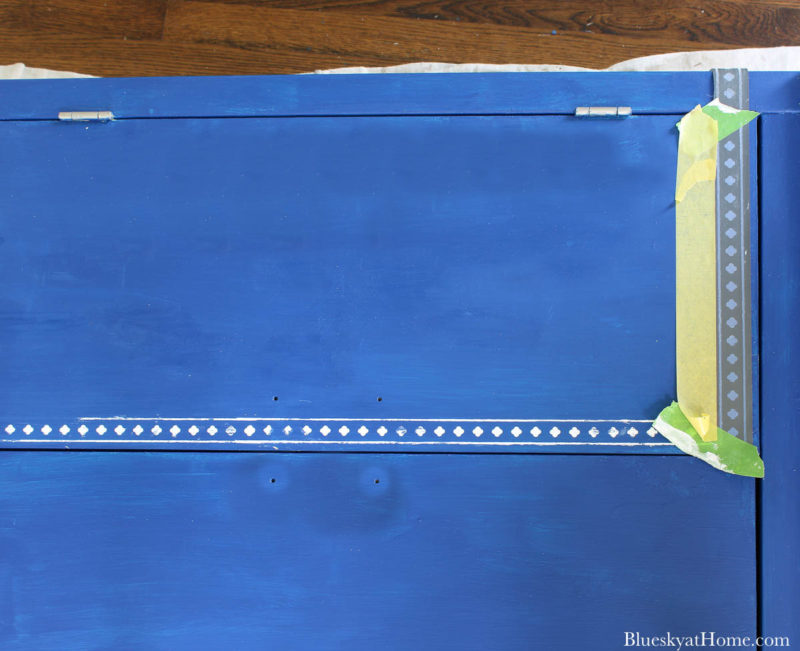
Step 8 – For the rest of the top of the cabinet, I would use the diamond border design of the stencil. Apply the stencil on one side of the cabinet top.
NOTE: At this point, I cut off the separate diamond border design.
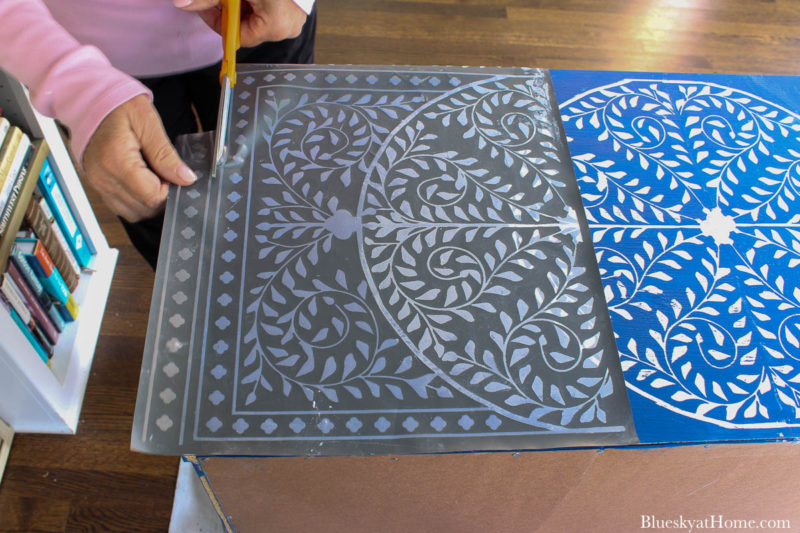
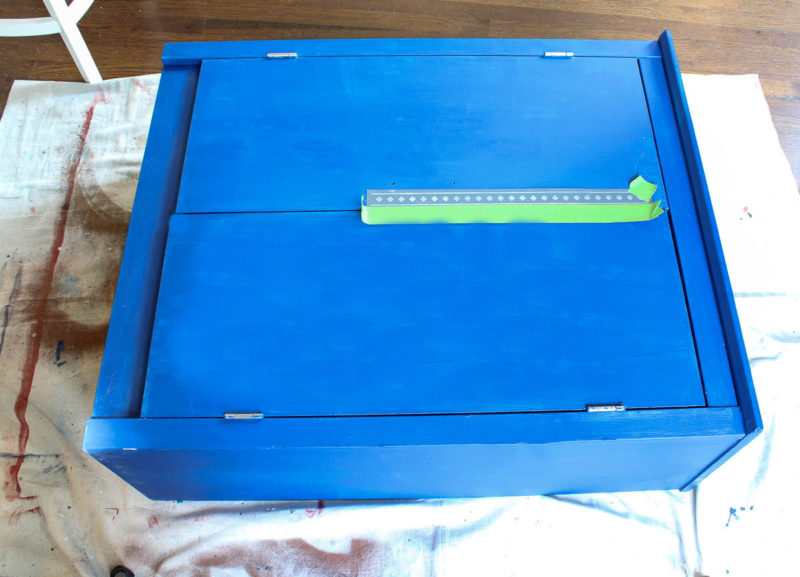
Step 9 – Tape off any areas you do not want to stencil.
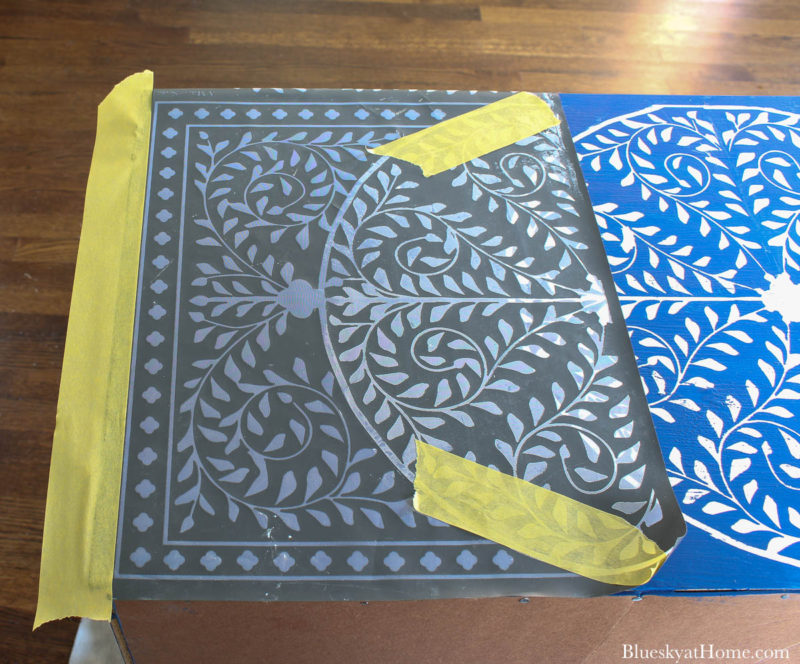
Step 10 – Apply your ChalkArt in the same way as the first stencil.
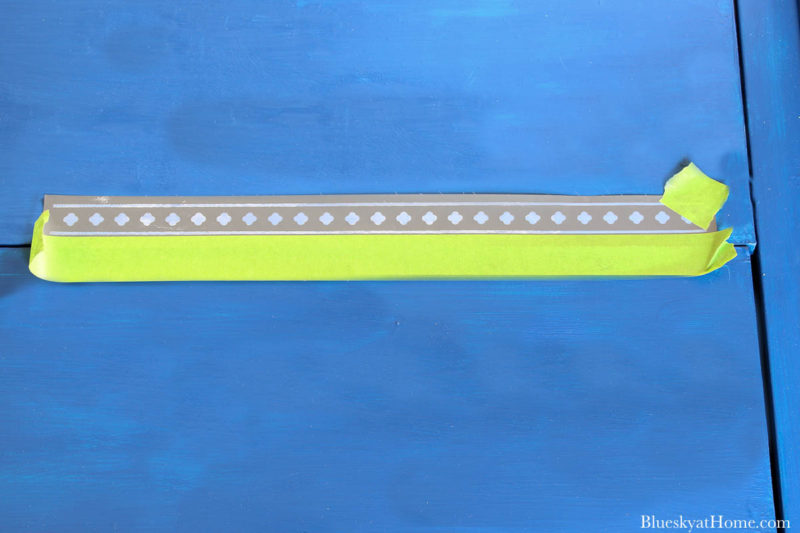
Step 11 – Use the strip of the diamond border to connect the first border to the half-circle.
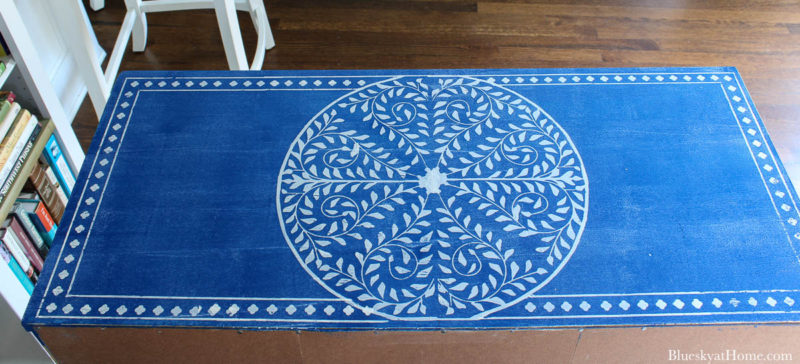
Step 12 – Repeat on the other side of the cabinet. Allow the ChalkArt to dry thoroughly, about 25 minutes. Clean up any stray ChalkArt with a cotton swab.
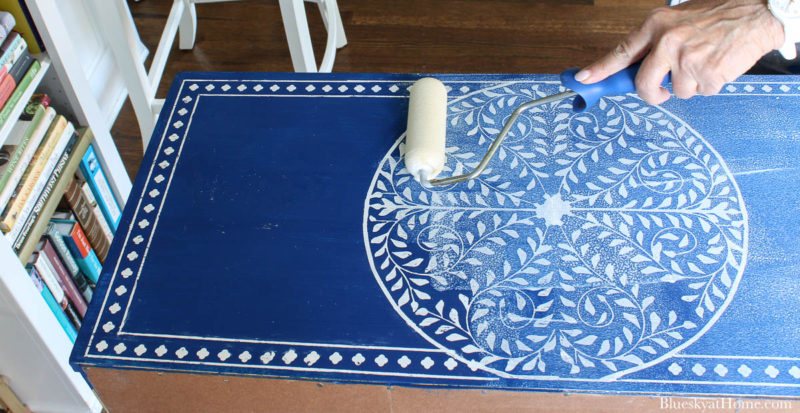
Step 13 – Since the top of the cabinet would have items set on it, I decided it should be sealed. I used Matte Sealer from A Makers’ Studio. The way to do this is with a roller.
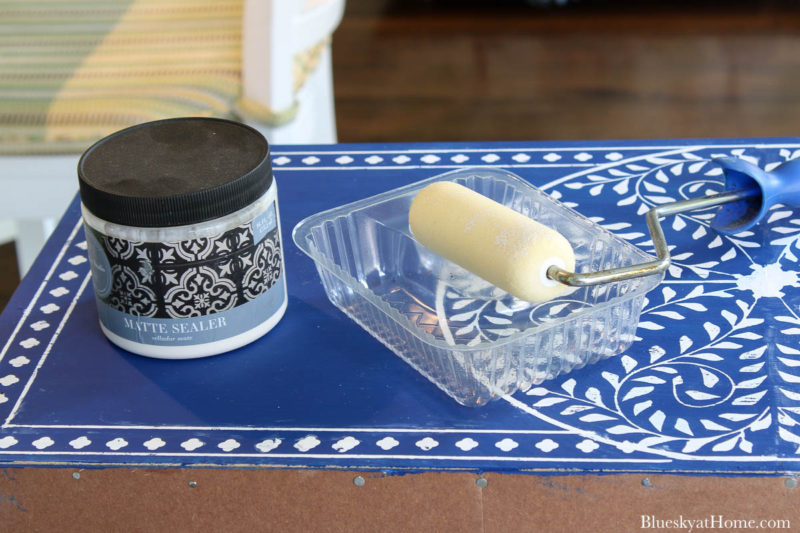
The Matte Sealer goes on white and dries clear. Let it dry for several hours.
When dry, the Matte Sealer will have a bit of shine and your surface will be protected, even from liquids. I’ve used it to seal our patio tables, and two years later they still look great.
STENCILING THE CABINET DOORS
To stencil the cabinet doors, we laid the cabinet down on the floor. I decided to use the same diamond border.
Step 14 – Lay the diamond border stencil down the edges of the door and apply the ChalkArt.
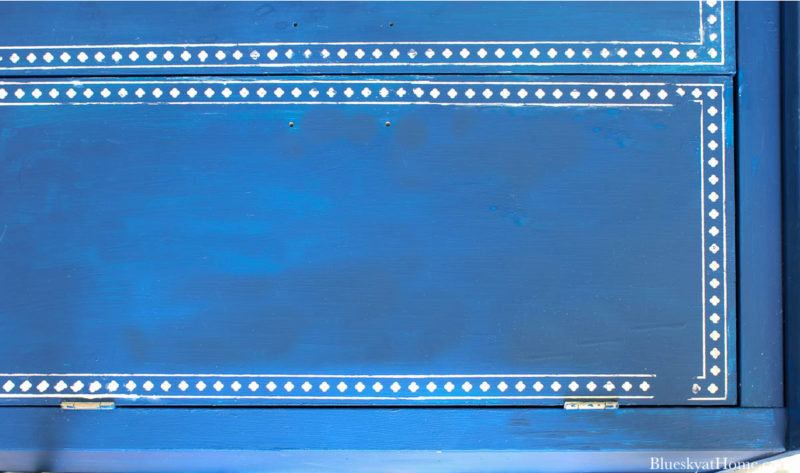
I finished the last of the diamond border. At this point, Sweet Shark and I agreed that we didn’t want to completely cover the cabinet like the inspiration pieces. It would be just too much in our living room.
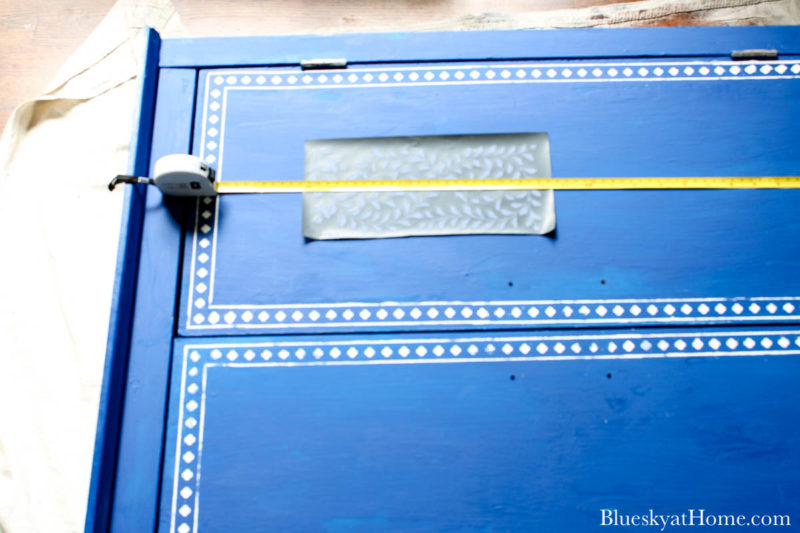
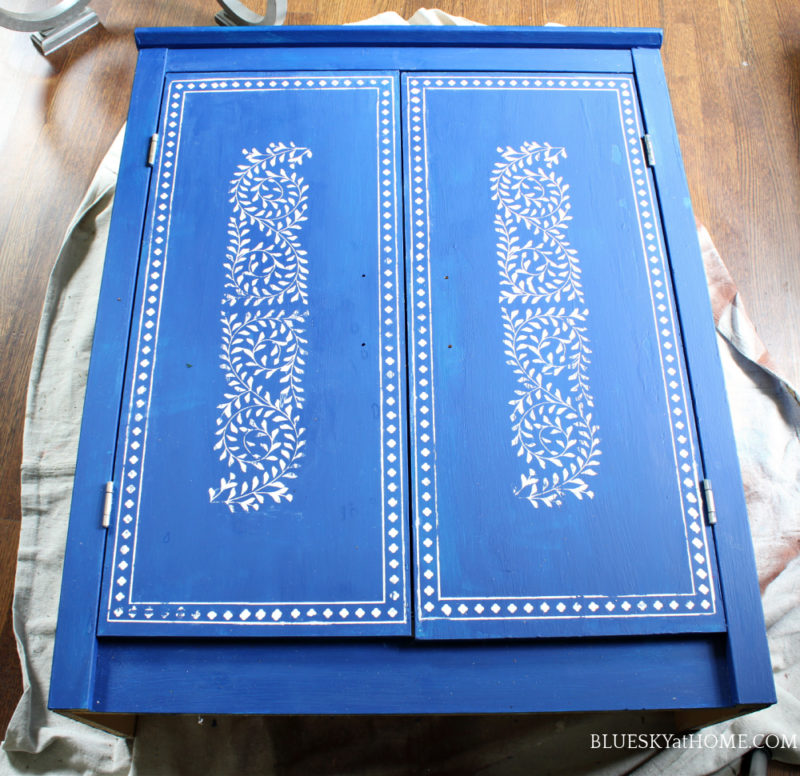
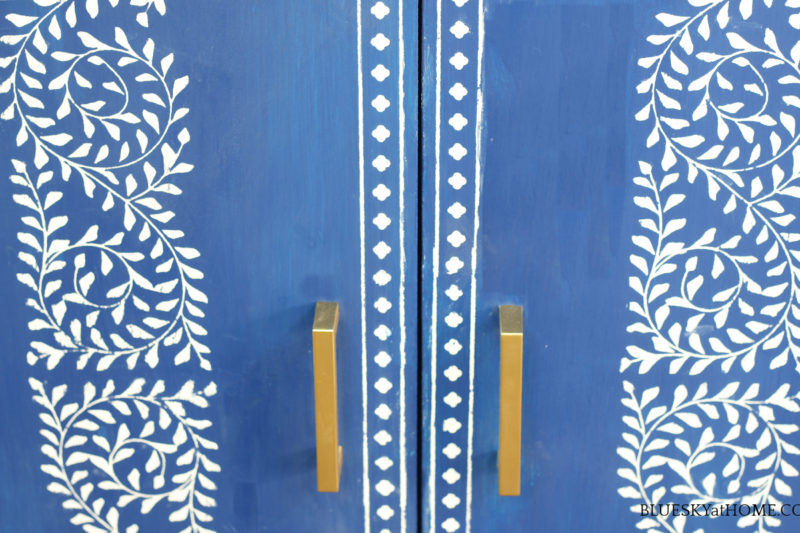
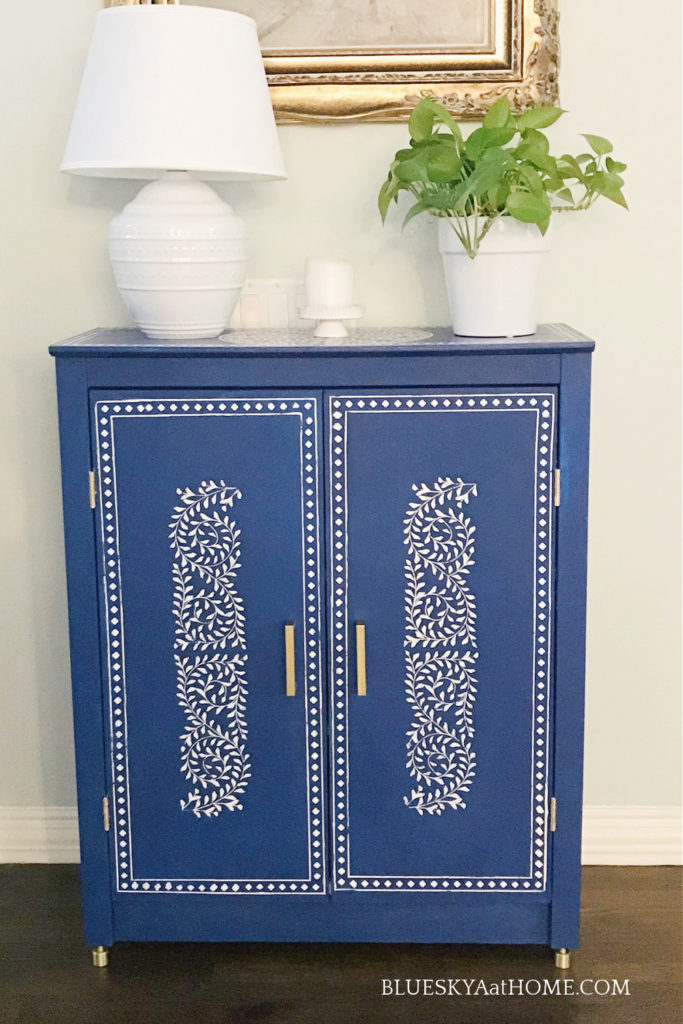
But the front of the cabinet doors did need a design as a focal point. The remaining leaf stencil in the center of the doors would be just the right amount of stencil.
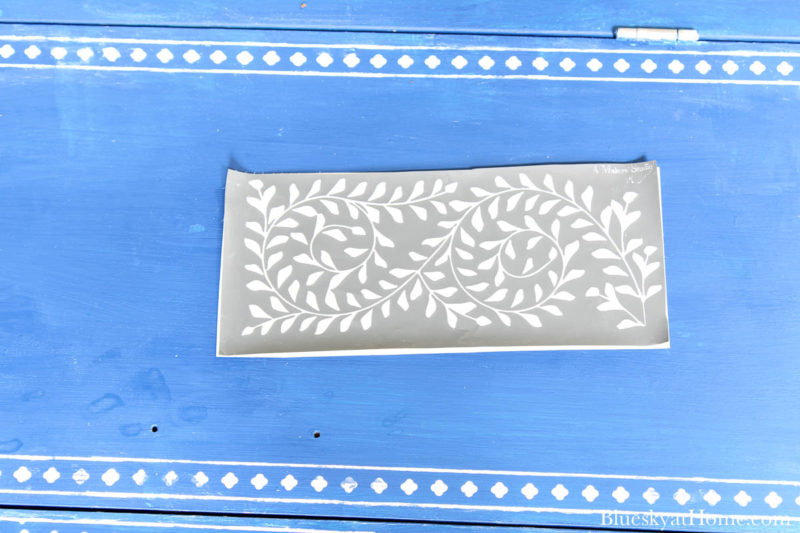
Step 15 – First, I measured to get the right vertical placement. I used the leaf stencil twice on each door in a vertical direction. Then, I applied the stencil exactly in the same way that I did the others. Once you know how to apply the ChalkArt to one stencil, you can use any stencil.
We think this is just enough design for the cabinet without overpowering it. What do you think? Was I finished? No!
EMBELISHING THE CABINET
Every piece of furniture needs a little bling, a little jewelry, to shine. A touch of gold will make the cabinet shine. That would require three last steps.
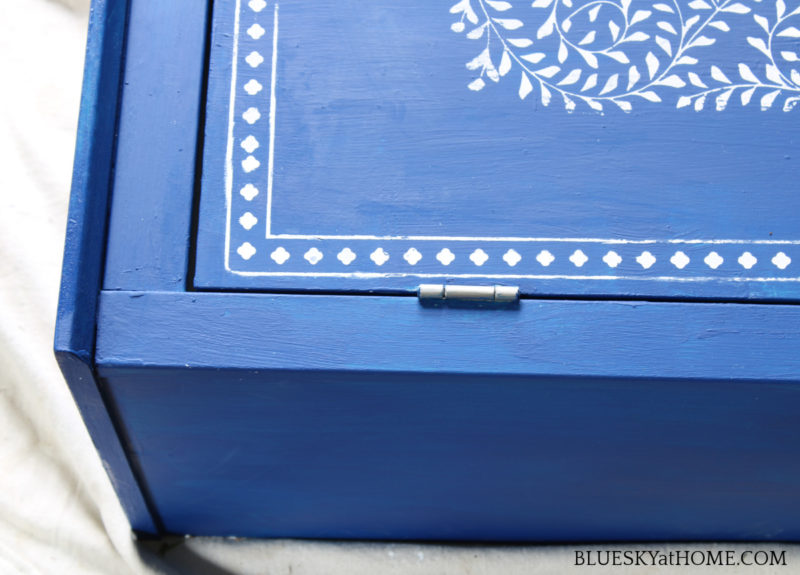
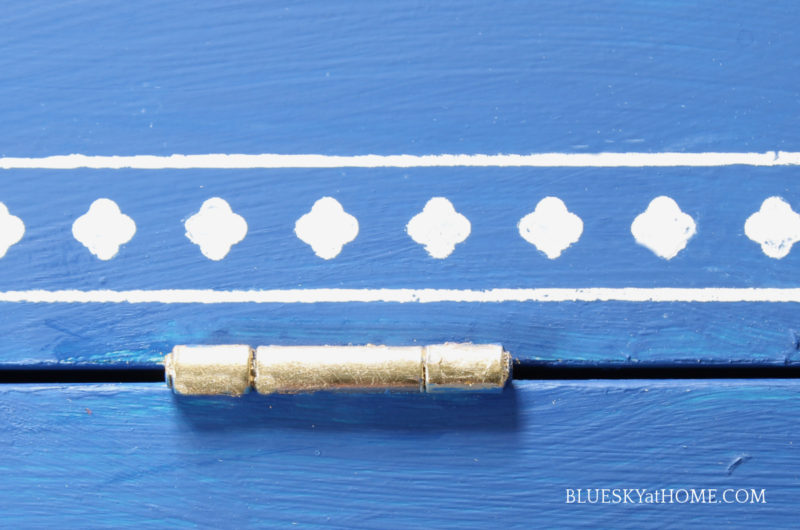
GOLD HINGES
The first thing I wanted to do was change the dull silver hinges to gold.
To do this, I used:
- Gold Leaf from A Makers’ Studio
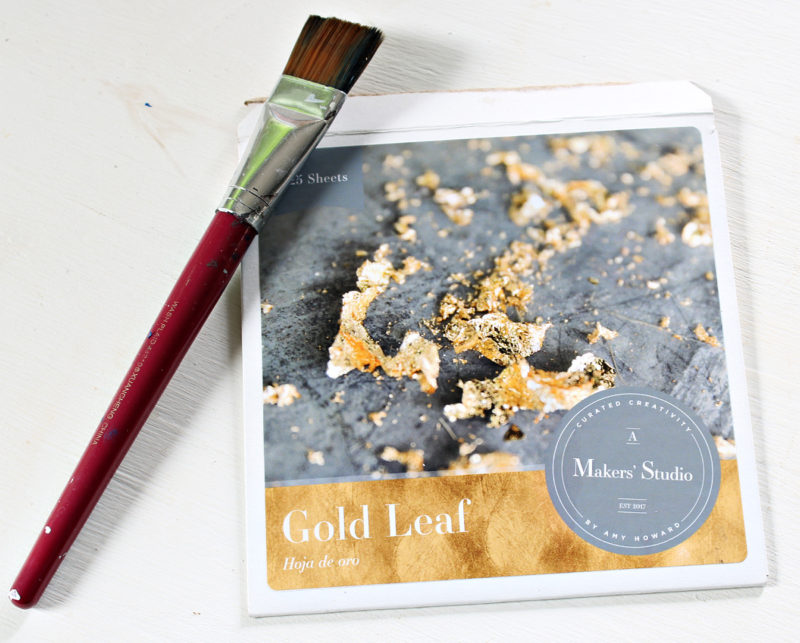
- Gilding Size from A Makers’ Studio
- Paintbrush
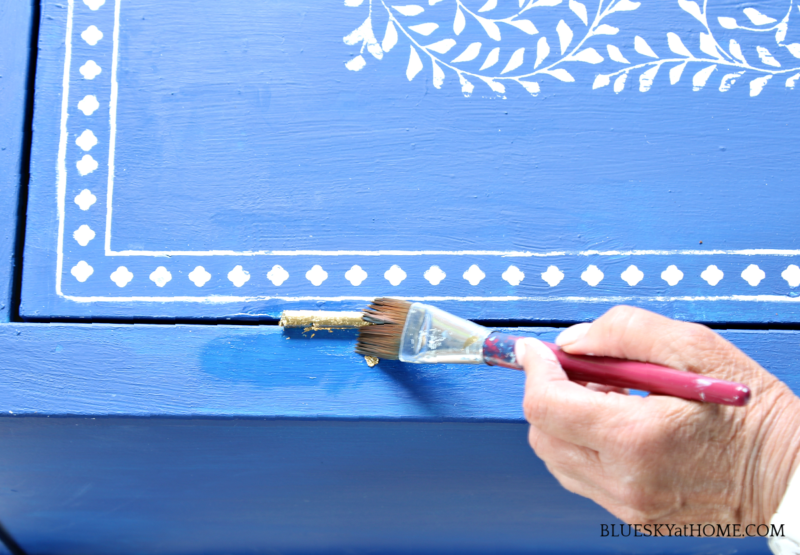
Step 1 ~ Apply the Gilding Size to the hinge with a small paintbrush. Allow to set for about 5 ~ 10 minutes until tacky to the touch.
Step 2 ~ Place a piece of Gold Leaf on the hinge using the orange tissue paper. Rub the tissue over the surface.
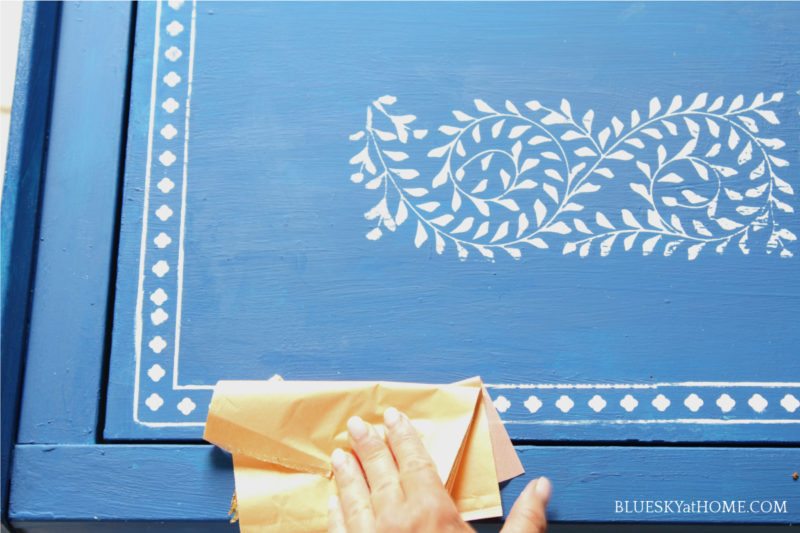
Step 3 ~ Use another small brush to remove the excess Gold Leaf.
Check this post for another project using Gilding.
Hello, Gold!
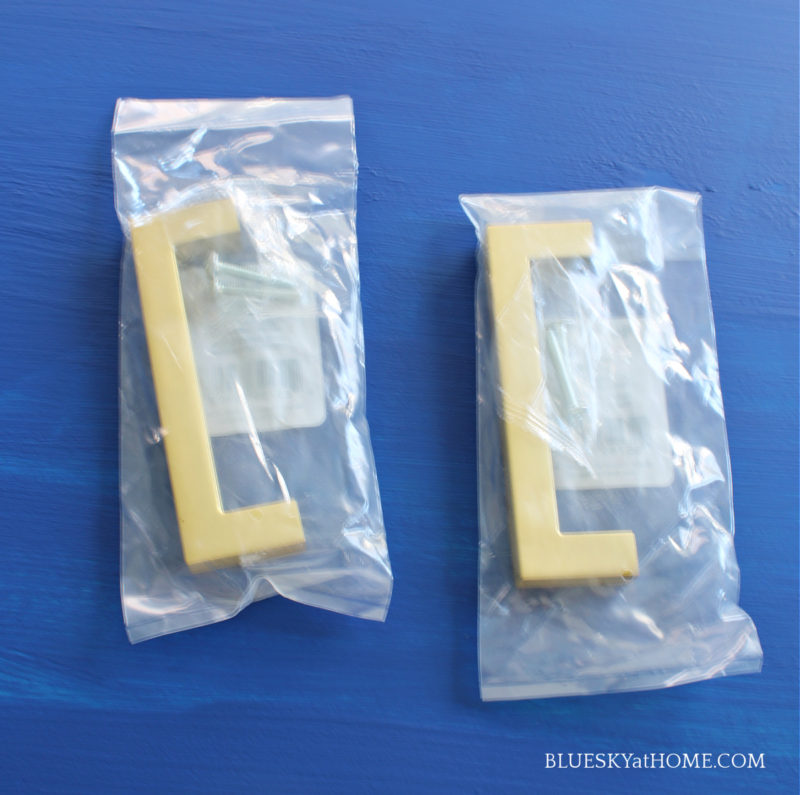
NEW GOLD HANDLES
I took the original silver handles to Lowe’s to match the size of the new handles. Luckily, I found the bigger, more modern handles that I needed. The handles were $4.98 each
NEW GOLD FEET
I really wanted some kind of feet or legs for the cabinet. It had a flat, boxy look on the bottom. I thought raising the cabinet would give it a more modern look. And, of course, the new feet had to be gold.
I couldn’t find any feet at Lowe’s, but I did find gold knobs that I thought would work. They only had one, so I ordered three online. The knobs were $3.98 each.
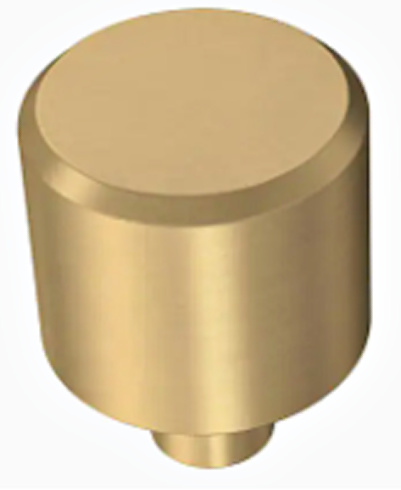
Because the knob had a screw with a head at one end, we had to remove it to attach the knob to the cabinet base.
To do that, you need a Dremel. Fortunately, I had a Dremel ~ a freebie in our swag bags a few years ago at Haven. It is a great tool for all sorts of uses.

Step 1 ~ I marked where the screw would go on all four bases of the cabinet.
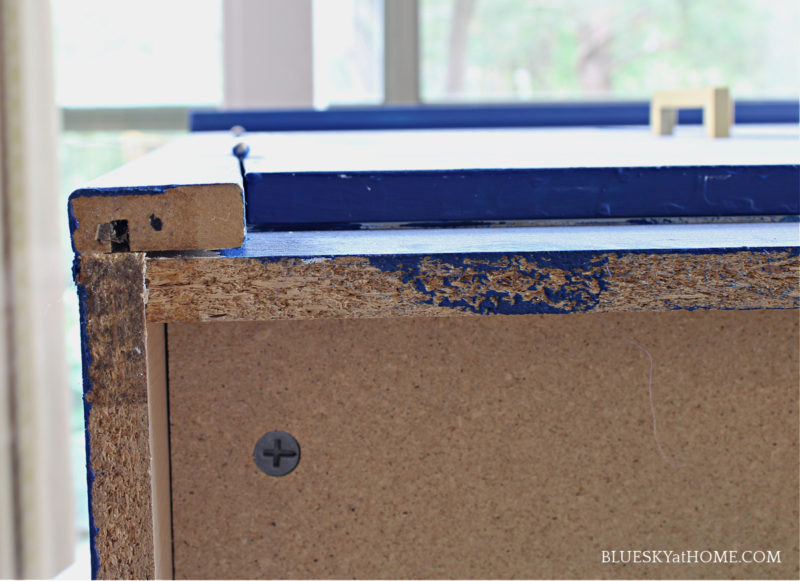
Step 2 ~ I drilled a pilot hole for the screw.
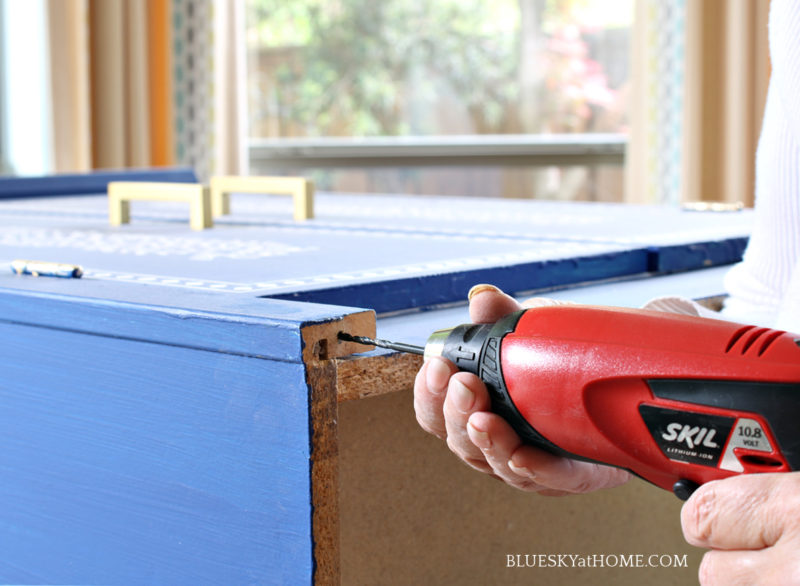
I called in the big guns ~ Sweet Shark ~ to help me with this step.
Step 3 ~ Measure how deep the screw needs to go in the cabinet base. We screwed it into the cabinet base with my drill. Enough of the screw was exposed to attach the knob. Now, we had to remove the screw head. Using the Dremel, we cut off the screw head. A little fireworks!

Step 4 ~ Once the screw head was off, we screwed the knobs on to make the feet.
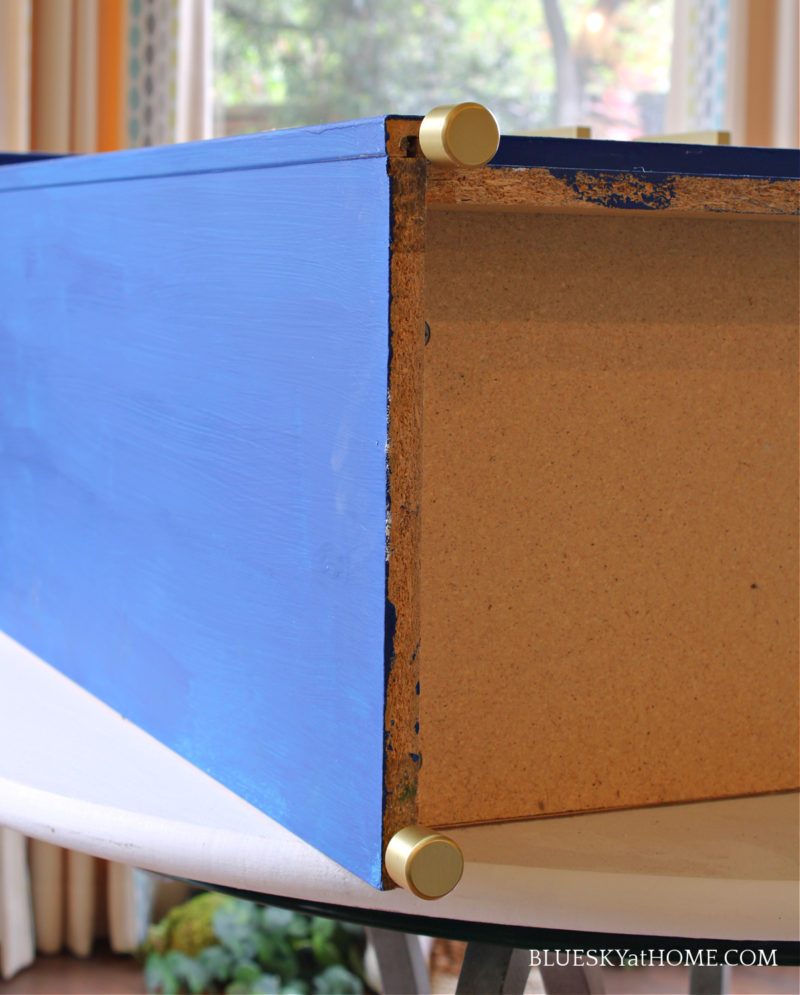
I now have gold embellishments for my painted and stenciled cabinet.
DISPLAYING AND ACCESSORIZING THE PAINTED AND STENCILED CABINET.
There were three parts to this cabinet transformation:
- Painting the cabinet
- Stenciling the cabinet
- Embellishing the Cabinet
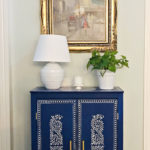
Finally, we placed the cabinet in the living room. I moved the previous small ladies’ table to the dining room.
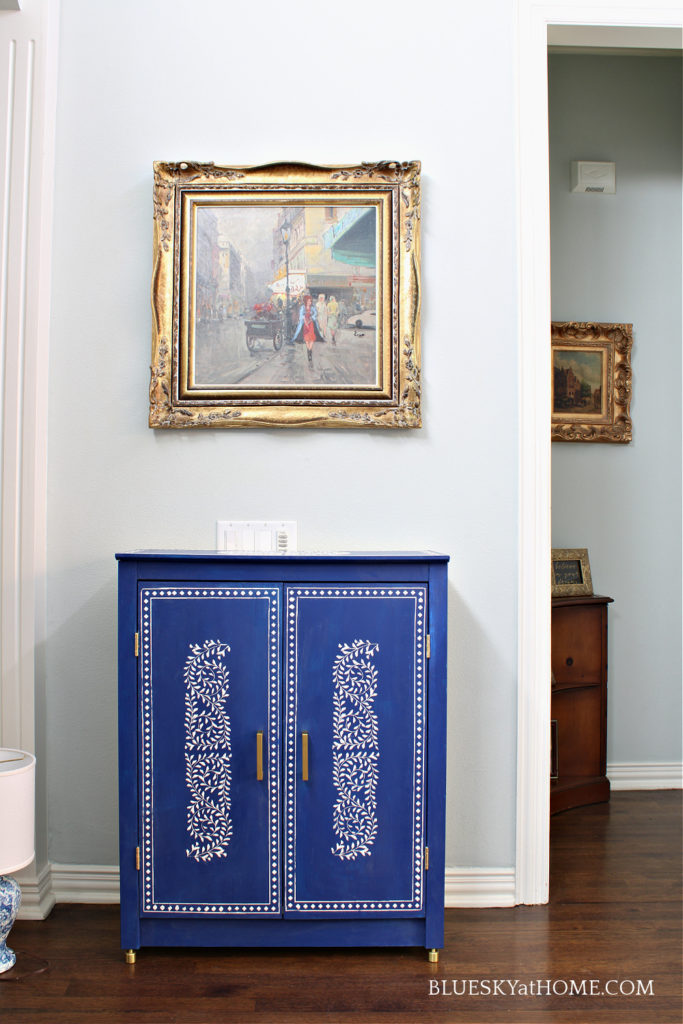
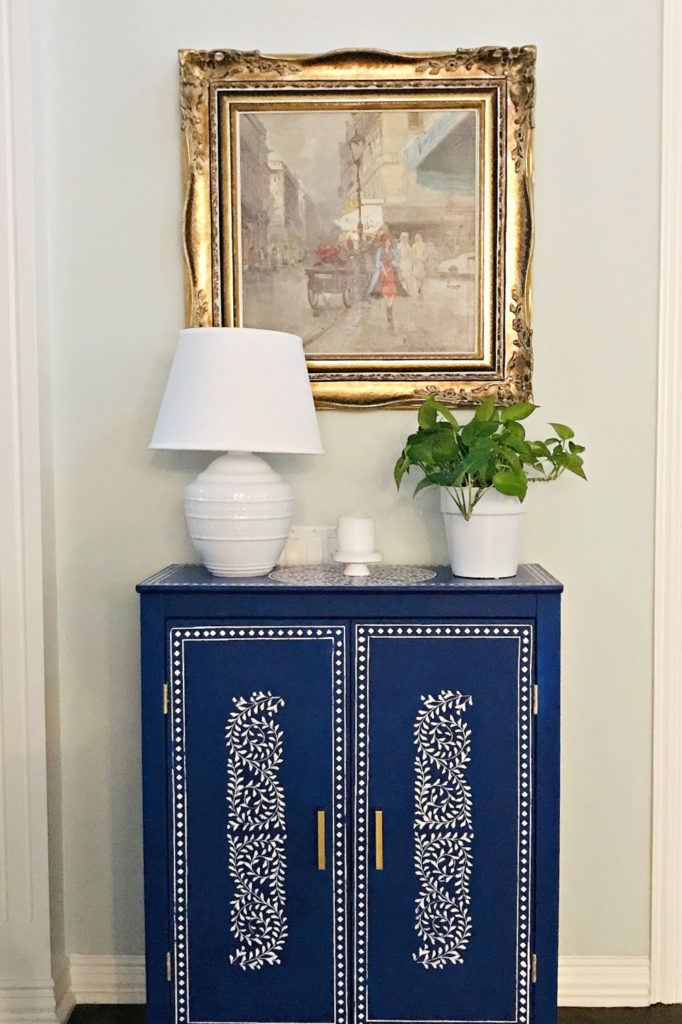
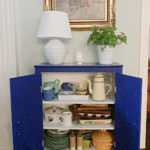
Because I didn’t want to cover the beautiful stencil design on the top of the cabinet, I kept the accessories to a minimum. First, I placed one of our two IKEA lamps on the cabinet.

Next, I added a white container with a green pothos plant and a small white candle to complete the look.
Finally, I could fill the cabinet with serving pieces from our butler’s pantry. This gave me more space there for additional craft storage.
I may raise the painting (which had been in my parent’s living room for years) up a few inches. What do you think?
I have to admit that it took about 5 weeks to complete this transformation. Far more time was spent doing other projects in between painting and stenciling and the embellishments than on the project itself.
We finished the project at the end of April, in time for our little Kentucky Derby party. I loved showing it off to our guests. It got lots of compliments.
Is this cabinet transformation perfect? No, but I’m proud of the new look. Some of our friends thought I had painted the design by hand. I had to laugh at that since I am not an artist. But up close, it does look like that. I don’t think you would ever realize that it was a stencil.
HOW MUCH DID THE CABINET TRANSFORMATION COST?
Here’s the cost of this project ~ nowhere near the cost of the inspiration pieces.
- cabinet ~ $20
- One Step Paint in American Dream ~ 32-ounce can ~ $34; I used about 1/2 half the can
- Moroccan Influence stencil ~ $23 (remember, these stencils are washable and reusable)
- ChalkArt ~ Peace and Joy ~ $10.99 ~ I used about 1/2 a jar
- Matte Sealer ~ already on hand
- Gold Leaf ~ already on hand
- Gilding Size ~ already on hand
- New Hardware ~ 2 handles @$4.99 each = $10
- New Feet ~ 4 knobs @$3.98 each = $12
The total cost was $99.00. Not bad. And I still have paint and a new stencil for other projects.
This was a bigger project than most repurposing projects that I’ve done, but I’m thrilled with the results. I now have extra storage space, a pretty focal point in the living room, and a new and different piece of furniture.
I’d love to know what you think of this project. If you have any questions, please leave them in the comments. I hope that you will PIN this painted and stenciled cabinet. It definitely was a labor of love.


Carol, your cabinet is lovely. Love the makeover. I bet your are thrilled. I am happy to feature your gorgeous cabinet at Love Your Creativity. Happy Memorial Day weekend.
This is a stunning makeover. I love the shade of blue you chose. It is amazing how it was such a plain and simple cabinet and now you have a one of a kind piece. Great job! Thanks for sharing it. #HomeMattersParty
You surely did an awesome job. And the versatility of that cabinet; it could be used anywhere. I would raise that picture up a bit; when the lamp is on, that scene will glow! I think your blue and white collection will be lovely on the cabinet, too! I never mind if we get a rainy patch caz I always have plenty of projects to work on in the house. It amazes me that so many people are SOOO bummed out by lousy weather when I go on, happy as a clam!
What an amazing makeover Carol! You really took the cabinet from ho-hum to WOWZA! I truly love the blue.
Nice! I love the stencil you chose, Carol! What an upgrade from the humble beginnings of this little cabinet 🙂
Thank you, Janet. I’m so glad I waited for the perfect stencil. Amazing what a little paint can do.
Carol, that cabinet is SO cute!
Hi, old friend. Hope you are doing well. Glad you like the cabinet redo. (I still want to see your new home.)
This a stunning jaw dropper of a cabinet Carol! It looks gorgeous and better than the ones on the magazine covers. Those were just a little to busy for me. I know I would have never even attempted that. Even love the new feet. Pinned
That’s so sweet, Cindy. It was a labor of love and I’m so glad it’s done. It is such a focal point in the living room.