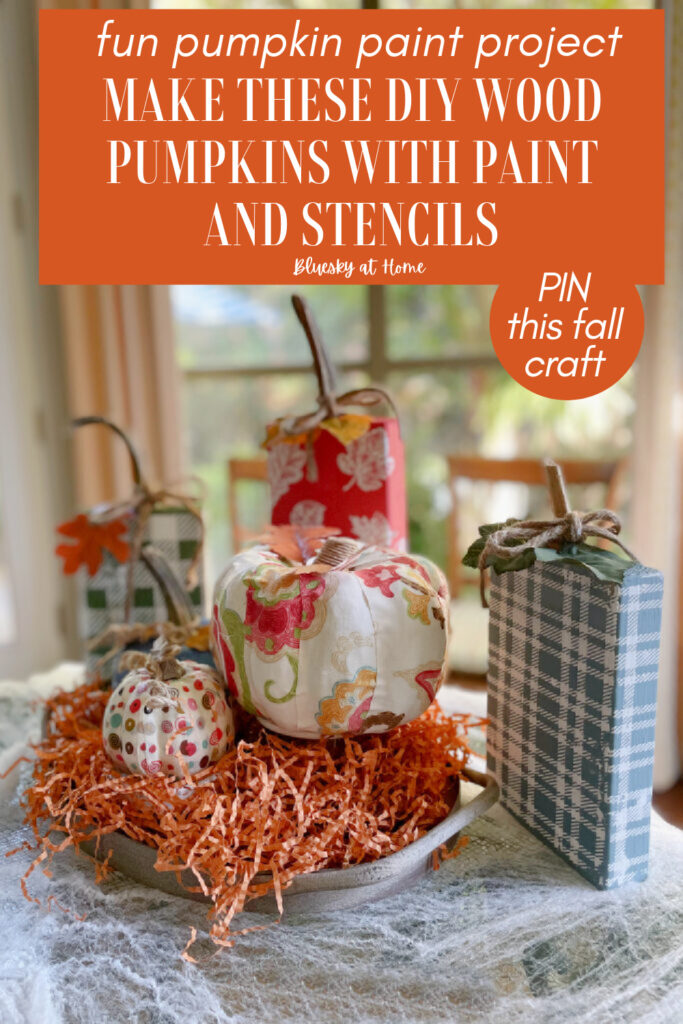
How to Make Easy Wood Block Pumpkins with Paint
Have you ever wondered what you could make with a block of wood? I did. Now I’m going to show you how to make easy wood block pumpkins with paint for your fall decorations.
As we get closer to Halloween, we continue to think about fall decor. These DIY painted wood block pumpkins are easy to make for your fall decor. Keep them from Halloween and through to Thanksgiving.
Making these DIY painted wood pumpkins is so easy and very inexpensive. These pumpkin blocks will be one of your favorite fall craft projects.
This is one of the easiest DIY projects you’ll ever make. You might think we will cut a pumpkin shape out of a block of wood. No, no.
We are going to use a plain block of wood, then paint and stencil it.
The wood block can be 1 X 4 inches or 2 X 6 inches. The height of the wood block is best between 4 and 8 inches.
Use whatever you have on hand or can find at your local big box hardware store.
The best part of this product is more about the idea of a pumpkin, not a literal pumpkin. It is open to interpretation.

Painted Wood Block Pumpkins: Make your Custom Style
This post contains affiliate links to products used to create this project. If you should order any item from this site, I may receive compensation, but you do not pay a penny more. Your purchase is greatly appreciated as it helps support the continued publication of this site.
One of the best things about this easy wood block pumpkin project is that you can customize it to your color and style preferences.
The color scheme for my wood blocks was inspired by an earlier pumpkin project. Several weeks ago, I made pumpkins using fabric and Mod Podge.
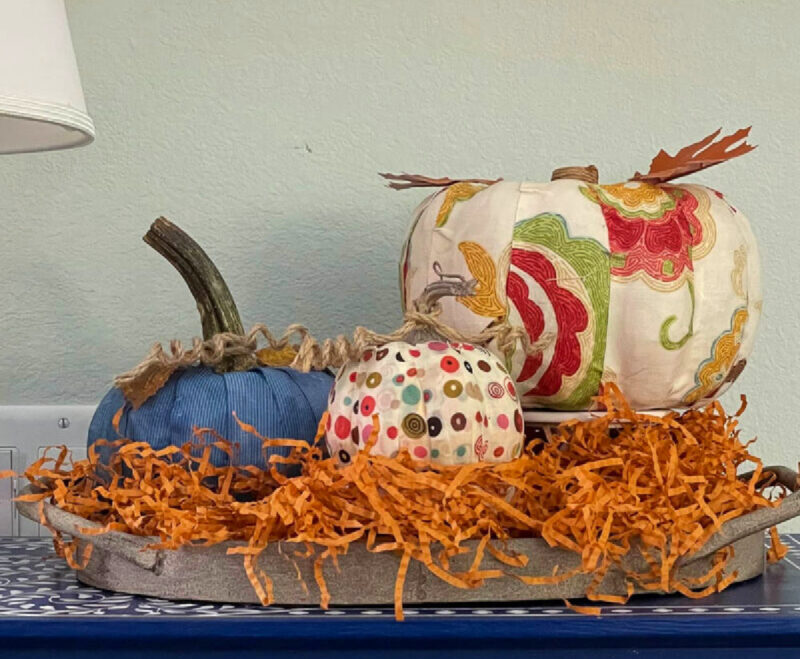
For these cute painted wooden pumpkins, I decided to use the same color palette of blue, fall green, and rusty red. That way I could use the fabric pumpkins and the wood pumpkins together in my fall decor going forward into Thanksgiving.
The fabric pumpkins had a combination of patterns. The wood block pumpkins would use patterns, too.
These days, pumpkins can be made of almost any material (yarn, twine, paper, fabric) in any color (pink, blue, white, cream, black – you name it).
I know that real and faux pumpkins are round. Wood blocks can be square or rectangular. This is a creative project that is an interpretation of the real thing. This is the perfect time to use your imagination.
What Supplies Will You Need to Paint the Wood Block Pumpkins?
The decision to make this project began when I found one wood block in the garage. It was a 1 X 6-inch piece of wood that was 8 inches tall. I don’t remember where it came from.
The piece of wood I had on hand would make one pumpkin. I wanted a trio of pumpkins to balance the three fabric pumpkins I had previously made.
A trip to Lowes to get more wood was in order. I went straight to the wood-cutting area.
While the Lowe’s man was helping another customer, I noticed a stack of 1 X 6’s on the ground in a scrap pile. They appeared to be about 6 inches tall.
I asked if I could have a couple. He asked if I wanted all of them. It turns out that there were eight pieces. How could I not take them?
- wood blocks – the size of your preference. I would use one 1 X 8-inch wood block and two 1 X 6-inch blocks. You could have the wood blocks as short as 4 inches or as tall as 8 inches.
- sandpaper
- chalk paint or acrylic paint for the blocks. I used paints from A Makers’ Studio, but you can use any chalk paint or acrylic paints you have on hand.
- paint brush – I love this new paint brush.
- stencils to decorate the pumpkins from A Makers’ Studio
- chalkArt paint to use with the stencils
- plastic scraper to apply the ChalkArt
- faux or “fresh” pumpkin stems; optional – wood branch, wine cork to use as stems
- optional decorations – faux leaves, ribbon, twine, leaves, acorns
TIP: Check out the wood scrap pile at your local big box hardware stores.
How Do You Prep the Wood Blocks?
First, you will probably need to sand the wood blocks. I used 220 grit on the two large flat sides of the wood blocks. I sanded the sides, corners, and cut edges of the wood block. The cut edges on the corners of the wood blocks needed the most work to get smooth.
After sanding all sides of the wood to a smooth finish, you will wipe the block down to remove the dust.
How Do You Paint the Wood Blocks?
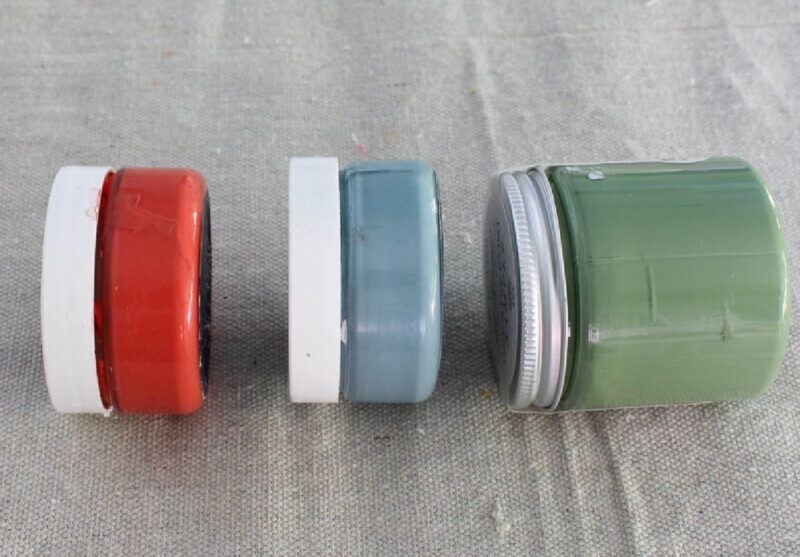
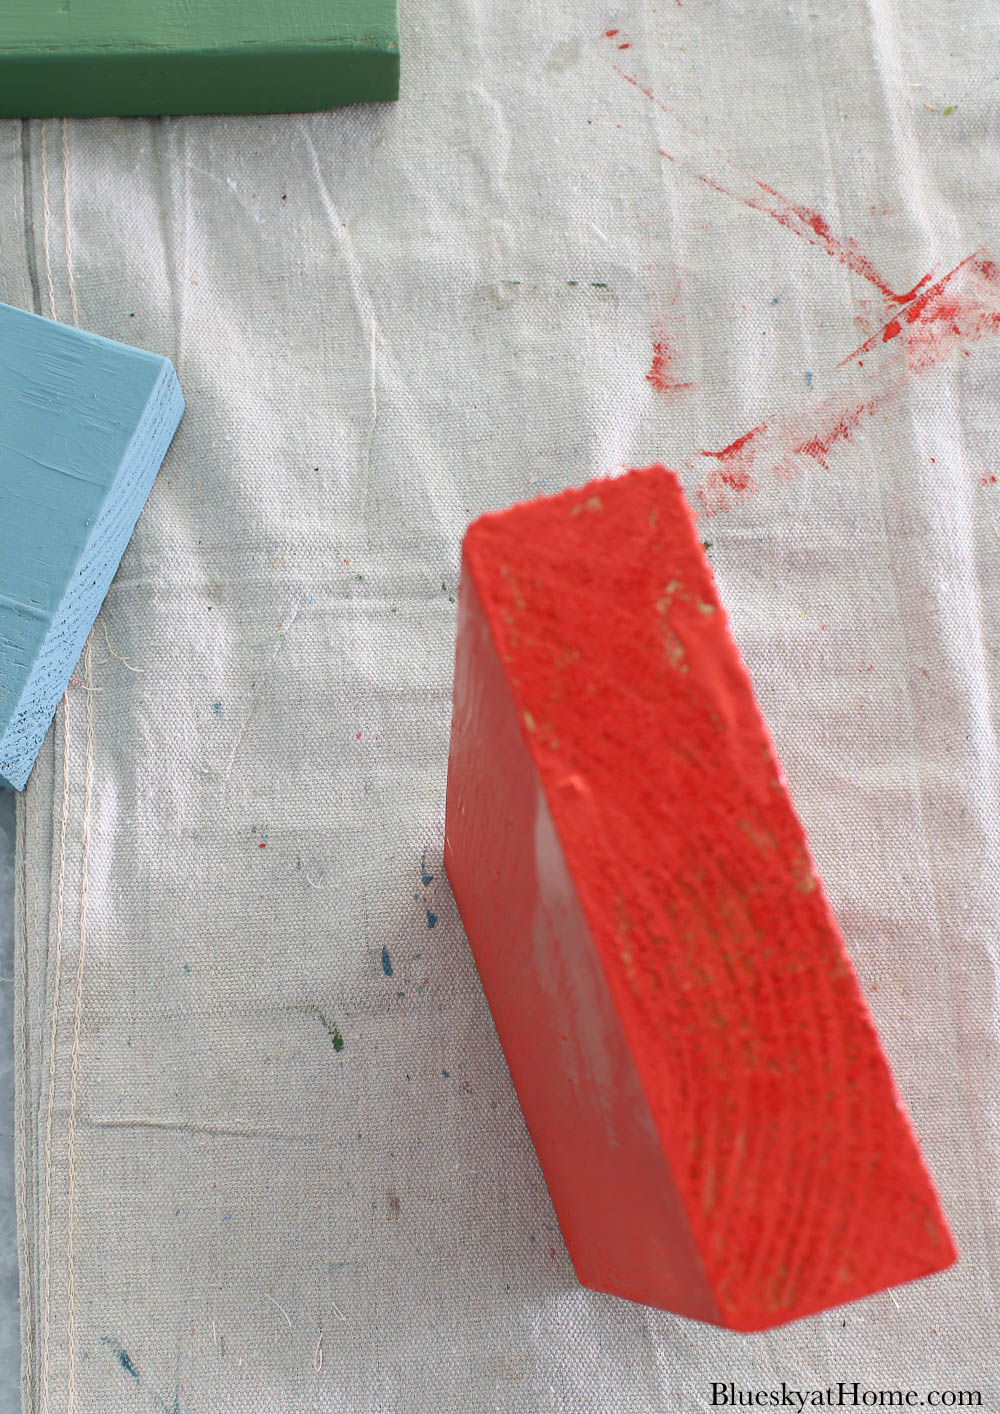
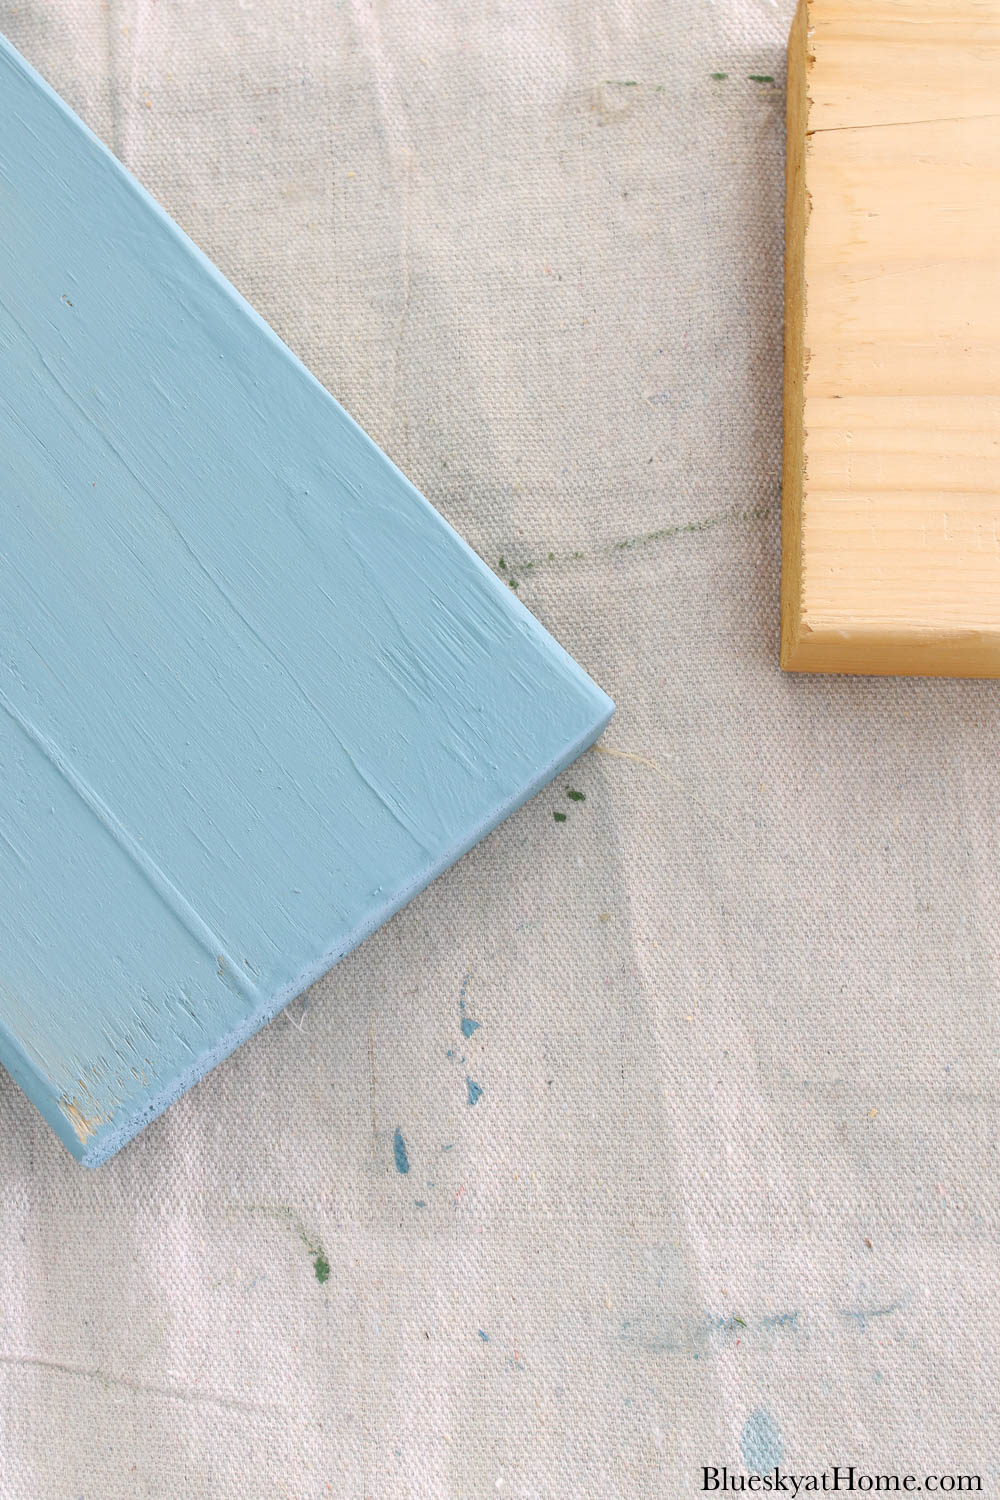
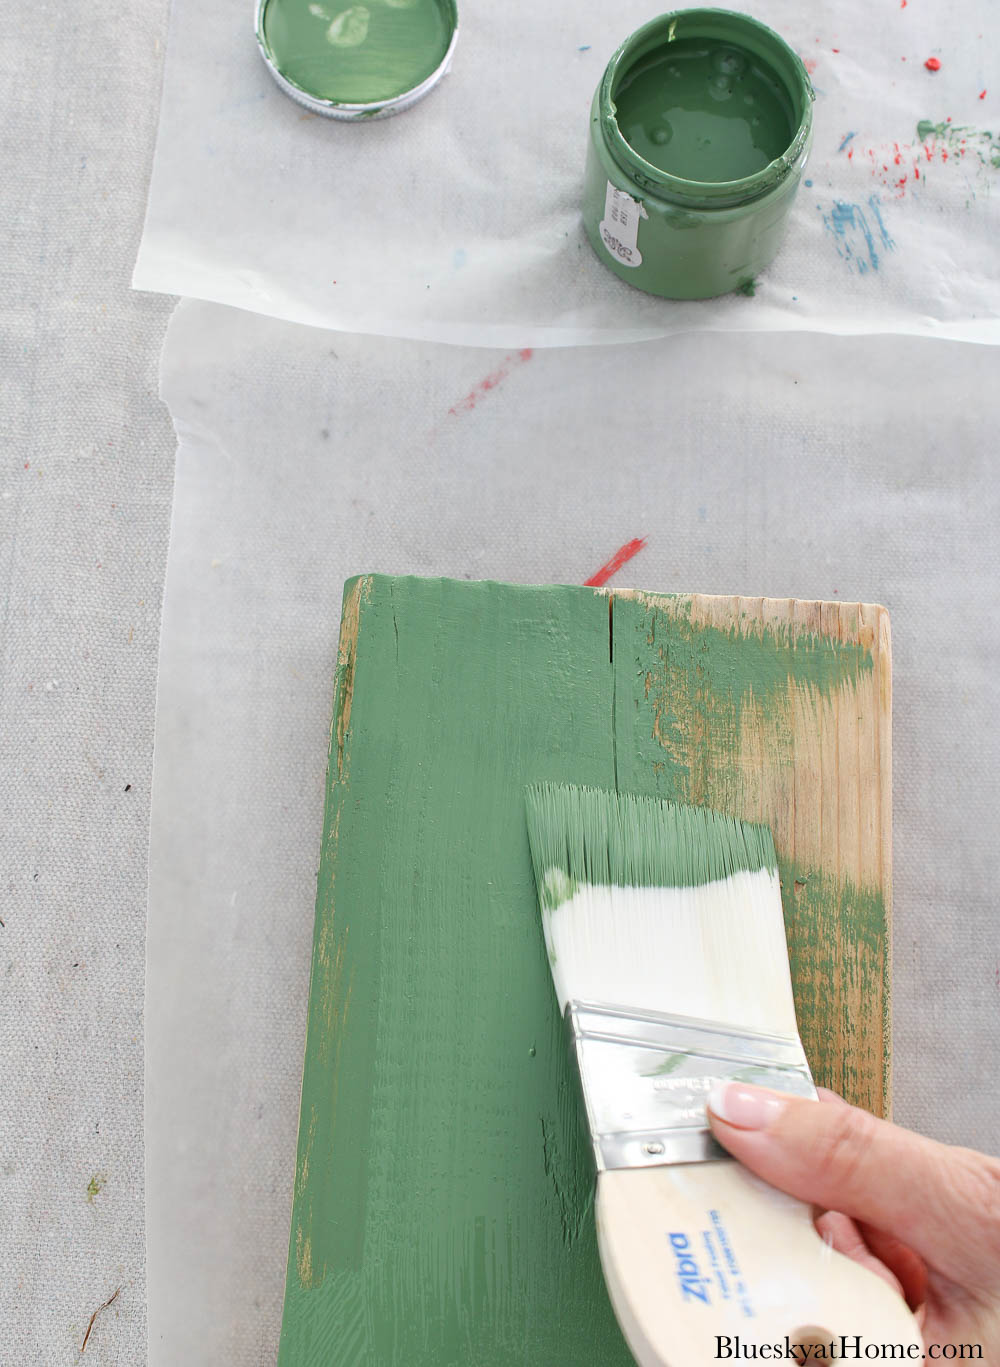
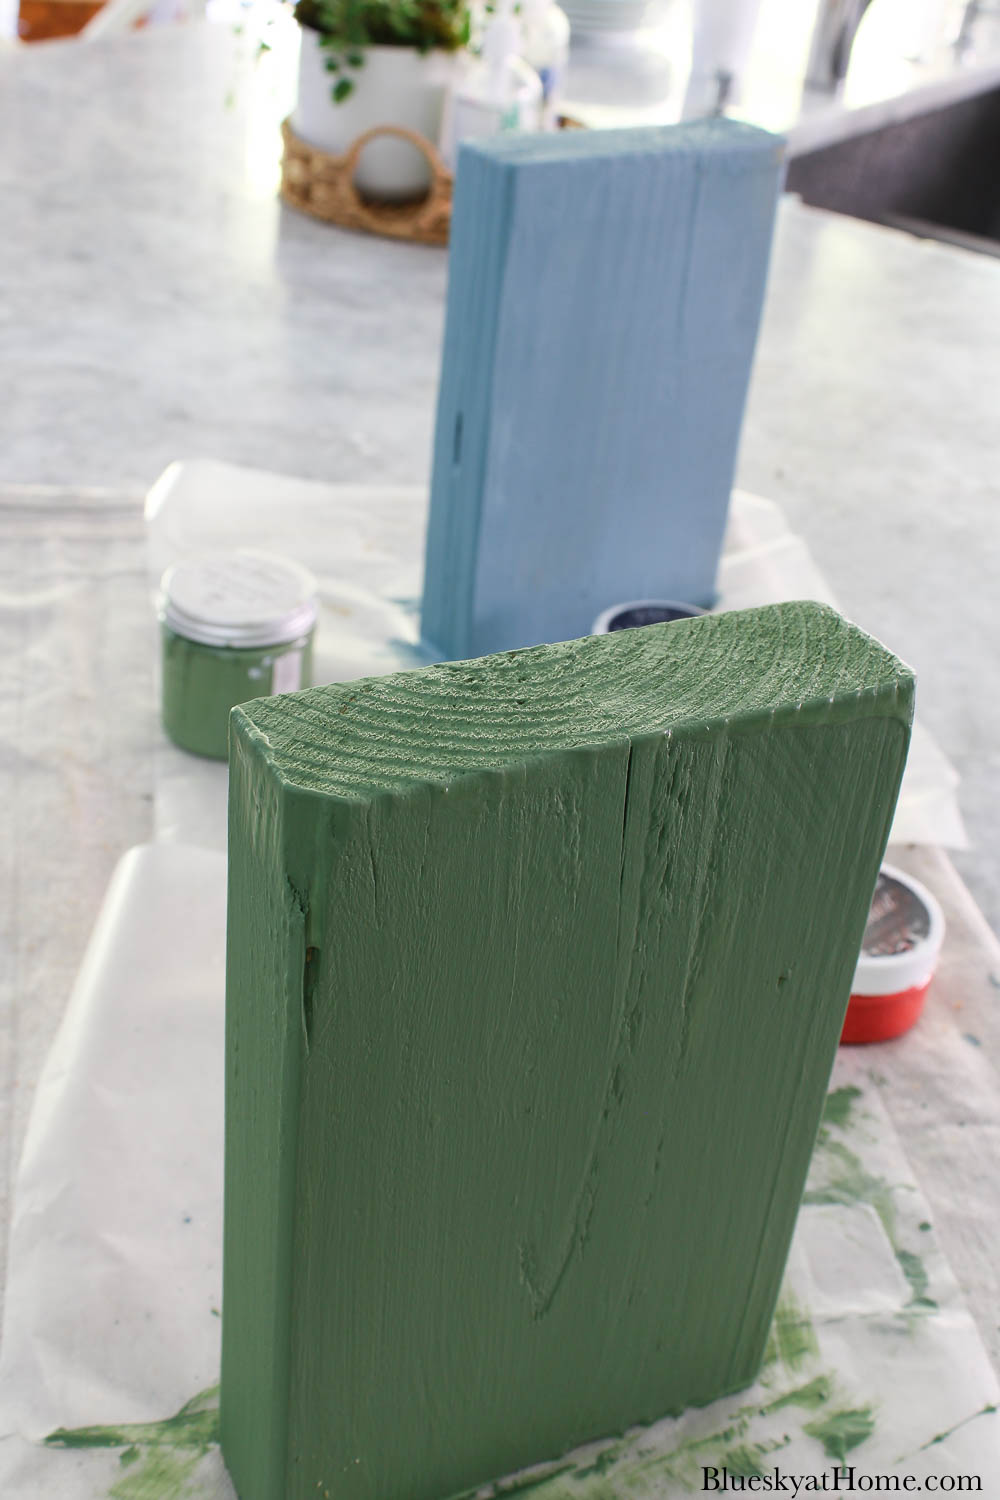
As I said, my colors would be a medium shade of blue, a rusty red, and a beautiful boxwood green.
All paints are from A Makers’ Studio:
- the blue is Vintage Affliction, One Step Paint, a beautiful grey-blue.
- the red is a discontinued Rescue Restore Paint.
- the green is English Boxwood, One Step Paint. I loved this pretty green and wanted to try it.
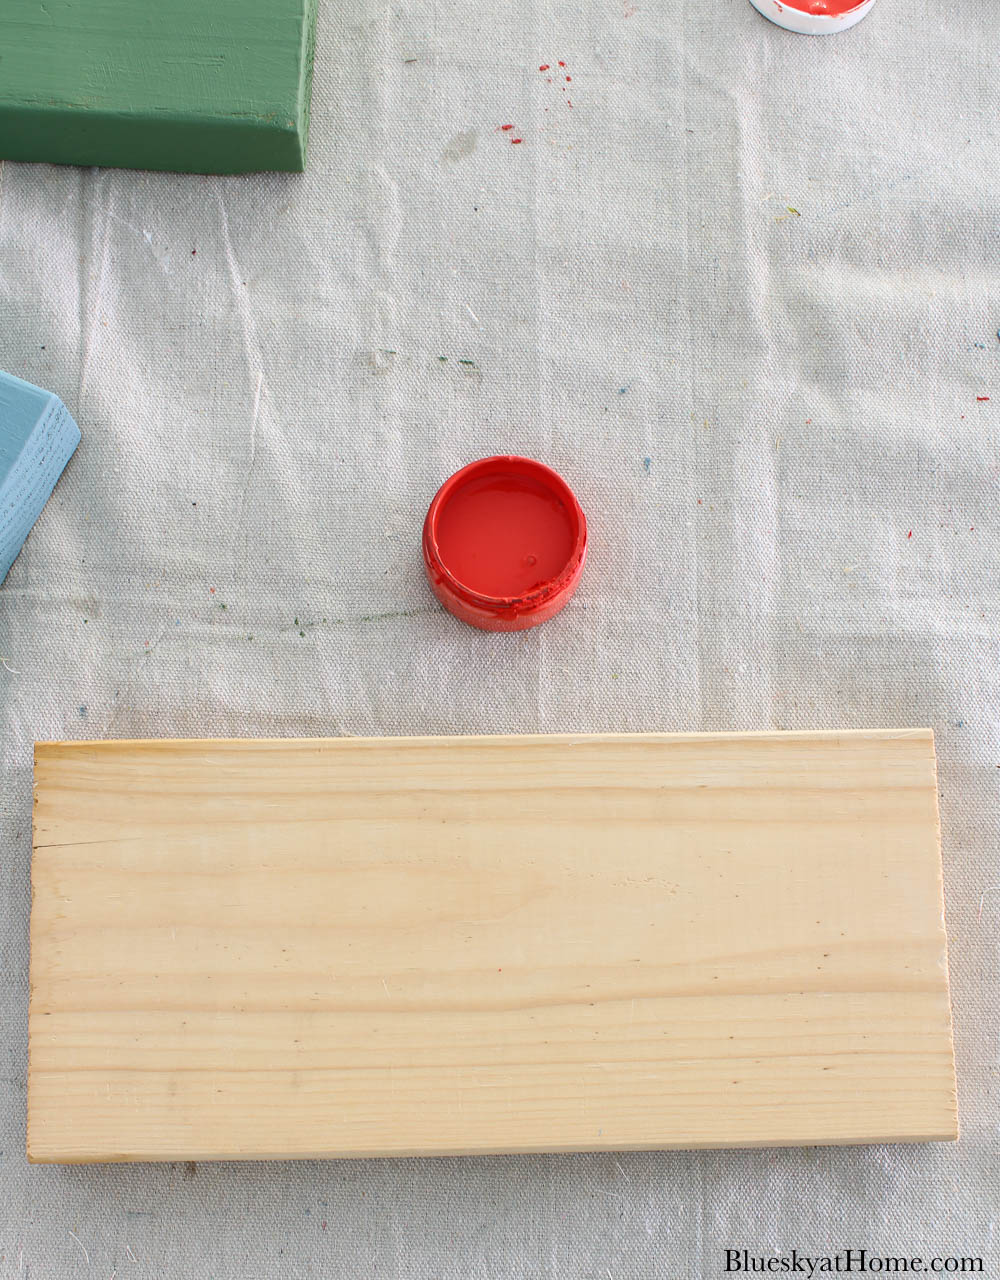
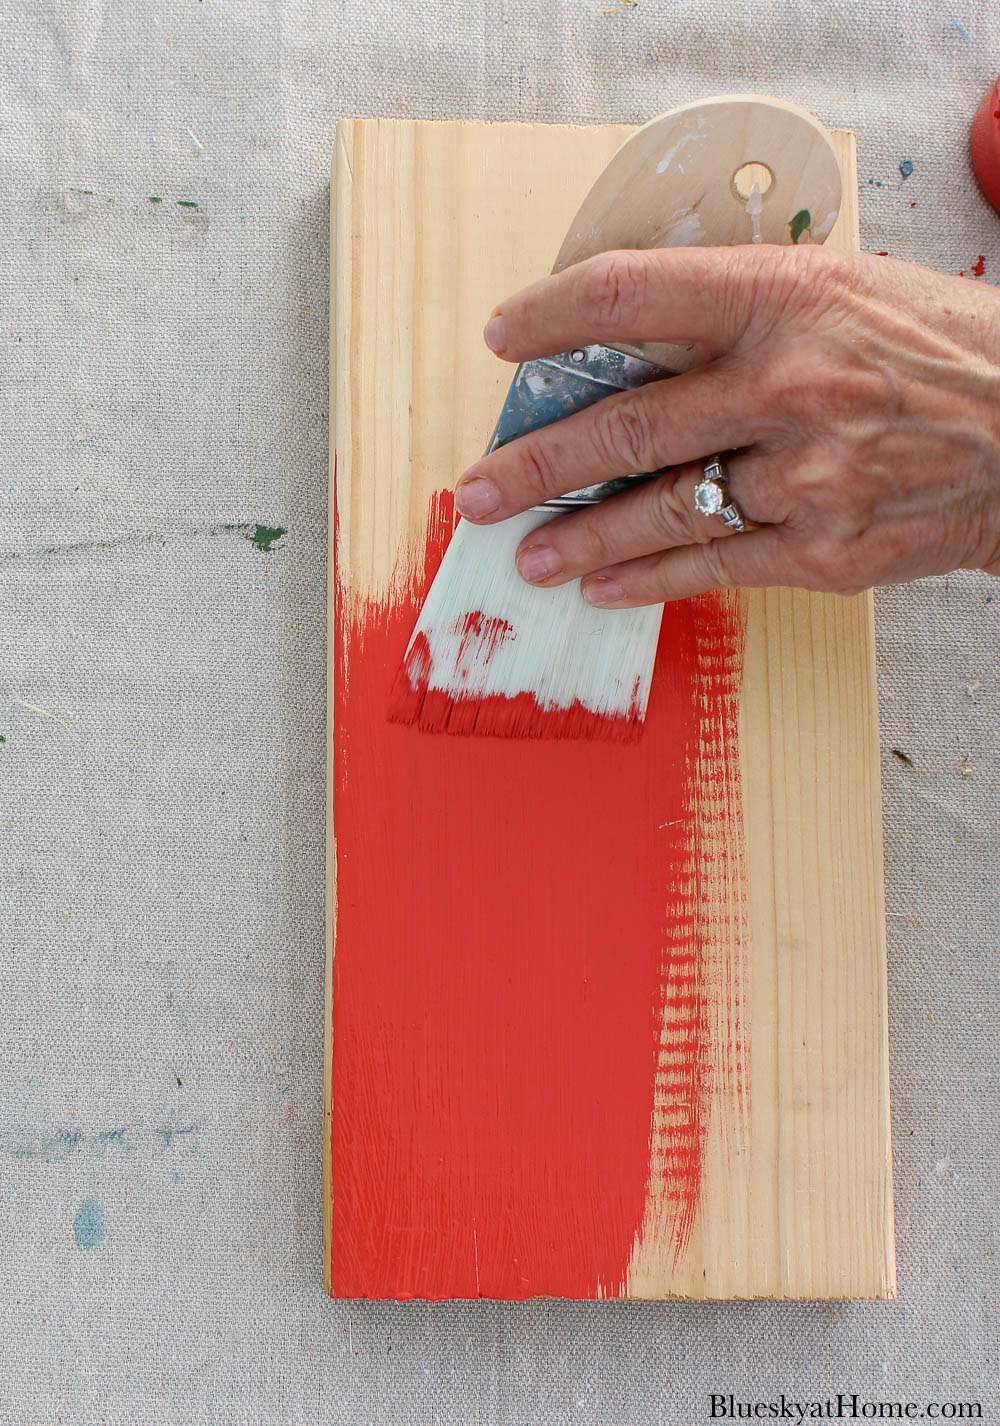
I used a new paintbrush from Zibra given to attendees at Haven to paint the wood blocks. I really like the design of this paintbrush. It’s very comfortable in your hand.

I painted all sides of the wood block except the bottom since it wouldn’t show. I painted two coats with a little sanding between coats.
Painting wood blocks red.
Painting wood blocks blue.

Paint wood blocks green.
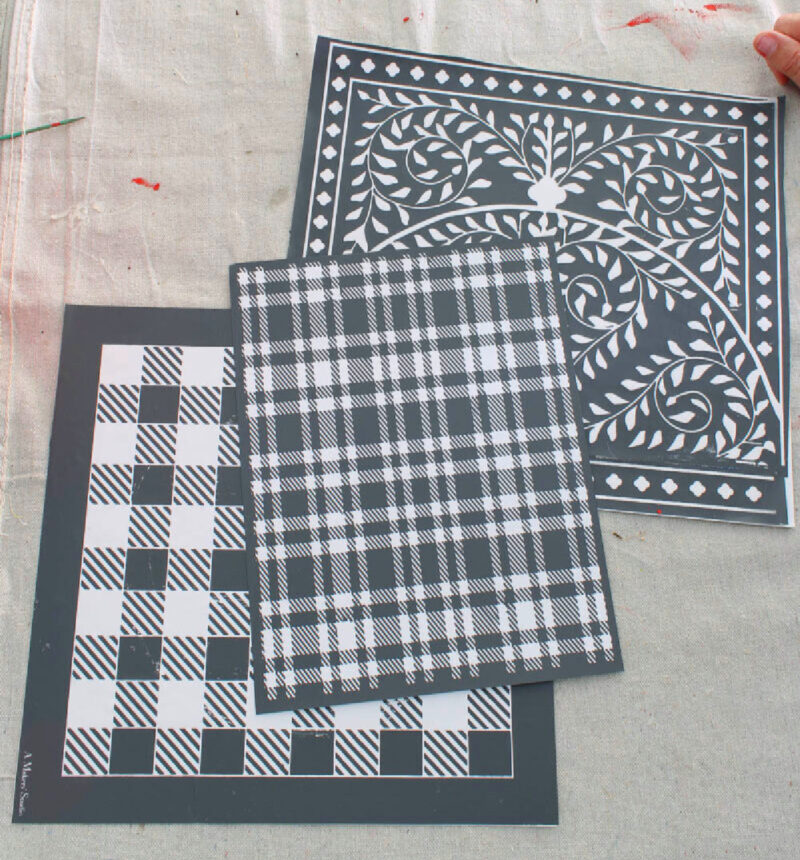
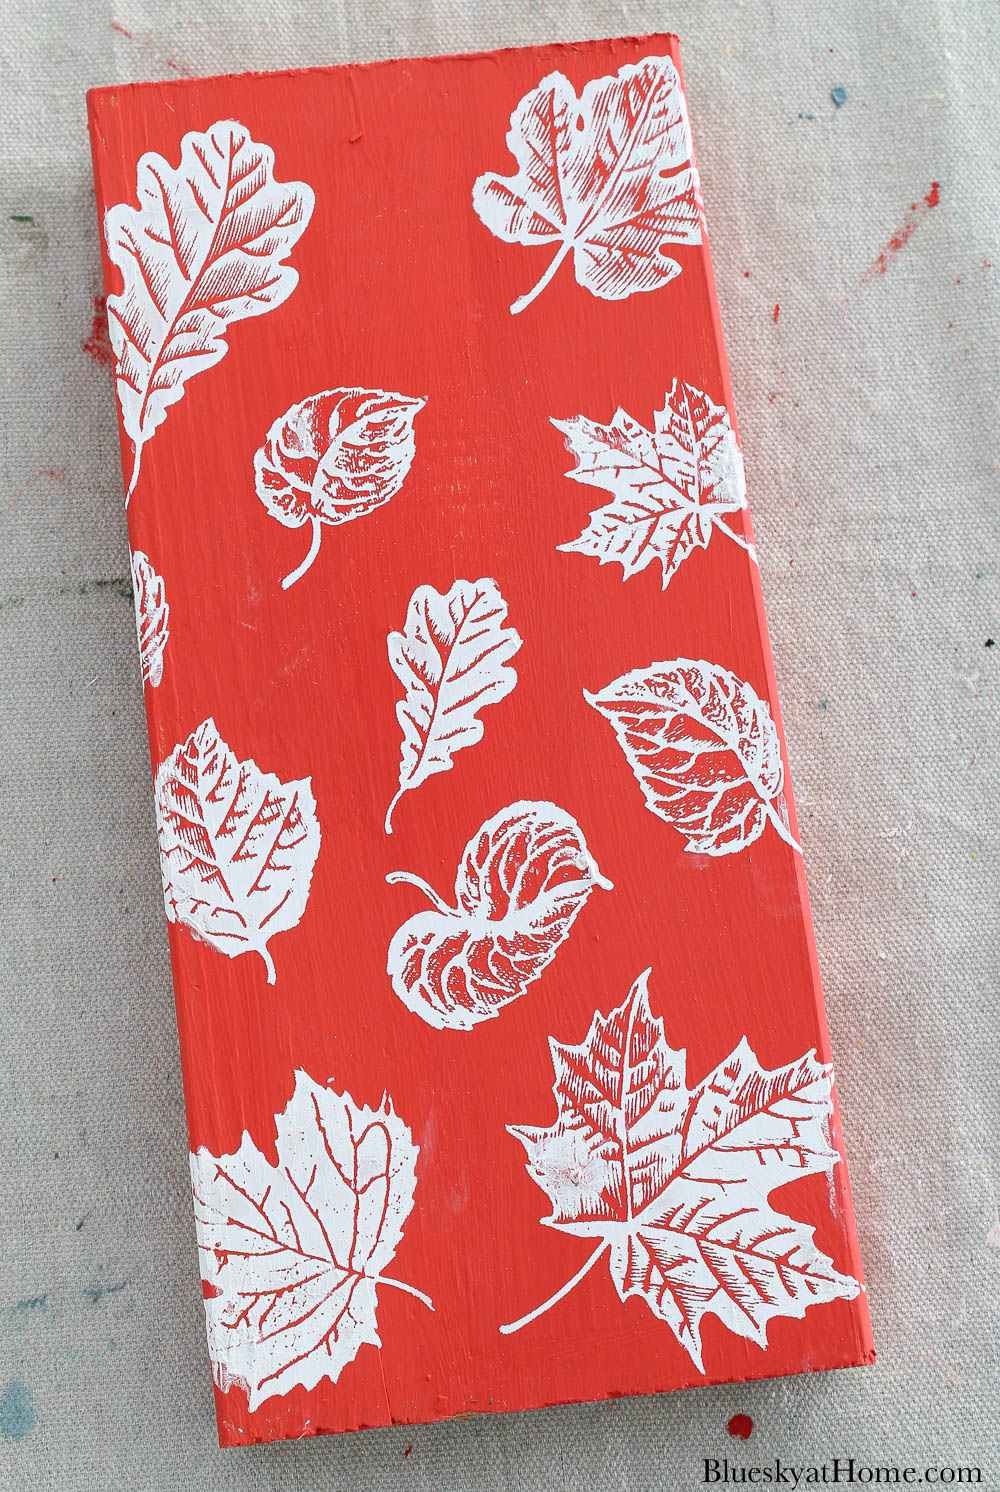
What Stencils Can You Use on the Wood Blocks?
You could add any design you like. I decided to use a combination of patterns:
I love these designs individually and thought they would work well together. I originally thought I would use the one on the right, but changed to the leaves stencil.
I started with the two smaller blocks.
To get detailed instructions on applying ChalkArt to tri-mesh stencils to wood surfaces, visit one or more of these posts:
- 7 Paint and Stencil Halloween Projects
- How to Stencil a Grateful Thanksgiving Wood Sign
- 9 Great Tips to Make Signs with Stencils
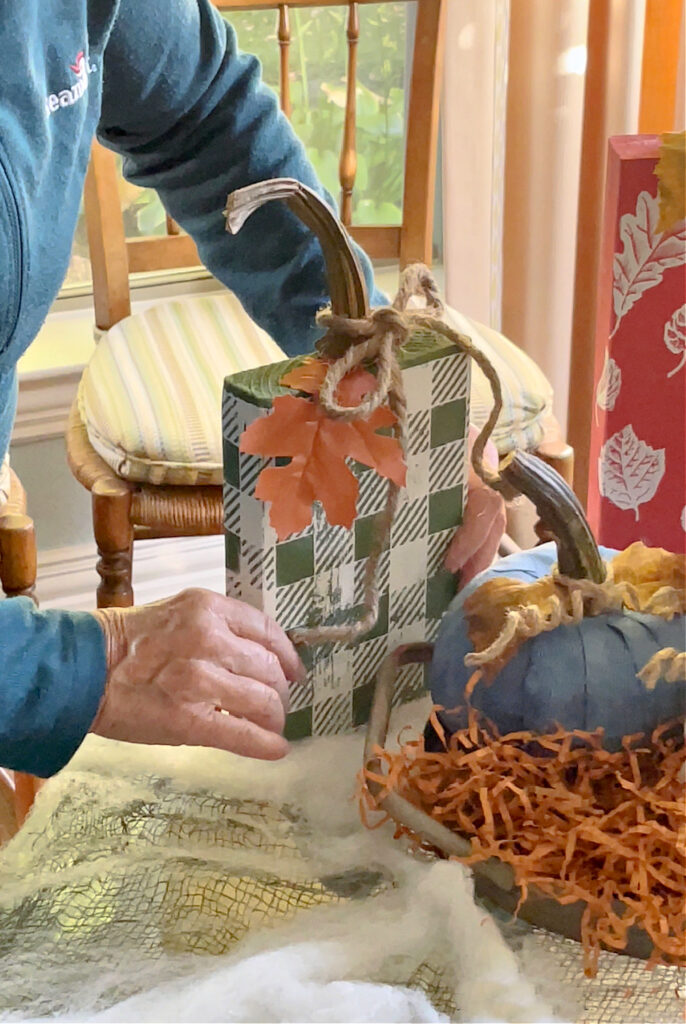
For the wood block pumpkins, I placed the stencil on one flat side of the wood block. This side will be the front of the block. (I’m not going to stencil the back of the wood block because I don’t envision it being seen.)
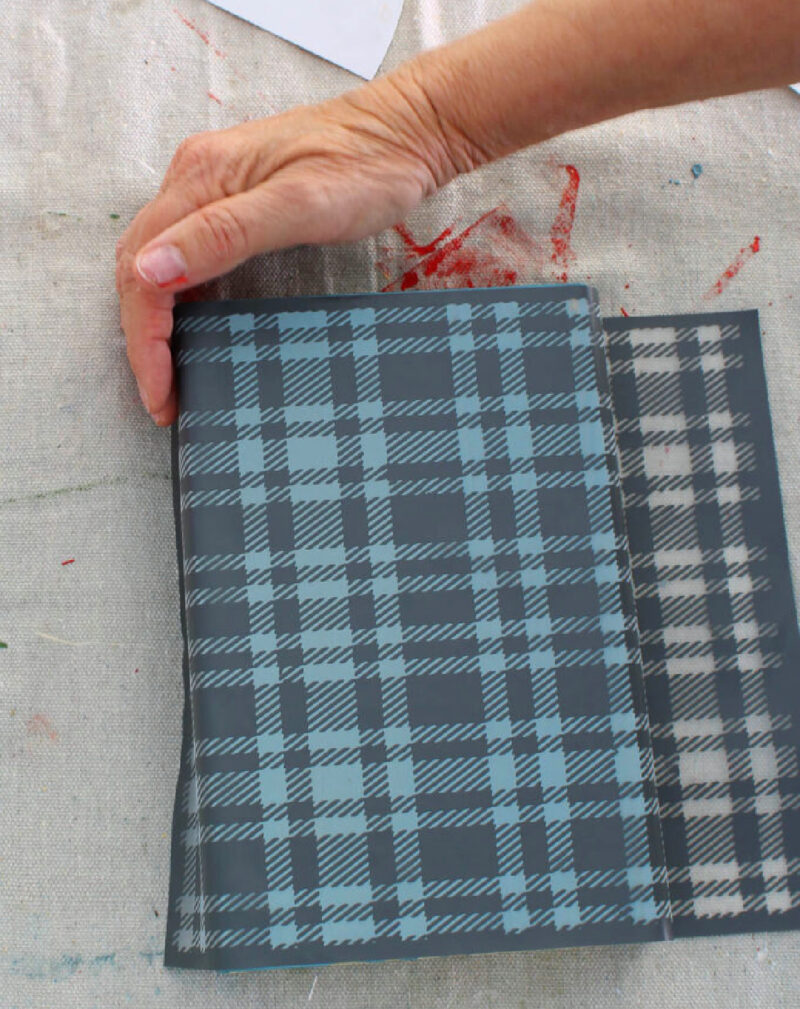
Then I folded the stencil over the two sides of the wood block.
Be sure to smooth down the stencil across the surface of the wood.
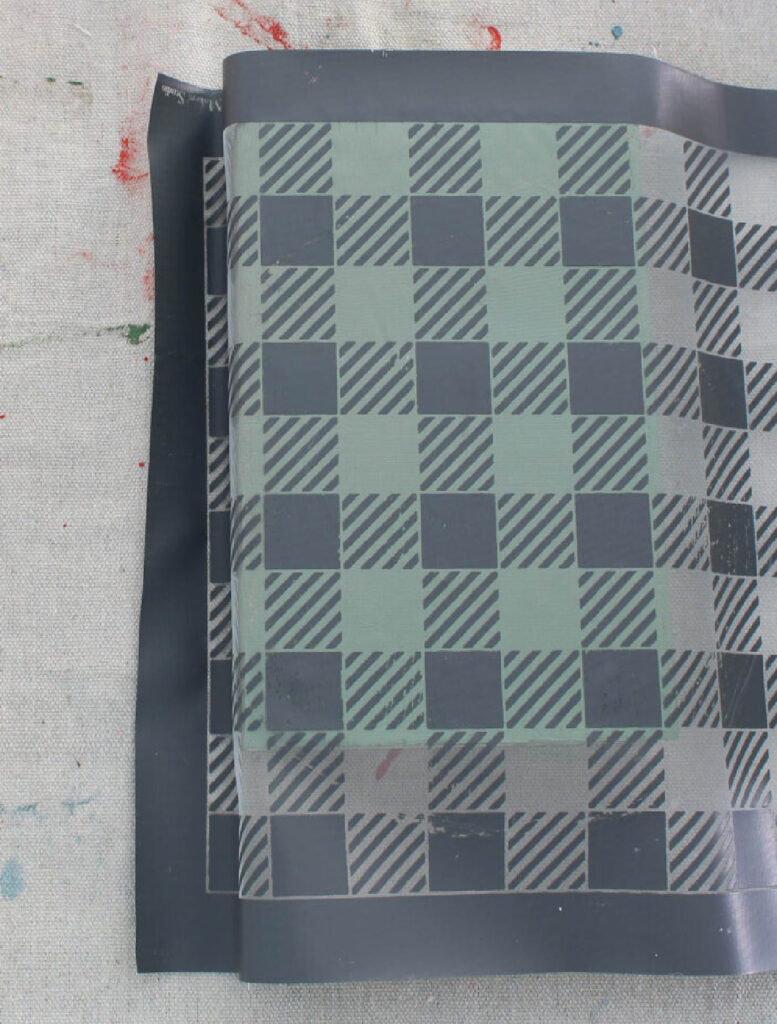
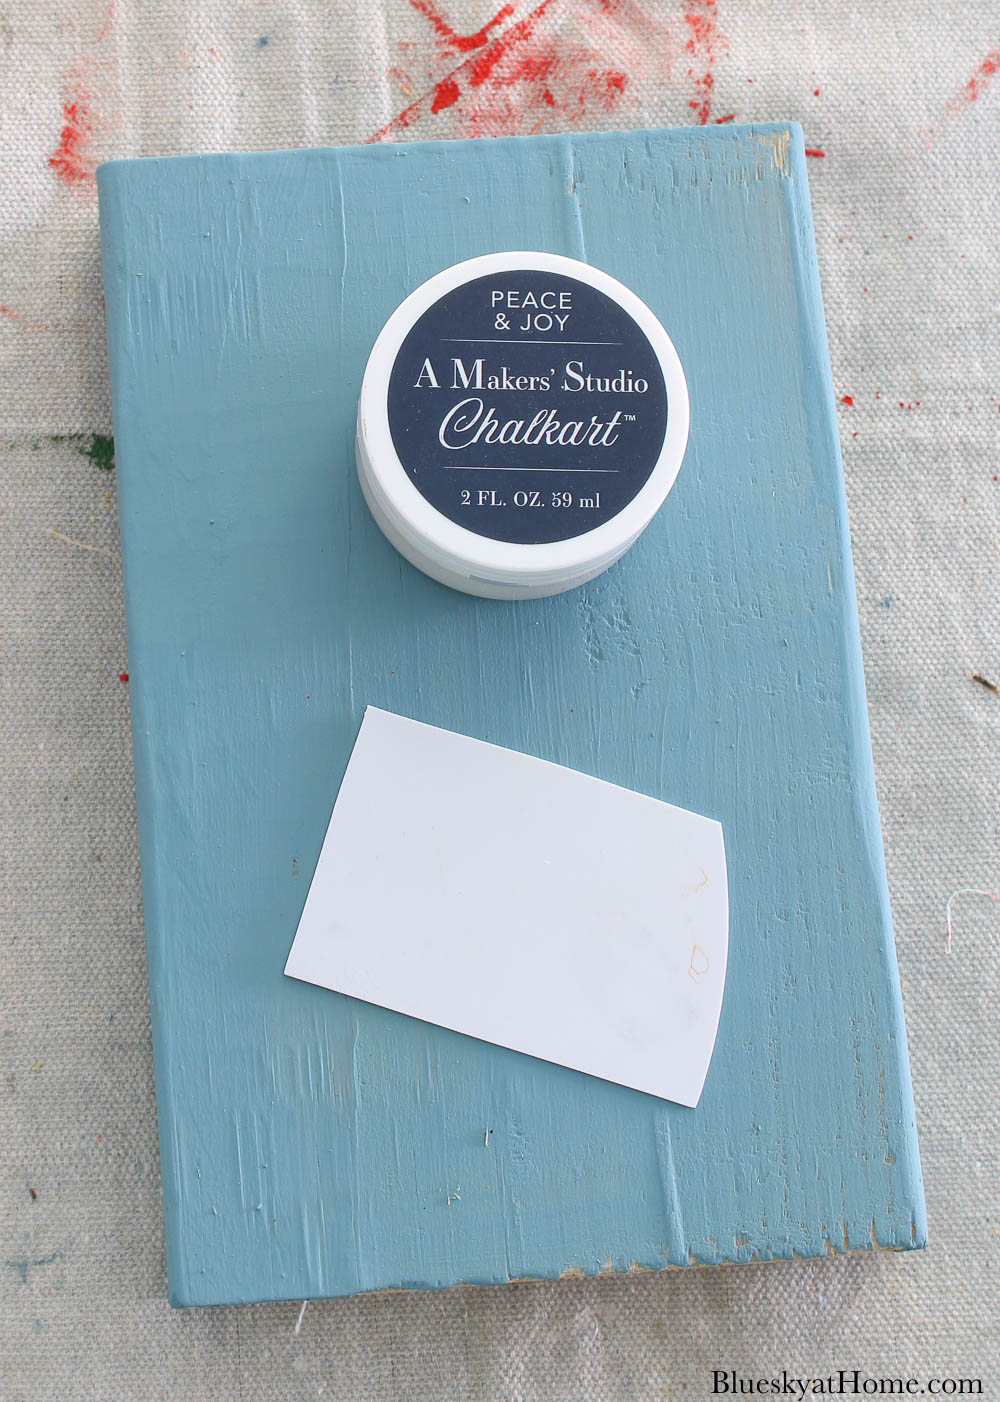
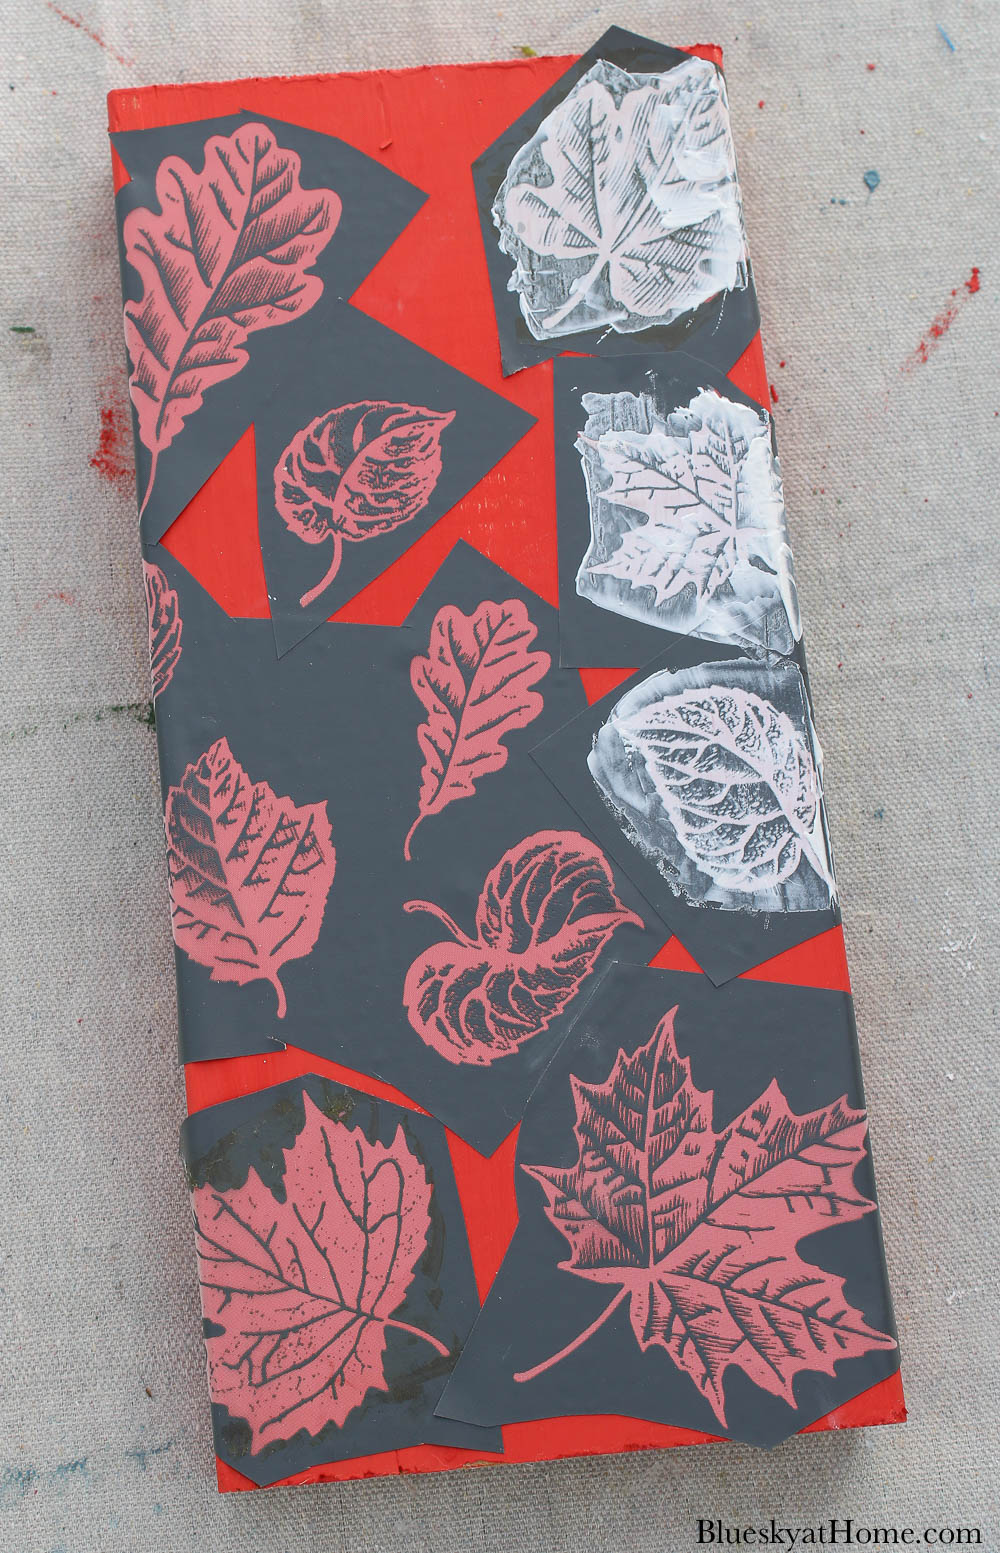
I’m using ChalkArt in Peace and Joy, which is white. Use your plastic scraper to apply the ChalkArt, pressing down as you scrape the ChalkArt across the stencil. Scrape off any excess ChalkArt.
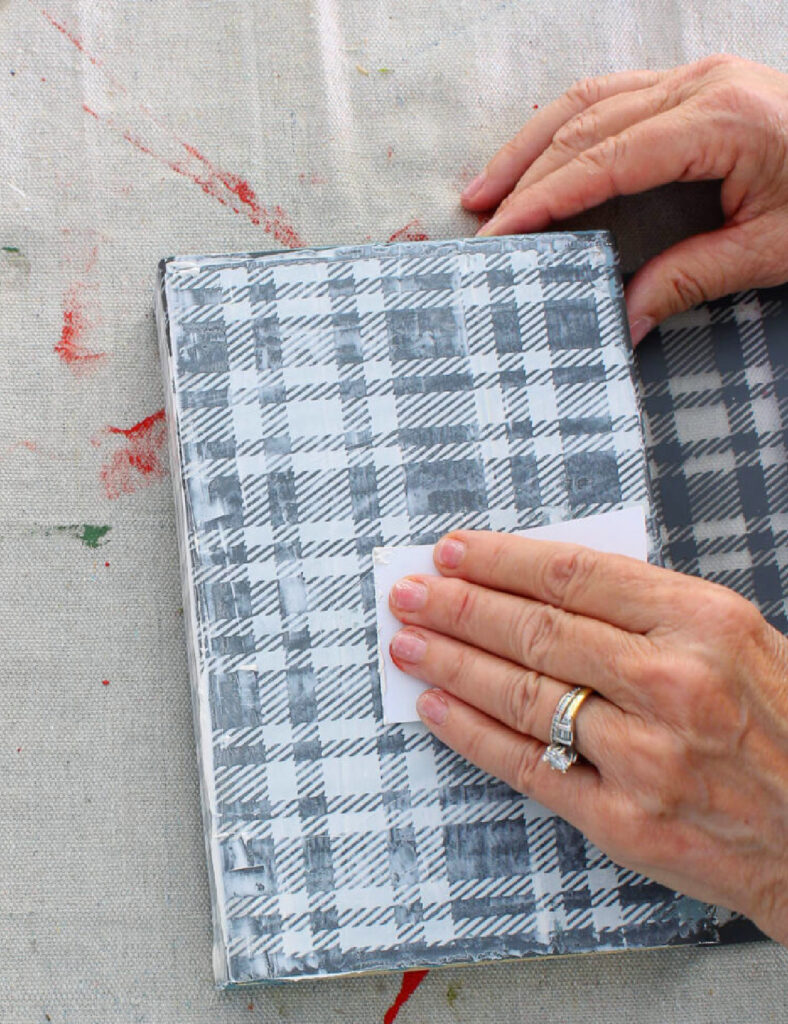
Make sure you cover all the designs of the stencil with ChalkArt.
Gently peel back the stencil and place it in a bowl of water for cleaning.
Allow the stencil to dry for at least 20 minutes.
NOTE: If you want to stencil all four sides of the wood pumpkin, allow the first sides to dry. Then apply the stencil just to the back side of the wood block.
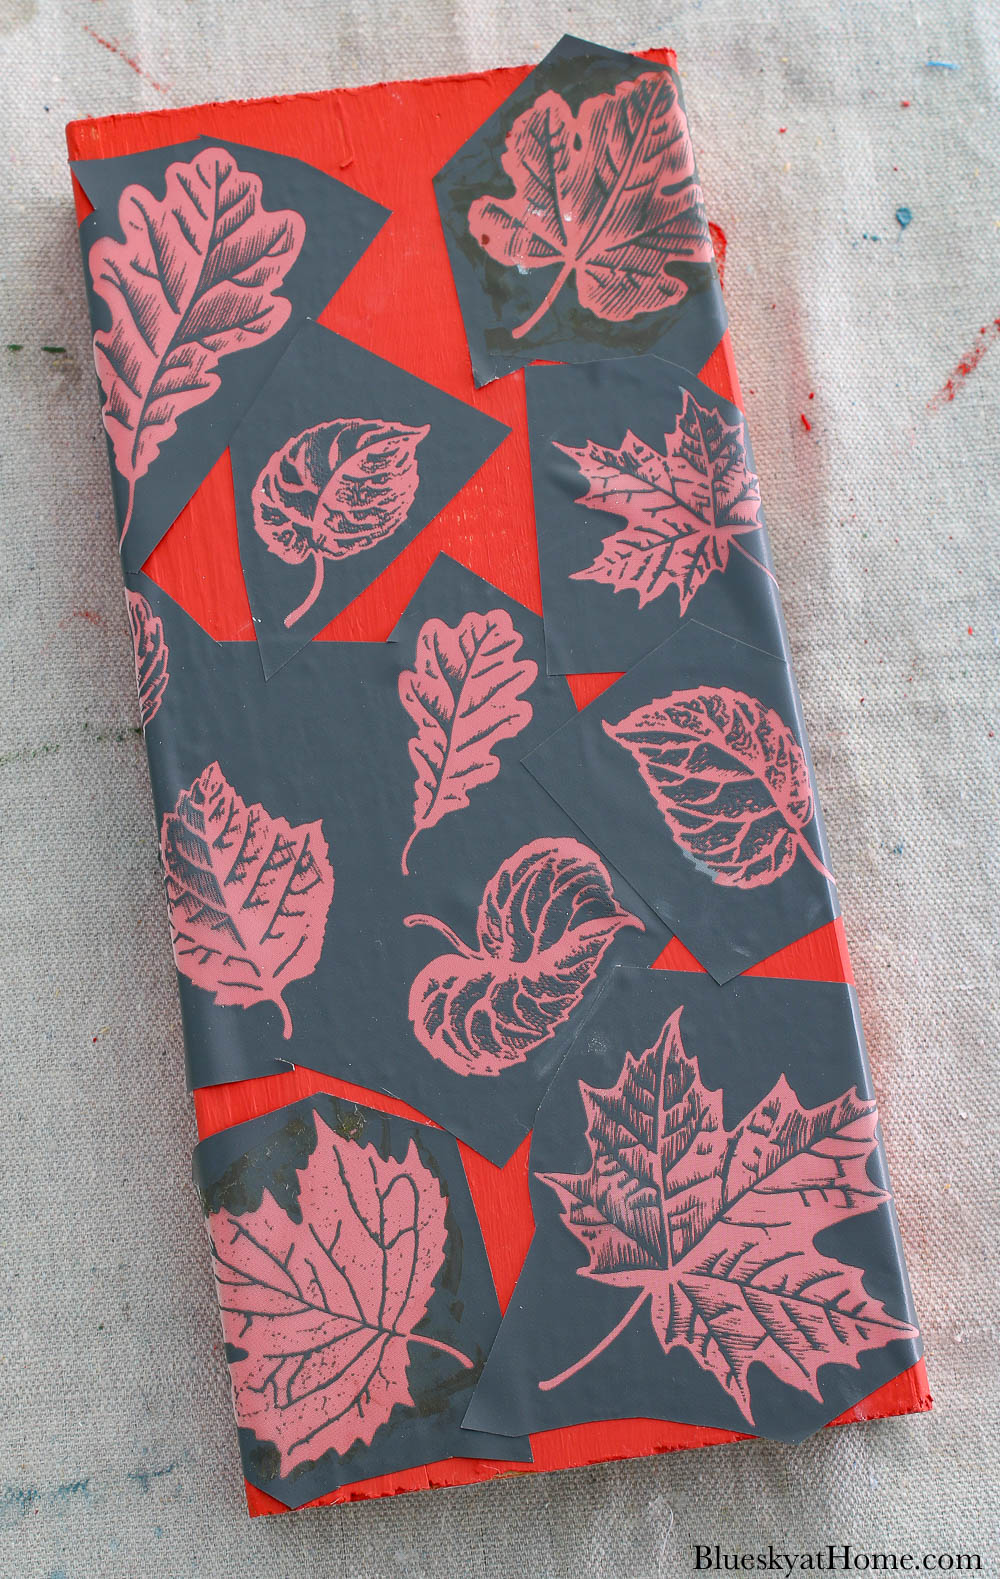
For the largest wood block, I used a stencil called Leaves. I previously used it on some resale shop shallow white bowls.
I cut out several leaf stencils and arranged them in a random pattern on the front of the wood block. I folded a few of the leaf stencils around the sides of the wood block.
I set the wood blocks aside while I gathered the supplies to embellish them for display.
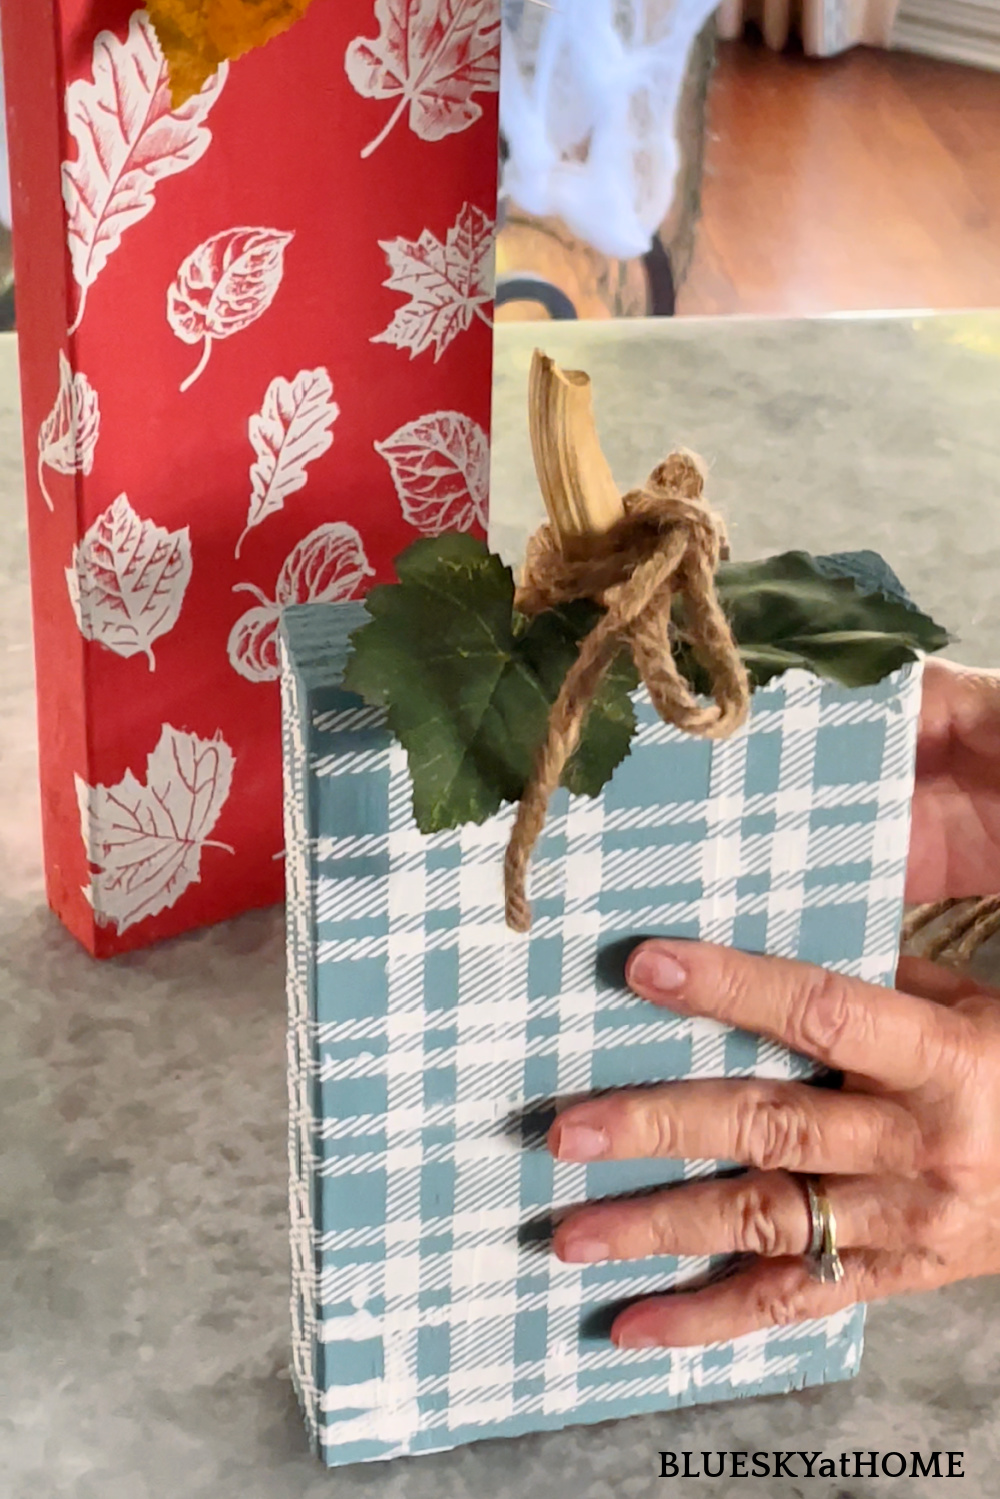
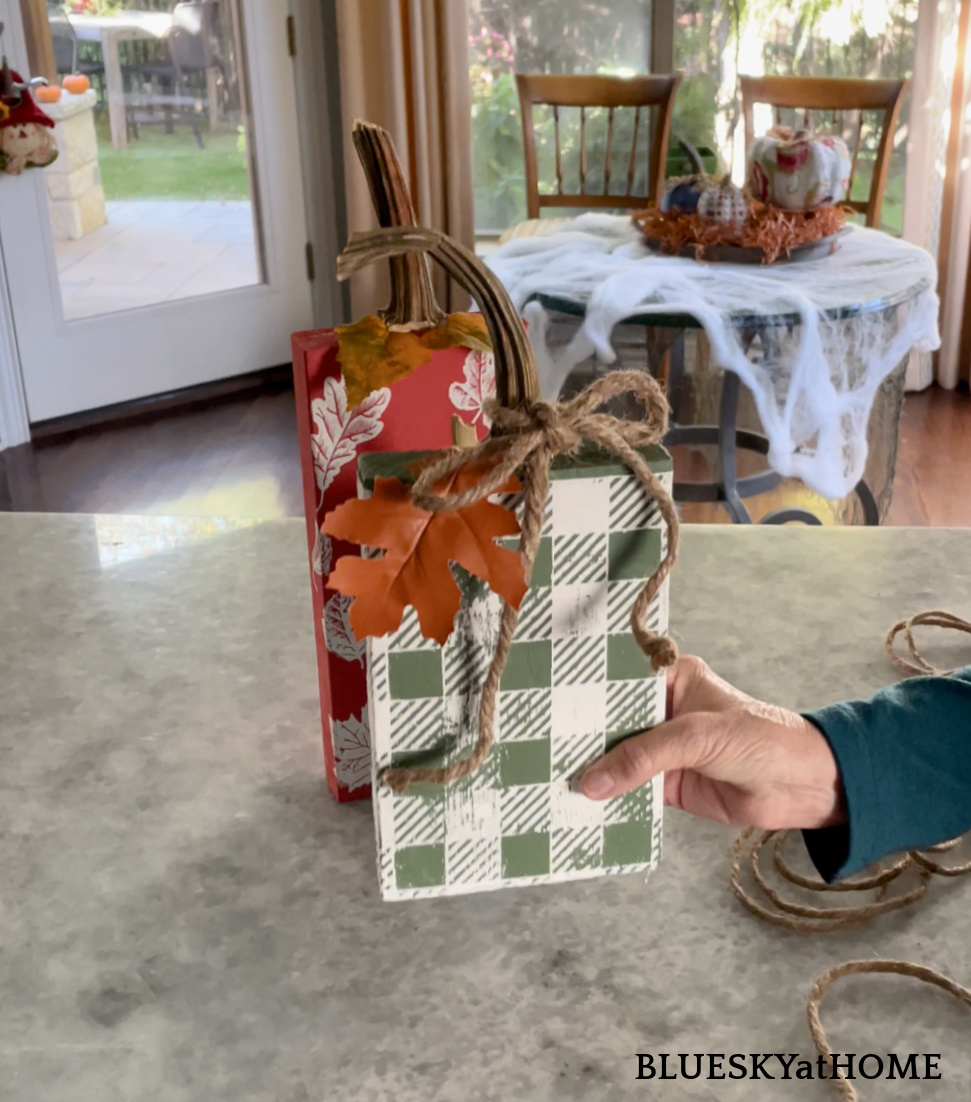
How to Add Pumpkin Stems?
Last year when I went pumpkin shopping, I searched through the piles of pumpkins for stems.
Fortunately, I found several and have kept them to use this year. All it took was a hot glue gun to add them to the top of the wood blocks.
Now my wood blocks were transformed into pumpkins. The fairy godmother couldn’t have done better.
If you don’t have real pumpkin stems, you can also add:

- pieces of small tree branches
- wine corks
- cinnamon sticks
How Can You Embellish Your Wood Block Pumpkins?
This is when more customization is possible. Here are a few ideas you can add to the stem of the pumpkin:
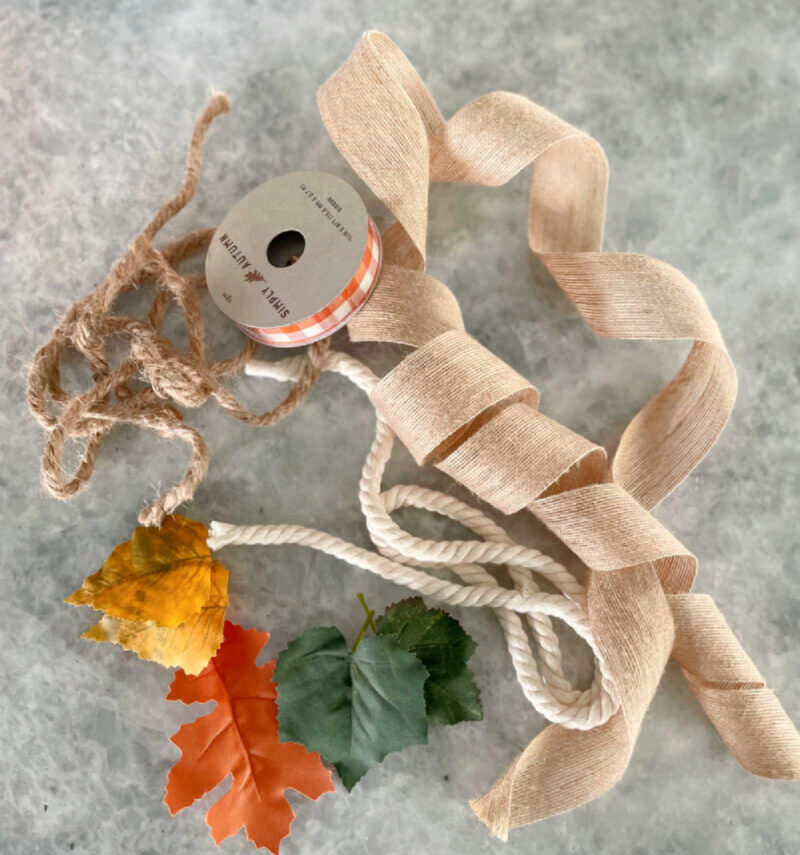


I decided to use a different color of leaves on each wood block.


Then I added a jute twine bow to each block pumpkin.
Using the Wood Block Pumpkins in Your Home Decor
You can use these DIY wood block pumpkins in several areas of your home:
- mantel
- coffee table
- side table
- kitchen counter
- table centerpiece
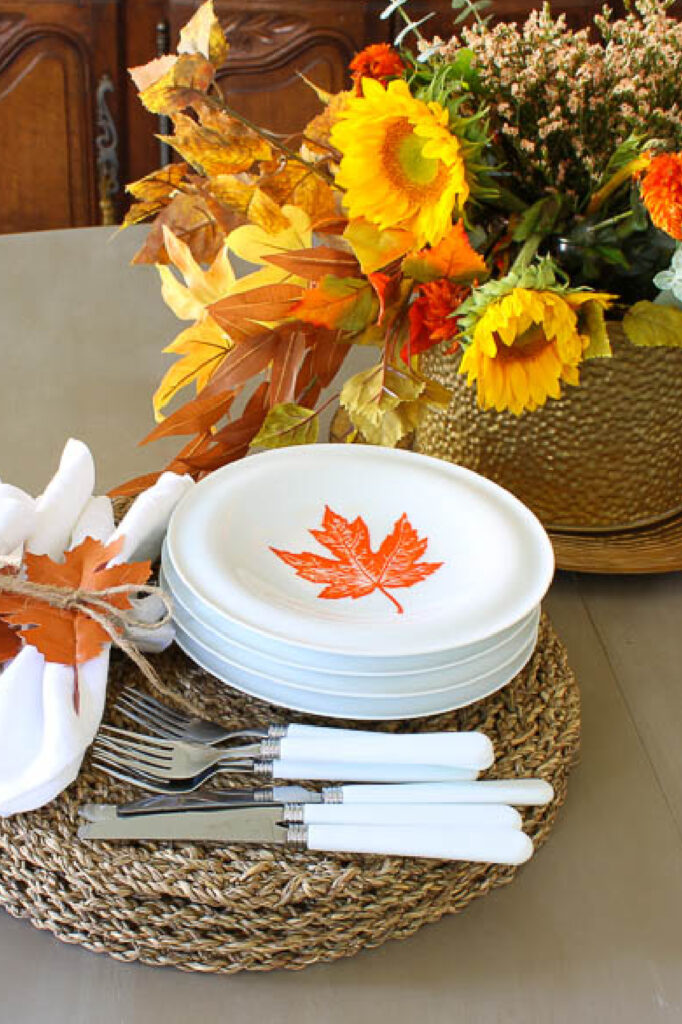
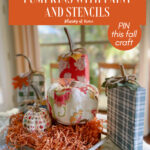
I used my wood block pumpkins as a centerpiece on our breakfast room table.
First I layered green and white spider webbing.
Then I added the wood block pumpkins to the fabric-covered pumpkins I made earlier. The colors of the pumpkins are the common denominator.

I think these pumpkin crafts are great for any setting.
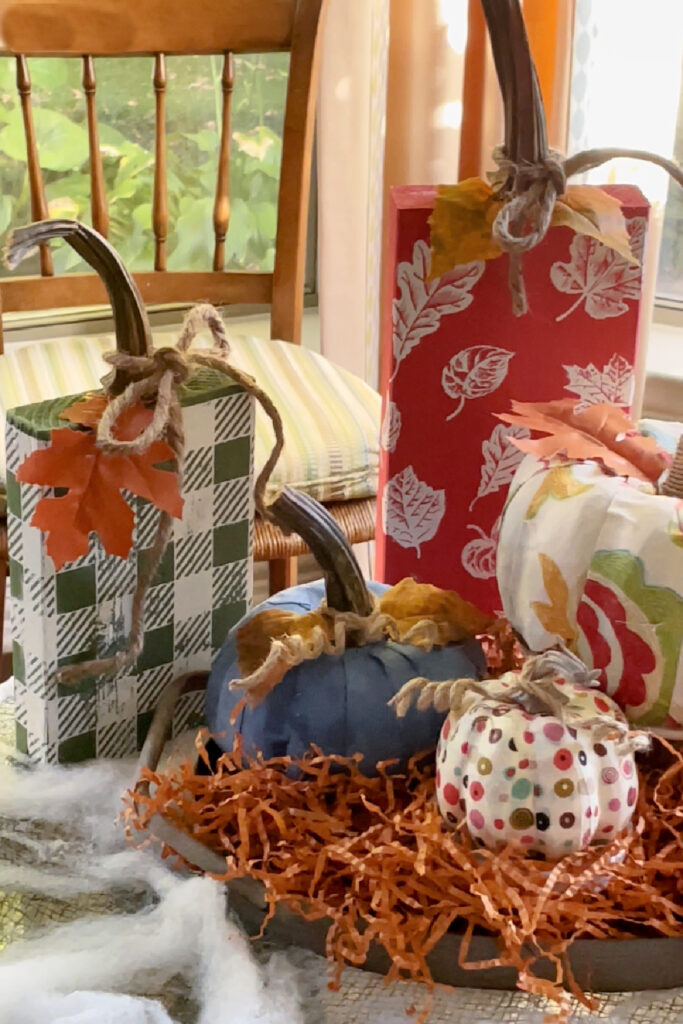
This table will be used as the wine bar for the girls’ Halloween get-together I’m hosting. I think it makes a nice setting.
Do you like my wood block pumpkins? I think they have a unique look. They cost practically nothing since I had all the supplies on hand.
Be sure to PIN this tutorial. It would be great if you want to have a fall craft for the kids to work on.
Check out and follow me seasonal DIY Pinterest Boards: Halloween DIY Projects and Fall DIY Projects.


Amazing that these were done with stencils! I would have guessed they were covered in paper. They look fantastic and I have pinned your post for inspiration for next year’s projects. Thanks so much for sharing the idea.
This is a clever way to use any wood scraps and they look beautiful, Carol. Thanks for sharing.
Lovely pumpkins, Carol! What a fun way to welcome and celebrate fall with stenciled wood block pumpkins! How creative and unique!
Carol I love the colors you used. So happy! At first glance I thought that you used fabric or tissue paper to create the patterns on your wooden blocks, but no it was a stencil. Genius! I love the patterns and colors. So cute and a wonderful upgrade for any piece. Thanks for sharing.
Super cute Carol!! I love the colors and designs you used and they do look adorable with your fabric ones! Thanks for the link to the faux pumpkin stems, I had no idea you could buy something like that…I swear you can get anything on Amazon! I just happen to have some wood pieces, I just might have to try this, thank you for your tips and ideas!
These are fabulous Carol; love all the patterns that will see you through the Fall season!