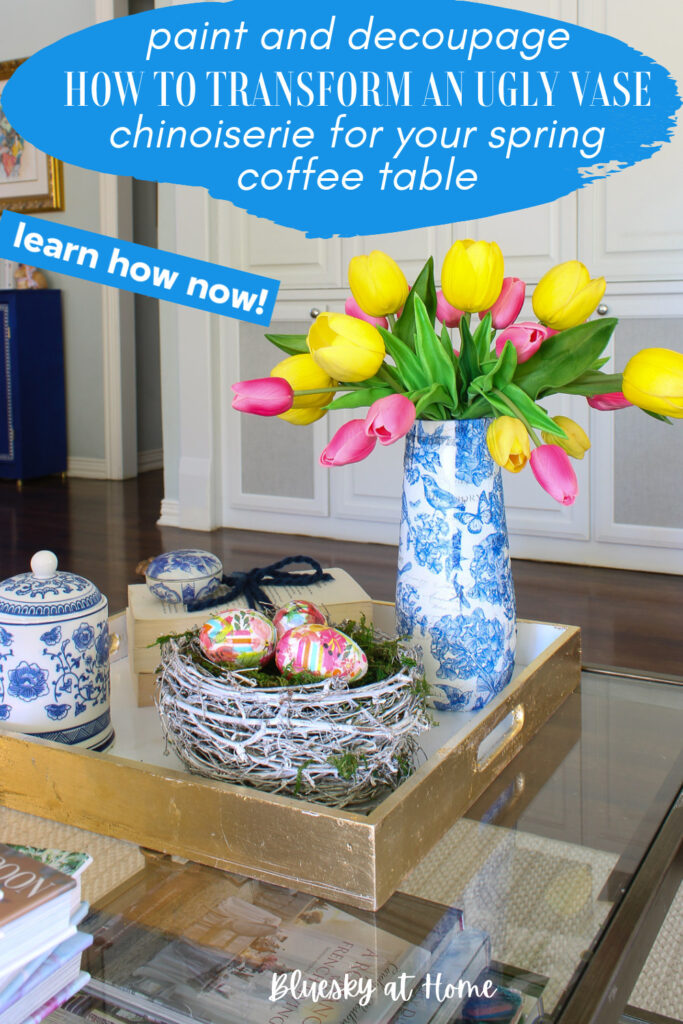
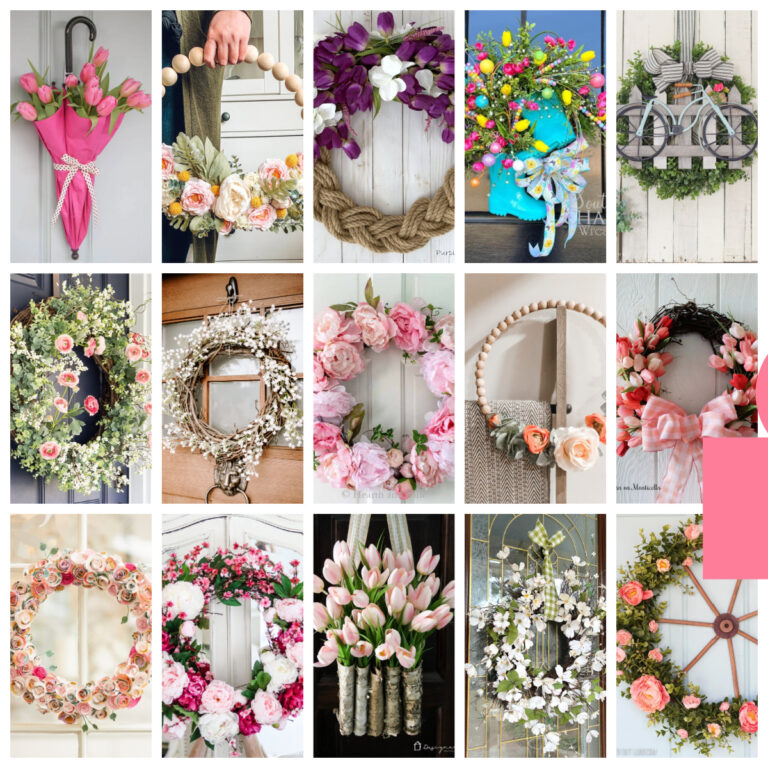
One-Hour Vase Makeover for Your Spring Coffee Table
If you’re anything like me, you’re always on the lookout for quick and easy ways to refresh your home, especially as we transition into the vibrant season of spring. That’s why I’m thrilled to share with you my latest DIY project: a one-hour vase makeover for your spring coffee table.
Imagine a dark, uninspiring vase transformed into a stunning centerpiece that perfectly captures the essence of springtime. With just a little paint, some decoupage magic, and an hour of your time, you can rescue a vase and use it to style your spring coffee table.
Are you ready to add a splash of springtime charm to your living space? Well, I’ve got just the project for you: a fresh spring coffee table vignette inspired by a one-hour vase makeover.
Springtime decor needs a pop of color, a touch of elegance, and a statement piece to tie it all together. With a sprinkle of creativity, we transformed an ordinary vase into a stunning centerpiece.
In one hour, we’ll craft a vase inspired by the timeless allure of chinoiserie. Trust me, this DIY project is as simple as it is stunning.
You’ll have plenty of time left to style a delightful spring vignette for your coffee table.

Vase Makeover Story
The idea for this vase started last August when Sweet Shark moved his office home.
Once he had organized his files, and got a brand new MAC, I thought he was settled in.
Then I noticed there were several boxes in the garage still full of office stuff. Right before Christmas, we started unpacking the pictures, knickknacks, and other stuff he had accumulated over 30 years.
In one box, I noticed a tall, slim black porcelain vase in perfect condition. I loved the size and shape, but not the color. So I set it aside for a future makeover.
Makeover time came last week. I knew exactly what I would do to give this old vase a fresh, updated look. I even knew where I would use the vase and what kind of flowers I would put in it.
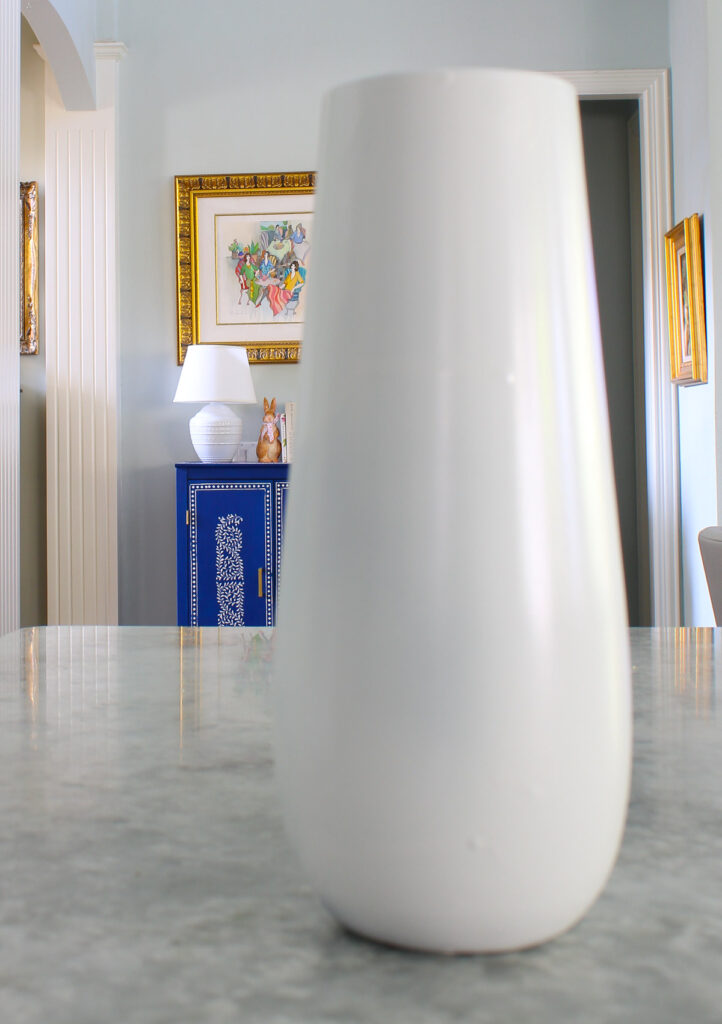
First, I have to confess that I cannot find the before picture of the vase. I know I took one but it’s not on my phone and it’s not on my DSLR disc and it’s not in my computer files. Here is one that is a good representation, except my black vase didn’t have any embellishment.

So, just picture a 10-inch tall shiny black vase with a smooth texture. It is 3 inches in diameter at the top and 4 inches in diameter at the bottom.
Making Over a Vase in One Hour
This post contains affiliate links to products used to create this project. If you should order any item from this site, I may receive compensation, but you do not pay a penny more. Your purchase is greatly appreciated as it helps support the continued publication of this site.
If you have read Bluesky at Home for any length of time, you know I love three things:
- blue and white
- chinoiserie
- decoupage
This DIY project would combine those three favorite things.
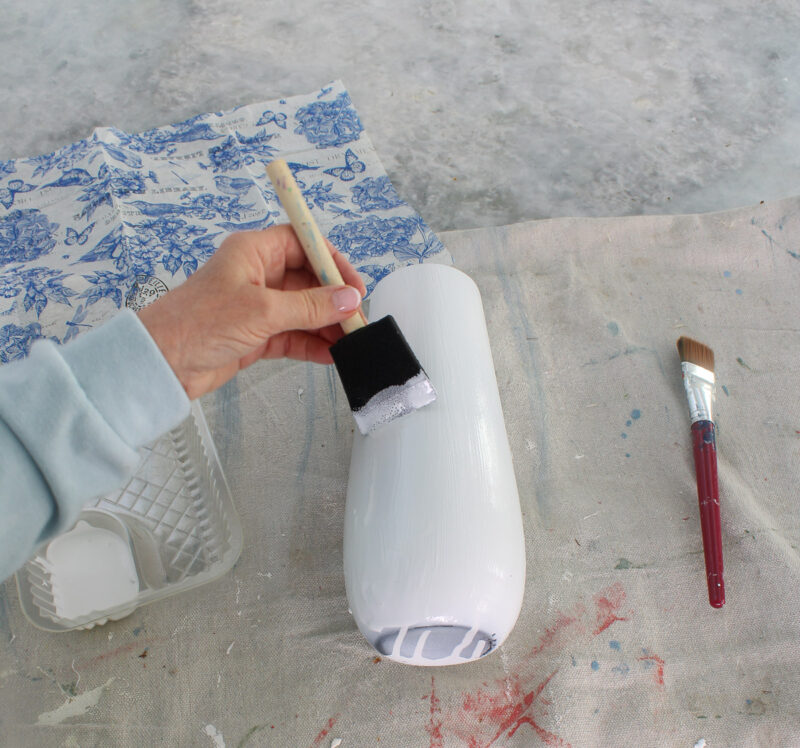
Step 1 – Painting the Vase
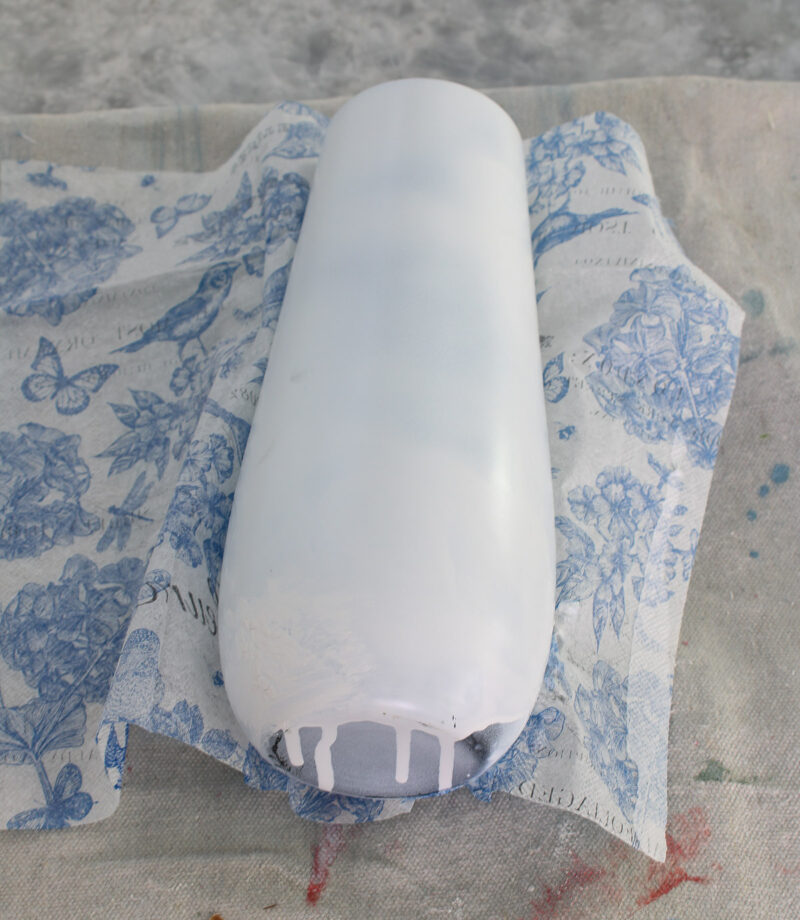
Start by painting the vase white. I used Rust-Oleum 2X Ultra Coverage Paint and Primer in Semi-Gloss. That’s what I had on hand, so that is what I used.
It was a beautiful, warm-ish day so I took an Amazon packing box outside on the driveway, placed the vase inside it, and gave the vase two coats, turning it over 4 times.
Finally, here is a picture of the vase after it’s been painted.
Step 2 – Choosing Design and Supplies
A chinoiserie design on the vase would be perfect, but what design? I had four different napkins on hand, including the one on the far left that I most recently used for my DIY chinoiserie planters for my handmade topiaries. I most recently used them to style my new Easter table decor on our dining table.
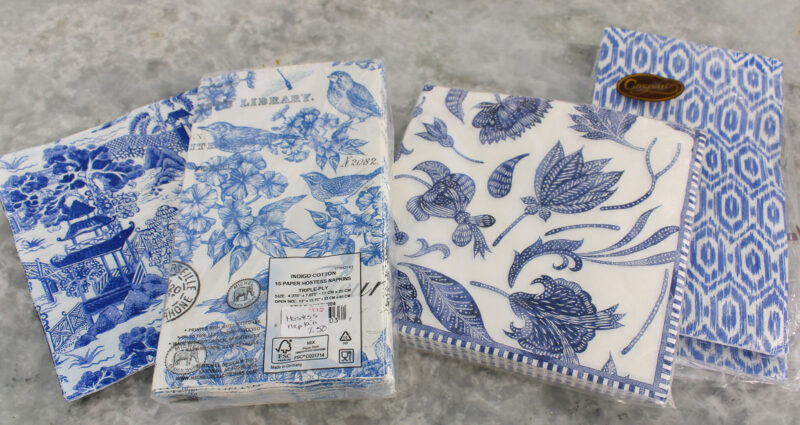
I narrowed the choice down to two, and then to one.
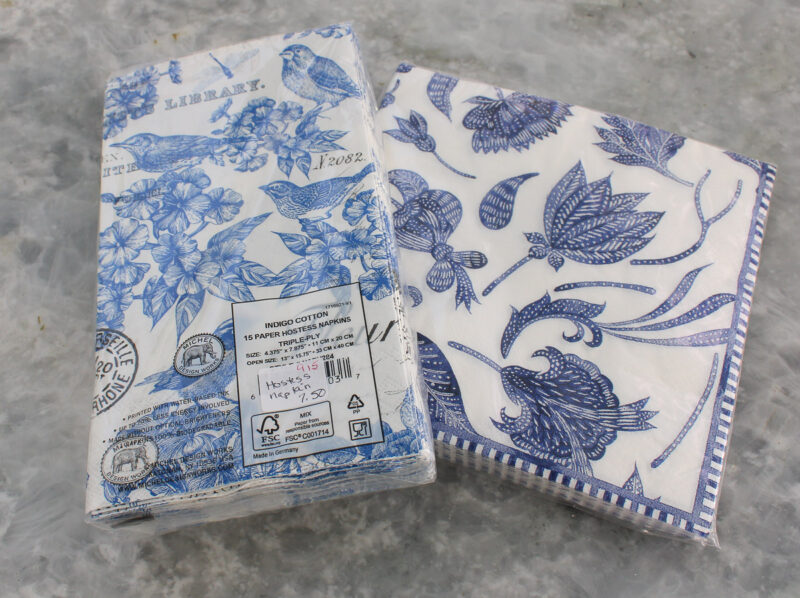
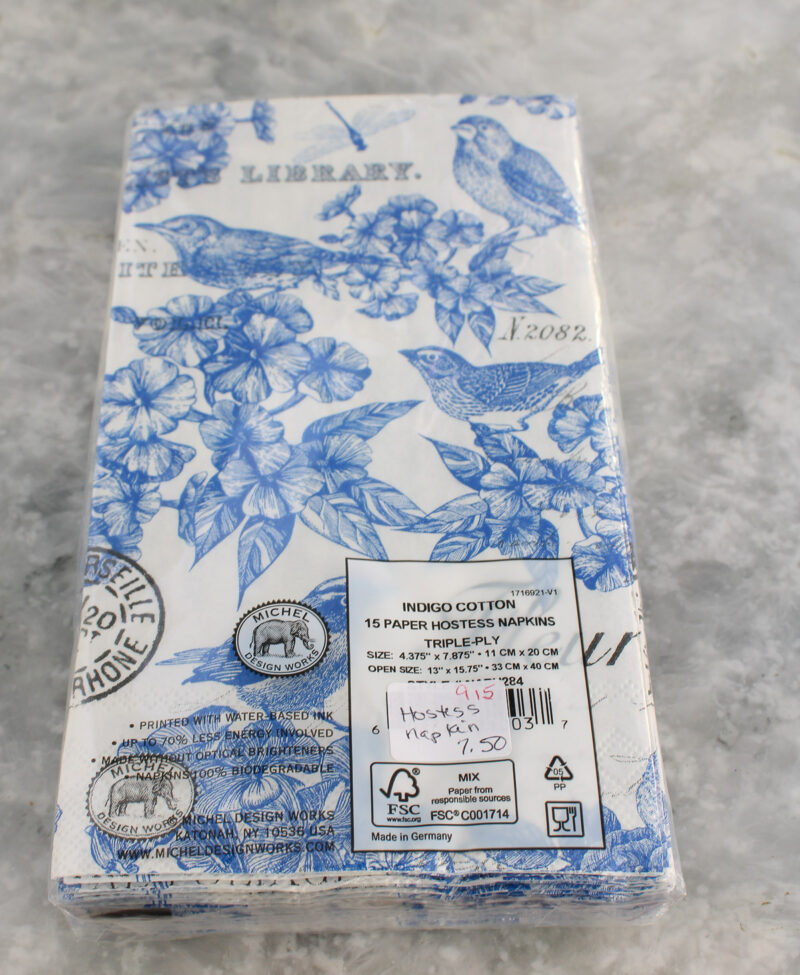
I think I bought these napkins at my local antique mall. (I say local because it’s the one closest to me.)
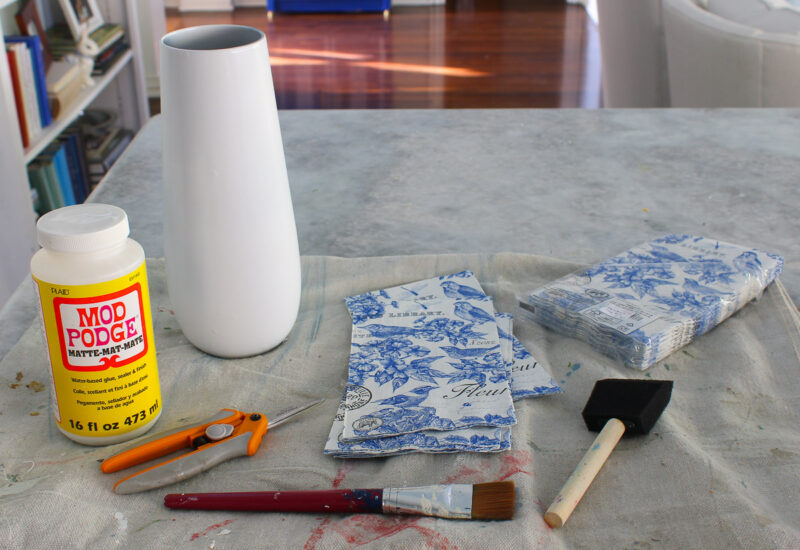
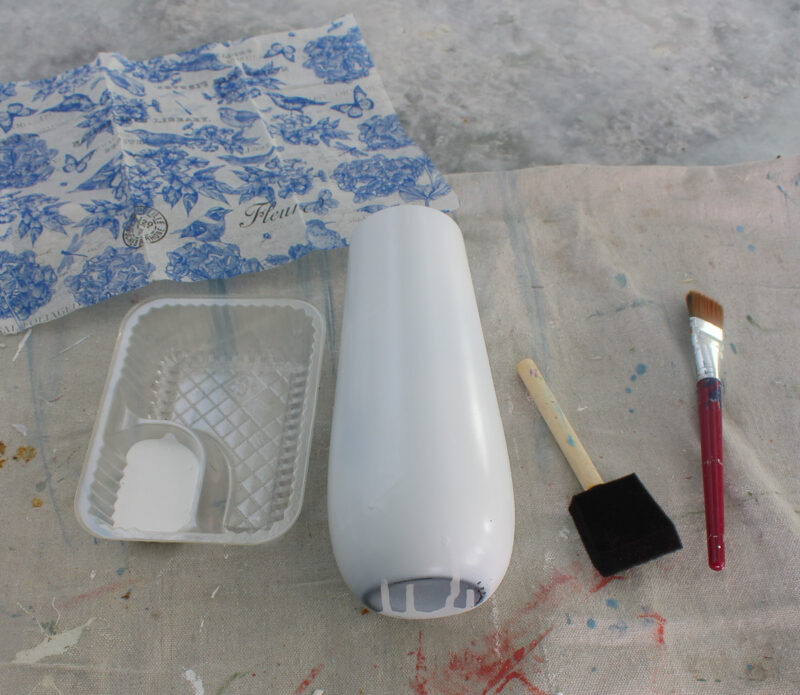
Once my napkin choice was made, I gathered the rest of my supplies:
- Matte Mod Podge
- Chinoiserie Style Guest Towel or this Chinoiserie Style (These styles are similar to the one I use.)
- Foam Brushes
- Dry Paint Brush
- Small Sharp Craft Scissors
Step 3 – Preparing the Napkins
While the paint on the vase was drying between coats, I prepared the napkins.
With any decoupage project, you first have to decide how you want the design to look. You can either cut or tear the napkin into pieces or leave the napkin whole. I wanted full coverage on my vase so I left the napkin whole.
I determined the height I needed for the napkin. The vase was 10-inches tall so I needed 11 inches to allow for turning over the napkin at the top of the vase.
I measured the napkin and measured 11 inches on both sides of the napkin.
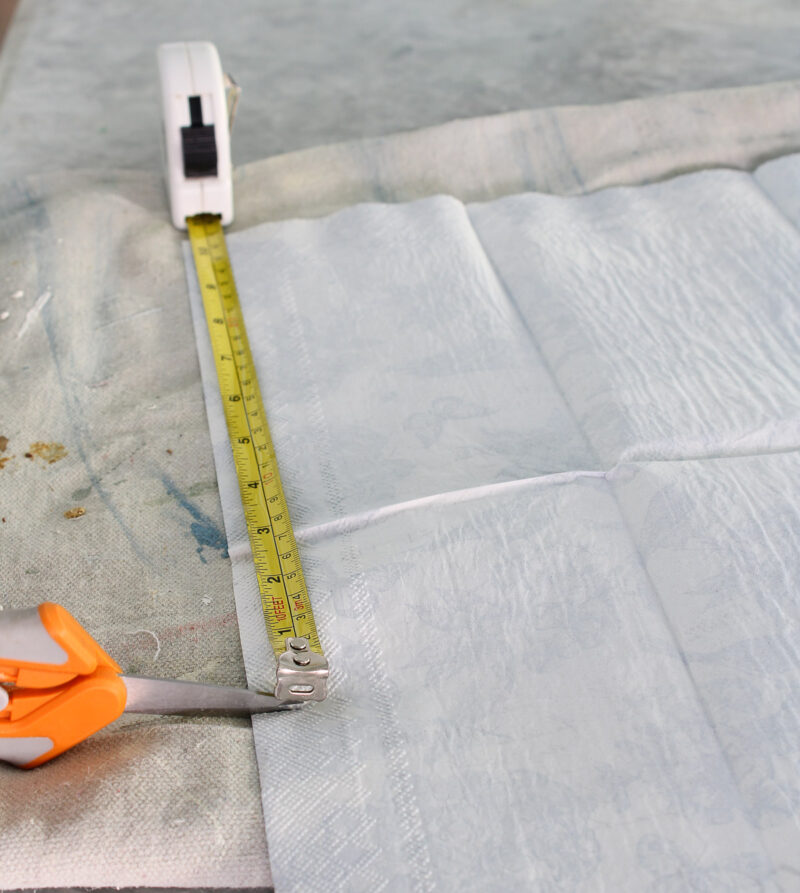
I made little slits with my scissors, folded down the excess, and cut across the width of the napkin.

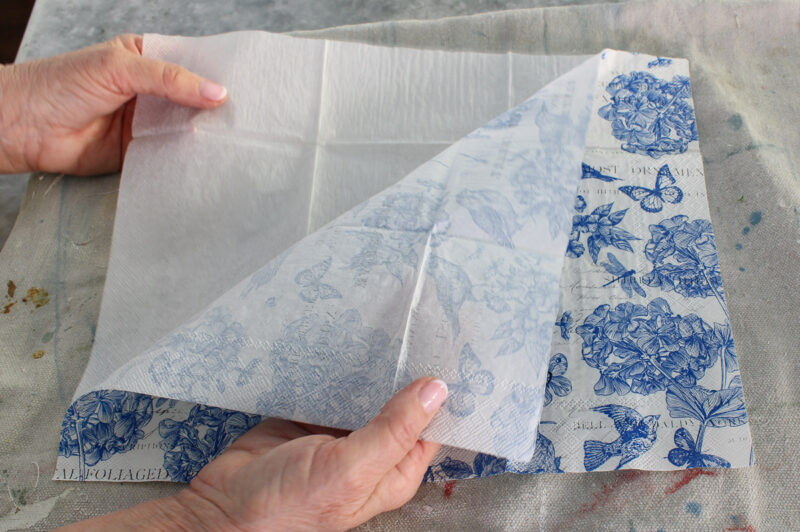
Next, the top layer of the napkin has to be separated from the bottom layers. This napkin was 3-ply so I removed each back layer separately.
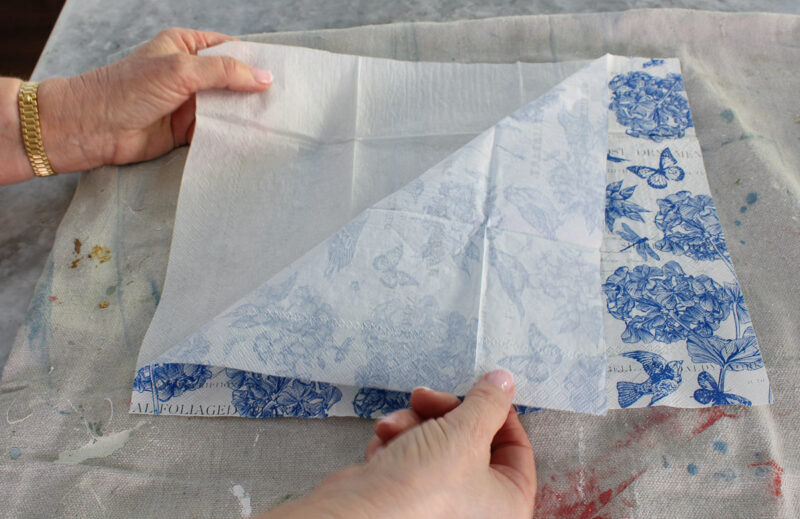
Once I had the correct napkin size, I could begin my decoupage.

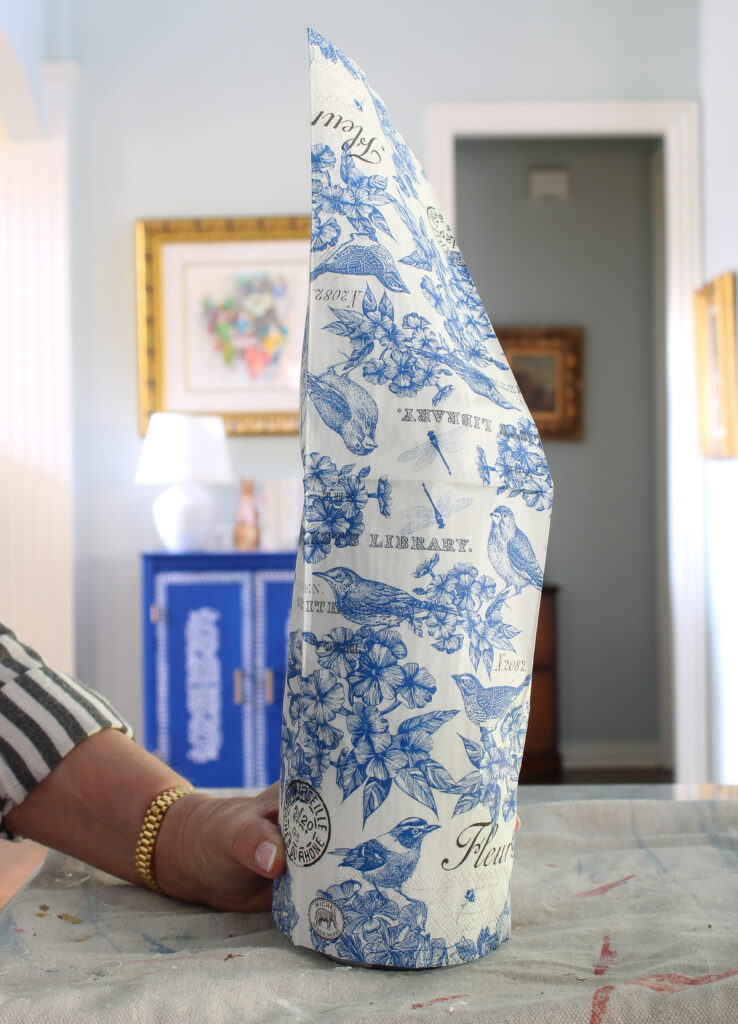
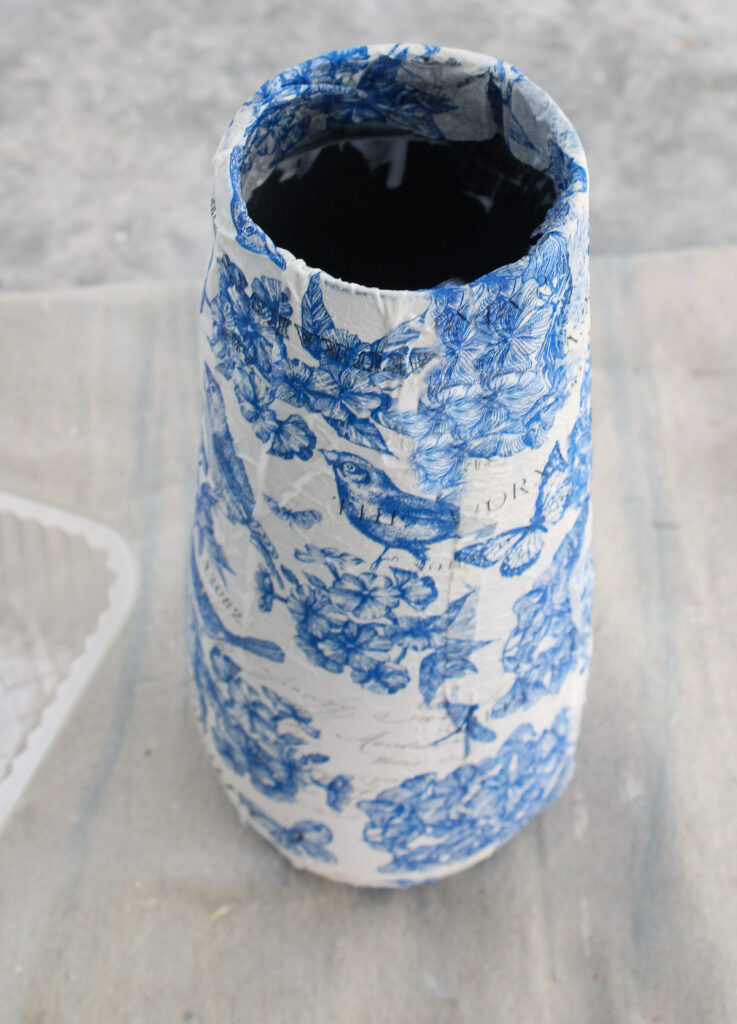
Step 4 – Decoupaging the Vase
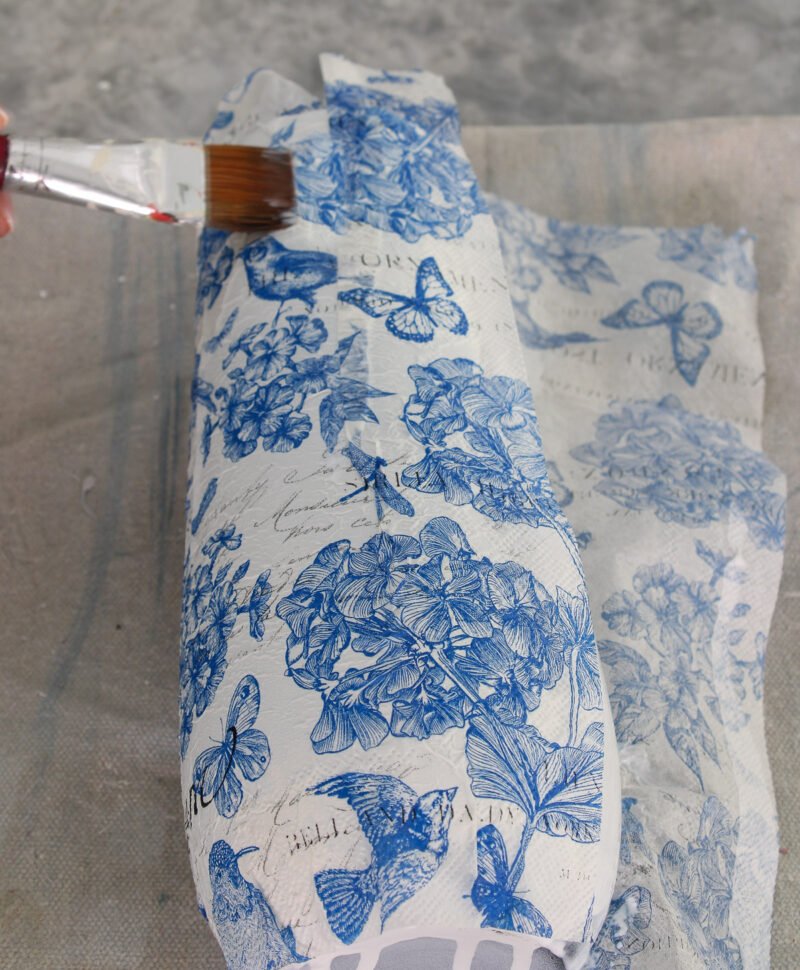
First, I laid the vase on its side and poured some of the Mod Podge into a plastic (nacho) container.
I used a foam brush to apply the Matte Mod Podge from top to bottom of the vase and about 5 inches wide.
Then I laid the napkin on the vase, with the bottom edge of the napkin at the bottom edge of the vase. I smoothed the napkin down with the dry brush.
On my last decoupage project, I discovered that using a dry brush works great to smooth down the napkin.
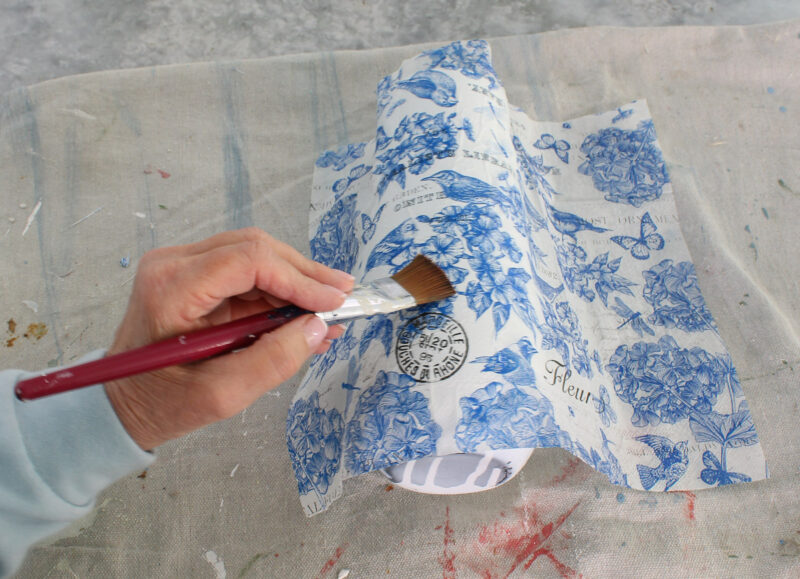
I rolled the vase over and added another “stripe” of Mod Podge, laid down the napkin, and smoothed it down with the dry brush.
Here you can see the original black color of the vase.
You want to keep the pattern of the napkin as straight as possible. This is easy to do if you make small folds in the napkins. They won’t show when you finish the vase.
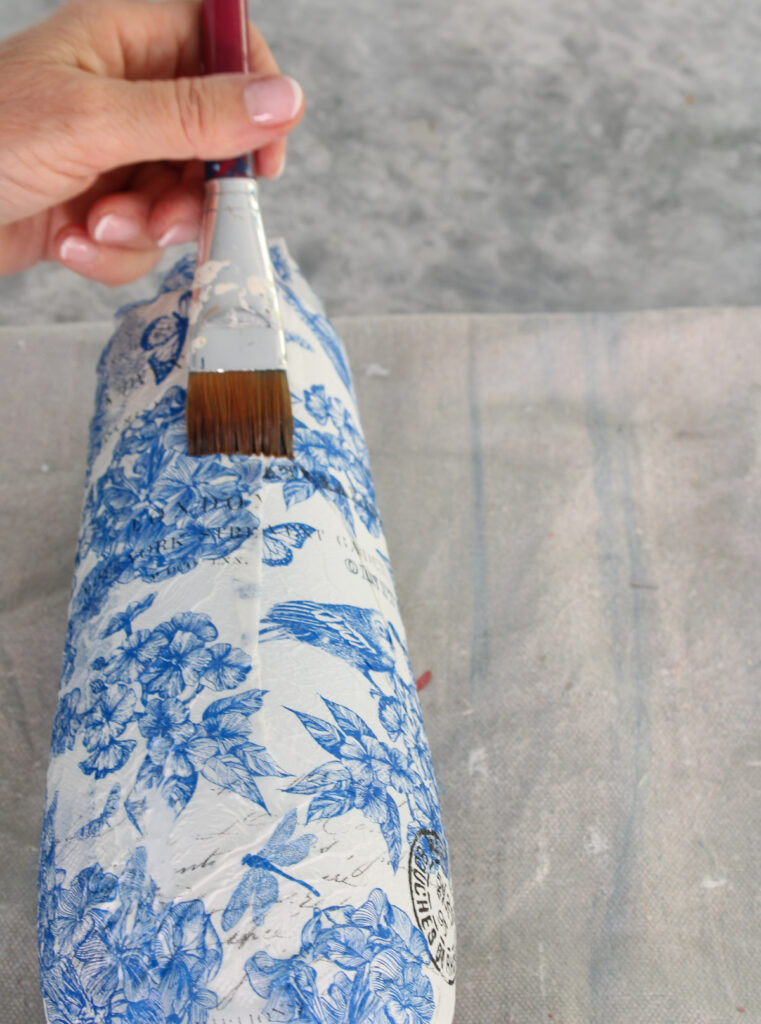
When I covered the entire vase, I cut off the excess.
Use the foam brush to glue down the folds in the napkin.
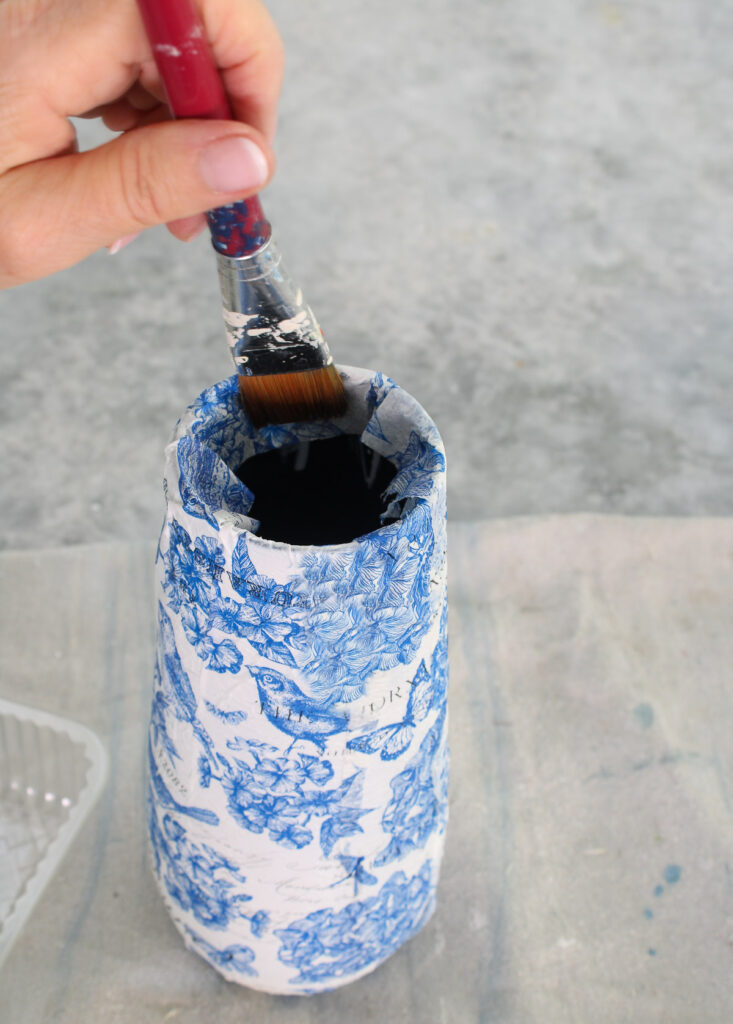
At the top of the vase, apply some decoupage on the inside of the vase. Use the dry brush to fold over and adhere the napkin on the inside of the vase.
I let the vase sit for about 10 minutes to dry.
Then I applied a coat of Mod Podge to the dried vase and allowed it to dry.
That concluded the vase makeover in about one hour.
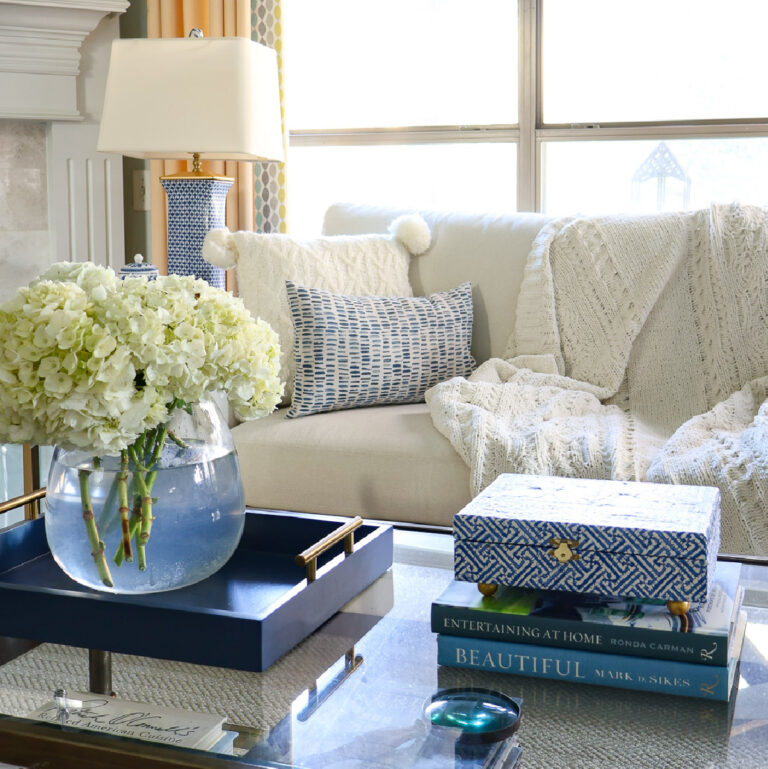
Spring Coffee Table Display Ideas
While the vase was drying, I gathered items in our home to style our living room coffee table. Since the coffee table is the centerpiece of your living room, you want it to be special. The coffee table is the perfect place to add spring decor to your home.
TIP: Pack seasonal decor together to make decorating your home an easier task.
TIP: Before you start styling your coffee table centerpiece, decide on a style and a color scheme.
The vase and other decorative objects will create your spring coffee table decor. Shopping your home for decorative items should be your first step.
Consider whether your coffee table is round, oval, square or rectangular. The shape will dictate to some extent the number of decorative items and how many you will use on your coffee table styling. Is your coffee table made of a solid material or glass (like mine)?
Our coffee table is rectangular which means I usually have two major complementary vignettes.
My color scheme was blue and pink with a simple style using pattern and different materials. There are so many decorative items you can use.
To help you get started, here’s a checklist of favorite coffee table decor ideas to include on your spring coffee table. Five to seven of these items will ensure that your spring coffee table is as fresh and fabulous as it can be.
- Fresh Flowers or Faux Flowers: Whether you opt for a bouquet of tulips, daffodils, or cherry blossoms, nothing says spring quite like fresh blooms. Both the beauty and scent of fresh florals and the ease of faux flowers have their place.
- Fresh Greenery: Add a touch of nature with potted plants or a small succulent arrangement. Greenery not only adds visual interest but also breathes life into your space.
- Large Tray: Corral your items together with a decorative tray, either a round tray or a rectangular one. Choose one that complements your decor style and adds a cohesive element to your vignette.
- Decorative Bowl or a Wooden Bowl: A pretty bowl in a pretty spring color or an interesting pattern brings a fun vibe to a spring coffee table. A wooden bowl provides a natural, warm feel for a neutral color palette.
- Decorative Boxes: Like a pretty bowl, a decorative box can create interest, color, and pattern. I made a small DIY box for our side table.
- Wicker Baskets or Woven Trays: These natural materials are perfect for gathering other smaller decorative items.
- Sculptural Pieces: Ceramics, such as Easter eggs, bunnies, ginger jars, pedestal pieces, cloches, or apothecary jars.
- Pillar or Taper Candles: Set the mood with scented candles in refreshing spring fragrances like citrus, lavender, or jasmine. Not only do they smell divine, but they also add a warm glow to your coffee table.
- Stack of Books: Stack a few coffee table books or magazines with colorful covers to add height and texture to your display. Plus, favorite coffee ta perfect for leisurely browsing on lazy spring afternoons.
- Seasonal Accents: Incorporate seasonal accents like decorative eggs, pastel-colored accents, or even a bunny figurine to celebrate the spirit of spring.
Once you’ve updated your vase, it’s time to curate a delightful spring vignette for your coffee table. Think of it as a scene of freshness and style right in the heart of your living room.
If you want more ideas for styling any coffee table, any time of year, see this article.
Also, get this Coffee Table Guide Printable.
Our Styled Spring Coffee Table
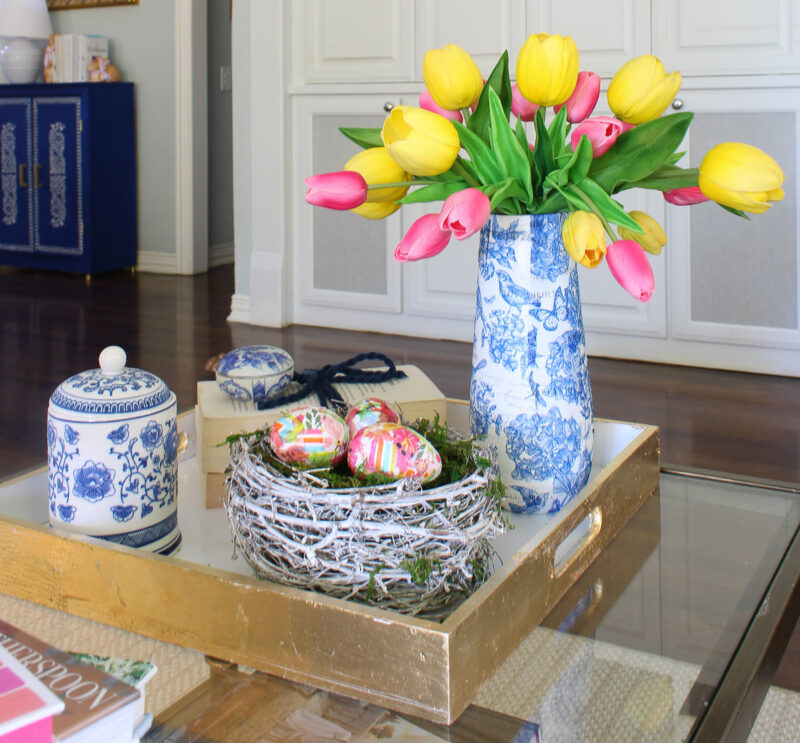
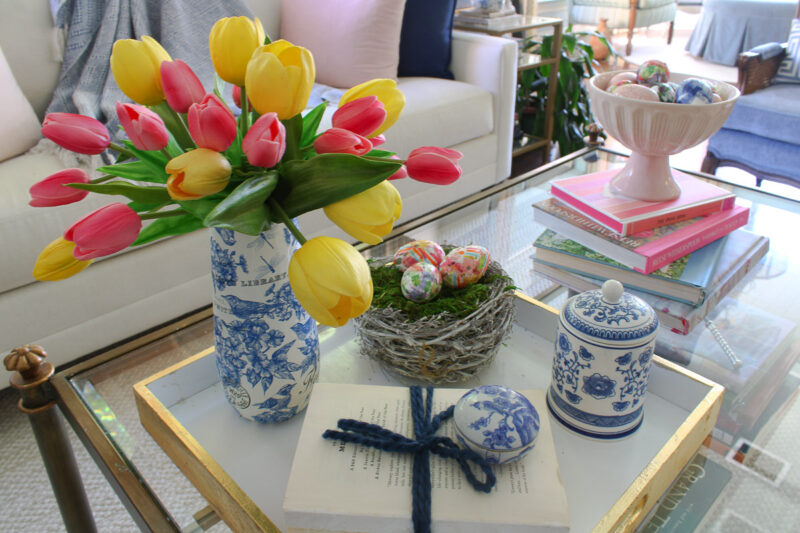
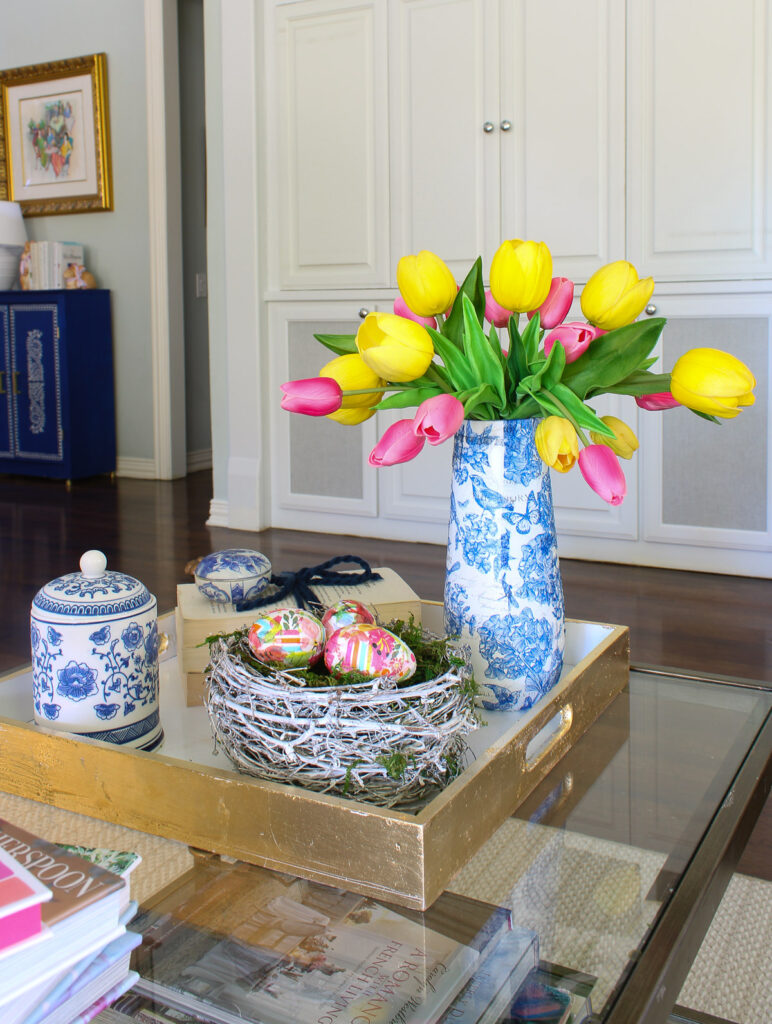
What items would I use on this spring coffee table? These are simple items that came together quickly.
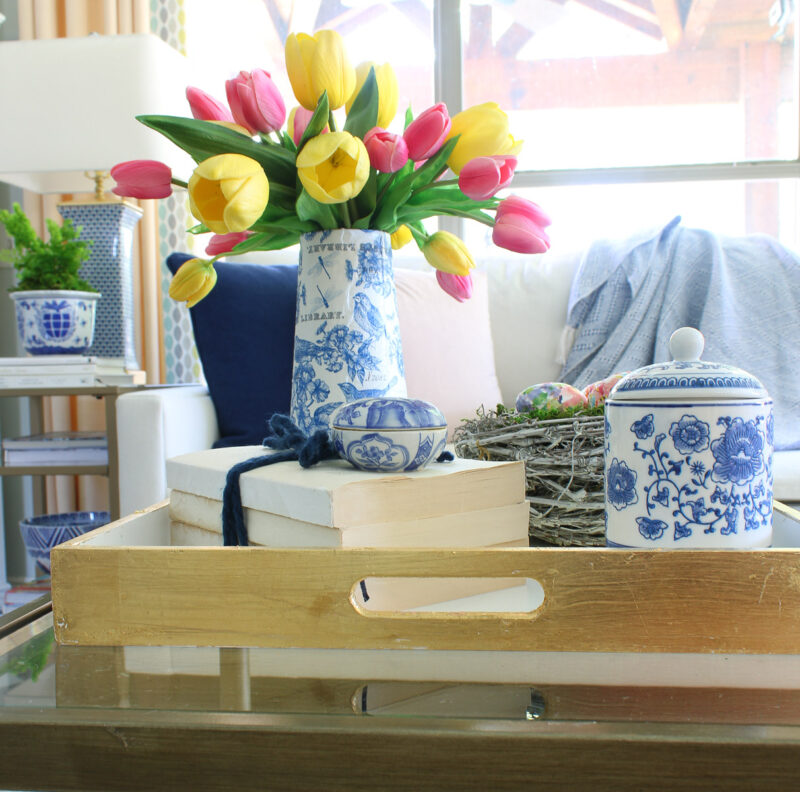
- Obviously, the vase that I made over with paint and decoupage.
- Bright pink and yellow faux tulips – I wanted the tulips to last for a couple of weeks, so faux flowers was the right choice. I already had the yellow tulips and the bright pink ones were a recent purchase.
- The white tray with gold trim that I made for our Christmas coffee table.
- Small stack of paperback books tied with a blue yarn
- Large bird nest with small DIY decoupage Easter eggs
- Chinoiserie candle jar
- Small chinoiserie ring container
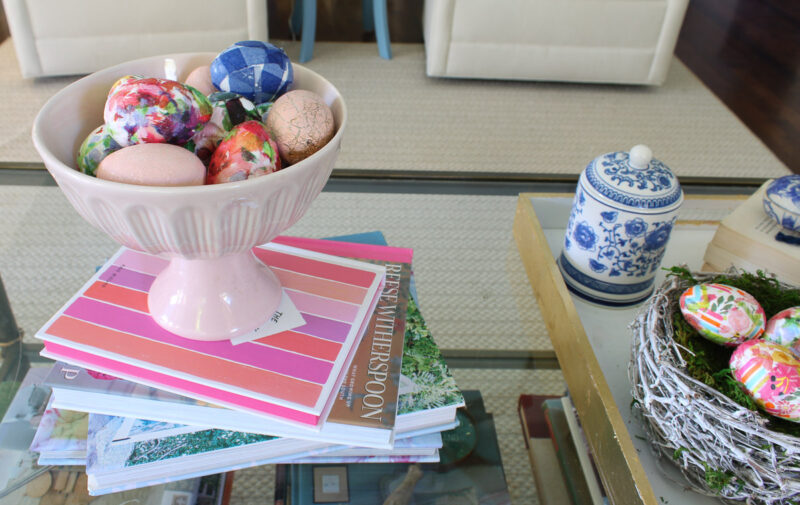
- Stack of large coffee table books in shades of blue and pink
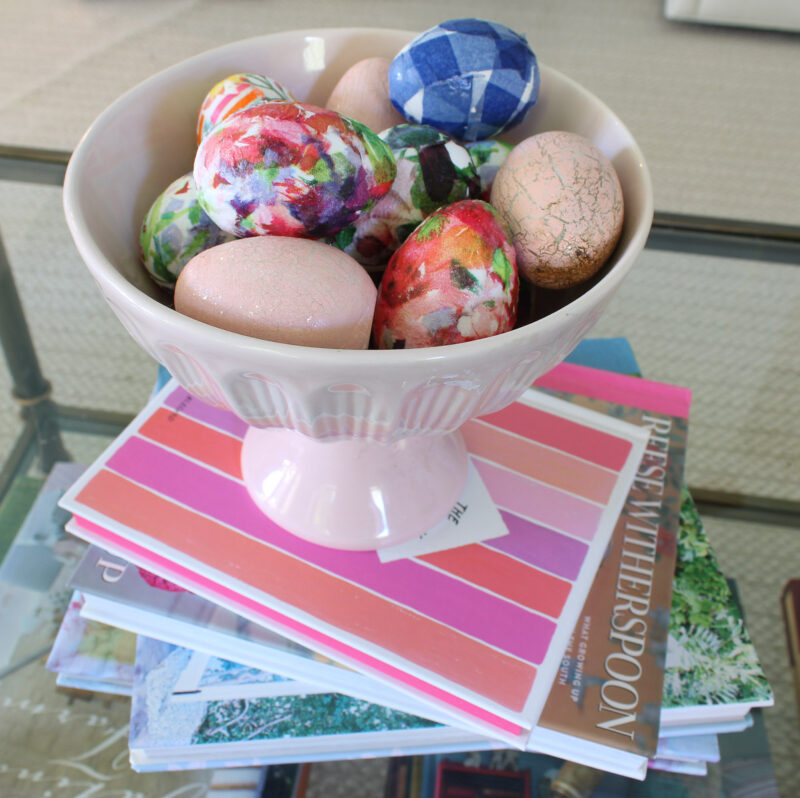
- Pale pink pedestal dish
- More small DIY decoupage Easter eggs
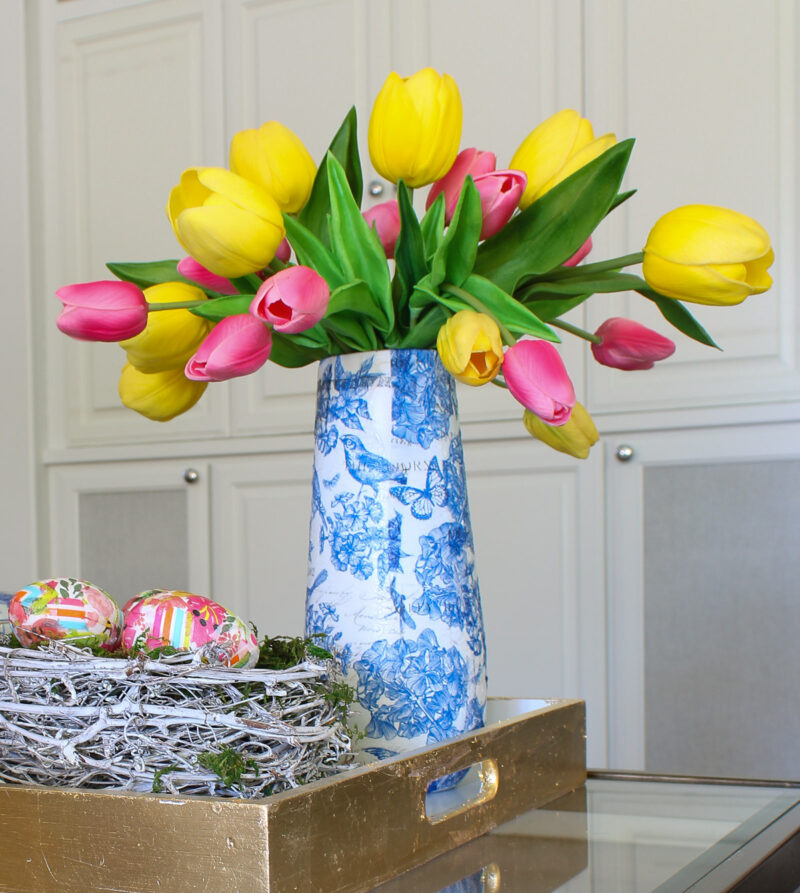
First thing, I filled the DIY decoupage vase with yellow and pink faux tulips. I love the bright colors of the tulips with the blue of the chinoiserie vase.
I placed the vase in the white tray along with a bird nest and decoupage eggs, a stack of books tied with a blue piece of yarn, a chinoiserie candle jar, and a small chinoiserie ring container.
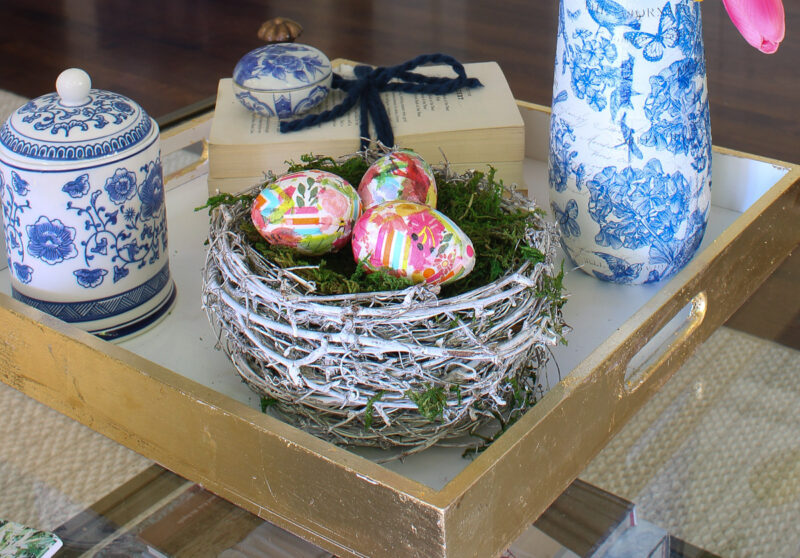
On this side of the coffee table, the dominant color is blue with pops of pink and yellow.
Next, I stacked four large coffee table books in pinks and blues. I set a favorite blush pink pedestal from Home Goods on the books and filled it with a collection of Easter eggs.
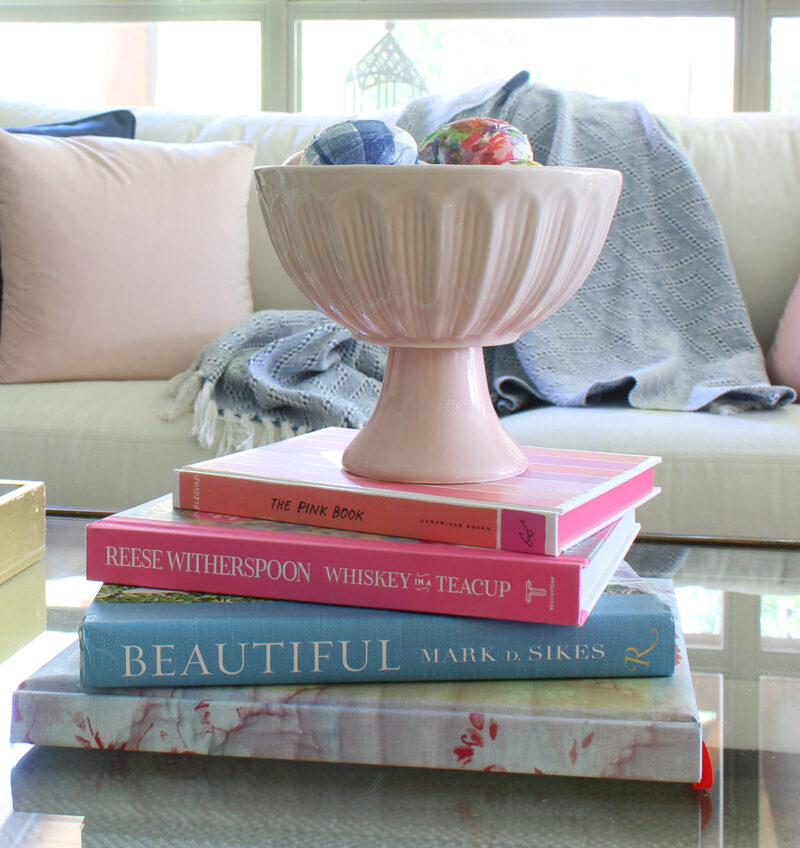
On this side of the table, I switched the color scheme to more pinks with little hints of blue.
Styling this simple coffee table look was so easy and took less than 10 minutes.
The vase makeover is at the center of the spring coffee table. I’m thrilled with the pretty result.
After Easter, I can easily remove the Easter eggs for the rest of the spring season.
Want to make your own decoupage projects? I hope so. Here are some of the supplies you will need.

Want more ideas for decorating ideas? Check out my Pinterest Boards: Spring Home Decor Ideas, Decoupage Ideas, and Easter Decorating Ideas.


That turned out so well!! I will be on the lookout for a thrifted vase or pot to try this technique on!
So glad you liked it, Heather. Vases of all shapes and sizes are easily available at thrift shops and flea markets. Good luck.
It looks beautiful, Carol! It’s so springy and bright with those lovely tulips popped inside. Decoupage is a favorite DIY, but I’m always looking for tips…thanks for sharing yours! Happy Spring!
Thanks, Kim. Turned out so good, better expected. Happy to share.