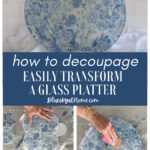
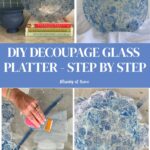
How to Easily Decoupage a Glass Platter
Have you ever spotted a plain glass platter at a thrift store or flea market and wondered what you could do with it? With a few napkins, some Mod Podge, and an afternoon, you can transform it into a stunning decorative piece. Let me show you how to decoupage a glass platter – it’s easier than you think!
Decoupage is one of my favorite DIY crafts because almost anyone can do it, the supplies are inexpensive, and the results look like something you’d find in a boutique. If you’ve decoupaged before but never tried it on glass, you’re in for a treat. And if you’re brand new to decoupage, this glass platter project is a perfect place to start.
You can use this same technique to decoupage plates, too – imagine a matching set in your favorite colors and designs!
This post contains affiliate links to products used to create this project. If you should order any item from this site, I may receive compensation, but you do not pay a penny more. Your purchase is greatly appreciated as it helps support the continued publication of this site.
Table of contents
What is Decoupage?
If you are new to crafting, you may be wondering what decoupage is. It’s a craft process that originated in France in the 17th century as a way to decorate bookcases, cabinets, and other pieces of furniture.
“Decoupage” means “cutting out” in French. The French tradition of decoupage came from the popularity of paper cutouts in China.
It’s an art form that involves cutting and gluing paper cutouts onto a wood, metal, ceramic or glass surface.
You can decoupage anything, from tables, chests, dressers, and bed frames to wastebaskets, hatboxes, lampshades, and screens – and yes, glass platters!
The cutouts are various types of artwork, wrapping paper, tissue paper, magazines, or manufactured decoupage paper. Today, paper napkins are the most popular medium for DIY projects.
All you need to create decoupage projects is a surface, paper, and glue. The decoupage technique is very straightforward.
I didn’t know it at the time but in high school, I made my first decoupage project. I cut out pictures from magazines and glued them to a piece of wood in a random manner. Then I glued over it. I’m sure the glue was regular old Elmer’s glue.
I can still see that first decoupage project. I wish I still had it.
My mom, who was the first person I ever knew to do DIY projects, made decorative wood purses with leather handles. She cut out designs from beautiful paper and glued them to the wooden boxes.
People would stop her in stores and ask to buy her purses. I was with her once in the grocery store when she dumped the contents of her purse into a bag and sold the purse. (As a young teen, I was so embarrassed.)
Today, she would have been a DIY blogger and an Etsy seller.
My Decoupage Inspiration
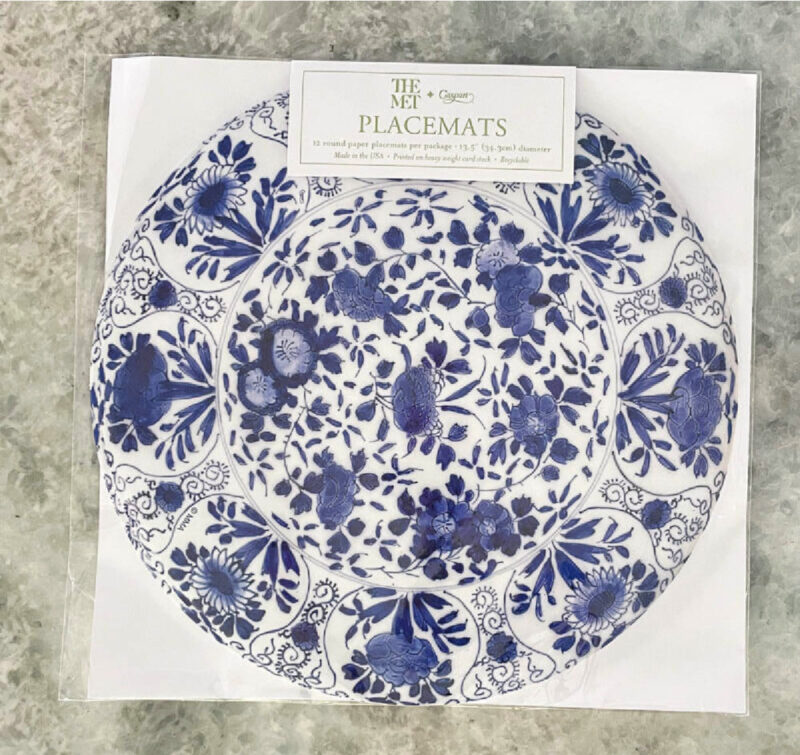
The glass platter was part of the inspiration for this project. The color and design for the platter came to me when I saw this package of paper placemats at the party store. I couldn’t resist these pretty placemats. Here is another pretty blue floral placemat option.
I love anything blue and a blue glass platter sounded like a great idea.
Here are some of my earlier decoupage projects you should see:
- How to Decoupage a Chinoiserie-Style Lamp
- 3 Ways to Decorate Terra Cotta Pots
- How to Make a Fabric Bowl with Decoupage
- How to Make DIY Charger Plates with Decoupage
Supplies for the Glass Platter Decoupage Project
This post contains affiliate links to products used in the creation of this project. If you should order any item from this site, I may receive compensation, but you do not pay a penny more. Your purchase is greatly appreciated as it helps support the continued publication of this site.
Supplies for Decoupaging a Glass Platter
- Glass platter – thrift stores, dollar stores, garage sales, Dollar Store, and estate sales are great sources for inexpensive finds
- Decorative paper napkins – cocktail or dinner size; choose a design and color you love
- Mod Podge – matte or gloss finish works great; use Mod Podge Dishwasher Safe for extra protection
- Mod Podge brushes – a small and medium brush give you the most control
- Sharp scissors – micro-tip scissors are ideal for cutting delicate napkin paper
- Small container – for pouring out your Mod Podge (plastic nacho cups work perfectly!)
- Drop cloth or protective covering – to protect your work surface
- 3 ramekins or small cups – to elevate the platter while you work on the back
The most popular decoupage medium is Mod Podge. It is a brand designed specifically for decoupage. It comes in several finishes, such as matte, gloss, outdoor, terra cotta surfaces, fabric, and one that is dishwasher safe.
MOd podge
I used Gloss for this project.

glass surface
For any decoupage project, you need a surface. For this project, it’s the glass platter. You could use any inexpensive glass plate – glass salad plates, dinner plates, glass bowls, or a piece of glass in a frame. See the supply list above for inexpensive places to find glass objects.
On my way home from tennis drills, I saw kids out on the street with signs advertising a youth flea market at a charity sale at a Catholic church. That’s where I found my glass platter. You could fill a bag for $10. What a deal!
The glass platter had a $3 tag and went into a large bag with a wooden bowl and two glass vases. So my plain glass platter cost me $2.50.

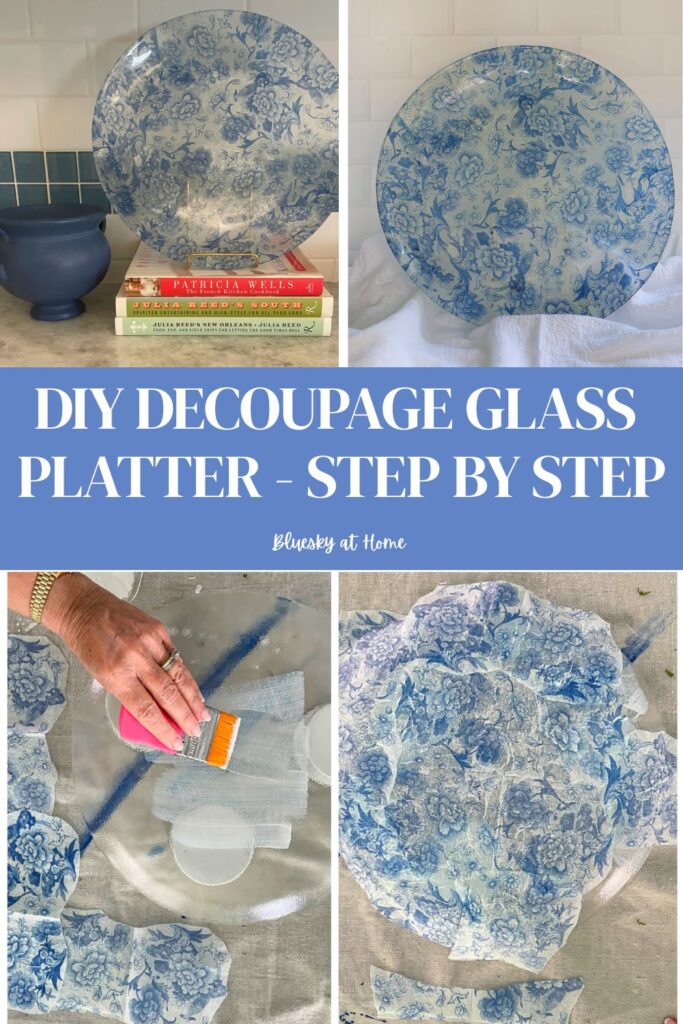
The platter is a generous 13 inches. The top of the platter is smooth, but the bottom is frosted and has a bit of texture.
I bought all these decorative pieces with the intention of using them for easy craft projects. More decoupage projects are coming to a “theater” near you soon.
Paper for Decoupage
Of course, you need some sort of paper. As I said, napkins are a very popular medium for decoupage projects. They offer endless design possibilities in every color and pattern.
Blue would be my color and floral would be my design choice. Fortunately, I had three napkins left from earlier projects that would be perfect.
This napkin matched my vision for the platter.

Brushes and scissors
You will also need a paintbrush and scissors. My favorite brushes are these Mod Podge brushes and I love these sharp scissors for cutting delicate paper and small spaces.

The Decoupage Process
Now on to the decoupage process. Once you know the process for one surface, it will work for most other surfaces.
Step 1 – Remove any stickers and any sticky residue from your platter. You can use Goo Gone, olive oil, rubbing alcohol, vinegar, or even lemon juice. Wash and dry your glass until you don’t feel any sticky residue.
Step 2 – Cover your work surface with a protective material. I used a canvas drop cloth, which obviously has been used a bunch.
Step 3 – Prepare your napkins. Whatever size your napkin (mine were cocktail size), you have to separate the back layers from the top decorative layer. Carefully separate the layers and pull back on the bottom layer (s). You can discard it.
NOTE: Paper napkins are either 2- or 3-ply (layers)

Step 4 – Cut or tear your paper into pieces. The size and shape of the paper are entirely up to you. It will vary by project, depending on the surface area and the design on the paper. For my platter, I wanted large pieces. I wanted as little overlap as possible since I wanted a smooth surface for the platter.
I cut off the borders of all three napkins with the super-sharp Fiskars scissors.

Step 5 – Usually, decorative paper is added to the top of the glass object. For this project, you will apply the paper to the back (bottom) of the platter.
So that the edge of my platter would not touch the work surface, I set it on three ramekins.

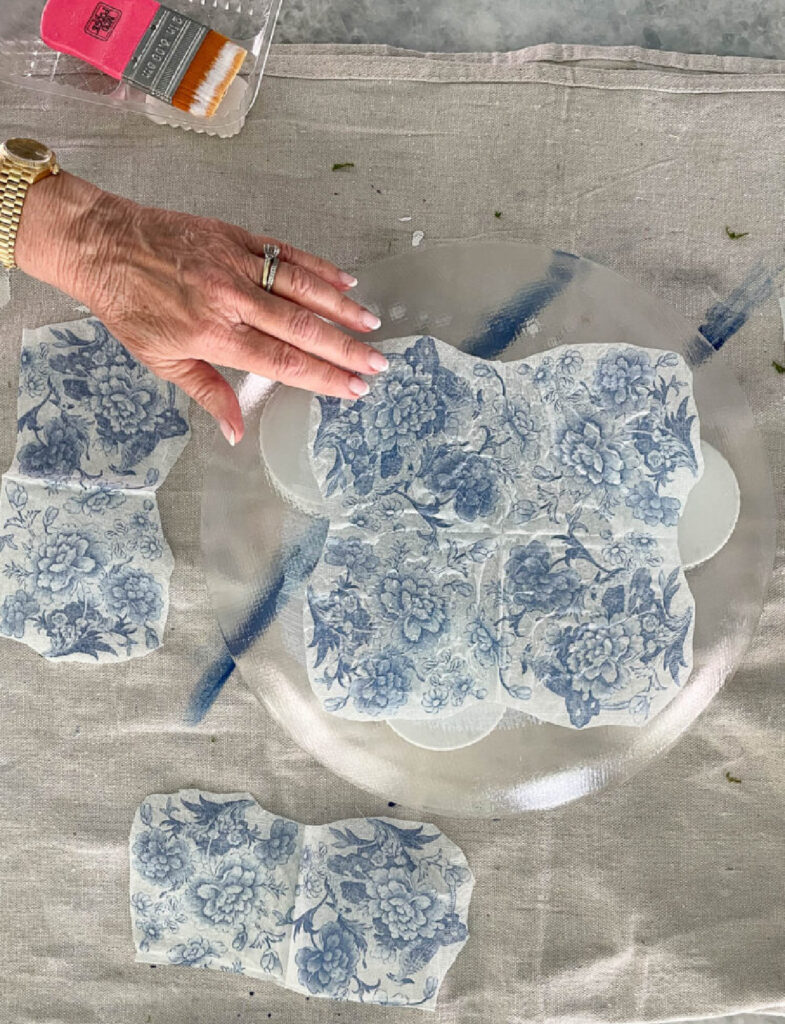
Step 6 – On the back of the platter, you can test the paper’s placement. I placed the large piece in the center of the platter.

Add more pieces of napkin until you get an arrangement you think will work.

NOTE: Remember to turn the napkin with the design facing the glass!
Step 7 – Pour a small amount of Mod Podge into a container. I use these plastic nacho containers.

Step 8 – Spread a thin layer of Mod Podge on the center of the platter.

Step 9 – Place the largest piece of napkin on top and gently smooth it down with your fingers or the brush. Make sure that all the napkin surfaces are glued down.
NOTE: As the Mod Podge dries, the wrinkles will smooth out.
I ended up cutting the other two pieces in half. Now I had one large piece and four small pieces.
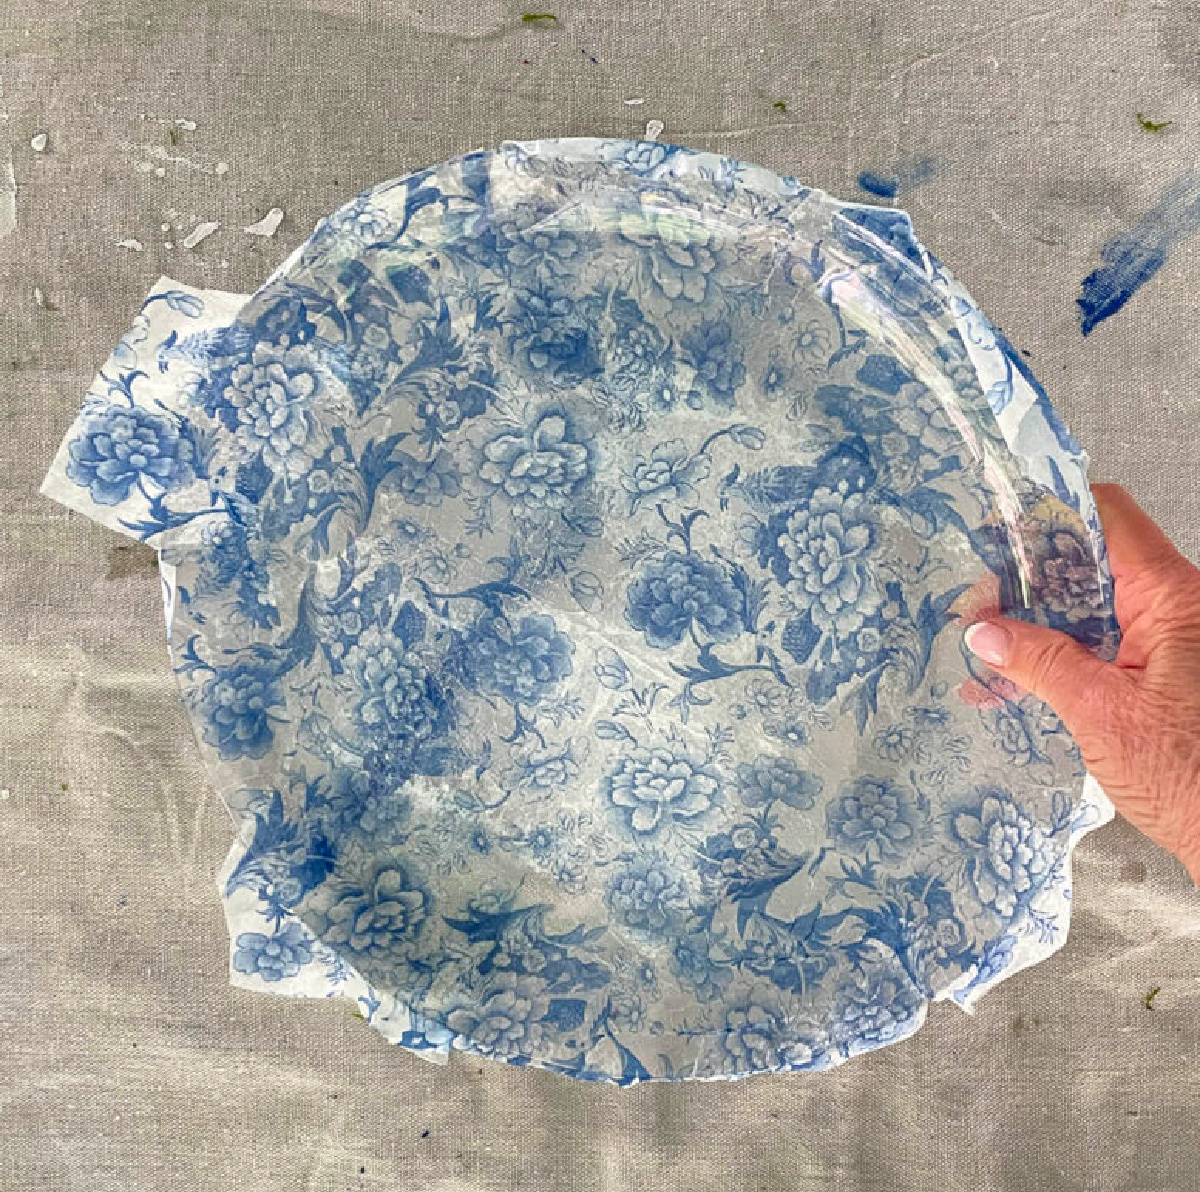
Step 10 – Continue around the platter with Mod Podge and place the other pieces of napkin on the surface. I wanted very little overlap of the napkin. Fill in with smaller pieces of napkin as needed.
I know it looks like a hot mess now, but trust me, it will all look great in the end.


Step 11 – After the platter is completely covered with the napkin pieces, cover the entire surface with another layer of Mod Podge. Allow the platter to sit for a few hours to dry. Then, for extra protection, apply another thin coat of Mod Podge to the entire back of the plate. Allow to completely dry.
TIP: It’s best to leave the Mod Podge to dry for a couple of days until the surface has no tackiness. As long as you feel that, it’s not completely dry yet.
NOTE: I’ve heard people mention using a hair dryer on medium to speed up the drying process. I’ve never used that option, but I would try it if I were in a hurry.

NOTE: You will notice that the Mod Podge is white. As the Mod Podge dries, it will become clear.
Step 12 – When your platter is completely dry, turn it right side up. You can see the excess paper around the edge of the platter. Using your small, sharp scissors, cut the excess paper napkin off from the edge of the plate.
TIP: It works best if you cut from the back side of the platter.

Step 13 – Using the small Mod Podge brush, apply a small amount of Mod Podge to the edge of the napkin to secure the edges.

Step 14 – Let it dry again for several hours. I let my platter dry overnight.

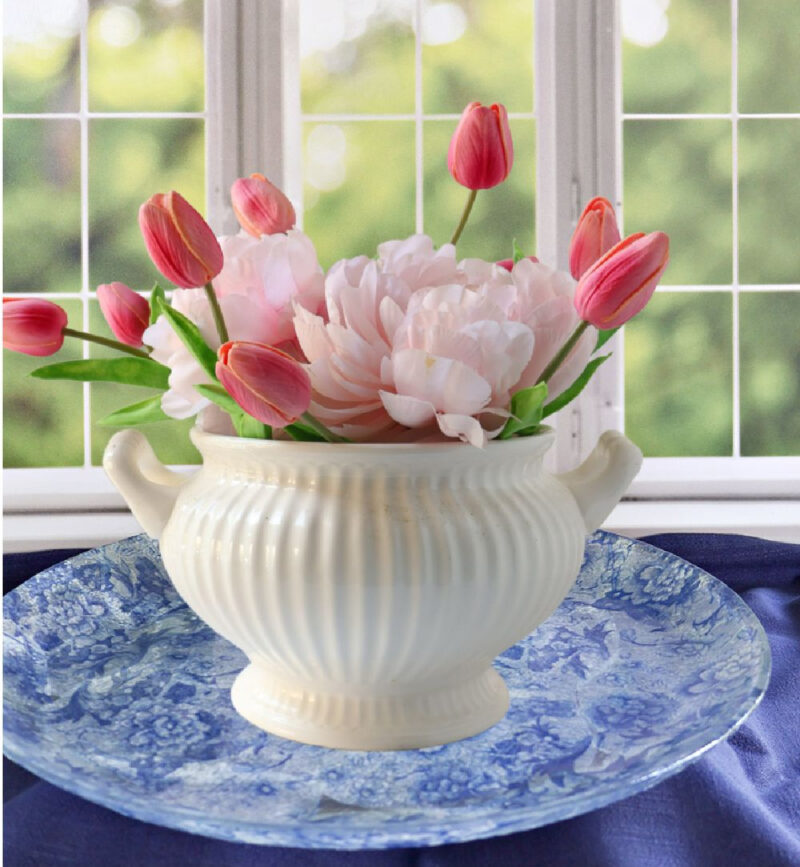
The background of the platter is now clearer and the design looks lovely.
Your platter is now ready to use. The platter is food-safe because the napkins and Mod Podge are on the bottom of the platter.

To clean your platter, gently wash the top lightly with a little soap and water. Wipe the back of the platter with a damp cloth, if needed. There is a dishwasher-safe Mod Podge, but I have yet to try it.
Ways to Use Your Decoupage Glass Platter at Home
Once your platter is finished, the decorating possibilities are endless! Here are some of my favorite ways to use a decoupage glass platter:
- Entertaining – use it as a serving platter for cheese, charcuterie, cookies, or appetizers at your next gathering. I have used my platter to serve salad, appetizers, and pasta. My guests asked me where I bought it and were amazed when I told them how I made it.
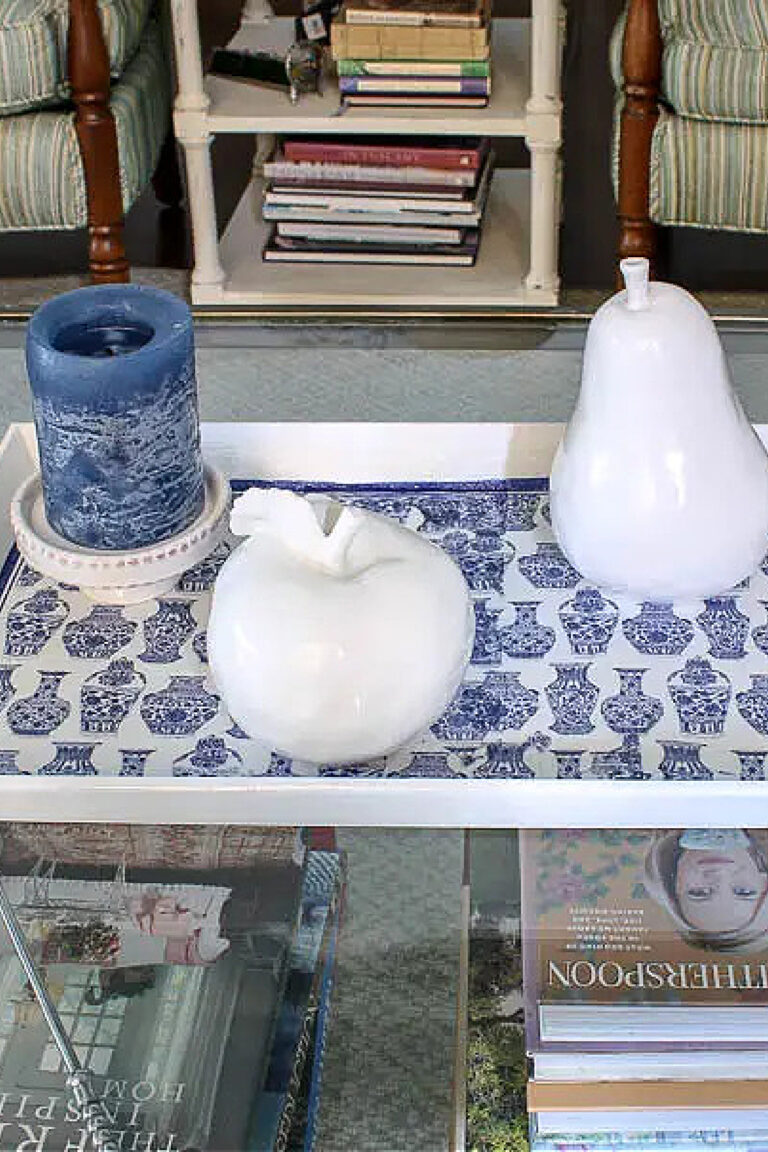
- Coffee table styling – place it on your coffee table as a decorative tray to corral candles, a small vase, faux flowers or smaller objects, such as seashells.
- Console table display – lean it against the wall or prop it on a small easel for an artful focal point. Also use it on a bookshelf or mantel.
- Kitchen counter decor – set out fruit, bread, or baked goods on it for an everyday touch of beauty. I used my platter set on an easel on our kitchen counter paired with a few colorful cookbooks.
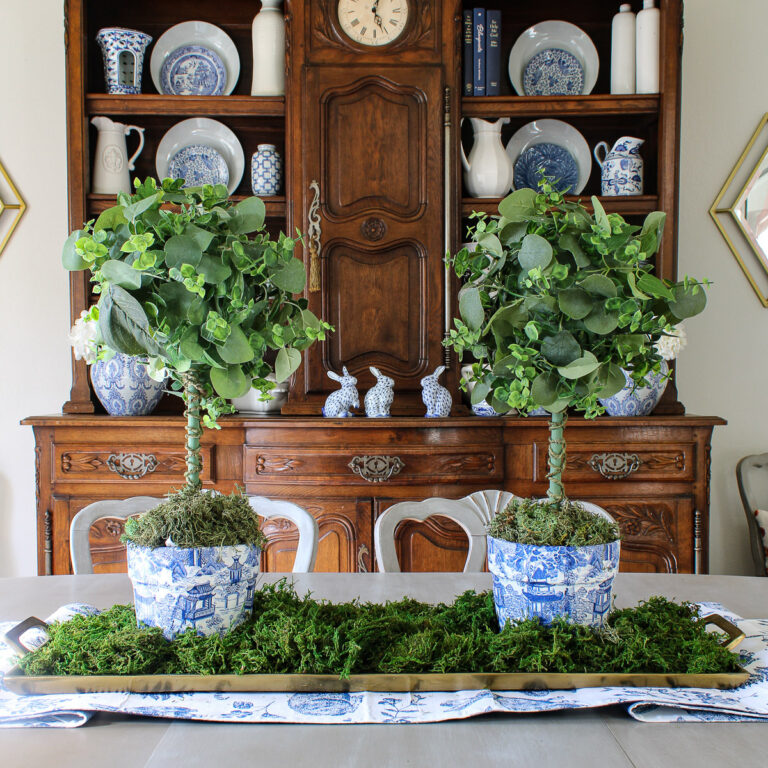
- Seasonal decorating – swap out what’s displayed on it by season; think pine cones and ornaments for Christmas, or eggs and greenery for Easter. You can make a platter for every season!
- Gift giving – fill it with homemade treats or small gifts and wrap it up – it’s a beautiful and personal present. Use wrapping cellophane and tie it with a pretty bow.
- Dining table centerpiece – use it as the base of a centerpiece with a candle, florals, or a small plant.
Here is a brand new, easy decoupage project you can make for fall: DIY Fall Decoupage Charger.
If you want another project decorating glass, try this easy-to-spray-paint glass lamp. What a difference it makes!
If glass isn’t your favorite surface, I love this project, making a decoupage wooden box.
Frequently Asked Questions About Decoupaging Glass
A. For most glass decoupage projects, regular Mod Podge in a matte or gloss finish works beautifully. If you want to be able to gently hand-wash your platter, look for Mod Podge Dishwasher Safe formula – it provides extra protection for glass surfaces.
A: Yes! Because the napkins and Mod Podge are applied to the back (bottom) of the platter, the top surface that comes in contact with food is plain glass. Just be sure to wash the top with soap and water as usual. If the food was minimal, wipe with a damp cloth.
A: Hand washing is best. Gently wash the top of the platter with soap and water. For the back where the decoupage is, wipe with a damp cloth only. Avoid soaking the platter or putting it in the dishwasher.
A: Absolutely! Tissue paper works very well on glass because it’s thin and translucent, similar to a single napkin layer. Look for decorative tissue paper with patterns or colors you love. The process is the same – just apply with Mod Podge.
A: Don’t worry – that’s completely normal! Mod Podge goes on white but dries clear. Once your platter has dried for a few hours, the milky color will disappear and your design will show through beautifully.
No, that is purely an aesthetic choice. It depends on the size, shape, and design of your napkin and the surface you are using.
If you are a beginner to decoupage, this project is a great one to start. Just a warning, you may get hooked!
I hope that you will try decoupage as a craft project. It’s creative, relaxing, and gives you a unique accessory to use in a practical and pretty way.
Don’t forget to PIN this project. Check out my Pinterest Decoupage Ideas Board for more ideas.


I have had an issue with my blue floral napkin looking purple after I applied mod-podge. Any idea to keep the color looking blue?
Michelle, I have no idea what would cause that. Is the Mod Podge old? Has it been exposed to heat or cold? I would contact Mod Podge’s customer service and ask. There is a toll-free number at the bottom of the page. https://plaidonline.com/. Hope that helps.
Hi Carol, Sharing this on The Weekend Edit on Saturday! We have had rain for 2 days! I love it!
xo laura
The rain or the plate? I hope the latter cos it’s very pretty