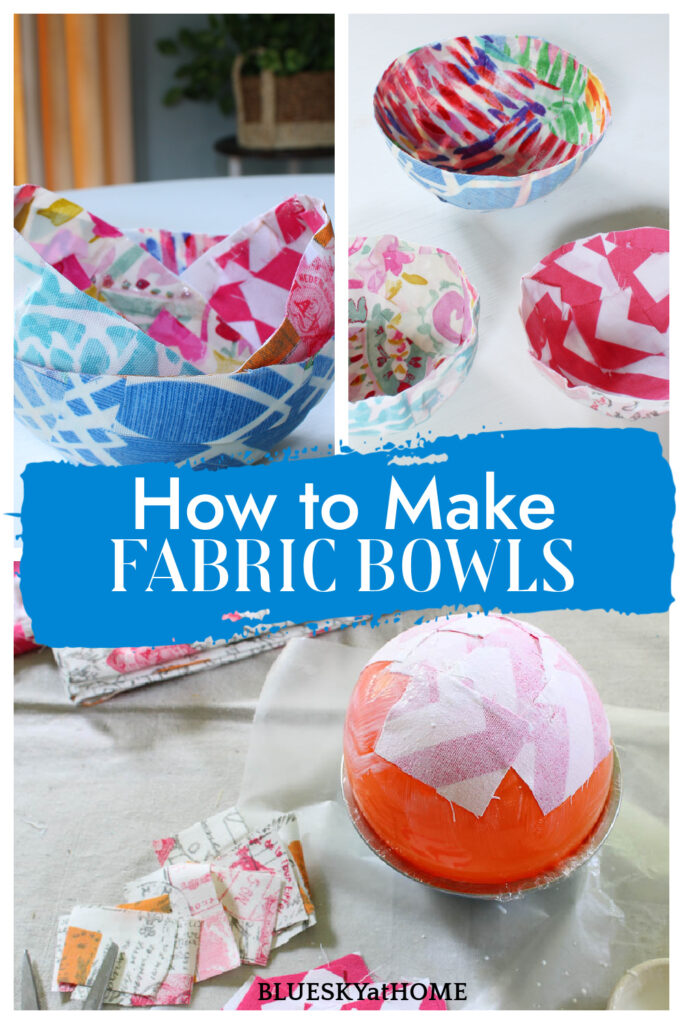
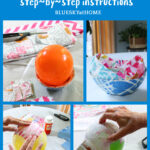
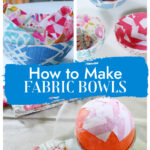
How to Make a Fabric Bowl with Mod Podge
Do you ever see a DIY project and think, “I’d love to try that one”? I do that all the time and this time I actually did. So let me show you this new project, how to make a fabric bowl with Mod Podge.
Now, I’ve used Mod Podge many times. It’s one of my favorite ingredients for creating unique accessories for the home. I use fabric quite a bit. But I’ve never used Mod Podge to make a fabric bowl.
I actually found a few different methods to make a fabric bowl. Same result, but different ways to get there.
I picked one that seemed interesting. But there was one problem: I can’t blow up a balloon.

What do balloons have to do with this project you ask? Everything!!
First, let me introduce you to our June Creative Craft Blog Hop. Sara of Birdz of a Feather is back as our hostess. We have 10 bloggers showing off creative ideas. I bet there will be a few that you love and want to try.
Fabric Bowl with Mod Podge: One Way to Get There
This is actually an easy project, especially if you have worked with Mod Podge before. Mod Podge is the product you use and decoupage is the method.
Most of the time you think about Mod Podge and paper.
Here are some previous decoupage projects that I’ve done.
- How to Make a Chinoiserie Lamp
- 3 Ways to Decorate Terra Cotta Pots with Decoupage
- Rescued Tray Gets Makeover
I did use some fabric scraps on one of my terra cotta pots. Making a fabric bowl from nothing but fabric and Mod Podge was a new endeavor.
If you Google “how to make a fabric bowl”, you will find a few different methods. All of them require fabric, of course. I had plenty of fabric pieces, both large and small to choose from.
I had plenty of Mod Podge.
I just had to decide which method. The balloon method won out. It seemed the easiest. And it was ~ until it wasn’t.
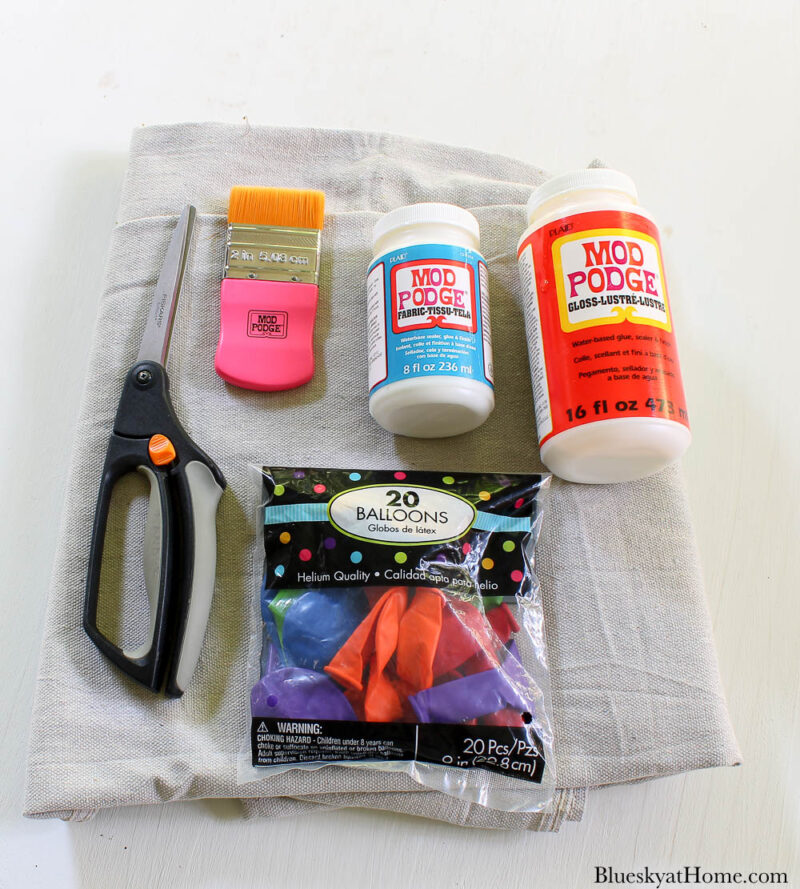
SUPPLIES FOR YOUR FABRIC BOWL WITH BALLOONS
This post contains affiliate links to products used in the creation of this project. If you should order any item from this site, I may receive compensation, but you do not pay a penny more. Your purchase is greatly appreciated as it helps support the continued publication of this site.
- fabric scraps – You won’t need much; if you don’t have any, then fat quarters would be perfect for this project.
- Mod Podge – I used the Gloss version.
- Mod Podge Brushes – I love using these brushes; they make the application and clean-up easy.
- sewing scissors – for cutting your fabric
- cover for your workspace – I used a drop cloth. I also recommend using a piece of wax paper for easy clean up.
- balloons – this was the only supply I bought. I bought a package of 9~inch balloons. The color doesn’t matter since you will discard them when you are done with the project.
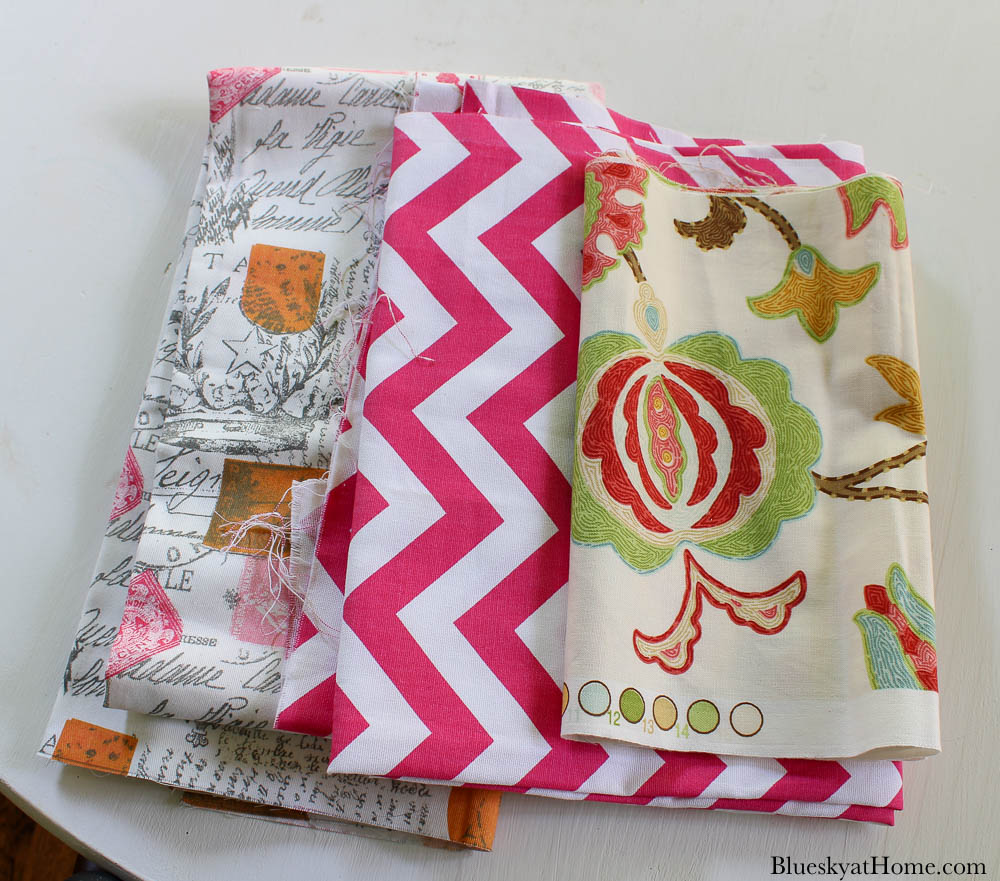
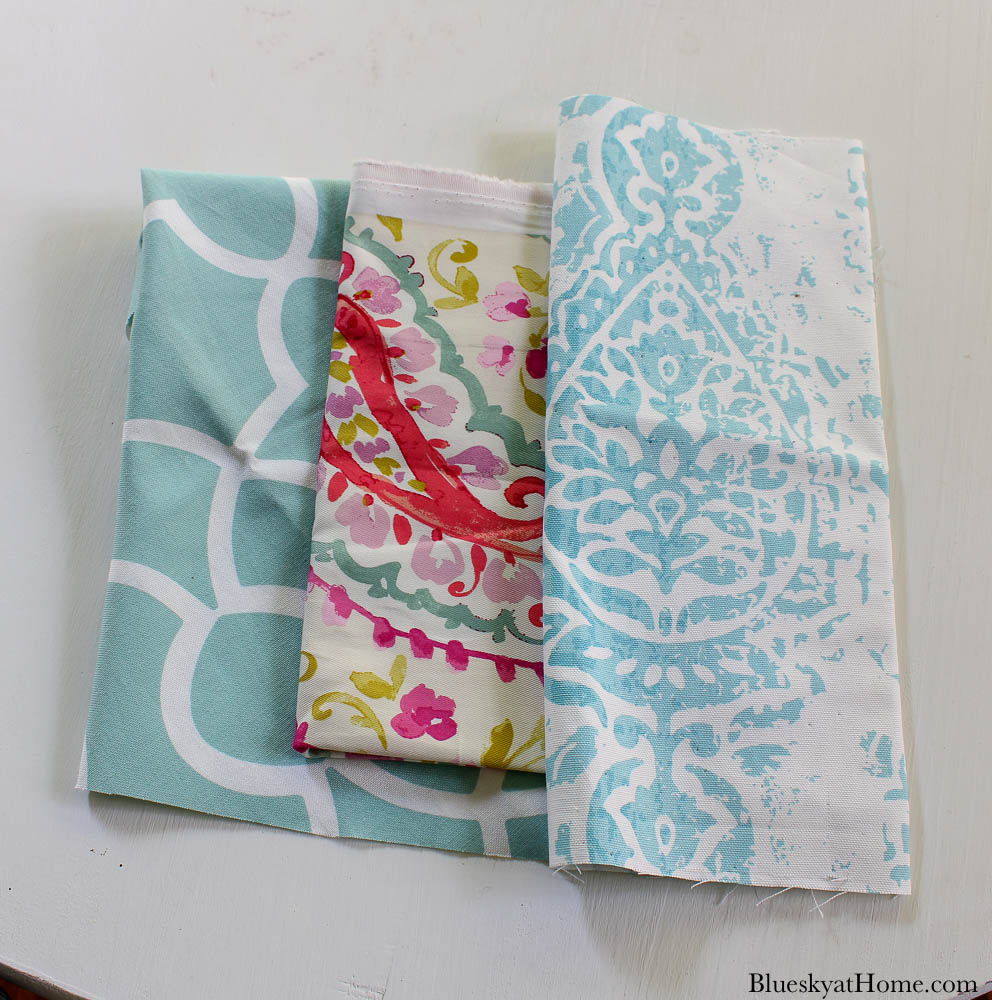
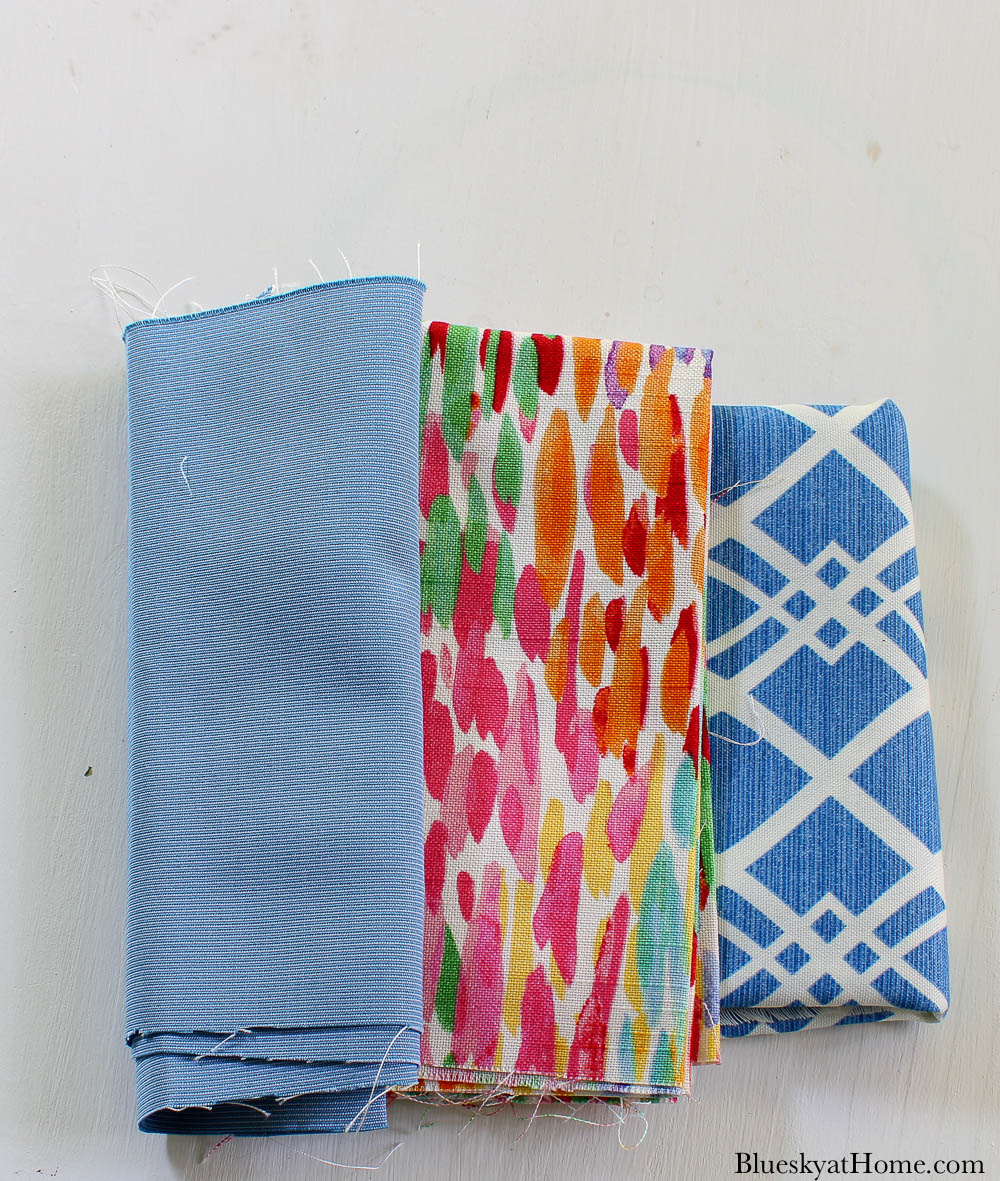
GATHERING FABRIC FOR YOUR FABRIC BOWL
Keep in mind that this is sort of an experience. Since I had never tried to make a fabric bowl, I had no idea how it would turn out.
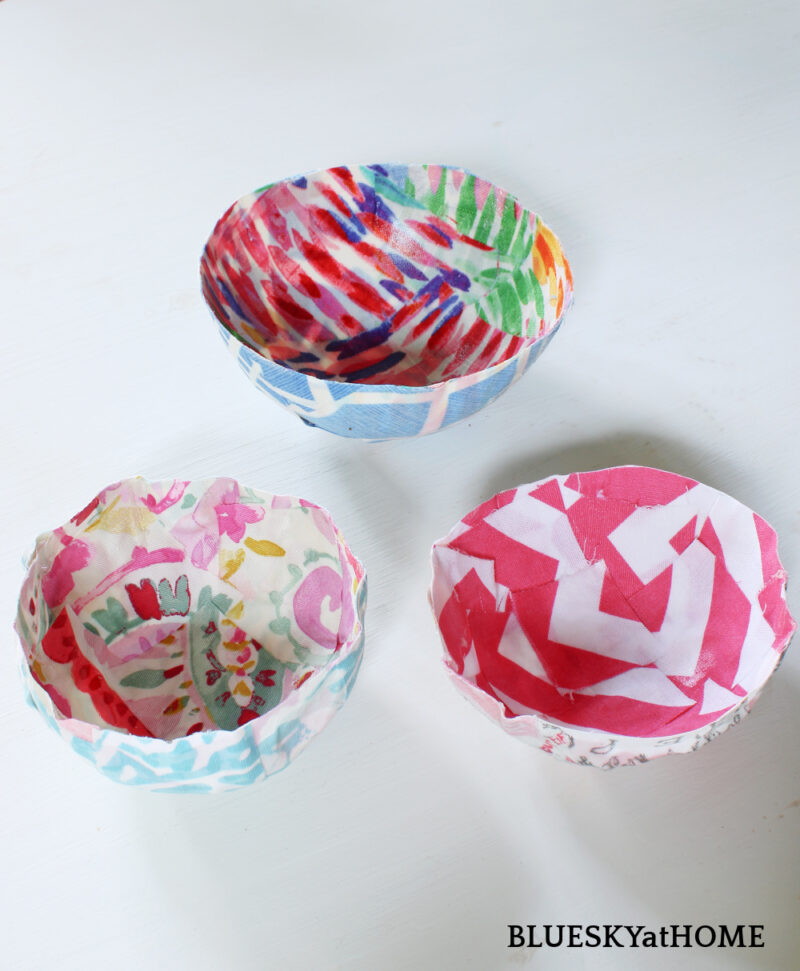
I planned to make three fabric bowls.
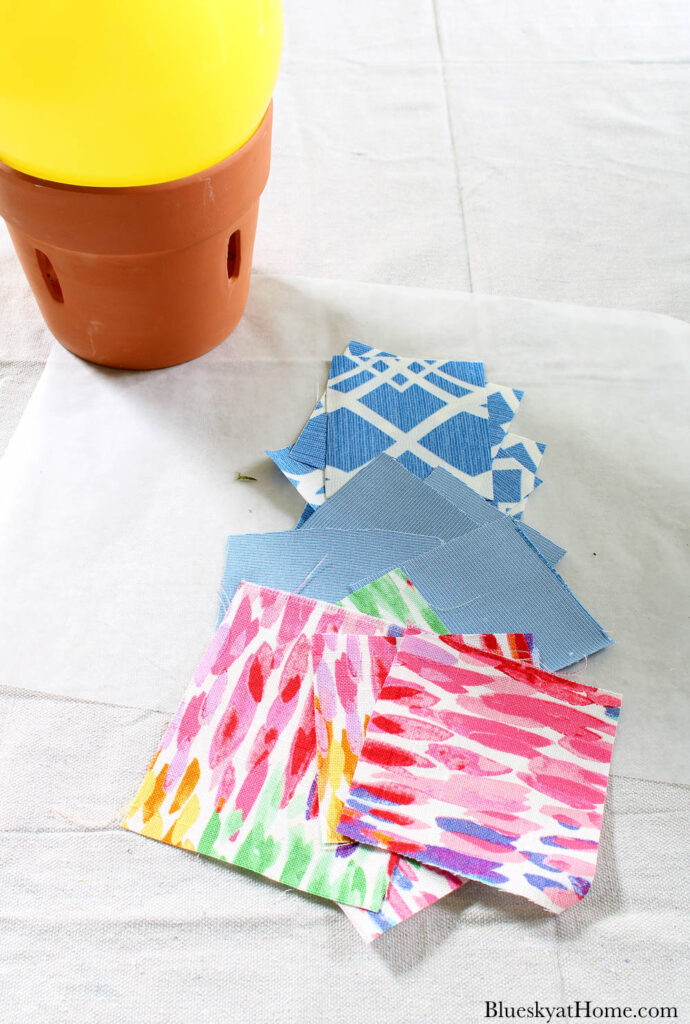
I went through all my fabric boxes (organized by color) and picked three sets of coordinating patterns that I liked. You can use one fabric pattern, if you like, for a solid look.
I want to try one pattern for the inside of the bowl and one pattern for the outside of the bowl.
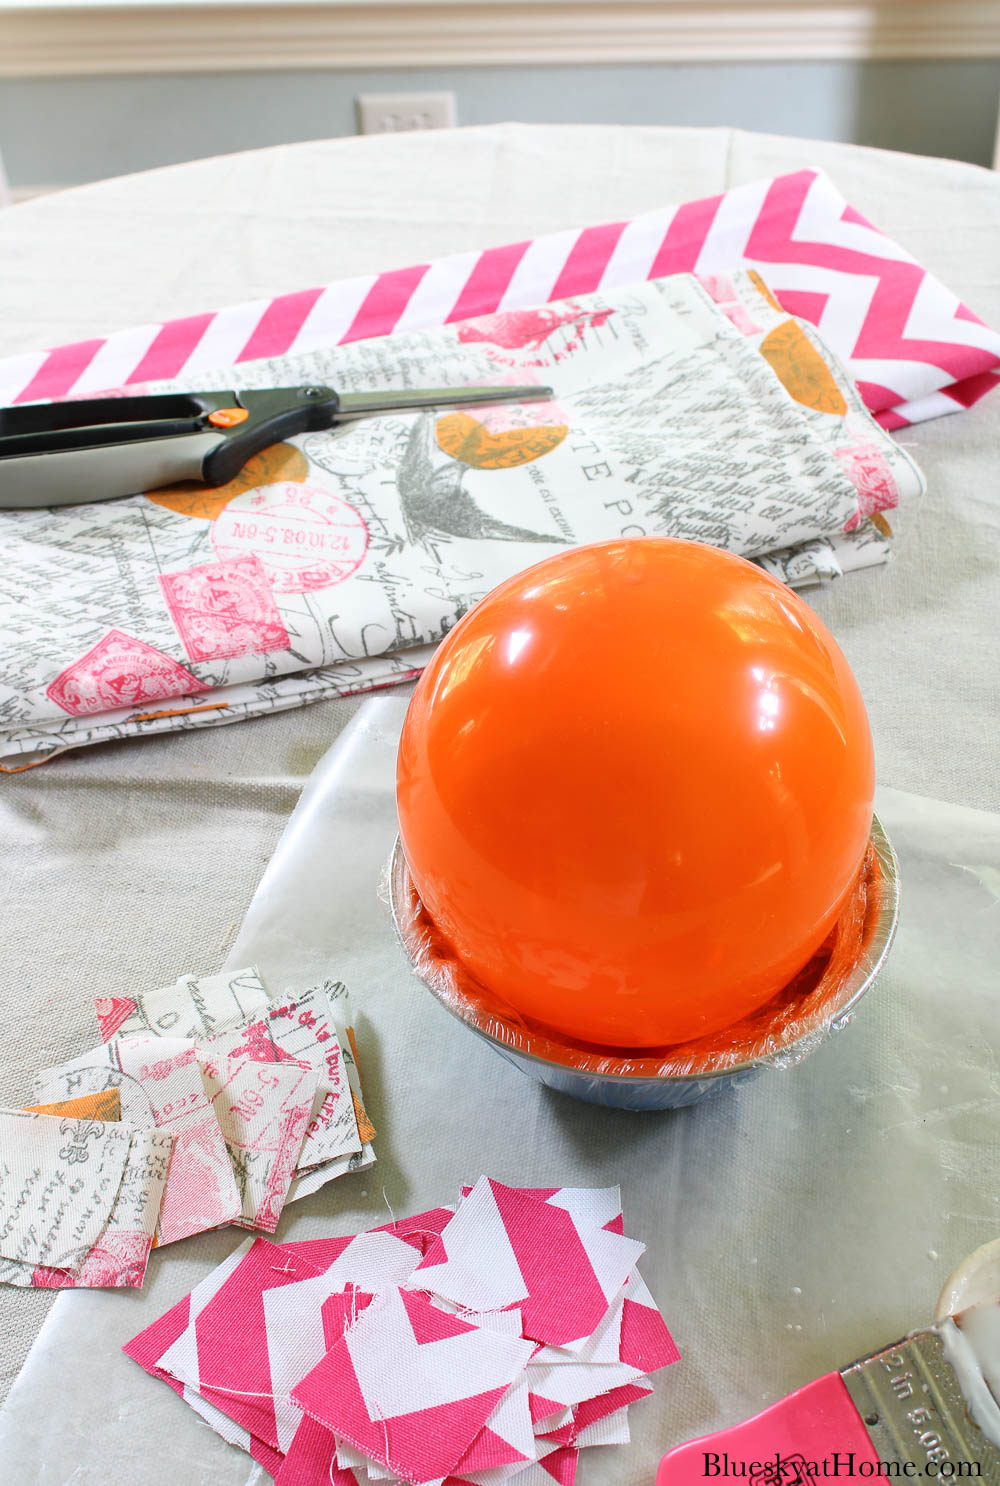
SETTING UP YOUR WORKSPACE
Lay your cover down on your work surface. I added a piece of wax paper so that any Mod Podge drips would be on the paper.
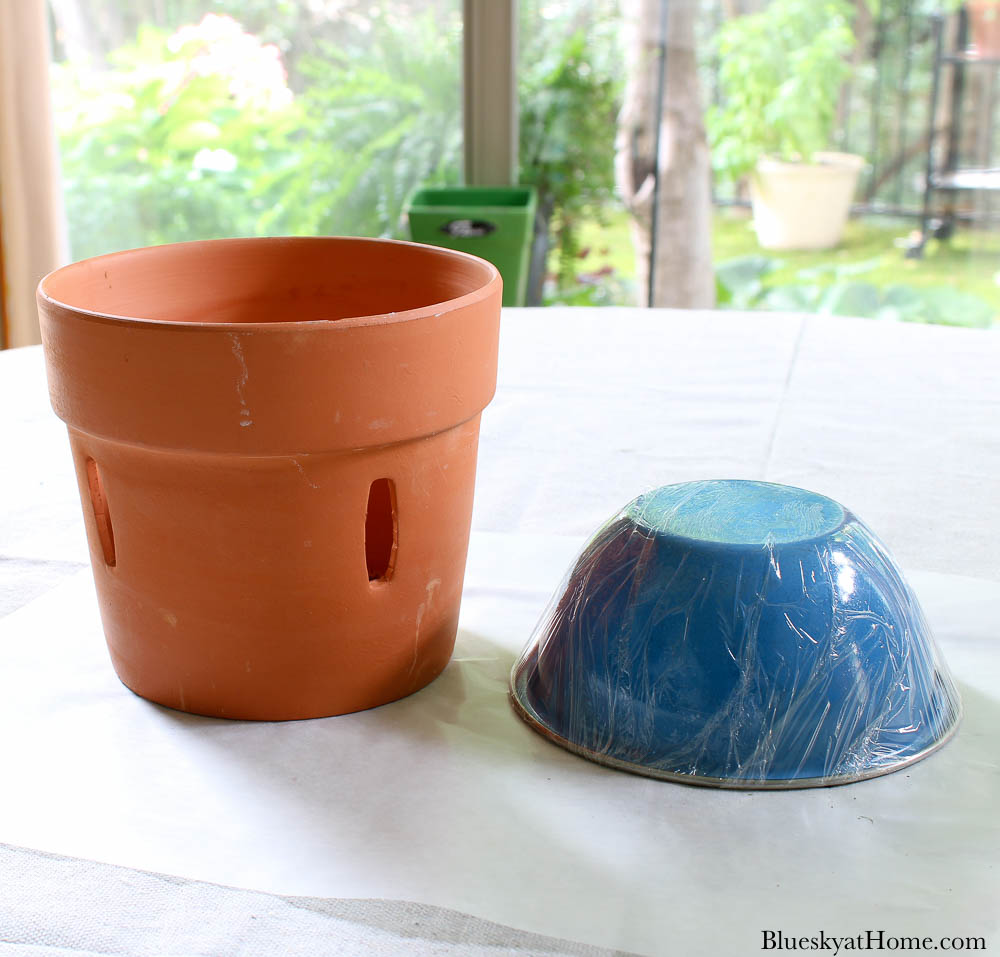
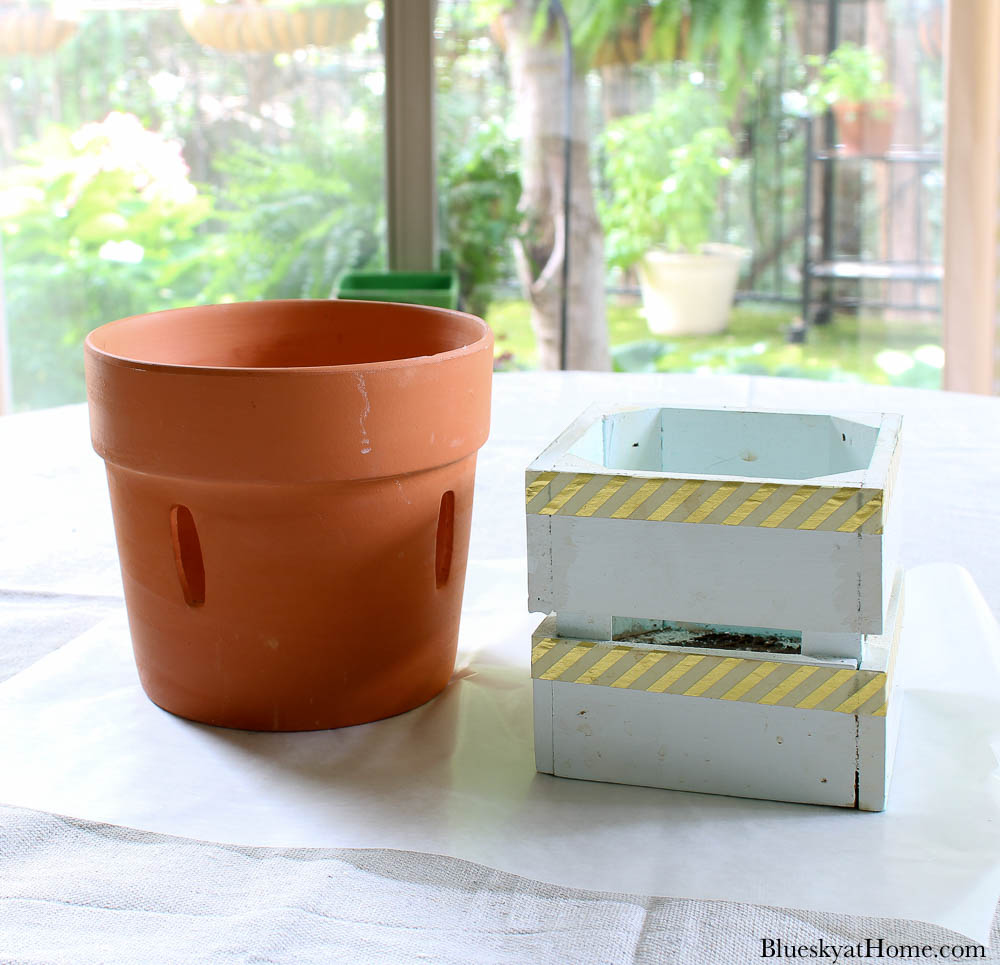
You will also need containers to hold your balloons.
BLOWING UP THE BALLOONS
I was ready to start my fabric bowl project when I hit a snag. I literally cannot blow up a balloon. I had forgotten about this flaw in my character. I even tried a pump that we had in the garage. Nada. Floppy balloon.
I thought I was going to have to go to the party store and get them to blow up the balloons. Fortunately, my housekeeper, Betty, arrived. She is always interested in DIY projects that I’m working on.
When I told her what I was working on and my balloon dilemma, she asked if she could try to blow them up. In three seconds, she had three balloons blown up to the sizes I needed! I was back in business.
MAKING THE FABRIC BOWLS
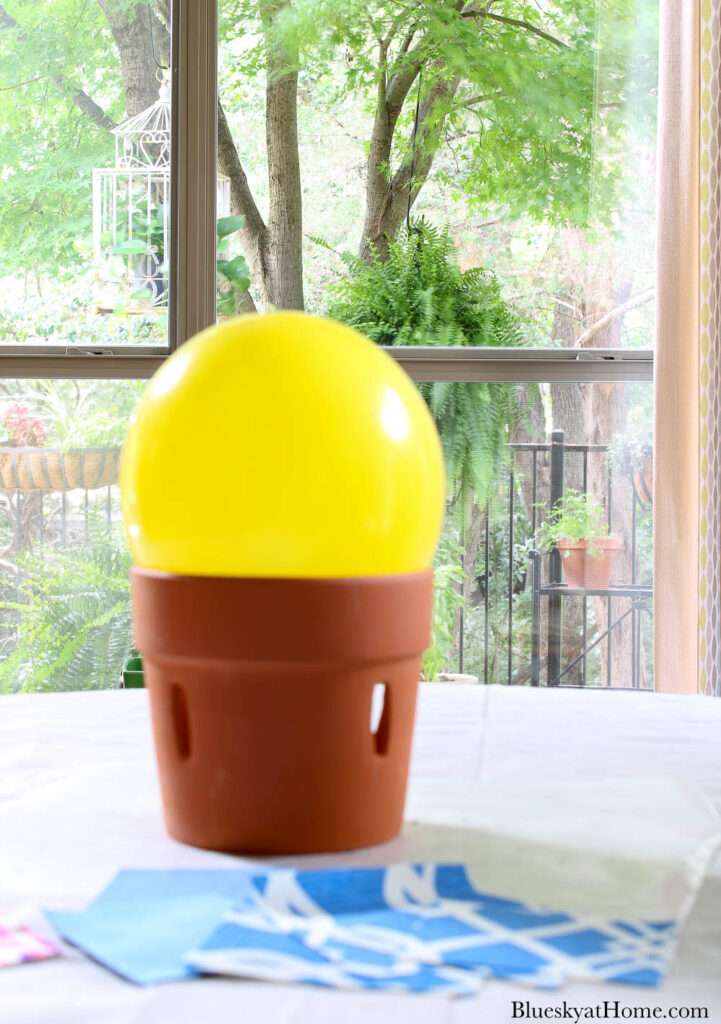
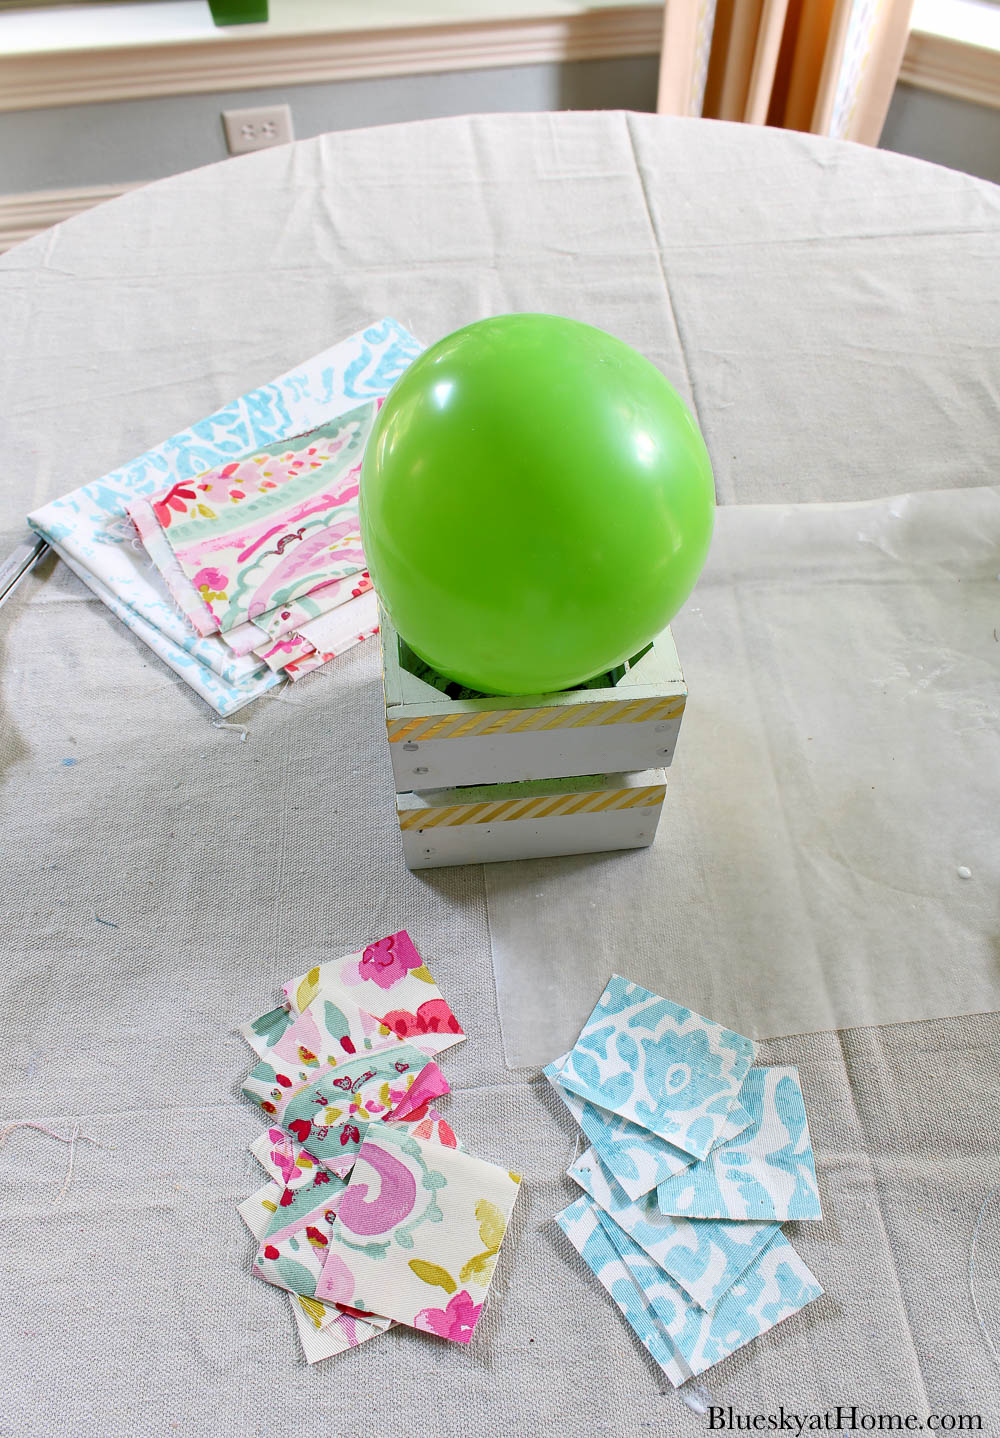
Step 1 ~ Blow up your balloon to the size you want. This one was about 7 inches in diameter. With the tied side down, place on a container to hold it.
Step 2 ~ After choosing your two fabrics, cut pieces into squares or rectangles. about 2 ~ 4 inches. I cut about 6 of each fabric to start, but you will need more as you go.
NOTE: I thought I would use three fabrics for each fabric bowl, but I only needed two.
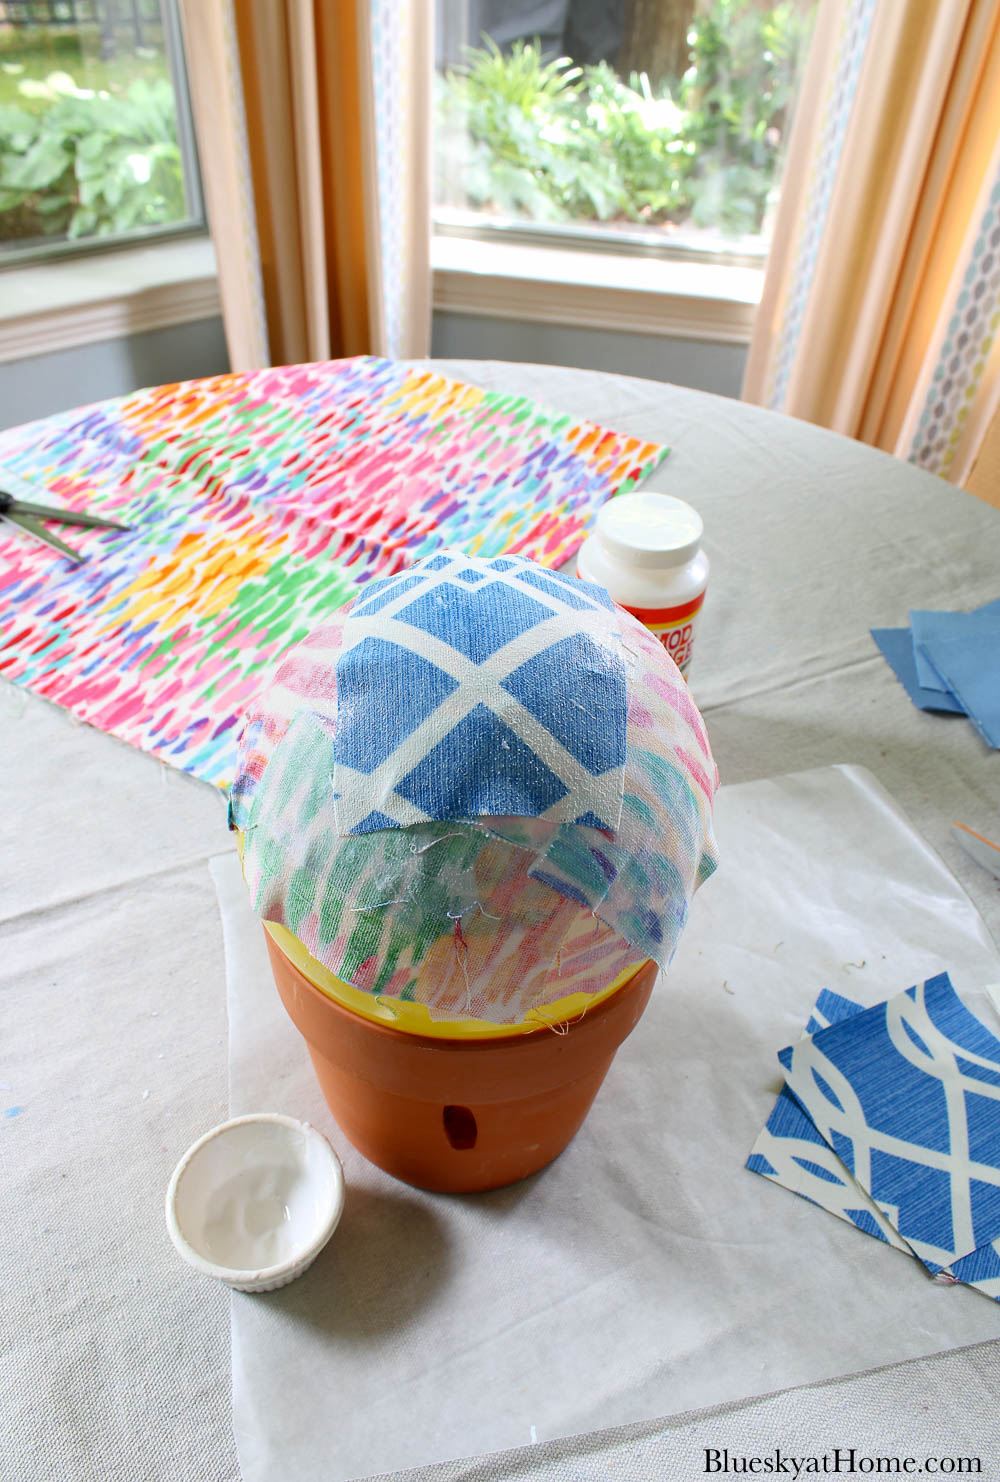
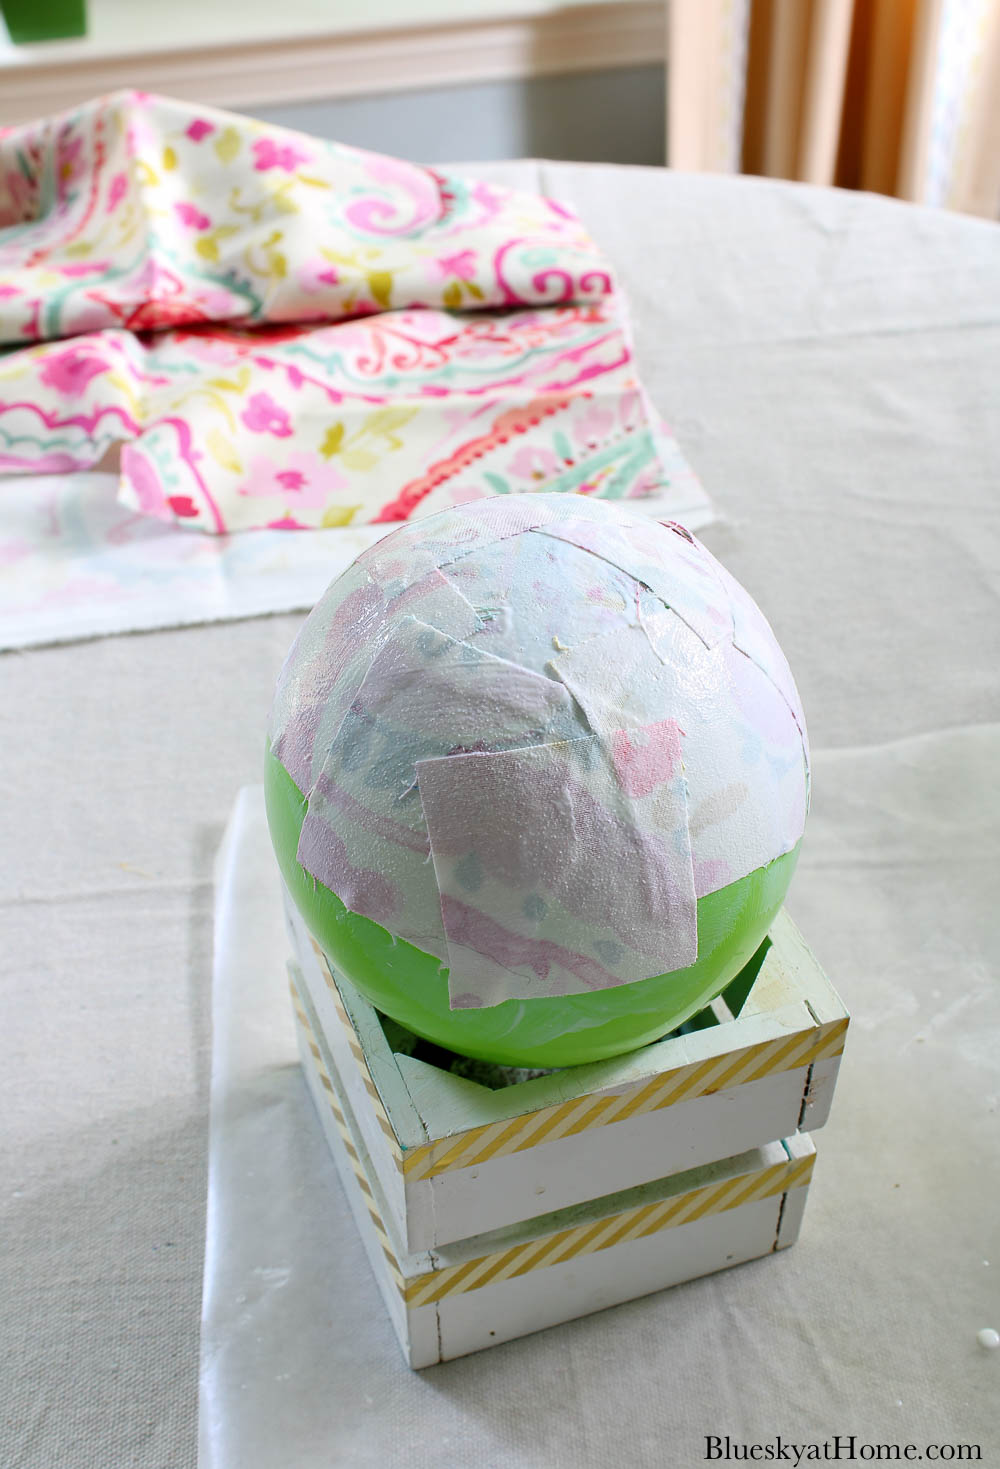
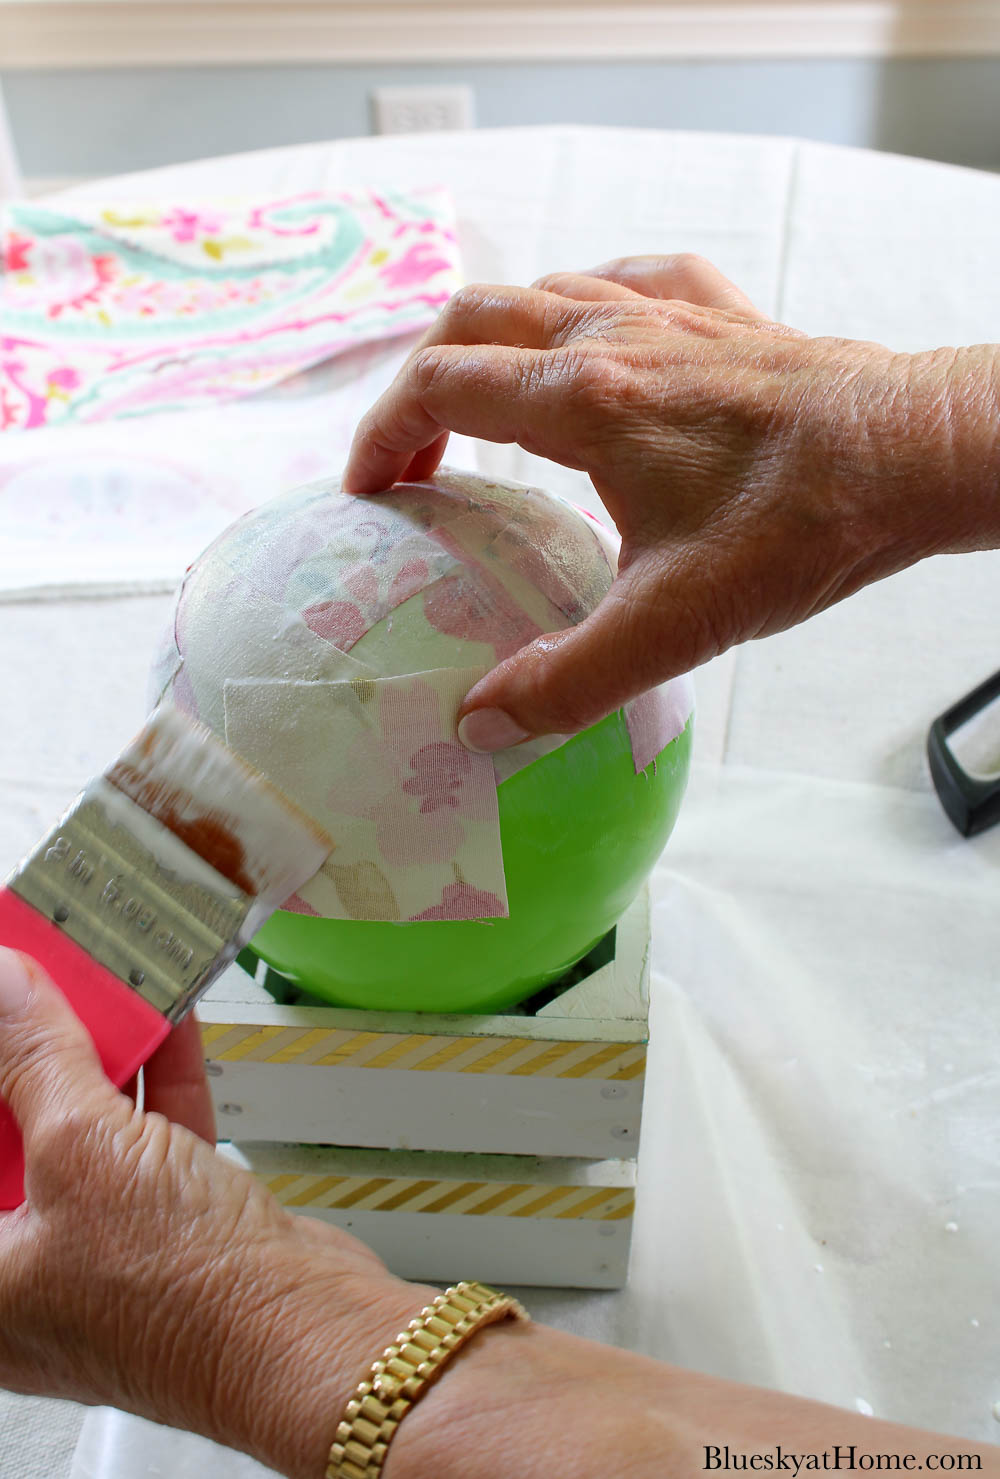
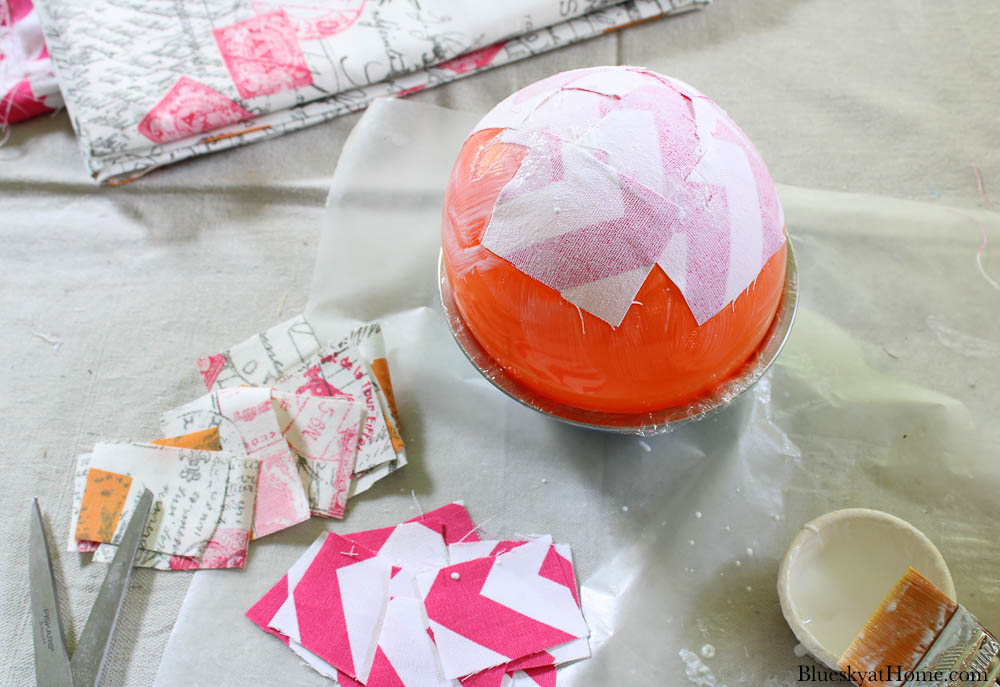
Step 3 ~ Using your Mod Podge brush, apply a very generous amount on the top of the balloon. Choose the fabric that you want to show on the INSIDE of the bowl. Place a piece of fabric with the RIGHT side facing DOWN on the balloon. Press down on the fabric and apply more Mod Podge on top, smooth the edges down to the balloon.
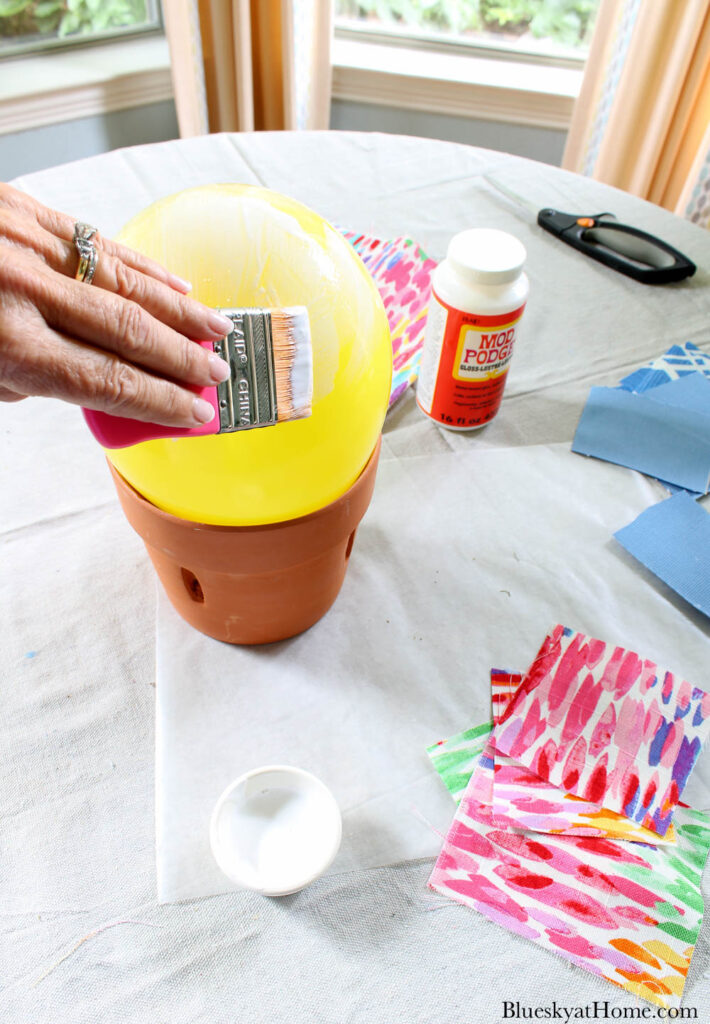
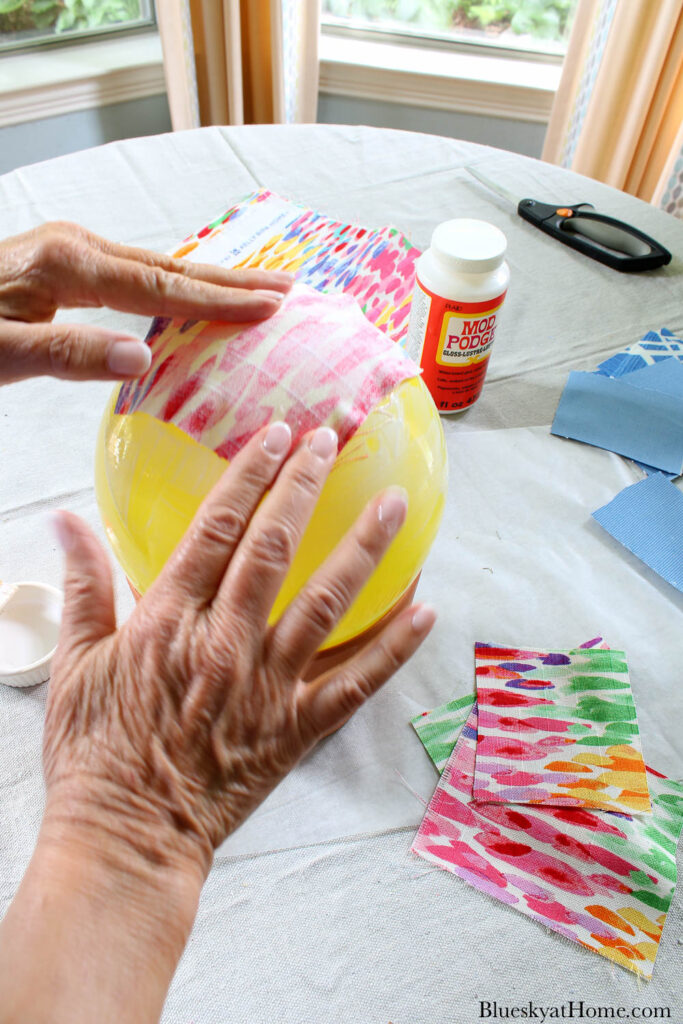
Step 4 ~ Continue layering the pieces of fabric on the balloon, making sure to overlap them. Repeat adding more Mod Podge to the balloon and to the fabric until you have the sides covered as much as you want.
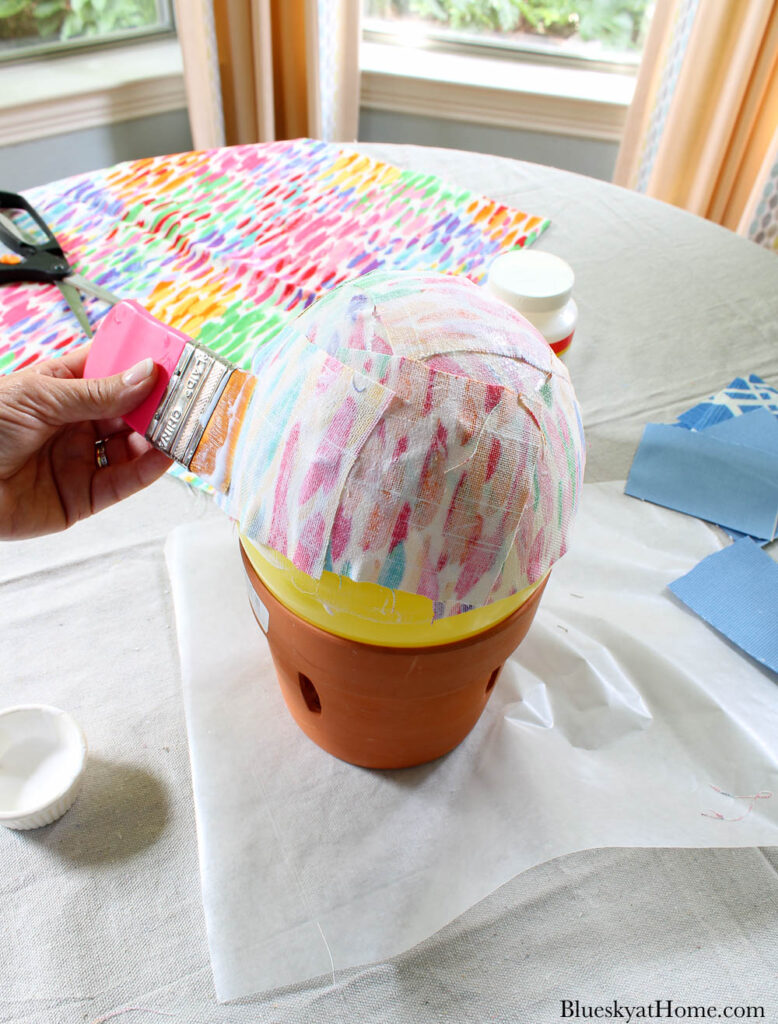
Step 5 ~ When you have covered as much of the balloon as you want, add another layer of Mod Podge all over the fabric. Later you will trim the fabric around the sides for an even bowl.
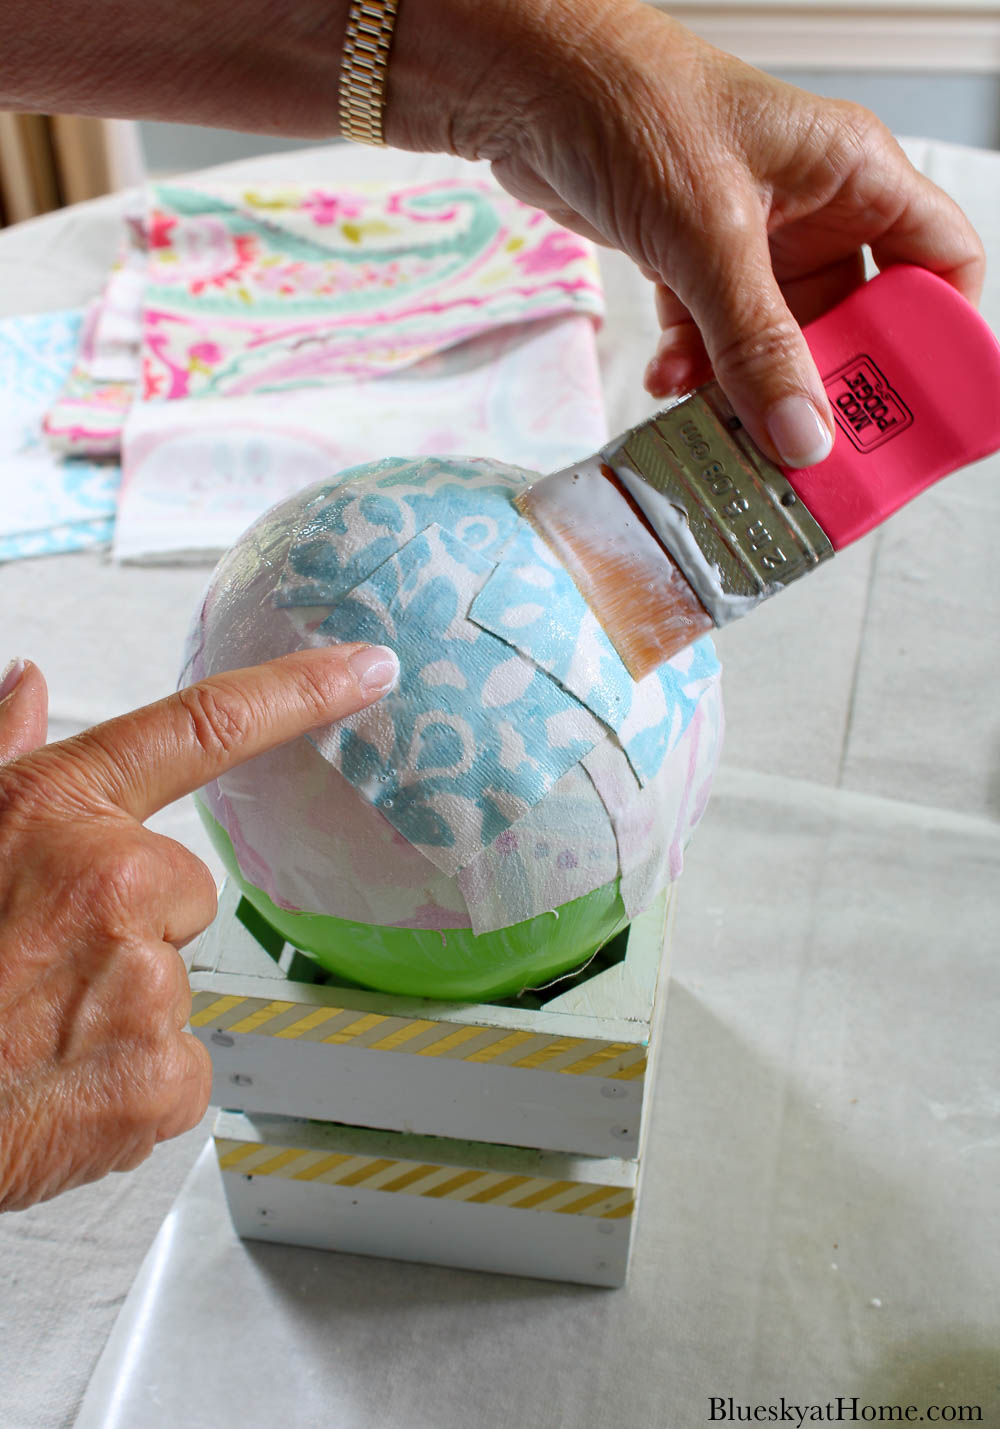
Step 6 ~ Now you are ready to apply the fabric that will go on the OUTSIDE of the bowl. Apply it in the same way as the first fabric. But this time the fabric will go with the RIGHT side UP.
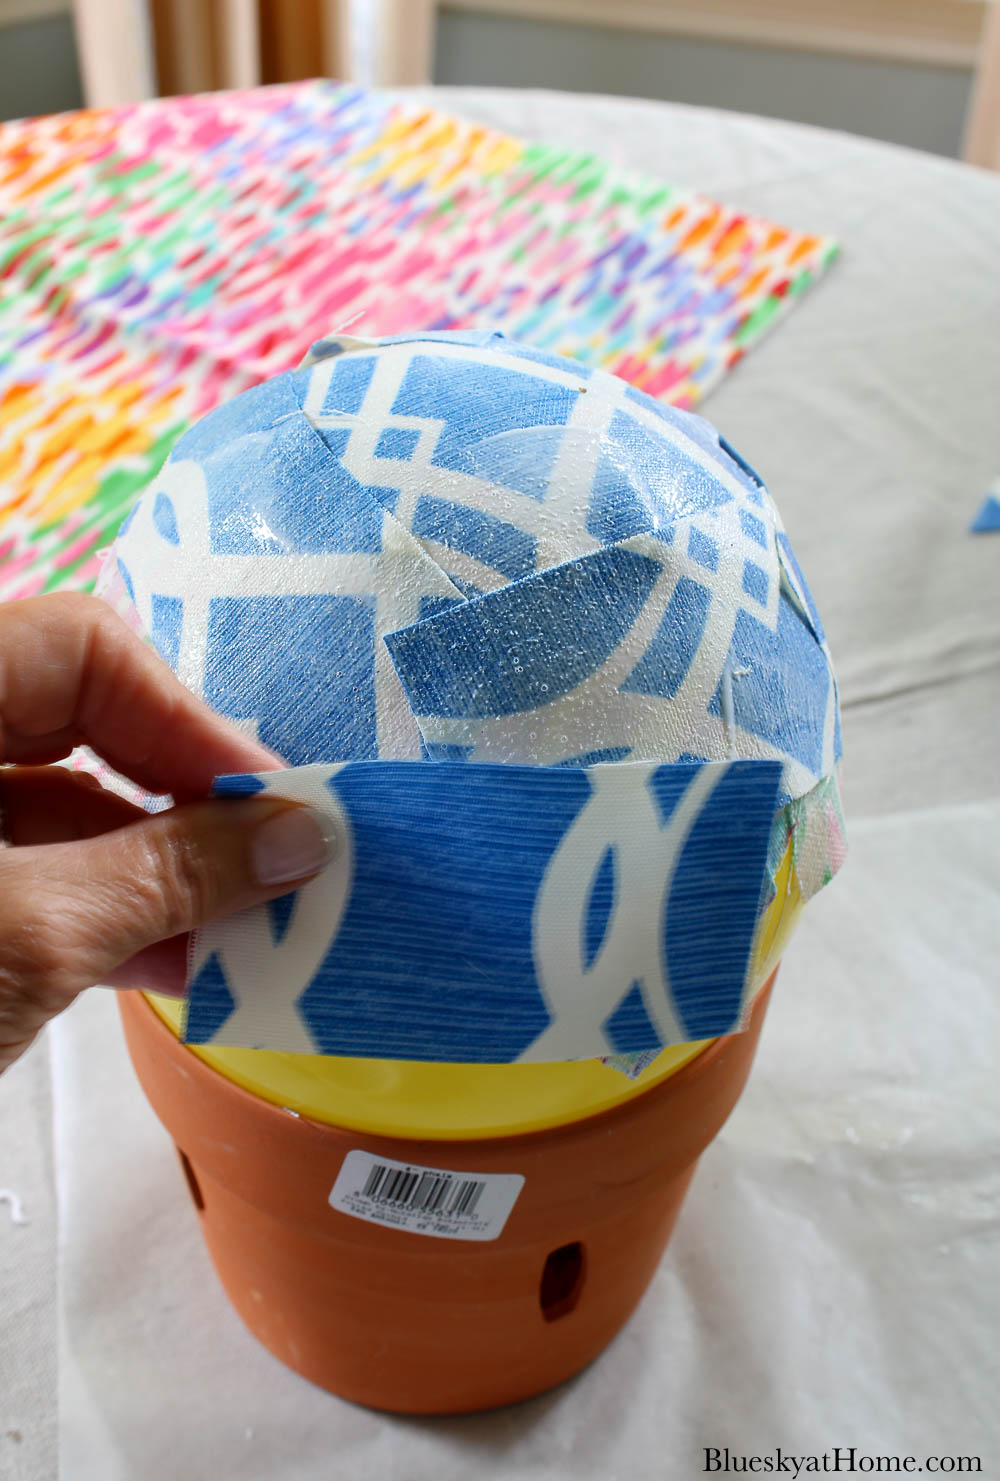
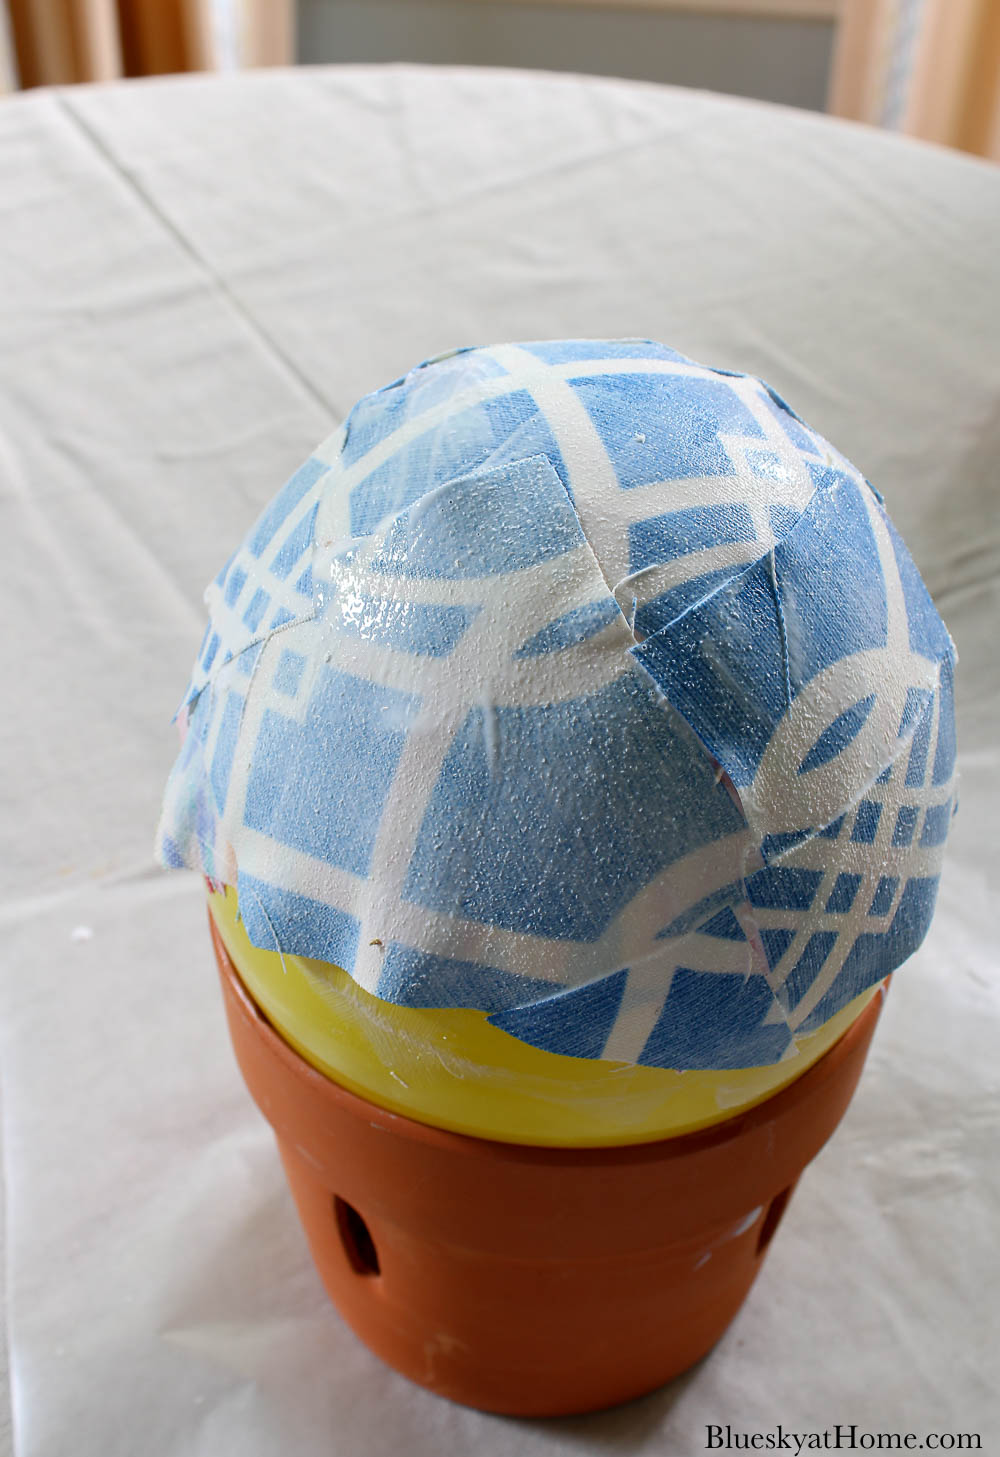
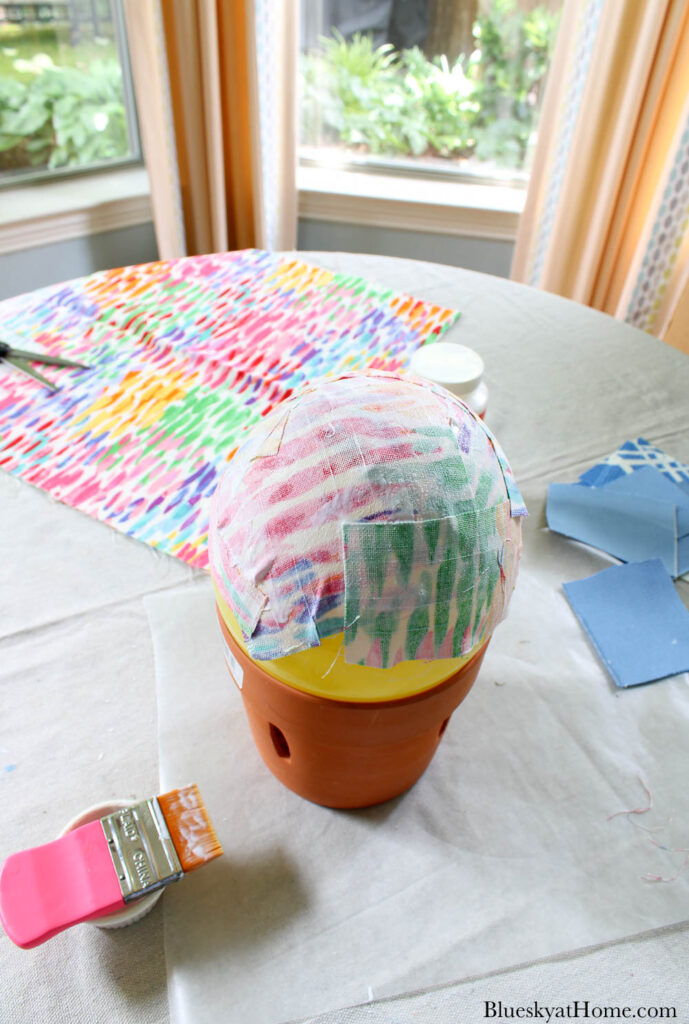
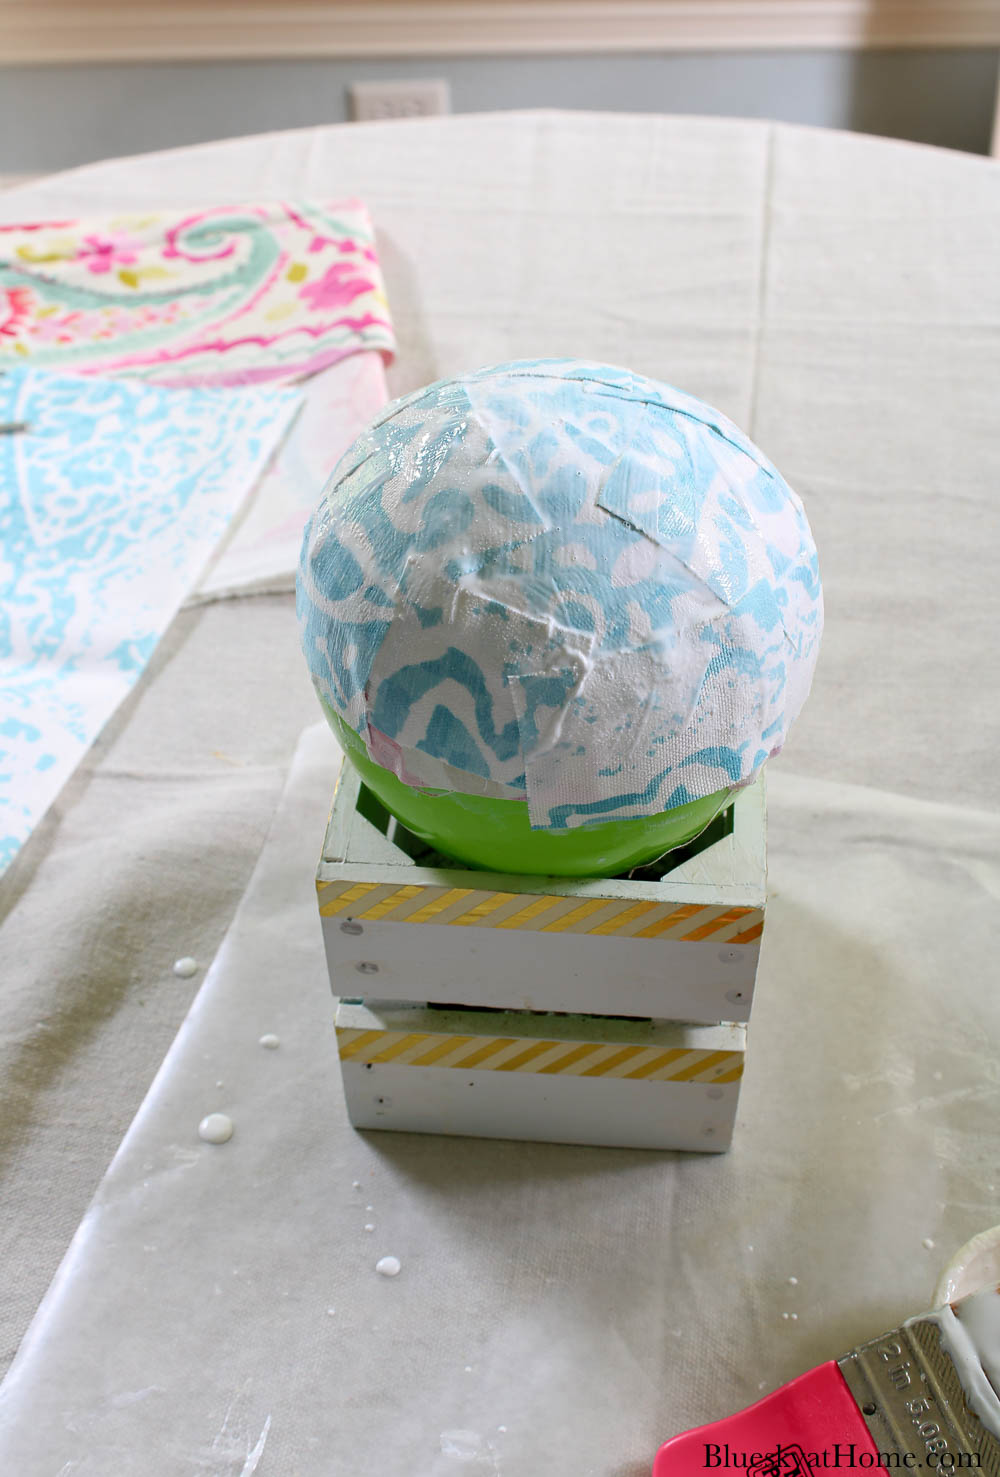
Step 7 ~ Again, when you are finished, give the fabric another good coat of Mod Podge.
Step 8 ~ Now set the container with the balloon aside to dry.
For more fabric bowls, repeat the exact same process.
The next two fabric bowls were smaller, about 5 inches in diameter.
Decoupaging the three fabric bowls took me about 45 minutes.
Once you are done with applying the fabric, set all your bowls aside to dry. This could take several hours to overnight.
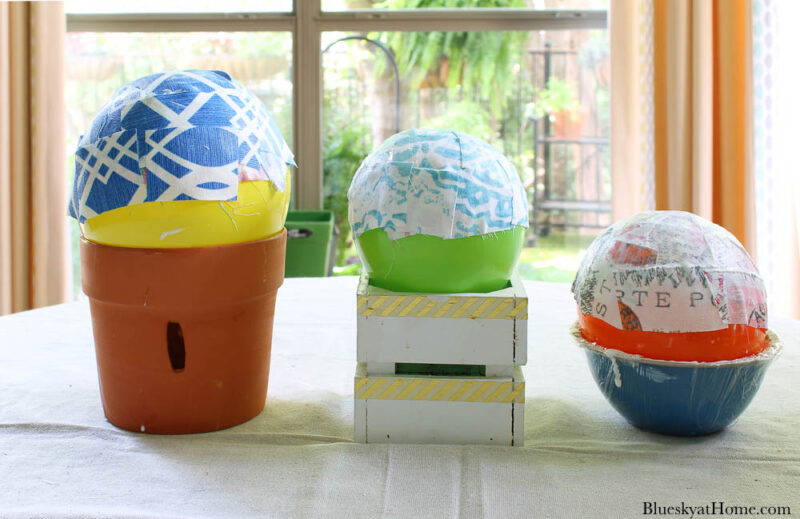
I set all three of my bowls in our south~facing breakfast room window, hoping they would dry faster. Since I had lost all morning, I was behind on my project. I finished the bowls at 1:00 and let them dry until about 6:30.
FINISHING THE FABRIC BOWLS
Now for the moment of truth. Since I had to finish the project, I started popping balloons after about 5 hours of drying time.
Step 9 ~ This part was easy. Just take a straight pin and pop the balloons. They will deflate and pull away from the sides of the fabric bowl. Discard the balloons. Remove any pieces of glue sticking to the fabric.
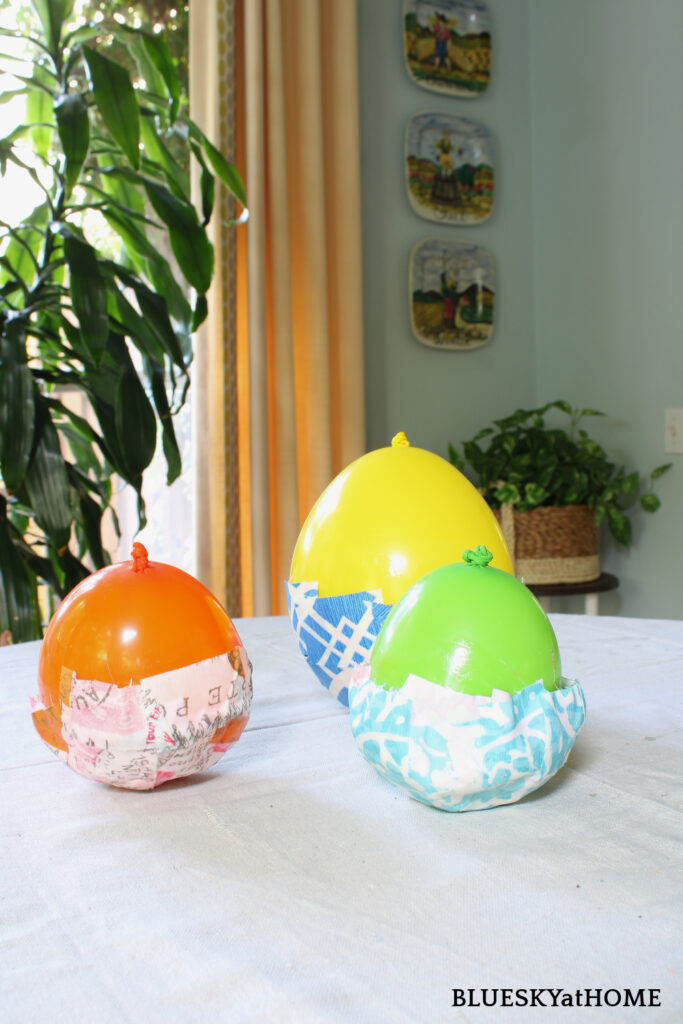
On the two smaller bowls, in a few places, I did reshape the fabric a bit. Then I let the bowls sit for another hour to further dry.
Step 10 ~ Using sharp scissors, trim the fabric to the size you want.
TIPS FOR MAKING THE FABRIC BOWLS
Here’s what I learned from doing this project.
- Plan ahead and make sure you can blow up balloons.
- Only blow up the balloons as big as you want your bowls.
- Keep your fabric pieces smaller for easier application.
- Move the container around, not the balloon.
- Keep a damp paper towel handy for cleaning off your fingers.
- Allow plenty of time for the bowls to dry.
- If necessary, cover any balloon holders with plastic wrap to keep Mod Podge off it.
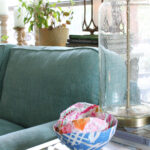
USING THE FABRIC BOWLS
Remember, these bowls are not food safe. They are strictly for decorative display or holding items like jewelry, paper clips, shells, or other small things. Make a small bowl for your guest room or guest bath.
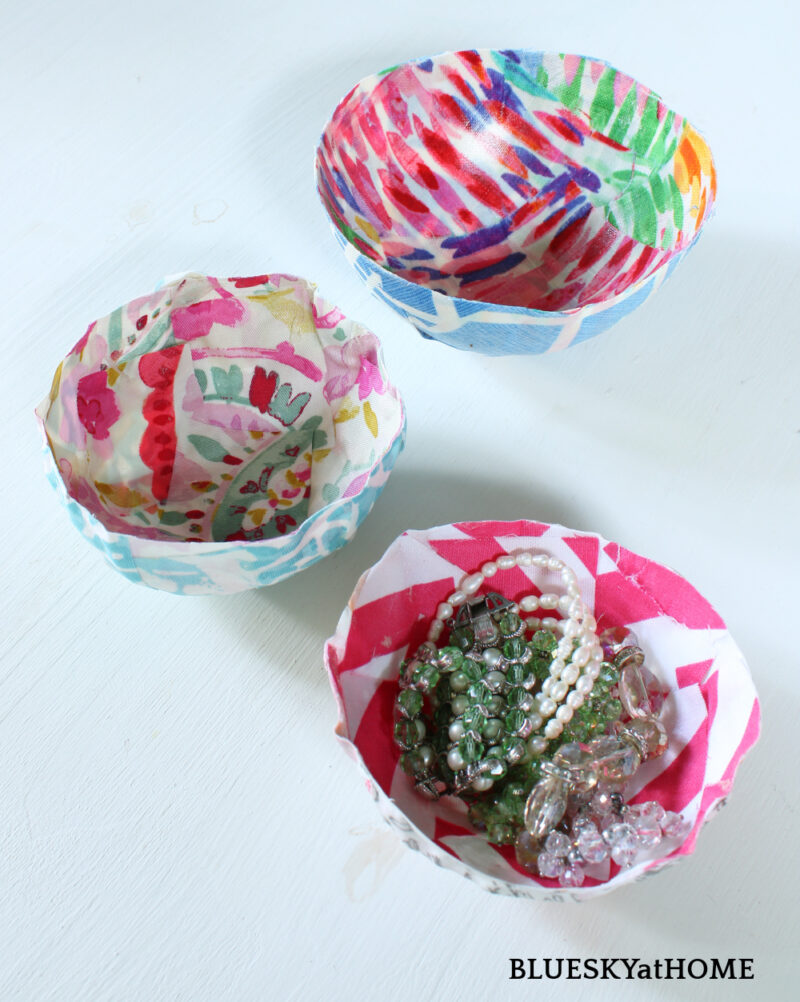
You can even stack them for a pretty look. Think of them as decorative arts.
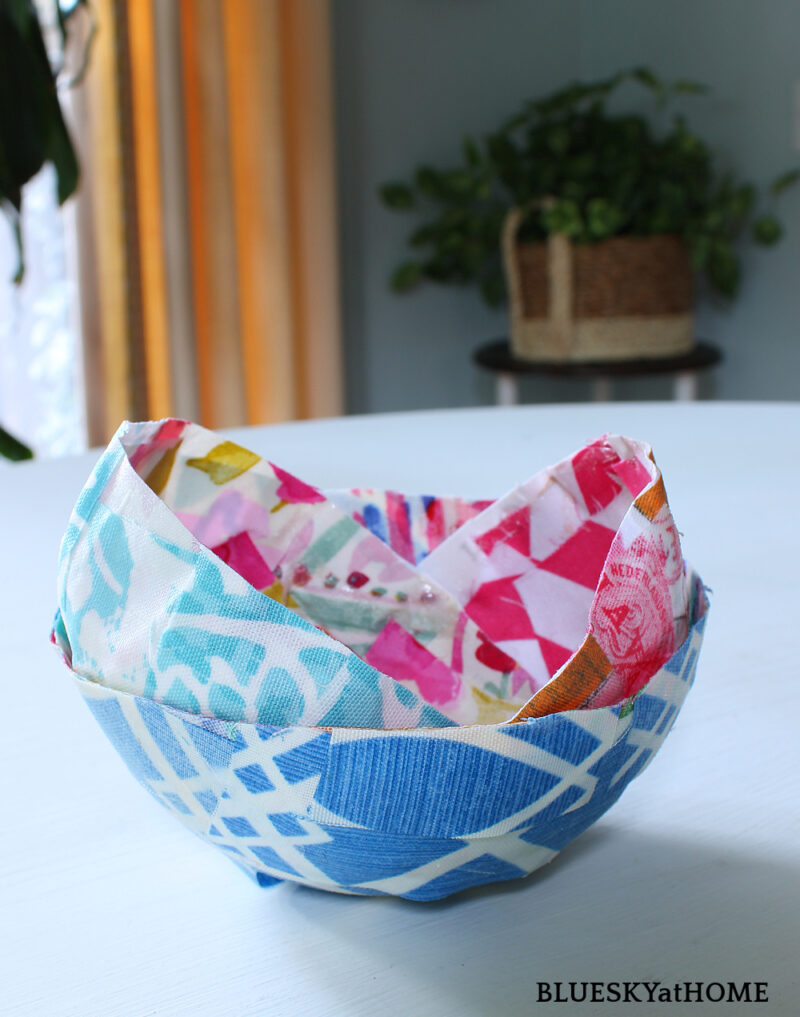
Set them on a table or bookshelf.
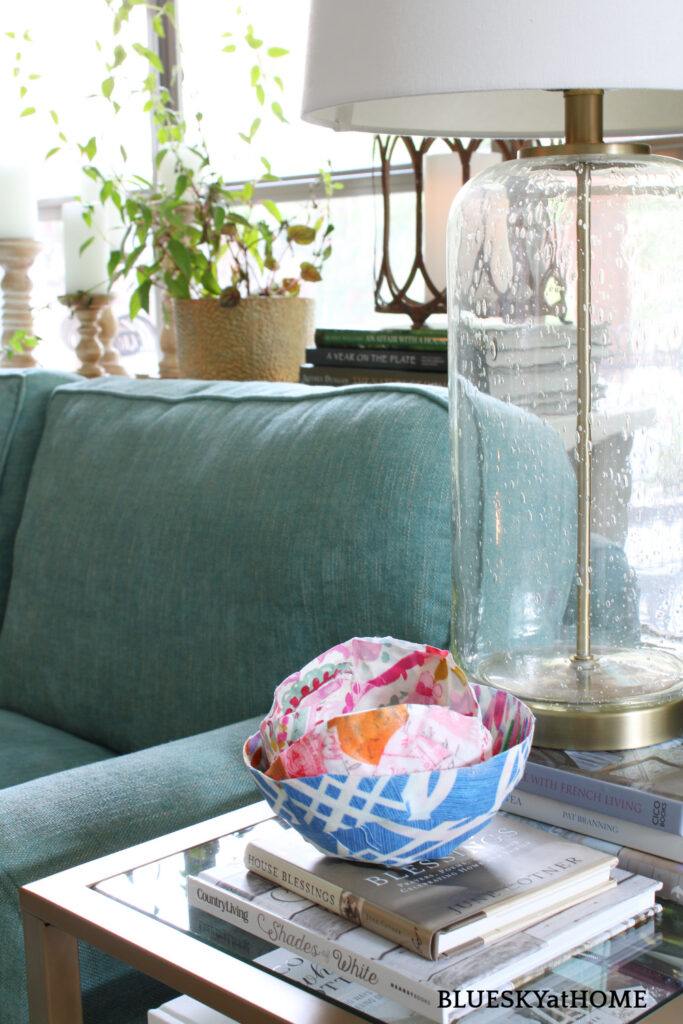
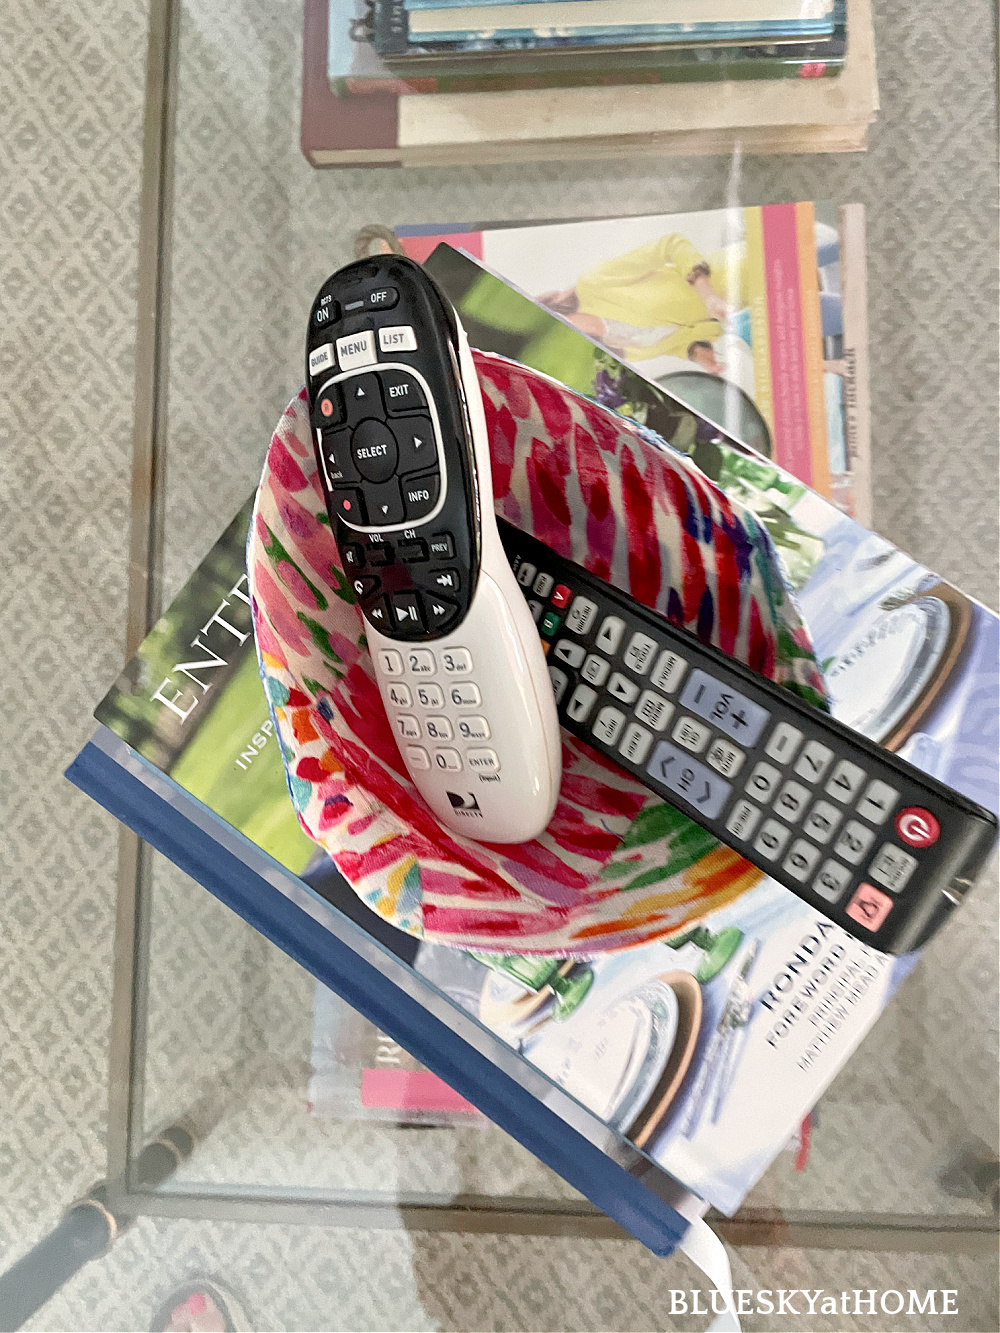
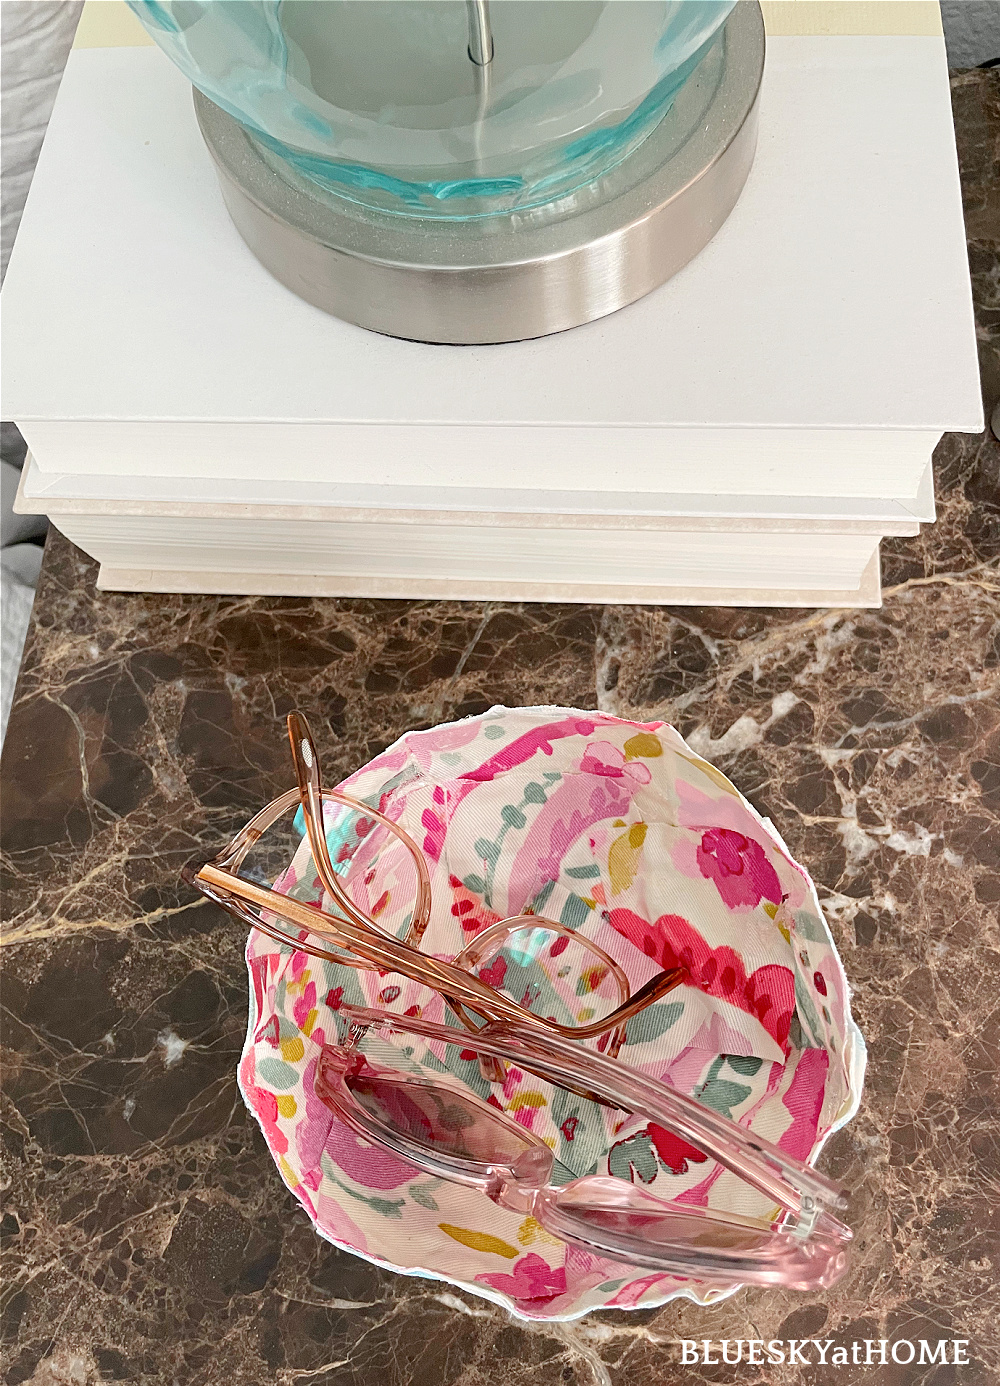
Use the fabric bowls to hold things like glasses on your nightstand or remotes in the living room.
SHOP THIS PROJECT


Hope you had fun watching how to make fabric bowls. It was much easier than I thought it would be. I would love to make some really small bowls.
PIN IT so you have the project at your fingertips.

Dollar Tree Mirror with Jenga Blocks
Patriotic Party Table Free Printables
Tin Wall Pocket
Bumblebee Wall Decor DIY
Shells on the Beach Canvas
How to Make a Fabric Bowl with Mod Podge
How to Make a Paper Cone Flower Basket
Faded to Fabulous Garden Sign Refresh
Crochet Pendant Light
Upcycled Magazine Holder


Please tell me, can any fabric work for the fabric bowls? How many layers are needed? Thanks.
Thanks for asking, Kim. Cotton and cotton blends are your best bet. They have more “body” to them. You want a fabric with a tight weave. I would not use velvets or silks, or anything with a nap. As far as the number of layers, it depends on the look you want. I was using multiple patterns so I wanted more layers for the inner and outer sides of the bowls. How sturdy does the bowl need to be? If you are going to fill (jewelry, marbles) the bowl, I would use more layers. If just decorative, you won’t need as many. Use your judgment. You can always add more layers if need be. Hope that helps and send me more questions.
Dear Carol,
Thank you for your clear and easy instructions. As we speak my bowles from paper en fabric are drying. Hope they will look nice when they are dry.
Kind regards from Holland!
Thank you for your feedback, all the way from Holland! Hope your bowls turned out great.
I love this idea, Carol! Wouldn’t it be cute to make bowls with Christmas fabric and then put some candy in the bowl? I’m thinking that would be a fun neighbor gift. 🙂
Kim, you can do this project. It’s really easy ~ just a little messy.
I love the colors you chose for your bowls ~ so fresh and fun! Although Mod Podge is messy, I think making bowls are worth it since they have so many uses. I’d use them in my craft room for small supplies.
Allyson, thank you for your kind words. I was so glad I could use some of my pretty fabric scraps.
I have this same thought so many times too! My craft room is full of projects I have yet to try out though. But this one I know I can do and you made it looks so easy too. This post will be one of the features this week. Thanks for sharing it here on the link party. #HomeMattersParty
I know, Donna. We see so many wonderful DIY projects and want to make them all. You can definitely do this one!
Thank you for sharing this on Traffic Jam Weekend. It has been chosen as a fave feature for this week’s link party that goes live on Thursday at 5:00 pm CST.
Kimberly, thank you so much for featuring this project at Traffic Jam Weekend. I appreciate it.
These are so cute. Think it would be a great bigger kids’ project, too! I love the summery colors you used! I, too, have a hard time with some balloons. I stretch them out first by putting the open end over my water faucet and filling the balloon with water. Then I drain the water out; prestretching the balloon helps me blow it up a lot easier! I refuse to let the balloons win! I think my favorite balloon craft has been making Easter egg vignettes by sugarstarching crochet cotton that has been wound all witchy-ways on balloons, then making a vignette inside the cutout, covering the cut edges with lace or rick rack. Also cute for Christmas ornaments.
Kathy A, I guess I just don’t have any breath to blow. Yes, I’ve tried stretching balloons, but never filling them up with water. Glad you liked the project. It would be fun for kids.
I love that idea! Those are so pretty, and I have never thought to do that.
Glad you liked them, Pam.
I’ll be featuring this post at Thursday Favorite Things today. Congrats! 🙂
Thank you so much for the feature, Pam.
Love the bowls you made, Carol! They are so pretty! Your tutorial is great! Thanks!
Thank you, Mary-Ann. I love this project. I want to make some little bowls.
Hi Carol, These turned out really cute and there are so many ways to use them! Happy Summer, Cecilia @My Thrift Store Addiction
Hi, Carol. Really cute project. TIP: when working on round surfaces, if you cut your pieces in TRIANGLES…you expose a bias surface and the pieces will smoothly curve over you shapes without bunching or rippling. Fun part of triangles is you can get very interesting patterns! I’m modge-podging a project right now and will be using this technique on all sorts of shapes. Craft On! Sandi
I can’t wait to try this Carol! This is one of those ideas I have had on my to do list for quite a while 😂 just like you said! I can’t whistle but I think I can blow up a balloon…question, doesn’t the balloon stick to the Mod Podge? Love the colors and fabrics you used, so cute!
Your fabric bowls are quite pretty, Carole! This is such a fun and cool way to make decorative bowls for just about any occasion! I love using mod podge with lots of different items including decorative fillers, too! Betty saved the day! In a pinch, you can cover a bowl with plastic wrap and go from there when you can’t blow up a balloon.
Okay…. these are super cute! I love them and will definitely be giving them a try. Pinning. Also, I love your fabric choices, visually they look so pretty all stacked up. And finally, in all the years I’ve done Mod Podge, how in the world did I not realize that they had brushes????? I went to add the ones posted to my Amazon wish list to purchase later and a ton of others popped up. Well, there goes my craft budget for the month! lol
This is a perfect project for those of us who love to decorate for a holiday. Very easy to follow tutorial Carol, thank you!
These are beautiful Carol and so well executed! I wouldn’t even think to double layer the fabric so you see pretty fabric on both sides. Thank goodness for Betty! I couldn’t blow up a balloon either if my life depended on it lol. I may have to rope Hubs into it so I can try this too.