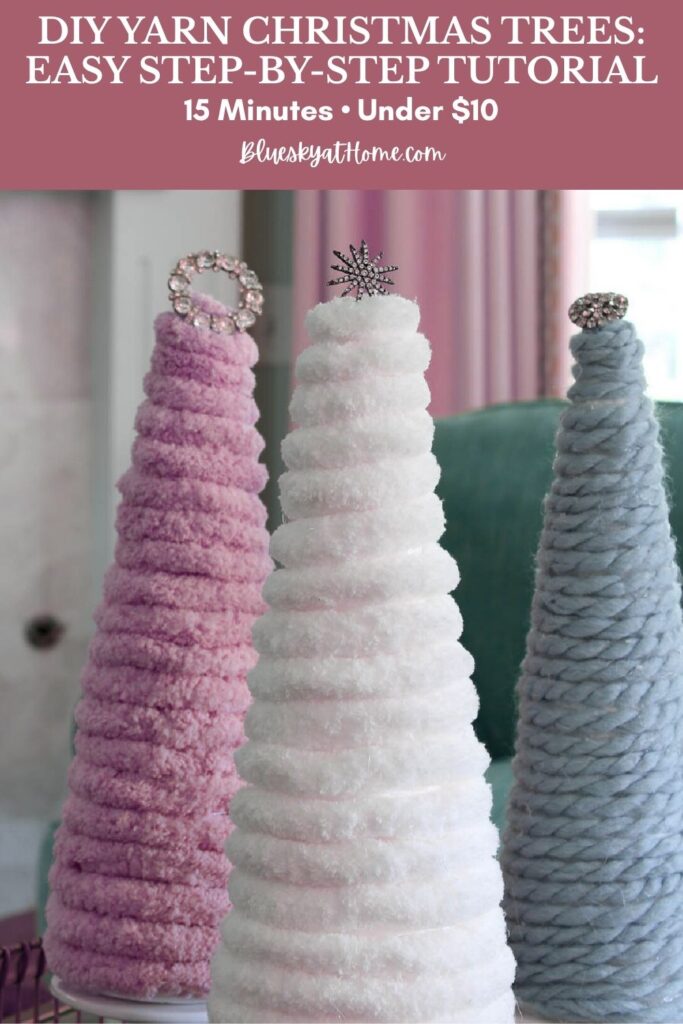
DIY Yarn Christmas Trees: Easy Step-by-Step Tutorial
Looking for an easy Christmas craft that delivers a big impact? These DIY yarn Christmas trees are about to become your new favorite holiday decoration.
Whether you’re a seasoned crafter or just getting started, this yarn Christmas tree tutorial is perfect for you. In no time (and with supplies you probably already have), you can create stunning holiday decor that looks expensive but costs just a few dollars.
The best part? These homemade yarn Christmas trees are:
- Quick to make – Perfect for last-minute decorating or crafting with kids
- Readily available supplies – get them at your craft store or online
- Budget-friendly – Most supplies cost under $10
- Fully customizable – Match any color scheme from traditional red and green, pastels, or metallics.
- Reusable – Store flat and bring them out year after year
Ready to create your own DIY Christmas tree decorations? Let’s get started with this simple step-by-step guide.

The Idea for These DIY Yarn Christmas Trees
Although I’ve seen yarn Christmas trees before, it was time to try this pretty idea myself. It looked like a fun DIY Christmas decoration.
NOTE: Before you buy your supplies, decide on the size of your Christmas trees and what color(s) you want.
Supplies for DIY Yarn Christmas Trees
This post contains affiliate links to products used to create this project. If you should order any item from this site, I may receive compensation, but you do not pay a penny more. Your purchase is greatly appreciated as it helps support the continued publication of this site.
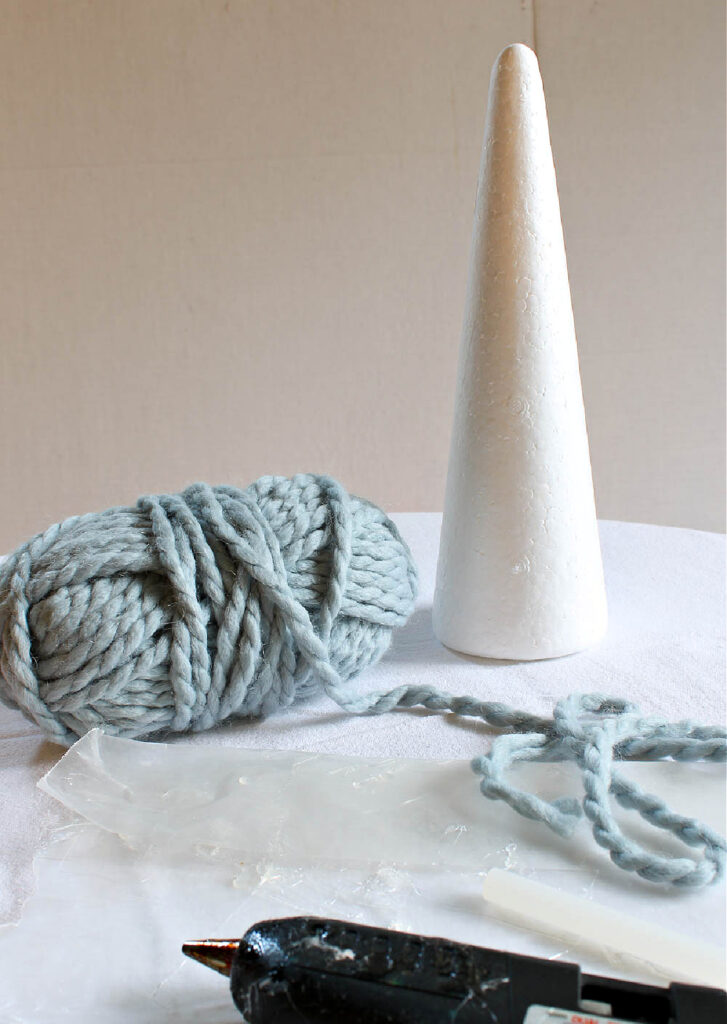
You only need a few supplies for the DIY Christmas trees.
- styrofoam cones in the size of your choice.
- chunky yarn in colors of your choice
- sewing scissors
- glue gun and glue sticks
- embellishments for decorating your Christmas trees (optional)
- finger protectors – Since you are using hot glue, I recommend using them. You don’t want to burn the tips of your fingers.
That’s it. I already had my glue gun, glue sticks and scissors on hand.
NOTE: You can also use cardboard cones or make your own.
The styrofoam cones I used are almost 12 inches tall and come in a package of four. I used three of them for my yarn trees.
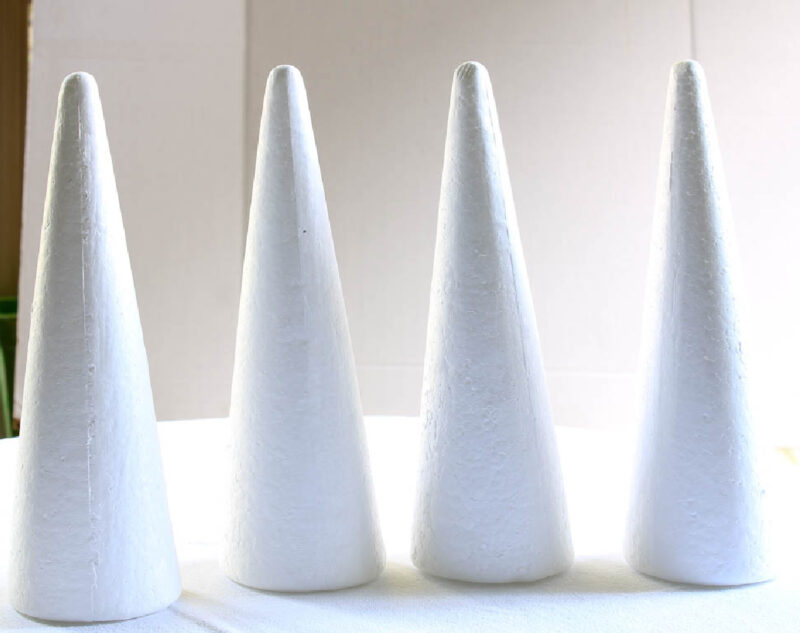
TIP: Styrofoam cones come in white and green. I used the white ones unless you are using green yarn.
For variation, you can use different sizes.
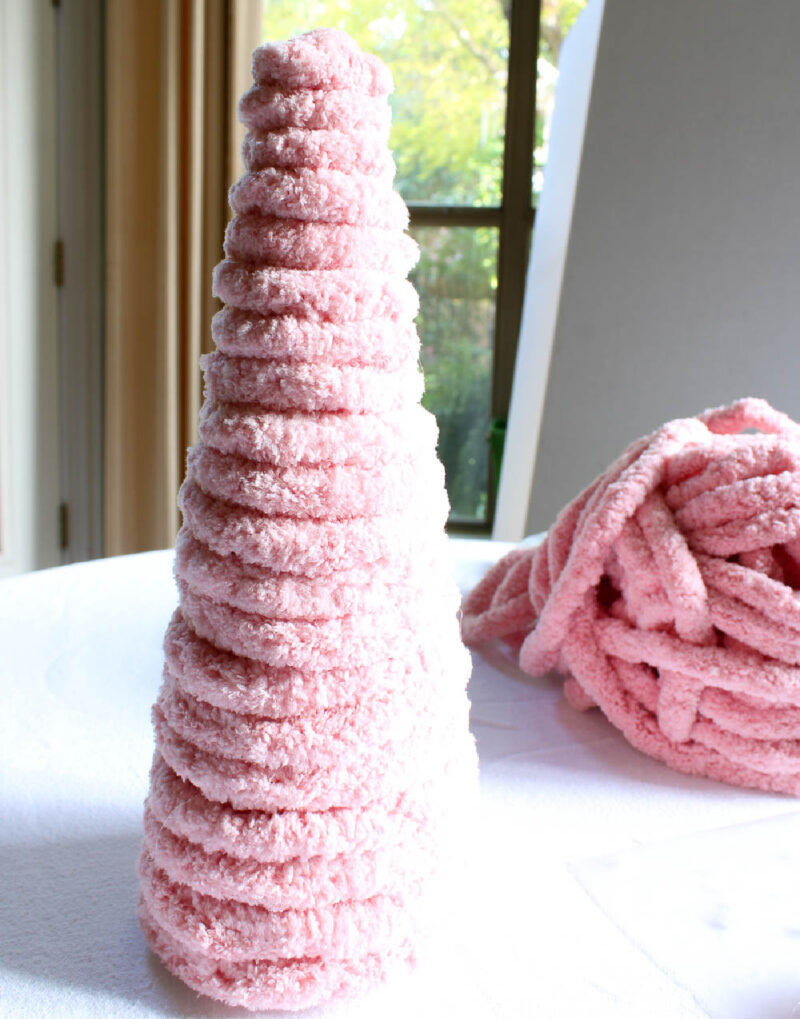
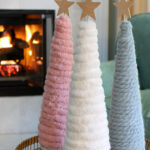
The colors I wanted for my yarn trees are blue, white, and pink. I wanted the yarn to be as thick as possible. I found the pink and white yarn in a nice chunky style. The blue is a little smaller.
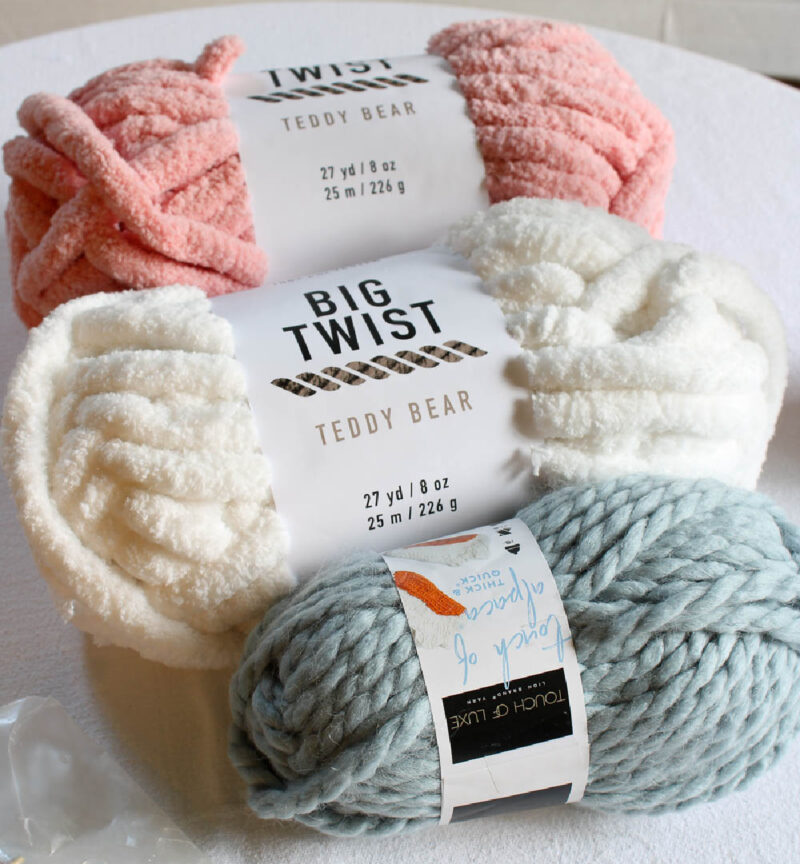
Keep in mind that the larger and chunkier your yarn, the less you will need. Obviously, the size of your styrofoam cone also determines how much yarn you will use. Also, the bigger your styrofoam cone, the chunkier your yarn can be.
Steps for Making Your Yarn Christmas Trees
Before beginning your project, I recommend placing a large piece of wax paper down on your work surface. You want to protect it from the hot glue and glue strings.
NOTE: The steps for all yarn Christmas trees are the same, regardless of the size of the cone or the thickness of the yarn.
Step 1 – Heat your glue gun.
Step 2 – While the glue gun is heating, gather your other supplies.
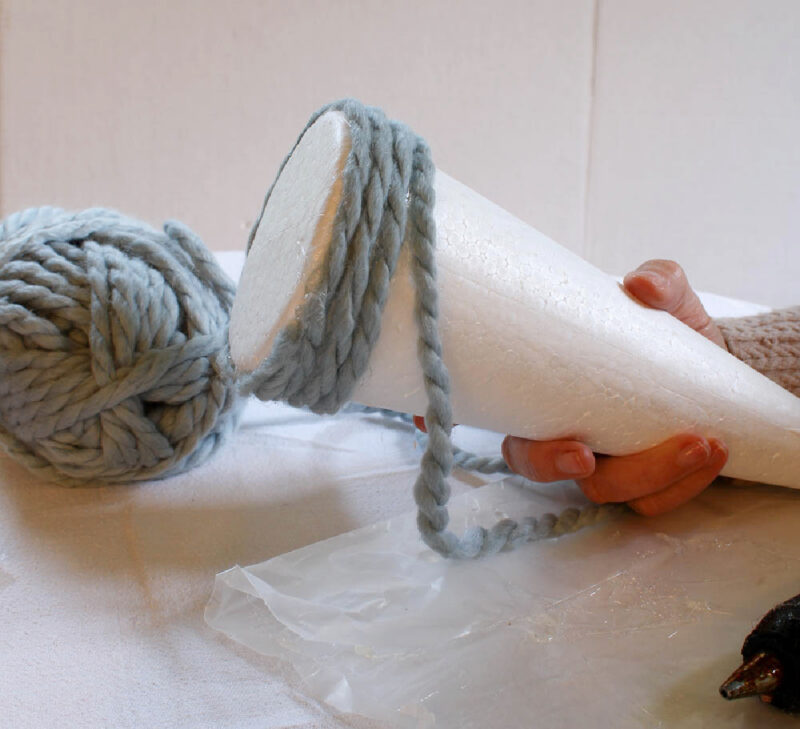
Step 3 – At the base of the styrofoam cones, lay down a line of hot glue several inches long.
Step 4 – Place the yarn on the glue and gently press down. Continue adding more hot glue around the bottom edge of the cone.
Step 5 – When you complete the first “circle” of yarn, add a second row of hot glue around the cone. Place the next row of yarn above the first one on the second row of glue.
TIP: Don’t make your row of glue too thick. You don’t want it to seep through between the rows of yarn.

Step 6 – As you place a row of yarn on the cone, gently “roll” it down to meet the row below. This little action will ensure that your yarn covers the styrofoam and makes your yarn tree look full.
Step 7 – As you get to the top of your tree, wrap the yarn until you can’t wind it anymore. Cut off the yarn with an extra couple of inches. Add a drop of glue to the top of the cone. Press the end of the yarn to the cone.
You’re done! Wasn’t that easy!
This project is so easy. It’s the perfect project to do while you are watching TV. Bring on the Hallmark Channel!
Using your hands, press around the yarn to make sure that every part of the yarn is attached to the cone.
Also, check the tree for glue strings. Either pull or cut them off the yarn.
Embellishing Your DIY Yarn Christmas Trees
This is the fun part of the project. How do you want to decorate the trees?
You can leave the yarn Christmas trees as is. They are pretty with just yarn.
I wanted to add a topper to my trees.
Option 1 – Using Vintagle Jewelry
First, I gathered some of my mom’s vintage rhinestone jewelry. I also had several stones that had fallen off some earrings and two very nice necklaces.
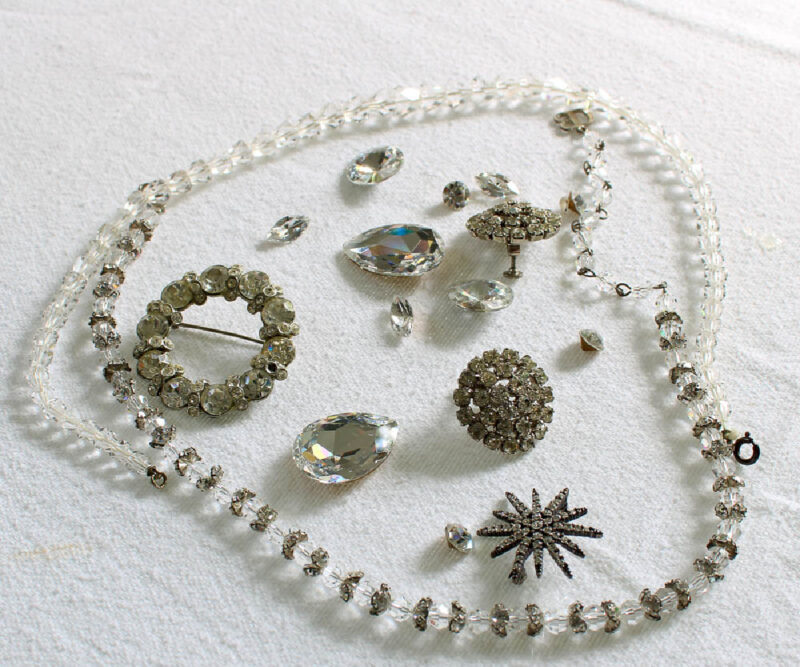
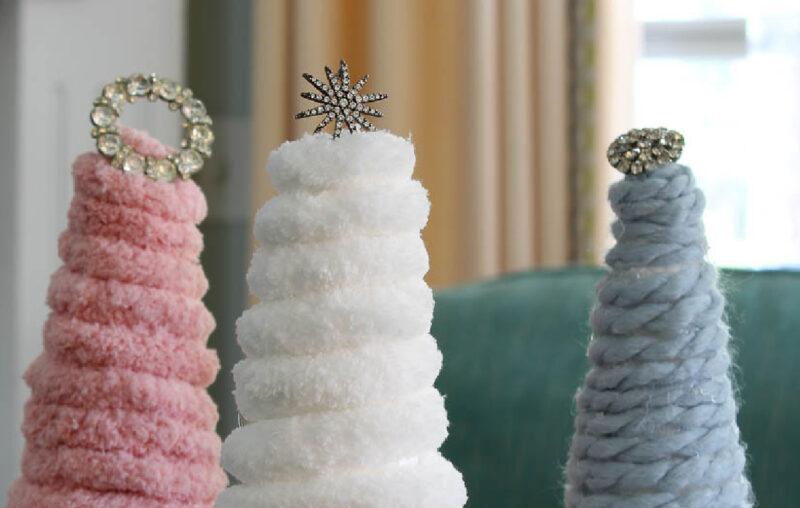
I began by picking three pieces: a circle pin, a star pin, and an earring. Since I did not want to glue the jewelry to the tree, I placed the stick pin into the top of the tree.

This gave the trees a sparkling, dressy look.
Option 2 – Wood Stars
I decided to try a more casual look.
Looking through my stash of wood pieces, I found several 2-inch wood stars.
I used my hot glue gun to glue a toothpick to three stars.
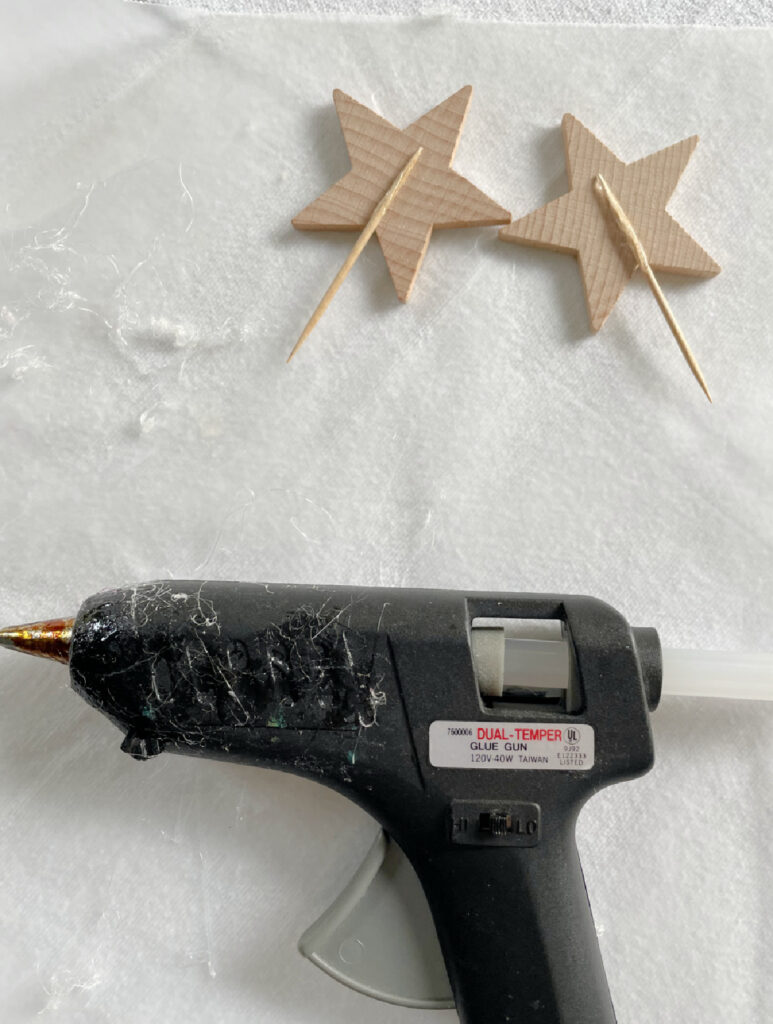
That was a nice look, but I wanted something just a little bit dressier.

Option 3 – Wood Stars with Glitter
Of course, I had glitter on hand – in gold, silver, red, and green. I decided to use silver glitter.
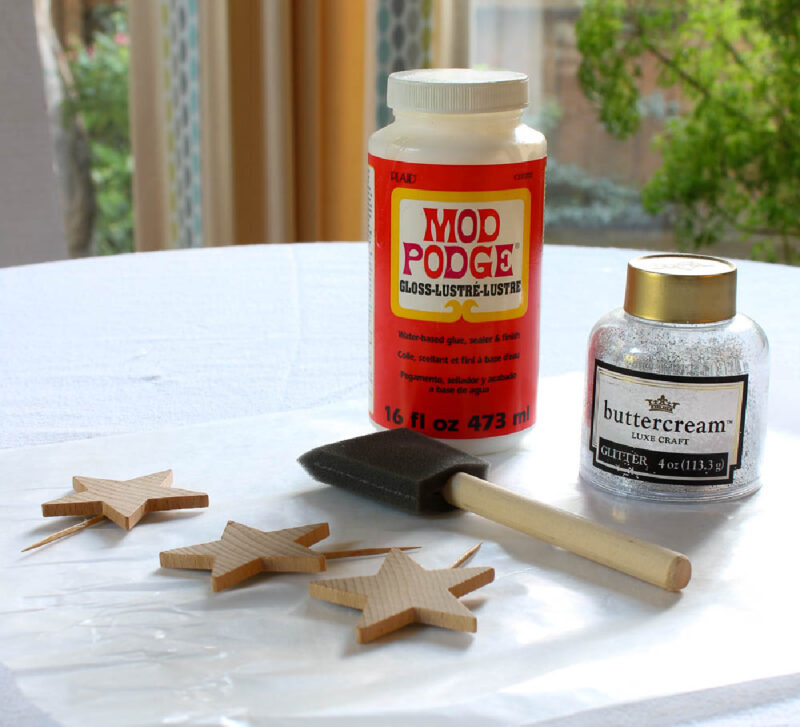
With a foam brush, I applied Mod Podge to the stars. You can use any type of craft glue.
TIP: Reuse your piece of wax paper.
The last step was to sprinkle the glitter on the stars and shake off the excess.
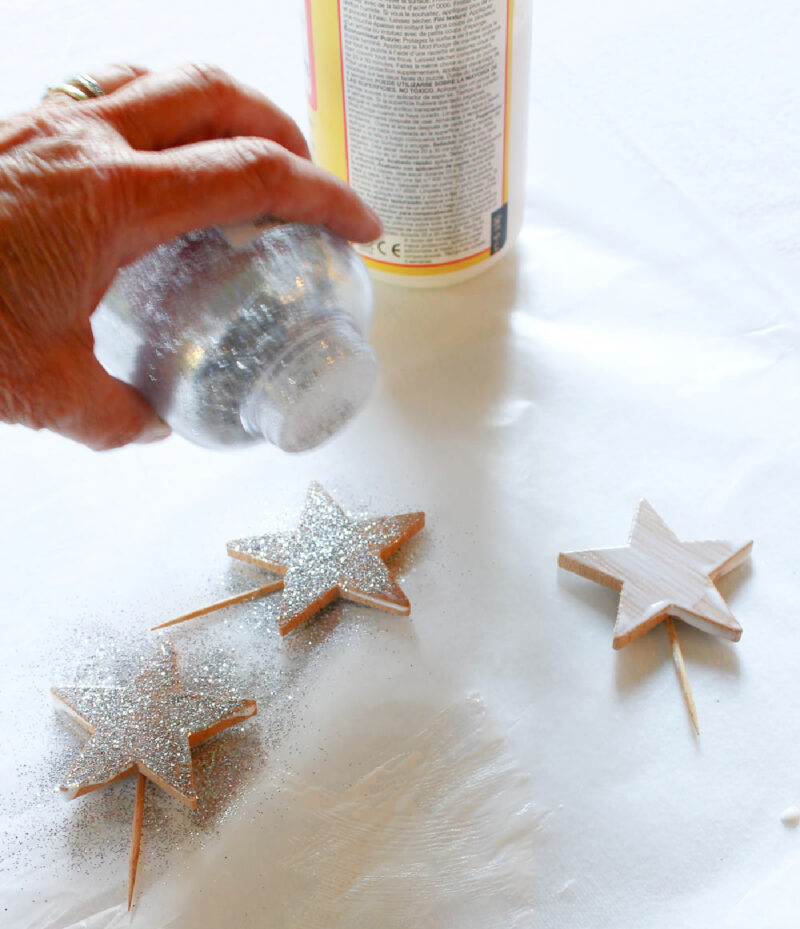
Stick the toothpick star into the top of your tree.
One more addition.
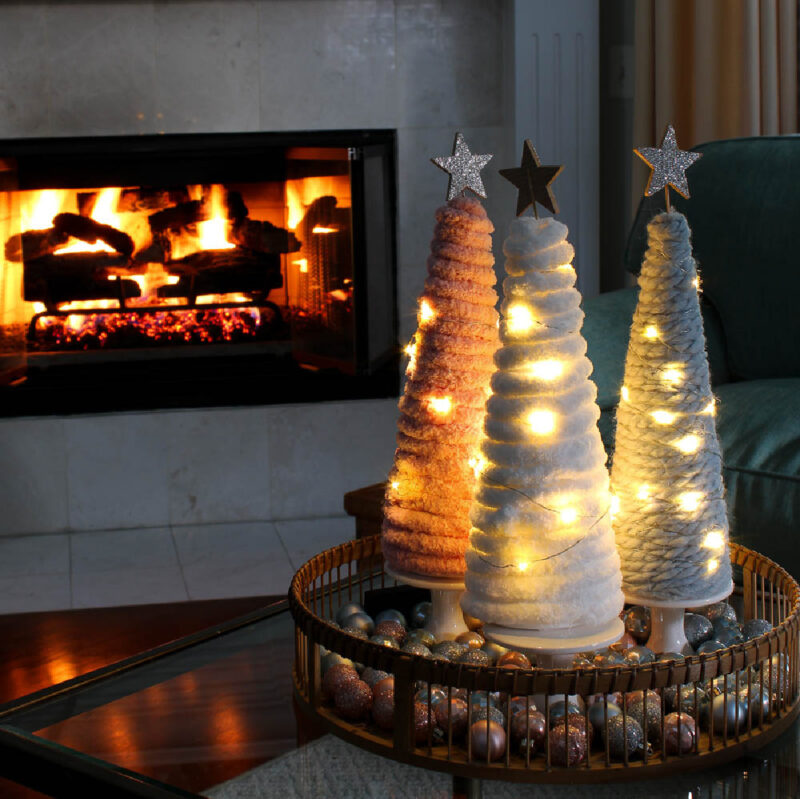
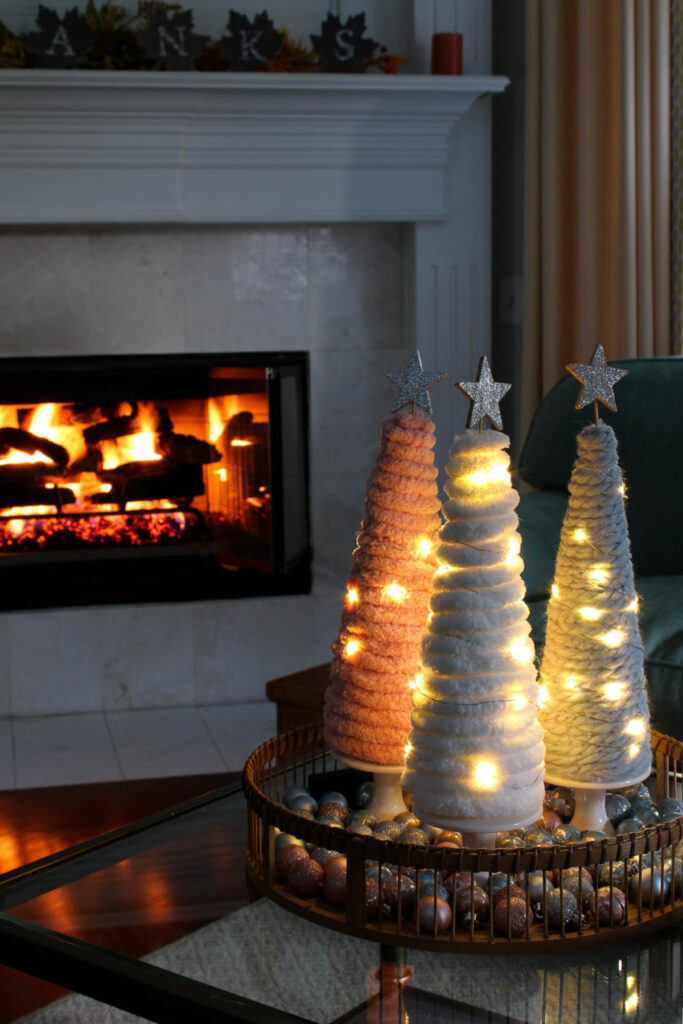
How about adding fairy lights? Fortunately, our batter-operated fairy lights were in a labeled box in the garage and easy to access.
Wrap each tree with a string of fairy lights. The lights give a little sparkle to your Christmas trees.
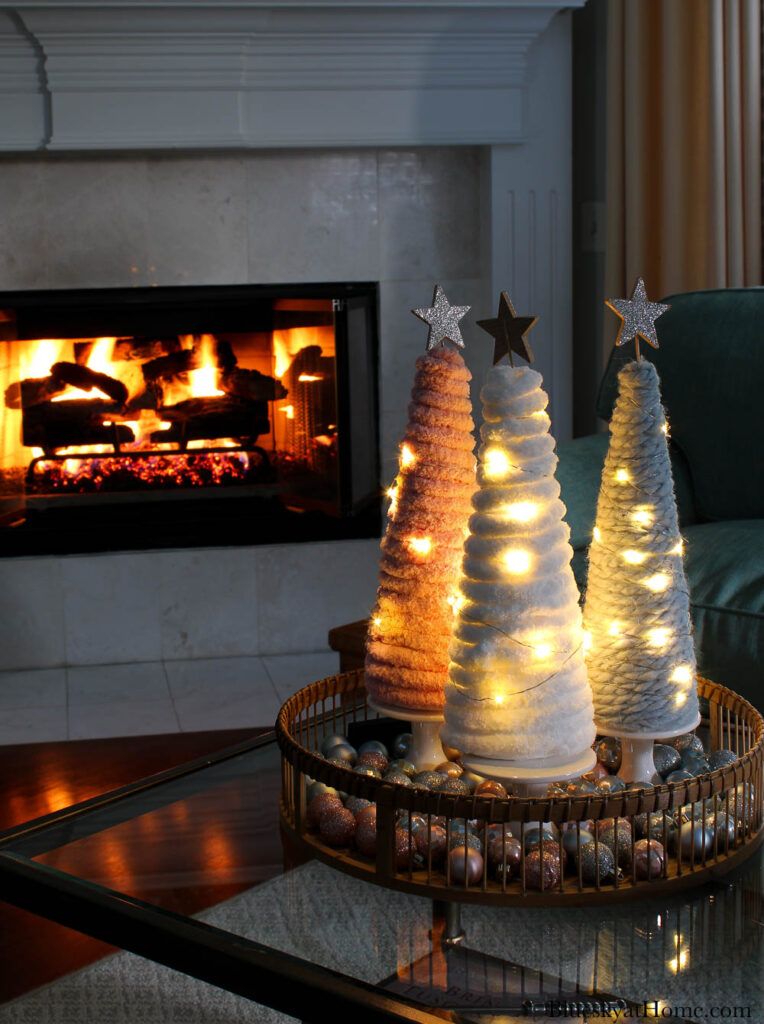
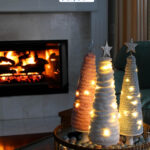
Displaying the Yarn Christmas Trees
For now, I decided to use the yarn Christmas trees on our living room coffee table.
I placed the trees in a round basket. For a little more height, I placed them on cupcake stands Using cupcake stands is a great way to add more height to small objects.
Then I covered the bottom of the basket with blue and pink mini ornaments. I actually bought these little ornaments for another Christmas tree project (standby).
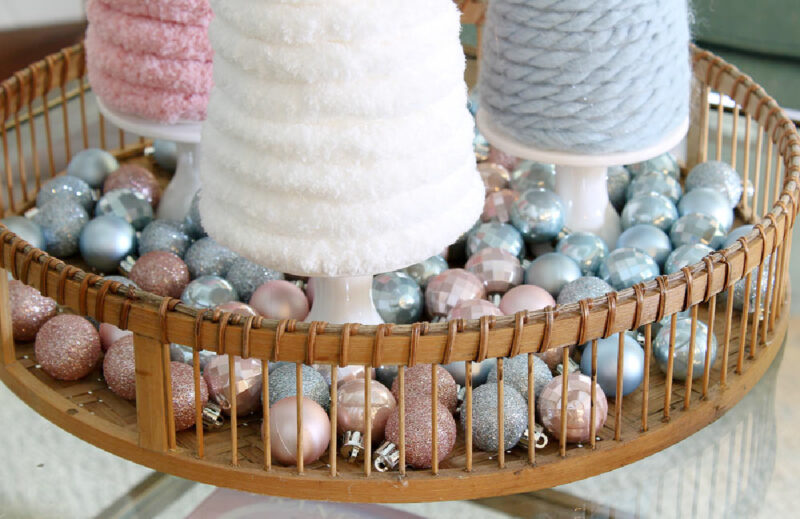
I will probably move these DIY yarn Christmas trees to our bedroom. (Hint, hint – I’m going pink and blue this year.)
I think this is a great project for your holiday decor. It’s easy, inexpensive, and very pretty. I love projects that I can do while watching a movie or TV show.
Other Options for Your Yarn Trees
- Make your trees all one color.
- Vary the size of your trees.
- Use different colors of yarn on one tree for an ombre look.
- Glue faux gems around the trees. I had some that I ordered for another project.
- Glue mini-ornaments on the trees
- Glue wool felt balls around the tree in a random pattern.
- Wrap a small-bead garland around the tree.
- Drape a piece of green yarn around the tree to look like garland.
- Insert a skewer in the base of your tree. Attach the skewer to a wood block or wood slice to make a tree stand.
- Place the skewer into a small decorative votive holder. Secure in a small piece of florist foam.
I hope you love this easy, pretty and fun DIY yarn Christmas tree project. This is a great craft for the holidays.
Here are more DIY Christmas tree projects you will love to PIN:
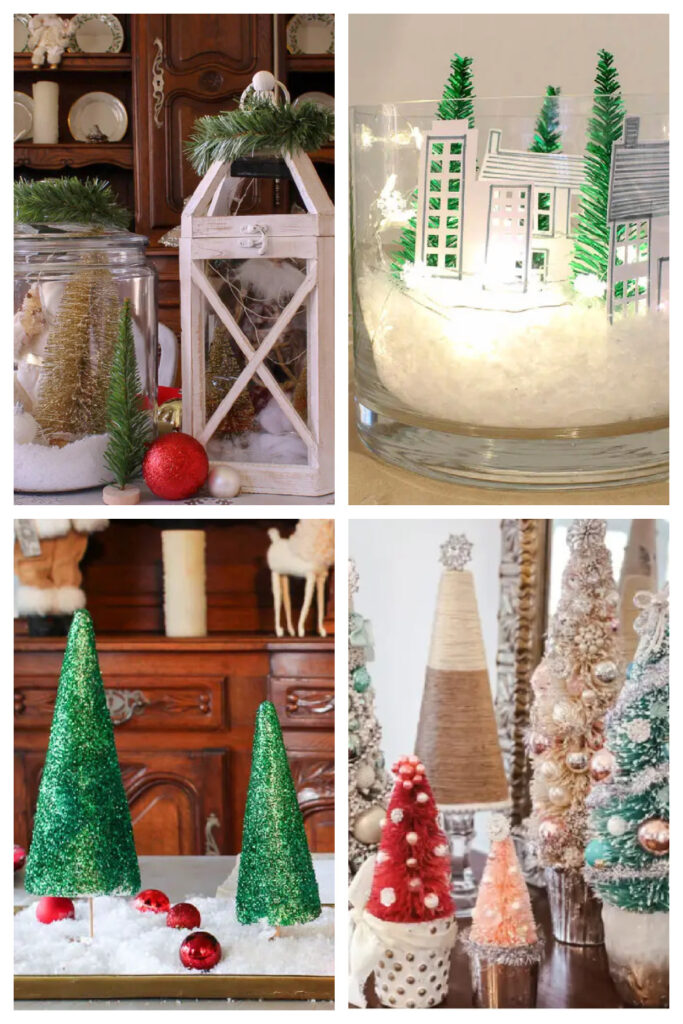
- Glitter Christmas Trees.
- 10 Fabulous DIY Christmas Tree Projects
- Ideas for Christmas Trees in Your Home
- 13 Creative DIY Christmas Tree Crafts
Visit these Christmas Pinterest Boards full of inspiration and ideas. I would love for you to FOLLOW one or all of these boards.
I bet you’ll want to PIN this DIY yarn Christmas tree project.


I’ve made these & used some pretty pearls to glue on as ornaments….also small
pompoms glued are a hit too!!!! So many ideas to complete your project….Craft on !!!
Birdie, that’s a great idea. Pearls are a beautiful idea for Christmas.
These trees are just the cutest, coziest things! I love them! We’re going to make them at our next craft get-together at our church. Was one skein of yarn enough for one tree of the size you chose? Did you have enough left over to make more?
What a fun idea! Yes, it should be more than enough! I have so much leftover yarn! Of course, it depends on the size of your styrofoam cone and the thickness of the yarn you choose. Good luck. I hope your group has a great time.
Hi Carol! Your trees are adorable. I am hosting a cookie party for some 11 year olds and thought this would be a fun craft. Can you tell me using the same size cone and yarn as the pink, how many cones did one roll cover?
Thank you
Emily, it depends on the thickness of the yarn and the size of your cones. I would use smaller cones and bigger yarn so the kids don’t get bored. My cones were 9 – 11 inches tall. The pink yarn I used was not too chunky. Hope that helps. Thanks for the feedback.
Hi Carol- Popping in to let you know your trees will be featured at tomorrow’s Home Imagined link party. I have pinned these and will be making my own version. Thanks for the inspiration. Hope to see you at the party. XO- MaryJo
MaryJo, Thank you so much for the feature. I’ll be there. I really appreciate the shout out.
Hi Carol – I love the soft colors you chose for these trees. The entire project turned out wonderfully. I love the glitter stars you put on the tops and the fact that you added lights. Thank you for sharing this post with the Home Imagined Link party.
What a fun idea Carol, I am going to give this a try. Thanks for sharing over Team Creative Crafts link party.
Thank you, Terri. Happy I found your link party.
I should have added: can you say what you used for a base for the trees?
Thank you again!
Wendy
Certainly, I used cupcake stands. Easy peasy way to elevate small things.
Carol!
Thank you! I love these trees so much. I’m going to do it.
Wendy
What a great DIY, Carol! Your yarn trees are so cute! Thanks for sharing with us!
I’m back to say that I’m featuring your cone trees on today’s Crafty Creators. Congrats & I hope you’ve had an amazing Thanksgiving!
You yarn trees are really pretty! I love how you topped them with the glittery stars, and they look extra cute with the lights. Pinning!
So cute, Carol! I LOVE that chunky yarn that you used…that makes them look like such cozy little trees! The glitter star toppers are the perfect touch!
Your cone trees are so pretty, Carol, and even better that they light up at night!
These are so cute. I love them with the fairy lights on them. Pinned!
Carol, your trees are adorable. Love how you added lights to yours. They look great in the tray with ornaments. The colors are so pretty too. Thanks for sharing.
So pretty Carol!! I LOVE the way you displayed them with the pink and blue ornaments! The glitter star toppers are a perfect festive touch, and everything turns to magic with little white lights! Beautiful!
Carol, the chunky yarn and jeweled toppers really elevate your yarn trees! I also love the colors you used.
Blessings, Cecilia @My Thrift Store Addiction
Your yarn trees are adorable, Carol! Of all the decorative tops, I love that you used your mom’s vintage jewelry! They make the trees extra special and very nostalgic! And the lights certainly enhances the holiday mood! Well done!
Carol these truly are the prettiest yarn Christmas trees! I’ve been looking for a craft for my friends luncheon that I host every year and this just might be the perfect craft for that. Thanks so much for sharing!
This is so timely Carol; I have so much left over yarn scraps and this would be perfect to use them up! They are so lovely all lit up and I love that you used your mom’s vintage jewellry as toppers; it makes them so special. Have a happy holiday season :).