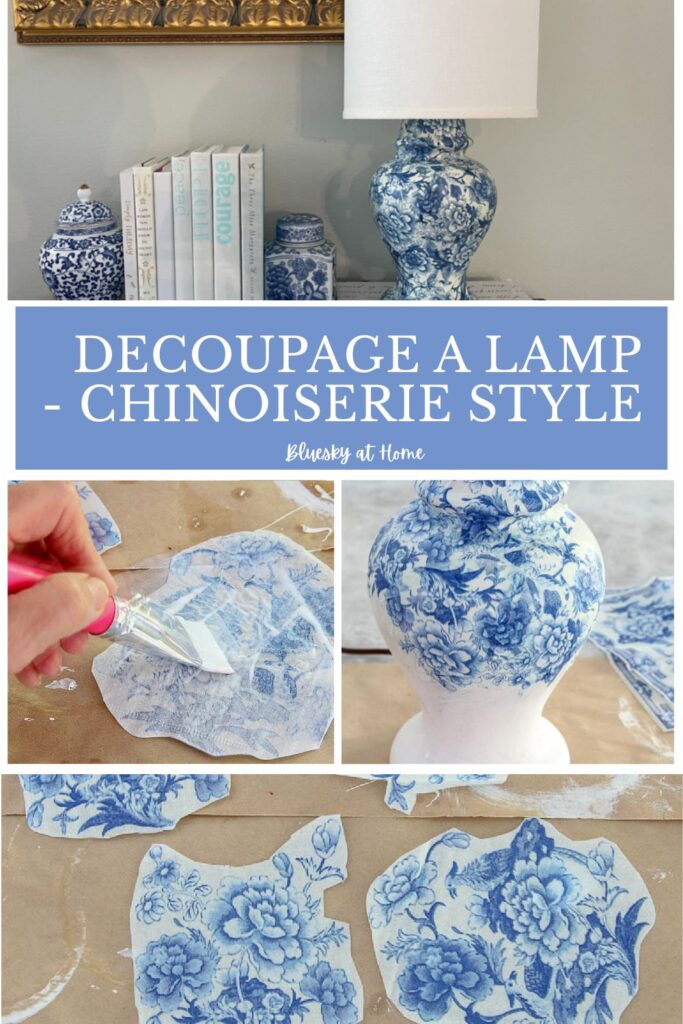
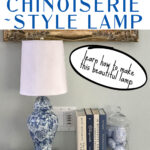
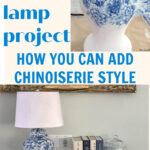
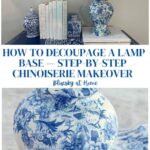
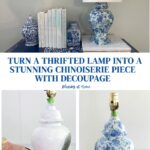
How to Make a Chinoiserie Style Lamp with Decoupage
As a former culinary instructor and longtime DIY blogger, I’ve taught hundreds of students that the best projects often start with what you already have. One of my favorite decoupage projects is a perfect example – another #randomactofDIY that proves you don’t need to spend a fortune to get a high-end look. Do you love chinoiserie style but cringe at the price tags? Keep reading, because I’m going to show you exactly how to make a chinoiserie-style lamp with decoupage – for next to nothing.
If you’ve been following along, you know I’ve fallen head over heels for decoupage. It’s one of those crafts that looks impressive but is genuinely beginner-friendly – and I say that as someone who has taught crafts on this blog for several years. The hardest part is choosing your materials, because the options are wonderfully endless.
I love it when the perfect project comes together almost by accident. All I needed was the right object. And then I found it. Out in the garage. Again.

So grab a glass of your favorite beverage (mine is sweet iced tea) and follow along as I share how I made this chinoiserie-style lamp with decoupage.
Table of contents
This post contains affiliate links to products used to create this project. If you should order any item from this site, I may receive compensation, but you do not pay a penny more. Your purchase is greatly appreciated as it helps support the continued publication of this site.
What is Chinioserie Style?
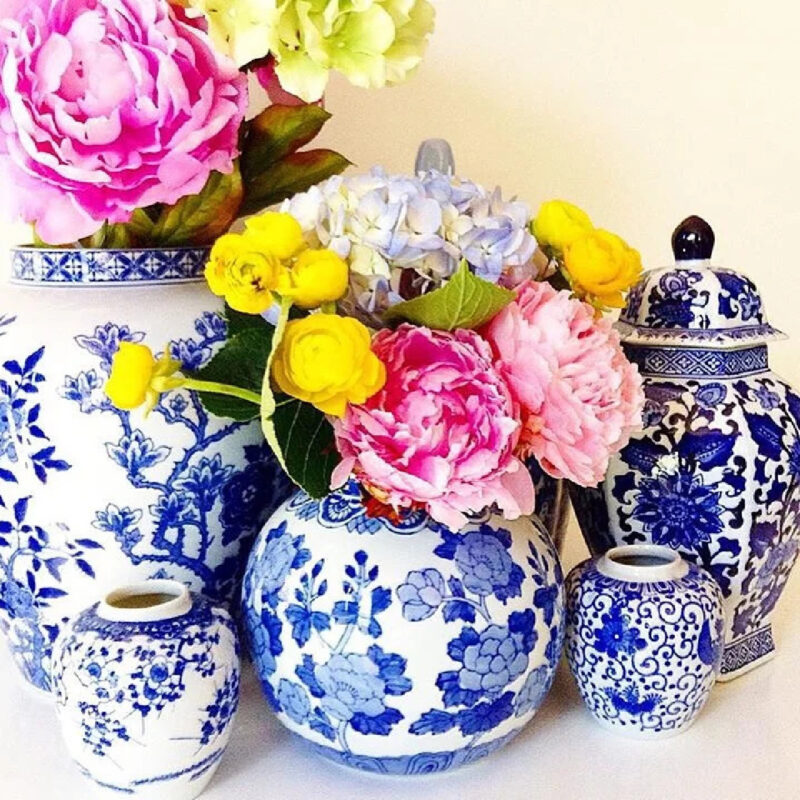
Another home decor element that I’ve embraced in the past several years is chinoiserie. This beloved pattern and style of decorative items has been cherished for a few centuries, and it seems the popularity is not waning.
Before we begin the project, in case you aren’t familiar with the style, here is a quick summary:
- Chinoiserie (pronounced “shin-wah-zer-EE”) is a decorative style originating in 17th- and 18th-century Europe, when trade routes from China brought silks, porcelain, lacquerware, and textiles to Western markets for the first time. European designers and craftsmen became captivated by these exotic goods and then began imitating the style, creating their own romanticized, imaginative interpretation of Chinese art and culture.
- The word “chinoiserie” comes from the French chinois, meaning “Chinese,” and the style flourished across furniture, wallpaper, pottery, and fabric from the courts of Versailles to the drawing rooms of Georgian England.
- What makes chinoiserie so instantly recognizable – and endlessly appealing – is its signature visual design: delicate pagodas, graceful willow trees, exotic birds, lotus blossoms, and flowing botanical motifs, all rendered in a dreamy, stylized way that feels both timeless and whimsical.
- The classic color palette is crisp blue and white, inspired by the famous blue-and-white porcelain that arrived from China centuries ago. You’ll also find chinoiserie in black and gold, soft greens, and coral.
- Today, the style is as popular as ever in home decor. Fortunately, with a little Mod Podge and the right napkins, you can bring that elegant, collected look into your home without the designer price tag.
- Chinoiserie style is found in porcelain or ceramic vases, bowls, candleholders, dishes, and figurines. Also, wallpaper and other paper goods, such as napkins. Fabric, dish towels, fashion. To me, it’s like monograms – if it doesn’t move, it can be chinoiserie.
- Chinoiserie style can range from very expensive (antique or hand-painted pieces) to affordable (modern reproductions), with high-end, 18th-century, or antique “japanned” furniture often costing over $4,000 to $60,000. Most of us can’t afford those prices, so we rely on reproductions, which still look amazing.
Supplies for the Lamp Makeover
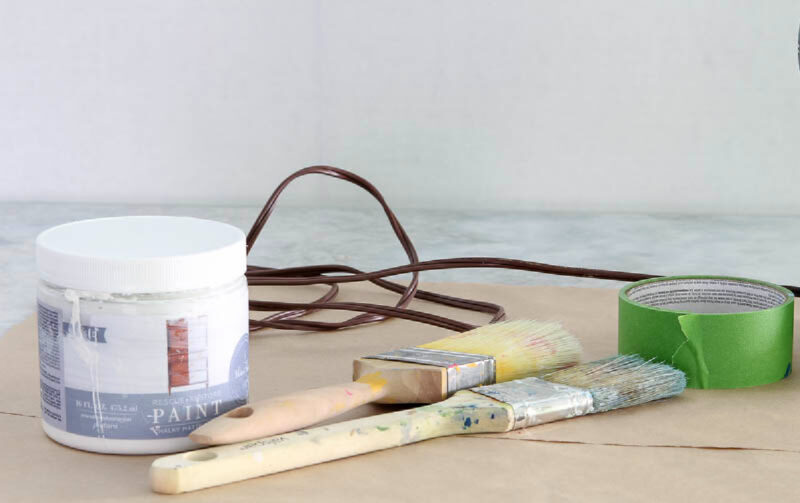
You may have all these supplies on hand. Besides the lamp, you need:
- Craft paper to cover your work surface
- White paint to cover the lamp – any acrylic or chalk paint will work for this project. You just want to completely cover the lamp in white.
- painter’s tape
- Brushes for painting the lamp – If your lamp is already smooth and white, you can skip this step.
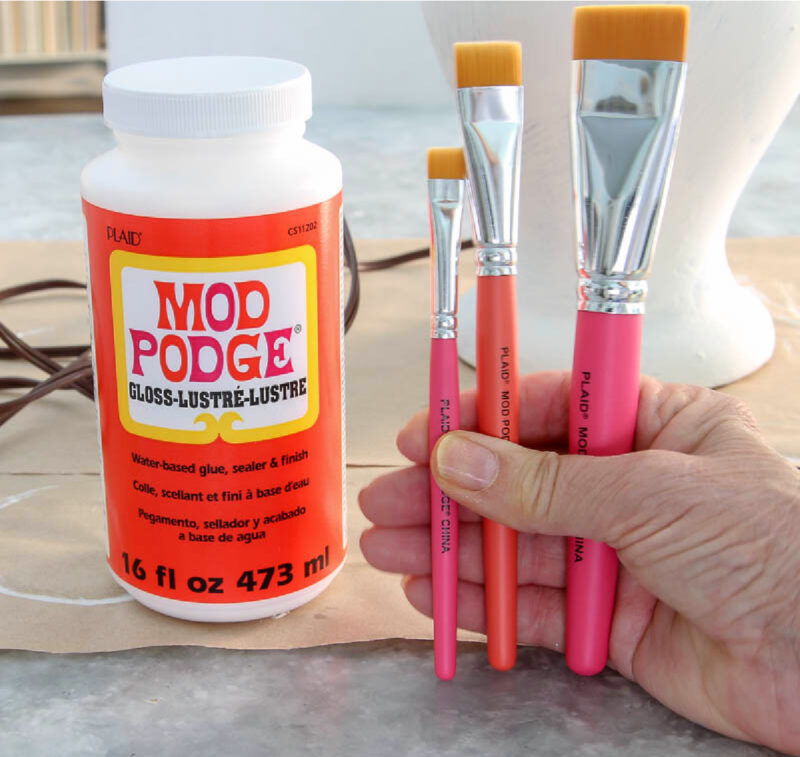
- Mod Podge in Gloss – ultra gloss would work too
- Mod Podge brushes – I decided to try these brushes. They definitely were better than using foam brushes.
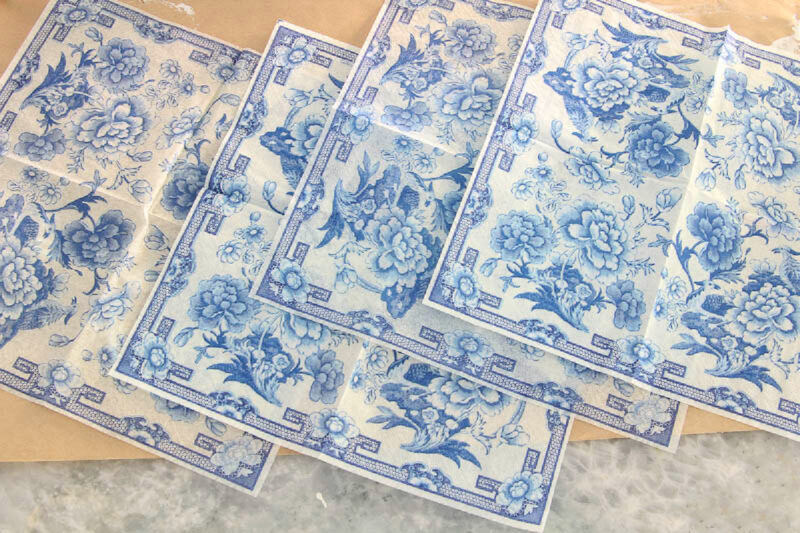
- Napkins of choice – I love these blue-flower motif napkins*. They are cocktail-sized.
- Sharp craft scissors for cutting out motifs from the napkins. These Fiskars are my favorite for small cut work.
If you want a wider variety of napkins to look at for projects (or entertaining), check out my AMAZON SHOP, PAPER GOODS.
Decorate an Old Lamp in Chinoiserie Style With Decoupage
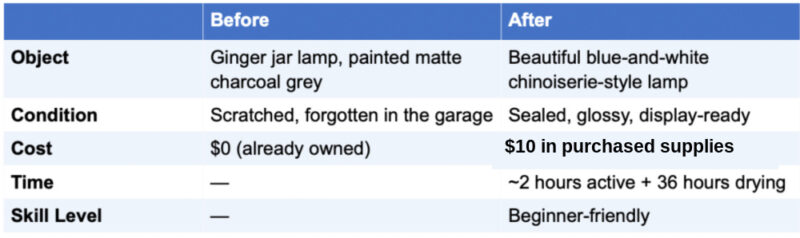
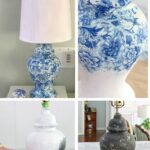
This is a DIY project, so I thought I would give you the short version of it. Here is a “before and after” of the process.
I didn’t find this object at a flea market. I found it in our garage. Again.
You might remember the discarded planters that I found in the garage and revived with paint and gold leaf. Those turned out to be among my favorite DIY projects, and they are still used today.
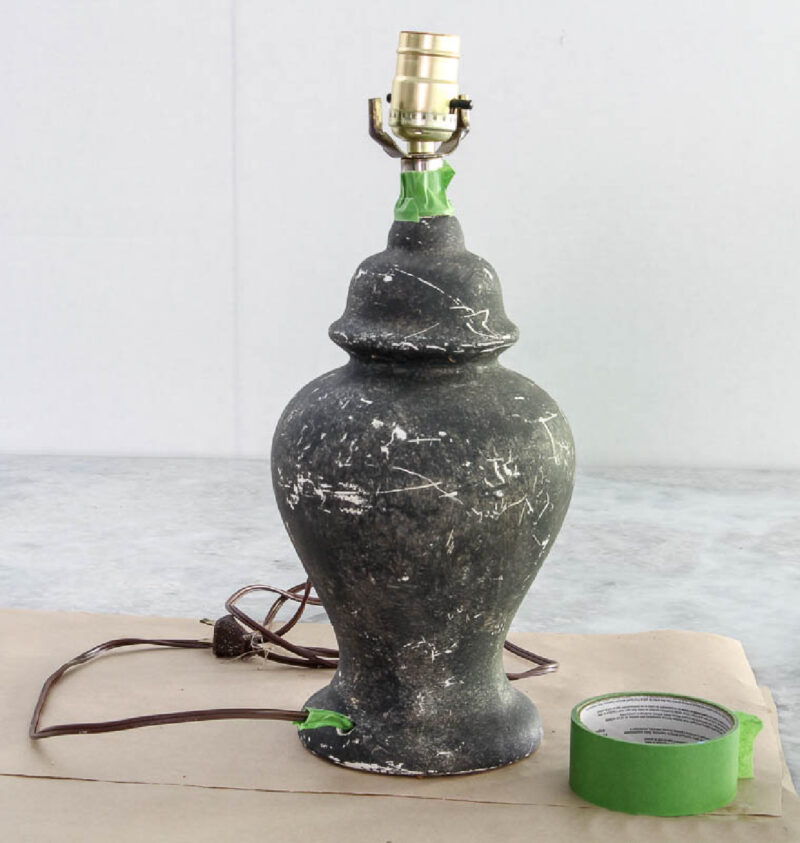
As I was rummaging through the garage, I found this ginger jar lamp sitting on the floor. It was another one of those forgotten items that I had changed up years ago.
Small accent lamps like this one are easy to find at thrift shops, flea markets, antique malls, and garage sales. They are relatively inexpensive. Just make sure to test that it works before you buy it.
In this case, the ceramic lamp started shiny white, and I painted it a matte charcoal grey (Don’t ask me why.) I even made a fabric-covered shade for it. I don’t know what happened to that.
You can see all the scratches from being moved around. I’m surprised it didn’t break from neglect.
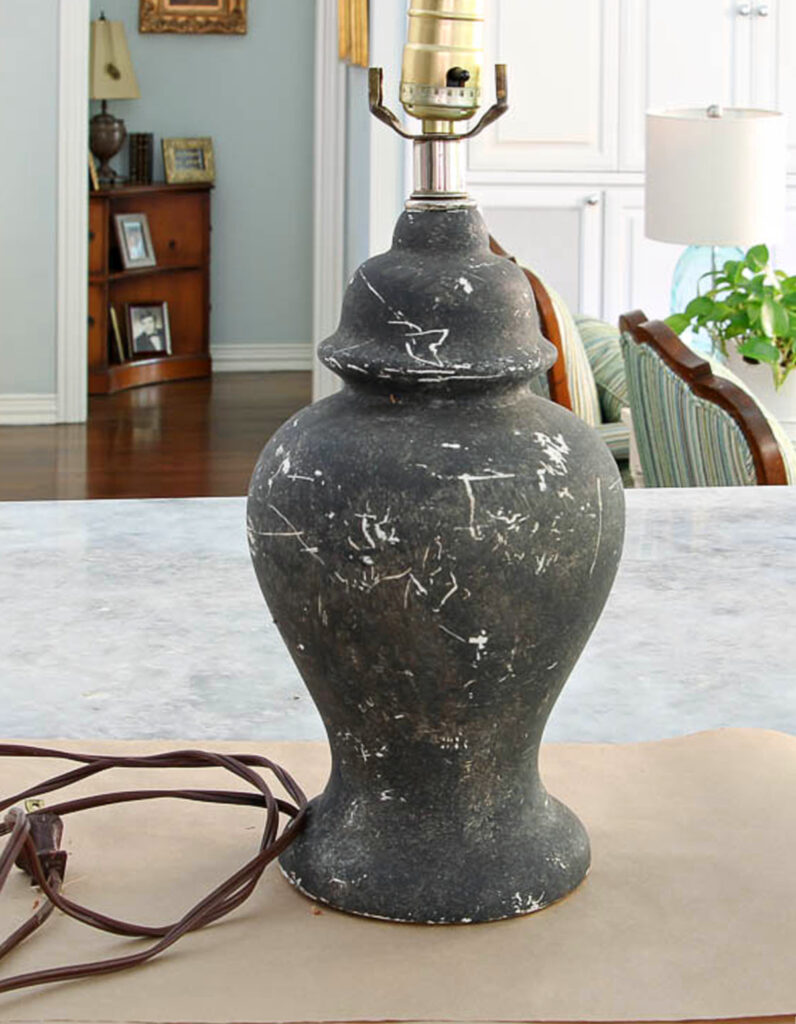
NOTE: I first checked to make sure the lamp still worked!
Step 1 – Preparing My Chinoiserie Style Lamp
The old ginger jar lamp was perfect for the project that I had in mind.
I wrapped the painter’s tape around the top of the lamp mechanism and around the cord.
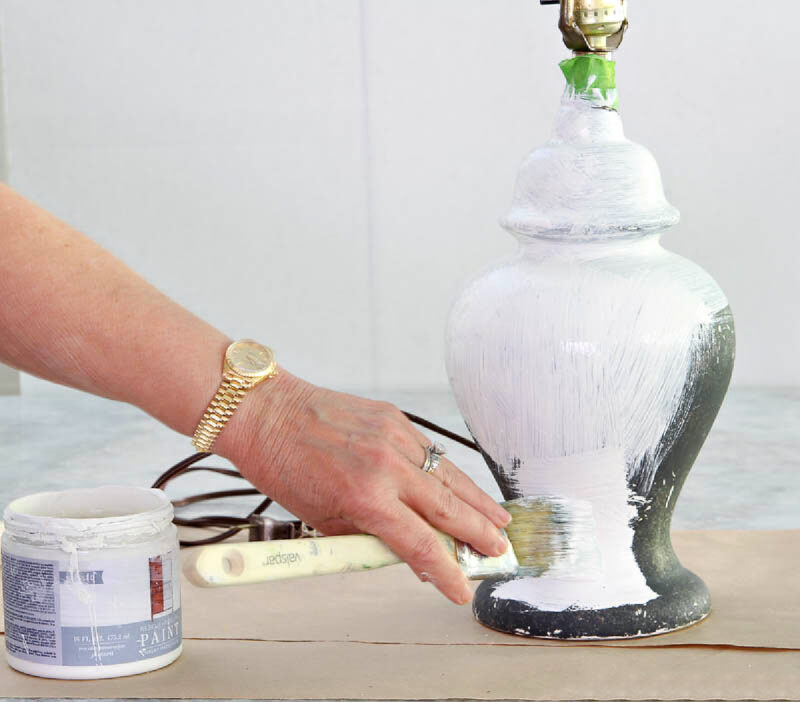
Step 2 – Painting the Lamp
Using a 3-inch paintbrush, I painted the entire surface of the lamp. This took about 6 minutes. I let it dry for about 30 minutes. Then, I repeated with a second coat of paint.
NOTE: You want the surface of your piece to be solid white so it doesn’t conflict with the napkin design.
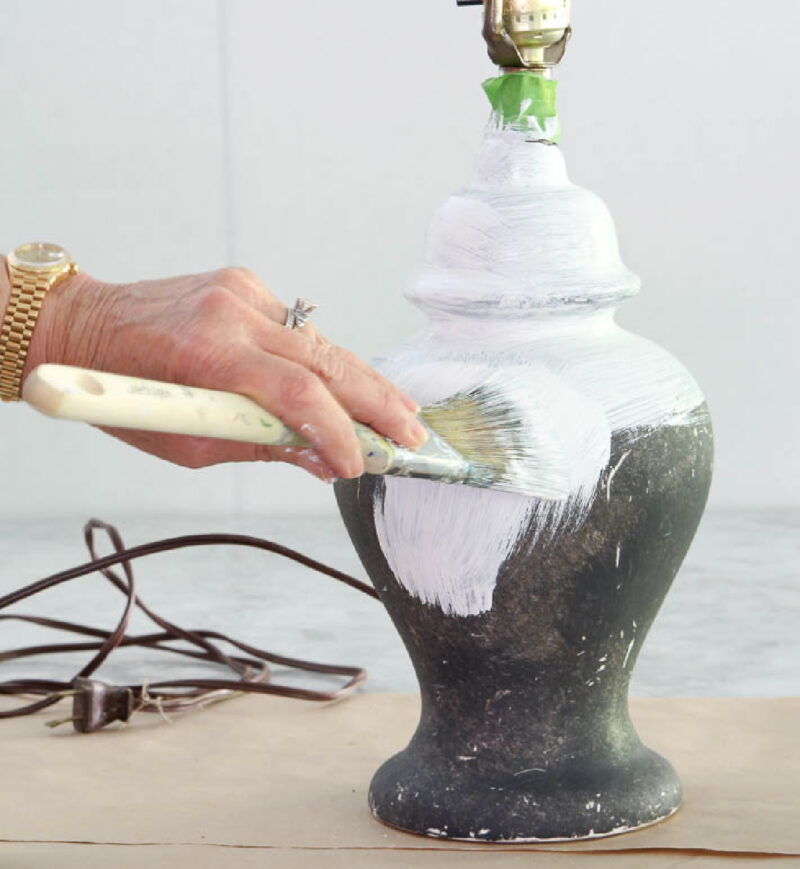
Since the lamp would be covered in Mod Podge and napkins, I wanted a solid white surface to cover the lamp.
Step 3 – Preparing the Napkins
For a few weeks, I have been ordering blue napkins online in patterns I thought would be good candidates for chinoiserie decoupage projects.
I loved these blue napkins, which reminded me of a chinoiserie-style vase. I was just waiting for the right item. Now, with the lamp I had discovered, I had my item.
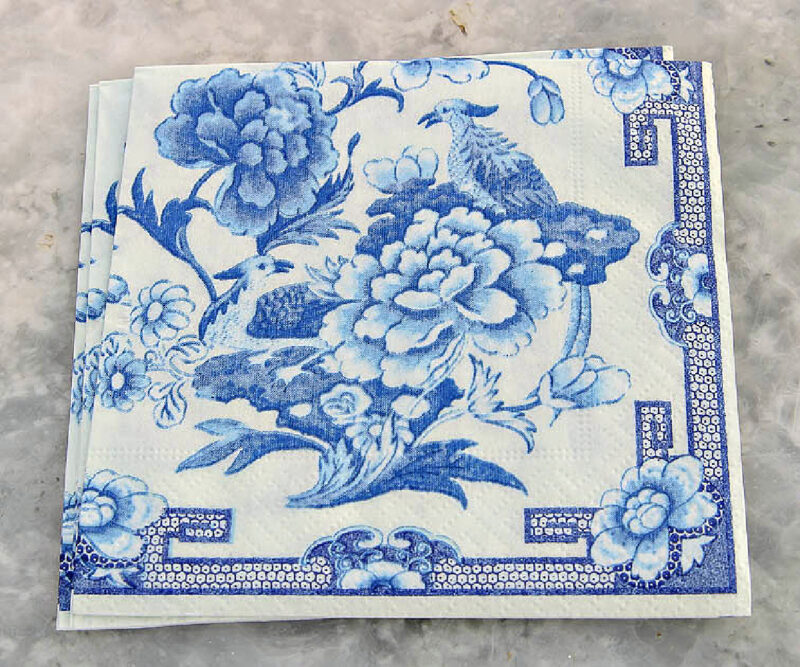
I estimated I would need 4 napkins. I unfolded them and removed the front layer from the back layer. You can discard the white back layer.
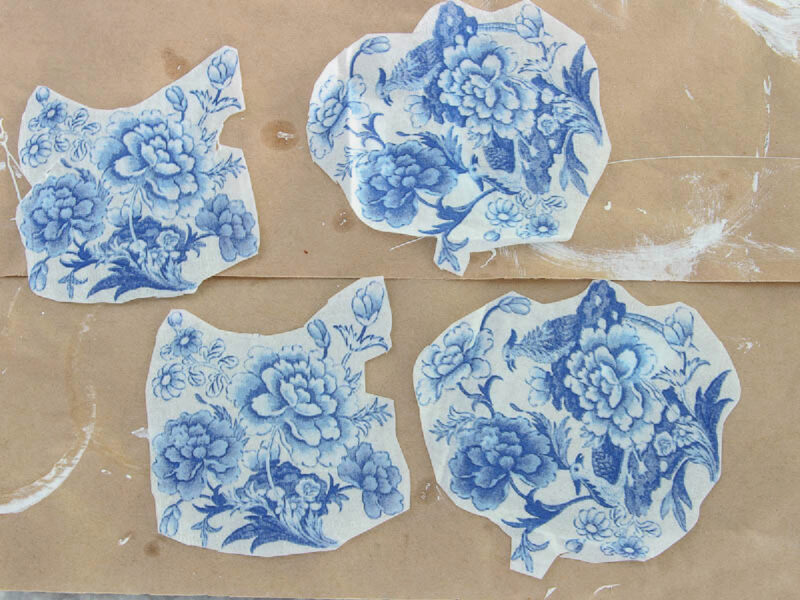
I wanted to have the large flower motifs on the lamp, so I cut around the 4 distinct sections on each napkin.
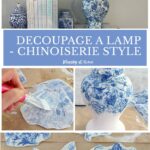
Step 4 – Decoupaging the Lamp
Now the fun really begins – applying the napkins to the lamp. I love these Mod Podge Brushes.
Since my last decoupage project, I read that you should apply Mod Podge to the napkin and the surface you are covering. That worked very well.
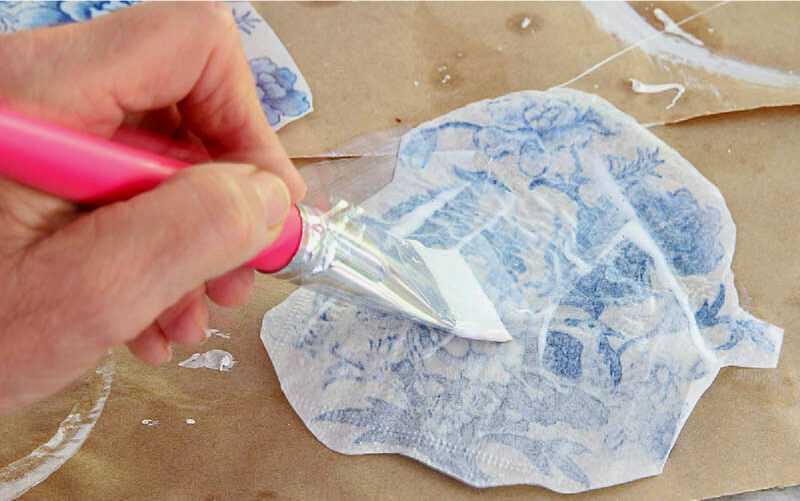
I brushed the Mod Podge in sections on the lamp, starting at the top. Applying the napkin pieces with Mod Podge worked great.
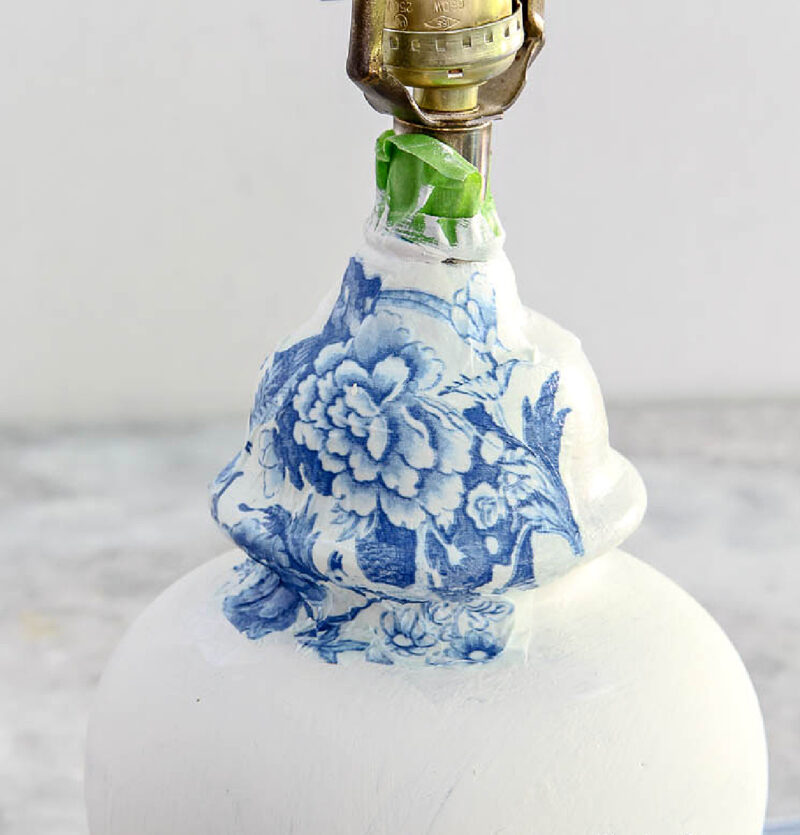
I worked my way down the lamp, slightly overlapping the napkin pieces as I went.
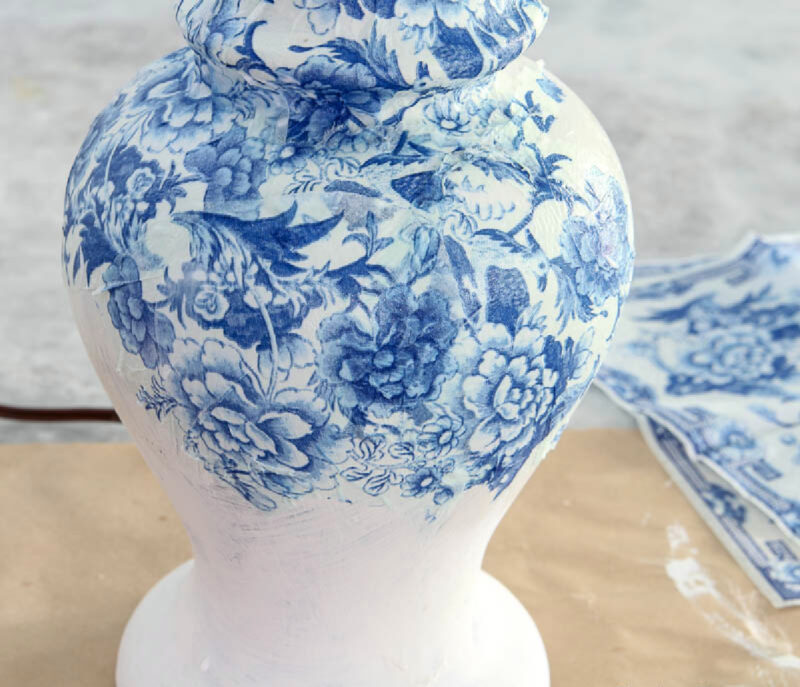
When I had covered 90% of the lamp, I cut out small pieces of a 5th napkin to fill in the small places that were not covered.
Finally, I went over the lamp with more Mod Podge, smoothing out wrinkled areas.
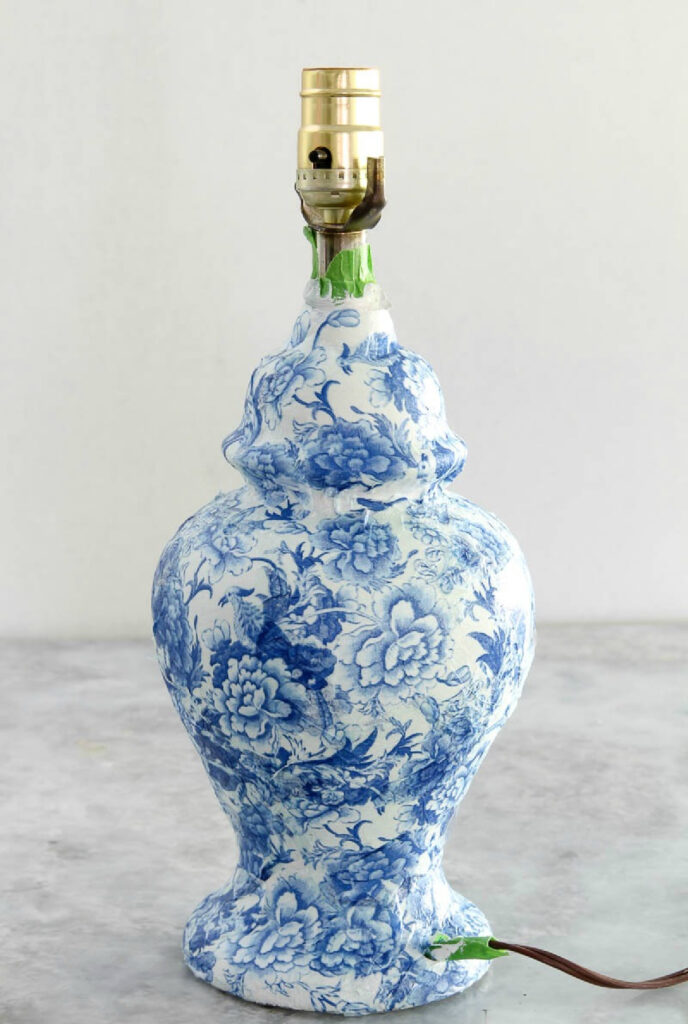
Step 5 – Sealing the Lamp
I let the lamp dry completely overnight; it took about 36 hours. Since I wanted the lamp to have a shiny finish – as a real ceramic lamp would, I used Mod Podge Ultra-Gloss Spray Sealer.
Next, I wrapped the lamp switch with plastic wrap to protect it.
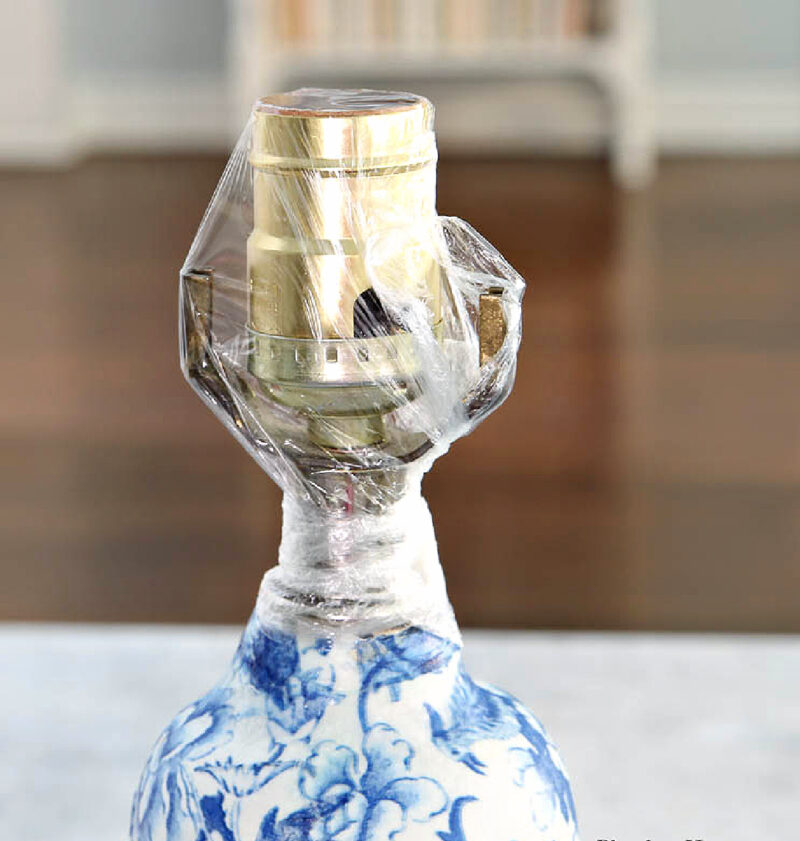
As well as the cord.
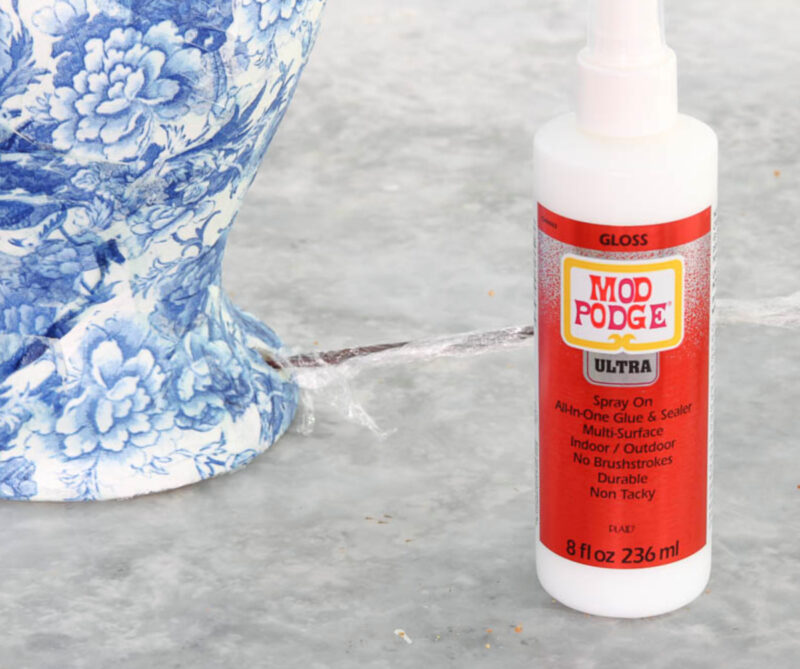
Fortunately, the day was sunny, but not windy. I took the lamp outside on our driveway and placed it on a stack of newspaper.
Then I gave it a good coverage of the Ultra Spray. This product isn’t like spray paint. It feels more like you are spritzing with water. Unfortunately, I didn’t take a picture of that process.
I brought the lamp back into the house and let it dry overnight. It now had the shiny finish I wanted.
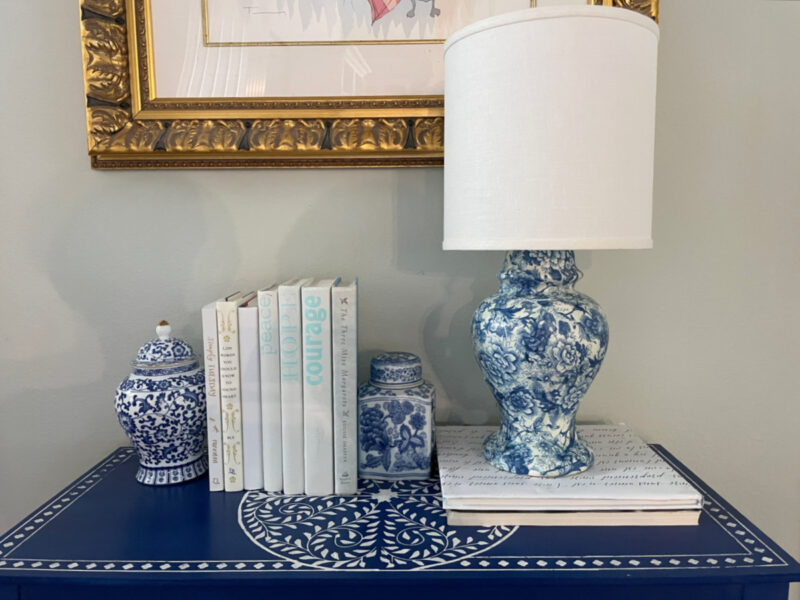
Once your lamp base is complete, you’ll want a shade to match.
NOTE: If you don’t have an extra lamp shade on hand, measure the diameter and height to determine the right size. I have a full tutorial on customizing a lampshade with fabric that pairs perfectly with this project.
I loved the results. Even Sweet Shark thought the lamp was awesome. Here is a peek of the finished chinoiserie-style lamp with decoupage. It’s usual spot is on the blue -painted chest (another DIY project) in our living room.
Have Questions? Here are the Answers.
Can I decoupage a ceramic lamp?
Yes! Ceramic is actually one of the best surfaces for decoupage because it’s smooth and non-porous. Just make sure the surface is clean and dry. If the lamp has a glossy finish, lightly sand it first so the paint and Mod Podge have something to grip.
What Mod Podge is best for lamps?
For the application step, use Mod Podge Gloss — it dries clear and gives a nice finish. For the final seal, I highly recommend the Mod Podge Ultra-Gloss Spray Sealer, which gives the lamp that shiny, ceramic-like appearance that makes it look like the real thing.
Do I need to paint the lamp before decoupaging?
If your lamp is already white, you can skip the paint step – the white base helps the napkin colors stay true. I painted mine because it was charcoal grey, and the dark color would have shown through the thin napkin paper.
What kind of napkins work best for decoupage?
Look for 3-ply cocktail or luncheon napkins with a printed design on the top layer only. Before applying, carefully peel apart the layers and use only the single printed top layer – it’s much thinner and adheres more smoothly.
Will the napkins wrinkle on a curved surface like a lamp?
Some light texture is normal and actually adds to the handcrafted look. To minimize wrinkles, work in small sections, apply Mod Podge to both the napkin piece and the surface, and smooth gently from the center outward. Overlapping pieces slightly also helps hide any edges.
How long does a decoupage lamp need to dry?
Plan for at least an overnight between steps. I let mine dry about 36 hours total before applying the spray sealer – patience pays off here. Rushing the drying time can cause the napkins to lift or wrinkle.
How do I protect the finished lamp?
The Mod Podge Ultra-Gloss Spray Sealer is key. Apply it outdoors on a calm, dry day, and let it cure completely before handling. This protects the napkins from moisture and gives the lamp a durable, polished finish.
Didn’t get enough chinoiseries and decoupage? No worries. I’ve got more:
- How to Make Chinoiserie Topiaries
- How to Easily Decoupage a Chinoiserie Platter
- One-Hour Chinoiserie Vase Makeover
Pretty enough to PIN? I hope this chinoiserie-style lamp with a decoupage project inspires you to try decoupage or gives you a new idea for your decoupage projects. Check out my new Pinterest Board – Chinoiserie Style and Projects and Decoupage Projects.


❤️the lamp !! Will wrinkles completely smooth out when finished ?
Your lamp came out lovely! I tried this with some beige-themed napkins from decopauge.com. Much to my dismay, the napkins started the tear off when gently applying mod podge to the surface after applying. The pieces are overlapping and it looks quite awful.
Jeb, I’m so sorry that your project didn’t turn out well. I’ve never had this issue. Did you separate the layers of the napkins and only use the top layer with the design? Normally, the pieces of napkins should overlap. You might Google what happened and see what comes up. I would try again on a small piece.
Hi Carol.
Your chinoiserie style lamp and shade is absolutely STUNNING!!!
I just love lamps, different styles, sizes and shapes. I keep telling myself I’m not going to buy another lamp, then I find one that just calls my name.
I have to try this, very soon. Excellent work!
Thanks so much, Donna for your nice compliment. That lamp is still one of my favorite DIY projects.
Hi. Love this! Have been wanting to do the exact same thing. Chinoiserie lamps new can be so expensive. Did you paint it to have the correct surface for the decoupage to stick to or just for a base color? The lamp I’m thinking to do this with is already white so wondering if I need to paint it for the process to work or if since it’s already white, I’m good to go.
This is FABULOUS Carol! I am happy to feature you at this week’s TFT party. Thanks for sharing!
https://followtheyellowbrickhome.com/early-summer-beauty-for-home-and-garden-at-thursday-favorite-things/
Carol, I love this so much. How pretty and creative. Thanks so much for sharing at Love Your Creativity. I am featuring your lamp at today’s link party.
Your lamp is beautiful, Carol. Thank you for sharing at Party In Your PJ’s!
Your lamp turned out gorgeous, Carol! I’ve been looking for blue and white chinoiserie ginger jars and vases, but they’re always so pricey. Now I know what to do! I have a collection of glass vases in my stash that would be perfect for this project. I didn’t know about the mod podge spray sealer, either. Thanks for sharing a great tutorial. It was fun crafting with you again!
This is such a wonderful and beautiful idea Carol!! Love the pattern!
Carol, Thanks for linking up this beautiful post at Charming Homes & Gardens!
Carol, that’s beautiful!! I love your choice of napkins used. I pinned this, and added some of the supplies to my shopping list. Thanks much!
Your lamp makeover looks awesome! I wish now that I hadn’t donated my old lamps.
Allyson, thank you. I know the feeling of letting something go and then you wish you had it back. Something new (old) will turn up.
Wow, your lamp looks amazing, Carol! What a great idea for upcycling a lamp. What what, there’s a “spray” Mod Podge?
Marie, thank you for your comment. Yes, I discovered the spray Mod Podge online. I think it’s really meant as a sealer ~ like how I used it.
Now this was a really great makeover and so worth the time. I love the blue colors your chose for your home. Thanks for sharing with us this week at #HomeMattersParty
Thank you Donna. Always a great party.
I need to show my husband this, he’s always complaining that I keep so much ‘old stuff’ but you never know when it could get a glamorous makeover! 😉
Jayne, husbands are funny. They call it junk until we do something fabulous with old stuff and don’t have to go out and spend more money. Keep on making over!
Also, what size napkins did you buy — cocktail or dinner? xo Kathleen
Kathleen, they were cocktail. Cost less than dinner size. I do have one package of guest towel size napkins ~ because I loved the pattern.
Thanks, Carol! BTW you were picked by me as a Vintage Charm Party feature in this week’s party! Hope to see you this week and, again, thanks so much for sharing your talents with Vintage Charm Party! xo Kathleen
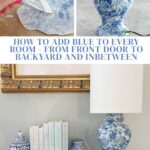
I am so thrilled to see this post — it’s all too timely for me. In the last 6 months or so I have been slowly warming up to the idea of using blues in my decor. And one of the things I wanted to get was a blue and white chinoiserie vase/ginger jar. However, prices have kept me from buying anything:( Now I know what I’m going to do — I’m going to make them! Seriously, I know this will be a project I take on. Thank you so much for the idea and inspiration! BTW your lamp is gorgeous! Pinned! Thanks for sharing at Vintage Charm! xo Kathleen
Kathleen, you have to try it! IT’s really easy, you can’t mess it up. Yes, the prices of chinoiserie lamps are expensive. No one will ever know that you made it ~ unless you tell and brag!
This is so pretty. Just love the way it turned out.
Carol, this is gorgeous! You really transformed the lamp and I love that you used napkins–thrifty and lovely! Blessings, Cecilia @My Thrift Store Addiction
Your lamp is beautiful Carol! What a great idea! Thank you for sharing with Charming Homes and Gardens Party!
Happy to sare at your party. Thank you, Kim.
Stunning lamp! Great job!!!
Oh, thank you so much, Maristella. You are so sweet to tell me.
Wow!! This lamp looks terrific. Great job.
Glad that you like it, Barbara. Thank you for commenting.
Your lamp came out so well! Loved your decoupage tips. I found out recently that cutting my motifs apart with my funky scrapbooking scissors gave me a “torn look” (especially the deckle-edged ones) without the goofs of ripping a design! Would SH believe you if you’d told him you’d spent big bucks at Anthropology for the lamp?
Kathy, so happy that you liked the lamp. What are funky scrapbooking scissors? I would love to know.
Hi Carol, your ginger jar lamp was a perfect candidate for decoupaging. It turned out beautiful. Great instructions – especially telling us about the brushes and the spray on glue.
Hugs,
Rachelle
Thank you, Rachelle. It wasn’t that hard and I’m so happy with the results.
Wow, Carol!! What a transformation!! I wonder how many of us have bought those same paper napkins for decoupage projects? I used them more than a year ago on Easter Eggs and an Easter bunny. That was one ugly lamp that looks like a high end lamp now! I love any blue home decor, and this is perfect! Thank you for joining in again in our crafty hop!
Chloe, thanks so much for the feedback. I really value your opinion. I did do Easter eggs this year. I loved this hop and all the wonderful projects. Thank you for hosting.
I’m pretty addicted to Mod Podge and Chinisorie as well. The lamp came out beautiful. Can’t wait to see what you do with the shade. So fun hopping with you.
Thanks, Cynthia. The shade post is Monday. It’s not as spectacular as the lamp but very customizable.
This looks like a lamp that would cost a fortune. I really like the way it turned out, blue and white is my jam. I have never tried to decoupage anything. I’m getting so many good ideas as a DIY beginner. So fun to see all the projects.
Andrea, I’d love to sell it for a fortune! Decoupage is easy to learn and you can’t mess up. I hope that you will try it.
Holy Wow Carol, your lamp is gorgeous!! It truly looks like the real thing!! I love decoupage, and I swear this is the best make over ever!!! Amazing!!
Wow Carol, this is amazing, you did a beautiful job!
Pinned! Great tutorial too.
Cindy
Thank you, Cindy. And thanks for Pinning.
OH, my gosh, Jenna, thank you so much. You’ve made my day.
Looks amazing Carol. I love the print you did on the lamp. WOW! I love it!
Thank you Terrie, you’ll probably see it again on other projects.
I love decoupaging as well. I thought about a lamp shade but never a lamp base… what a great idea! It looks fantastic too!. Great job friend and so great crafting with you!
Chas, it is great to be on the hop with you and see all the fabulous projects. I will definitely do a shade in the future.
Your lamp looks amazing!! I have yet to succeed at decoupaging something….. But each beautiful thing I see makes me want to try again!
Liberty
I’ve learned a lot recently, Liberty. Thank you so much for the compliment. Keep on trying.
This is gorgeous Carol. What an amazing transformation! I really must try this.
Your lamp turned out great Carol! I love your pretty blue and white Chinoiserie napkins and how you found the perfect candidate for your craft project in the garage! 😉 Happy to be hopping with you today. ♥