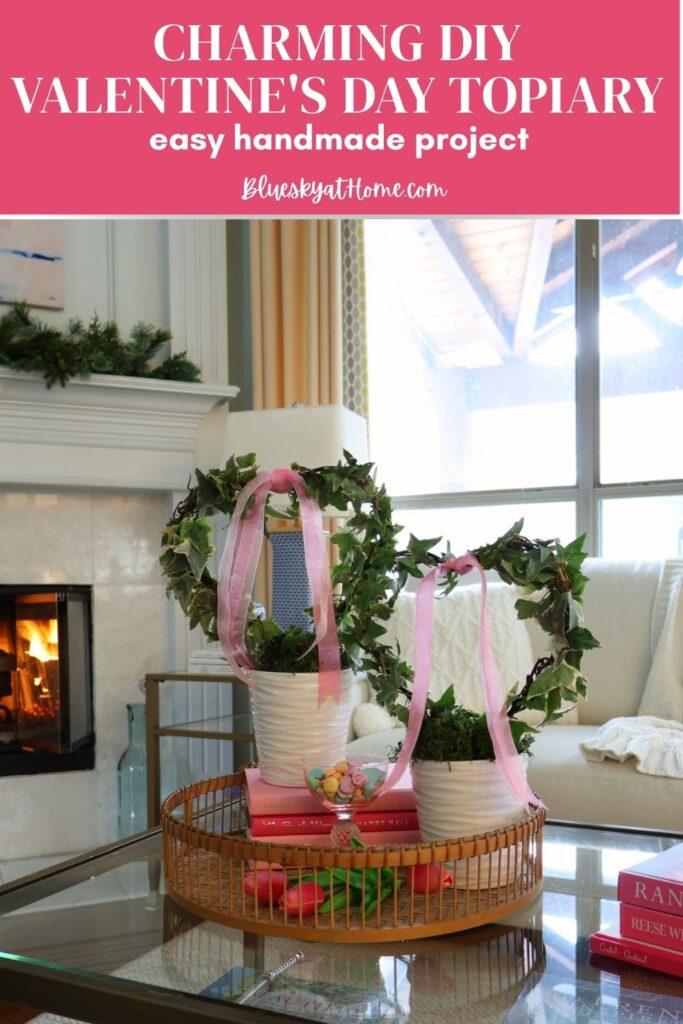
DIY Valentine’s Day Heart Topiary
Looking for a charming way to bring a little Valentine’s love into your home? This DIY Valentine’s Day Heart Topiary is exactly what you need! It’s one of those handmade projects that looks impressive but is surprisingly simple to make – the best kind, right?
I love creating seasonal decor, especially Valentine’s decor, that adds a festive touch without being over-the-top, too time-consuming or expensive. This topiary hits that sweet spot perfectly. It brings just the right amount of Valentine’s charm to any space.
The best part? You can customize it to match your style. For Valentine’s Day, you can go bold with bright reds and pinks, or keep things soft and romantic with blush tones and natural textures. Either way, you’ll have a beautiful Valentine’s decoration that you’ll want to bring out year after year.
Ready to get started? Let me show you how to create this easy Valentine’s craft. You can add it to your list of Valentine’s home decor ideas.

Inspirational Pinterest Challenge Post
My thanks to Cindy of County Road 407 for once again giving us an inspirational idea to create and share. I love topiaries and was happy to make another one.
I love this idea from my friend Kate of Southern Home and Hospitality. Kate used natural materials – grapevine, greenery, and terra cotta pots – to create a lovely Valentine’s decorative accessory. This topiary has a rustic look. I think this grapevine heart form is similar to the one that Kate used.

If you are joining me from my friend, Laura of Decor to Adore, welcome. I’m excited to share my vision for a Valentine’s-themed topiary.
This post contains affiliate links to products used to create this project. If you should order any item from this site, I may receive compensation, but you do not pay a penny more. Your purchase is greatly appreciated as it helps support the continued publication of this site.
Other Topiary Ideas
I had to share some of my other topiary creations to inspire your creativity.
- This Valentine’s topiary uses pink tulips.
- This spring topiary with faux greenery.
- This topiary in a DIY chinoiserie planter.


Where to Display Topiaries
As you can see in the previously created topiaries above, this classic creation can be displayed in many places:
- on your coffee table,
- kitchen island
- as a centerpiece on your dining table
- on your entryway console
- bedroom side table
- mantel
- breakfast room table
I also think a small handmade topiary can be used for other purposes:
- Hostess gift – Perfect for bringing to a dinner party or lunch. It’s more memorable than wine or flowers and shows you put thought into it.
- Teacher appreciation – A sweet way to show teachers some love during Valentine’s week. Much more lasting than candy or typical Valentine’s treats.
- New Neighbor gift – Spread the love in your neighborhood! It’s a charming way to brighten someone’s day without breaking the bank.
- Office decor gift – Bring one to a coworker or give to your work team. It adds a festive touch to cubicles and desks without taking up too much space.
- Wedding or bridal shower centerpiece – If you’re hosting or attending a wedding, topiaries make adorable table decorations that guests can even take home.
- Nursing home or hospital gift – A cheerful, non-edible alternative for visiting elderly relatives or friends who might not be able to have flowers or food in their rooms.
- Valentine’s Day party favor – Make several smaller versions as take-home gifts for a Valentine’s party or event you’re hosting.
Topiaries are perfect any time of year and for any season or special event.
Supplies for a New Valentine’s Topiary
If you’re looking for easy Valentine’s crafts, this is perfect for beginners, and it requires only a few supplies.
For this topiary, I decided to create a “soft” Valentine version. I also needed to use elements that I already had on hand. (Winter storm coming!)
All topiaries need a container to hold them. I’ve used terra cotta pots, traditional painted containers, and the DIY decoupage chinoiserie pot.
For this topiary, I used these thrift shop white ceramic planters. They have been in my supply chest for a few years, so I was happy to finally use them. I like the textural pattern.
If you don’t have or can’t find a thrift store one, here is a similar pot.

For the topiary, I’m reusing the wire heart form that I used last year for the tulip topiary. Yes, I did remove all those faux pink tulips.

For the greenery, I pulled out a long strand of eucalyptus to wrap my wire heart.

You will also need florist foam to hold the topiary. I find that a good bread knife is the best way to cut the florist foam to size. I’ll show you in a moment why I have clippers

Making the Topiary
Step 1 – Cut your florist foam to fit your container.


Step 2 – Place the florist foam in the containers.


Step 3 – Lay out your chosen greenery and begin to wrap it around your heart frame.

CHANGE OF PLANS – I struggled to get the eucalyptus to wrap around the wire frame. It was too stiff and didn’t look nice. I needed to go to plan B.
While fighting with the eucalyptus, I was looking out our breakfast room window and noticed all the ivy on the fence. We have a ton of it in two different colors and leaf sizes.
Would real ivy work? It had rained that morning, so everything was wet. I grabbed my clippers and went outside. I cut about 6 to 8 ivy vines (the lighter-colored ones with the smaller leaves) and brought them inside. I used dish towels to dry them. I should have taken a picture of the ivy.
Step 3 Rewind – Begin wrapping your real ivy around the wire heart. This was so much easier. The vines were flexible and easy to wrap tightly for a full green heart.

It was easy to tuck one vine into another one. I ended up using 3 vines for each wire heart.

Step 4 – Place the wire heart in the florist foam.


Next time, I would have some faux ivy on hand. I know the real ivy won’t last but a few days.
Trimming the Heart Topiary
The topiaries were a little hairy and needed a trim to look more like hearts. My clippers came in handy.

Finishing the Topiary
The base of topiaries should always be covered. This finishing touch covers where the topiary attaches to the florist form. My go-to “garnish” is Super Moss. We use it for both real and faux plant arrangements.
This moss always stays fresh and soft. You can reuse it repeatedly.

It doesn’t take but a handful to fill in around the base.

Adding a Touch of Valentine’s
At first, I thought the wire heart greenery could stand as is. But the more I looked at it, the more I wanted to give it a pop of soft pink. Ribbon was the answer. Fortunately, I have my collection of sheer pink ribbon in several shades.

I pulled out 3 shades and cut off about 15 inches for each topiary. I just looped the ribbon at the top of the wire heart, but you could cut a longer piece to make a bow.

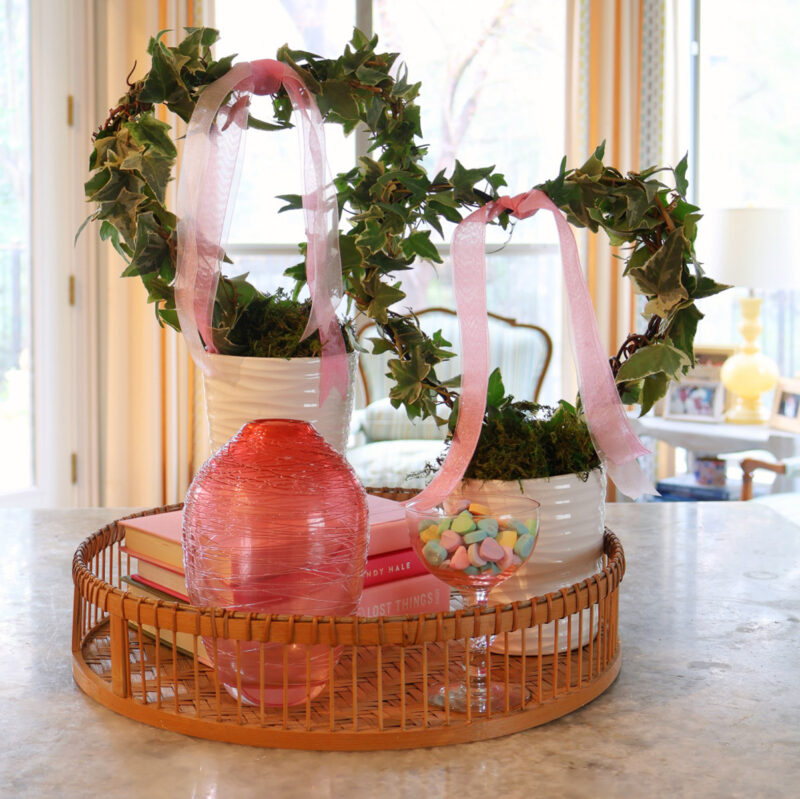
Making a Valentine’s Day Vignette
Now came the real fun. I used a round woven basket/tray as a base on our kitchen island. I added a few pink books to add height to one of the topiaries. A pink vase, which we’ve had for years, and a pink sherbet glass (an antique mall set) filled with Valentine’s candy hearts.
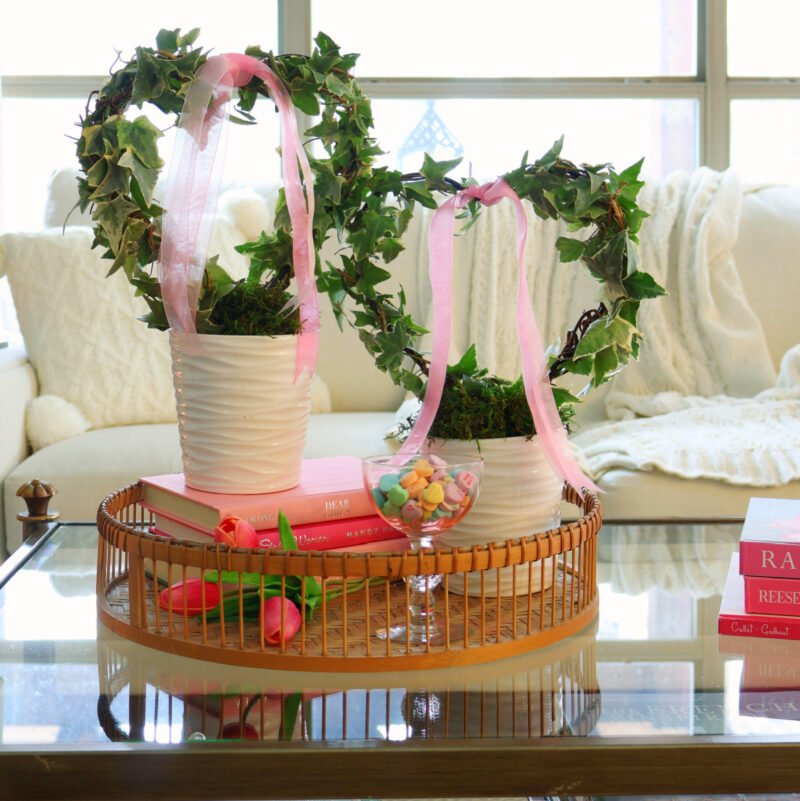
I decided that I would prefer the Valentine vignette on our living room coffee table. A few adjustments, and I had a new vignette for the living room.
I removed the pink vase and added a trio of faux pink tulips.

The pink vase now sits on a stack of pink coffee table books.

By this time, the cold weather and ice hit us, so the fireplace added a cozy feel to the Valentine’s scene.

I don’t know how long the fresh ivy will last, but for now, this topiary adds both a pop of greenery in the center of the living room and a pretty pink ode to Valentine’s Day.
Want more ideas for Valentine’s decorative accessories? Check out these Pinterest Boards: Valentine’s Day DIY Projects, Valentine’s Day Ideas, and Valentine’s Day Decorations.
Please PIN or save this topiary project so you can make one, too.
Next up in our Valentine’s Day topiary collection is Lora of Lora Bloomquist. She uses books, too.
I hope that you will PIN all these pretty Valentine’s Day ideas.


Carol,
These are so lovely, and I adore how you displayed them. Your ribbon collection is so pretty. I am quite inspired by how you store them. Your craft closet must be so organized.
Christy, thanks for the feedback. The ribbons came in the box, so I can’t take credit for their organization. Actually, my crafts need a good cleaning out right now!
You can’t go wrong with moss and ivy, two of my favorites! Featuring you at Wednesdays in the Studio!
Thank you so much!
OOOH, Love how these turned out!! Pretty and perfect to celebrate the month of Love. ❤️
Thank you, Libbie! So nice to hear from you.
Lucky you clipped the ivy before the snow and ice hit! Those wire frames are great; such a fun flexible canvas to use over and over. The coffee table vignette is so pretty!
I’ve had two real ivy topiaries, and have had no luck keeping them alive. This is right up my alley. Love your entire vignette. Thanks for joining. Great tutorial too. pinned
Normally, I wouldn’t use real ivy, but necessity is the mother of invention!. The real ivy is about on its last leg, so I ordered some pretty faux ivy to replace it.
We both had the same idea for this challenge, Carol! 🙂 I love your DIY heart topiary—simple, cozy, and perfect for Valentine’s Day décor! Pinned!
Love your pink book selection too.
Thanks! Can’t have too much pink! Thanks for visiting Bluesky at Home.
Carol, totally sweet Valentine topiaries… I’m glad you had real ivy ~ it looks really nice wrapped on the wreaths! It’s the one vine I haven’t put in in our backyard (yet!). I love how you moved your topiaries around and changed up the decor with them. Thank you for the ideas!! Love all the pink book covers… <3 Happily pinned a bunch.
Keep warm! Hopefully we are beginning to thaw out.
Hugs,
Barb 🙂
Thank you. I didn’t have much choice with the coming storm. It turned out to work well, and I’ve enjoyed the real stuff – for now!
Carol your ivy topiaries turned out so nice, love the gauzy pink ribbon you chose!
Carol
Such a fun vignette. I really like the heart frames you used. They are perfect for this project. Great post.