How to Transform Orange Pumpkins with Paint and Gilding
Are you ready to give your autumn decor a chic makeover? If you’re tired of the same old orange pumpkins, get ready to transform your fall decor with a sophisticated twist on this classic seasonal staple. In this post, I’ll show you how to transform orange pumpkins with paint and gilding.
Painting pumpkins is not only a fun and easy DIY project, but it also allows you to customize your decor to match your personal style.
Painting pumpkins is a fantastic outlet that allows for endless artistic expression. Unlike carving, which requires sharp tools and can be messy, painting is a safe and accessible activity for all ages, making it perfect for fall decorating.
Painted pumpkins last longer than their carved counterparts, as they won’t rot, allowing you to enjoy your festive creations throughout the fall season. Plus, using faux pumpkins, your painted creations can be enjoyed year after year!
Another significant advantage of painting pumpkins is the versatility it offers. With a variety of paint colors and techniques, you can create anything from whimsical designs to elegant patterns that suit your personal style or seasonal themes.
Whether you opt for vibrant colors, intricate patterns, or simple designs, painting pumpkins provides an opportunity to showcase your creativity and make unique decorations that stand out.
Best of all, painted faux pumpkins can easily be customized to fit any decor style, from rustic to modern. You can choose colors that complement your home’s interior or seasonal themes, making them a versatile addition to your autumn decor.
A few weeks ago, I did some exploring on Pinterest about orange pumpkin paint makeovers. Now I’m sharing my own pumpkin paint project.
What Color to Paint Your Pumpkins?
Pumpkins can be painted whatever color fits your design aesthetic. Fall colors are usually dark and rich:
- rust
- gold
- sage green
- burgundy
- chocolate brown
- purple
- eggplant
- even pink and shades of blue
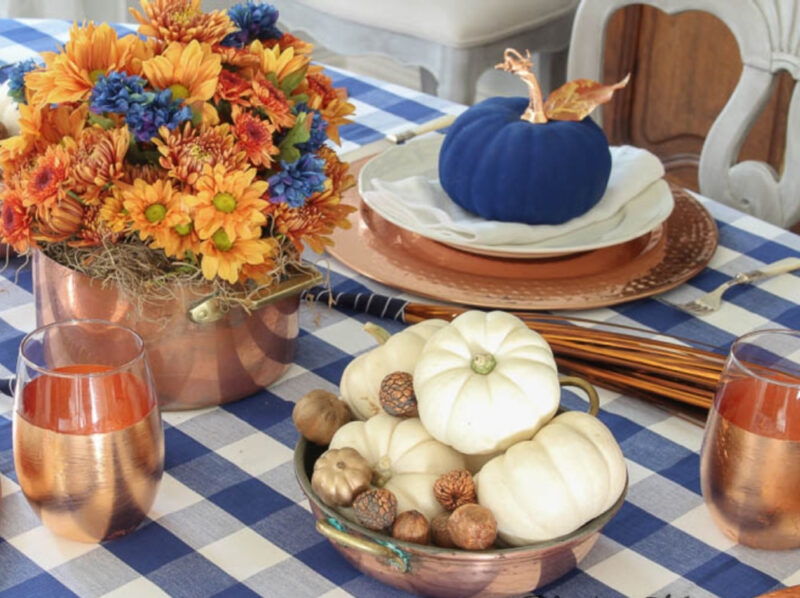
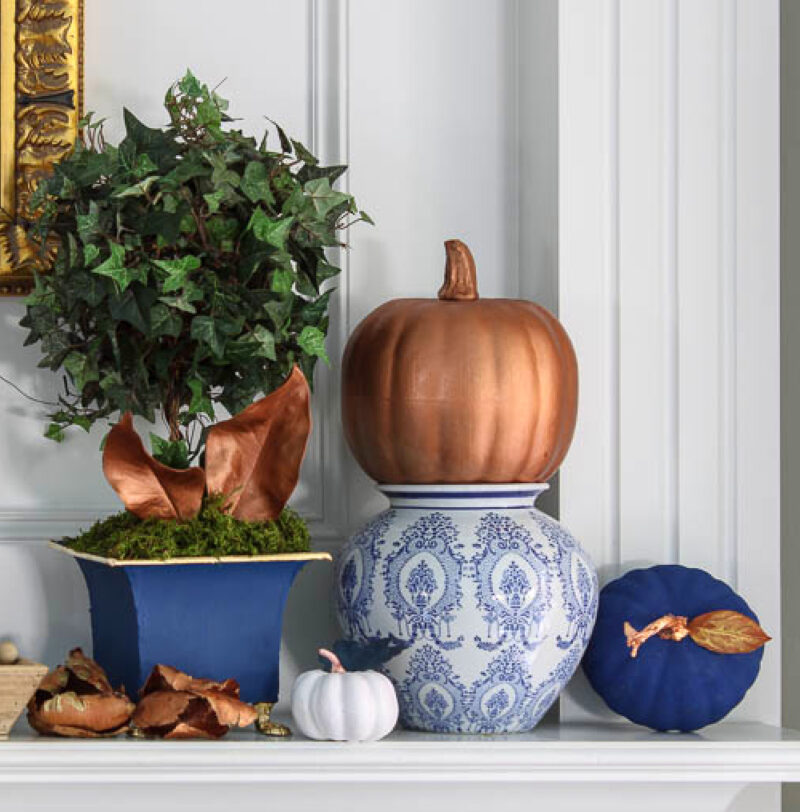
This project turns ordinary faux pumpkins into stunning navy and copper showstoppers that will elevate your home’s fall aesthetic.
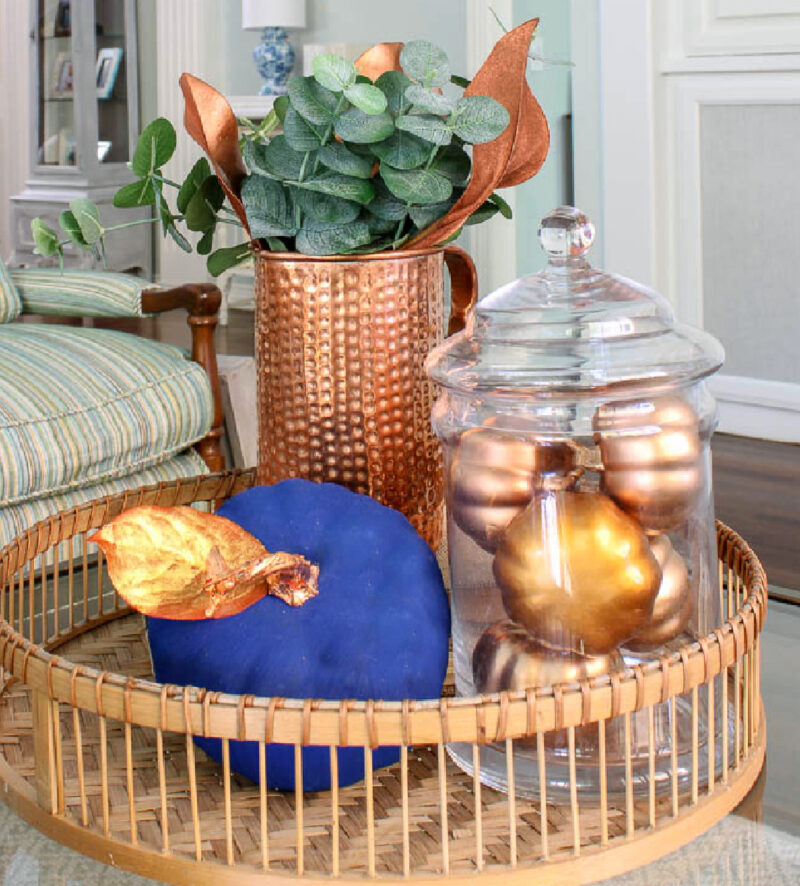
I love navy, which is the main accent color in our living room. Navy is a rich color, which works as a saturated color for fall decor. As a pairing, copper is my favorite metallic for fall. I started using it in our fall living room on the mantle and our coffee table,
I love this combination for fall. The navy represents the cooler temperatures of fall and the deepening night skies. The darker shade of blue is just more suitable for fall.
This project combines paint and copper leaf. I will be using this project as part of a fall tablescape, but it could easily be used on a mantle, a table, or a coffee table for fall decor.
This post contains affiliate links to products used in the creation of this project. If you should order any item from this site, I may receive compensation, but you do not pay a penny more. Your purchase is greatly appreciated as it helps support the continued publication of this site.
Supplies for the Navy-Painted and Copper Leaf Pumpkins
Ready to give your fall decor a fresh update? Here’s what you’ll need to create these eye-catching painted pumpkins:
- number of faux pumpkins you need; these are vinyl-covered styrofoam, but any pumpkin will work
- paint colors of your choice
- sponge brushes
- painter’s tape
- Copper Leaf from A Makers’ Studio*
- Gilding Size from A Makers’ Studio*
*Gilding Leaf also comes in Gold, Silver and Variegated.
You can’t have a fall tablescape or decor without a pumpkin somewhere.
I first bought some all-styrofoam pumpkins at Dollar Tree. Then I found these pumpkins on sale at Joann for $2.39, which was a great price since they have a nice size and feel to them. I decided to use them instead of the Dollar Tree ones.
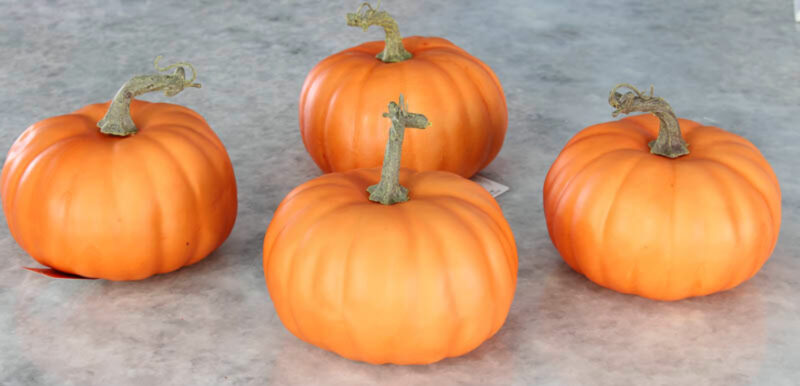
You know these pumpkins are not going to stay orange, right?
Steps to Preparing the Pumpkins
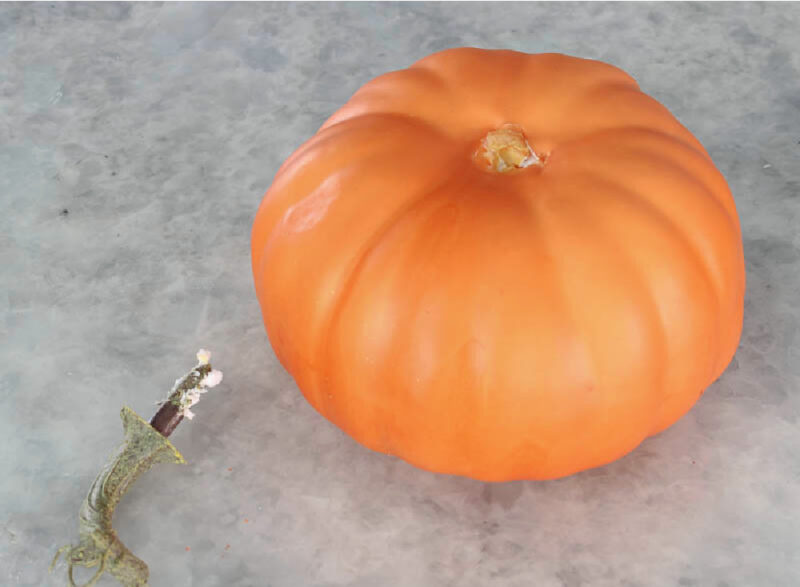
Remove the stems, which come out easily, just by pulling them out of the pumpkin.
Originally, I was going to cover the pumpkins in fabric, so I dug out a bigger hole. I bought the navy check fabric at Joann. It was 3/4 of a yard and normally $16.99 a yard. Because it was a scrap piece on the bolt, I got it for $2.55.
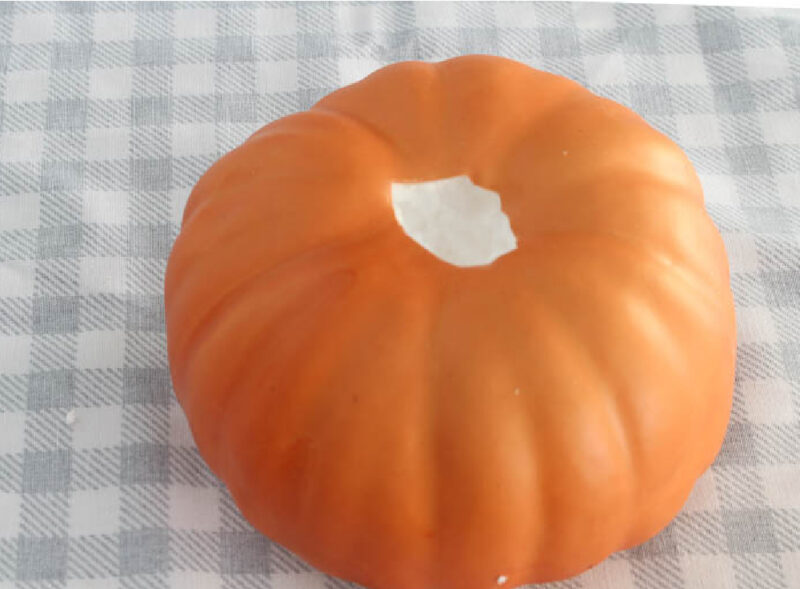
After trying to get the fabric to gather and lay nicely around the pumpkin and stuffing the excess into the big hole, I just didn’t like the look. That’s when the idea just to paint the pumpkins was born. I’m so glad I changed my mind because I like the painted look much better.
Painting the Pumpkins
Step 1 – For my paint, I decided to use a deep blue textured paint from Folk Art. I received a set of about 13 paints after Haven a few years ago and used it for the first time this past summer. I used this blue to paint a terra cotta pot. This paint is very thick, but goes on easily.
NOTE: This paint is online but all colors show as unavailable.
Any acrylic or chalk paint will work for painting pumpkins.

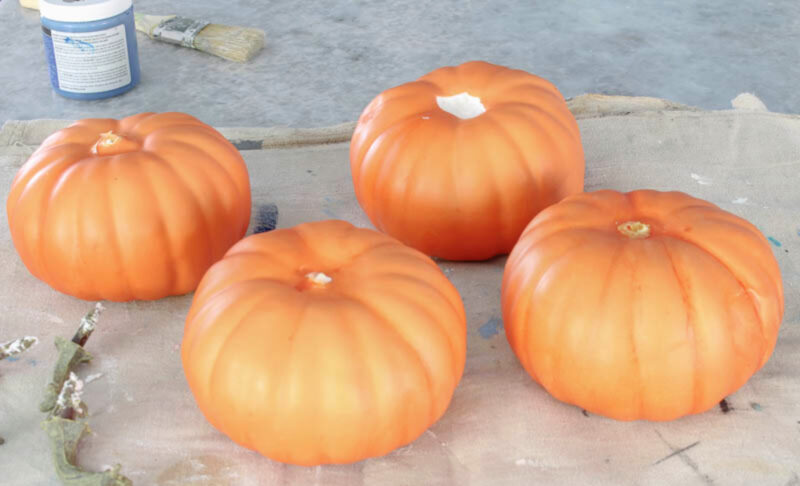
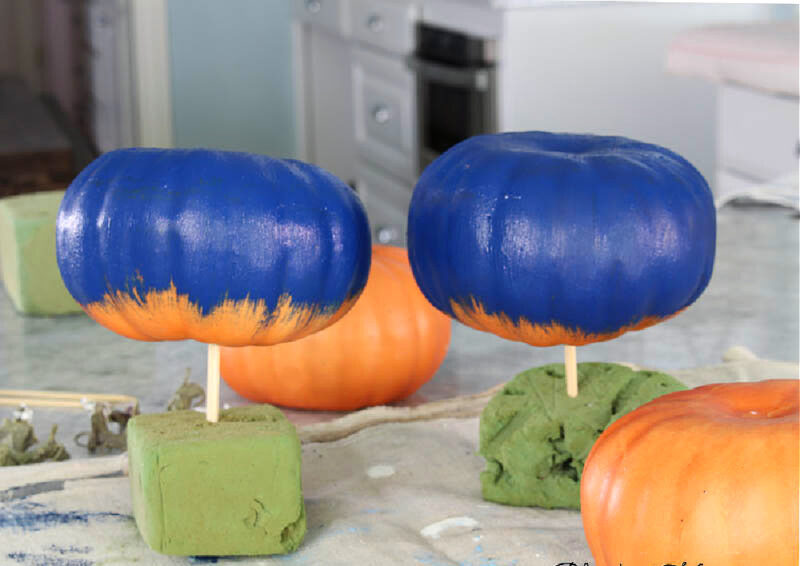
Step 2 – I used thick wood skewers to hold the pumpkins while I painted. I stuck the skewers in old pieces of florist foam. Then I placed the top of the skewer in the hole where I removed the stem.
Starting on the bottom, paint the pumpkins using a sponge brush. They easily dried on the skewers.
Step 3 – Spray paint the stems. While the bottom of the pumpkins was drying, I went outside on the driveway and used Krylon Copper Metallic Spray Paint to paint the stems. (I had already checked my supplies to make sure I had some on hand.)
NOTE: The rocks are to hold the newspaper down.
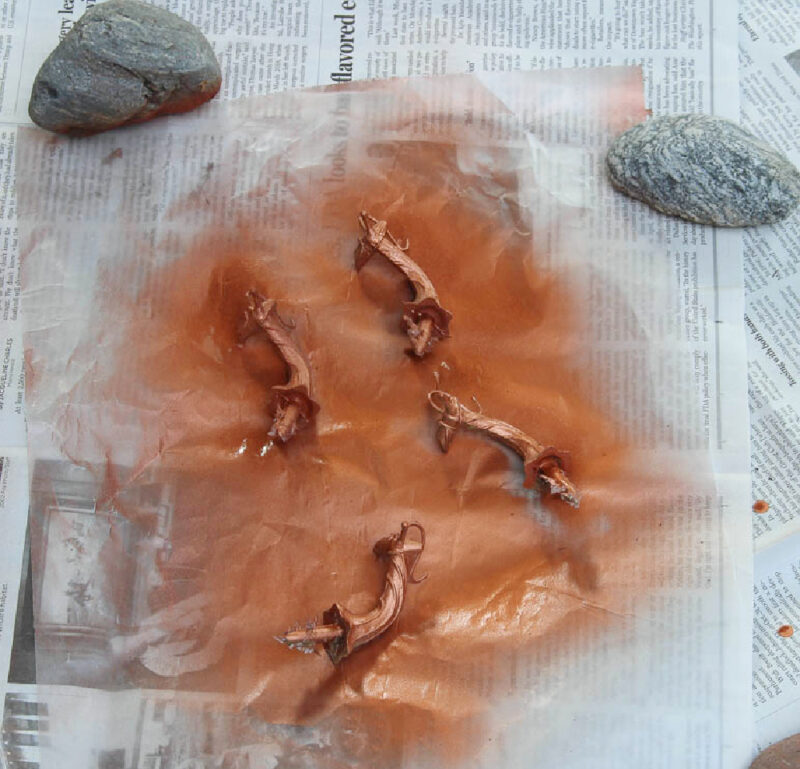
I closed the garage doors so I wouldn’t accidentally spray my car. I also used wax paper so the stems don’t stick to the newspaper.
Step 4 – Paint the top of the pumpkins. I removed the skewers from the florist foam and turned the pumpkins right side up on my drop cloth. Then I painted the tops and then let them dry for about 25 minutes on each side.
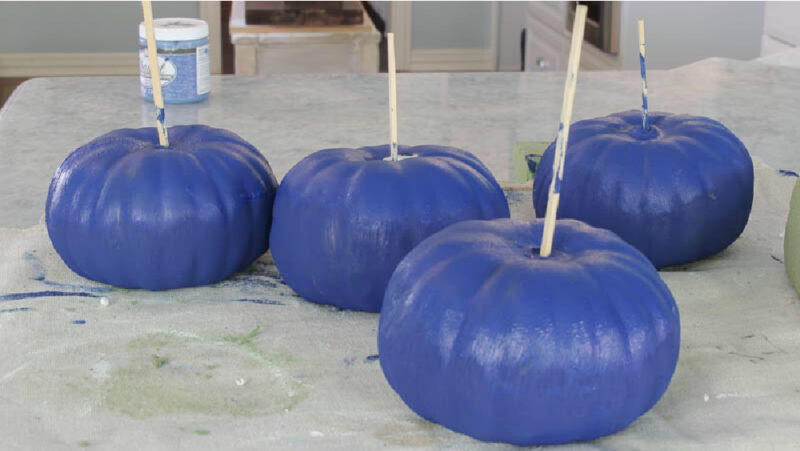
Step 5 – Put the stems back in the pumpkins. Just push the end of the stem back in the hole.
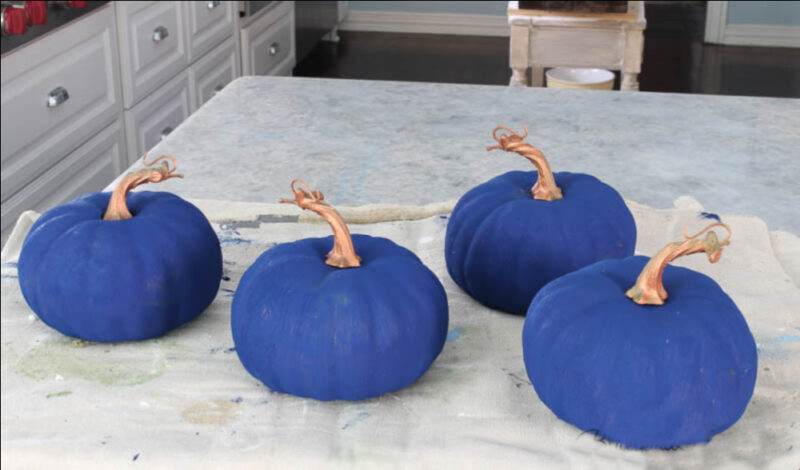
At this point, I was a little disappointed in the stems. I wanted the copper stems to be more pronounced and brighter. Solution? Out came the copper leaf and the gilding size. Since I had never gilded over paint, I tried one stem first to see if it worked.
I pulled the stems slightly out from the pumpkins and brushed the gilding size on.
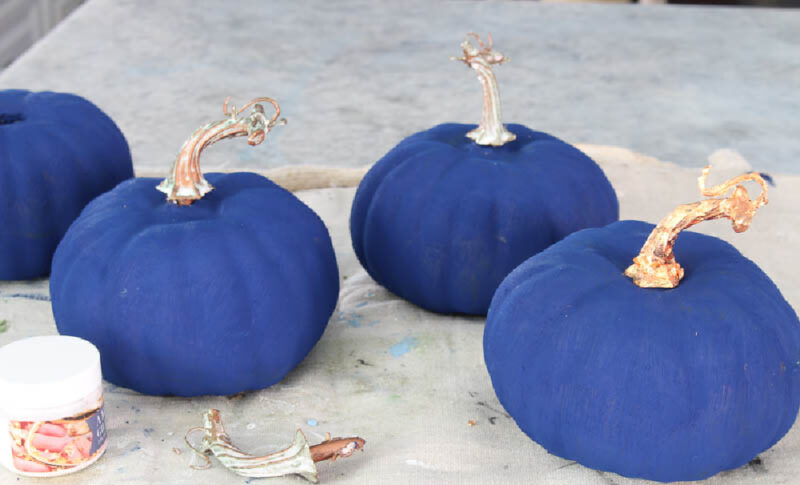
I waited about 5 minutes until the gilding size became tacky. Then I added the sheets of copper leaf to cover the stem.
It worked like a charm.
So much better with the brighter copper stems. Easy peasy.

Using Blue-Painted Pumpkins in Fall Decor
I first used these blue-painted pumpkins on a fall tablescape. As you can see, I added a copper-painted leaf to the pumpkin.
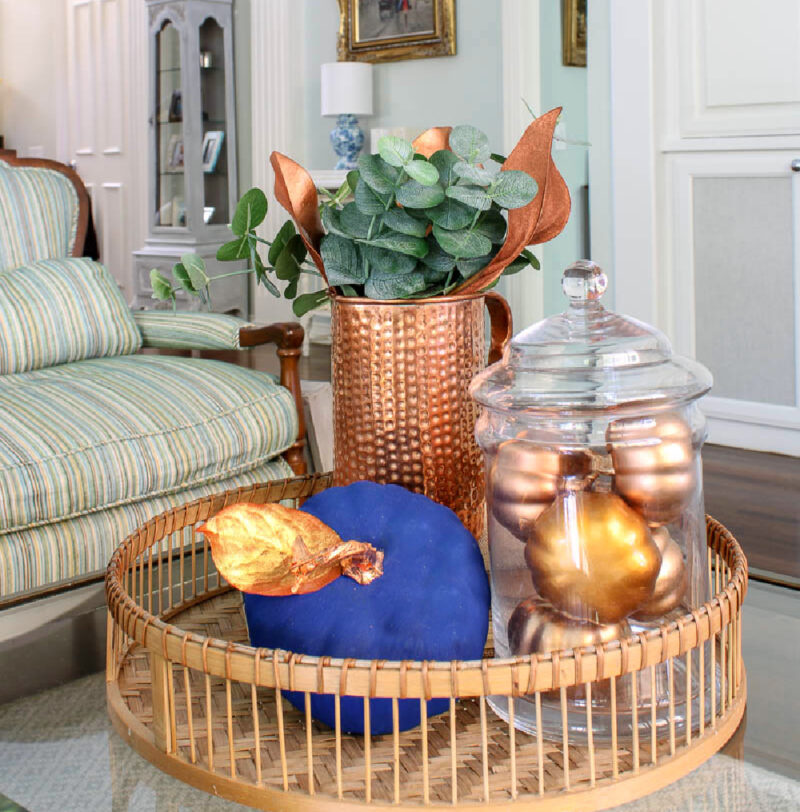
I’ve also used the pumpkins in a fall vignette on our coffee table.
And in another vignette on our breakfast room table.
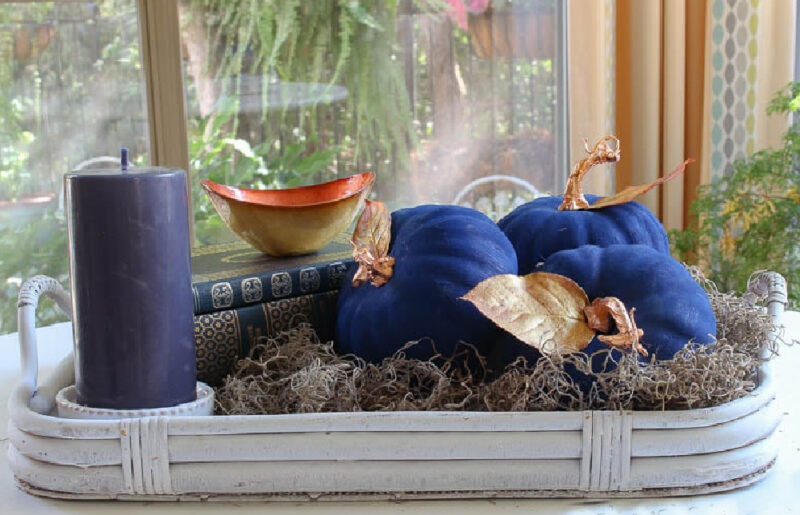
Of course, I had to use them on our fall mantel.
You can see how many ways painted faux pumpkins can be used in your fall home decor.
To see more detailed guides using leaf and gilding size, check out these projects:
- How to Update Containers with Paint and Gold Leaf
- Gold-Leaf Votive Candles
- How to DIY a Christmas Coffee Table Tray with Gold Leaf
Be this post to your favorite Pinterest Boards. Check out these Pinterest Boards with plenty of inspiration: Fall DIY Projects, Fall Home Decor, Fall Tablescapes,