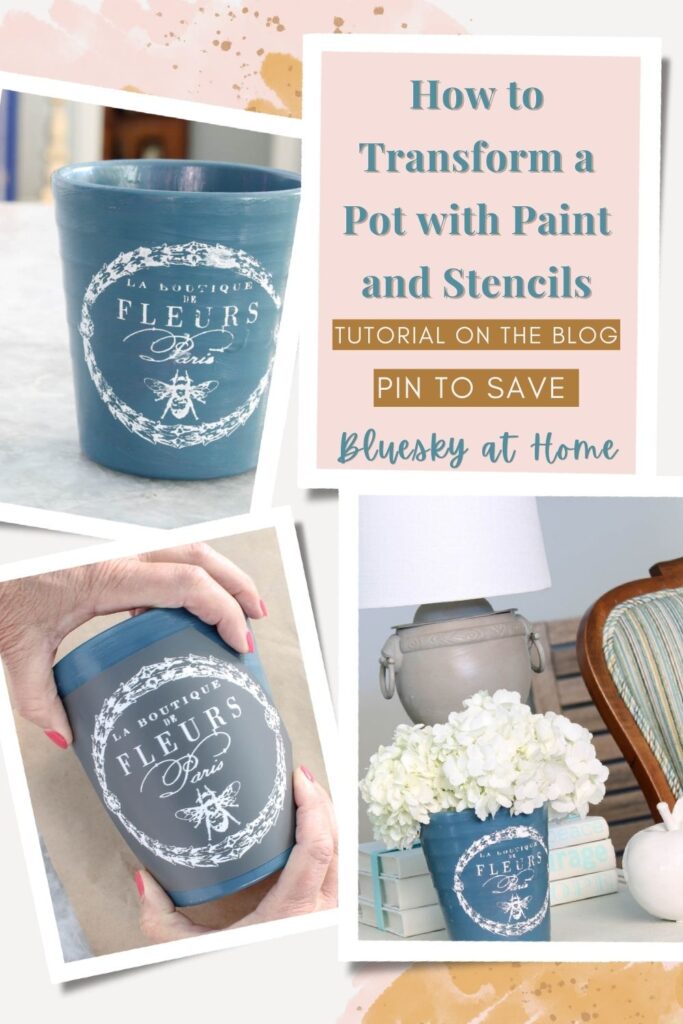
How to Paint a Flower Pot with Ceramic Paint
Flower pots come in all colors. Unfortunately, sometimes they come in a color that doesn’t fit your style or aesthetic. What to do? I’m going to show you how to paint a flower pot with ceramic paint.
Ceramic flower pots can be found at the big box stores, dollar stores, garage sales, and flea markets. They come in all sizes and shapes. And colors. That’s where this project comes in – changing the color of that flower pot by painting it with ceramic paint.
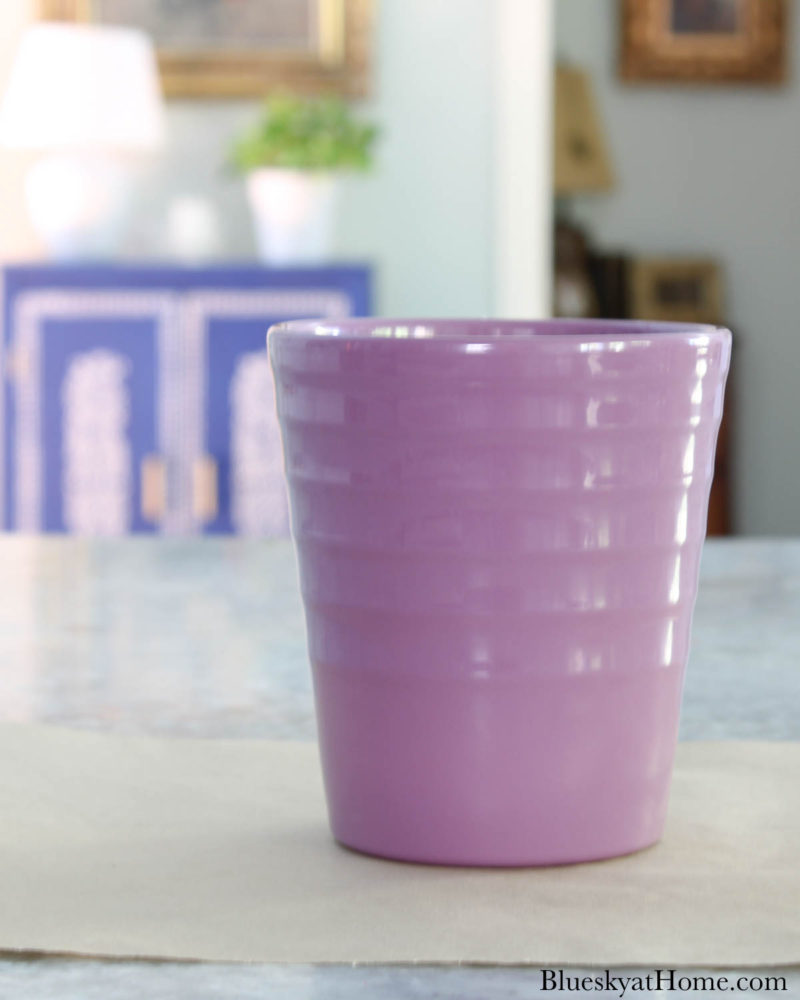
I was lucky last year when a friend brought us a beautiful orchid in a ceramic pot. The orchid was gorgeous, but the color of the pot was not my favorite.
The orchid quickly found a home in our bedroom for several months. The bloom is now in remission as Sweet Shark babies it back to blooming.
Now is the time to change the color of the ceramic flower pot. Come along on this project.

Using Ceramic Paint and Stencils to Decorate a Flower Pot
Good timing for this ceramic flower pot paint project. I needed just the design and the type of paint for this project.
Supplies You Will Need To Paint A Flower Pot
Have you ever painted a ceramic flower pot? I haven’t. Painting this ceramic flower pot was so easy. Now I will not let the wrong color hold me back.
I have stenciled with ceramic paint, but I have not painted a flower pot or anything with ceramic paint. What supplies will you need?
- A ceramic pot of your choice
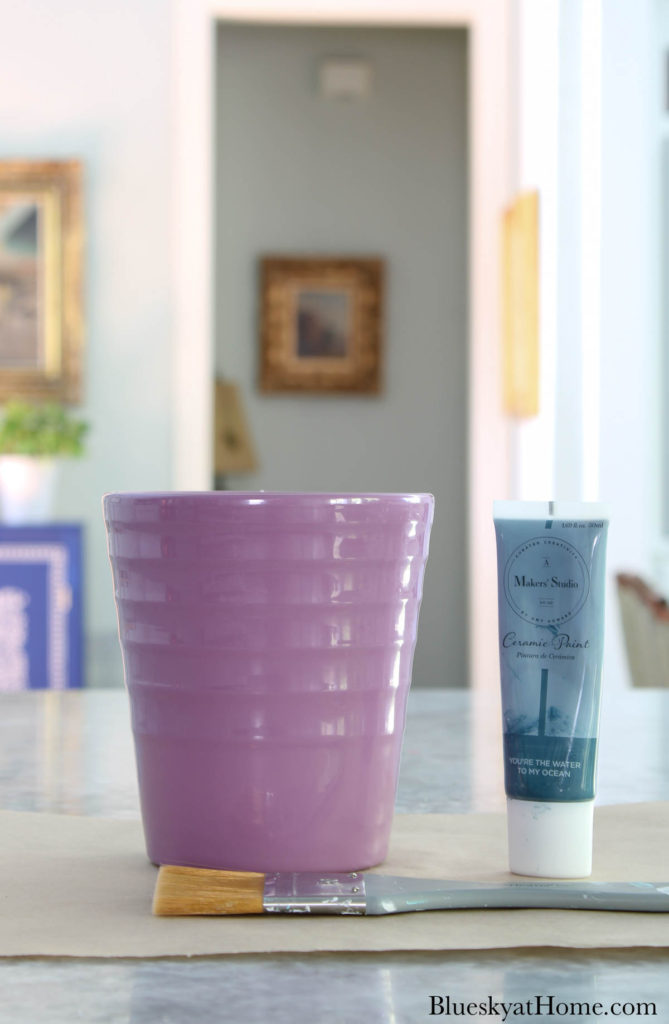
- Paint created for painting specifically on ceramics; that means porcelain, glass, and ceramics. My go-to is No Bake Ceramic Paint from A Makers’ Studio. You should read all about this awesome paint option. It comes in 14 vibrant permanent colors, is hand washable, microwaveable, and food safe.
- A paintbrush
Painting The Flower Pot
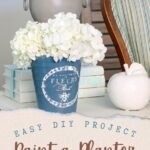
Step 1 – Choose your pot. As I said, mine was a gift. Make sure that the flower pot is clean and free of dirt, grease, oil, etc. If you read Bluesky at Home often, your know my favorite colors are blue and pink. Mauve isn’t on the top 50.
QUESTION: Can you use a terra cotta pot for this project? Yes, terra cotta pots are a good alternative if you don’t have a ceramic pot on hand.
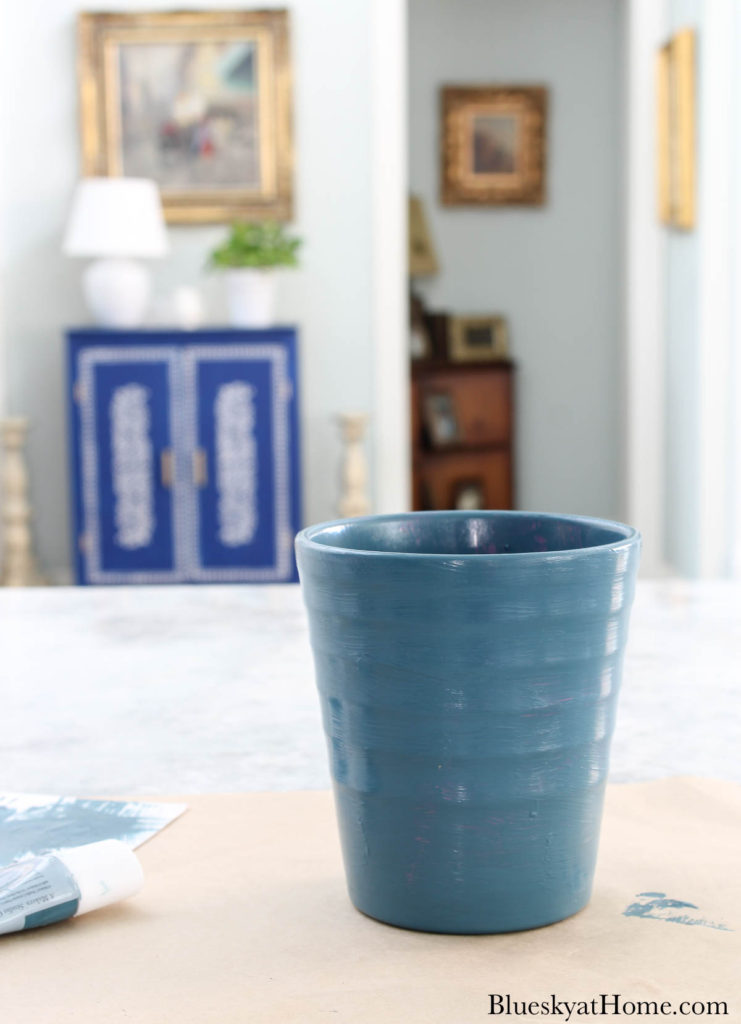
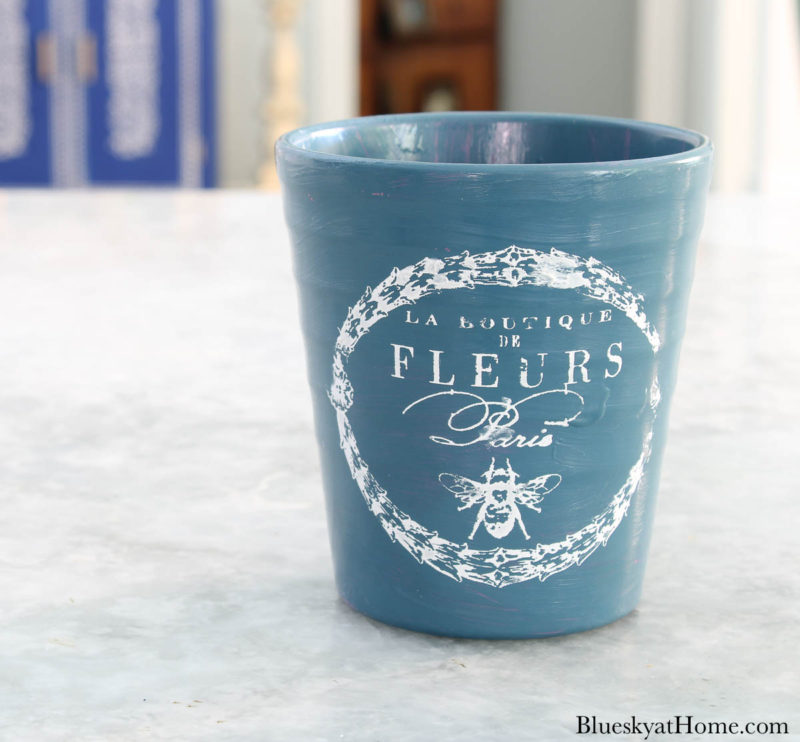
Step 2 – Choose your ceramic paint color. I already had a pretty blue – You’re the Water to My Ocean – that I have used for other stencil projects.
QUESTION: Can you use acrylic paint for this project? Yes, but you will get a different finish on the planter.
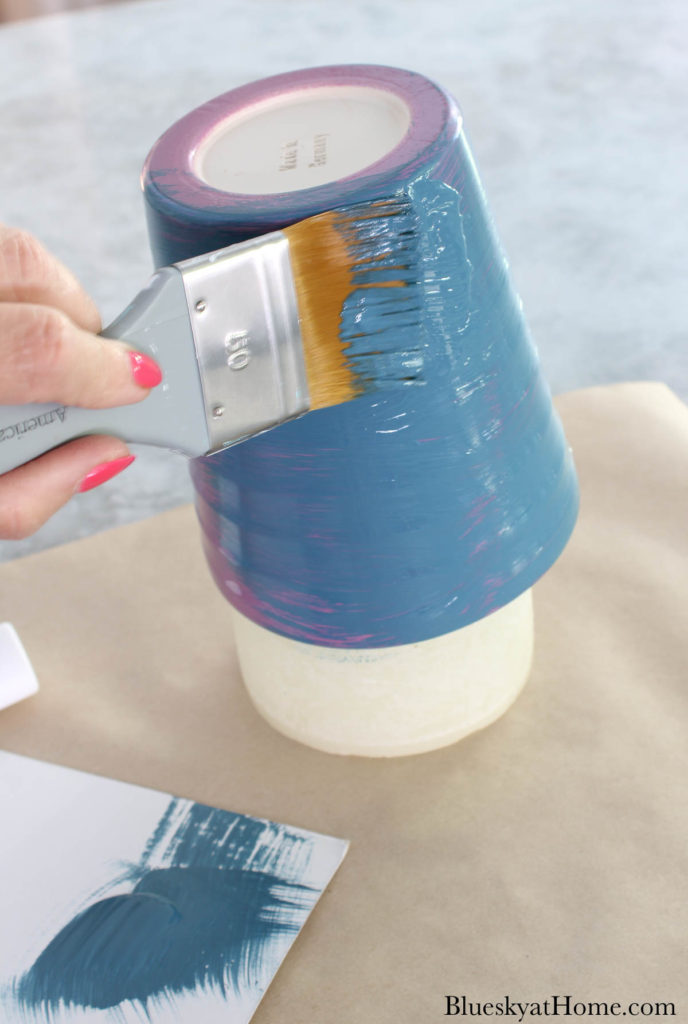
Step 3 – Turn your flower pot upside down. This makes it easier to paint the bottom of the pot first. I put my flower pot on a candle to hold it off the work surface.
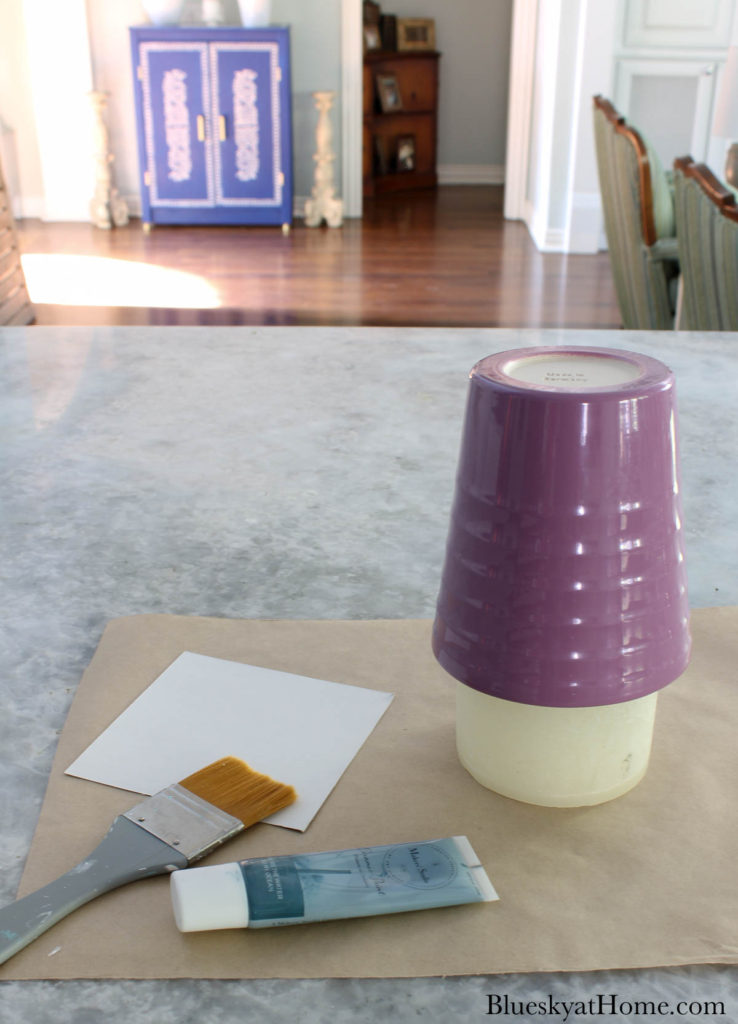
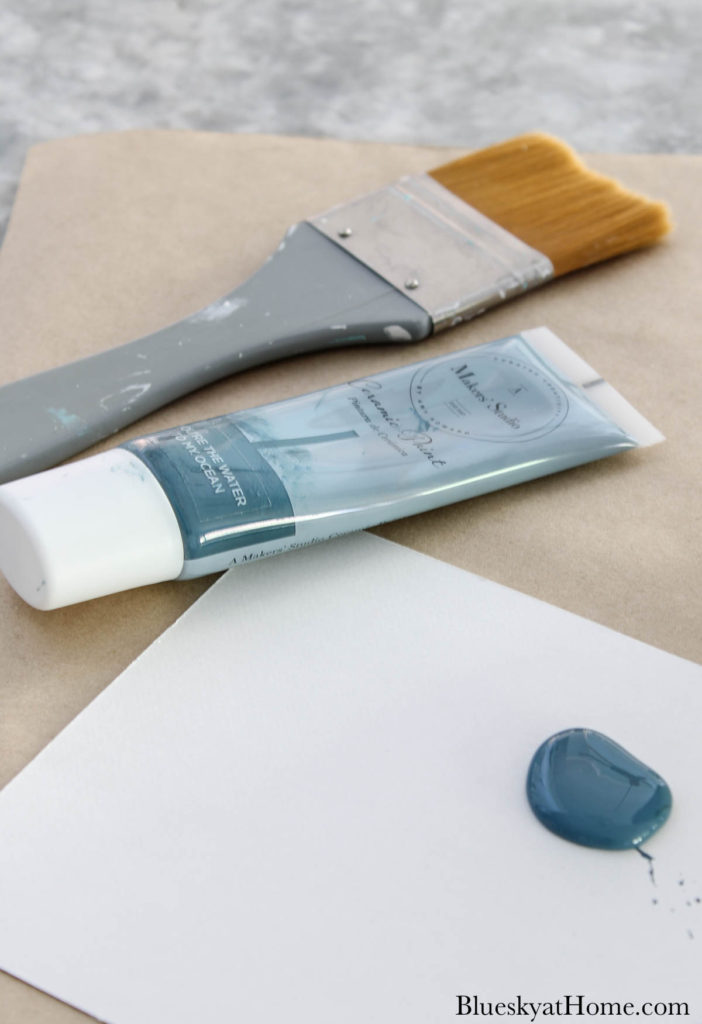
Step 4 – Squeeze a dollop of the No-Bake Ceramic Paint on a piece of cardboard, paper plate, or glass plate.
NOTE: A little Ceramic Paint goes a long way.
This amount covered the entire flower pot.
Step 5 – Use your paintbrush to apply the Ceramic Paint to the flower pot. I painted one coat and let it dry for several hours and then added a second coat.
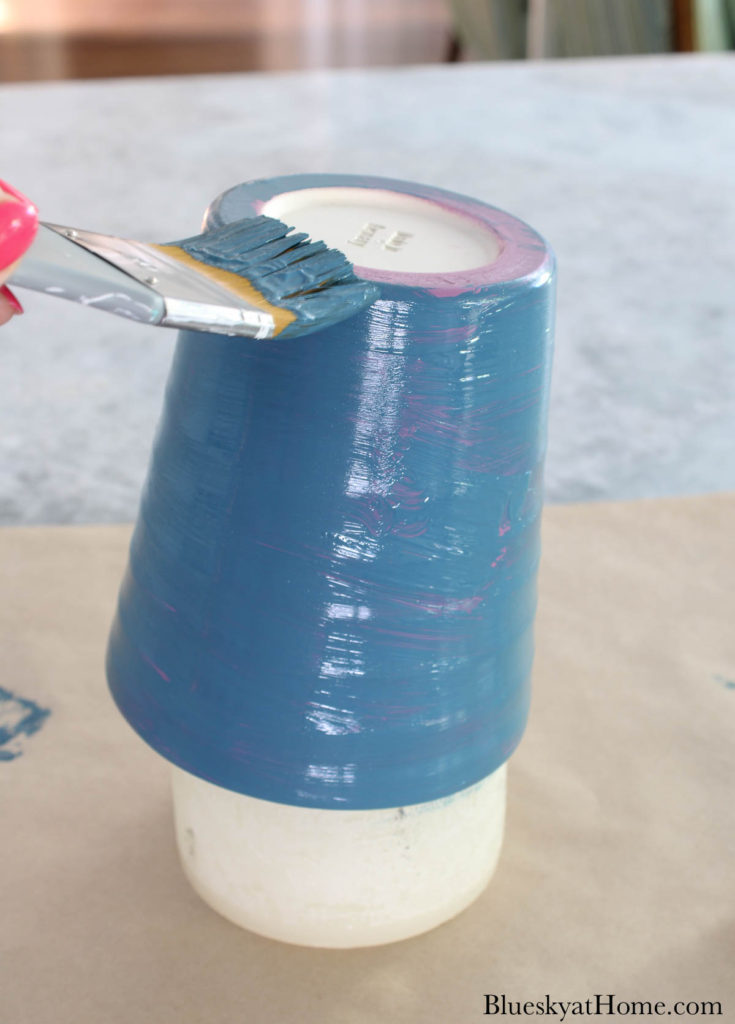
Step 6 – Turn the flower pot over and paint the inner rim of the pot and the inside for an inch or two. Then let the flower pot dry overnight.
You are done with painting your flower pot – or any plain glass vase, dish or platter. Your transformed ceramic piece will have a smooth finish and slightly shiny.
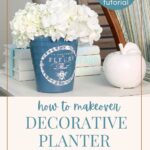
Was I done with my flower pot painted with ceramic paint? NO! I wanted to add more design to my now pretty blue-painted flower pot.
Adding a Stencil Design to the Ceramic Painted Flower Pot
Want more design on your painted pot? It’s easy to do with a stencil.
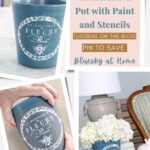
A few weeks ago I ordered a new stencil from A Makers’ Studio. I love French-inspired designs and Le Fleur has 8 different designs you can use on just about any surface.
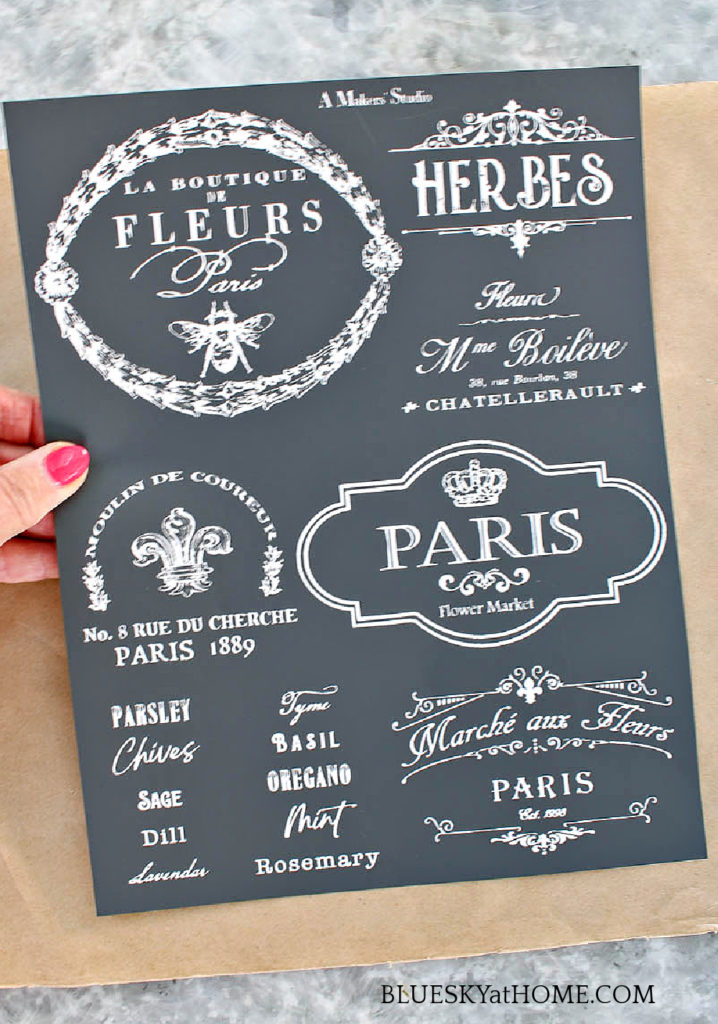
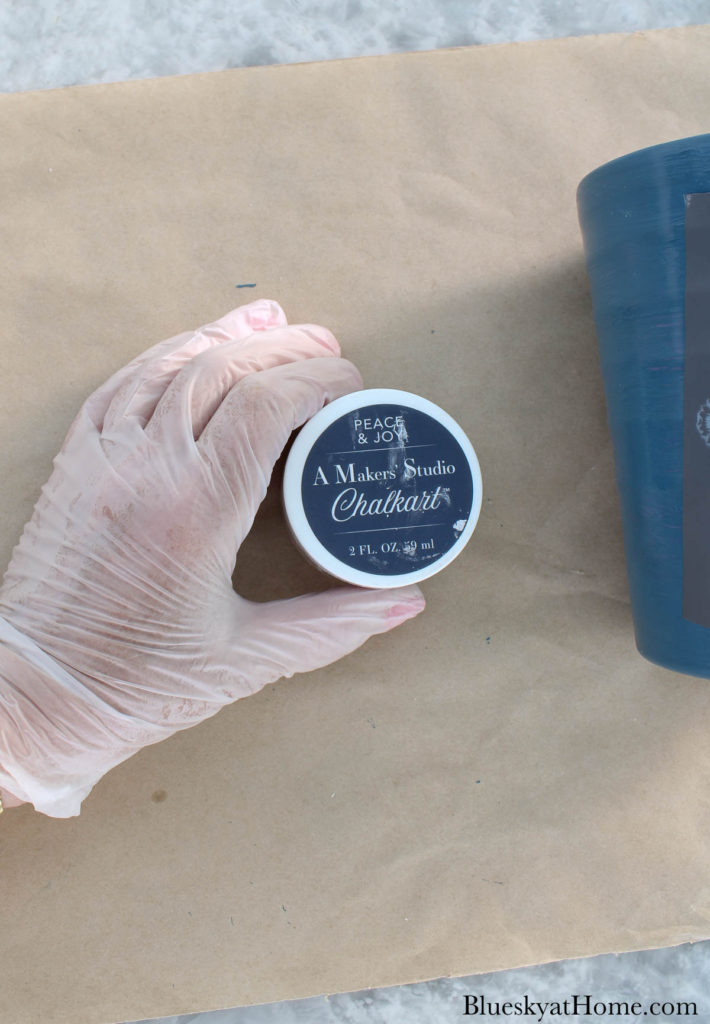
You can stencil with Ceramic Paint, GelArt Ink or ChalkArt. Since ChalkArt is removable, I chose it for this project. I used Peace & Joy, a bright white. I always keep this color on hand.
If I wanted the stencil design to be permanent, I would have used Ceramic Paint in Angel Wings.
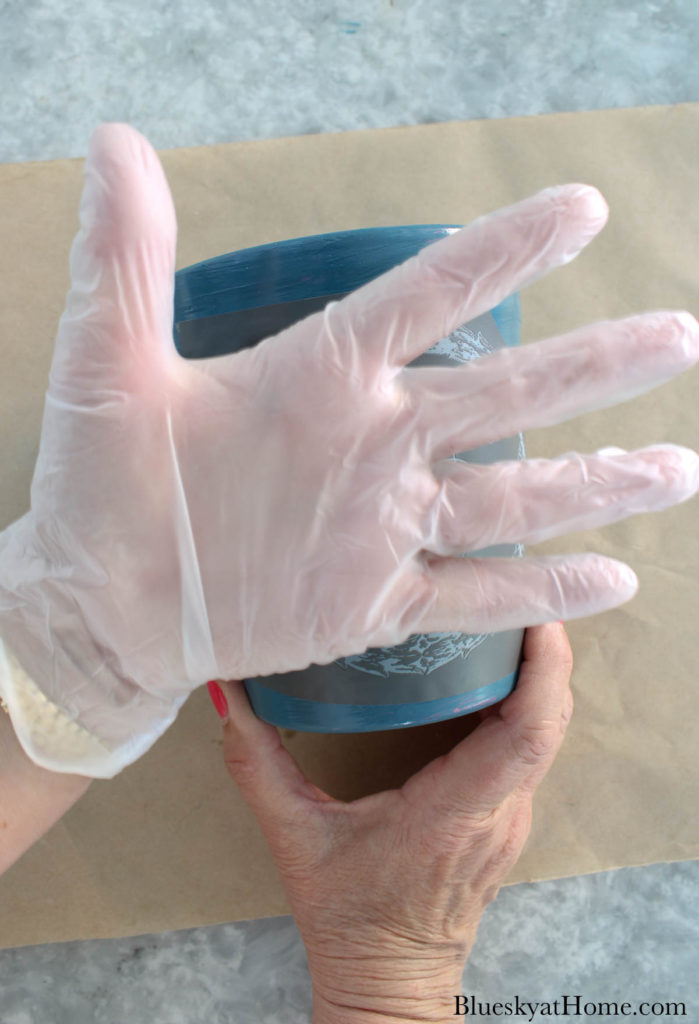
Step 1 – After choosing your stencil and your paint color, cut out the stencil that you want to use. Remove the stencil from the paper backing. Then adhere the tri-mesh stencil to the surface. Smooth it down to remove any bubbles.
NOTE: Keep the paper backing and the plastic envelope for storing the stencil.
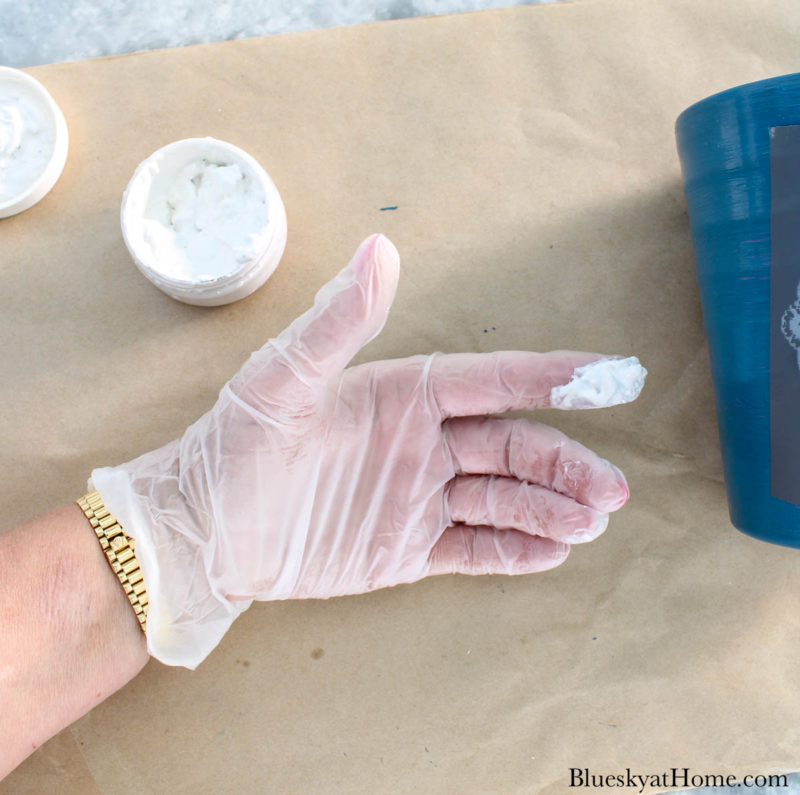
Step 2 – Normally, you use a plastic scraper to apply the ChalkArt. Since my flower pot had a ridge in the surface and the sides are not straight, I find it easier to apply the ChalkArt with my finger while wearing a plastic glove.
Step 3 – With your finger, rub the ChalkArt over the stencil design. Be sure to cover it completely.
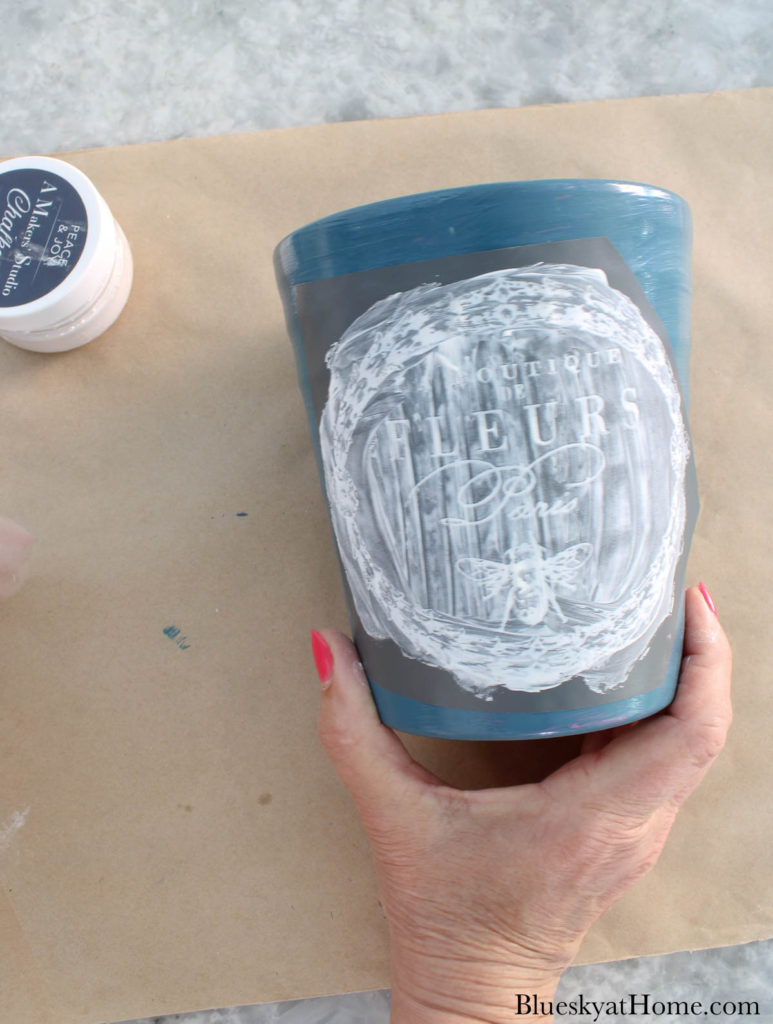
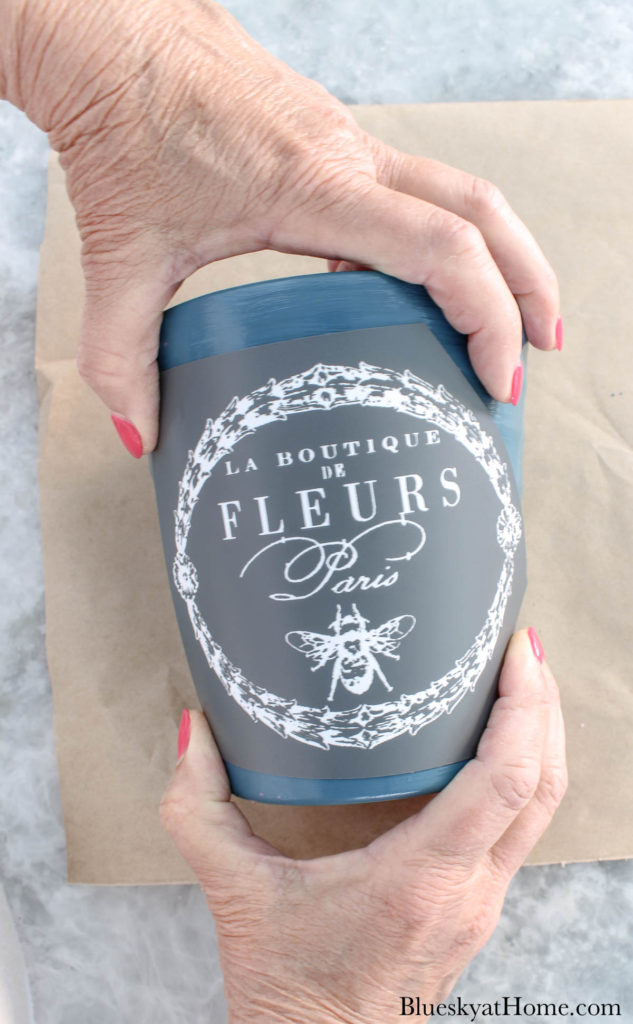
Step 4 – Carefully pick up a corner of the stencil and gently pull it back to reveal your stencil design.
Place the stencil in a container of water or in the sink and rub off all the ChalkArt. Place the stencil design-side down on a paper towel to dry.
Allow your ChalkArt design to dry for about 30 minutes.
Filling The Ceramic Painted Flower Pot With Flowers
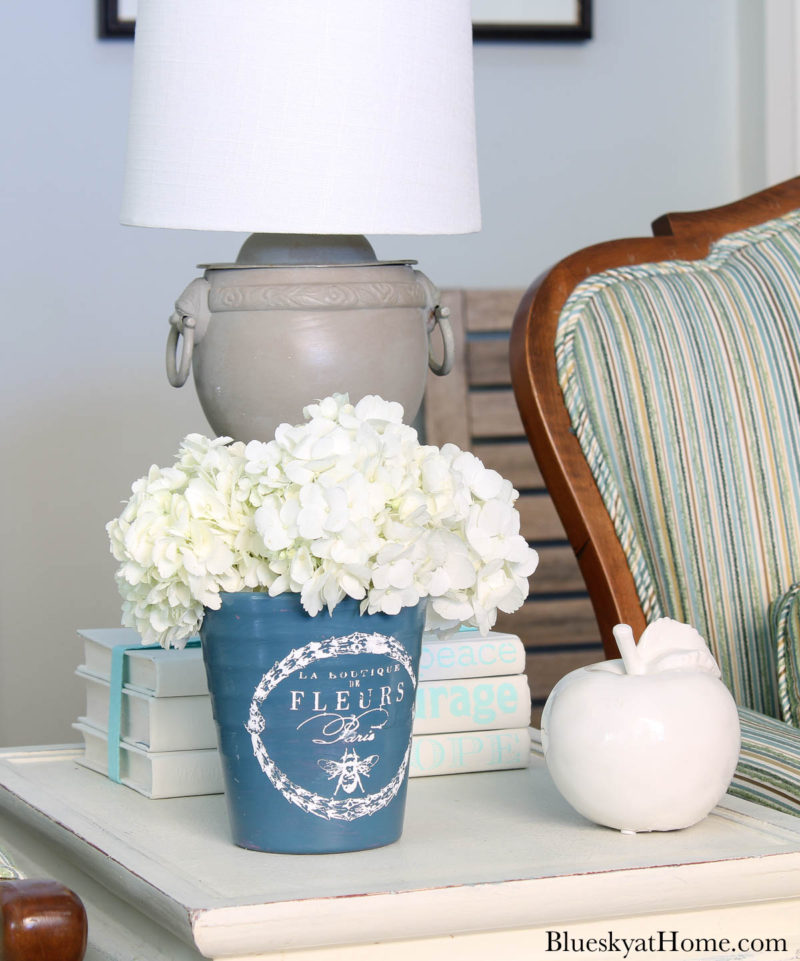
With my flower pot now painted with ceramic paint and finished with a pretty French flower stencil, I was ready to fill it with flowers.
I picked up two bunches of white hydrangeas at my local Trader Joe’s. I cut off part of the stem and let them soak in a container in the sink while I was painting and stenciling the ceramic flower pot.
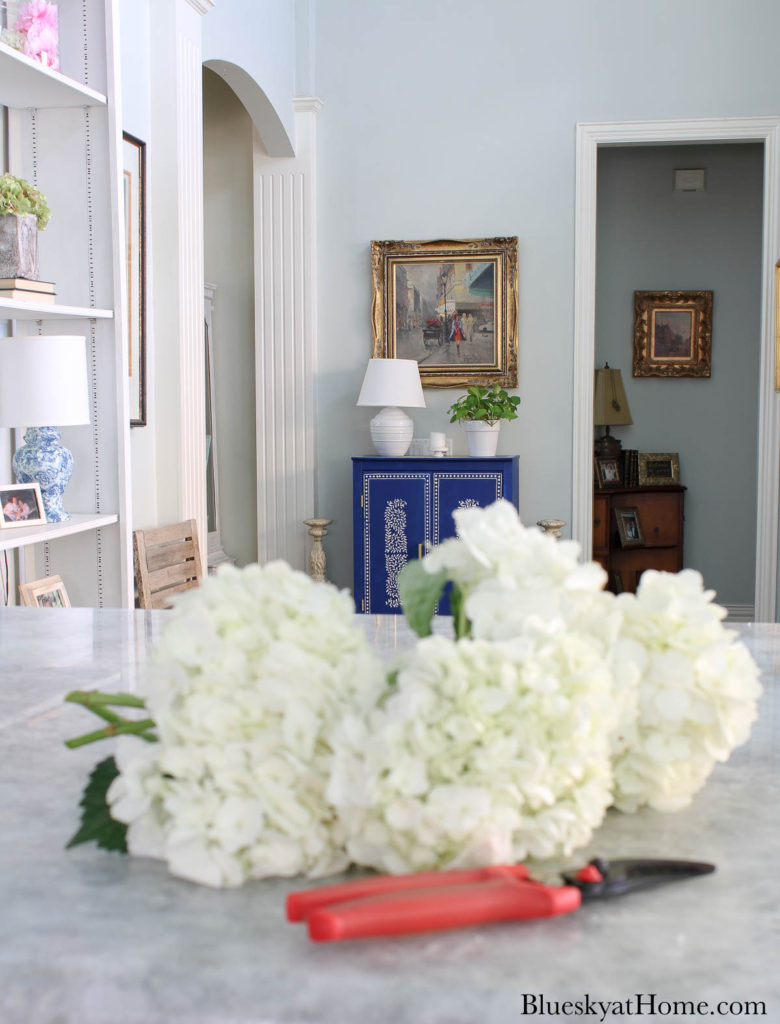
I used three stems in my flower pot.
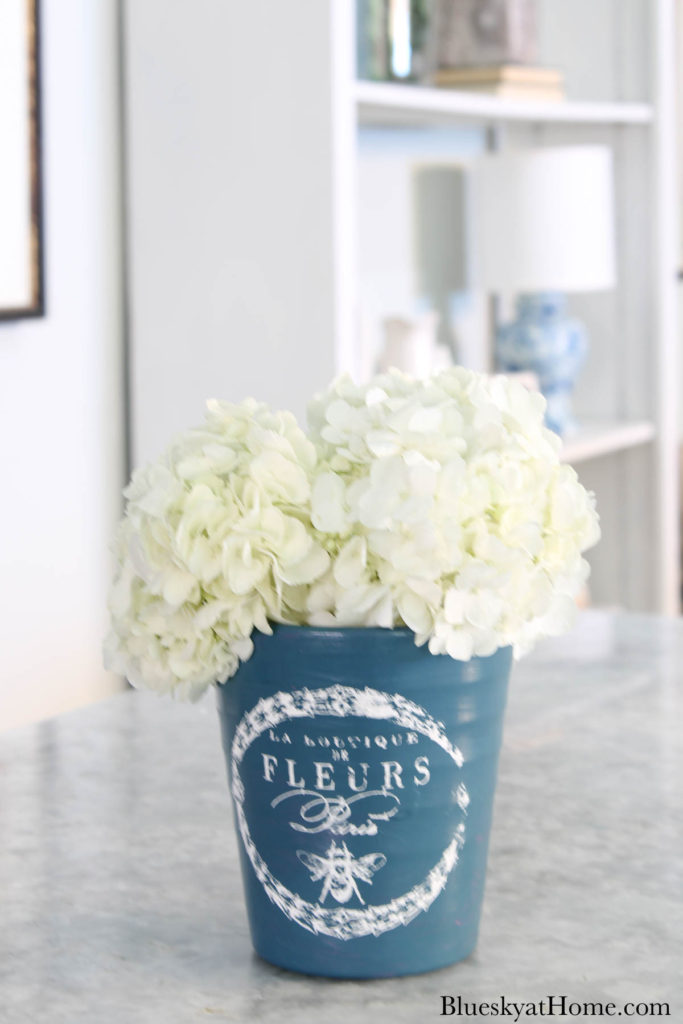
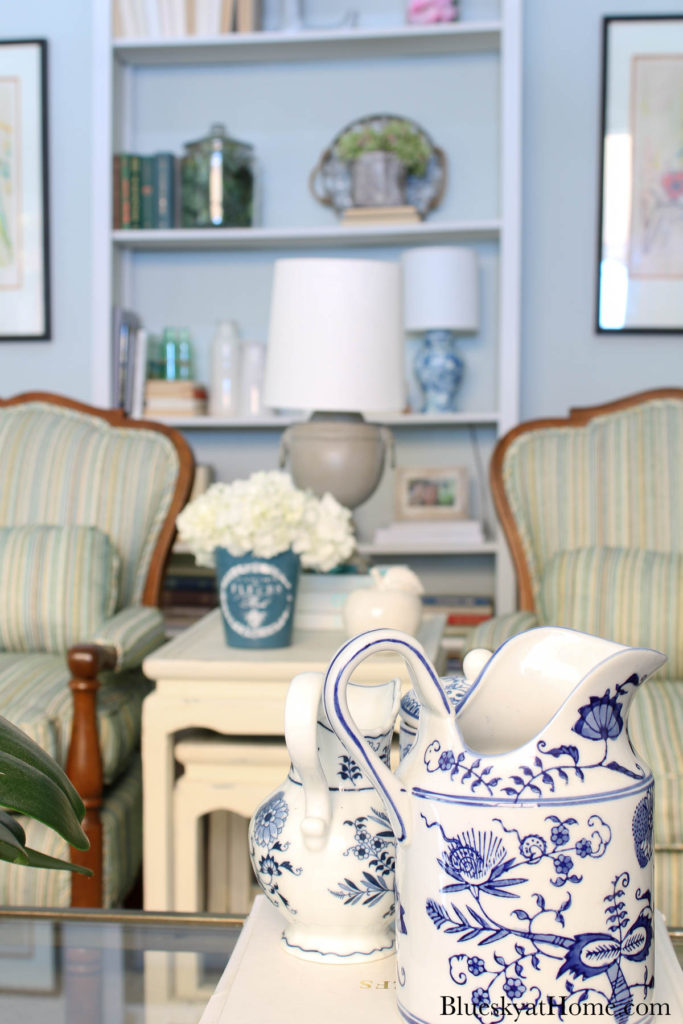
It doesn’t get any better than a blue flower pot filled with white hydrangeas. I placed the flower pot on a side table in our living room. In this spot, we can see it from the entry, the living room, and the kitchen.
I hope that I’ve shown you how easy it is to change the color of a ceramic or glass container by painting them with ceramic paint.
Here are other ways that you can use ceramic paint for stencil projects:
Our Favorite
Ceramic Paint Projects
First, please PIN this project to your Pinterest ideas for future reference. Check out my Paint Projects and Stencil Projects Boards.


Carol, it’s always fun to dress up the terra pots. Yours’s looks perfect for summer. Thanks for sharing at the FWF link party.
Thank you, Rachelle. It was a fun project.
The blue of your vase makeover is a stunning color. I am sure you will enjoy it so much more now that you have made it your own. Thanks for sharing. #HomeMattersParty
Thank you, Donna. It is such a pretty blue color. Happy to share.
Beautiful pot. Thanks for sharing in the Beautifully Made Link Party
Your flower pot came out great, Carol! I love the color you chose and the French inspired stencil! It looks perfect with your beautiful hydrangeas. I hope you are enjoying a wonderful weekend!
Hi, Lynne, thank you so much for the nice comments. Glad you liked the pot project.
I’m not a big fan of mauve either, Carol. It was pretty popular in 80’s home decor lol! Your flower pot looks so chic now in that nice shade of blue with the French stencil. I didn’t know you can use your fingers with the mesh stencils…I’ll have to try that! And I agree that’s there’s nothing better than white hydrangeas 🙂 It’s always fun to hop with you!
Love this container. Looks like you bought it like this. Great job Carol.
The pot looks beautiful, Carol. I had no idea there was a “thing” such as ‘ceramic paint’. I have purchased plenty of these orchids that come in these pots and yes, they don’t always come in the color that goes with your decor. I know I have donated more of those to the local thrift store than I can count, now I have a different option! Thanks for the inspiration!
Carol, I love the way this pot turned out. The blue is your color and perfect for summer, and the label adds lots of French charm 🙂
So Cute!
How pretty; the new colour you chose looks great! The before looked like a pot more suited to Gail – lol! Now it would certainly fit in with our decor too; we love the combo of blue and white!
It’s always fun to be able to change something to match your own decor. It turned out great!
Wow you have really inspired me to try this paint. I wonder if it works on ceramic tile? I love the way it looks with the stencil. And I love to get peaks into your home. Thanks so much for being in the hop.
Great makeover Carol! I’ve never seen that ceramic paint, I must check it out, it looks like good stuff! Great idea to use your finger and plastic gloves to apply the stencil, it turned out so pretty and the hydrangeas are perfect in it!
Looks amazing Carol, and I love that stencil too. My daughter’s nickname is “B” and her favorite color is blue. I’m going to show this to her and I know she’ll love it. Thank you so much for sharing and wonderful crafting with you