How to Paint a Vintage Dining Table
Do you love finding vintage items? There is something so satisfying about repurposing, reusing and reloving old pieces. I have to show you my favorite vintage makeover – how to paint a vintage dining table.
One of the easiest ways to repurpose an item is with paint. When I found a vintage dining room table at a thrift shop, I knew it was exactly the table I wanted for our dining room makeover. Please enjoy as I show you how to paint a vintage dining table.
Back in 2018, I was participating in the One Room Challenge and my challenge room was our dining room. We know that the focal point of any dining room is a dining room table.
Before the Challenge began, I had been searching for a “new” table to use in our dining room. Finding the table and painting the table was a big deal. If I had not found the table first, I wouldn’t have made over the dining room.
For some reason, during the Challenge, I focused on the room and not the table. I loved reading all the comments, feedback, and suggestions during the 6 weeks of our dining room makeover.
Many readers did mention how much they liked the table. I felt really bad not giving a big shout-out to the most important piece of furniture in the room and how I painted the vintage dining table.
So I’m going to share now how I painted the vintage dining room table and its amazing transformation.
Searching for a Vintage Dining Table to Paint
A little background about our dining room table.
When Sweet Shark and I downsized 9 years ago, we sold our huge glass-top, stone pedestal dining room table. While we lived in an apartment for a year, we used our pub table as a dining table. When we moved into our present home after 5 months of remodeling, we put our breakfast room table in our dining room.
Now, this was a very nice table, which was custom-made with a pewter base and stained wood top. But it didn’t fit our new dining room with our 19th-century French hutch (vasselier), which had been in our breakfast room and our antique marble-topped commode which had been in our entry hall. Our new champagne-colored crystal chandelier also dictated a more formal table.
By then (This was 2013), I had been painting and repurposing some old vintage pieces for a couple of years, becoming addicted to painting old, vintage furniture, frames, baskets – in fact, anything I could get my hands on. I knew I could get just the look I wanted if I was patient.
Vision for My Dining Room Table
I wanted a French-looking table, one that looked like I found it in a French brocantes or country cottage. I knew I couldn’t afford the real thing and to tell you the truth, I was way past spending money on expensive antiques.
Here were my inspiration photos. First, these two tables are the style I wanted.
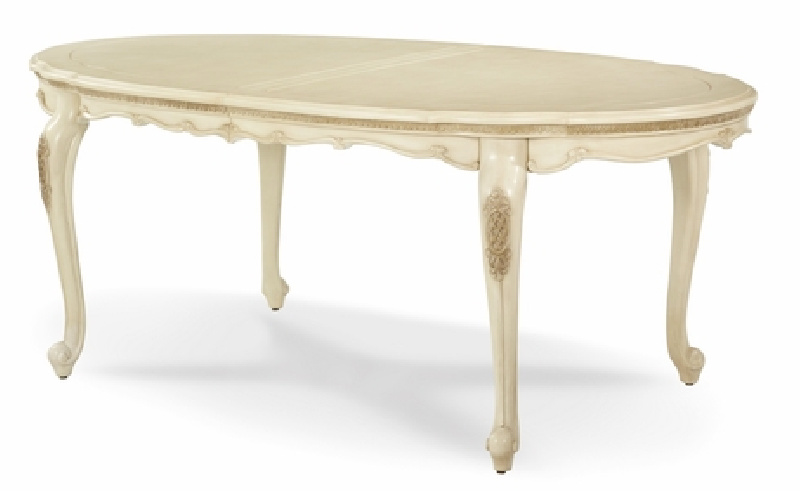
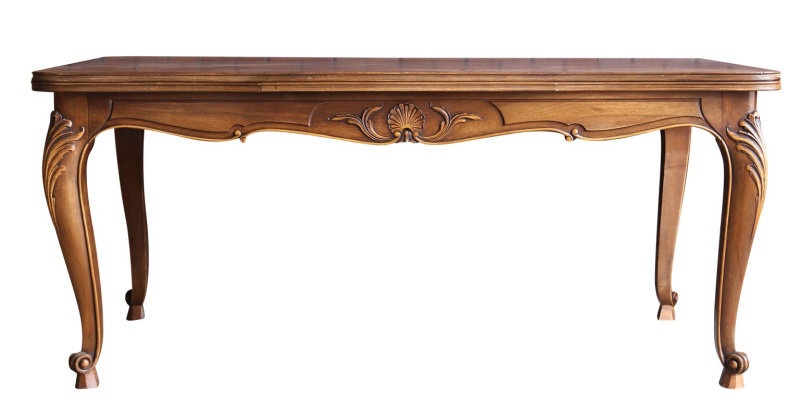
Here are a few photos that are an inspiration for my dream dining room table chairs. I love the color of the fabric chairs and the finish on the table.
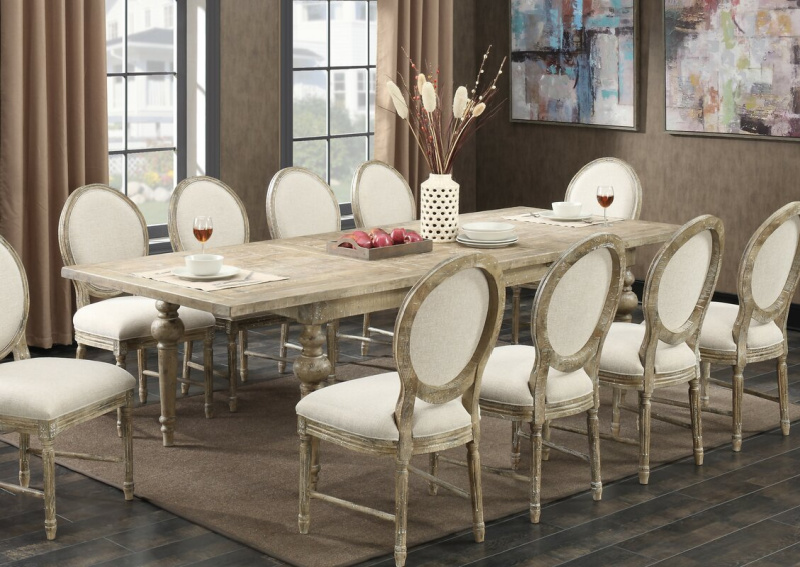
I love the grey tones on this table and chairs.
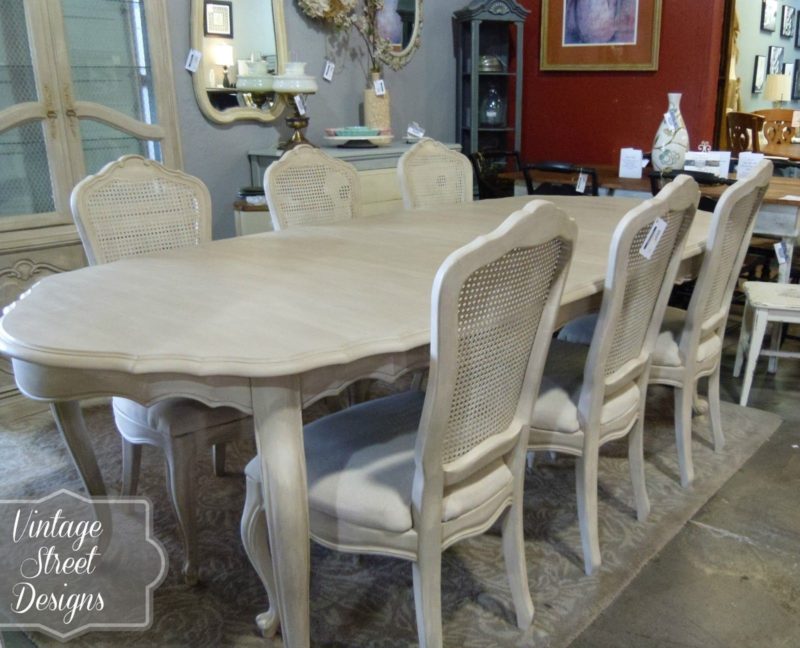
These chairs are some of my favorites.
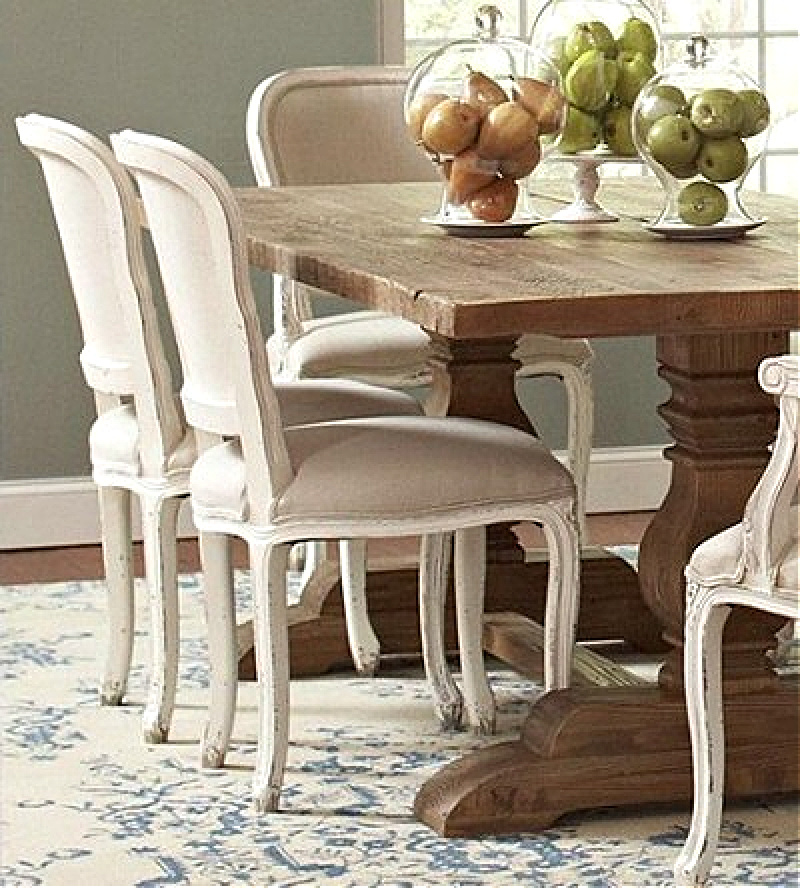
These chairs have the white fabric and natural finish that I love.
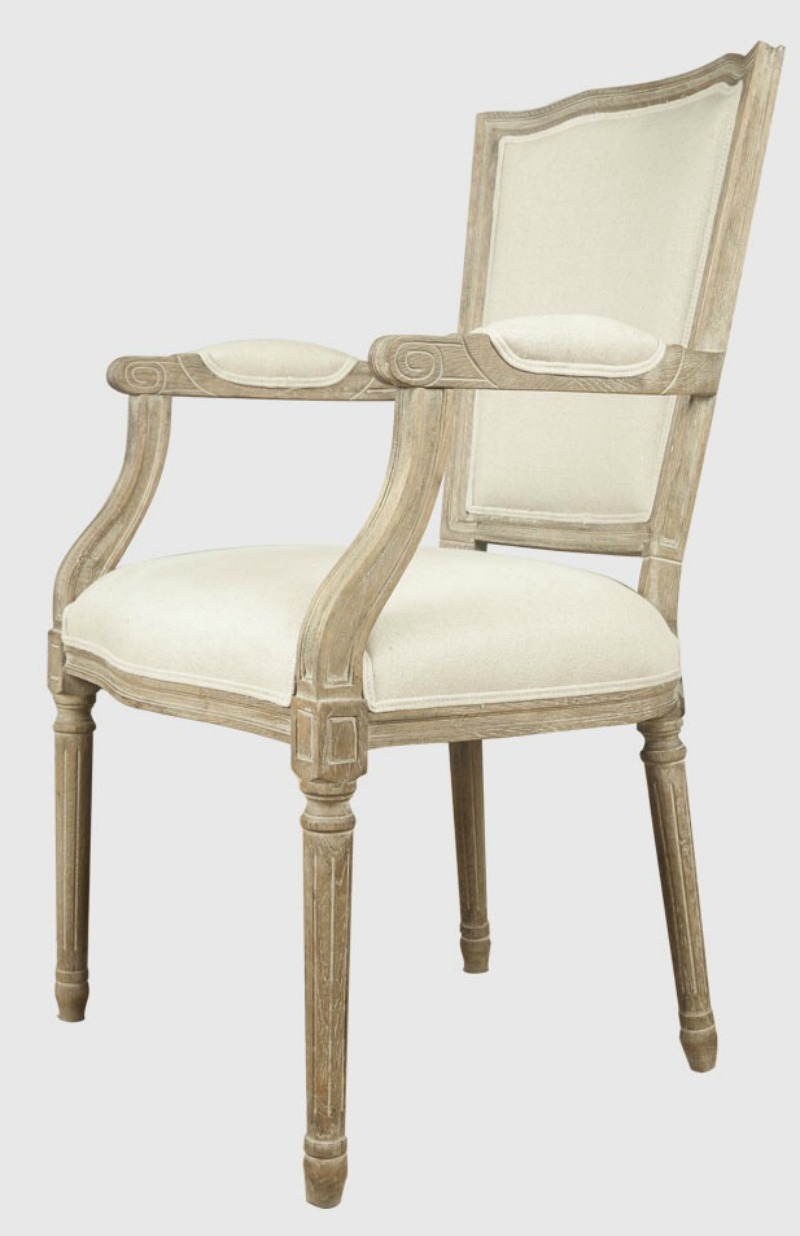
For a variety of reasons, it took me over three years to find the right table. I had some specific criteria for my “new” table:
- It had to have some French style, such as curved legs
- It had to seat 10 people with one or two leaves
- It had to be vintage and appropriate for repurposing with paint
- It had to be affordable
Finding My Vintage Dining Table and Chairs
As soon as we moved into our new home, I started looking for a new dining room table. Three years later, my patience finally paid off with a little help from my friend Susie. I (actually, Susie) found the perfect table – well, almost perfect. I took an old cast off and made it into a stunning piece.
Susie called to tell me she just saw a table at a thrift store that she thought would work. (This store actually was a “donation store” for the local Catholic diocese.) She sent me some pictures and my heart started beating fast.
I headed over there as fast as I could and asked about the table. As soon as I saw it, I knew it was what I had been looking for.
Not just a table, but one with six side chairs and two armchairs, and the table pads that we pay a bundle to have custom-made. And the price? $200!
I would have paid triple that.
I sat in every chair, looked under the table, and had one of the leaves put in. Done deal! I paid and arranged to pick it up in a couple of weeks, using my son’s truck.
The Original Vintage Table
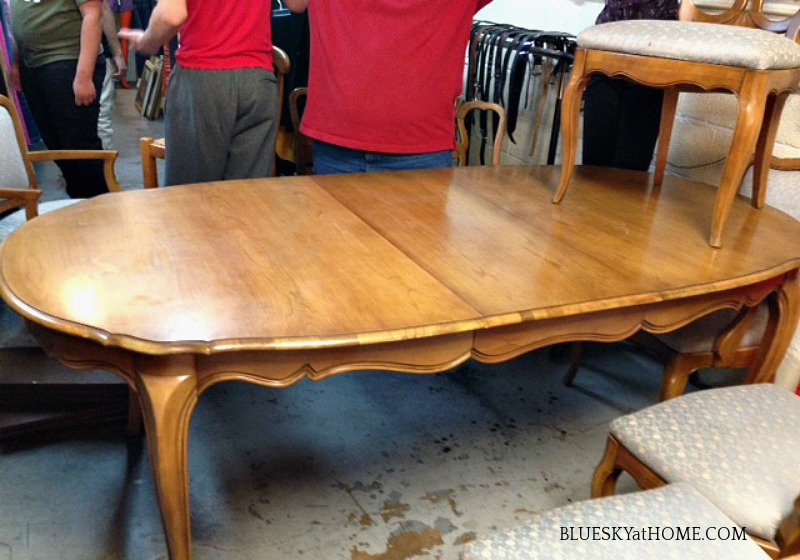
Here’s the table with one leaf. Notice it has curved legs and a curved apron – and the finish is blah, blah, blah. But no scratches, no cigarette burns, no gouges, no wobbling legs – solid as a rock.
Here are the side and host chairs. They are definitely in need of a new finish and new fabric.
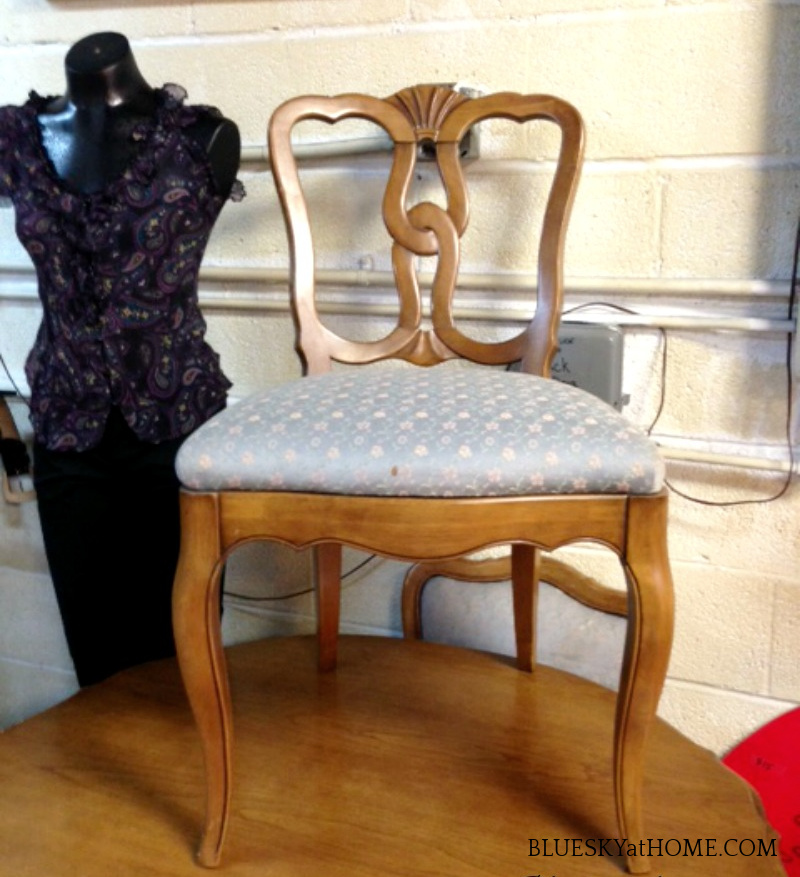
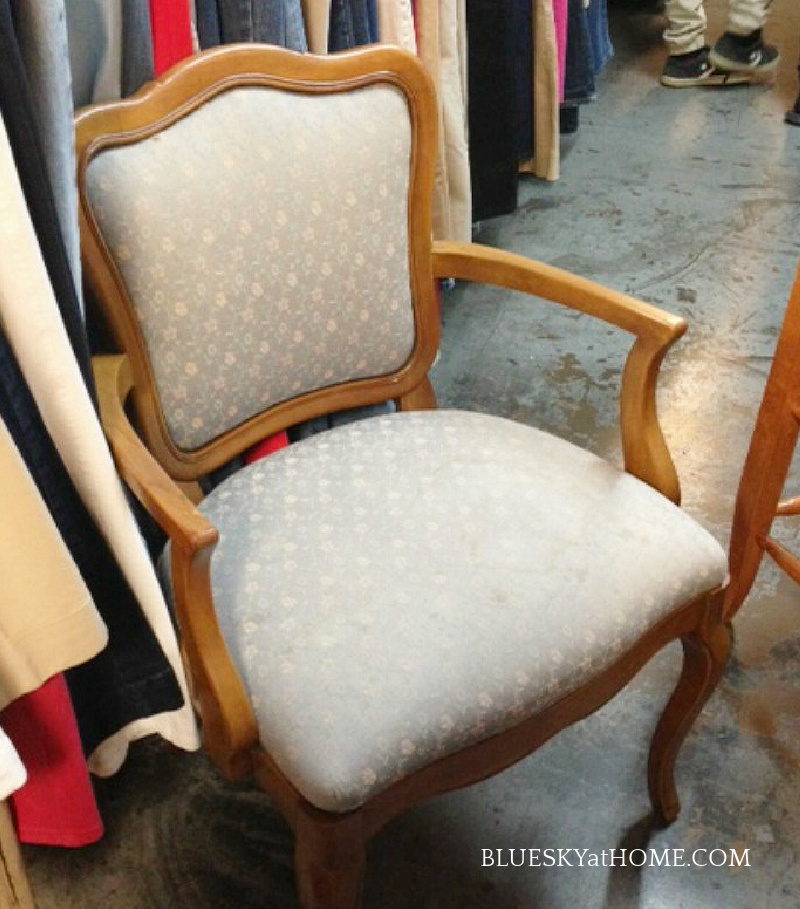
I love the scrollwork on the chairs, but obviously not the fabric and the finish.
My son (thank goodness for sons with trucks) was living in Waco then and couldn’t get up to Dallas for two weeks. I couldn’t wait two weeks, so I made two trips to pick up the chairs and the two leaves.
The Plan to Transform a Vintage Table
- paint the table and chairs using chalk paint
- reupholster the chair seats and the captain chair backs
How to Paint the Table and Chairs
I want to show you how you can do it too. Here’s how to paint a vintage dining table.
Step 1 – I began by removing all the chair cushions. I left the fabric on the chair backs for now. I wasn’t worried about accidentally getting paint on them.
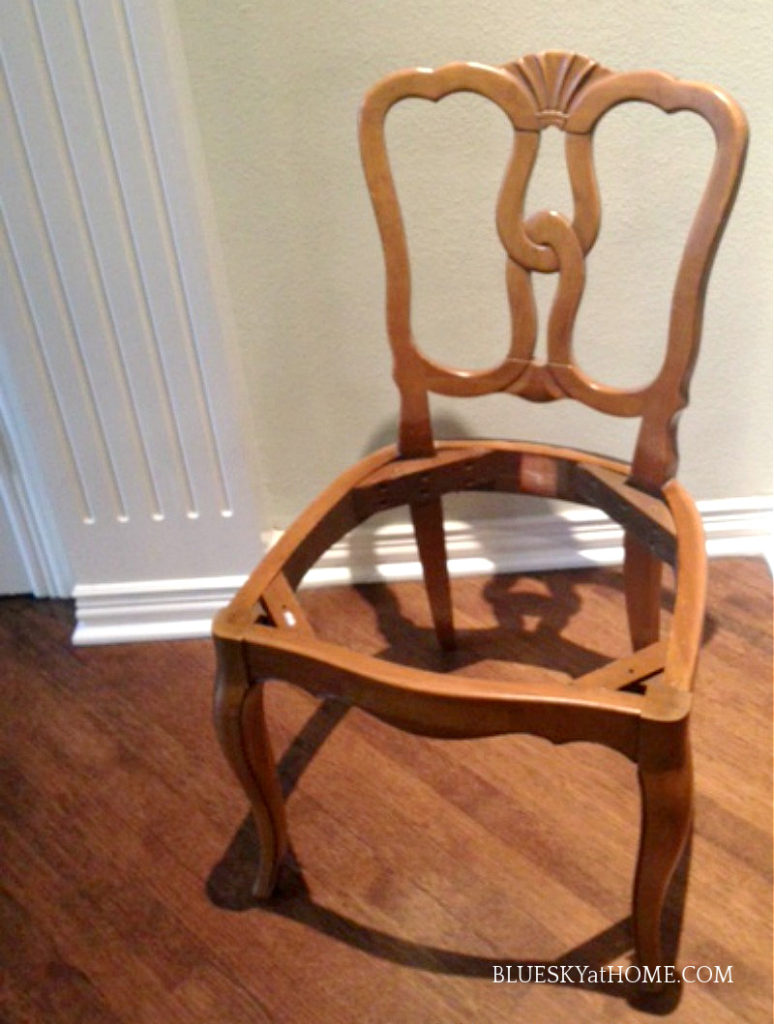
Step 2 – Set up your work area. Since I was going to be doing this paint transformation inside, I put down one drop cloth on the hardwood floor and then covered our pub table (now our breakfast room table) with another cloth.
Next, I sealed all the chairs with a sealer. Any type of good sealer will do. This step is important so that the old varnish doesn’t bleed through the paint. A couple of coats should ensure that you don’t have any bleed-through.
TIP: Don’t paint at night. Artificial light creates shadows and you can miss spots. Just like photography, it’s much better to paint in the daytime with natural light.
Step 3 – Test your paint colors. If you are not 100% sure of the color you are going to use, test a couple of options. I tested Annie Sloan Coco and French Linen. I chose Coco, which is a soft, very light milk-chocolate color – very French. But it comes off looking somewhat like a soft grey.
Painting the Chairs
Step 4 – I painted the legs and bottoms of the chairs with one coat of Coco.
Step 5 – After you have painted the bottom of the chair and it has dried, turn the chair right side up, and repeat the paint application. Here the chair has 2 coats of paint which gave complete coverage over the original walnut stain.
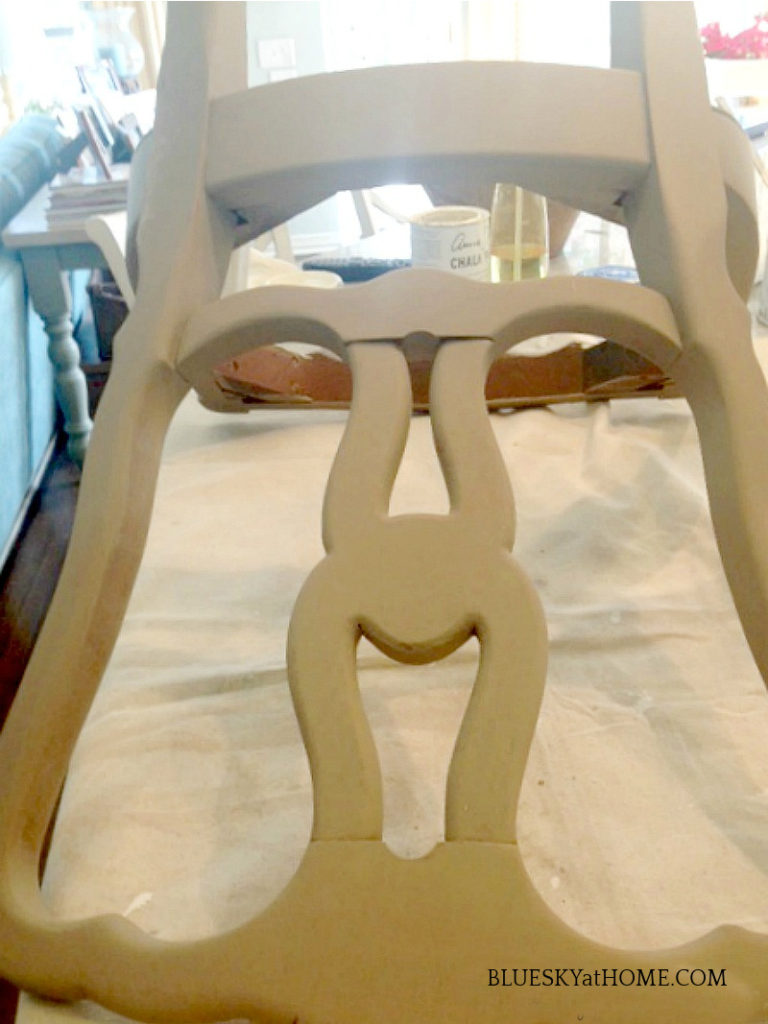
Step 6 – The White-Wash. After the Coco was dry on all the chairs, about 30 minutes, I made a wash of Old White, painting it on with a damp brush and immediately wiping it off with a lint-free cloth.
The chair in the background has just paint and you can see the difference from the chair in the front which has been whitewashed. It’s lighter and softer. At this point, I really noticed the grooves on the chairs and I knew I had to emphasize them.
TIP: It’s best to start paint projects with the piece upside down. When the bottom is down, you can paint the top last and it can dry “face~up”.
Ideally, I like to paint standing up with my “subject” at table height ~ no bending over!. Also, we get great light in our breakfast room.
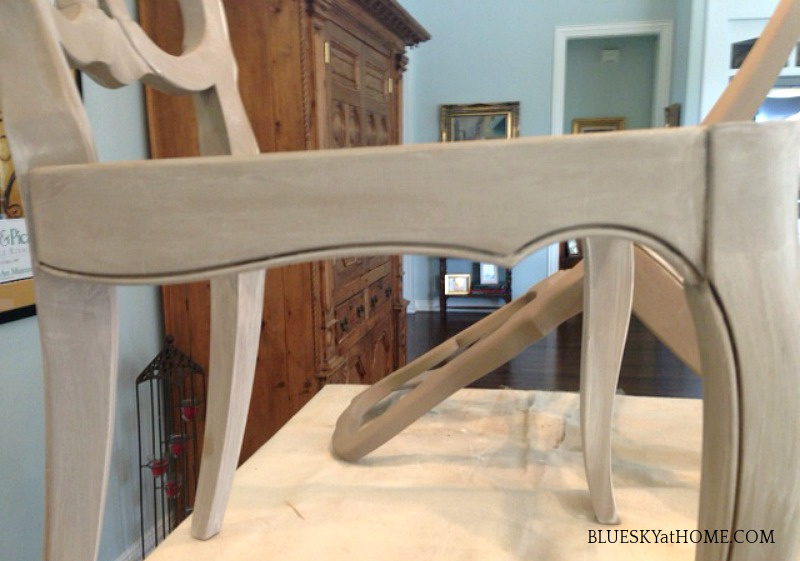
Step 7 – Next, I painted the table leaves (I have 3.), using the exact same colors and techniques.
Step 8 – To paint the decorative grooves on the chairs and table, I used a very thin brush to fill in the groove with full-strength Old White. I did the same on all the chairs. (Sorry, I didn’t get a picture of this step, but you can see the finished product.)
Step 9 – Now, I waxed with Clear Wax and lightly distressed in places where normal wear and tear would have occurred. The next day, I used buffing pads to polish the chairs and table leaves to a nice sheen.
Step 10 – With the chairs finished, I shopped for fabric for the chair cushions at Childress Fabrics in Addison (a Dallas suburb), one of my very favorite fabric stores.
My inspiration was a piece of cream and taupe fabric with a French pattern that I had found a few years previously on the remnant table at Childress. I loved it and knew someday I would find a use for it. It would be perfect for the captain’s chair backs.
A solid linen/poly cream would be perfect on all the cushions ~ almost exactly like the inspiration pieces. I took the two captain chairs and the six chair cushions to Childress for them to start the reupholstery.
Painting the Table
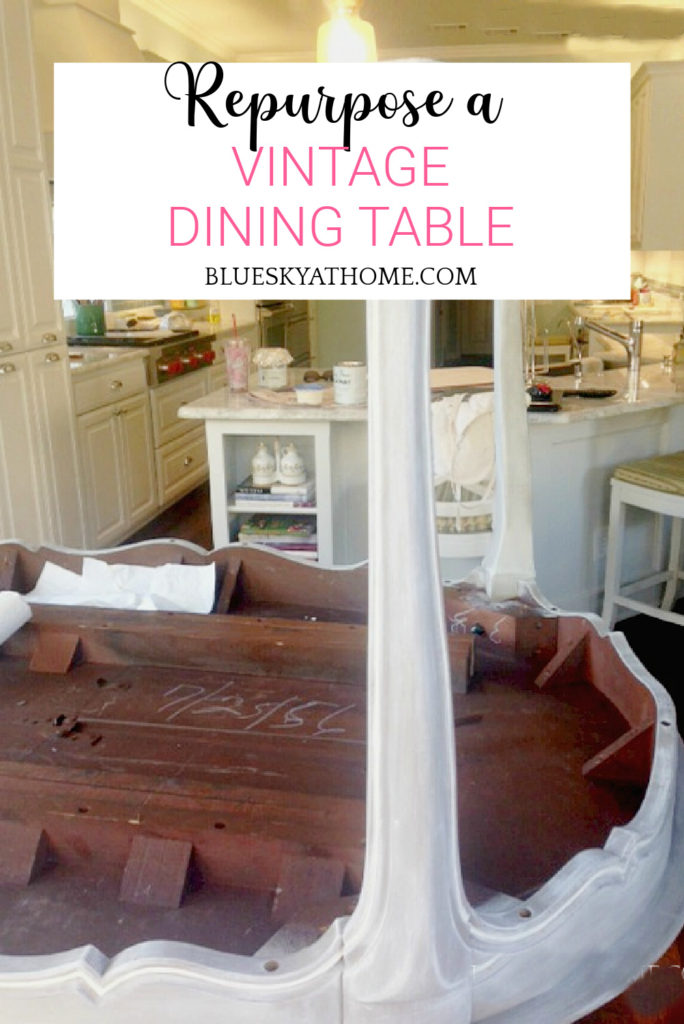
Step 11 – Finally, my son was able to come to Dallas and pick up the table. When we got the table home, I returned my paint drop cloths to the floor and on top of our breakfast room table and put the dining table upside down on it. You can see here how painting the grooves with full-strength white paint and a small brush added a nice detail to the table.
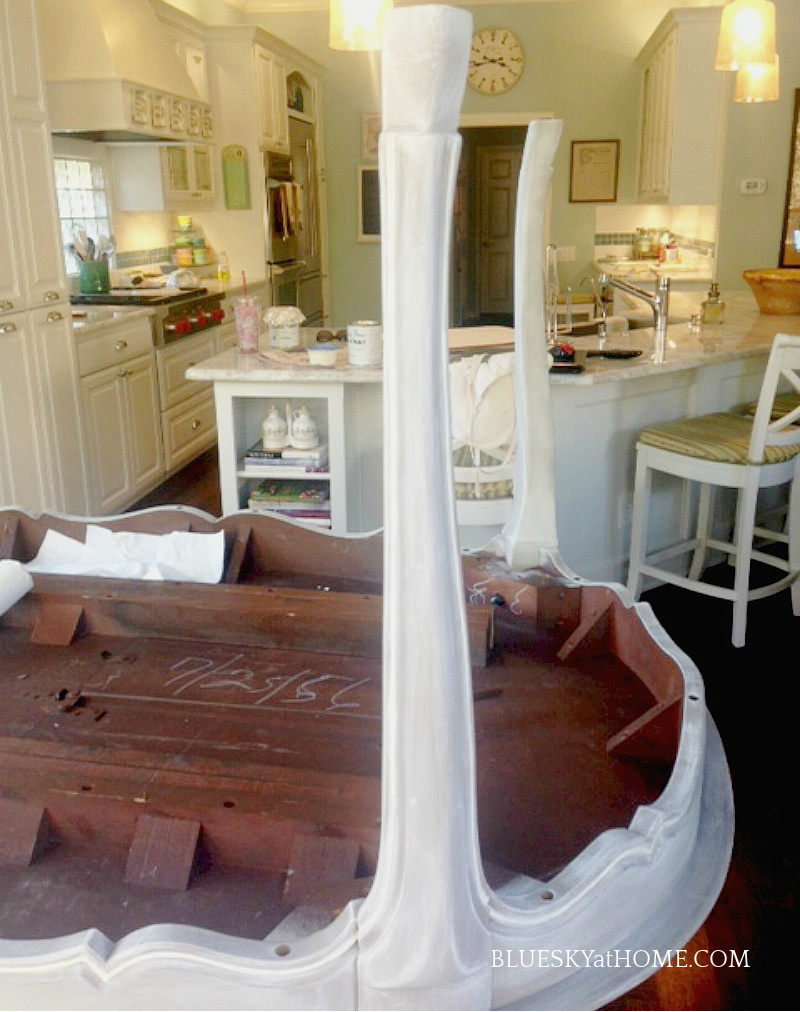
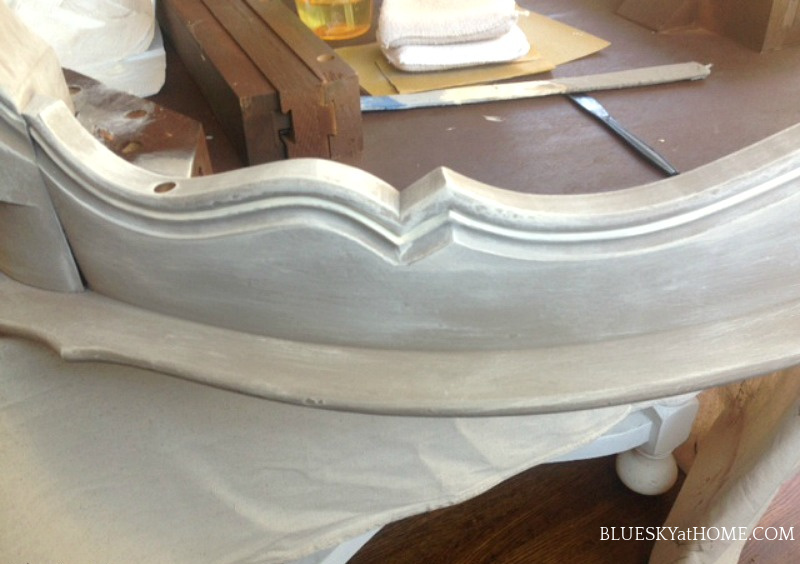
Step 12 – I placed the drop cloth on the dining room floor and we moved the table into the dining room for the final painting step. You can see the amazing difference between the painted table base and the walnut~stained top.
At this point, I debated whether to restain the top a dark brown to match our hardwood floors. In the end, painting the tabletop was more in keeping with the country French look I wanted and the inspiration photos.
Painting the Table Top
This is the table without any leaves in it. The chairs in the background belonged to Sweet Shark’s grandmother. They are very country French and I love them. The red checked fabric was what we had in the breakfast room of our previous home. I decided to have these cushions reupholstered in the same cream linen as the new dining room cushions. That way, if we need extra chairs, they will work together.
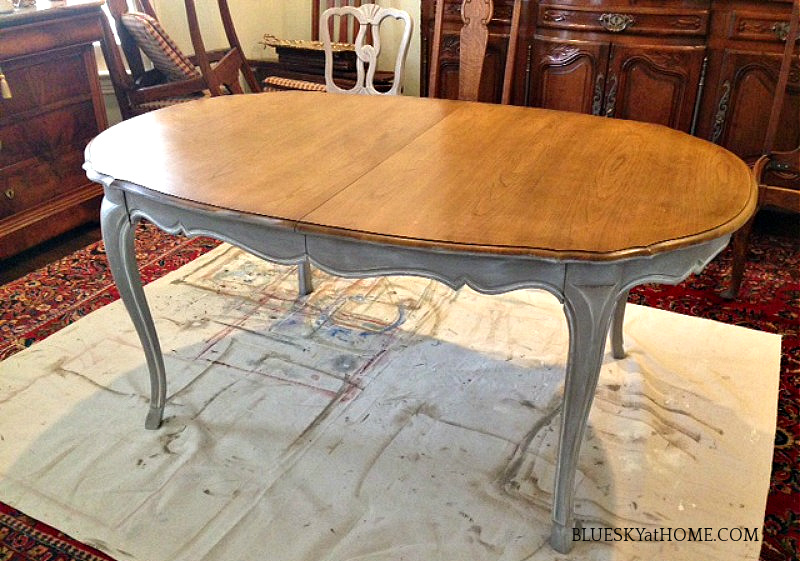
Step 13 – Since the top of the table would be the most noticed and used, I applied 2 coats of sealer. Then I painted, white-washed, waxed and buffed the tabletop. Because the table would get a lot of use, I let the wax set and cure for a few weeks.
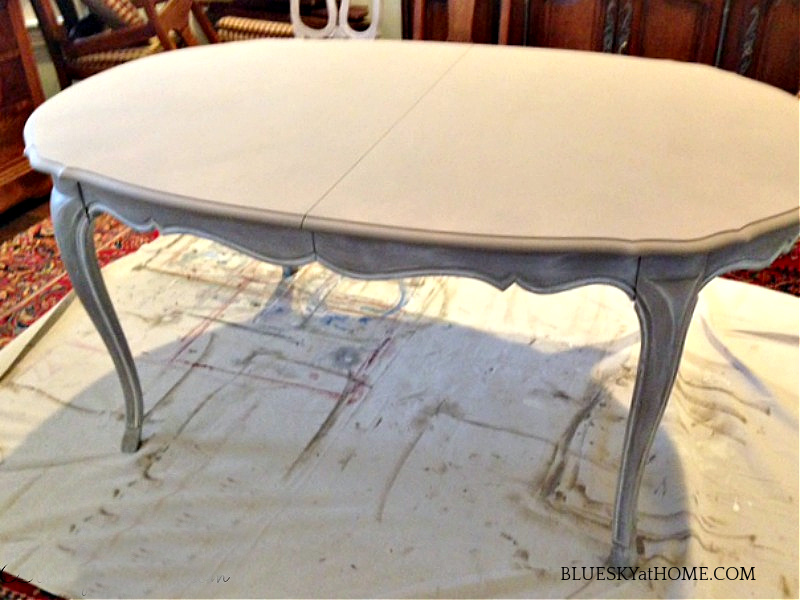
After I finished all the painting, waxing, and polishing, I just had to wait until the cushions were ready for pick up.
After everything was finished, I put both leaves in the table. We can comfortably seat 8 or 10 if we need to by adding 2 of the country chairs. So far, I’ve left them in their original stain.
Adding the Cushions to the Chairs
When the new cushions were ready, we set them in the seats and screwed them in. The chairs didn’t seem quite finished around the base. You can see where there is a gap between the cushion and the chair.
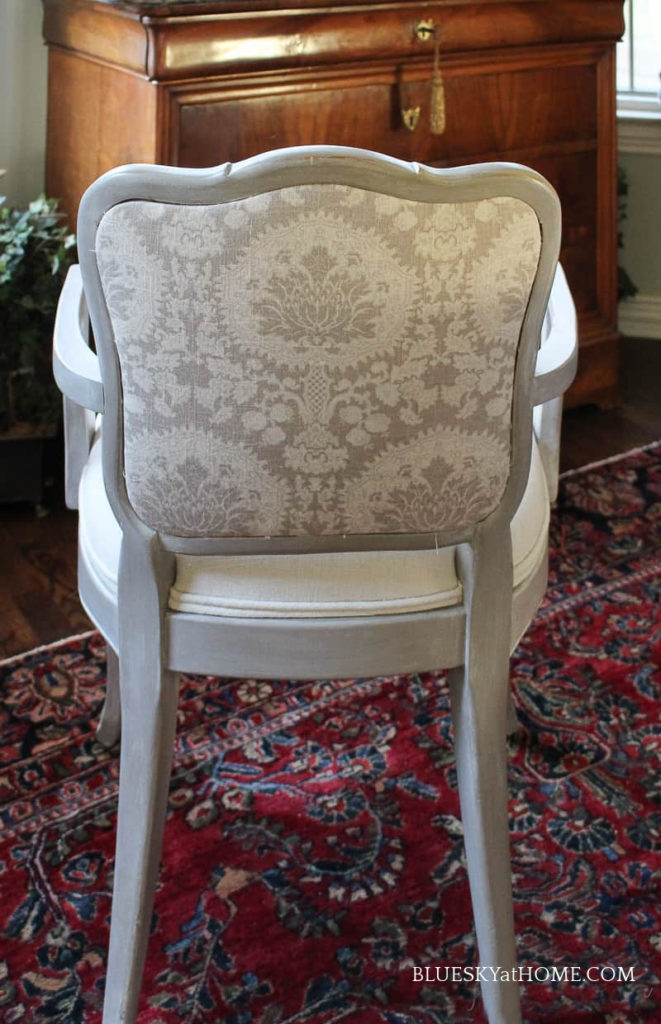
Since I still had plenty of fabric left, I ordered double cording made. I’ve made cording before, but I just wasn’t up to it this time.
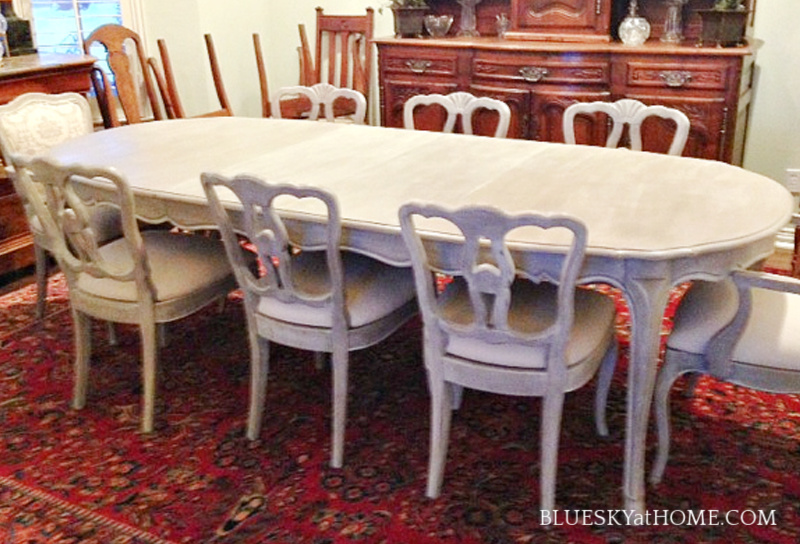
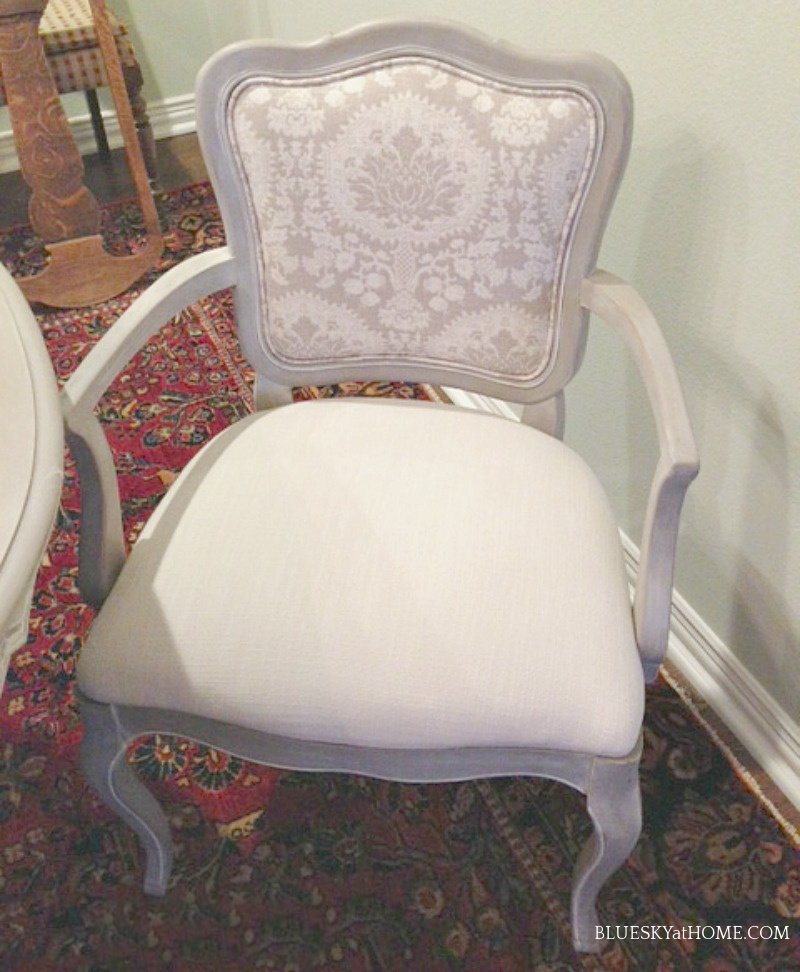
When the cording was done, I applied it around the base of the cushion with straight pins and fabric glue. When the glue was dry (I gave it 24 hours.), I removed the pins. Here you can see how the cording gives the chairs a finished look and there is no more gap.
The Finished Table and Chairs
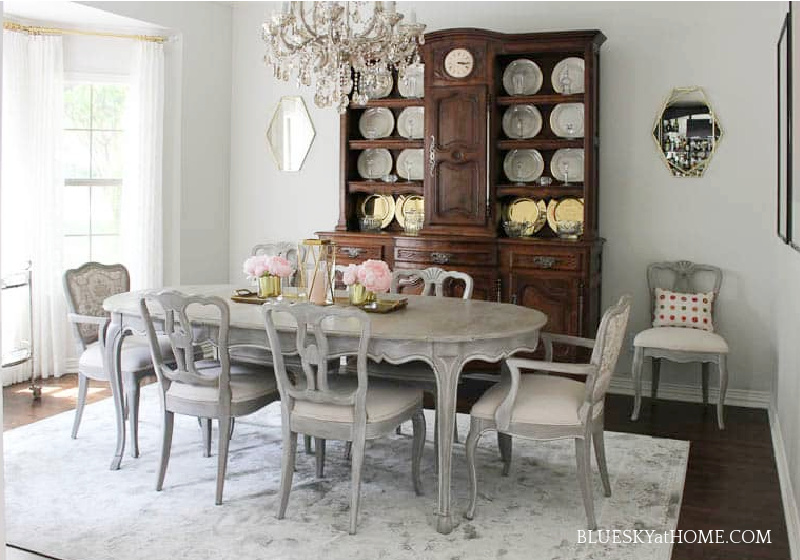
We have used our painted vintage table for about three years and I still love it. I took this photo in January after all the Christmas decorations had been put away.
Now that the entire room has been given a makeover, I think the table just shines even more.
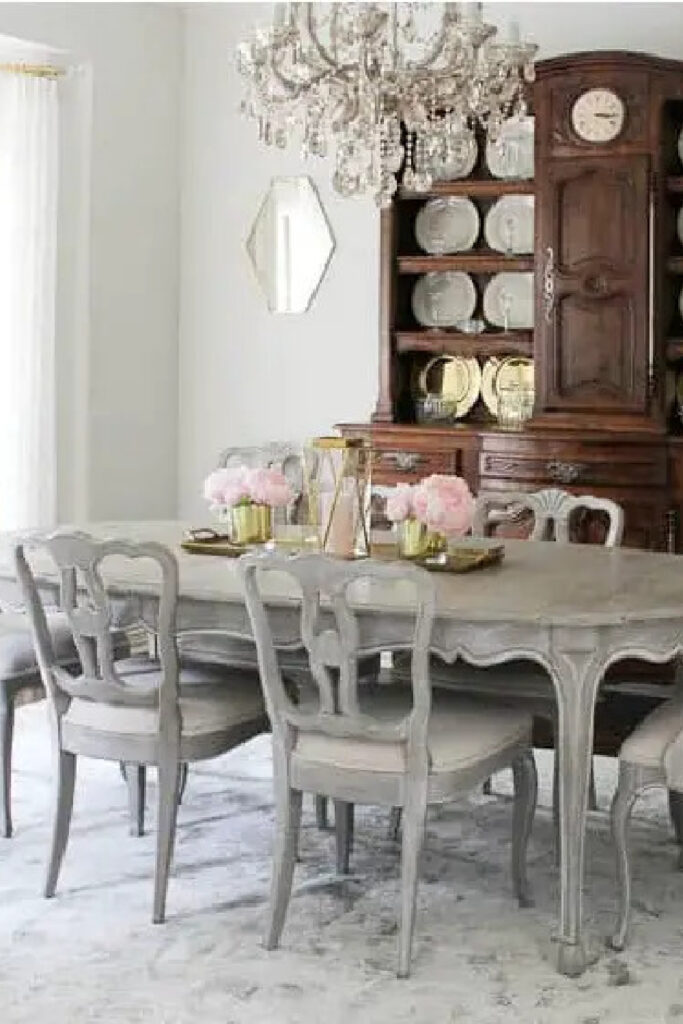
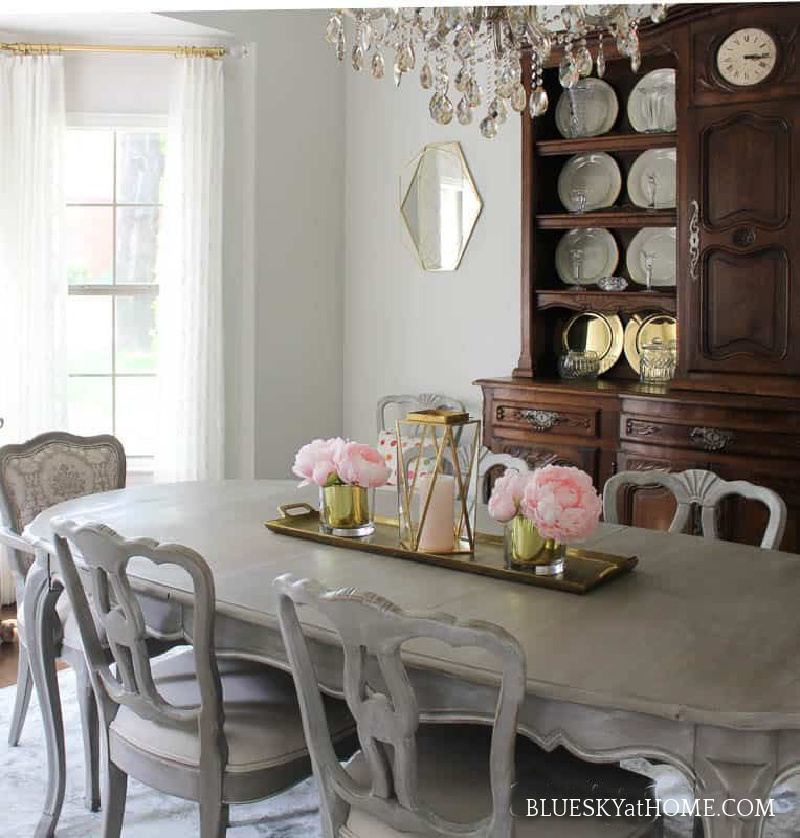
Whatever brand or type of paint you use, painting and repurposing a piece of vintage furniture is so worthwhile. Treasuring and reusing pieces to give them a place and a purpose is a great feeling. Not to mention the savings.
It actually cost me more to have the chair cushions reupholstered than the cost of the table and chairs and paint. Now I have a one~of~a~kind dining table and chairs with a great look.
I love our vintage dining room table. It’s not an heirloom, not a treasured inheritance from a parent, it’s not a valuable antique. I love it because it’s none of those things.
It’s a thrift shop find, a cast~off donation that had seen (many) better days. It’s like a rescued puppy, maybe that’s why I love it so much. The new look in our dining room has allowed the table to shine in all its glory, and I have fallen in love with it all over again.
I hope that showing you how to paint a vintage dining table will inspire you will try repurposing a piece of furniture or an old frame or mirror. The sense of accomplishment is so satisfying.
If you like how I painted this vintage table, you might also like these paint projects:
Breakfast Room Table
Painting an Old Bookcase
Vintage Chandelier Transformation
How to Transform French Doors into a Barn Door
Have a vintage dining room table in your future? Be sure to PIN this project for reference. The list of the DIY Challenge participants is below.







Oh I love this sooo much!! I’m a single mom that is starting over at 40!! I found a gorgeous, solid antique table and chairs set that I plan to refinish just like this!! Thank you so much for the paint colors and awesome description of what to do. I hope mine turns out this pretty!! Great job!
You go, girl. Repainting, recycling and reusing furniture is so satisfying. Good luck with your project. I’m sure it will turn out great.
Carol, your dining table and chairs turned out beautifully!!! I love the soft grey with the whitewash look overtop, and that fabric for the head chairs’ fronts is perfect! Happy to feature your post at this week’s Share Your Style #299 for you. <3
Just lovely,
Barb 🙂
Looks nice, great job!! Thanks so much for linking up with me at the Unlimited Monthly Link Party 23!
Thank you, Dee.
Carol, you did an absolutely amazing job. I have been wanting to paint our dining set, but I’ve been so intimidated. Your steps don’t look too difficult! Thanks for sharing at the TFT party!
Your dining table is beautiful. Sometimes the wait – even years long – is so worth it to get the piece you will love for a long time. Thanks for stopping by and sharing the transformation. Your dining room is very lovely. #HomeMattersParty
The table looks beautiful, and I love the fabric choice! Thanks for sharing at Vintage Charm. xo Kathleen
Wow! A beautiful table and chairs you have created for your lovely dining room. Can you please tell me the sealer you used before you started all your painting. I just love how it all turned out after all your labor of love.
Anne, thank you so much for your kind remarks. The sealer I used at that time was Artisan Enhancements from Annie Sloan. I no longer use that product line. I now use One Step Paint products from Amy Howard at Home. You don’t have to use a sealer with this paint. If you are painting an old piece that is stained or painted, I would first highly recommend cleaning with Clean Slate to remove all oils, grime and waxes. Here is my link to the website. https://amyhowardhome.com/#5eadd5f674374
What color would you use from this line of paint to achieve the same look as the Coco that you used on your table?
What a beautiful dining room, Carol! So, the variation in color in the table, is from whitewashing over the gray paint? I recently painted a hutch in a similar shade, using Miss Mustard Seed Milk Paint– and the color really varies. At first it aggravated me, but it is growing on me. Your table is gorgeous.
Wow Carol! $200 for that set is a steal! And they look fantastic too. Great job.
You did a great job refinishing. That can be a lot of work. Thanks for sharing your tips!
This is a fantastic transformation. I love the entire piece and great painting too. Love painting and adding washes and waxes. Beautiful French addition!
Cindy
Looks amazing Carol. Your hard work paid off.
You did a fabulous job in re-creating the look you had in mind for your dining room, Carol! It looks gorgeous!
Wow I just love this makeover! Beautiful job!
Thanks Amber, it was definitely a major project, but I love the results ~ everyday.
your table transformation is amazing. It looks so at home in your new dining room. Gorgeous.
Absolutely fabulous! You really did get a great deal, and I love what you did with all of it. I would take that table for my dining room in a heartbeat:) Thanks for sharing with Vintage Charm. xo Kathleen|Our Hopeful Home
The table and chairs are so gorgeous. It is leading me one step closer to redoing my set.
Debra, don’t delay. You should enjoy the table and chairs the way you want them to look!
Carol, I love the new color and fabric you choose! Very french country just like you said! Thank you for sharing the The Creative Circle link party!
Linda, I appreciate the party and you commenting. We certainly have enjoyed the table and chairs for entertaining.
Carol, it’s gorgeous! I need to update my dining room furniture and I’ve been tossing the idea around of painting instead of staining. Love the way yours turned out. Thank you for sharing. You are one of the fan favorites at The Sunday Showcase from the Make it Pretty Monday party at The Dedicated House. http://www.thededicatedhouse.com/sunday-showcase-make-pretty-monday-8-33/ Hope you have a lovely week! Toodles, Kathryn @TheDedicatedHouse
What a great job! You really hit the mark with this project ~ absolutely Frenchified it! Love it. Thanks for sharing at Vintage Charm! xo Kathleen|Our Hopeful Home
Carol,
Wow, your table and chairs are just gorgeous. Love the color and the fabric you choose for the chairs. It is a labor of love but so worth it.
Hope you stop by Over The Moon party today, since you are being featured.
Hugs,
Bev
Beverly, thank you are so sweet to comment about my dining room table project. It was a labor of love!
WOW Carol, I love the transformation. You did a gorgeous job on that set! The upholstery job is amazing as well as the paint makeover. Saw your post at the Share your style party:) pinned!
Kathleen, thank you so much for clicking over to visit.I really appreciate your feedback. Drop back by again please.
It looks lovely in your dining room, Carol. Thanks for sharing with us at Share Your Style!
Carol, your party is always on my list of parties. Thanks for the feedback.
This looks like lots of work especially with all the chairs but so worth it. It is gorgeous, you can be really proud of how it turned out. Fantastic makeover.
Leanna, It was a lot of work, but as you said, well worth it. Something to enjoy every day.
It’s beautiful and balances your room!
Thanks so much Julie for dropping by.
Oh My Golly, that is fantabulous! Love the color and the fabrics. Great tutorial too.
Thank you Cindy, I appreciate your feedback.
That is one gorgeous table, Carol. I’ve never used Cocoa, but I am a big fan of French Linen. You did a great job!
Jilly, I love French Linen too. I tested French Linen.Coco has a bit more brown. I was surprised that it seemed the better choice.
Siaosi, thank you for visiting. I love this country French style too. It’s so versatile and can go with other styles for a eclectic looks. I love finding flea market or thrift shop treasures.