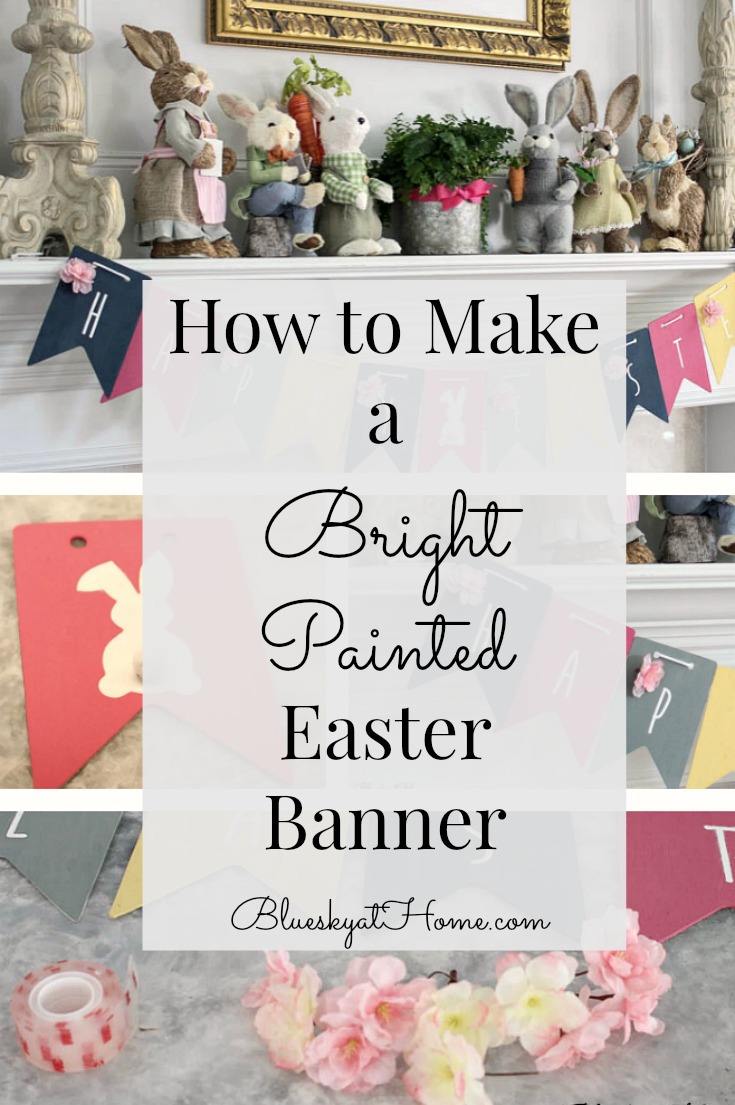
Easy Easter DIY Decoration under $10
You know I love a good DIY project, especially when it doesn’t require a big financial investment. And even more when I don’t have to spend a penny to create decorations or accessories for our home. Showing you how make DIY projects that you can make yourself and quickly is my jam. Today is a great day because I have an easy Easter DIY decoration under $10 that you can make in about 1 hour.
I also love joining blogger friends to share our creative projects. Earlier this week I participated in the Hop Into Easter Blog Hop hosed by Amber of Follow the Yellow Brick Home. It was a big one, so you may need to take a few days to work you way through the fabulous Easter decorations. It will be well worth it, I promise.
And today I’m here with my monthly Ten on the 10th under $10 group to show you how I put together one Easter DIY decoration I included. Thank you to this month’s Ten on the 10th hostess, Barbara of French Ethereal. If you are coming over from Patti @Pandora’s Box, then welcome to Bluesky at Home.

Easy Easter DIY Decoration under $10
I actually gave a peek of this easy Easter DIY decoration during the Hop into Easter Blog Hop. I shared all about using bunnies in our Easter decorations.
I didn’t spend less than $10 on this Easter DIY decoration. Using items and supplies that I already had on hand, I didn’t spend a dime. I definitely got a lot of bang for my buck.
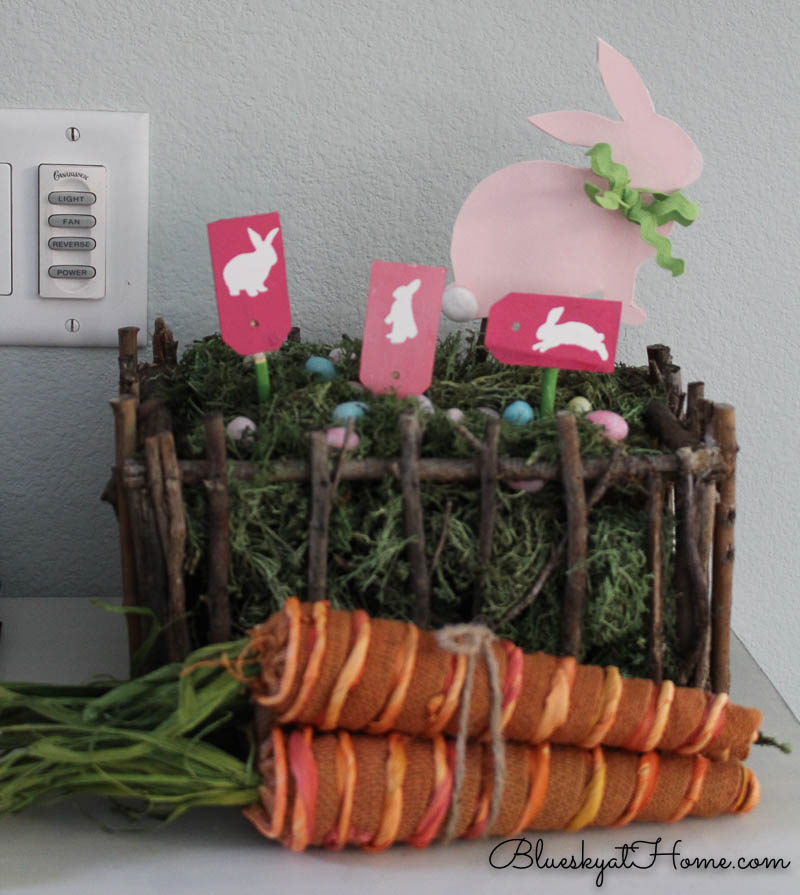
My Easy Easter DIY Container
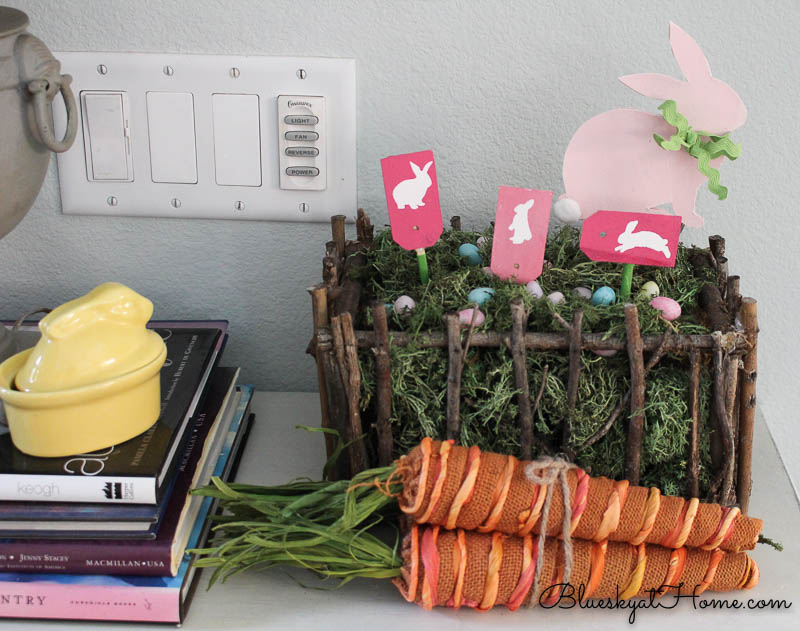
Not only did this Easter decoration not cost anything to make, its beginning was an accident. I was out in our garage where I keep extra pots, containers and gardening supplies. I reached up for a galvanized pail when my hand landed on a container that I have had for several years. It’s been hiding; I haven’t even thought about it in a couple of years. But I knew that it needed to come out of hiding for Easter.
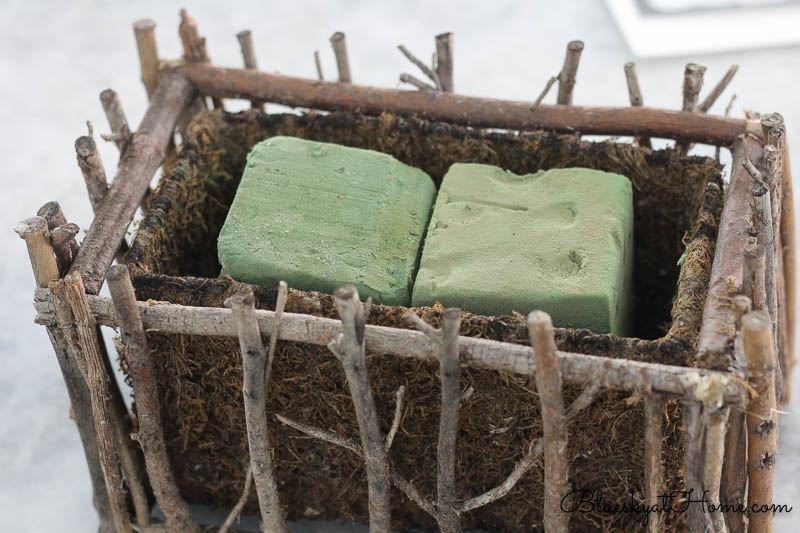
This container is made of twigs so it has a very natural, rustic look. Inside is a liner that looks like moss. Also on the shelf was a couple of blocks of florist foam ~ obviously well used, but still in “working order”. I wouldn’t be using the foam for flowers but to hold my DIY project.

I placed the florist foam inside the container.
The DIY Project
I had an idea for my project ~ bunnies. I went to the craft stores, hoping to find wooden bunnies to paint. Trips to the wood section of my 2 favorite stores did’t result in wood bunnies. Back to the drawing board.
Back at home, I realized I had some supplies on hand to make my bunny project, just not with wood.
Here’s what I did have:
- heavy card stock
- paint (Gel Ink)
- stencil
- wood tags
- wooden skewers
- small craft paint brush
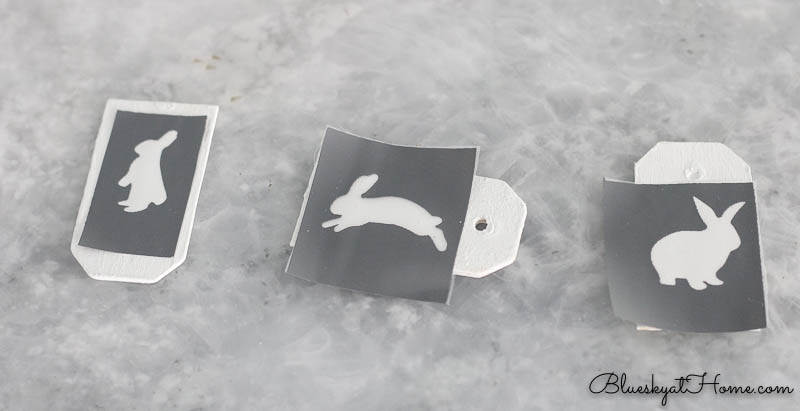
I pulled out 1 sheet of the heaviest piece of white card stock I had and the A Maker’s Studio Easter stencil (sold out) with the large bunny design. I would need 2 bunnies to make my project.
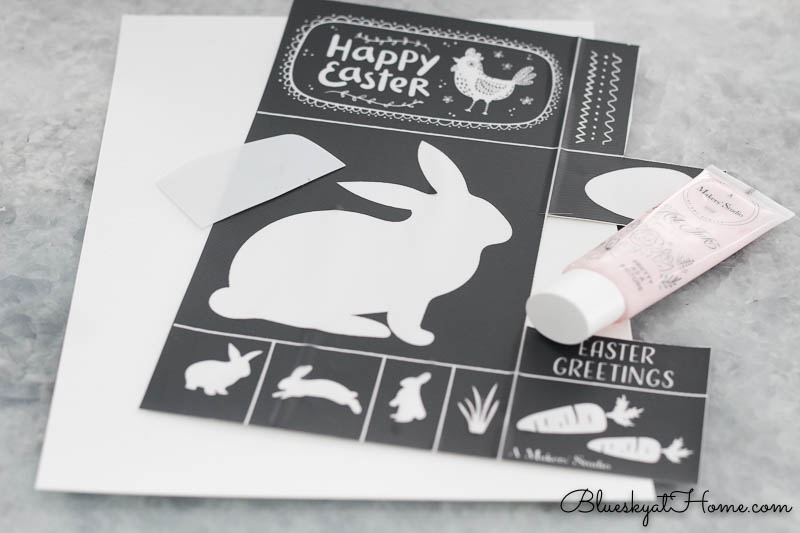
I applied my stencil to the paper and used our Gel Ink in Pretty as a Picture to make my bunny.
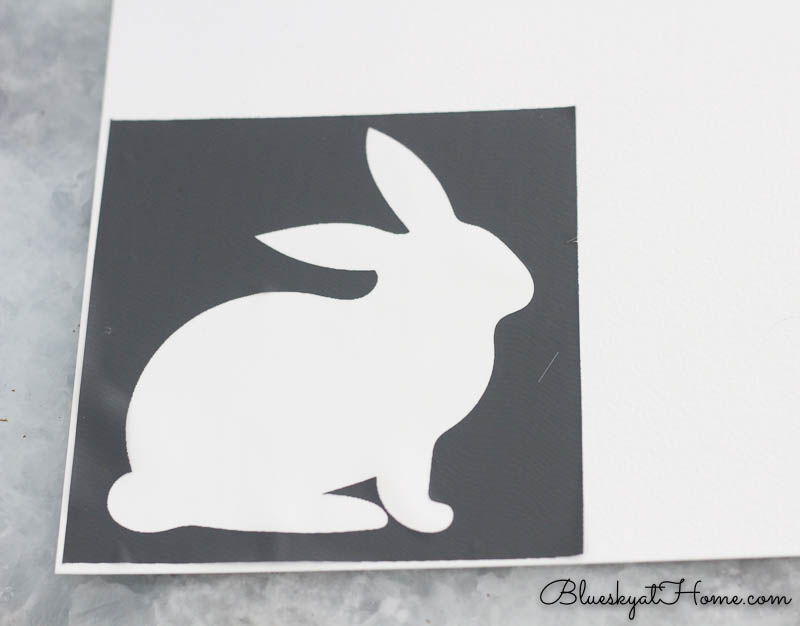
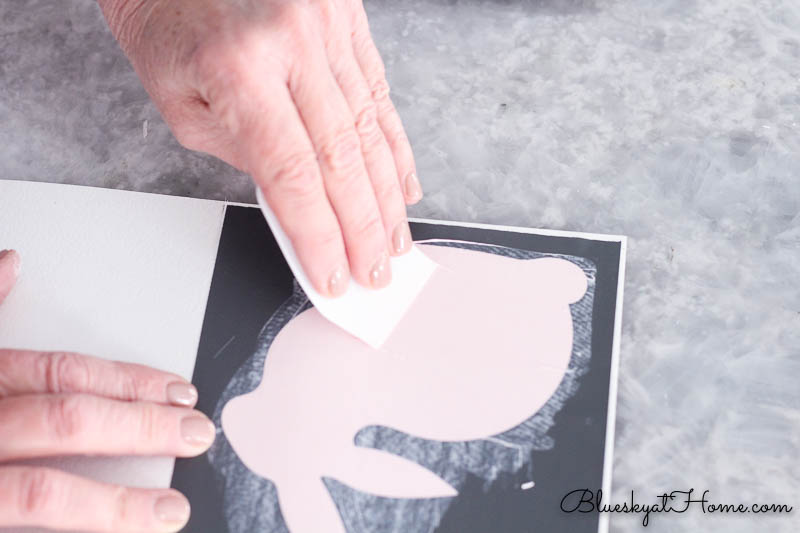
Once the Gel Ink was dry, I cut out my bunny with scissors.
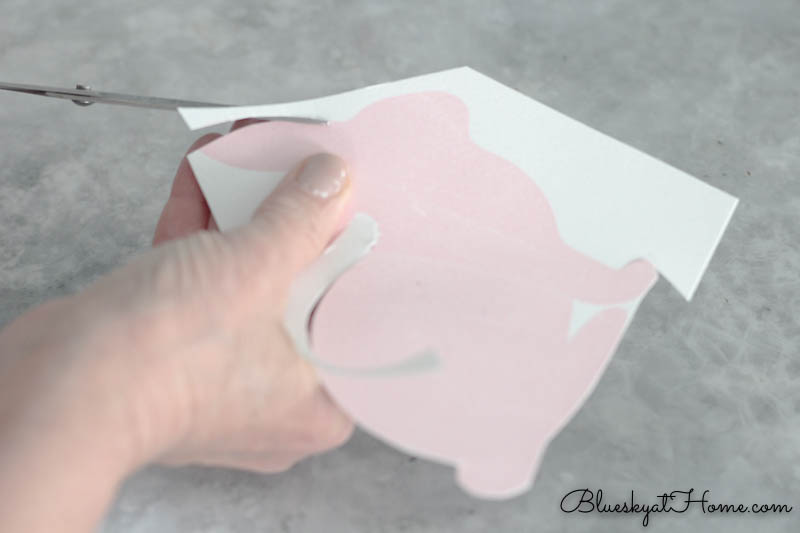
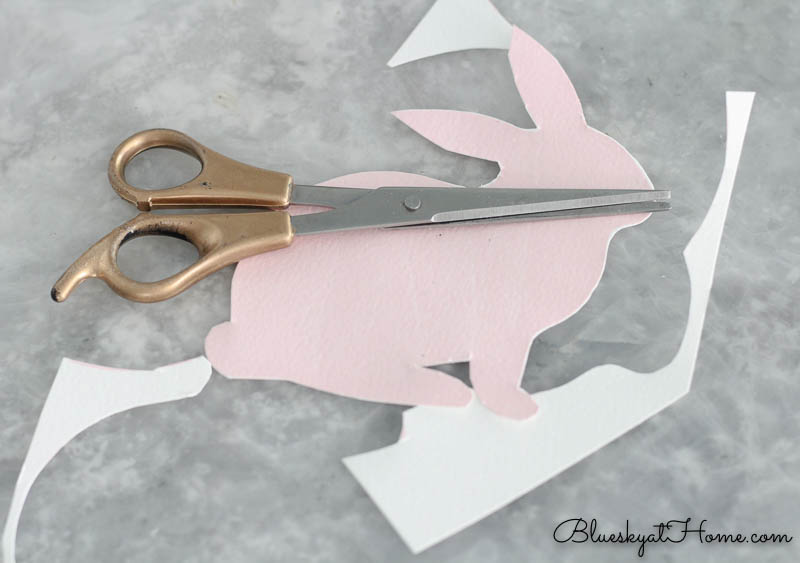
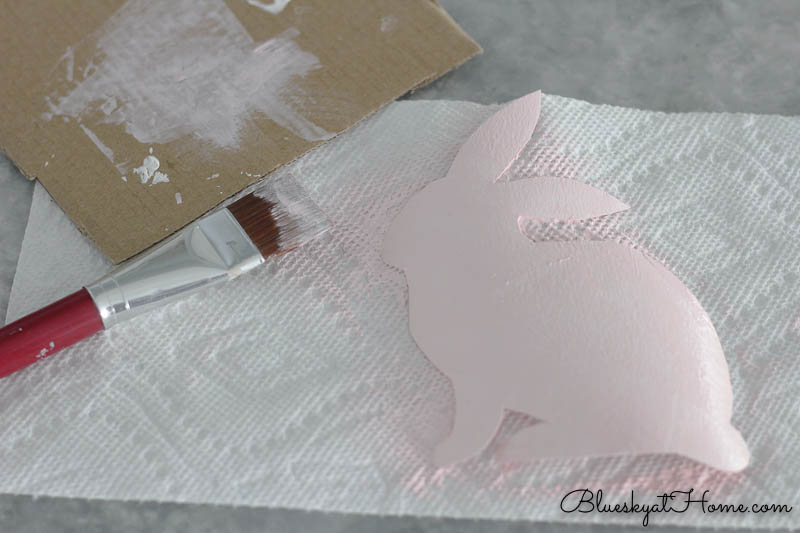
I needed a 2nd mirror~image bunny so I turned this one over and traced an outline and then cut this one out. Next I painted this bunny pink also.
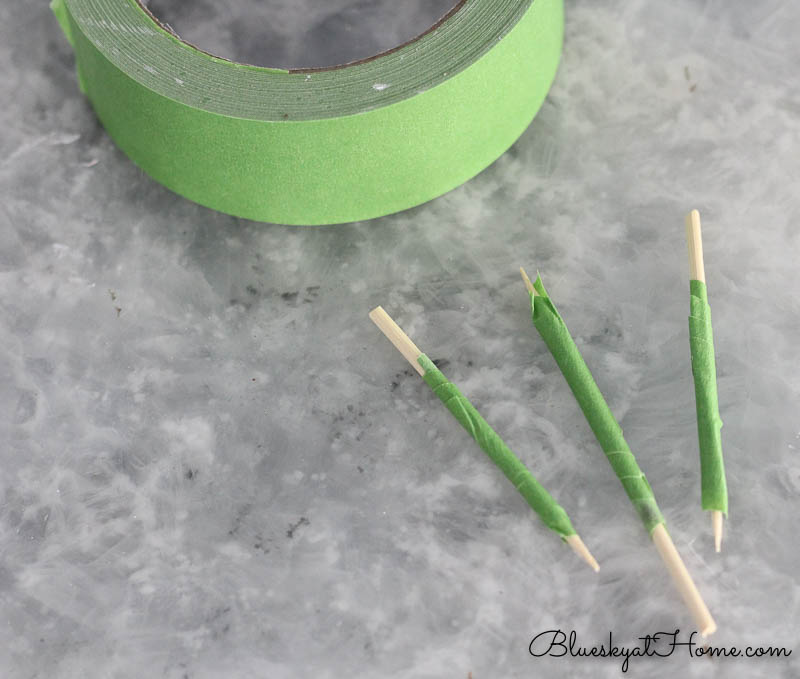
While this bunny was drying, I wrapped a wooden skewer in Frog Tape to look like the color of grass and glued it to the back of the first bunny. The wooden skewer came from my kitchen drawer.
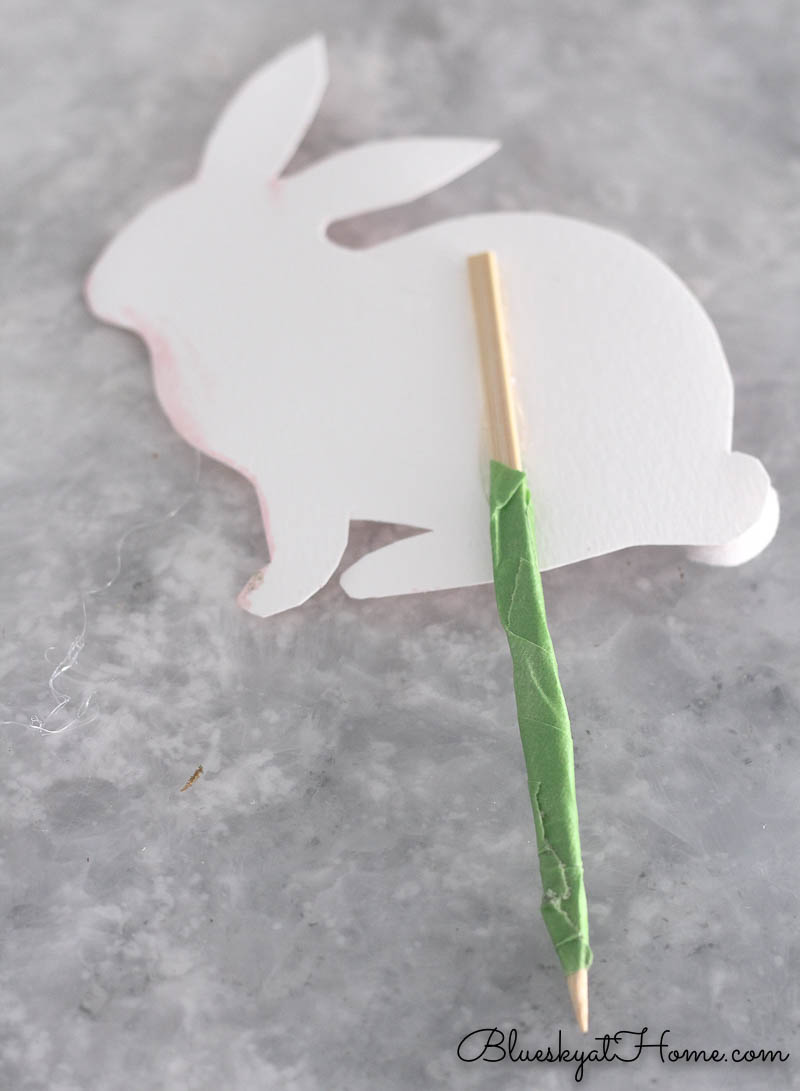
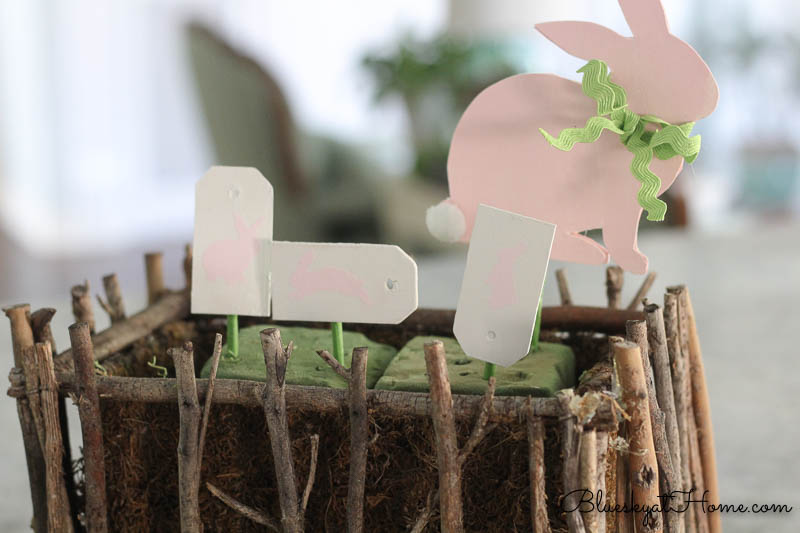
Every bunny needs to have a tail. I had small pom~pom trim left over from other projects and I just pulled off one pom~pom and glued it to the bunny.
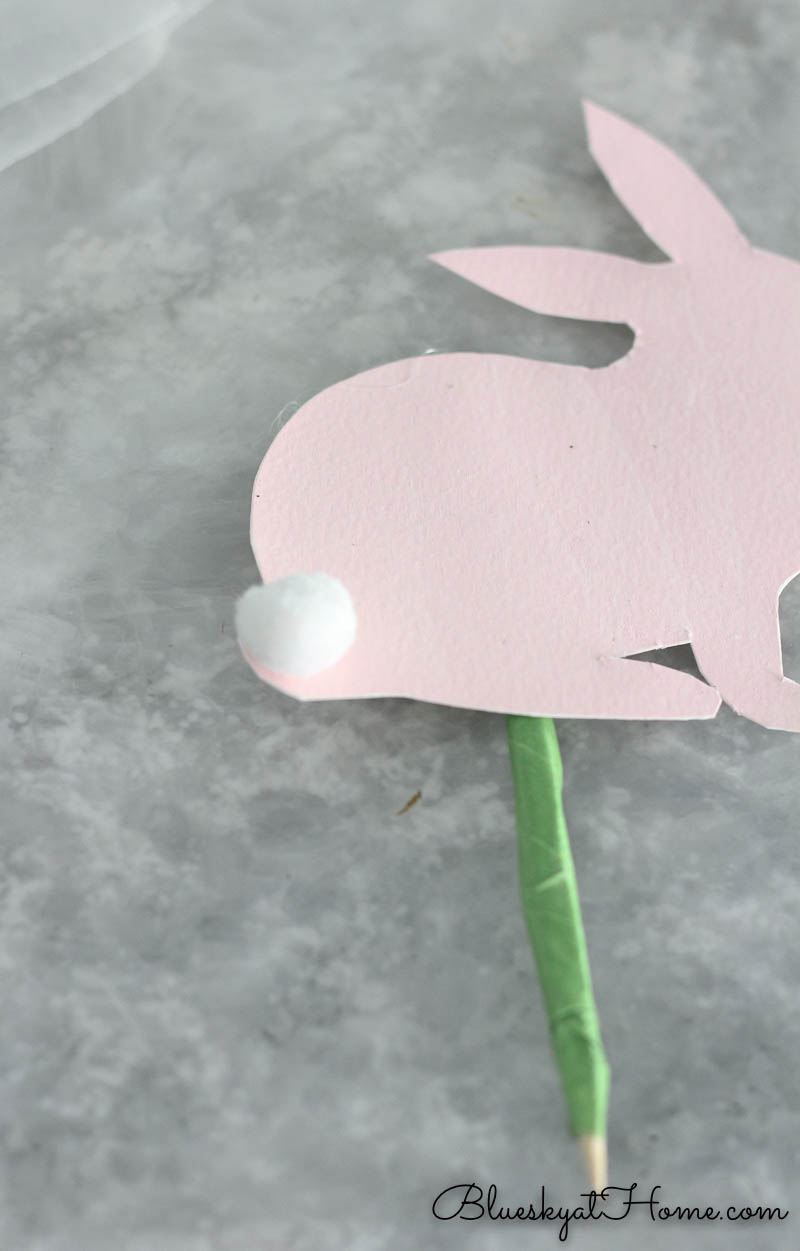
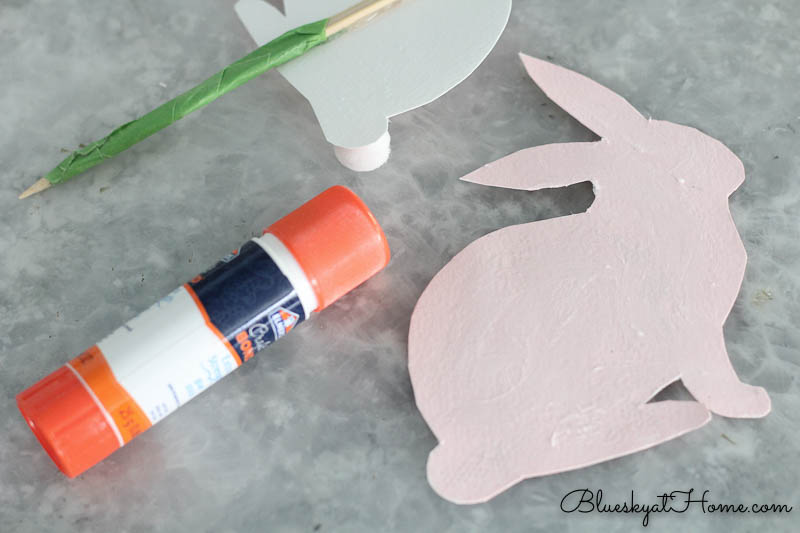
Then using a glue stick, I glued the 2 bunnies together, pressing all around to stick the card stock together.
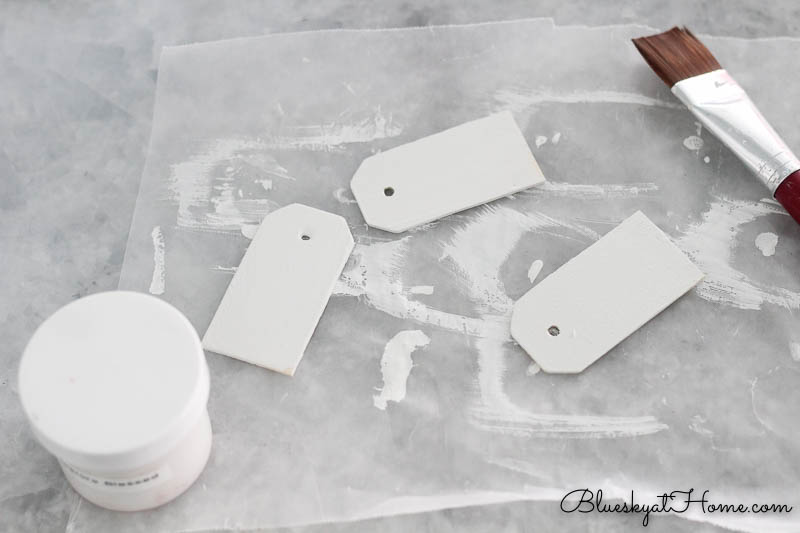
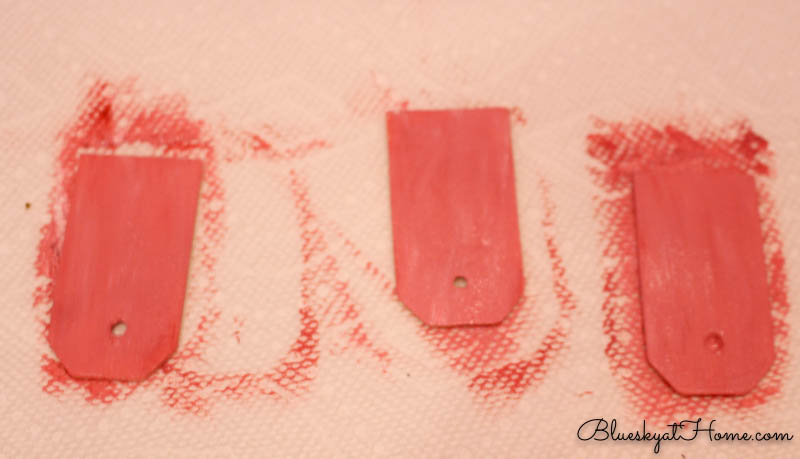
I wanted small bunnies to make a bunny family. I found an open package of 3 1/4~inch wood tags. I needed 3 tags and there were 6 left in the package of 8.
I used Rescue Restore paint in Blessed to paint both sides of the wood tags. You could use any acrylic paint, but this is what I had on hand.
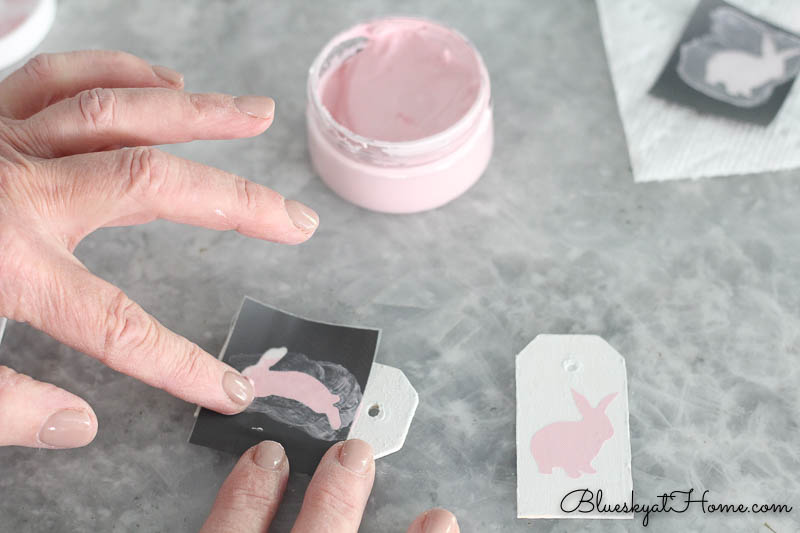
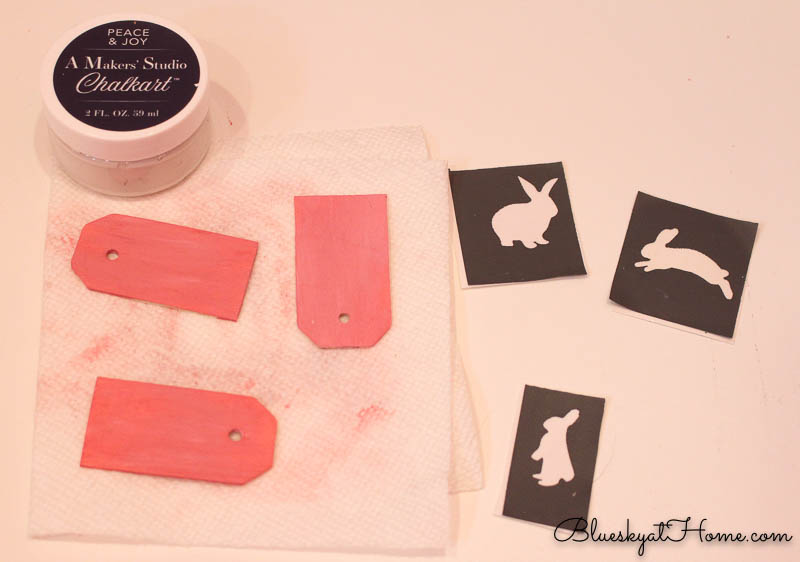
Since now I was working on wood, I used ChalkArt in Be Mine, a pretty pale pink, to stencil 3 different little bunnies on the tags.
When the stencils are little, it’s easiest to use your fingers.
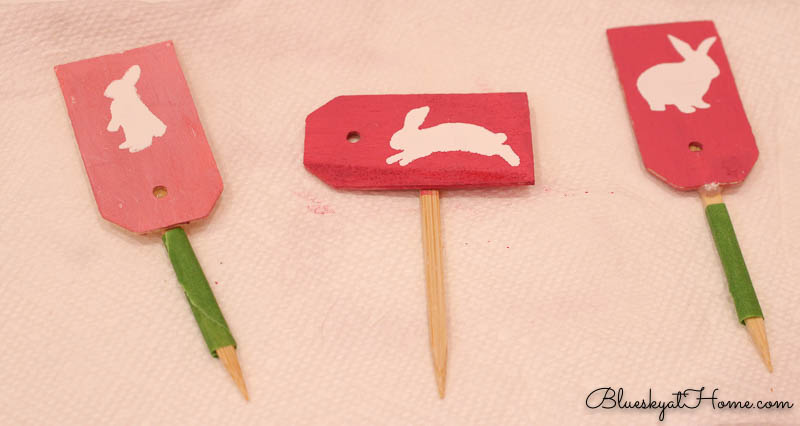
I cut 3 skewers (also from my kitchen drawer) down to about 3 inches, wrapped those in Frog Tape, and glued them to the back of the little bunny tags.
Next I stuck the bunnies in the florist foam. I found some green rick~rack in my ribbon box and tied a bow on the big bunny. The last step was to cover the foam with moss from the bag I keep in the garage. (This was before I bought my new box of Super Moss.)
At this point I thought I was done with my DIY project. I thought it was really cute and I didn’t have to buy a thing. I used supplies that I already had on hand and in the case of most, I had already used.
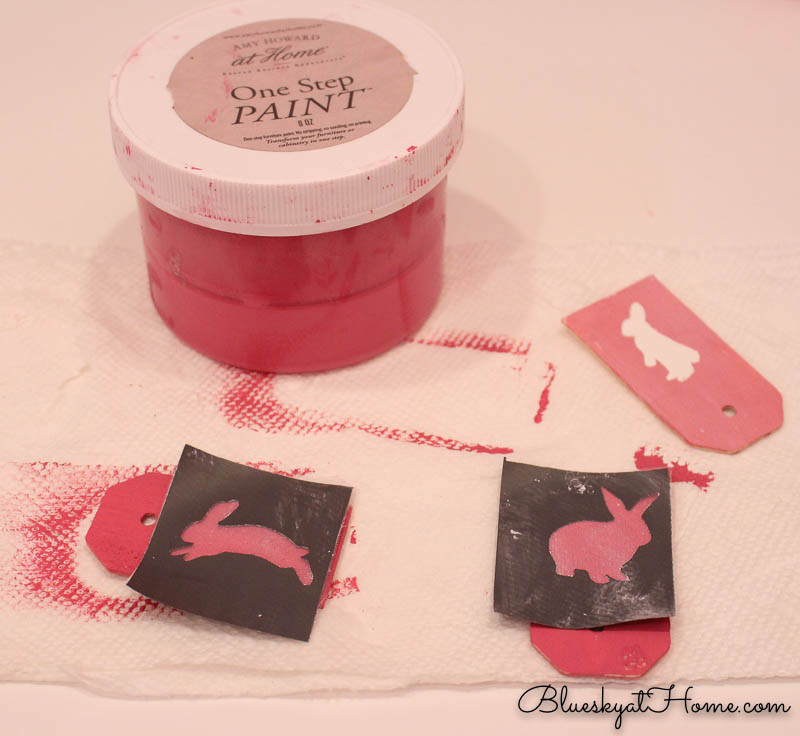
BUT, after a couple of days, I realized that the little pink wood bunnies didn’t show up when displayed. So back to the drawing painting board.
Fortunately, I had 3 more wood tags. I had a jar of Amy Howard at Home One Step Paint in a bright pink called Drama Queen. I used this color in my office to paint a printer paper storage box I made and a stand for my computer.
So I painted the tags in Drama Queen.
Then I used ChalkArt in Peace & Joy, which is white, to stencil the bunnies. This turned out much better. The little bunnies show up and bright pink is a nice contrast to the pale pink of the large bunny.
I stuffed more moss down the sides of the twig container and sprinkled some Easter jelly beans on top of the foam. A bundle of carrots tied in twine finished off the scene.
That’s it folks, a bundle of bunnies for free. Don’t you love creating for nothing? This really was design on a dime for less than a penny. Sweet Shark was really impressed that I didn’t spend any $$.
You may not make this same project, but I hope it inspires you to try making something cute and sweet with supplies you already have on hand. It’s a great feeling of satisfaction. If you need more Easter decorations, you might look at these 3 that are perfect for an Easter table. I’ll be back next time with one more easy Easter DIY project. (HINT: I showed it on the Hop into Easter Blog Hop.)
Now please hop on over to my fellow creator Tammy @ Patina and Paint. Enjoy this special Ten on the 10th. Pin our projects! And have fun creating your own.

Barbara ~ French Ethereal
Cindy ~ County Road 407
Susan ~ Homeroad
Katie ~ Let’s Add Sprinkles
Ann ~ Apple Street Cottage
Patti ~ Pandora’s Box
Carol ~ Bluesky at Home
Tammy ~ Patina and Paint
Benita ~ Chasing Quaintness
Laura ~ Decor to Adore
Amber ~ Follow the Yellow Brick Home

You are so stinkin’ creative! 😉
Thanks a stinkin’ nice thing to say. Love it!
Adorable, Carol! I love the soft pink color on your big rabbit and the tags turned out really cute ~ I am sure you’ll find a use for the first batch you made!!! They were all cute. 🙂 And I love that everything was made with things you had on hand ~ always a plus.
Happy to be with you on 10 on the 10th again,
Hugs,
Barb 🙂
This is such a creative post. I love what you’ve done with the container and the bunnies. TFS
So cute Carol! You are so crafty, I love seeing all your come up with. Isn’t it great when you find something you forgot about and it pulls everything together? That little basket is the cutest!
So fun joining you today!
So cute, Carol, and the price tag makes it even better. I just love shopping in my own closets- garage- basement!
You are always so clever with your crafts! Love this idea too. And free?! Hello!
Cindy, free makes an DIY better.
Such a cute centerpiece Carol! I adore your rustic container and the carrots are darling.
Thanks, Laura. Want to hear more about your trip to Roundtop.
I love your Easter arrangement, that is just too adorable! And I love that it was FREE!!! That is absolutely awesome! Shopping our homes and recycling other pieces to create new decor is the best…I think it makes us more creative! Hugs!
Love it! I did the same thing myself – planted a cardstock bunny in a pot filled with foam and moss. Stuck a ribbon around his neck and called it “loved.” Thanks for sharing ideas that don’t cost a lot of money. I love the little wooden tag bunnies planted near the larger one.
Barbara, great minds think alike! Hope this gives you inspiration!
What a cute craft. I love finding treasure in the garage. Cute basket.
Clever and cute basket!! As children we always made our easter decorations, so this brought back warm memories!! Happy Easter!
Patti, DIY has come full circle from when we were kids. Nice that the traditions are back.
Carol what a darling easter arrangement! I love the natural twig basket! So cute!!!!
Carol that is a great idea to make your own sticks! This is adorable!