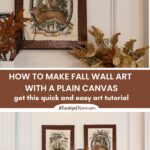
DIY Fall Wall Art with Canvas: Easy Autumn Decor Tutorial
Transform your home into a cozy autumn haven with this simple DIY fall wall art project that takes just one afternoon to complete! If you’re looking for easy fall decor ideas that are budget-friendly, this canvas wall art tutorial is perfect for you. Using just a plain canvas and a few basic supplies, you’ll create stunning autumn wall decor that captures all the warm, inviting vibes of the season.
Whether you’re a complete beginner or a seasoned DIY enthusiast, this fall wall art project with canvas requires no special skills or expensive materials.
The best part? You can customize the colors and design to perfectly match your existing home decor and a favorite print you have found in a local store or online. This versatile project lets you bring the beautiful colors of fall indoors.
Ready to create gorgeous fall wall art that your guests will think you bought from an expensive boutique? Let’s dive into this budget-friendly autumn decor tutorial that will have your walls looking festive in no time!

Welcome to the monthly Creative Craft Blog Hop. Today we have six unique projects to pick from. You will find a variety of skill levels, materials and methods. Our hostess is Sara of Birdz of a Feather. If you are joining me from Sara’s blog, then welcome to this fun DIY blog hop.
Fall Wall Art Inspiration
A few weeks ago, I went to my favorite local antique mall to buy a set of six beautiful Lenox blue wine glasses. The prior week, I purchased six sherbet/coupe glasses and I decided to go back and get the wine glasses.
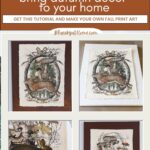
I can’t resist browsing anytime I visit the mall. I came across a bin of gorgeous prints on what I can only describe as textured pressed paper with old-fashioned “ragged” edges. You can feel the texture of the paper with your fingers.
I Googled “pressed paper” and found this website that produces this type of paper. It will show you the type of paper I’m talking about.
Each print had beautiful images of flowers or nature. The images and the paper looked like something you would find in an old library or home.
Two of them had related images of bunnies with fall colors. They would be perfect for fall decor. The detail, the natural colors, and the organic fall colors are so beautiful.
The interpretations of the bunny/rabbit, the mushrooms, and the script give the prints a whimsical, magical vibe.


You can see the rough texture of the paper and the ragged edges. The image looks like it is painted on the paper. The script is beautiful, and the colors are rich and saturated.

The prints were a little pricy, $32 each, but I couldn’t resist and bought both prints. I envisioned them on the wall next to the mirror in our entry or above the mantel in our living room.
What to Use to Frame the Prints
Now, how to hang them? I did not want to place them in a traditional frame under glass. I envisioned them “floating” on a canvas.
The prints are 12 X 14 inches. I had one canvas that was 16 X 20 inches. That size seemed just right for the prints.
I only had one canvas, so I ordered a set of two 16 X 20-inch canvases.

I made sure that the canvases would be big enough to “frame” the prints.
Now I had to figure out, how to create a “frame” to highlight the prints? I could have painted a border to create a frame. I did that for this wall art using a rub-off transfer.
I wanted something different with a bit of texture. Scrounging through my supply chest, I found a huge roll of 2-inch wide brown tape. Would this material work? I originally used it to tape faux and real branches to make a tree for a fall project.
The color would work well with the colors in the print. Surely, it would be easy to attach the tape to the canvas. It was worth a try.
I’ve used a blank canvas previously to make fall wall art in our entry.
Supplies for the Fall Art Wall with Canvas Project
Except for the prints and the tape, I had everything on hand.
- prints of your choice; antique malls, flea markets, online and Etsy would be good sources.
- white canvas in the size that will work with the size of your prints. You want a canvas that is 1 – 2 inches larger than the size of your prints.
- mat duct tape in the color and the width best for your print – this tape comes in many colors
- ruler
- pencil
- small craft sharp scissors for cutting the tape
- removable double-sided adhesive mounting tape
- Command clear plastic picture hangers

How to Make Your Fall Wall Art Frame on Canvas
This process is so easy and takes about 30 – 40 minutes to complete.
Step 1 – Place your print on the canvas and center it where you want it. I placed my prints so that there were two inches all the way around, both vertically and horizontally.

Step 2 – With a pencil, make a few light marks at the edge of the canvas.

Step 3 – Remove the print and use your ruler to connect the light dots to make lines on all sides of the canvas. This line will show where the first tape goes.

Step 4 – Pull a piece of the duct tape to stretch across each side of the canvas. Allow about 1 1/2 inches on each end. Use your scissors to cut the tape from the roll.


Step 5 – Continue adding strips of tape on all four sides of the canvas. After I placed one strip of duct tape all around the canvas, I added a second strip to cover all the white edges, including the sides of the canvas.

I turned the extra tape over the back side of the canvas.

I folded the tape over like you were wrapping the ends of present.

NOTE: You want to make sure that the tape is flat as possible and the corner is squared off.

Attaching Your Print to Your Canvas
I wanted the print to slightly “float above the canvas.
I used the round double-sided adhesive plastic mounts. I removed the plastic covers from two adhesive rounds and stuck them together to make it a little thicker.

I placed the adhesive mounts at the four corners of both prints and then centered the prints on the canvas.

I pressed down and rubbed a little to adhere the prints to the canvas.

Hanging the Fall Wall Art
I decided to use the fall wall art above our mantel. We used a measuring tape and pencil to determine where to place the canvas wall art. Sweet Shark always helps with this task.

We used the Command clear plastic removable hangers.
I hung the canvases side by side with the bunnies facing toward the center.


Decorating the Mantel for Fall
To finish our mantel for early fall, I wanted to complement the prints. I wanted the mantel to reflect the fall colors and the organic feeling of the prints.
To do that, I used three simple textured vases filled with florals.
On both ends of the mantel, I used the two round vases filled with faux florals.


In the center of the mantel, I placed a tall textured vase with faux branches that had used in an early project. The branches mimic some in the print on the left.

Now, my early fall mantel is done.

It’s simple, has a fall flavor, and uses the easy-to-make natural prints I found. The DIY fall wall art with canvas is a project that can be repeated with different prints and different colored “frames”. I hope you will try this easy autumn project for your home decor.
I have other projects on my Pinterest Boards: DIY Fall Projects, Fall Mantels, and Fall Home Decor
Now, please head over to Terri of Decorate and More with Tip and her pretty papier-mache project.


Decorate and More with Tip – How to Make Paper Mache Pears
Purple Hues and Me – Nylon Wrapped Lighted Pumpkin Garland
Simple Sunshine – Simple Sunflower Pumpkins
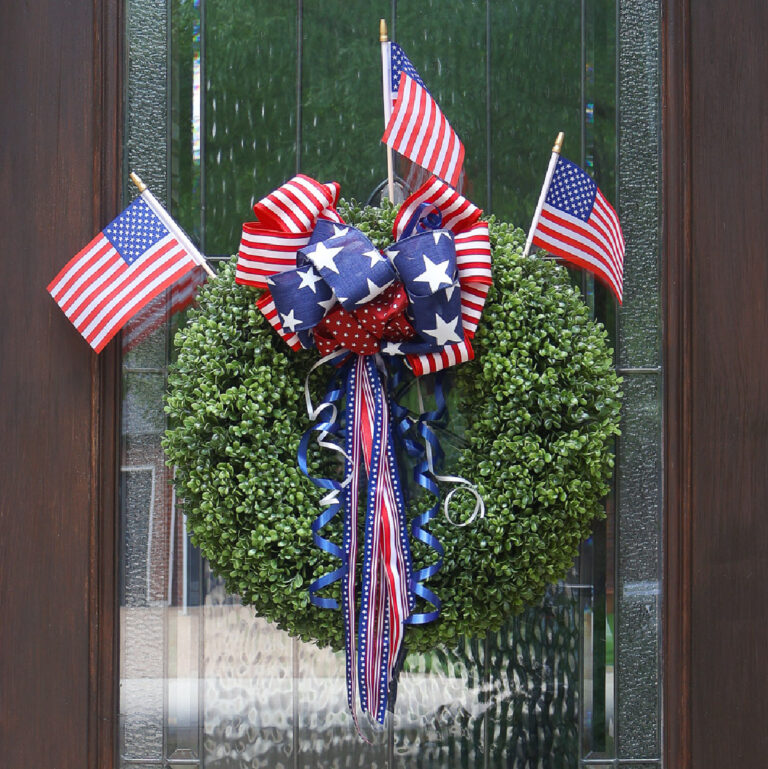
Modern on Monticello – DIY Football Themed Wreath
Birdz of a Feather – Seed of Life
Bluesky at Home – DIY Fall Wall Art with Canvas: Easy Autumn Decor Tutorial


Carol, creative. It looks really very nice. I don’t know how you came up with that idea but you’re very talented. Thanks for sharing.
Patricia, necessity is the mother of invention! Thank you for your sweet comment.
Using duct tape as a border frame is such a creative and unique choice, Carol! It really suits the print artwork fabulously and makes the prints pop! Very resourceful, too!
Carol, your canvas art is beautiful and I am so smitten with pretty prints you selected! Blessings, Cecilia – My Thrift Store Addiction
Thank you, Cecilia. I love the prints so much, too.
Wow Carol – you really managed to highlight everything that’s so great about these prints. It would’ve been a shame to lose the texture of those gorgeous edges behind glass. Well done!
You always share such creative ways to decorate your home on a budget. This one is perfect! Thanks for sharing Carol.
These prints are so pretty. I can see why you wanted to use them. I think your idea for how to frame them is genius. No one would ever guess they are made with duct tape.