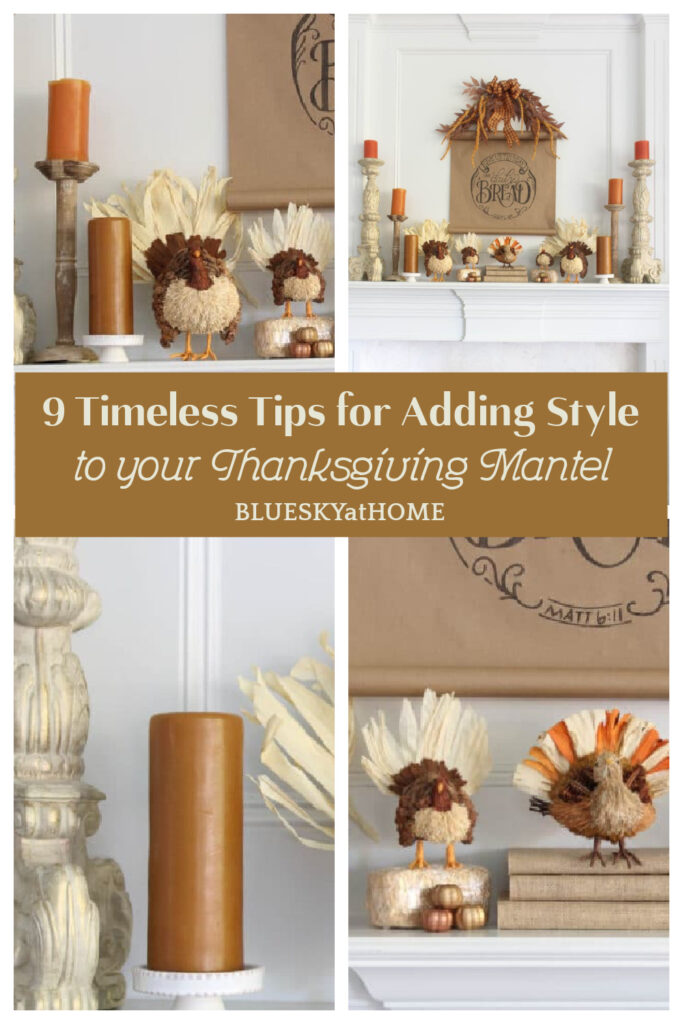
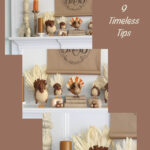
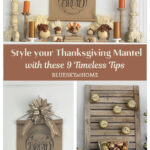
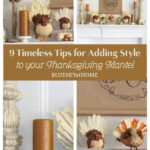
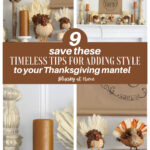
9 Tips for a Thanksgiving Mantel in 30 Minutes
Halloween is behind us ~ except for the leftover candy! Now it’s time to turn our attention to November. The mantel is usually the first area that I decorate and I have 9 tips for a Thanksgiving mantel in 30 minutes.
I’ve always found it challenging to decorate our home for Thanksgiving since the stores just don’t offer that many decorations for this quintessential American holiday. I have incorporated some tips for a Thanksgiving mantel that I think will help you, too.
It’s taken us years to gather enough items to really put a stamp on this favorite time of year. One thing that we have collected is turkeys. I decided that some of our turkeys would provide the theme of our Thanksgiving mantel.
As I was designing our mantel, I didn’t intend for it to take just 30 minutes, but that was a nice bonus.
This post really isn’t about the time, but the tips. Because regardless of the time it takes, these 9 tips for a Thanksgiving mantel will help you design your own mantel for any occasion or season.
I love tips for any home decor challenge. These simple tried and true steps will get you the results you want more quickly. Then you can go on to the next area in your home.
Since we are now in the most intensive decorating time of year, any guidelines to help us save time are helpful. I hope these 9 tips for a Thanksgiving mantel will help you get on to the next item on your decorating list and then enjoy the Thanksgiving mantel that you created.
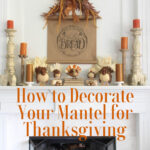
30 Minutes and 9 Tips to a Thanksgiving Mantle
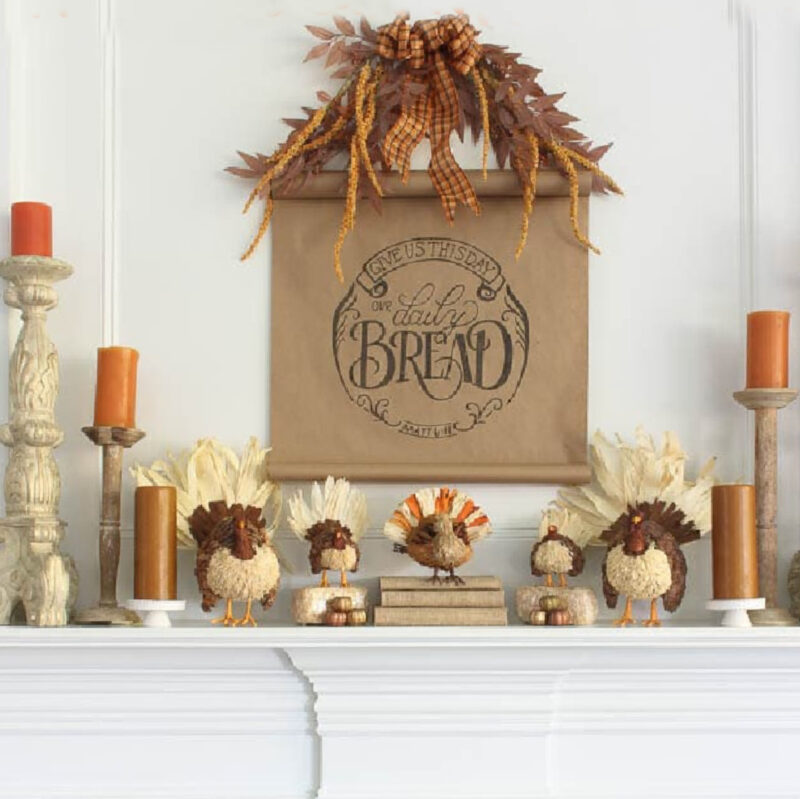
Remember that a mantle is a flat surface, just like a table. But unlike a table, a mantel has a back that is perfect for displaying your main focal point.
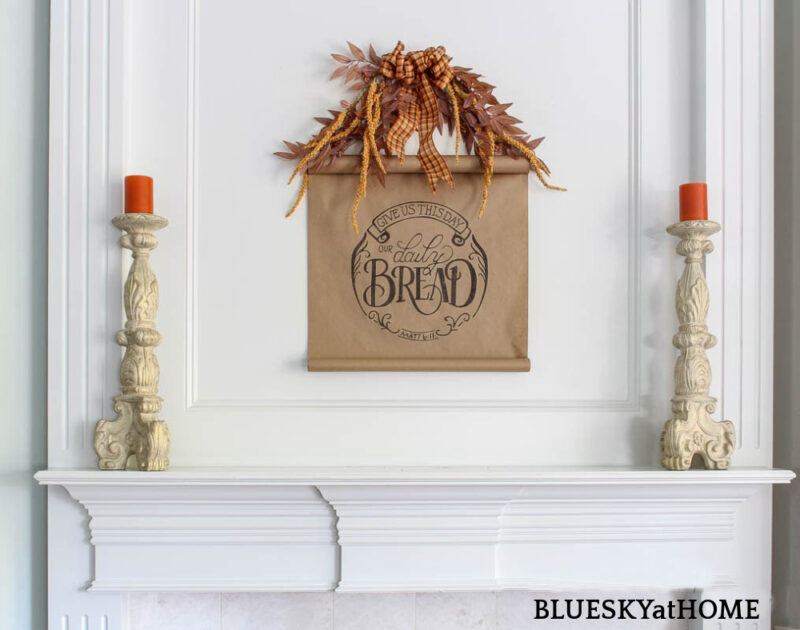
I recently created a graphic art scroll for the Thanksgiving holidays. I loved how this scroll turned out. I knew it would be a focal point above our mantel for the season. That brings us to our first tip.
TIP 1: Create a focal point on your mantel. This focal point could be a sign, a wreath, a painting ~ anything that draws the eye to the mantel and the fireplace. The focal point should be large enough in scale to fill the space you have. The focal point may be hung or sit on the mantel.
I hung the scroll as soon as I finished it, but our Halloween decorations were still on the mantel for a couple of days.
Once I removed all the Halloween decorations, I could tell that the scroll was too low. Since the space above our mantel is quite tall, the scroll was off-center from top to bottom. At least, it was centered from left to right.

I raised the scroll by 6 inches by nailing in a small picture hook, which achieved the right height. The original picture hook holds a large piece of art that we will rehang after the Christmas holidays so I didn’t want to take it down.
Unfortunately, you could see this hook. Fortunately, I had enough ribbon left to add a tail, which actually made the scroll look so much better.
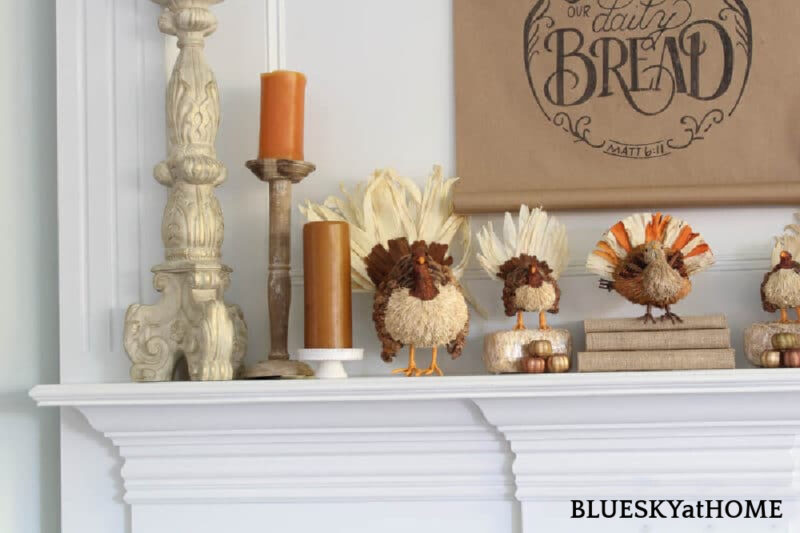
I did leave our tall candlesticks with the battery~operated candles from Wayfair. They are on a timer which is great; if they were real candles, we would have to get out the step stool every time we wanted to light the candles.
TIP 2: Battery-operated candles are a great item for tall mantles, both for safety and convenience.
These candlesticks provide height and symmetry. You may notice that the top of the candles is just about the same height as the top of the scroll. This practice keeps the eye from having to hop around too much.
Because our mantel is all white, I used fall colors for contrast: the orange candles, the faux leaves and the plaid ribbon. Everything I put on this mantel design must have color to stand out from the white.
TIP 3: Use colors on your mantel that will contrast with the background. If your mantel is dark wood or dark brick, lots of white and cream will pop against the background.
Since our mantel is white, I use items with a bright or contrasting colors.
Since the scroll and the candlesticks provide some height, I will need some more items for height across the mantel.
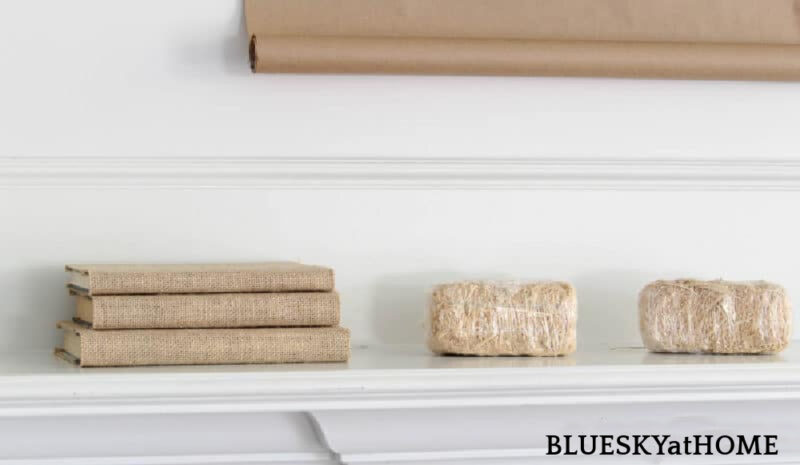
For me, a stack of burlap~covered books and 5~inch mini~hay bales from Joann are the perfect solution. They also keep the natural color that started with the kraft paper of the scroll.
By the way, don’t take the plastic wrapping off the hay bales – less mess and they will last longer. This is the second year that I’ve used the mini-hay bales.
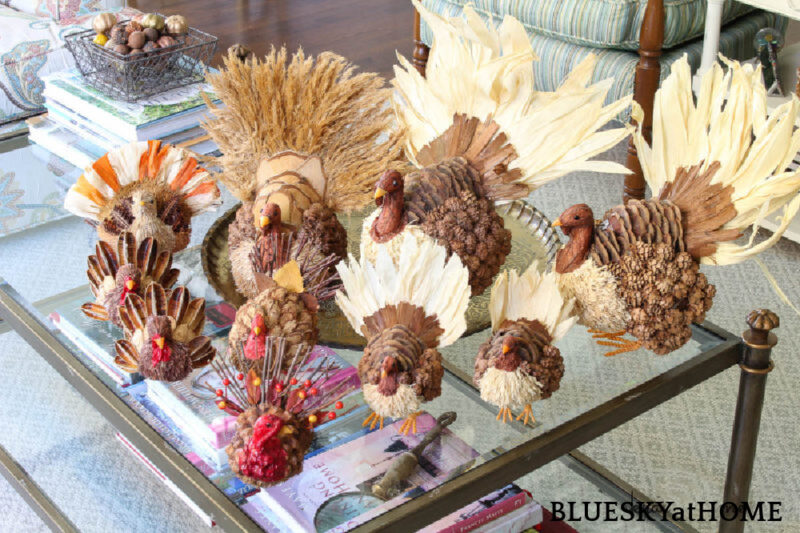
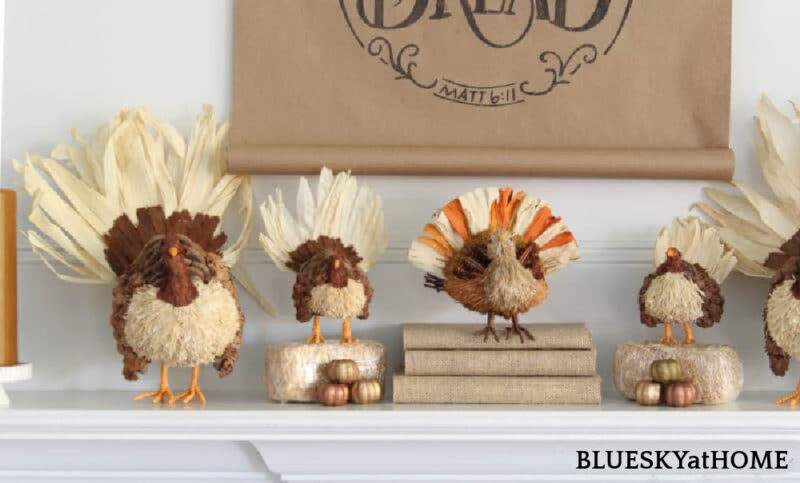
As I unpacked all our Thanksgiving decorations, I gathered all our natural material turkeys on the coffee table. These are not all our turkeys, just the ones that have that organic, natural look. They would provide the theme of our mantel.
We have bought these turkeys at places like Pier 1, Joann and local gift shops. I recently found this really nice decorative turkey.
TIP 4: Use a collection of items to create a grouping for your mantel. A group should be at least 3 things of similar type. The smaller an item, the more important to have a collection. This approach creates more interest than one small item which can get visually lost.
TIP4A: Have all your items out before you begin creating your mantel design. It also helps to have a step stool ready for reaching higher places.
I decided that I would have a symmetrical arrangement below the scroll. I moved the book stack to the center flanked by the hay bales. Then I placed two of the larger turkeys on the mantel at a slight angle. This creates a visual outline below the scroll.
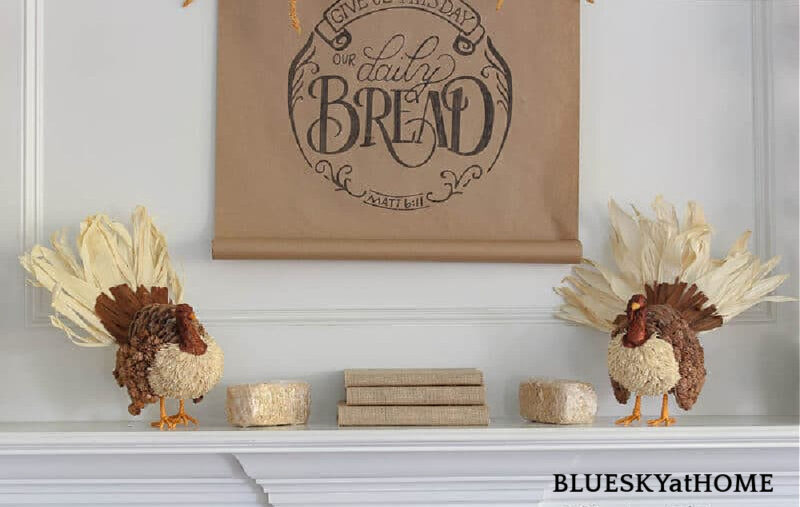
Next, I placed two smaller turkeys on the two hay bales.
TIP 5: Use different heights to create interest. You can use these things to give height to smaller objects:
- stacks of books
- hay bales
- boxes
- cake stands
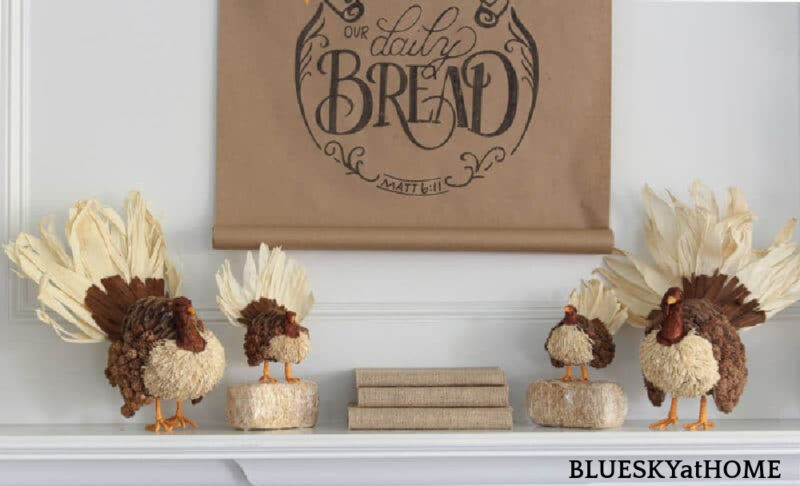
And finally, I placed one more turkey in the center of the mantel on the book stack.
Now I have a symmetrical arrangement, but using an odd number of items. I have 5 turkeys (an odd number), but I have kept the symmetry of the vignette.
TIP 6: Use odd numbers to create interest. Odd numbers may be used in either a symmetrical or asymmetrical arrangement.

Next, I needed more height next to the very tall candlesticks at the outside of the mantle. We already had these tall “butterscotch” colored candles. To give them a little more height, I placed them on cupcake stands.
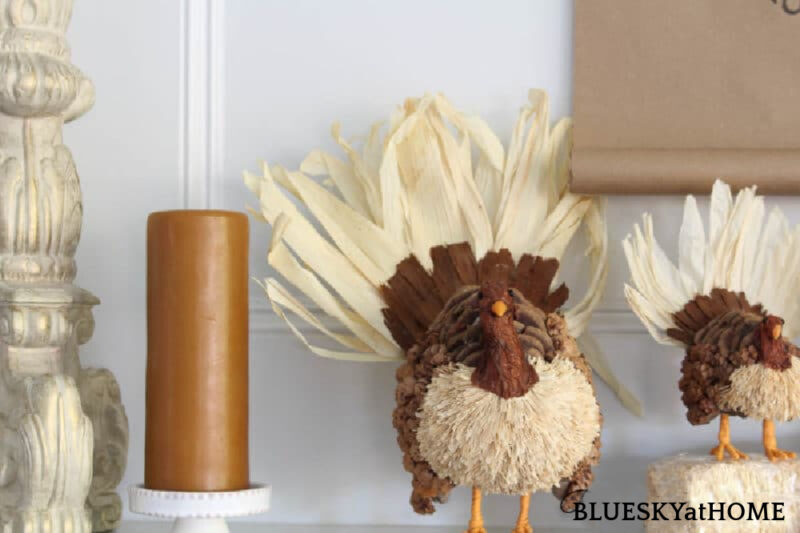
I loved how well the colors of the turkeys and the candles worked together.
The symmetry and the focal point were good, but the hay bales seemed a little bare.
So I stacked 3 (odd number) small metallic pumpkins in front of them. A simple little addition that adds a pop of metallic color and interest.
TIP 7: Small details can add more color or an extra touch of whimsy and fun to any vignette.
Stepping back to view the mantel as a whole, I thought there was too much distance between the shorter candles and the tall white and gold candlesticks. There was definitely a contrast in heights, but maybe too much.
The solution? Bring in another candlestick that softens the distance between the first two candlesticks. I used the natural wood vintage candlesticks that I found last year.
TIP 8: Differences in height and spacing should be pleasant, not jarring to the eye. Step back to look at the composition of your vignette to see the spacing from a distance.
I had another set of candles which provided one more variation of my color theme. This additional color continues the colors in the plaid ribbon and the feathers on the turkeys.
My last tip for a Thanksgiving mantel?
TIP 9: Repeat your main color in different shades or intensity throughout your mantel or vignette.
Let’s recap the tips for a Thanksgiving mantel:
- Have a large focal point that fits in scale and is positioned correctly against your background – it should look and feel just right.
- Battery-operated candles are a smart, safe choice for places that you can’t easily reach.
- The colors on your mantel should contrast with the background rather than blend in.
- Use collections that you love – at least 3 – but not so many that your arrangement looks cluttered.
- Use different, subtle changes in height to create interest.
- Use odd numbers.
- Include small details that can add more color or depth to your vignette.
- Step back to look at your composition to make sure that it is coherent and pleasing to the eye.
- Repeat your main color in different shades or intensity throughout your arrangement.
The Complete Mantel and More Examples
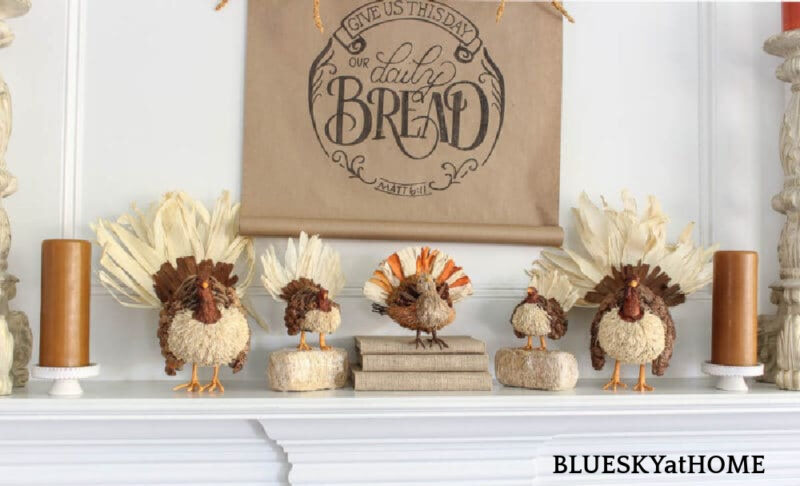
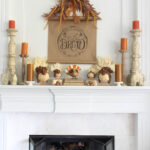
Here’s the complete mantel, ready for display through Thanksgiving.
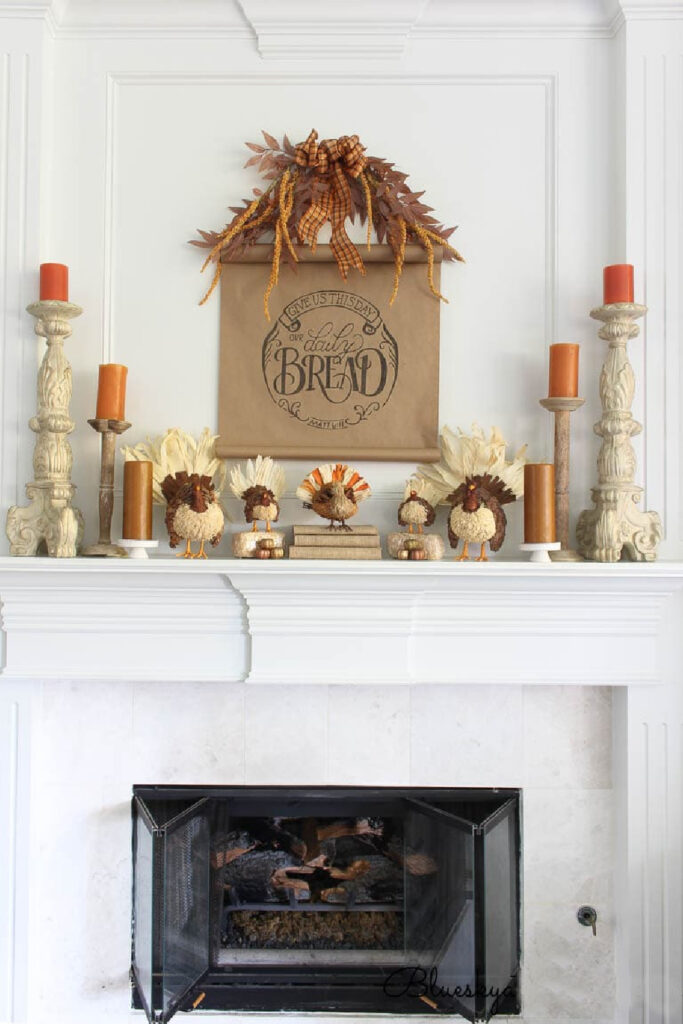
I love the simplicity of the elements and how the shades of orange and rust really pop against the white background.
Although this is a symmetrical arrangement, there are odd numbers – 5 turkeys, 3 candlesticks on each side, 3 pumpkins on each side, and one central focal point; the book stack and 2 hay bales form a 3-some in the center.
Do you like our mantel? I hope so. I knew that it took me about 30 minutes because I was watching a recording of Grey’s Anatomy while designing the mantel and it was about halfway through when I finished.
Here are some more ideas for your Thanksgiving mantel.
- Use these ideas to Easily Decorate Your Fall Mantel
- Two DIY Projects for your Thanksgiving Mantel
- Easy DIY Fall Banner for your Thanksgiving Mantel


Adapt these 9 tips to your own mantel and what items you have on hand.
I really hope that these 9 tips for a Thanksgiving mantel will help you create your own – for Thanksgiving and future mantel projects.
Be a sweetheart and PIN it too.


I love your mantel, Carol! The fact that it takes just a few minutes to create means that I could do something like this last minute (which is very much needed for me this Fall!).
Thanks so much for joining the Grace at Home party at Imparting Grace. I’m featuring you this week!
Carol,
I am so excited to be featuring you on Tuesday at the Home Imagined Link party! I love your Thanksgiving mantle!-Meagan
Thank you, Meagan. That’s always such a nice treat.
So excited to tell you this post will be featured on Tuesday Turn About Link Party this week! Hope to see you at the party this week! Pinned 🙂
Great ideas, and LOVE that scroll!!! Thanks for sharing at Vintage Charm. xo Kathleen
Hi Carol – Your Thanksgiving mantel looks fabulous. The colors you chose look lovely against the white background (as you noted) and they are perfect for the season. Thank you for all the tips and ideas you shared. Also, thank you for sharing this post on the Home Imagined Link Party.
LOVE love your Thanksgiving mantel, Carol! That scroll is amazing. Happy November!
lOVE THIS! Pinned! laura in Colorado
Carol,
What a great Thanksgiving mantel! Those little turkeys are the cutest. Love all the candle sticks too. Thank you for stopping by our Home Imagined party-Meagan
Carol this is an absolutely stunning mantel display! Love it. I am happy to feature you at this week’s All About Home party. Thanks for sharing with us!
Great tips, Carol. I wish my house had a mantle, but, sadly it doesn’t. I told my husband the next one has to! Thank you for sharing at Party In Your PJ’s!
I am in LOVE with that scroll! I love the Scripture. So beautiful. Thank you for sharing this!
Absolutely pinning. Thank you for linking up w us at Creative Muster!
Blessings to you. xoxoxo Sharon