How to Make Natural-Looking DIY Faux Acorns for Fall Home Decor
Crisp autumn air is blowing in and leaves are turning vibrant shades of orange, rust, and gold. There’s no better time to include the beauty of the fall season by adding iconic fall elements to your home decor. I’m here to show you how to make natural-looking DIY faux acorns for fall home decor.
One charming way to celebrate this season is by using and creating iconic fall elements. Acorns and pinecones are natural and organic items that we can access in the fall. Yes, we can gather acorns – if you have live oak trees – in your neighborhood.
Not only do these delightful elements capture the essence of autumn, but they also offer an opportunity for creativity and personal expression in your home.
In this post, I’ll guide you through a simple project that will add a sense of whimsy to your cozy fall haven.
Creating your own acorns is not just about aesthetics; it’s about connecting with nature and bringing that warmth indoors.

This DIY faux acorn project is perfect for all skill levels—whether you’re a seasoned DIYer or just starting out.
This post contains affiliate links to products used in the creation of this project. If you should order any item from this site, I may receive compensation, but you do not pay a penny more. Your purchase is greatly appreciated as it helps support the continued publication of this site.
Supplies for these Natural-Looking DIY Faux Acorns
The supplies you need for this acorn project are easy to find. You may have some at home already.
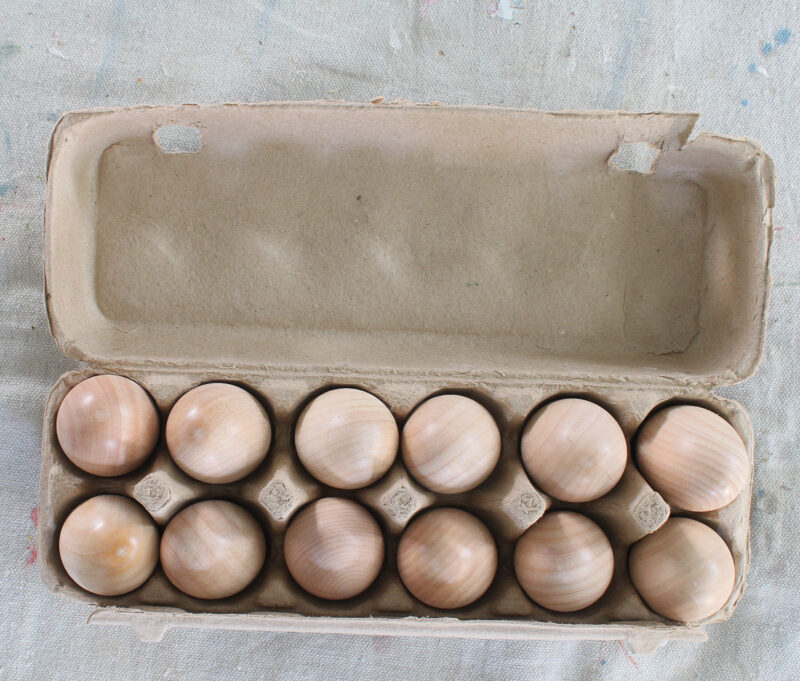
- Easter eggs – foam, plastic, or wood. I used wood eggs because I liked the “weight” of them, the size, and natural look of the wood grain.
- Acrylic paint or stain. I used brown stain because I had it on hand and I wanted the grain of the wood to come through for a natural look.
- Sponge brush
- Plastic gloves – keep your hands clean when apply paint or stain
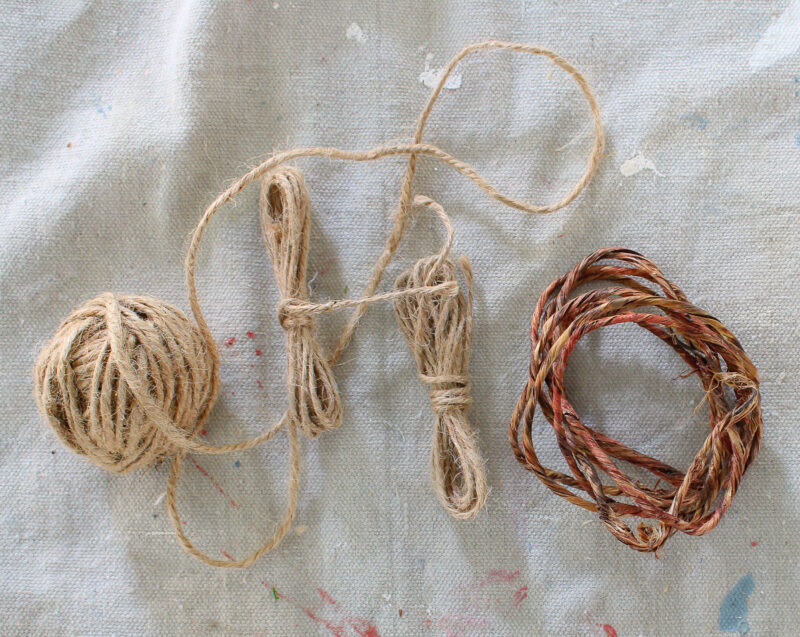
- Jute twine – I had thin twine on hand so I used it. I wouldn’t recommend twine that is too thick.
- Wired jute twine – for making acorn stems.
- Glue gun and glue sticks
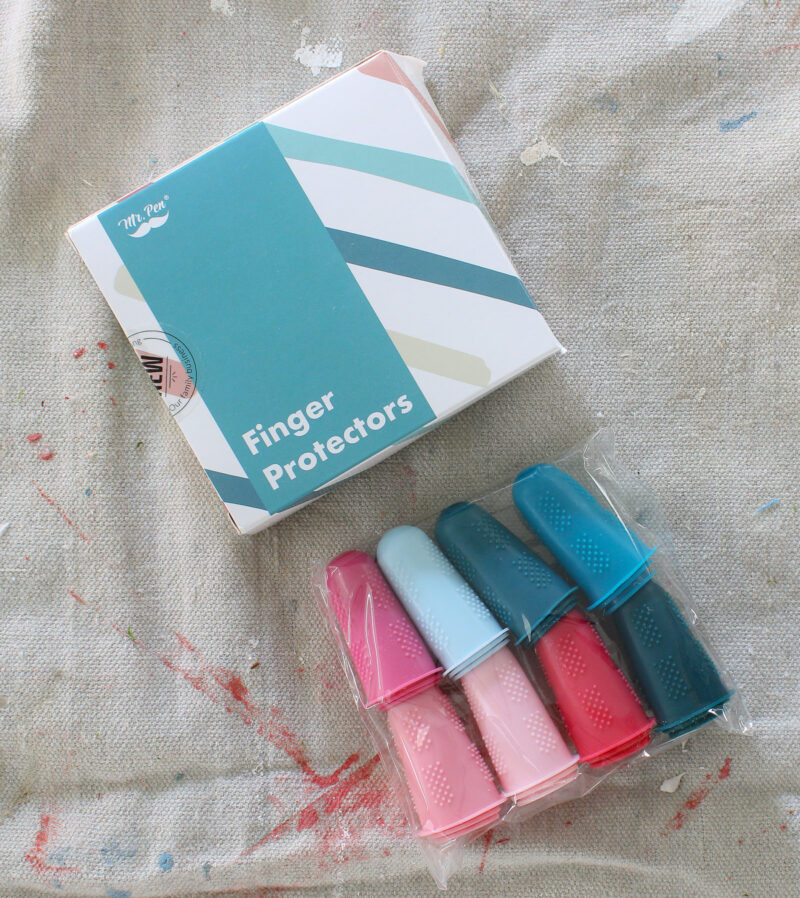
- Finger projectors – I finally ordered a package to project my fingers from burns. They definitely helped. This package had 8 sets of three different sizes.
- Sharp craft scissors – this one is my favorite.
- Wire snips – for cutting the wired jute twine.
Preparing Your Eggs
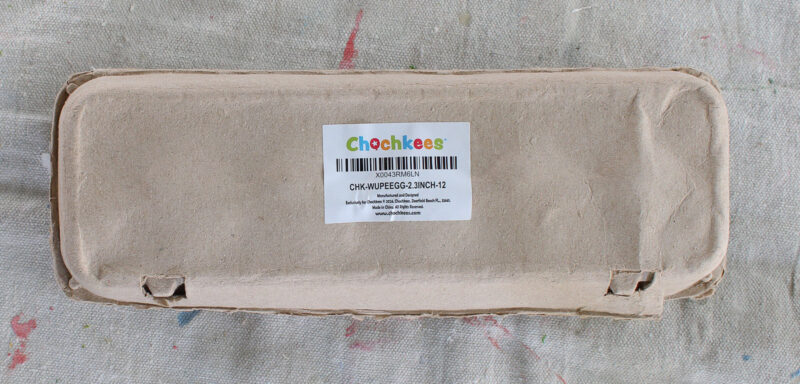
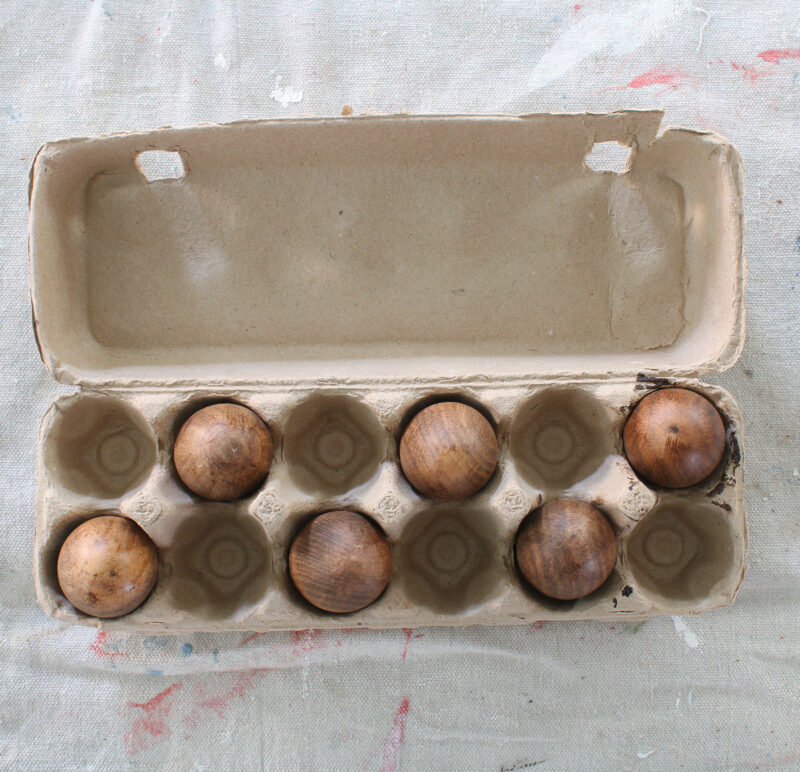
The first step is pick your wood eggs. There are a dozen in each carton. I thought six would be enough for my intended use.
I noticed that six of the eggs were a darker color and six were a lighter color. Since I planned to stain the eggs, I picked the darker six eggs.
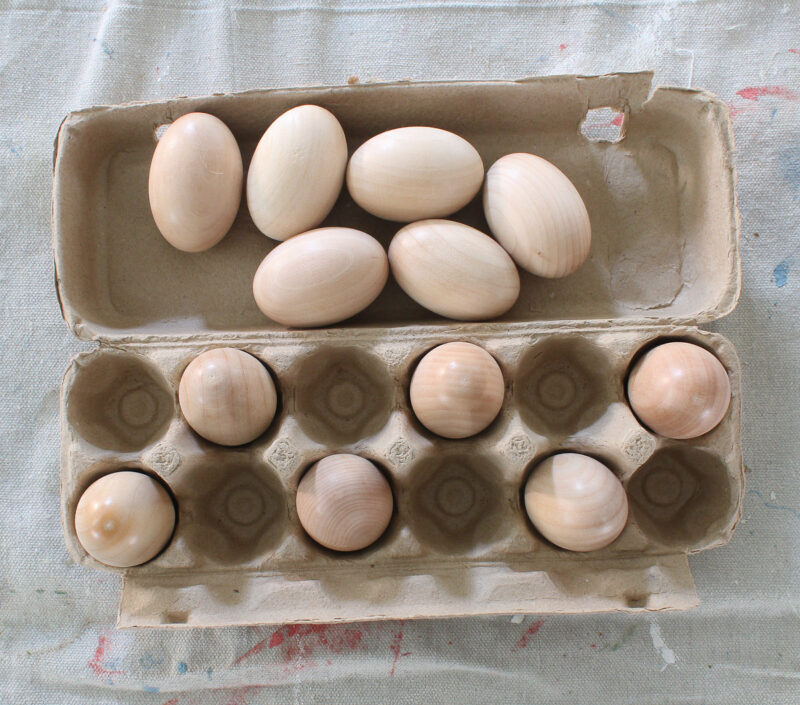
I’ll save the lighter eggs for another project.
Staining/Painting the Eggs
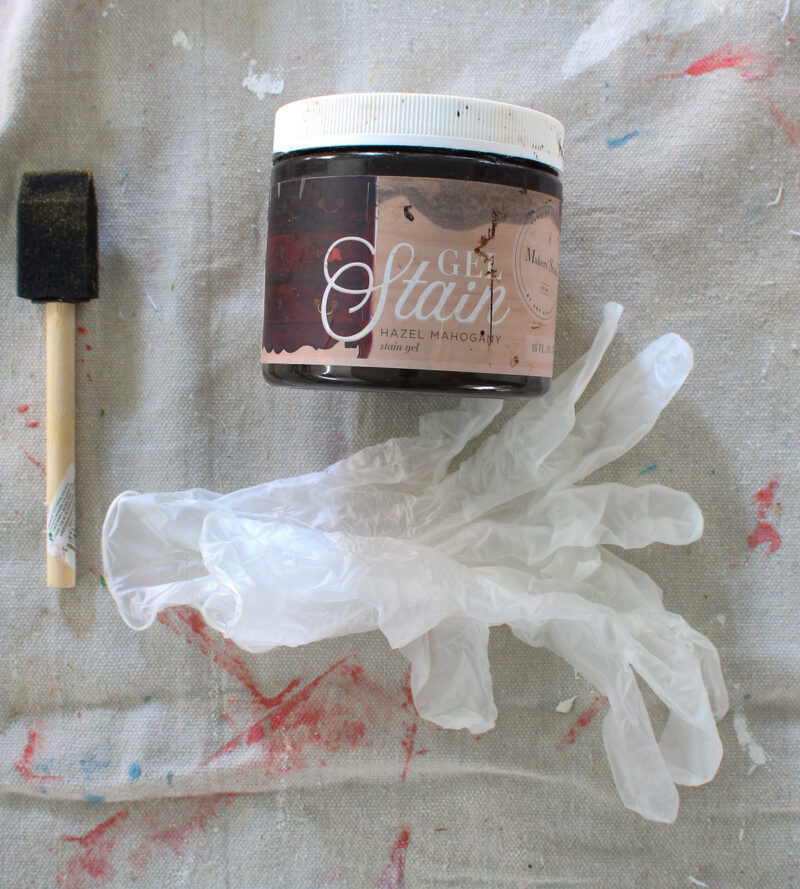
The second step is to prepare your stain or paint, if necessary.
This water-based gel stain is from A Makers’ Studio and I love it. It has no odor, goes on easily and has great coverage. I’ve used it for many applications, from staining our front door to our patio coffee table.
You can see those projects: How to Use Gel Stain to Refresh Your Furniture.
There was very little stain left in the jar so I added a little water and shook the jar to combine the water and stain. This color is Hazel Mahogany. It’s a dark brown.
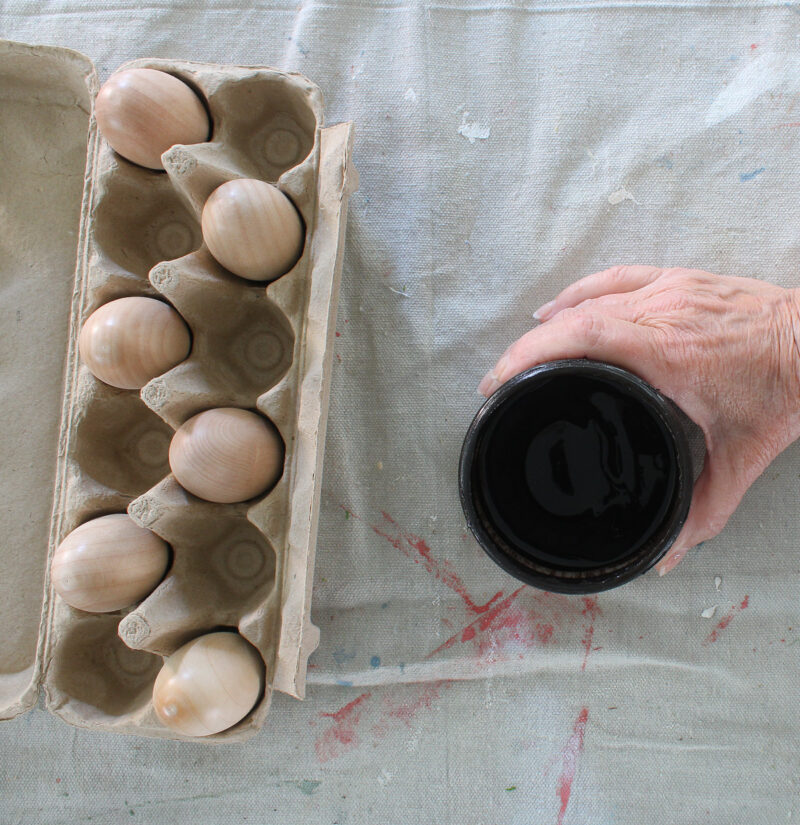
I like to use my disposible gloves when I use stain on paint.
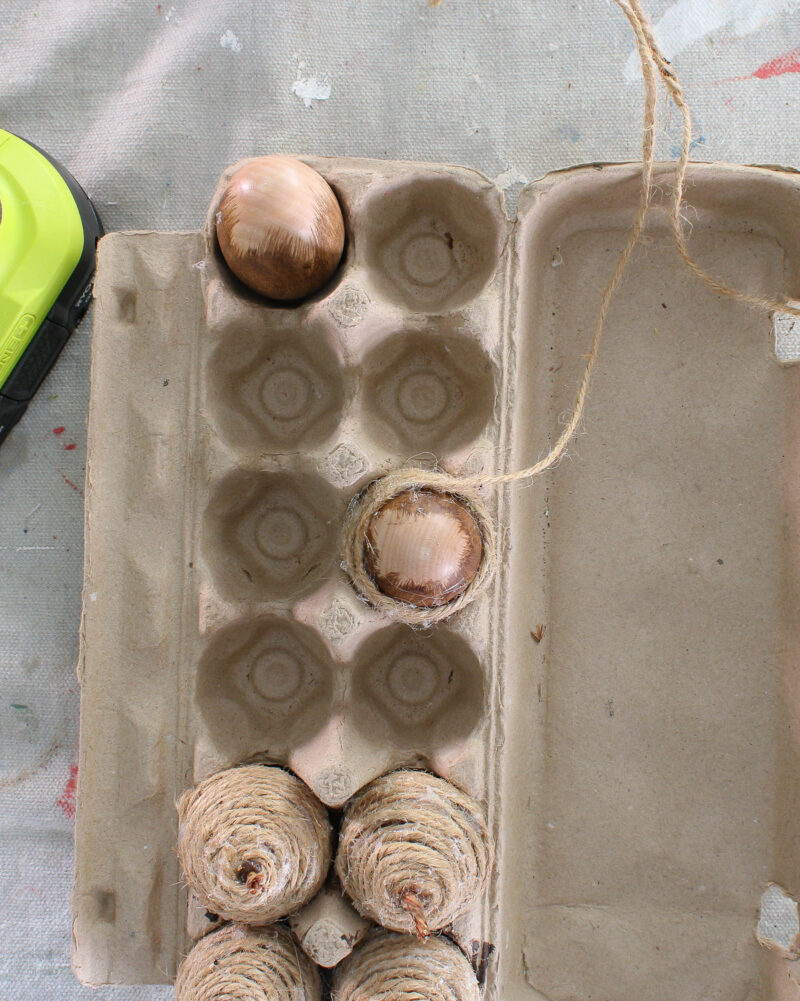
Using a sponge brush, brush on the stain. I purposely didn’t cover the entire egg since it would be covered with jute twine.
The paper carton acts as a holder for the eggs to dry.
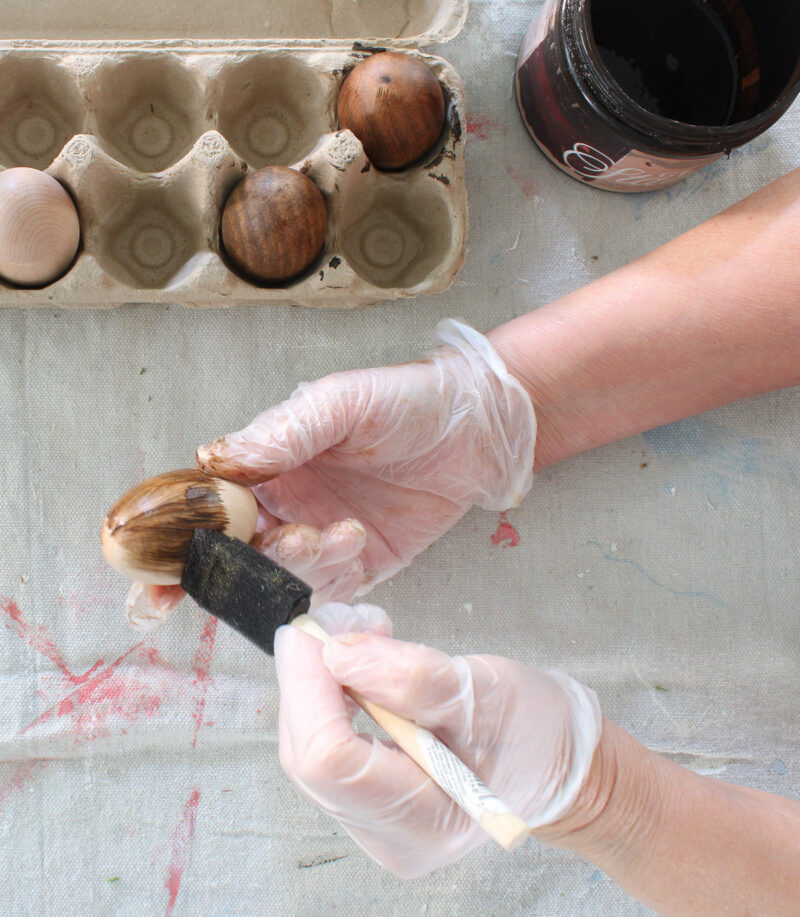
I wanted the grain to show, so I used a dry paper towel to immeditely wipe off the stain.
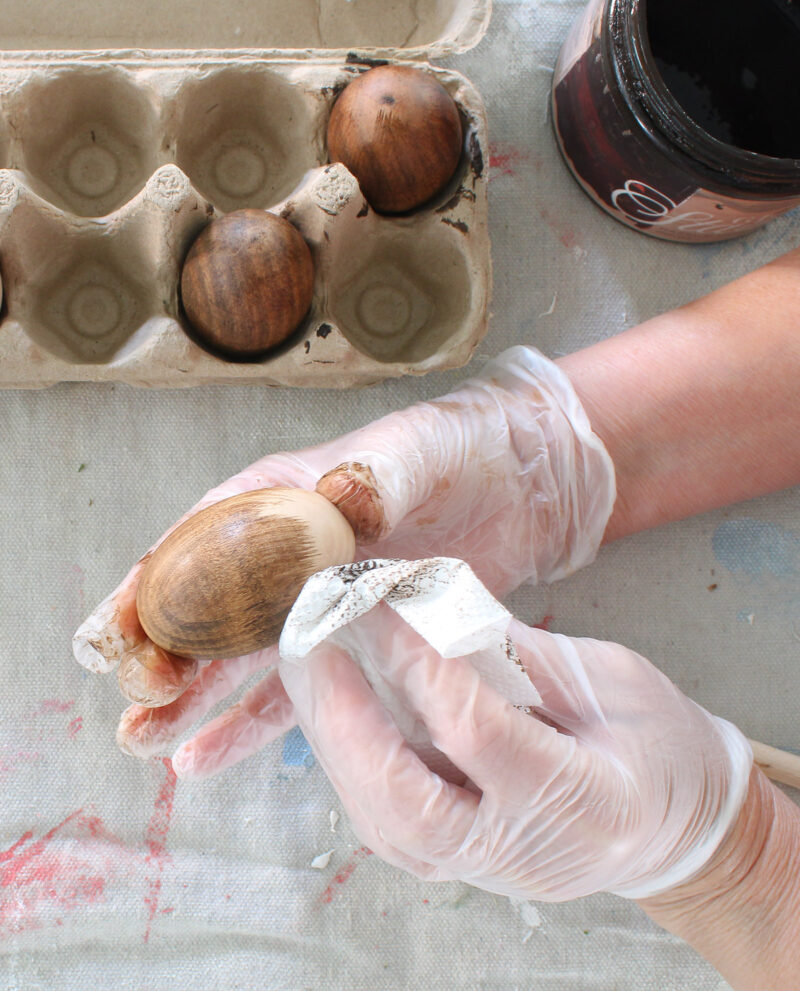
You can leave the eggs to dry in the carton until you are ready for the next step.
Adding the Twine to Make an Acorn Top
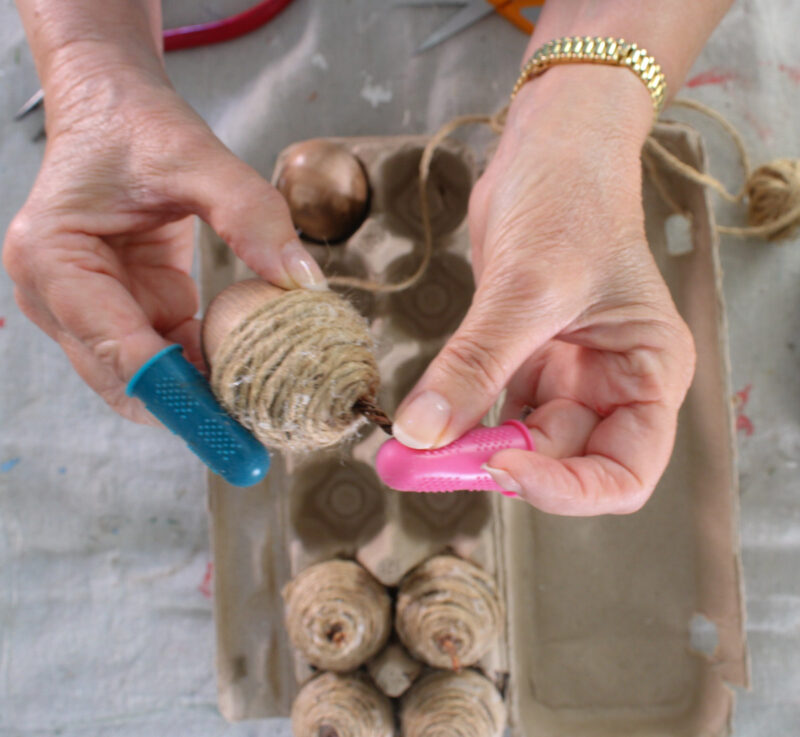
To transform this wood Easter egg into an acorn, you will use the jute twine and your glue gun.
Definitely try the finger protectors!
Hold the egg at the top and bottom – use your middle finger and thumb – with one hand. With your other hand, run a bead of glue on the top 1/3 of the egg. Then place one end of the jute twine on the wood egg. Use the finger protector to press the twine to the egg.
Continue by adding a lines of glue around the egg, wrapping and pressing the twine down with your protected finger.
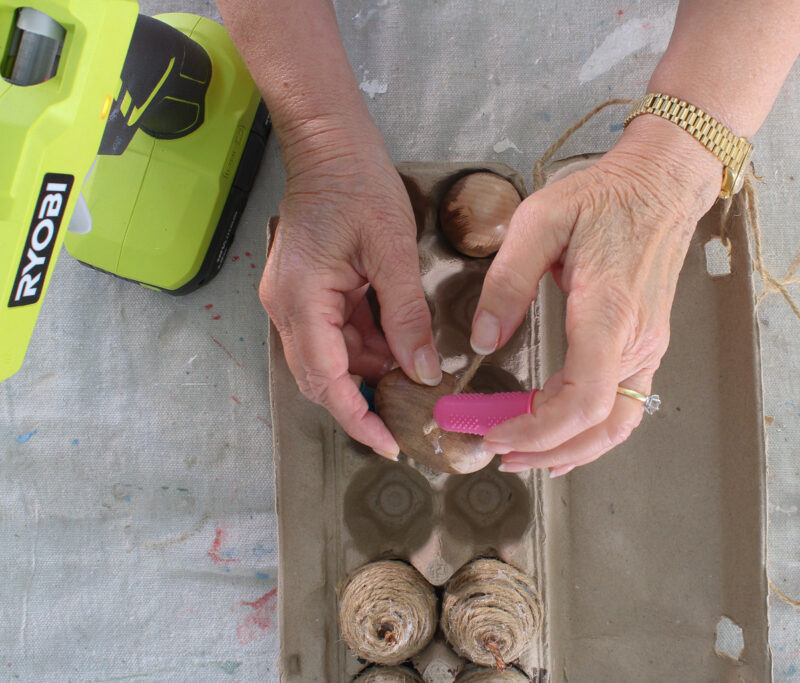
When the top of your egg is half covered, place the egg in the carton to hold it. Now you can use both hands to glue and wrap the twine around the egg.
TIP: Don’t pull on the twine or it will separate from the previous row of twine. I found that as I got closer to the top of the egg, the twine started to naturally curl.
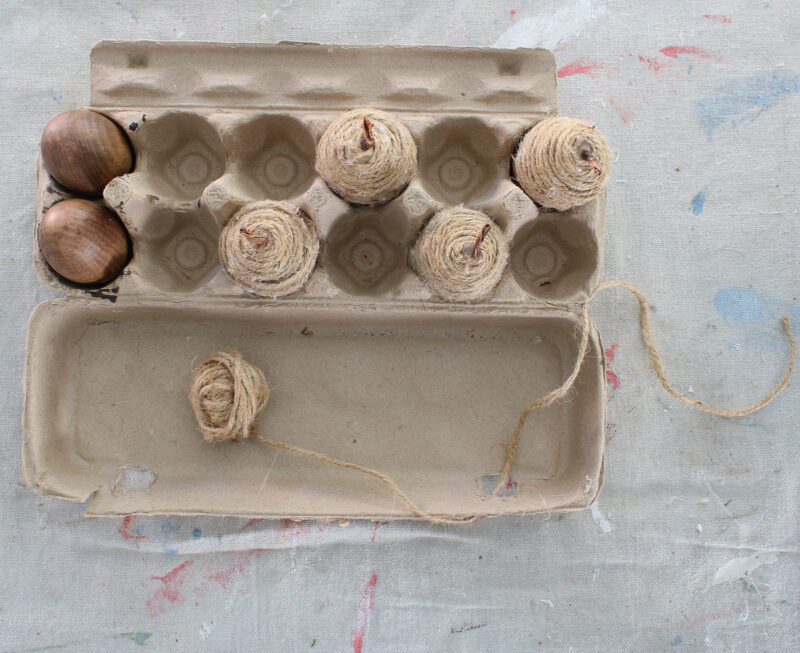
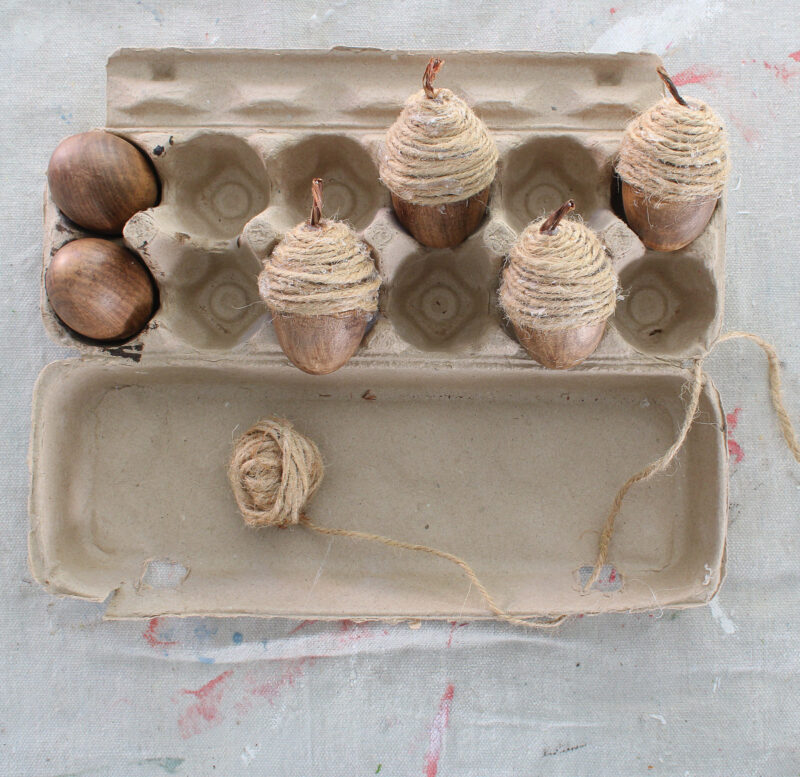
When you get to the top of the egg, cut off the excess twine, tuck into the egg, and press down to cover the top of the egg.
Now cut off a piece of the wired jute twine with your wire snips. Add a bead of glue to the center of the top of the egg – the last of the jute twine – and add the wired jute. Hold for a few seconds until adhered to the egg.
Place in the carton while you finish the eggs acorns.
TIP: Cut off any glue strings or twine strings with your sharp craft scissors.
NOTE: If you want more bulk or coverage of the acorn tops, you can add a second layer of twine.
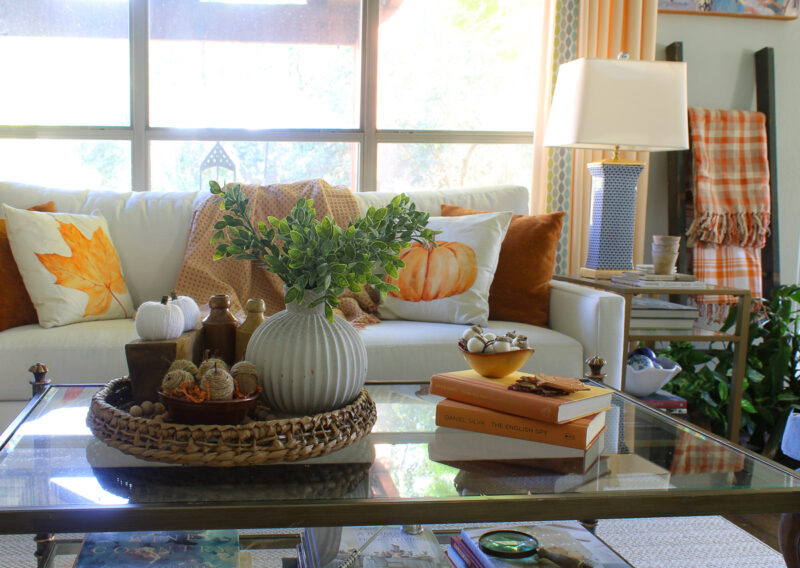
Displaying the Faux Acorns
Now you can use your DIY faux acorns in your fall home decor.
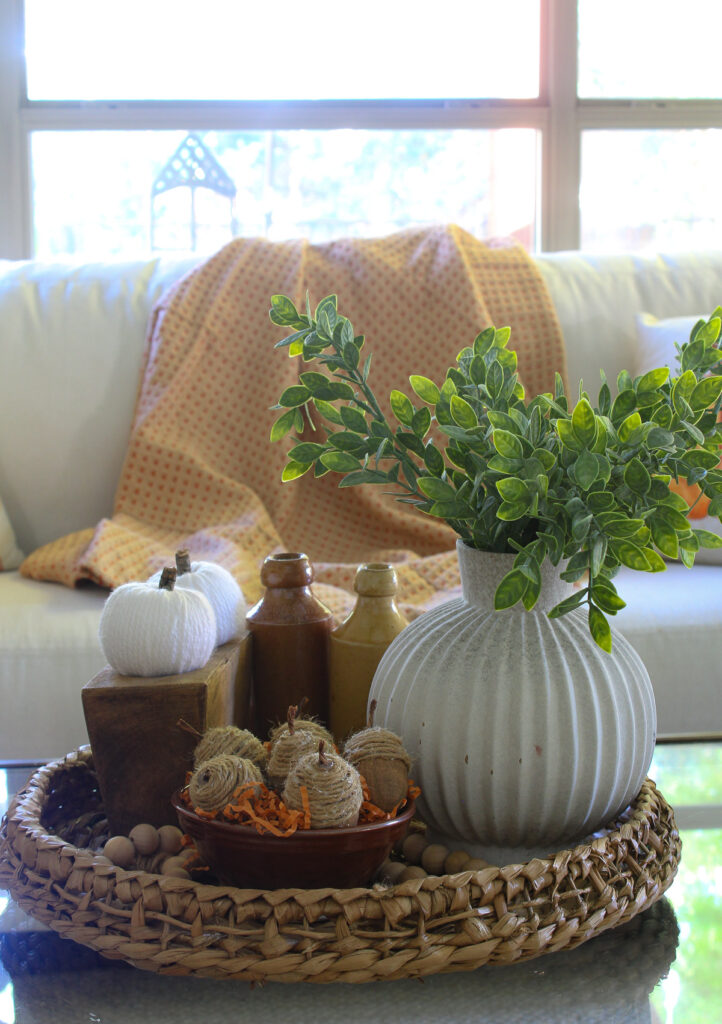
I always intended to use my faux acorns in an arrangement on our coffee table. I also decided I wanted a fairly neutral color palette with a variety of natural textures.
I brought out several items to possibly use in my coffee table vingette.
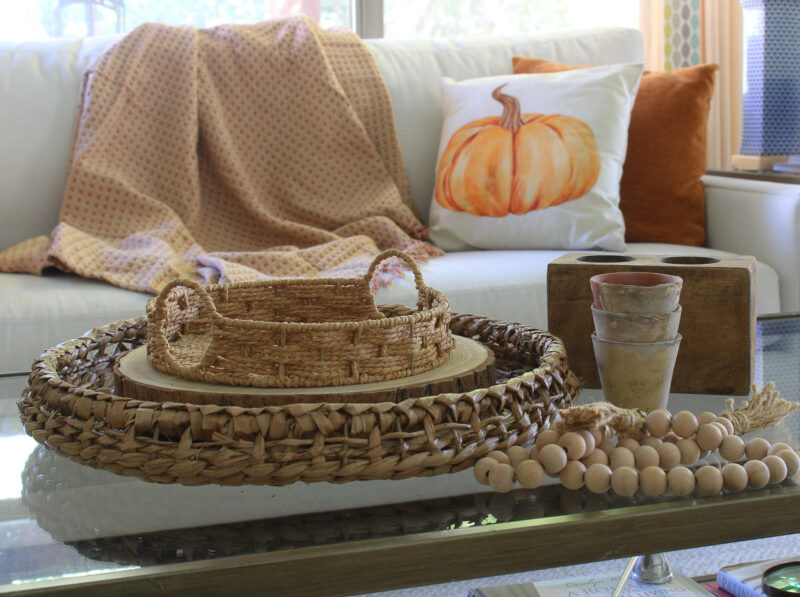
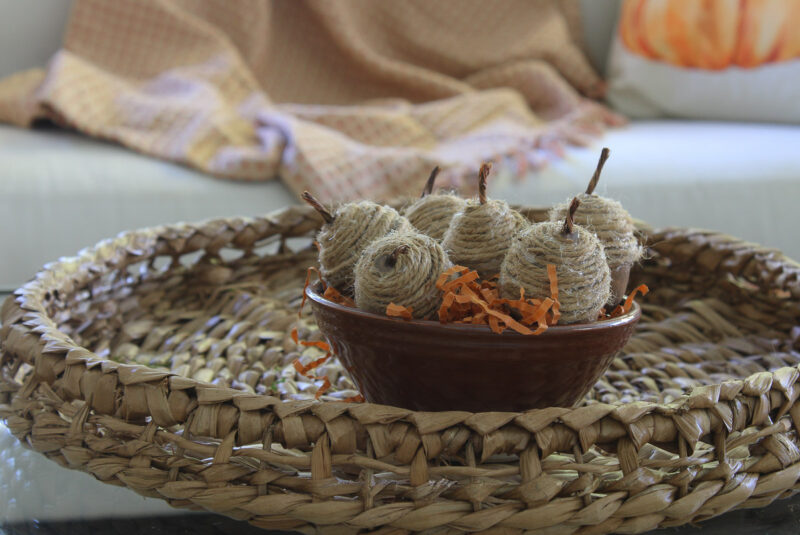
I picked my favorite large round woven basket to hold my items.
To hold the faux acorns, I used a brown bowl. It’s actually part of a mortar and pestle set. Use whatever bowl or dish you like.
I filled the bowl with orange shred paper.
Then I placed the bowl in the woven basket.
Previously, I added two sets of pillows and a fall throw to the sofa. To my faux acorn vignette, I added:
- two vintage ceramic bottles from a vintage shop in mustard and brown colors
- a vintage wood candle mold
- two white yarn pumpkins for a pop of white
- a round textured vase (a freebie from Joann a few years ago)
- greenery for a pop of natural color
- two strands of DIY wood beads
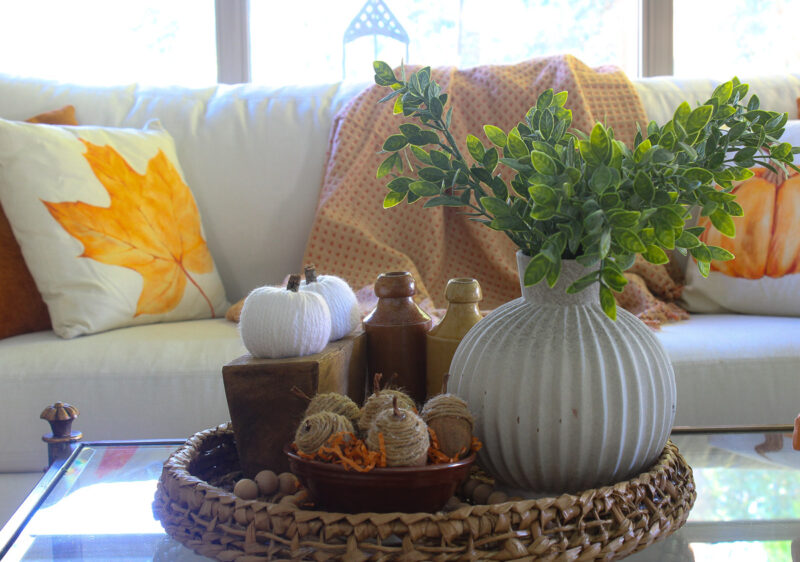
To complete the coffee table vignette, I added a stack of mustard yellow and burnt orange books to the table.
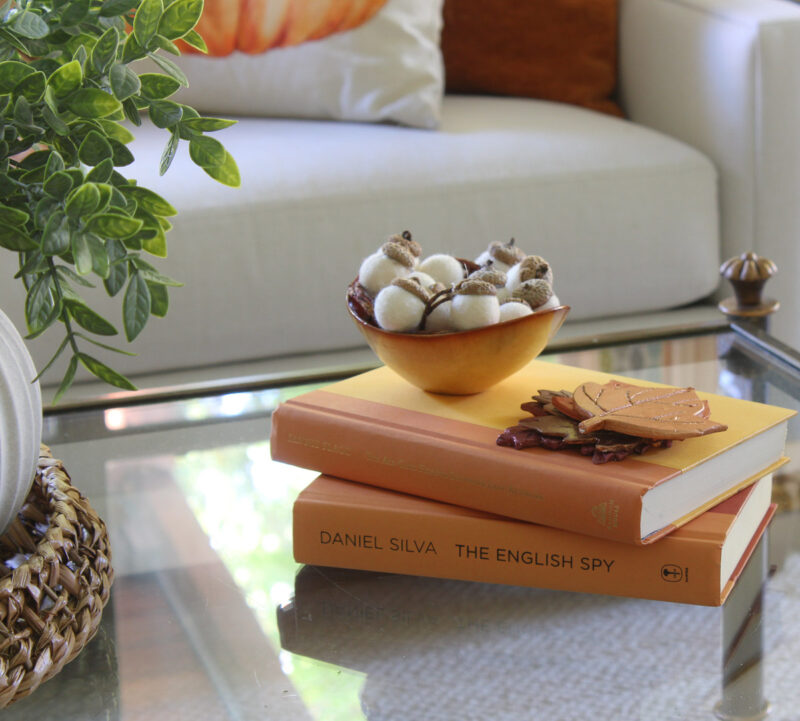
I had a small bowl that was the perfect size for another easy DIY faux acorn project, using felt balls and real acorns that I collected in our nearby neighborhood. I used them in a fall vignette.
To finish off the fall vignette, I added the four air dry clay leaves I made several weeks ago.
Here is my completed fall coffee table vignette inspired by this latest DIY faux acorn craft.
I really liked this DIY faux acorns for fall home decor. It’s something that I can use over and over during the fall season.

Grab your Free copy
11 Tips to Styling Your Coffee Table
Use this helpful cheatsheet to guide you in creating a coffee table arrangement for everyday and through the seasons and holidays.
Here is another fall vignette from last year – Fall Tray Vignette with Leaves and Flowers.
Want more fall DIY projects to use in your seasonal decor? Try one of the these:
- Easy Air-Dry Clay Pumpkin Napkin Rings
- How to Reuse and Restyle Fall Decorations
- DIY Easy Yarn Pumpkins
If you want more fall DIY ideas, please follow me on Pinterest and enjoy these Pinterest Boards: Fall DIY Project Ideas, Fall Mantels, DIY Accessories for the Home.