How to Make an Easy Summer Wreath with Flowers
There’s nothing quite like a bright, cheerful wreath to welcome summer and add a burst of color to your home. I just made a brand new summer wreath for our front door. I hope that you will follow how to make a summer wreath with flowers for your front door or porch.
Whether you want to spruce up your front door, create a festive backdrop for gatherings, or simply bring a little sunshine indoors, a handmade floral wreath is the perfect seasonal project.
You don’t need to be a crafting expert or invest hours of your time – this easy summer wreath tutorial is designed for beginners and seasoned DIYers alike.
Would you like to greet friends and neighbors with a custom creation that reflects your personal style and the vibrant energy of summer? This is the wreath for you.
Using bold faux flowers, such as colorful gerber daisies, zinnias, and pink dahlias, you can mix and match your favorite blooms for a look that’s uniquely yours.
With just a few simple materials and a little creativity, you’ll have a beautiful wreath ready to display in no time.

What Inspired This Summer Wreath?
This post contains affiliate links to products used to create this project. If you should order any item from this site, I may receive compensation, but you do not pay a penny more. Your purchase is greatly appreciated as it helps support the continued publication of this site.
We get ideas from all sorts of places. Two things inspired this summer wreath.
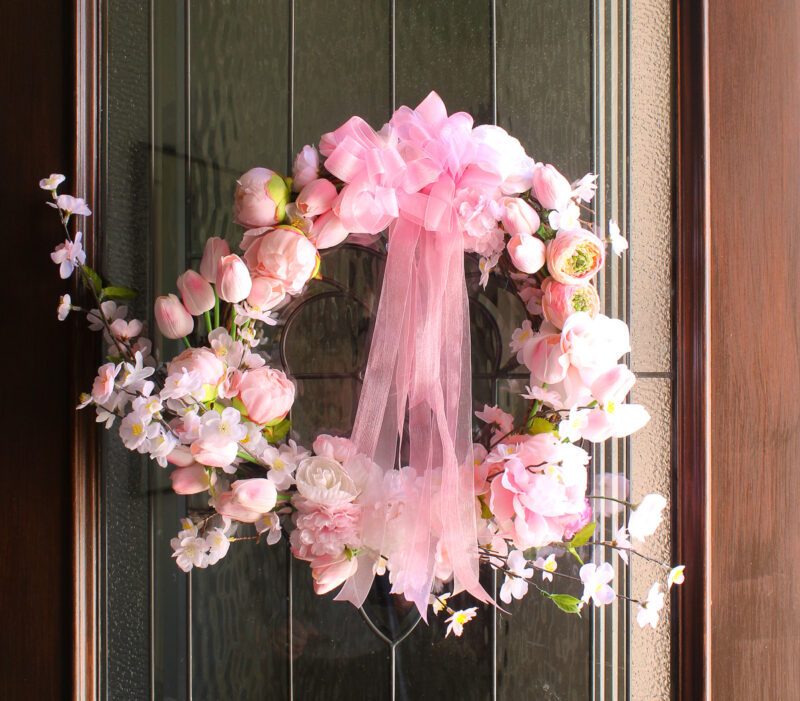
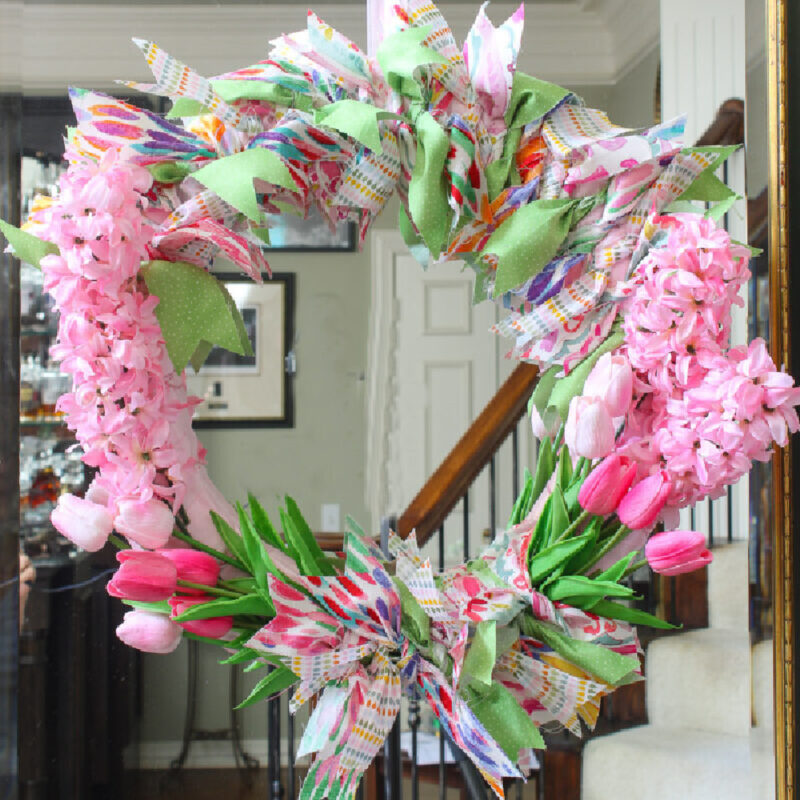
First, I saw this beautiful summer wreath online.

I thought the wreath had the perfect summer vibe. But as is usually the case, pre-made wreaths are very expensive. And, as you might imagine, I’m a DIY girl and I couldn’t imagine buying a wreath when I could make a pretty facsimile.
Second, we needed a new front door mat. This colorful striped mat from Dash and Albert (I love their rugs and mats.) caught my eye.
It’s as bright and pretty in real life. It comes in several sizes. I bought 2 X 3-foot size – perfect for a small front door area, a laundry room, playroom, or kid’s room. And, yes, it is indoor/outdoor and stain-resistant.

Ready to get started? Follow along for step-by-step instructions, helpful tips, and plenty of inspiration to make your own stunning summer wreath with flowers!
Decisions for Your Summer Wreath
I needed a new wreath for our front door to kick off the summer season. My spring wreath full of pink peonies, hydrangeas, and ranunculus was my starting point.
I try not to glue faux flowers to my wreath bases. I want to be able to reuse the bases and the faux flowers. The easiest way to secure them is through the branches of the grapevine wreath – that’s why it’s my favorite wreath base.
The first thing you need to do is decide the look you want for this DIY project:
- Where will you place your summer wreath? My summer wreath would be on our front door. Your entry or an interior door are also possibilities.
- What wreath base do you want to use? I want to use a grapevine base.
- Do you have a wreath base on hand or do you need to purchase a new wreath? I’m reusing a grapevine wreath
- What size wreath do you want? My wreath is 15 inches. Use the size that fits the scale of your door.
- What colors do you want? I’m using bright colors in pinks, orange and yellow
- What type of flowers? I have Gerber daisies on hand. I also found some pretty pink dahlias online.
- How do you want to attach your flowers? Preferably with wire or by inserting the flowers into the grapevine wreath.
Materials You’ll Need
The next thing is to purchase or gather all your supplies:
- Wreath base: grapevine, wire, or foam (16 – 18 inches is a good size)
- Artificial or dried flowers: sunflowers, Gerber daisies, geraniums, peonies, or dahlias

- Greenery: Eucalyptus, ferns, or any faux foliage (I already had some on hand.) I pulled out two types of greenery.

- Floral wire or hot glue gun
- Wire cutters
- Ribbon (optional): For hanging or a bow
Step-by-Step Instructions
This version of a summer wreath doesn’t take long, about 30 – 45 minutes.
1. Prepare Your Wreath Base
Lay your wreath base on a flat surface. If you’re using a grapevine wreath, gently shake out any loose bits.

After removing the pink spring flowers, I noticed that one side of the grapevine wreath had come a little loose. I needed to fix that.
I used wired twine, wrapping it around the wreath and pulling it tight. Then I cut off the excess with wire cutters.

It worked great to pull the twigs of the wreath back together. Now I was ready to create my new summer wreath.

2. Attach the Greenery
Start by securing greenery to the base. Use floral wire to attach stems or tuck the ends into the wreath base. Layer greenery to create a lush background.

3. Arrange Your Flowers
Before attaching anything, it does help to lay your flowers on the wreath to plan your design. You can cluster flowers on one side for an asymmetrical look or spread them all the way around for a fuller wreath.
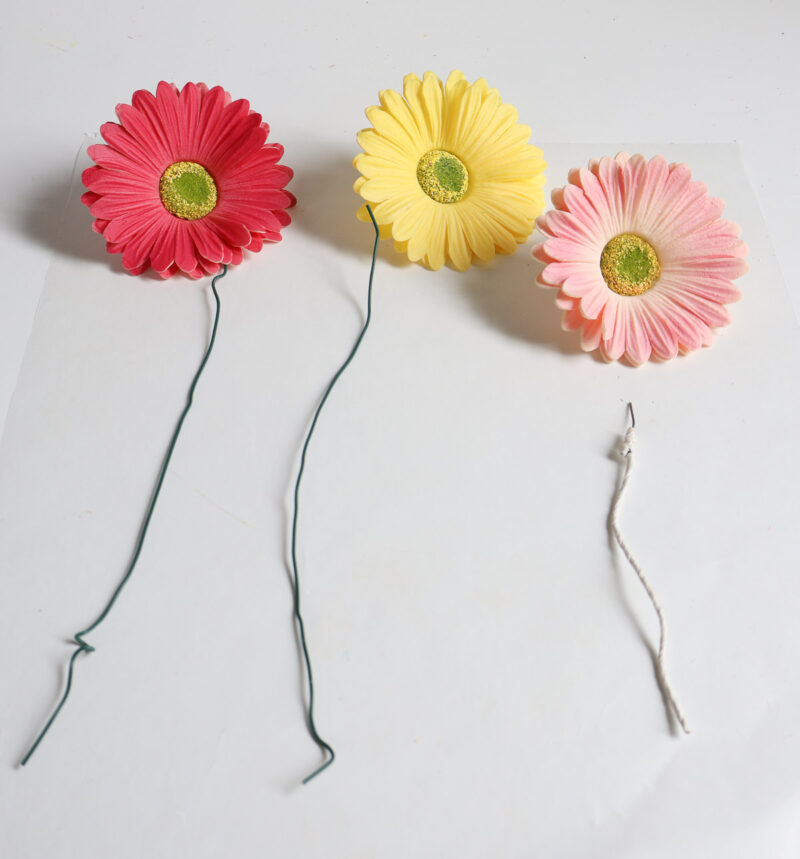
I started with the Gerber daisies. I have used these realistic faux flowers on our mantel and on a summer coffee table. They are easy to bend to get the natural look you want at the height you want.
However, wrapping them around the grapevine wreath was as bit more challenging. Some worked fine.


In some cases, I had to pull the flower head off the rubbery stem.
Now, how to attach them to the wreath? Remember I did not want to glue anything to the wreath.
I found a small bundle of florist wire in my supply stash. Attaching the flowers would work better with the thin wire.
I grabbed one of my small glue guns (I usually use my Ryobi glue gun.), heated it up and added a small dollop of glue to the tip of the flower.
Then it was easy to stick the thin wire into the hole and hold it for a second.

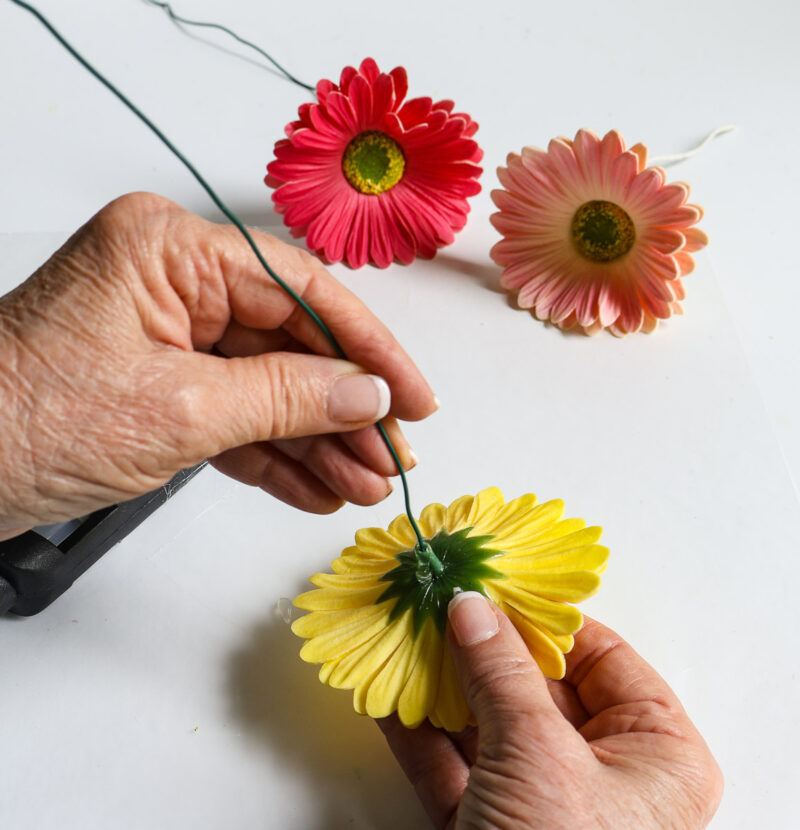
I set the flowers face down and let them dry for a couple of minutes.


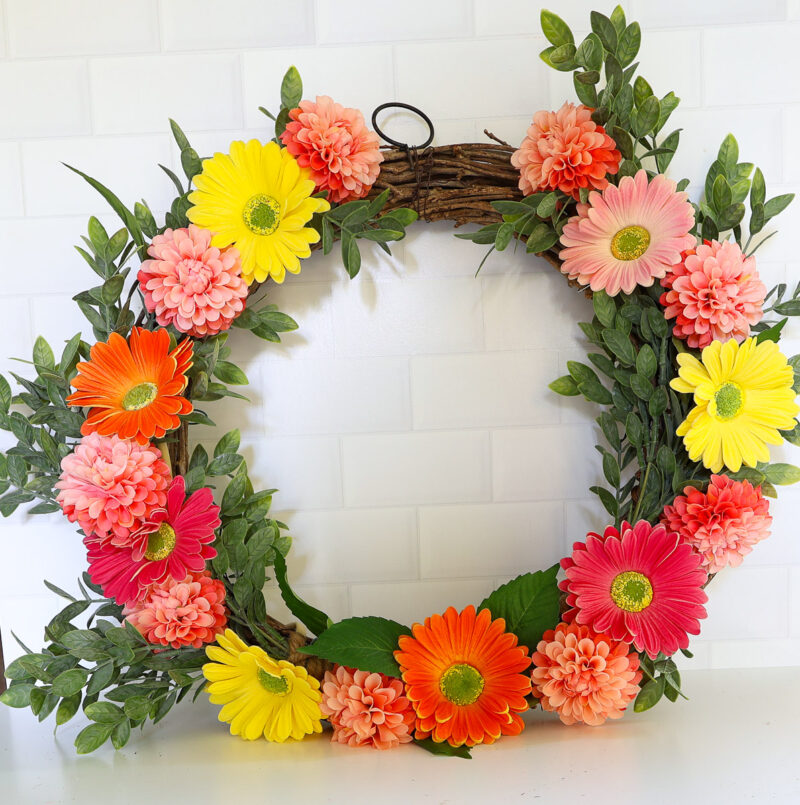
At this point, I decided I wanted to mix up the Gerber daisies and the dahlias.
- I cut down the length of the dahlia stems.

- I removed every other one of the Gerber daisies and inserted a dahlia in between them into the grapevine wreath.
- I wrapped the three Gerber daisies with the thin wire around the wreath – this step was so easy.

This arrangement created a natural, vibrant look.
5. Fill in Any Gaps
If necessary, tuck in smaller flowers or extra greenery to cover any bare spots. Step back occasionally to check your work from a distance.
6. Add a Ribbon or Bow (Optional)
The top of the wreath needed a bow.
I couldn’t find any ribbon that would work with the colors on my wreath.
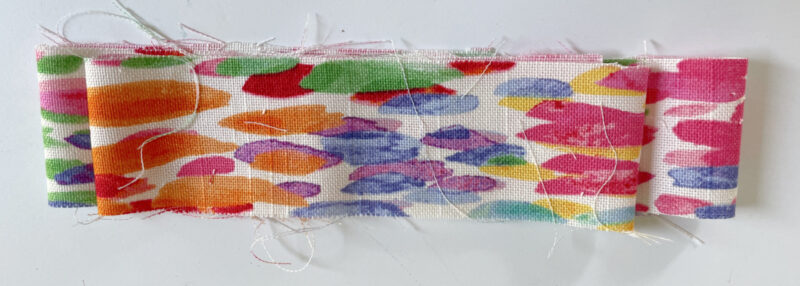
What to do? Get creative. I remembered the spring wreath I made with fabric and flowers. I knew I still had plenty of fabric strips left over from that project.
I had two fabric possibilities. I chose the pattern on the right.

I cut two pieces of fabric in half lengthwise to make my “ribbon”.

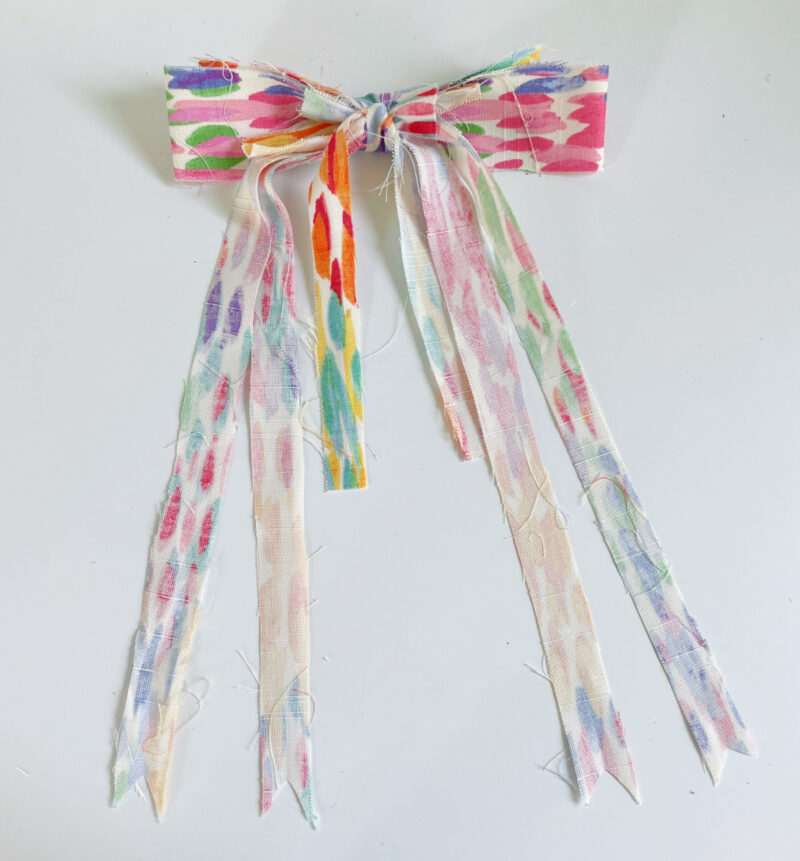
I tied two pieces together and notched the ends to make tails for my bow.

To make the bow, I folded two pieces in half and tied them together with a narrow piece of fabric.

The final step was to tie the bow to the tails. I didn’t worry about the fabric raveling a bit.
I tied the bow to the summer wreath and it was done.
Hang Your Wreath
Now comes the fun part – hanging your summer wreath and decorating your front door. Use a wreath hanger or a loop of ribbon to hang your finished wreath on your door or wall. I have a Command strip hanger on the glass on our front door.
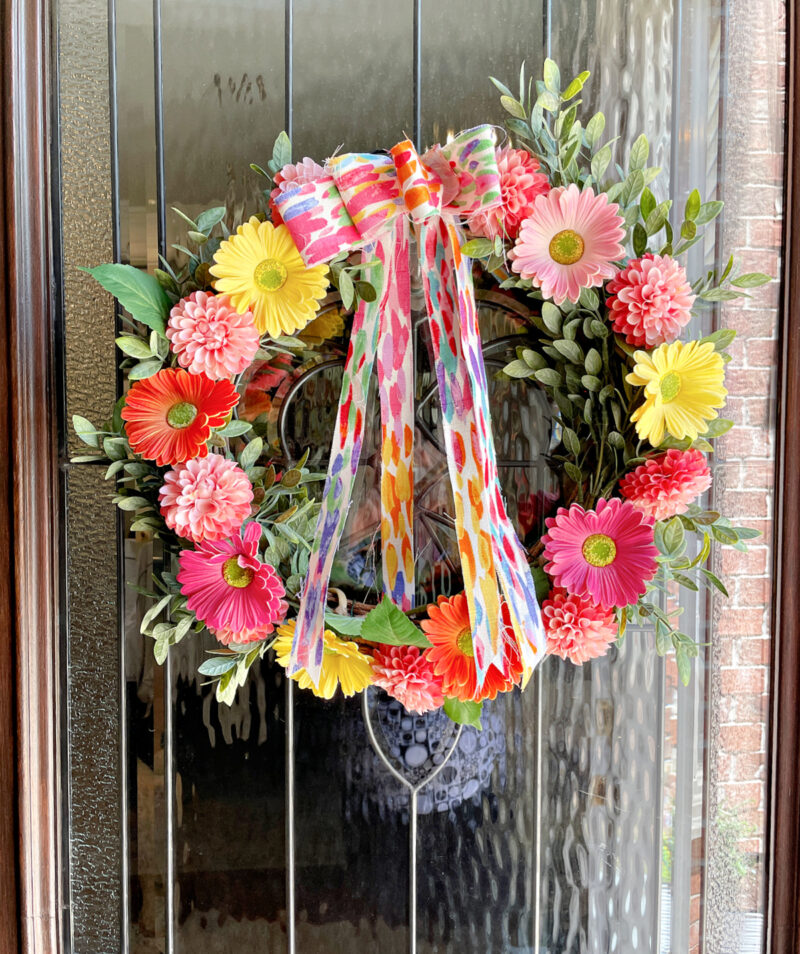
I love how easy this wreath came together. The bright colors of the flowers are exactly what I envisioned. I love these new pink dahlias – I may order more!
The colorful striped mat creates that summer vibe that we all yearn for.
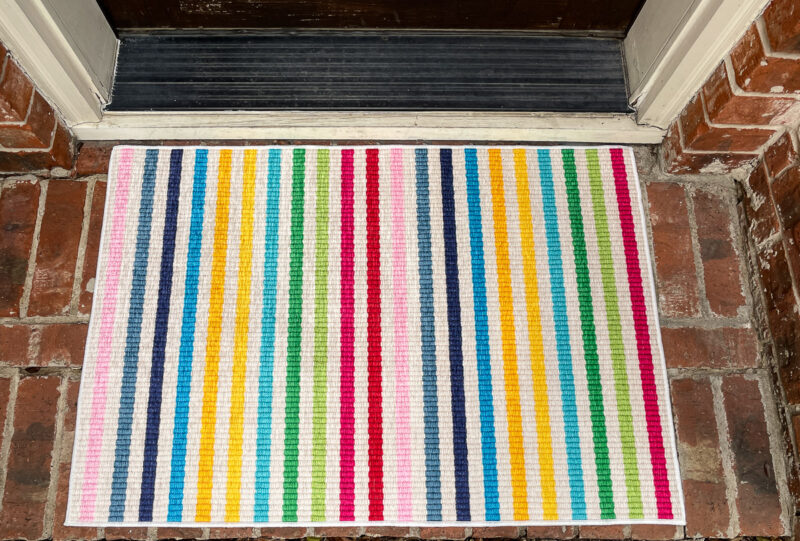
I especially love how the new summer wreath goes so well with our new striped front door mat.

My Tips for Success
- Mix textures: Combine different types of flowers and foliage for a more interesting look.
- Go faux: Artificial flowers last all season and can be reused next year.
- Personalize: Add small summer accents like pretty bows.
For more summer front door ideas, check out these posts: Easy DIY Summer Front Door Ideas and How to Make an Easy Summer Wreath.
I hope that you’ll save this summer wreath project to make one of your own. Also look at these Pinterest boards for more seasonal projects for your home: DIY Projects, Summer DIY Projects, and Summer Home Decor Ideas.
Enjoy getting ready for summer.


How pretty! Featuring you at Wednesdays in the Studio!
Loved the bright pops of color that your wreath gave your front door and how it went well with your new rug! I made a late spring wreathe using “frosted” pink peonies and apple blossoms as here in Maine, we often have a late snowstorm (not this year, thankfully). I’ll replace it when the real apple blossoms are gone! Always love the clarity of your tutorials!
Thank you so much, Kathy. Love the idea of frosted pink peonies. We had a peony for a couple of years, but it just never did well.I guess it’s out Texas heat. Our hydrangeas do much better.