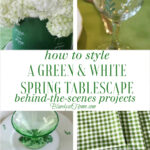
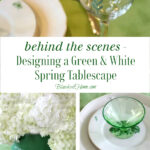
How to Design a Spring Tablescape – Behind the Scenes
Do you need inspiration or a little nudge to start thinking about spring decorations and spring tablescapes? How do you plan and design a tablescape? I’d love to share the behind-the-scenes of how to design a spring tablescape.
I shared my green and white springtime tablescape earlier this week.
If you are like me, I just don’t want to see the pretty pictures. I want to know how to make the room pretty or the tablescape beautiful or the vignette work. I’m a how-did-you-do-that kind of girl.

I know we all love the big reveals on TV, in magazines, and here in the blog world. I love the behind the scenes, the process, of getting from point A to point Z for any home decor project. Showing you the steps how to design a spring tablescape will demonstrate how easy it is.
Behind the Scenes of Designing a Spring Tablescape
Designing a tablescape turns out best when you have a process in mind but are willing to switch gears when you discover something new that will add to the aesthetic and enjoyment of the tablescape.
First – the Vision of a Spring Tablescape
Ideas for spring tablescapes can come from many sources:
- dishes, glassware
- fabric
- magazines
- catalogs
- flowers
- tablecloths
- ribbon
- color
- patterns
- decorative items
- and, of course, our favorite resource Pinterest
Find your inspiration and then run with it. Build on the vision in your head or a pretty picture.
Based on the occasion, decide on:
- your color scheme
- your style – casual or elegant, for example
- number of place settings
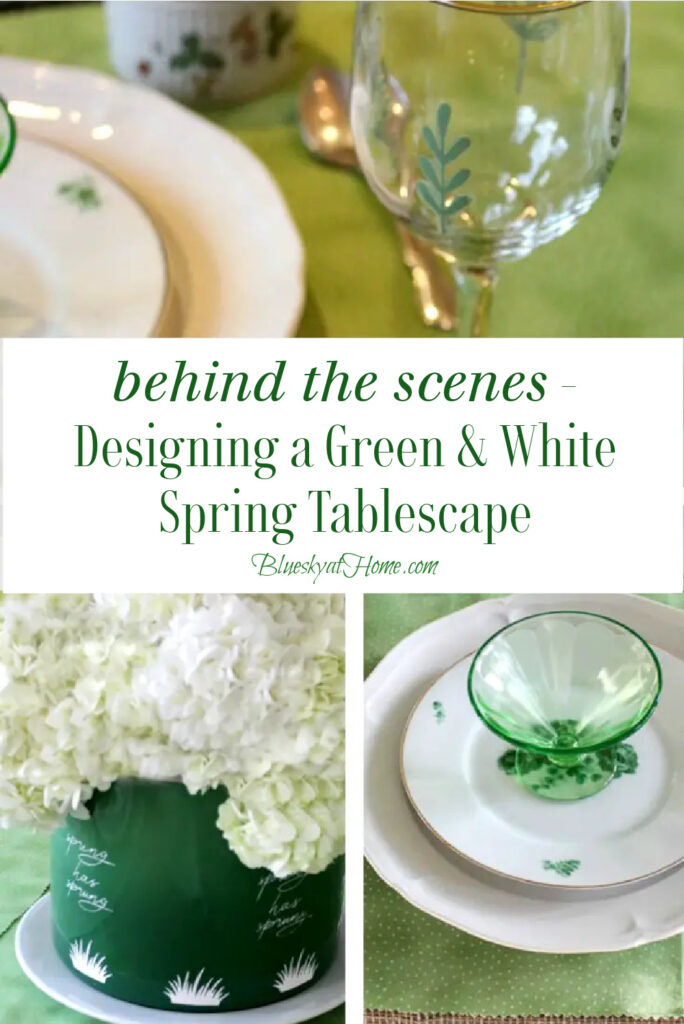
My vision for this spring tablescape was based on color, specifically, green and white. I had green on the brain so that is what I focused on. I also wanted a fairly casual and simple tablescape. My normal number of place settings is 6 which is the most comfortable number for our table.
Second – Shop Your Home
Our homes are our best resources for tablescape inspiration. We all have dishes, silverware, glassware, placemats, tablecloths and napkins, containers, and decorative items that can be used to adorn our tables for spring.
For this tablescape, I knew for certain the items that I already had and would use.
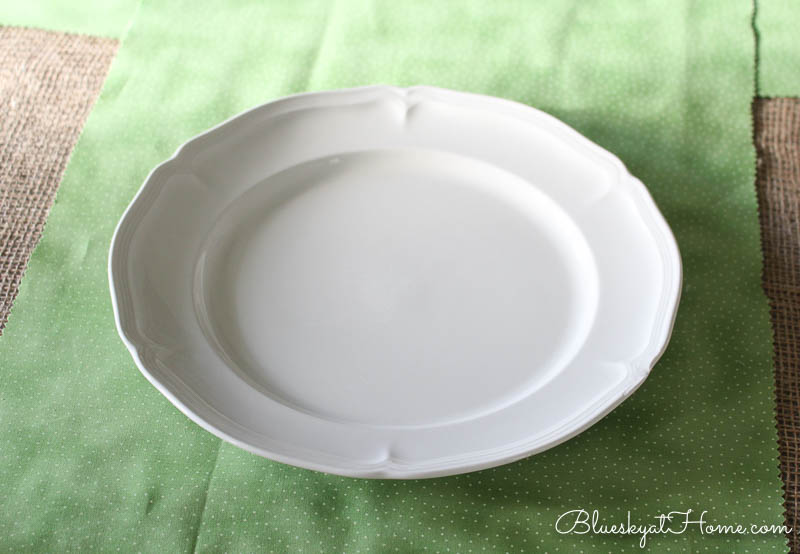
- our white everyday china – Manoir by Villeroy & Boch
- wine glasses from Dollar Tree that I bought over a year ago
- our everyday silverware
- large flea market white crock for flowers
- the bright green pillows that I bought last spring at Wisteria
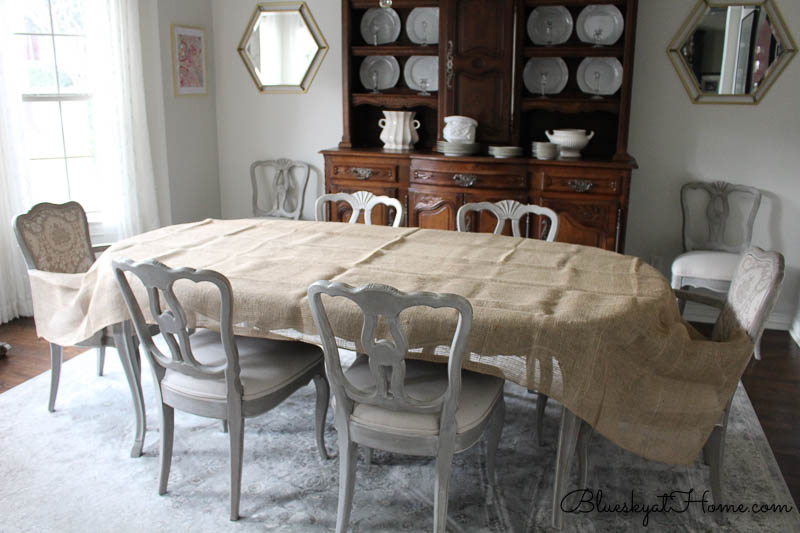
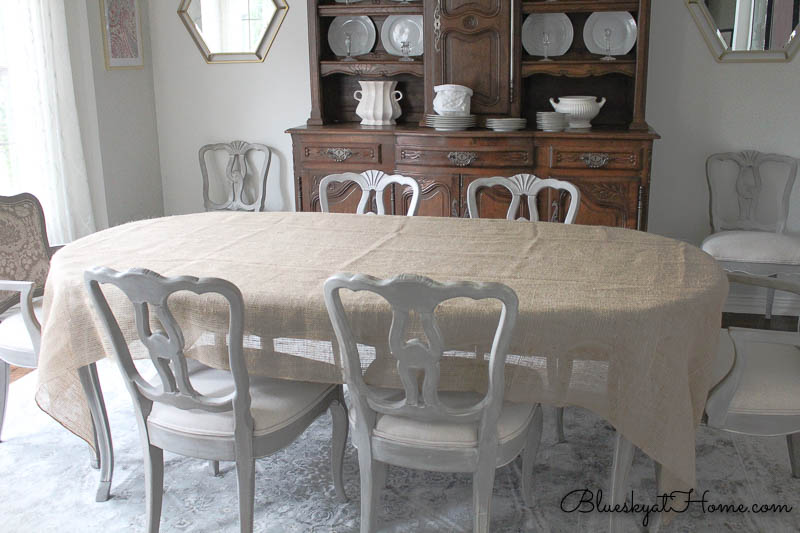
- the burlap tablecloth that I recently purchased last year in Atlanta. I wanted a rustic, natural look for the foundation of my table.
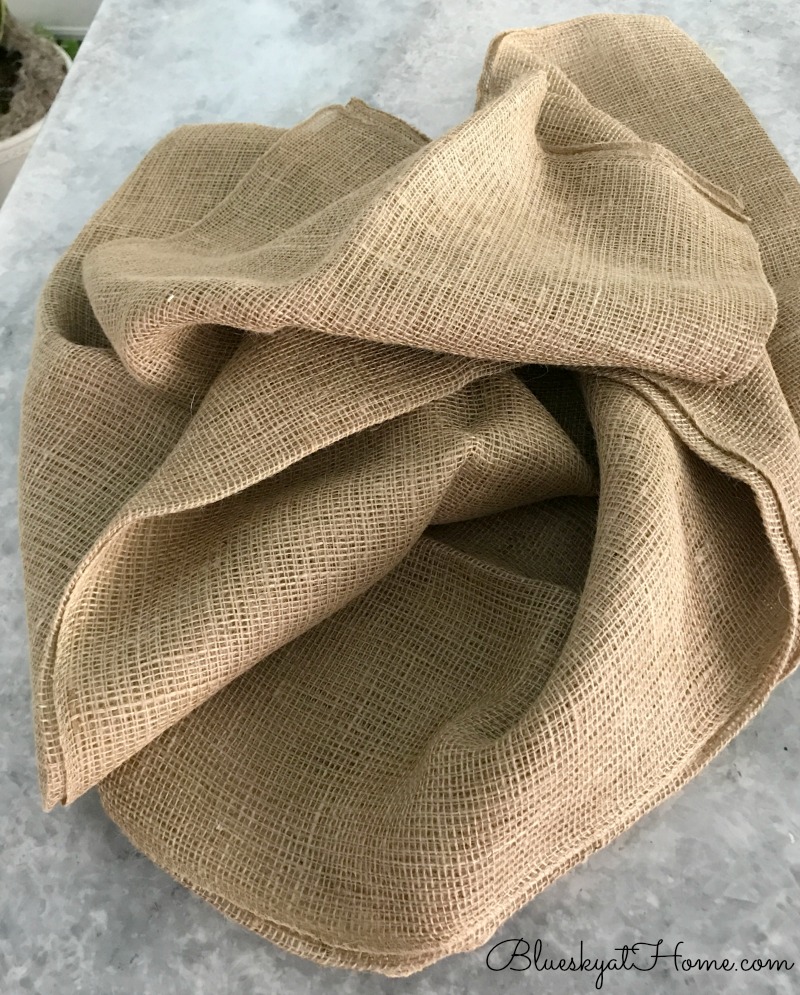
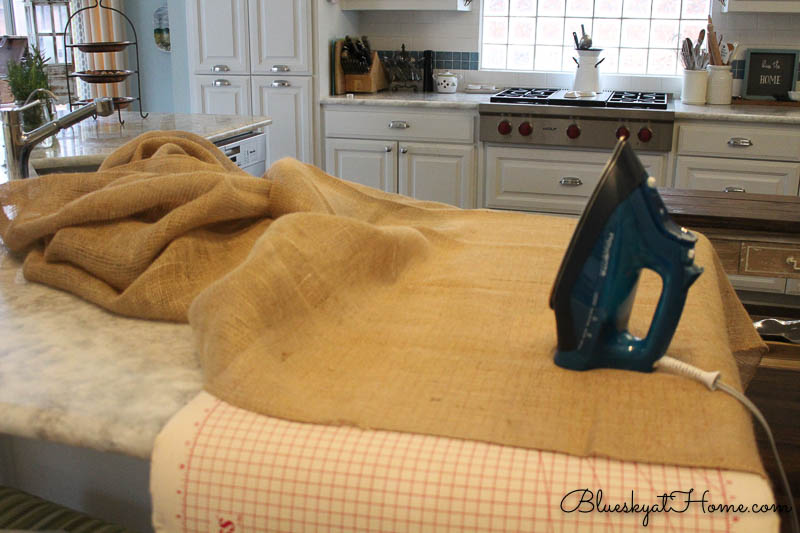
I laid it out on my dining room table and knew immediately that it would need to be ironed. Have you ever ironed burlap? It’s not easy.
TIP: Always give linens a fresh pressing if they have been folded or hanging.
I always use my ironing pad for pressing tablecloths and larger pieces of fabric, as you can see in this placemat project. It gives you so much more flat surface than an ironing board. Some of the best money I’ve ever spent.
That looks so much better.
Third – Evaluate What You Need to Purchase
Now take stock and make a list of what you may need to buy. Here’s what I didn’t have on hand:
- linens- I went through all my placemats and napkins and couldn’t find any green that fit the springtime look
- fresh flowers or greenery – since I planned to use my white ceramic crock, and I wanted a green and white theme, I would need greenery, such as ferns for my centerpiece; that would be the last thing that I purchased.
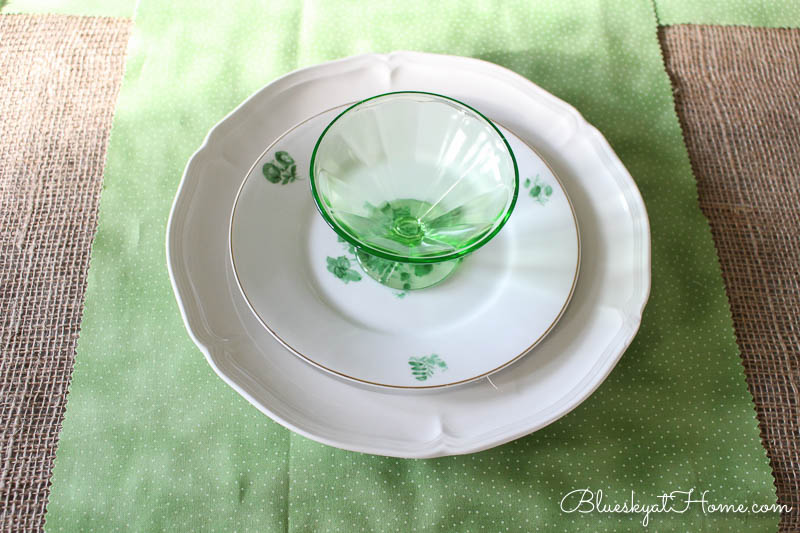
- other than my white dishes, I didn’t have any green plates.
Rather than buying green placemats and napkins, I decided to purchase fabric and make my own, which I have done many times. You can get the exact color and patterns that you want and it’s much less expensive.

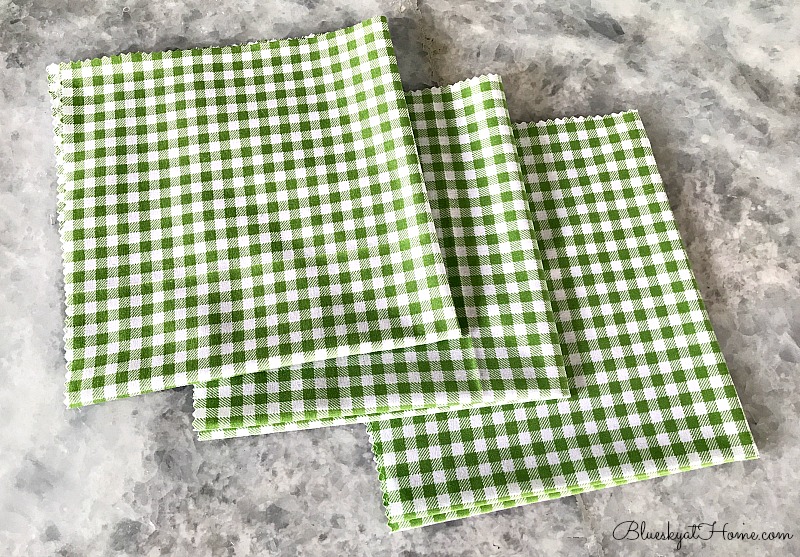
I made a trip to Hobby Lobby and found the cutest 2 patterns: tiny polka dots and green gingham (I’m a little obsessed with gingham.) I intended to use the polka dot fabric for placemats but then decided to make runners. That was so easy as I used pinking shears to cut the fabric.
Next, I could start building my place setting.
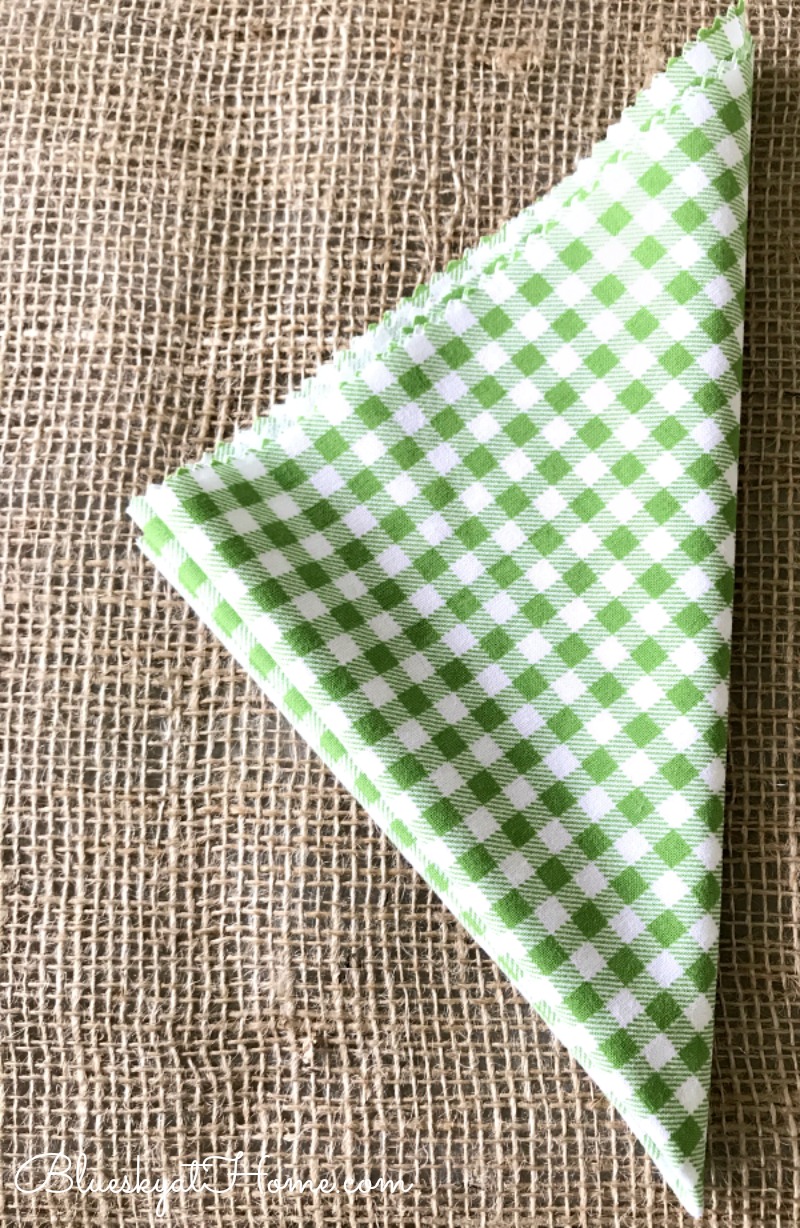
The gingham was perfect for napkins and I made 16-inch squares using my pinking shears. Here’s a similar gingham fabric.
Then I added the napkin to the place setting. Because I wanted the cute pinked edge to show, I folded the napkin in half to make a triangle.
Now I really needed to bring in more green color with dishes. A trip to Dollar Tree didn’t yield any green dishes (but other things were purchased!). Right down the street was an antique mall that I had not been to in a few years.
Walking in, I knew this was my kind of place – lots of vintage big and smalls, not the super expensive antiques the other antique malls in our area seem to focus on.
TIP: So you don’t miss anything, walk the grid of the antique mall, up and down one aisle before going on to the next one.
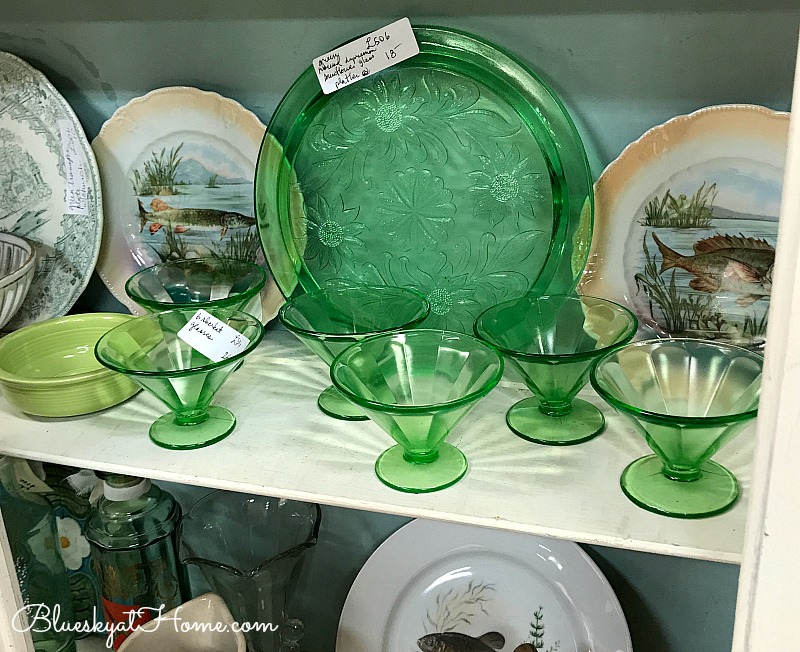
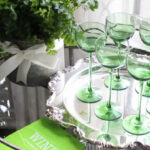
So the first thing I noticed were these darling green sherbet glasses. And there were 6 of them. For $18 and 20% off.
I grabbed those fast and took them up to the cashier. I just wish that I had bought the platter. So many people commented that this was Depression glass that I did a little research. I didn’t find the exact match, but several were close. If anyone has information, I’d love for you to share it.
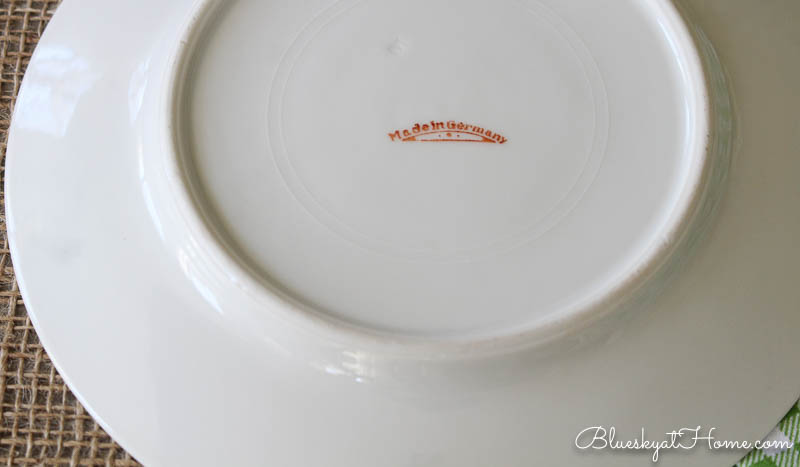
Now I just needed to find some cute salad plates in green. Well, the antique mall fairies must have been watching over me, because 2 booths down were these sweet plates with a pretty green design. I didn’t have to think twice. The plates were also $18, but not on sale. They still came home with me. I couldn’t wait to add them to my place setting.

BTW, when I took the tags off, I noticed they said “German dishes” and sure enough on the back was the trademark.
Next came the green sherbet dishes. Many of you commented in the reveal that the sherbet glass was Depression glass.
Now I could add my gingham napkin and silverware. I liked that the pinking edge of the napkins stood out.
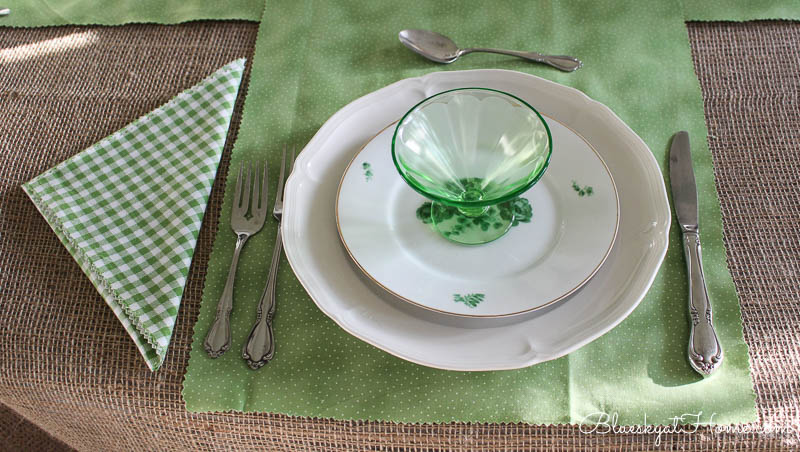
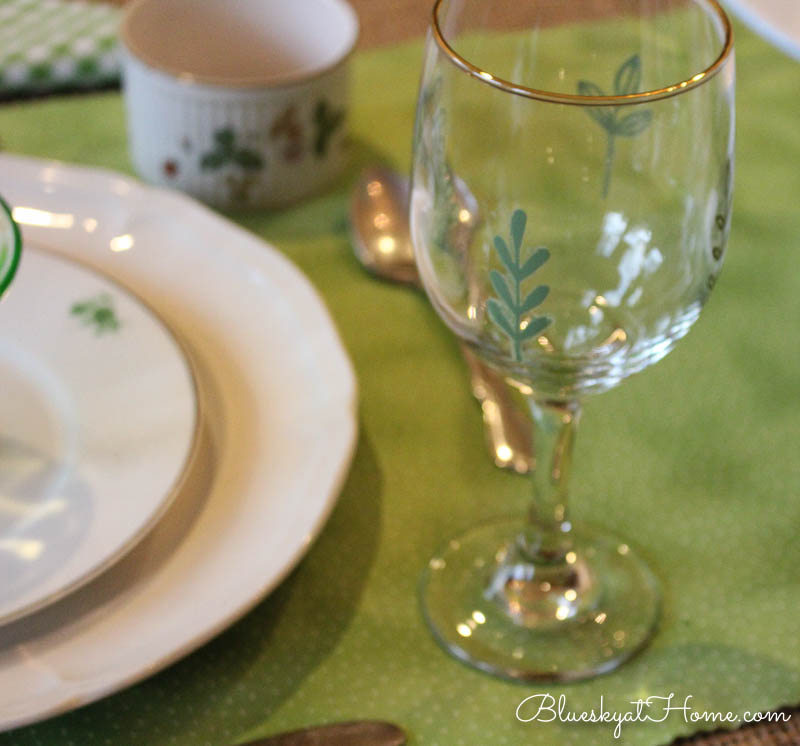
To complete the place setting, next up were the Dollar Tree wine glasses. You don’t think I would leave them alone? Not on your life.
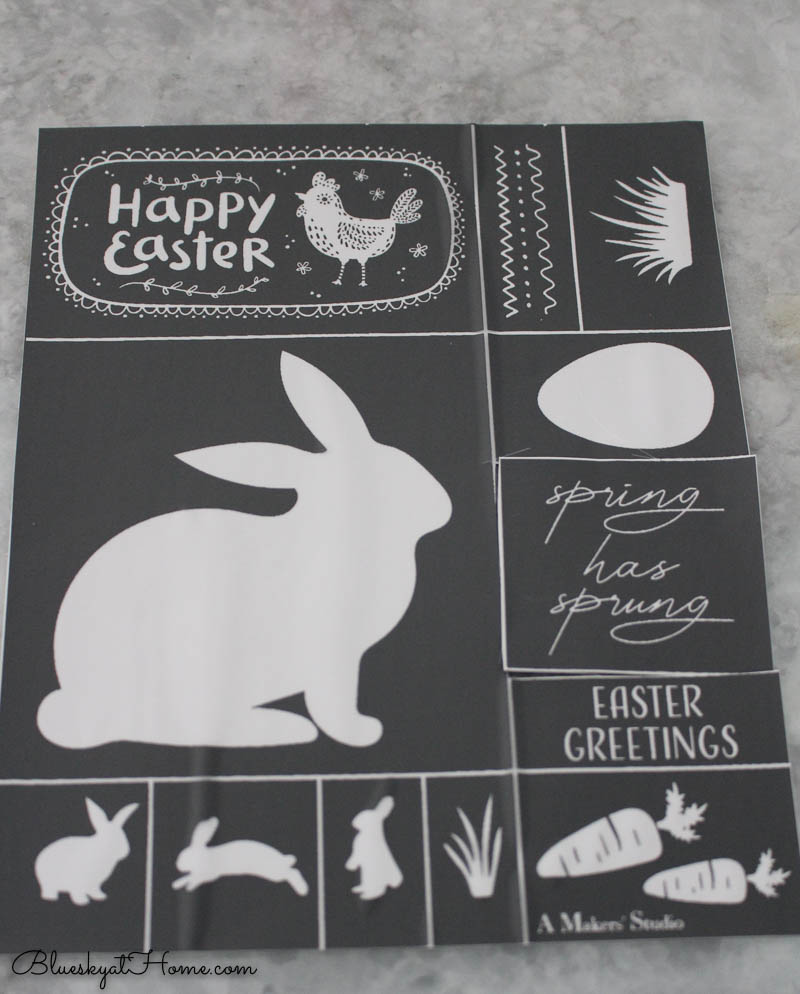
I got out my ChalkArt and stencils from A Maker’s Studio. I used a leaf motif and Together Forever, a pretty green color.
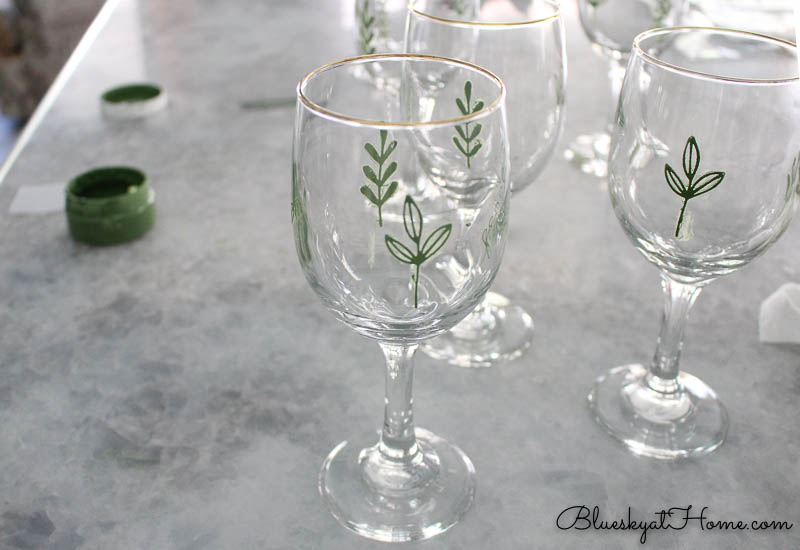
Now the place setting looked complete. I’ll share exactly how I made these leaf motif glasses in a later post.
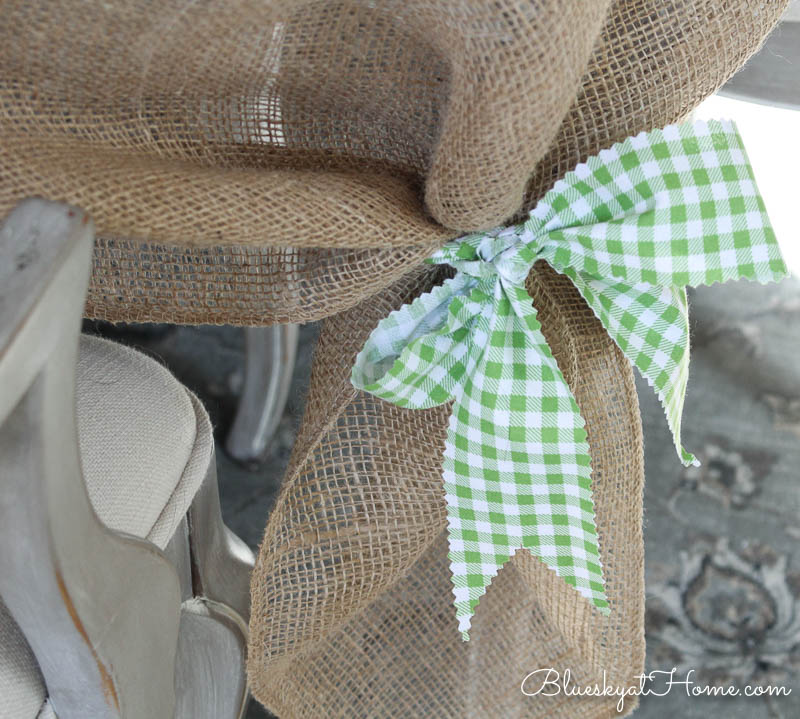
As a bonus, I had enough fabric to make bows to tie up the excess burlap on each corner of the table. The fabric was 43 inches wide and so I cut the “ribbon” 2 3/4 inches wide by 43 inches long. As it turned out, this little bonus was one of my favorite design elements – and it was a happy afterthought.
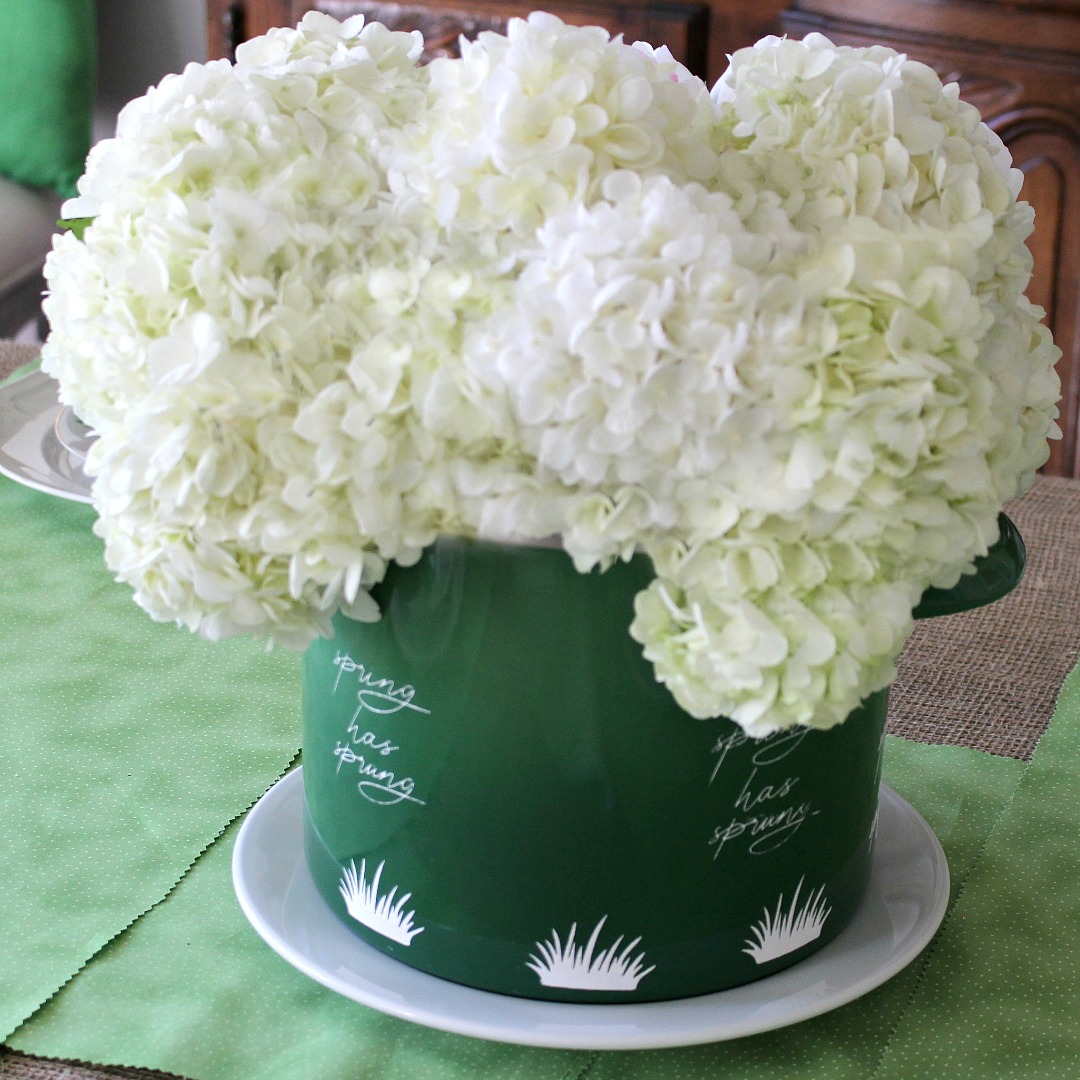
The Centerpiece
Here’s where things took an unexpected turn for the better. This is true. I was getting out our pasta pot for dinner and dropped my jaw when I saw my Le Creuset enamel stockpot. It’s not just any stockpot – but a green stockpot. The color is fennel (It’s been discontinued.) and I bought it with my discount several years ago at our local Le Creuset store when I was teaching cooking classes there.
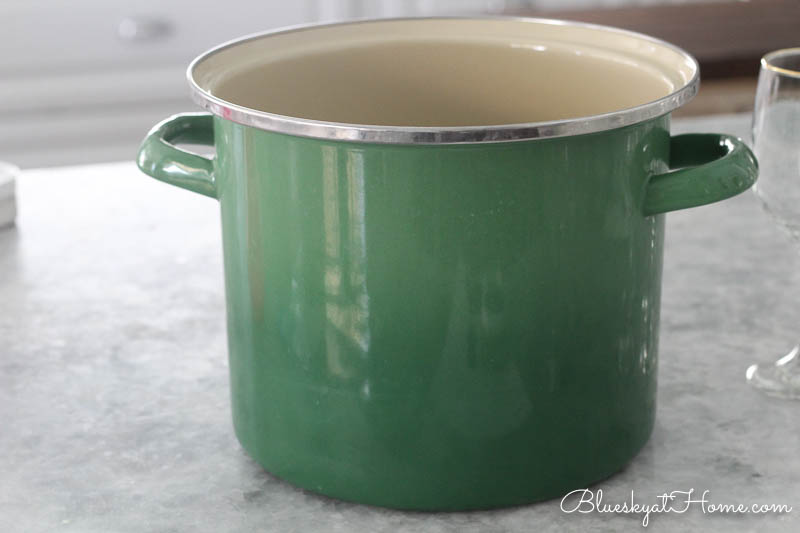
Wow, this would be perfect as a flower container for a centerpiece.
The white crock quickly was set aside. In 2 seconds, I decided to toss the fern idea out the window and use white hydrangeas – one of my favorites. But would plain green work? No, it needed a little embellishment.
The stencils and ChalkArt in Peace & Joy came out again. I was so excited to use the spring and Easter stencils (sold out now) that had been burning a hole in my DIY pocket.
Five minutes later and my green stockpot became a green spring container for white hydrangeas from Trader Joe’s.
I’ll share the process for this little project in a later post.
The moral of the story: Don’t judge a pot by its cover. Things you don’t normally think of as plant containers can be perfect for your centerpiece.
Decorative Elements
Now all I needed were some little embellishments.
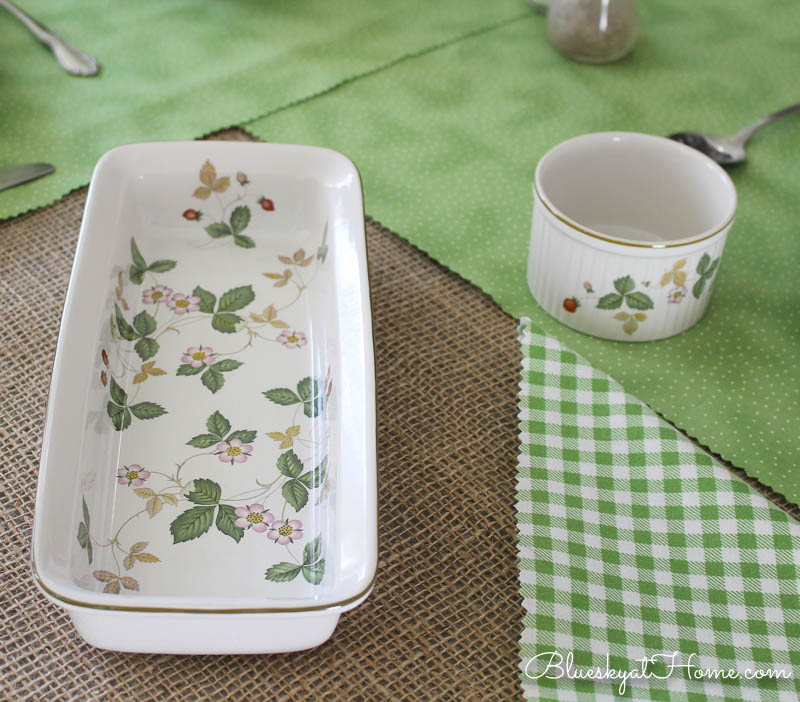
Opening drawers in our vaisselier, I found this sweet serving dish and ramekins. I’ve always loved this sweet Wedgewood pattern in Wild Strawberries. While not just green, its springtime design is perfect for the feel of my green and white spring tablescape.
The rectangular dish would be just right for the scones I planned to serve.
As I continued looking through the vaisselier in our dining room for salt and pepper shakers, I found this set of green aperitif glasses.
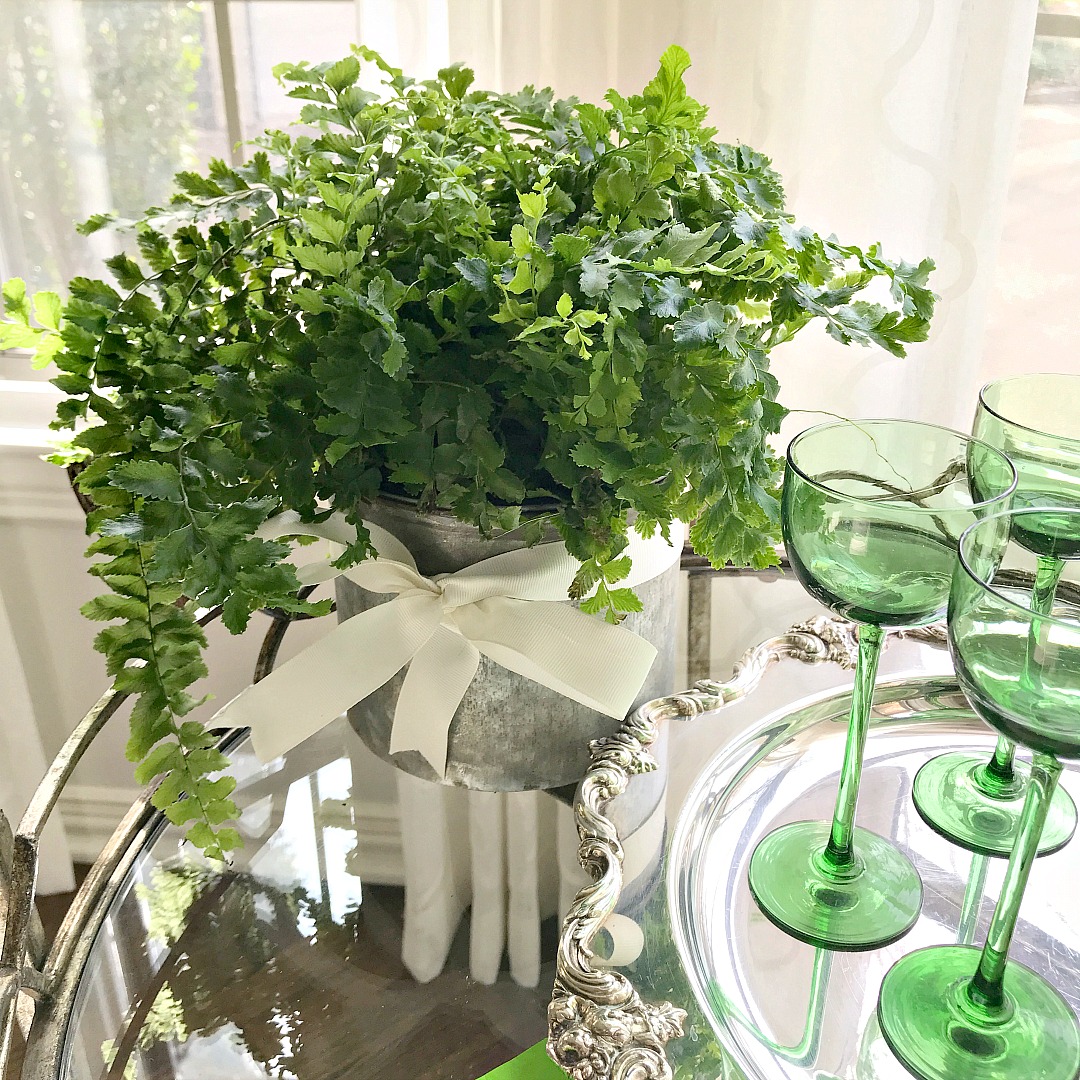
We’ve had these glasses for years and years and I don’t remember where they came from. I definitely was going to use them. I already had glasses for the table, but the aperitif glasses would be perfect on the bar cart that sits in our bay window.
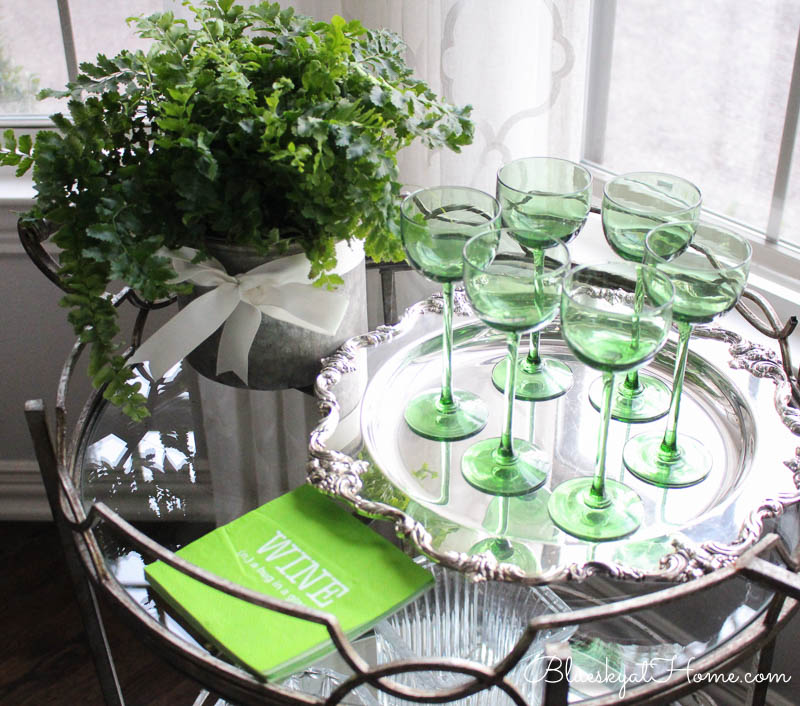
I bought the fern thinking I would use it in the white crock, but now it was perfect on the bar cart. The white ribbon adds to the green and white theme.
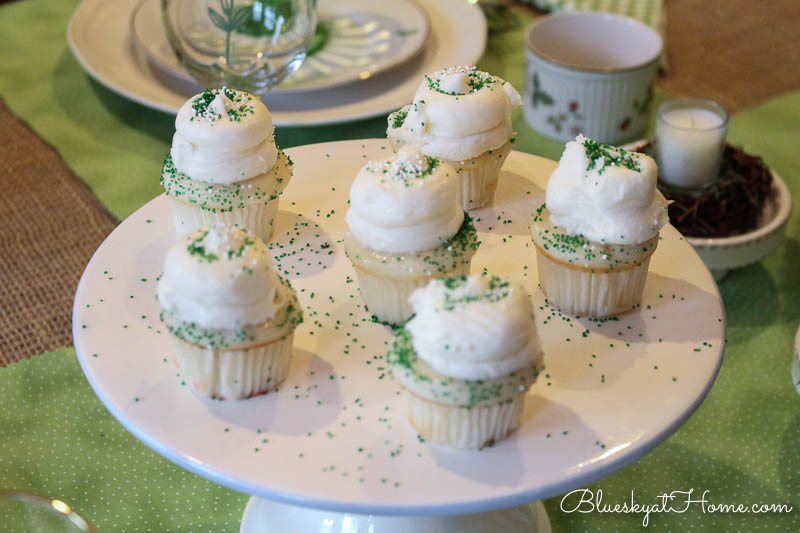
Next up were the mini wreaths from my Atlanta flea market shopping spree placed on cupcake stands. I added some green moss from Dollar Tree and a little votive candle ~ a set of 6 that I’ve had for years and never used.
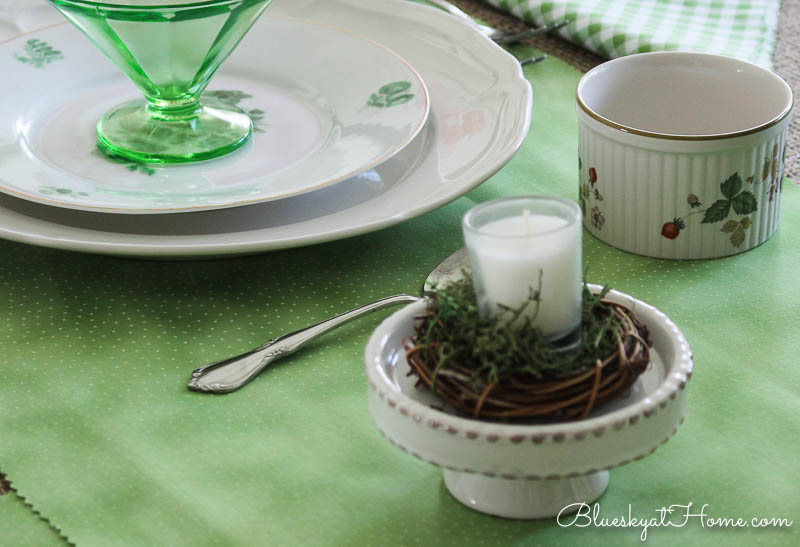
I purchased some yummy cupcakes at my favorite bakery and used a white cake stand trimmed with blue – another flea market find in Atlanta from a few years ago.
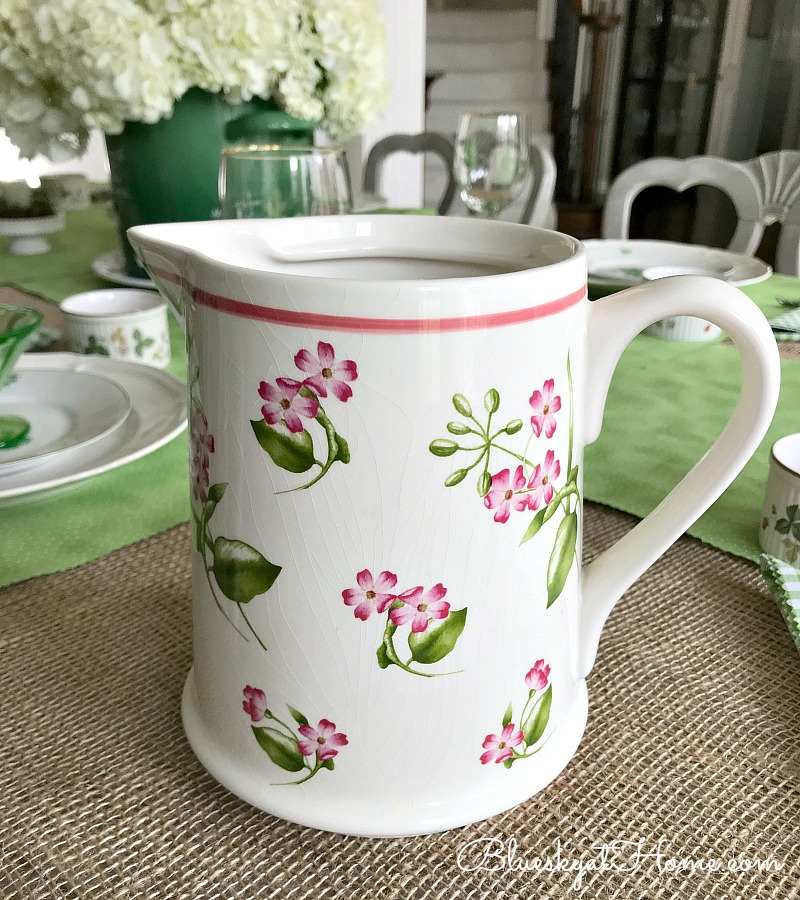
And the last embellishment – and a practical one – was this pitcher for water or (green) tea. I love the design – it definitely speaks of spring.
That’s how to design a spring tablescape:
- Vision
- Shopping at home
- List for shopping
- Centerpiece
- Decorative accessories
I hope that this behind-the-scenes of how to design a spring centerpiece helped you. I always want to know the how and why behind projects. It helps me understand and learn from the process.
Let me know if you have any questions or have a project that you would like me to try. If you like these projects and don’t want to forget where you found them, be sure to PIN it for Later.


I enjoyed your thoughtful presentation. I’m curious about the table runner and napkins — by using pinking shears, do you manage to avoid having them fray through use and washings? And what’s your secret for cutting straight lines with pinking shears?
Hi Sandra, thanks for your nice comments. I try not to wash the runner if possible. The napkins I just wash by hand in the sink and air dry. Then I iron them. As far as cutting straight lines, I cut and fold back the fabric to see to the printed lines on the ironing pad that I always use. For the green gingham napkins, I measured the 16~inches and then used the pattern of the fabric to guide me. It’s not perfect, but close enough.
Well, you certainly pulled several rabbits out of your hat for this one. Finding the green stock pot and the other green glasses well that was a lot of fun. But having enough material to make bows for your napkins and then stumbling upon the picture for green tea. Well, the tablescape fairies were certainly looking down on you for this one. Your table is very pretty and springy.
Clearissa, I did luck out on finding the stock pot in the bottom drawer where I keep pots and pans. I had totally not thought about it.
I do my own decorating on a system sort of like your own. I must say that I love the green, oh how pretty and perfect for March
come see us at http://shopannies.blogspot.com
Carol, Love your tablescapes! Really enjoyed this behind the scene! I love, love the green depression glass! I still have a few pieces from my Mom!
Carol, you tablescape is gorgeous! I love how you shopped your home as well as stores! I swear diet Jello tastes better in a pretty dish/sherbet! Your green is perfectly for St. Patrick’s day into Easter! Is a vaisselier your china cupboard or another storage piece? Another new word for my vocab!
Carol, your thrifty creativity welcomes spring perfectly, it is a wonderful table and liked the tutorial too. Pinned xo